Items
Key items (where they are and what they open), healing and crafting, and everything else you pick up.
Key items
58| Item | Where | Use |
|---|---|---|
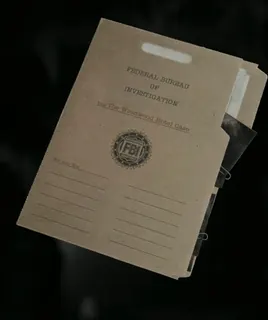 Investigation Report Investigation Report | 1 · Wrenwood (Prologue) In Grace's inventory from the start of the game. | Examine it in the inventory: rotate it and pull out the photo sticking out. That adds the Investigation Report file: FBI agent Kyle Eames's report on the body in the Wrenwood Hotel restroom and 4 more deaths of Raccoon City survivors, all with black bruising. One of its photos shows an "8" on a toilet stall door. It is a Final Puzzle clue: the 8 toilet flushes (see **Marie's Doll**). |
| Photo of Grace | 1 · Wrenwood (Prologue) Lounge & Bar (hotel 1F): stuck to the support pillar of the bar. Follow the police evidence markers to the Restroom first. | Turn it over in the inventory: the Old Key is taped to the back, with the message "Meet me in Room 204". |
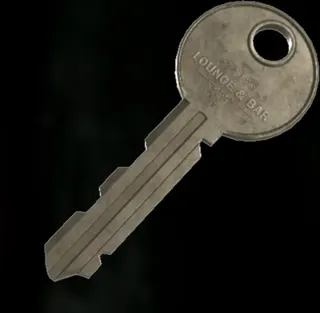 Old Key Old Key | 1 · Wrenwood (Prologue) Taped to the back of the Photo of Grace. | Opens the Lounge & Bar door to the 1F Corridor, towards the Lobby and the Office. From here the employee entrance is shut: you cannot go back to Main Street. Read the Wrenwood City Guide file on the street notice board first. |
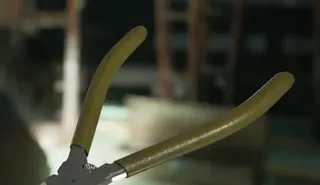 Wire Cutters Wire Cutters | 1 · Wrenwood (Prologue) Rec Room (hotel 2F): small toolbox on the billiard table, west side, by the stairs. | Cuts the wire tying the Rec Room doors to the 2F Corridor shut. |
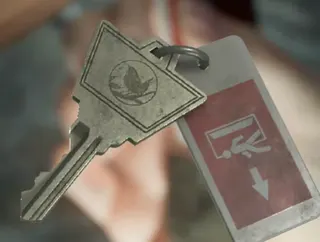 Emergency Exit Key Emergency Exit Key | 1 · Wrenwood (Prologue) Hotel Lobby (1F): you get it automatically after the zombie encounter that follows reading Alyssa's Journal (behind the west-side painting). | Opens the Rec Room door to the Emergency Exit: Grace leaves the hotel and her part ends. That door is the hotel's point of no return: read the Hotel Pamphlet (Lobby), Notice of Closure (Office) and Alyssa's Journal files first. |
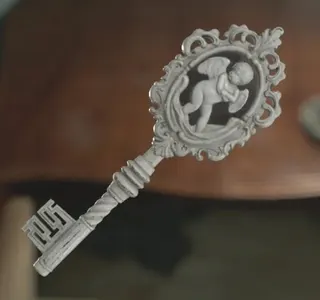 Cherub Key Cherub Key | 2 · Care Center: Arrival Nurses' Corridor (Care Center 2F): drawer of the small table with a lamp at the south-west end, by the locked gate. | Opens the cherub door: Room 201, with the first typewriter, the Lighter and the Fuse panel. |
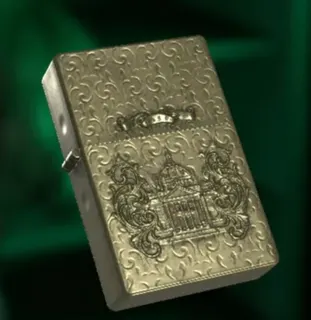 Lighter Lighter | 2 · Care Center: Arrival Room 201: shelves of the small west storage room (the walk-in closet), south-west corner. | A light source for the dark 2F East Wing. Equip it to see hidden items, such as the Note on Cardboard Box file in the Room 202 wardrobe. Switch on the Prep Room light before you have it and the bulb blows. With the Lighter in hand, the Prep Room leads to the Nurses' Station. |
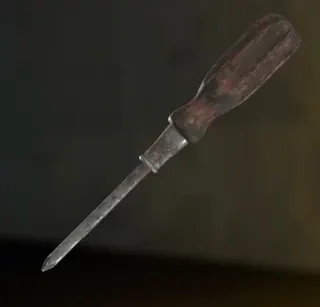 Screwdriver Screwdriver | 2 · Care Center: Arrival Nurses' Station: red toolbox on top of the south shelves. Push the trolley against the shelves, climb it, rotate the box and open the latch. | Opens the wall panel (fusebox) in the Room 201 storage room: the Fuse is inside. The Note on Cardboard Box file (Room 202) tells you where it is. Moving the trolley makes noise and The Girl comes in: hide under the barricade or the small corner table, keeping the debris between you. Before you move it, climb up for Antique Coin #1 (north locker). |
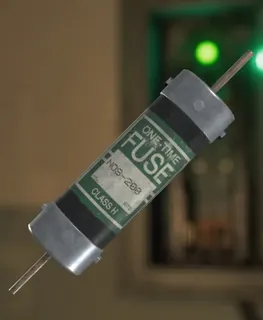 Fuse Fuse | 2 · Care Center: Arrival Room 201: wall panel of the storage room (south-west). You need the Screwdriver. | Put it in the fuse box by the Nurses' Corridor gate: it opens the way to the Central Hall and ends Grace's part of the chapter. When you take it, The Girl drops from the ceiling: run right to the horse statue, then left to the gate. Save at the Room 201 typewriter first. One source says the gate needs 2 fuses; the other 4 say one. |
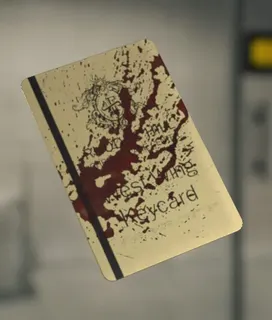 West Wing Keycard West Wing Keycard | 3 · Care Center: Main Building Medication Room (next to the Guard Office, 1F): you take it in the cutscene on your first visit, from the gasping man on the floor. | Opens the Central Hall door to the South West Corridor (West Wing). "Golden keycard covered in blood." There are 70 Infected Blood by the man: come back once you have the Blood Collector. Careful: he can get up later. |
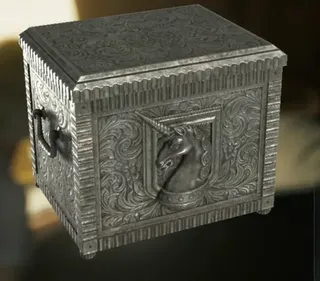 Unicorn Trinket Box Unicorn Trinket Box | 3 · Care Center: Main Building Chairman's Office Lounge (2F): on the chest of drawers in the north-east corner. Insanity: in the Chairman's Office, next to the model ship (south). | Examine it, turn it over and press the switch on the back: out comes the Red Jewel. |
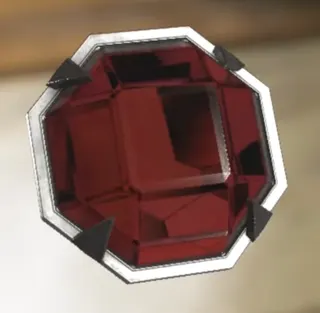 Red Jewel Red Jewel | 3 · Care Center: Main Building Inside the Unicorn Trinket Box. | Opens the unicorn door in the South West Corridor: the Parlor, with the 4 Antique Coin cabinets and the East Wing Keycard. |
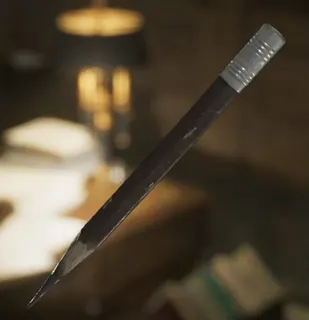 Pencil Pencil | 3 · Care Center: Main Building Chairman's Office: the desk in the middle. | Rub it on the notepad on the Chairman's Office Lounge coffee table: it reveals the Chairman's Note file with the Moon Quartz code. |
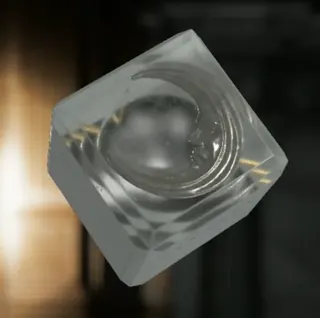 Moon Quartz Moon Quartz | 3 · Care Center: Main Building Chairman's Office Lounge: puzzle cabinet in the south-west corner. Code from the Chairman's Note: Moon, Sun, Star, Moon. | First of the 3 quartz cubes for the Central Hall door to the Courtyard (Sun, Moon, Star). The Care Center Pamphlet motto pairs each quartz with an executive: Chairman = Moon, Lead Researcher = Sun, Security Manager = Star. One source swaps the Moon Quartz and Sun Quartz locations; 3 others agree with this entry. |
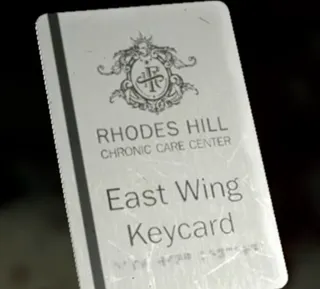 East Wing Keycard East Wing Keycard | 3 · Care Center: Main Building Parlor (1F): in the hand of the severed arm on the floor, north-west corner, by the bar. Rotate the arm to pry it loose. | Opens the Central Hall door to the East Wing Lobby (East Wing). "Silver keycard covered in scratches." The Parlor holds 3 Antique Coins (none on Insanity): on the edge of the roulette table, on the north edge of the bar and inside the small green vase on the bar (NE corner). |
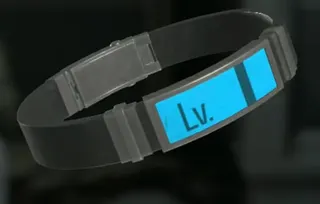 ID Wristband (Level 1) ID Wristband (Level 1) | 3 · Care Center: Main Building On the corpse in the Locker Room (2F) doorway to the East Stairway. Taking it makes Chunk appear. | Opens the blue Level 1 doors: Blood Lab → Blood Reports Room; Waiting Room → Closet; Service Hallway → Garage Entry; Filing Room → Filing Storeroom. One source places the body "outside the Lead Researcher's Office": it is the same one. Chunk is optional for Grace; killing him gives the Eye Spy Charm. |
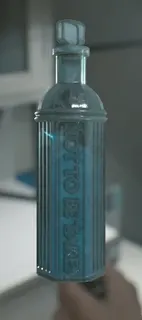 Corrosive Corrosive | 3 · Care Center: Main Building Conference Room (Research Lab, 2F): medical cabinet in the north-west corner, in the file room at the back where the second Singer starts. | Melts the padlock on the Lead Researcher's Office puzzle cabinet. The Lead Researcher's Message file hints at it: the researcher lost the padlock key. |
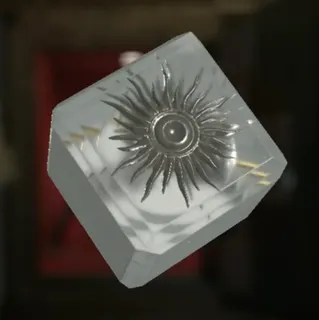 Sun Quartz Sun Quartz | 3 · Care Center: Main Building Lead Researcher's Office (2F): puzzle cabinet in the north-west corner. Melt the padlock with the Corrosive and enter Star, Sun, Moon, Sun (read off the backgrounds of Lead Researcher's Pictures 1 and 2). | Second cube for the Central Hall door to the Courtyard. The Leatherbound Notebook is in the same cabinet. This cabinet is also the Final Puzzle box (see Marie's Doll). |
| Leatherbound Notebook | 3 · Care Center: Main Building In the Lead Researcher's Office puzzle cabinet, with the Sun Quartz. | Examine it: it adds the Unlocking the Organ Transport Box file (the solution to the Garage box) and Spencer's Research I. |
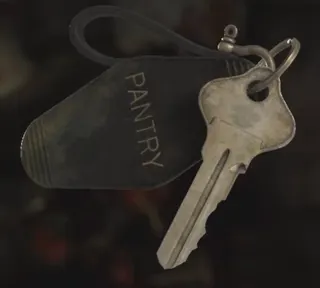 Pantry Key Pantry Key | 3 · Care Center: Main Building Dropped by the Chef when he dies (Kitchen, north-west area). Insanity: on the south medical cabinet of the Closet (Level 1, off the Waiting Room); there the Chef drops 2 Antique Coins instead. | Opens the Kitchen door to the Pantry: the Stakeout Takeout Charm, 12.7×55mm Ammo and, for Leon (ch04), warped closet #4. Killing the Chef gives **Order Up!**: best is a Hemolytic Injector from behind (instant kill). With guns, Casual takes 1 Requiem headshot plus 4 or 5 handgun headshots, and more on Standard. If Grace doesn't kill him, Leon can in ch04 and open the Pantry himself. The Dishwasher's Note file (Leon, Gallery Corridor warped closet) says the Chef has it; on Insanity it still says so even though he no longer carries it. |
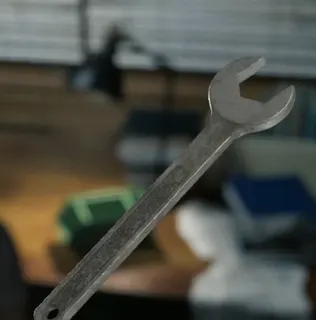 Wrench Wrench | 3 · Care Center: Main Building Custodian's Office (1F): small green tray or toolbox on the desk, north-west corner. | Opens the North West Corridor door to Cold Storage. It only works after that door's own valve handle comes off in Grace's hands. |
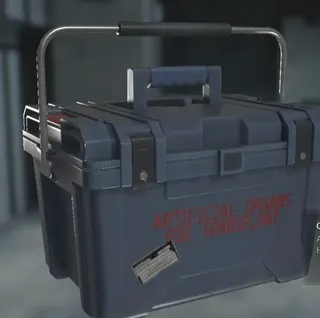 Organ Transport Box Organ Transport Box | 3 · Care Center: Main Building Garage (1F, through the Level 1 Garage Entry door): in the back of the van, north-west area. | Open it from the back panel with the solution in the Unlocking the Organ Transport Box file: switch AUTO to HAND, slide the far-right slider up to the middle, press switch 5, then switch 2, and switch HAND back to AUTO. If you already tried, press Reset first. The Artificial Lungs are inside. |
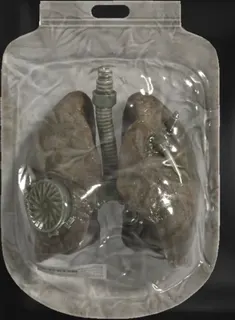 Artificial Lungs Artificial Lungs | 3 · Care Center: Main Building Inside the Organ Transport Box. | With the Artificial Heart, place them in the organless corpse on the Examination Room operating table. Once both organs are in, the corpse gets up: kill it and it drops the ID Wristband (Level 2). |
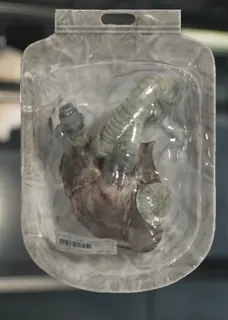 Artificial Heart Artificial Heart | 3 · Care Center: Main Building Cold Storage (1F): hanging from the hooks in the middle. | With the Artificial Lungs, into the Examination Room corpse. Cold Storage also holds a Transfusion Bag (80) in the south-west metal cabinet. One source calls the item "Frozen Heart". |
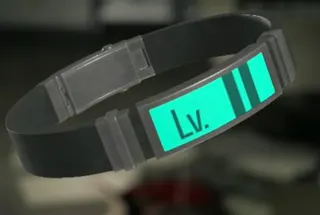 ID Wristband (Level 2) ID Wristband (Level 2) | 3 · Care Center: Main Building Dropped by the Examination Room corpse once you give it the organs: it gets up and you have to kill it. | Adds the green Level 2 door: Isolation Ward Lobby → Isolation Ward Entry. |
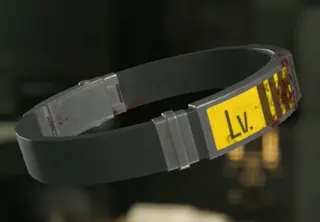 ID Wristband (Level 3) ID Wristband (Level 3) | 3 · Care Center: Main Building Security Manager's Office (1F): you get it automatically after examining the note on the desk and then the puzzle cabinet (south). It belongs to Security Manager Luke Clark. | Adds the two Medication Room cells: Emily's and the empty one next to it (Mr. Raccoon #5 behind the bed). The Security Manager's cabinet is in braille and holds the Star Quartz: code **Star, Star, Moon, Sun** (with the buttons Sun, Moon, Star from left to right: right, right, middle, left). Grace can't read it and fetches Emily; Emily gives you the Star Quartz in ch05. |
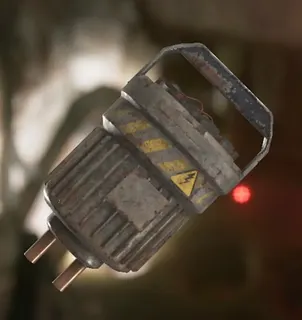 Joint Plug Joint Plug | 5 · Care Center: Basement 3 in the Care Center Basement: 1) the power distributor at the east end of the Holding Cells; 2) the south-west distributor in Construction Storage, by the forklift; 3) the distributor on the south platform of Processing (reached after using the first two in the Collection Pool). | Each plug powers an area, and light drives The Girl away. Slots: Holding Cells west end (Workshop), Furnace ('L' Passage), Elevator Passage (Fuel Storage), Central Passage (Boiler Room and Bunkroom), Collection Pool (2 at once: Ventilation Passage), Construction Storage (Inspection) and the Processing south platform (Ventilation Passage and Processing Office). With all 3 at the east end of the Holding Cells and the left lever pulled, the cells open and you rescue Emily. Pulling a plug cuts that area's power. When you pull the Construction Storage one, The Girl drops and blocks the vent: plug it back in, she retreats, then take it again. **Before plugging all 3 into the cells**, take the Empty Injector from the second north cell: afterwards you can't. The Unlocking the Cells file explains the puzzle. |
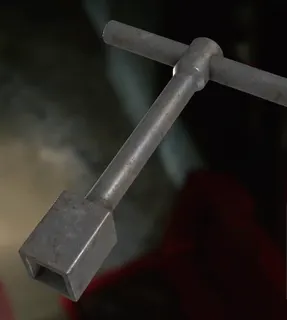 Square Socket Wrench Square Socket Wrench | 5 · Care Center: Basement Boiler Room: red toolbox on the floor inside the western fenced area. Powering the Boiler Room directly electrifies the water: plug the Elevator Passage instead (it opens Fuel Storage), shove the box aside, go through the hole in the fence and cross in the dark. | Unlocks the Collection Pool distributor panel and the north-west mesh cover in the Workshop (vent to the Service Passage). The Technician's Note file hints at it. The same box holds an Empty Bottle; a Lockpick lies on the floor on the east side. |
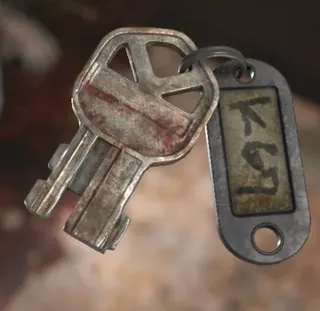 Forklift Key Forklift Key | 5 · Care Center: Basement Processing: on the floor by the body, north-west corner of the south platform. | Works the forklifts: the one on the west side of Processing (to the Processing Office, with Hip Pouch #3) and the one on the west side of Construction Storage (to Inspection). After you take it, the zombie in the second north cell of the Holding Cells breaks out: the Basement Empty Injector is in that cell. |
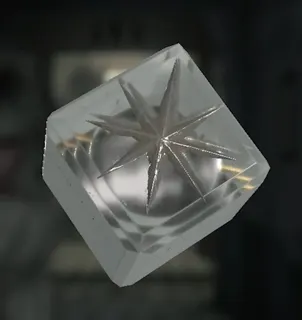 Star Quartz Star Quartz | 5 · Care Center: Basement Emily gives it to you in the Elevator Corridor (1F) after you escape the Basement. | Third cube: insert Sun, Moon and Star in the Central Hall door and head out to the Courtyard. It is the one from the braille cabinet in the Security Manager's Office (code Star, Star, Moon, Sun). |
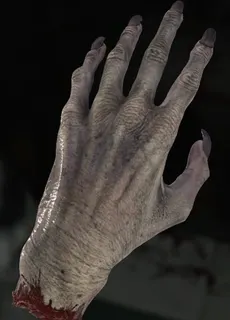 Severed Hand Severed Hand | 5 · Care Center: Basement Elevator Corridor (1F): on the floor by the wrecked elevator, as you leave the Basement. It is The Girl's hand. | Optional. Put Emily down on the Guard Office sofa first, then analyse it at a Blood Analyzer (Blood Lab or 2F Office). 3-step puzzle: the centre cube and the two end cubes (order doesn't matter). It shows "Let's play." and the mRNA code GGC AAG AUA ACG UGU CAU. It is only a Final Puzzle easter egg: its amino-acid initials spell GLITCH. Drop the As and read G = Sun, U = Moon and C = Star to get the 12-symbol code: Sun, Sun, Star, Sun, Moon, Star, Sun, Moon, Sun, Moon, Star, Moon. You don't need to carry it to solve the puzzle. |
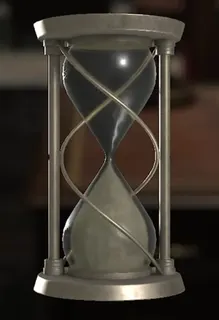 Hourglass Hourglass | 6 · Courtyard and Research Facility VIP Suite (Courtyard West): the model on the desk on the west side. Examine it and remove the screw on each side. | Optional. Turn it over, let the sand run and tilt it: it reads "U = 380000" (the km from Earth to the Moon: U = Moon). It is a Final Puzzle clue. It doesn't fit the plinth and never leaves your inventory on its own: drop it in the Research Facility Reception Item Box. |
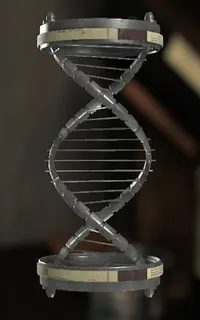 Double Helix Model Double Helix Model | 6 · Courtyard and Research Facility VIP Suite: the wine bottle on the south cabinet. Examine it, turn the crooked label until it lines up and pull the two halves apart. | Fit it into the plinth in the middle of the VIP Suite: the room descends like an elevator to the Research Facility. **Point of no return** for the Care Center and the Courtyard: before using it, collect coins, Mr. Raccoons, locks and anything else you still need. |
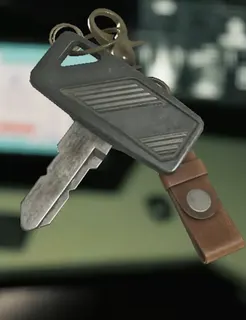 Helicopter Key Helicopter Key | 6 · Courtyard and Research Facility Private Lab (Research Facility): by the keyboard of the main computer, on the monitor desk in the south-east corner of the south room. | Starts the helicopter on the helipad, where Emily and Harry are waiting. |
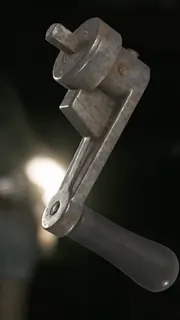 Crank Lever Crank Lever | 8 · Water Treatment Plant Filing Room (Water Treatment Plant 1F): shelves on the north side, next to the Control Room. | Fit it into the Control Room control panel: it restores power to the plant. When you try to fit it, The Girl bursts in and throws Grace against the window. Shoot her with the Requiem (1 round stuns her on Casual and Standard, 2 on Insanity; a good spot for **Bring Out the Big Guns**) and run to the panel. To open the roof hatch later, restart the 3 power distribution units in the lower area (Roof Hatch Manual file). |
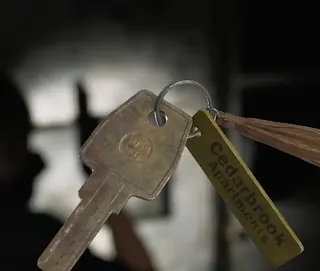 Cedarbrook Apartments Key Cedarbrook Apartments Key | 9 · East Raccoon City Logistics Warehouse, 3F Corridor (dark): in the key locker on the north-west wall, next to the storeroom door. | Opens the Central Camp gate to the Cedarbrook Apartments Side Yard (under the "Cedarbrook Apartments" sign, right of the camp fence). One source places it on 2F; the room-by-room map says 3F. |
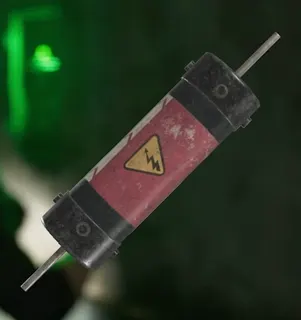 Battery Battery | 9 · East Raccoon City 2: 1) Underground Parking Garage Power Room (B1): panel on the north wall, in the isolated room north-west of the flooded garage, with the Gal; 2) Sewage Facility Power Room (B1): panel in the north-west corner, after the Blister Borne. | Put both in the barrier gate of the Underground Parking Garage: the east side of Main Street opens. The Battery Storage Locations file (red-lit panel by the flooded gate) tells you where they are. Sources disagree on which one is first: the order doesn't matter. |
 Valve Handwheel Valve Handwheel | 9 · East Raccoon City Sewage Facility Pit (B1): drop into the empty circular tank, turn around and it is at the end of the tunnel on the west side. | Fit it into the mechanism across the room: it opens the east area of the Sewage Facility. |
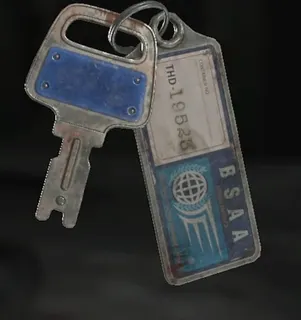 BSAA Container Key BSAA Container Key | 9 · East Raccoon City Main Street: you get it automatically once you have found all the dead BSAA soldiers in front of the Cedarbrook Apartments Foyer door. | Opens the 3 locked BSAA containers: 02 in Central Camp (Repair Kit and the motorcycle), 04 on North West Street (BSAA Emblem Charm and an 8,600 Legendary Tracking Module) and 03 at the east end of Main Street (Marksman 1A). The Inventory List file (in the open container by the Foyer) sums up the contents: 01 medical supplies, 02 motorcycle and repair kit, 03 sniper rifles, 04 attachments. Opening all 3 gives **Crate Expectations**. |
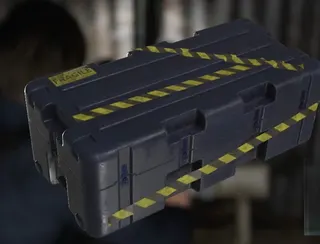 Repair Kit Repair Kit | 9 · East Raccoon City Central Camp: BSAA Container 02 (south-west corner), large toolbox on the back wall. You need the BSAA Container Key. | Repairs the Broken Signal Receiver (or the Damaged Detonator): use it on it in the inventory. The Engineer Corps Note file points to it ("This one's up to you, Graves"). |
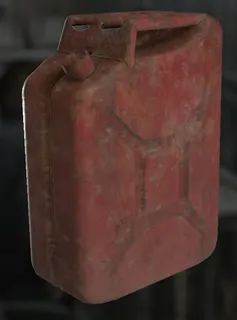 Gas Can Gas Can | 9 · East Raccoon City Gas Station Small Yard: on the wooden crate by the generator, south-east corner. Shoot down the ladder outside the blocked station and cut through the shop to the fenced yard. | Fill it at the Refill Area: it becomes the Gas Can with Fuel. Heading back through the shop with it, a Chainsaw Zombie bursts out of the boxes; then, outside, an armored one smashes through the cars to the west, and that one drops a 5,100 Rare Tracking Module. |
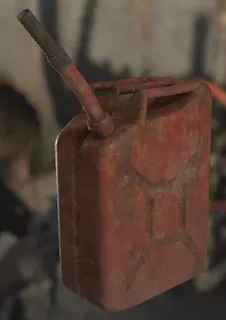 Gas Can with Fuel Gas Can with Fuel | 9 · East Raccoon City Gas Station Refill Area (north): turn the valve on the big tank and use the Gas Can on the faucet. | One fill runs every generator: the Gas Station Small Yard (door to Main Street), the middle of Main Street (door to the Construction Yard Storage Area) and the orange generator on the Logistics Warehouse 4F (terrace and zipline to the Willis Tower). On Standard (Classic) and Insanity, 2 zombies and 2 Blister Heads appear mid-street on Main Street once it is filled. |
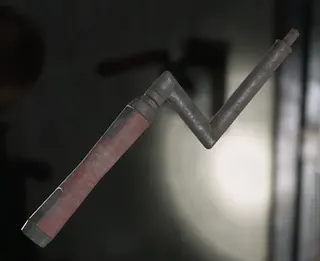 Rusty Crank Rusty Crank | 9 · East Raccoon City Cedarbrook Apartments 1F: in the wall socket on the west side. Climb the stairs and drop through the broken railing. | Fits 3 wall sockets: Cedarbrook 1F → Foyer; Cedarbrook 2F Terrace → access to 3F; Sewage Facility Storeroom → Side Street. The Sewage Facility shortcut leads up to the Side Street: its weapons case (south) holds a Stacked Hand Grenade, a 3,600 Tracking Module, 12.7×55mm Ammo ×2 and Shotgun Shells ×4. |
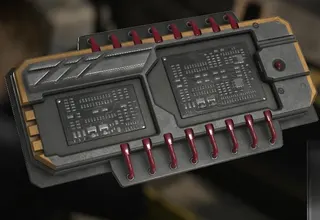 Distributor Distributor | 9 · East Raccoon City Logistics Warehouse roof ("Mid Point"): large yellow case, on the left at the top of the last ladder. | Detonator part (1 of 3). The Orders for the Engineer Corps file (Central Camp tent table) gives the 3 points: Signal Receiver = East Point, Distributor = Mid Point, Relay = West Point. |
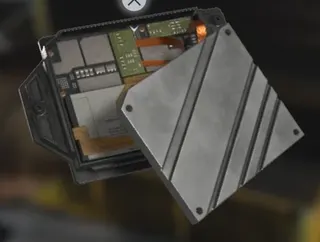 Broken Signal Receiver Broken Signal Receiver | 9 · East Raccoon City Cedarbrook Apartments Roof (5F, "East Point"): large yellow case on top of the north-west building (north end of the roof: go round the left side and climb the ladder). | Detonator part; it must be repaired with the Repair Kit first. Taking it spawns 6 zombies to the north-east: sprint back to the mortar and shell them from there. Buy Body Armor Lv.II first: one mortar hit breaks Lv.I. The Engineer Corps Note file is in the case to its right. |
| Signal Receiver | 9 · East Raccoon City You get it by using the Repair Kit on the Broken Signal Receiver. | The repaired Detonator part. Combining parts gives intermediate items: Distributor & Relay, Distributor & Broken Signal Receiver and Distributor & Signal Receiver. The order you combine them in doesn't matter. |
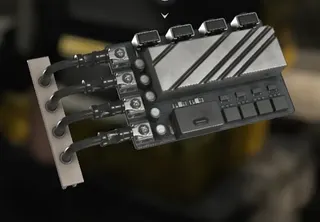 Relay Relay | 9 · East Raccoon City Building 1 Rooftop Edge, the Grimstone Building roof ("West Point"): after the Willis Tower, open the gate on the right; large yellow case in the middle. | Last Detonator part. The weapon crates to the east hold a Hand Grenade and a 2,500 Tracking Module. The door on the left is the Building 1 Storeroom: save point and Supply Box. |
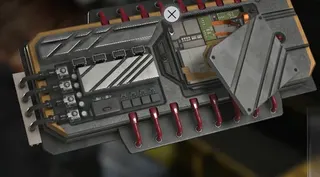 Damaged Detonator Damaged Detonator | 9 · East Raccoon City Assembled automatically if you already hold the other 2 parts when you pick up the Broken Signal Receiver. | Use the Repair Kit on it in the inventory: it becomes the Detonator. "A completed detonator. Unfortunately, the broken part needs some time with a repair kit before it can be used." |
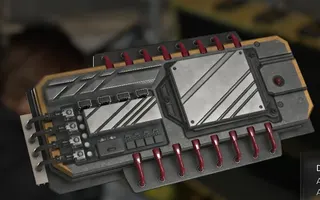 Detonator Detonator | 9 · East Raccoon City Completed by putting the Distributor, Relay and Signal Receiver together. | Set it on the incomplete bomb at the military gate on Main Street: it opens the way to Raccoon City Center. **Point of no return** for Raccoon City East: the motorcycle chase follows. Open the 3 BSAA containers, collect the Tracking Modules and spend credits at the Supply Box first. |
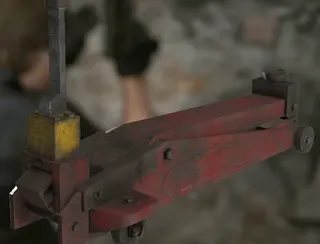 Mechanic Jack Mechanic Jack | 10 · Raccoon City Center: R.P.D. Library (R.P.D. 2F): on the floor in the northern half, by the bookshelves that no longer move (the same spot as in Resident Evil 2). It is hard to see. | Raises the 2 Main Hall shutters (1F): west (Reception) and east (East Hallway, which leads to the Zeno and Grace cutscene and ch11). Before the east shutter, finish what is left in the station. If you miss something, in ch12 you are back in the Main Hall and can still explore the building. |
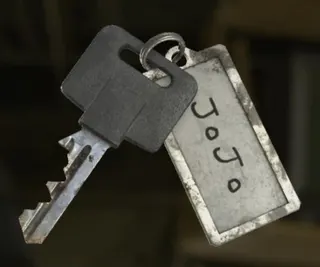 Locker Key Locker Key | 10 · Raccoon City Center: R.P.D. Operations Room (1F): inside the bracket of the ceiling TV, south-east corner. Climb the pallets in front of the chalkboard. It only spawns after you have examined both clues in this run: Scavenger Hunt - Clue 1 (jacket hanging between the desks in the S.T.A.R.S. Office) and Scavenger Hunt - Clue 2 (locker right of the entrance). | Opens the "JoJo" locker on the west side of the West Office: the S.T.A.R.S. Emblem Charm and 2 Raccoon City Zoo tickets ("Enjoy! And don't say I never gave you anything! - Barry"). Optional. The locker has a Street Fighter Alpha poster, a console and Capcom games inside. After you examine the clues, an R.P.D. zombie appears banging on the vending machine in the West Central Passage. Some guides call it "JoJo's Locker Key". |
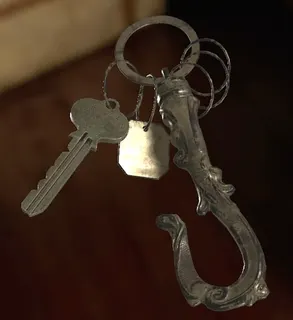 Hatch Key Hatch Key | 11 · Orphanage Director's Room (Orphanage 1F): hanging on the west wall. Pull out the bureau's bottom drawer and climb it; Chloe stumbles and the key falls: pick it up from the floor. | Opens the hatch in the south-east corner of the Director's Room. You play as **Chloe** (1990): no weapons, key items only. One guide describes it as a key box. |
 Fire Poker Fire Poker | 11 · Orphanage Crypt Storeroom (Orphanage B2): south-east corner. Go behind the altar in the Underground Chapel (secret door), throw the wall switch, pull out a bottom-shelf coffin, climb over the top of the barred door and drop onto the mattress. Unlock the gate from inside. | Hook the ladder on the west side of the Underground Chapel, behind the secret door, and climb to the ARK Storage Closet: you escape The Children, who don't follow. With Chloe it is not a weapon: it is a key item. |
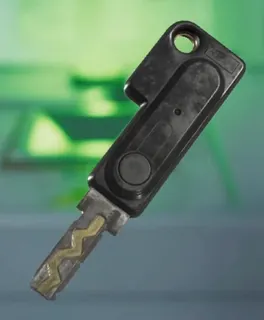 Override Key (Dump Control Room) Override Key (Dump Control Room) | 14 · ARK: Lower Levels Chemical Storage (ARK B2): glowing green slot in the control panel, east side, at the far end. Sneak there through Bioweapon Repository 02. | Insert it into the Dump Control Room terminal (B4): the crane rises and Leon gets out of the Dump. Taking it cuts the power: 1 ARK Zombie bursts out of the south-east pod in Bioweapon Repository 02 and 1 Licker β2 drops into the East Stairway. Approach slowly and crouched; a Bottle of Acid kills it in one hit. |
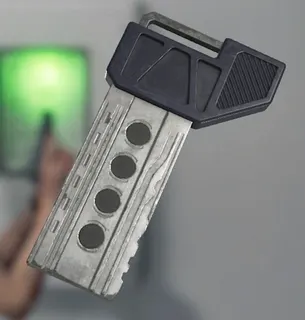 Magnetic Key Magnetic Key | 14 · ARK: Lower Levels Dump Control Room (B4): wall panel on the north side, by the doorway. It unlocks once the Override Key restores power. | Opens 2 doors: Lab Entrance → Lobby and Bioweapon Repository 02 → Cleanroom. |
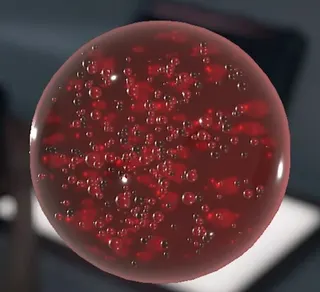 Animus Orb Animus Orb | 14 · ARK: Lower Levels Cleanroom (B2): black-and-red case on the north side, on the back wall. | With the Noblesse Orb, in the Lobby door to the Archives (panel with two slots). The crimson orb. Taking it brings in 3 ARK Zombies (on Insanity, 2 more in Bioweapon Repository 02): throw a Molotov Cocktail when they bunch up in the doorway. The same room holds a Transfusion Bag (80) and a Molotov Cocktail. |
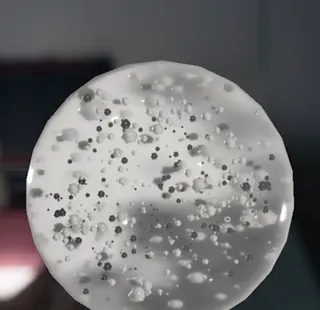 Noblesse Orb Noblesse Orb | 14 · ARK: Lower Levels Operations Room (B2, through Bioweapon Repository 05): black-and-red case on the west side, next to a Mr. Raccoon. | With the Animus Orb, opens the Archives door from the Lobby. The white orb. Taking it brings 2 Licker β2 onto the walkway and 2 more smash through the Anteroom windows: have Bottles of Acid ready. |
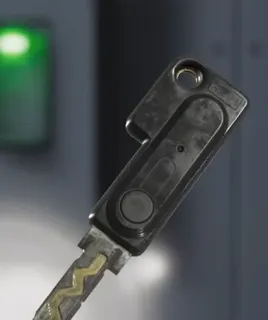 Override Key (Bioweapon Repository 11) Override Key (Bioweapon Repository 11) | 15 · ARK: Finale Systems Management (B4): wall panel on the east side. You get there by the east stairs of Bioweapon Repository 12 after pressing its two switches (Bioweapon Repository 12 and Generator Room). | Restores power to Bioweapon Repository 11: the north elevator panel takes you to the top level. Once you take it, on Casual and Standard 6 Licker β2 wait on the Bioweapon Repository 11 ceiling: go in slowly and use the room's red explosive canisters and a Stacked Hand Grenade. Systems Management also holds a Hand Grenade, a Med Injector and 12.7×55mm Ammo ×2. |
Healing
4| Item | Where | Effect |
|---|---|---|
 Green Herb 40 Green Herb 40 | 1 · Wrenwood (Prologue) 50 on Standard (Modern), 46 on Standard (Classic) and 49 on Insanity. The first is Leon's in Wrenwood (ch01): in the back of the dark van on the east side of the street. Grace's first is in the north locker of the Nurses' Station (ch02). | Restores a small amount of health. Use it from the inventory or with the quick-heal button. Combine it: 2 make a Mixed Herb (G+G) and 3 a Mixed Herb (G+G+G). With the Blood Specimen (Converged) recipe, Grace turns it into a Med Injector (Green Herb + 60 Infected Blood), which restores full health. Leon sells it for 40 credits; it takes 1×2 in his case. No source publishes how much health each heal restores. On a **Never Touch the Stuff** run (finish without herbs or Med Injectors) neither Grace nor Leon may use it: craft with it or sell it. |
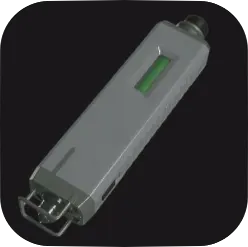 Med Injector 1,500 Med Injector 1,500 | 1 · Wrenwood (Prologue) 30 on Standard (Modern), 29 on Standard (Classic) and 28 on Insanity. Leon starts with 1. Grace's first is on the Nurses' Station floor, in the pool of blood to the south-west (ch02). Other fixed ones: the Sterilization Chamber and Monitor Control Room safes (ch14). Leon's Supply Box sells it as "Injection". | Fully restores your health. Works for both Grace and Leon. Recipe: Green Herb + 60 Infected Blood, or Mixed Herb (G+G) + 30 Infected Blood (Grace only) Grace unlocks the recipe with the Blood Specimen (Converged) (ch03). With herbs to spare, the (G+G) + 30 version saves blood; with blood to spare, a Green Herb + 60 saves herbs. One source asks 40 blood with the (G+G); 3 say 30. Leon cannot craft it: he buys it for 1,500 credits and sells it for the same. On Insanity the ones dropped by a Conference Room zombie and a Connecting Corridor zombie (ch03) are gone. Using one breaks **Never Touch the Stuff**. |
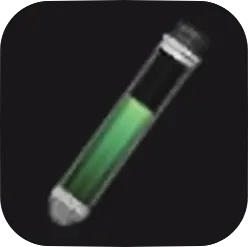 Mixed Herb (G+G) 100 Mixed Herb (G+G) 100 | 2 · Care Center: Arrival Only 3 pre-mixed: the glass cabinet in the upper south-west area of the Rehabilitation Ward (Leon, ch02; not on Insanity), the Records Room warped closet (Leon, ch04) and the weapons case in the Construction Yard Storage Area (Raccoon City East, ch09). Standard (Classic) adds one in the Subterranean Passage (Blackthorn Station B3, ch12). The rest are crafted. | Restores a medium amount of health. Recipe: Green Herb + Green Herb Both characters know the recipe from the start. With Leon it counts for **Master Craftsman** (1 of his 9 recipes). Grace uses it for a Med Injector at only 30 blood. Leon sells it for 100 credits. |
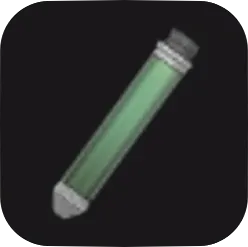 Mixed Herb (G+G+G) 200 Mixed Herb (G+G+G) 200 | None comes pre-mixed: it is crafted only. | Fully restores your health. Recipe: Green Herb + Green Herb + Green Herb, or Mixed Herb (G+G) + Green Herb With Leon these are 2 separate **Master Craftsman** recipes: craft it once each way. You can save, craft and reload: it still counts. Leon sells it for 200 credits. For Grace, a Med Injector heals the same from a single Green Herb + 60 blood. |
Materials and crafting
9| Item | Where | Effect |
|---|---|---|
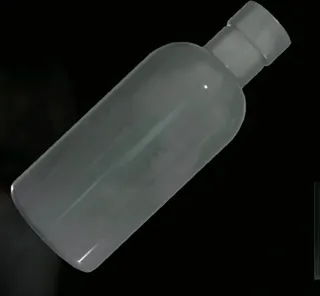 Empty Bottle Empty Bottle | 2 · Care Center: Arrival 15 on Standard (Modern and Classic), 16 on Insanity. The first 3 are in ch02: the one that rolls towards you if you switch on the Prep Room light, the one in the Room 201 wardrobe and the one on the Nurses' Corridor table (with the Lighter). In ch03, the one on the Dining Room's west cabinet, behind the table. | Throw it to smash it and draw the enemies that hunt by sound: The Girl, the blind patients, the Licker β2. It is the ingredient of the Molotov Cocktail and the Bottle of Acid. Keep the Dining Room one in the Item Box for **Internal Dispute** (ch03): in the Waiting Room, throw it at the zombie in the black dress while she stands by the blind patient and he will attack her. Smash one near Martin L. Case, the patient who can't stand noise, and he attacks whoever is next to him. Don't waste them: from the Basement on, each one is a Molotov Cocktail and, in the ARK, a Bottle of Acid. |
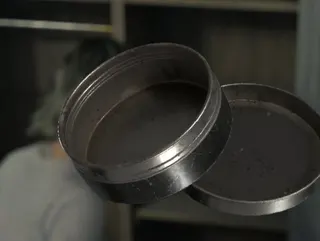 Ink Ribbon Tin Ink Ribbon Tin | 3 · Care Center: Main Building Only on Standard (Classic) and Insanity: 16 per run. Guard Office (north-west card cabinet, 2), Parlor (south-east round table, 2), Isolation Ward Lobby (north-east bed), Lead Researcher's Office Lounge (south cabinets), Records Room (north-east filing cabinet) and Cold Storage (middle bench, 2) in ch03; Security Room (east desk and south-west boxes) and Processing Office (west barrels) in ch05; in the ARK, Chemical Storage (east bench), Cleanroom (north-west trolley), Lobby (south-east seat) and Bioweapon Repository 05 (west container) in ch14. | Material: the Blood Collector turns it into 1 Ink Ribbon. Recipe: Ink Ribbon Tin + 40 Infected Blood The 15 ribbons and 16 tins give up to 31 saves per run, at 40 blood per tin. If blood is tight, don't convert tins until you are low on ribbons. |
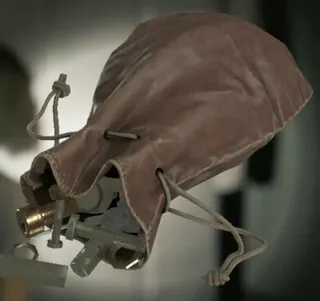 Scrap 100 Scrap 100 | 3 · Care Center: Main Building Over 30 fixed pickups across both characters, plus enemy drops. Among Grace's first are the one inside the breakable ornament on the Chairman's Office Lounge coffee table and the one in the Blood Lab's north-east locker (ch03). | The base material. Grace: Handgun Ammo, Hemolytic Injector, Makeshift Knife and, on Insanity, the R.I.P. Knife. Leon: all his ammo and the Hand Grenade. Recipe: Makeshift Knife or Hunting Knife (break it down: 1 Scrap) Breaking a knife down gives 1 Scrap even at 1 durability, and that Scrap is 8 handgun rounds: never throw away a worn knife. 2 Scrap make a Makeshift Knife. With the Crafting Recipes - Bottle of Acid/Various recipe (ch14), 5 spare Antique Coins give 1 Scrap. Leon sells it for 100 credits. |
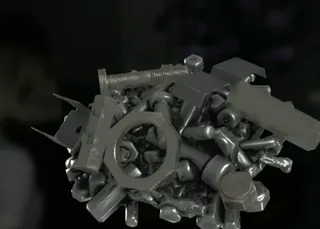 Rare Metal Rare Metal | 3 · Care Center: Main Building 5, all behind Lockpick locks: the East Wing Lobby south-east drawer, the West Corridor north-west drawer and the Gallery Corridor drawer right of the Chairman's Office Lounge door (ch03); the left locker (east) in the Bunkroom and the left locker (north-east) in Inspection (ch05). | Material for the Requiem's ammo: each one makes 2 rounds of 12.7×55mm Ammo. You need the Blood Specimen (Converged) recipe: Rare Metal + 80 Infected Blood. All 5 make 10 rounds, more than the 9 loose ones Grace finds. |
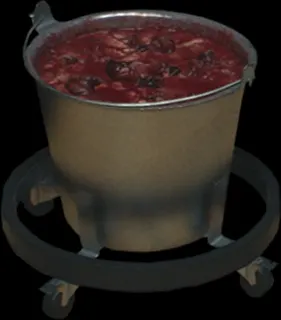 Infected Blood Infected Blood | 3 · Care Center: Main Building Pools, buckets and bathtubs of blood, and dead infected. 34 fixed sources add up to 1,750 on Standard (30 and 1,530 on Insanity), plus whatever each corpse gives. The first stashes, in ch03: 70 by the man in the Medication Room, 60 in the Kitchen bucket and 100 in the bathtub of the Restroom's far stall. | Grace's crafting currency: gather it with the Blood Collector (Blood Lab, ch03) and spend it on her recipes. Capacity: 100; 150 with the Override Manual; 200 if you also buy the Matsuoka Master Manual (Special Content, 1,000 CP). Anything over capacity is lost. Shooting heads and legs raises the blood a corpse gives, and the R.I.P. Knife (Insanity) draws 2 to 3 times more. Trophies: **The Power of Blood** (craft once), **Blood! More Blood!** (use 300) and **Bloodlust** (collect 5,000; progress survives reloading a save). Never picking up the Blood Collector clears the **Minimalist** challenge. |
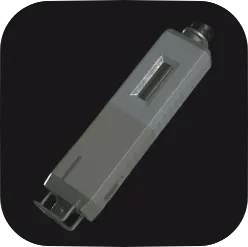 Empty Injector Empty Injector | 3 · Care Center: Main Building 3 on Standard: the Blood Reports Room north-east bench and the Records Room north-east shelves (ch03), and the bed of the second north cell in the Holding Cells (ch05). Insanity adds 1 on the Kitchen's east counter, opposite the Service Hallway door. | Fill it with Infected Blood to craft Steroids (more max health) or a Stabilizer (more firepower and stability), both permanent. Recipe: Empty Injector + 110 Infected Blood (+10 for each one already crafted) The Basement one is lost if you plug all 3 Joint Plugs into the Holding Cells before entering that cell. The price rises by 10 after each craft: 110, 120, 130 (and 140 for Insanity's fourth); whether the counter is shared between the two items is not confirmed. Budget about 360 blood for the 3 on Standard. They are in the collectibles list. |
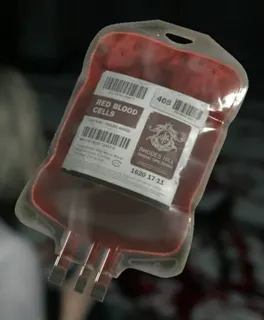 Transfusion Bag Transfusion Bag | 3 · Care Center: Main Building 9 on Standard (600 blood), 11 on Insanity (770). In ch03: dropped by the Waiting Room blind zombie (50); Blood Reports Room north cabinet (50); dropped by a Records Room zombie (50); Cold Storage south-west metal cabinet (80); Isolation Room 2, north side (60); Isolation Room 3, south bed (50). The Water Treatment Plant Storage Bay, on a barrel (100, ch08). In the ARK (ch14): Cleanroom north-west examination bed (80) and Bioweapon Repository 05 north-east container (80). Insanity only: on the cabinet on the west side of the Dining Room (70) and the Records Room south shelves (100). | Refills the Blood Collector at once. Anything over capacity is lost. Use it when the collector is nearly empty. For **Bloodlust**: empty the collector by crafting, save, use the bags, reload and repeat. |
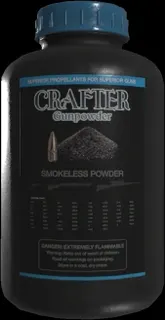 Gunpowder (Large) 300 Gunpowder (Large) 300 | 9 · East Raccoon City 12 on Standard (Modern and Classic), all from Raccoon City on. In ch09: the NF Building 3F north window sill, the Cedarbrook Apartments Side Yard wooden box, the Underground Parking Garage large north case, the Sewage Facility Storeroom crate on the east shelves, a car trunk on Main Street by the Cedarbrook Foyer, the Willis Tower Office 2 south desk and the Building 4 barrel on the north-west terrace. In ch12: the Blackthorn Station B1 Platform south-west seats and the B3 Subterranean Passage north crate. In the ARK: the Server Room and Central Corridor shelves (B1, ch13) and the Generator Room north-west corner (B5, ch15). Insanity adds 3 in the Care Center: the Attic Lounge and the Attic upper level (ch04), and the Courtyard East Overlook (ch07). | Leon's material for Shotgun Shells, Rifle Ammo and the Hand Grenade. Recipes: Scrap + Gunpowder (Large) = Shotgun Shells ×3 or Rifle Ammo ×5; Scrap + 2 Gunpowder (Large) = 1 Hand Grenade (one source asks only 1). For **Master Craftsman**, 2 of them and 2 Scrap are enough if you save, craft and reload. Sells for 300 credits. |
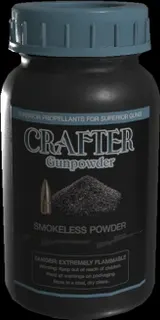 Gunpowder (Small) 200 Gunpowder (Small) 200 | 9 · East Raccoon City Only 2 in the whole game: the right (east) locker of the Logistics Warehouse 1F Office (ch09) and the south-east AC unit on the Blackthorn Station B2 East Platform (ch12). One source doesn't list the Blackthorn one on Standard (Classic); probably an omission. | Leon's material for Handgun Ammo (×10) and Machine Gun Ammo (×40). **Don't sell it** (200 credits): **Master Craftsman** needs both recipes. With the save, craft and reload trick, one is enough for both. |
Special items
19| Item | Where | Effect |
|---|---|---|
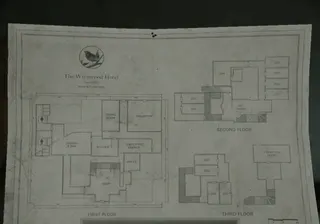 The Wrenwood Hotel Floor Plan The Wrenwood Hotel Floor Plan | 1 · Wrenwood (Prologue) Hotel Office (1F): hanging on the north-west wall. | Reveals the hotel's floor plan on the map. The Notice of Closure file is in the drawer of the blue metal desk in the same office. |
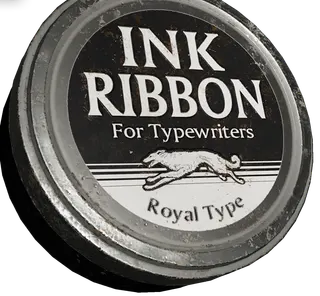 Ink Ribbon Ink Ribbon | 2 · Care Center: Arrival Only on Standard (Classic) and Insanity: 15 per run. The first ones are on the round table (north) in Room 201 and in the north drawer of the Nurses' Station (drag the body off the desk first) (ch02). Then: Guard Office, West Corridor, Custodian's Office, Closet, Pantry and Security Manager's Office (ch03); Security Room, Processing Office and the cardboard box in Processing (ch05); Private Lab (ch06); the Water Treatment Plant Storage Bay (ch08); the ARK Lab Entrance and Operations Room (ch14). | Grace spends 1 every time she saves at a typewriter. Leon saves for free at his laptops on every difficulty. Recipe: Ink Ribbon Tin + 40 Infected Blood They don't exist on Casual and Standard (Modern): saves are unlimited. Saving once with a ribbon gives the **The Ol' Fashioned Way** trophy. **Infinite Ribbon** (Special Content: finish the story in under 4 hours) removes the cost; a single source adds that you must also release Elpis. |
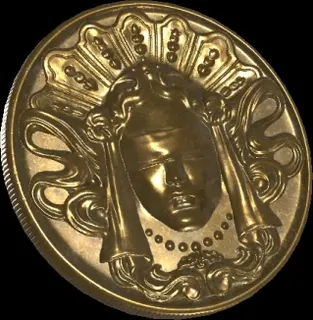 Antique Coin Antique Coin | 2 · Care Center: Arrival 22 fixed on Standard (32 on Insanity), all in the Care Center (on Insanity, 2 in Wrenwood), plus 1 from the roulette and 4 that Chunk drops if you carry the Eye Spy Charm from an earlier run. #1 is on top of the north locker in the Nurses' Station (ch02): climb the trolley before you move it. Each one is in the collectibles list. | Currency for the 4 Parlor cabinets (ch03). Standard: Hip Pouch 3, Stabilizer 4, Steroids 4 and Override Manual 6 (17 in all). Insanity: Hip Pouch 3, Handgun Ammo ×30 5, R.I.P. Knife 5 and Override Manual 6 (19). You can feed a cabinet a few coins at a time, without carrying the full price. Leftovers become Scrap (5 coins → 1 Scrap) with the Crafting Recipes - Bottle of Acid/Various recipe (ch14, per IGN). |
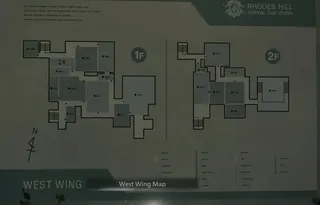 Care Center West Wing Map Care Center West Wing Map | 3 · Care Center: Main Building Landing 2F (West Wing): hanging on the south-west wall, at the top of the first flight of stairs. | Reveals the Care Center West Wing rooms on the map. |
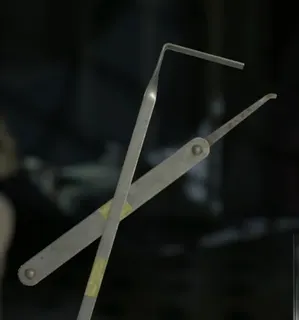 Lockpick Lockpick | 3 · Care Center: Main Building 5 per run, all Grace's. In ch03: Lead Researcher's Office Lounge (small east cabinet, left of the typewriter), Custodian's Office (left locker on the east side) and the 2F Office (north-west desk). In ch05: Boiler Room (floor, east) and Service Passage (north-west floor of the vent between the Workshop and Construction Storage). | One use: opens a simple locked drawer or locker. There are 5 locks and each holds 1 Rare Metal. Opening the first gives the **Like Mother, Like Daughter** trophy. The 5 locks are in the collectibles list: East Wing Lobby, West Corridor and Gallery Corridor (ch03), Bunkroom and Inspection (ch05). It all stays in the Care Center: use them before the VIP Suite elevator (ch06). |
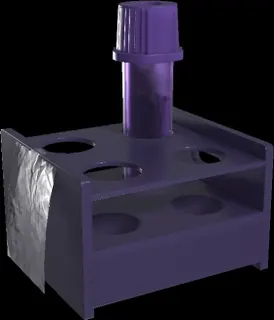 Blood Specimen (Denatured) Blood Specimen (Denatured) | 3 · Care Center: Main Building Blood Lab (1F East Wing): the bench on the east side, next to the laser microscope. | Analyse it at a Blood Analyzer (Blood Lab or 2F Office): Handgun Ammo and Hemolytic Injector recipes. 1-step puzzle: press the middle cube. The first analysis gives the **Science!** trophy. It is in the collectibles list. |
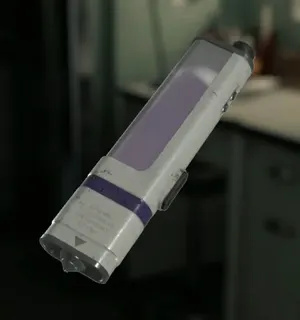 Hemolytic Injector Hemolytic Injector | 3 · Care Center: Main Building Only 1 pre-made: on the white desk on the east side of the Examination Room (ch03). Not on Insanity. The rest are crafted. | Press ZR behind an enemy that hasn't seen you, or on a staggered or downed one: it dies instantly. Works on zombies, the Chef, staggered Blister Heads and Licker β2. Injected into a corpse, it stops it mutating into a Blister Head. An alerted enemy is only staggered. Recipe: Scrap + 60 Infected Blood Blood Specimen (Denatured) recipe. It hits Chunk hard: 3 kill him. The back-turned zombie just left of the Examination Room injector is your first shot at the **Fatal Dose** trophy. IGN advises crafting injectors over bullets while you still have ammo. The Double Mutation file explains Blister Heads. |
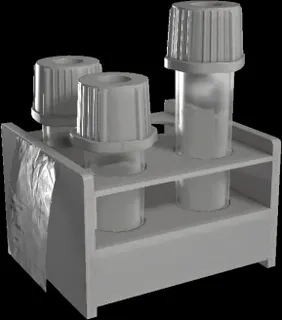 Blood Specimen (Reversible) Blood Specimen (Reversible) | 3 · Care Center: Main Building Blood Reports Room (Level 1 door inside the Blood Lab): small medical trolley to the north-east, with the Victor's Journal Entry file and Empty Injector #1. | Steroids and Stabilizer recipes (Empty Injector + Infected Blood). 4-step puzzle: the bottom-left corner cube, the middle cube, the top-right cube and the second cube from the top (Game8). The recipes cost 110 blood or more: without the Override Manual (capacity 150) you can't craft them. It is in the collectibles list. |
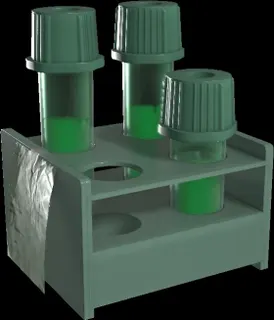 Blood Specimen (Converged) Blood Specimen (Converged) | 3 · Care Center: Main Building Closet (Level 1 door off the Waiting Room): medical cabinet, south side. Insanity: Records Room (2F) north-east filing cabinet; the Pantry Key takes its place. | Med Injector and 12.7×55mm Ammo recipes. 2-step puzzle: the top middle cube, then the second cube from the bottom. It is in the collectibles list. |
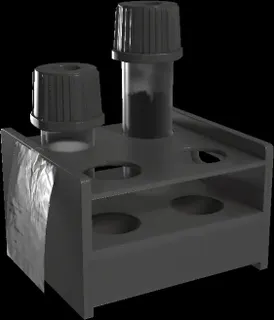 Blood Specimen (Polymerized) Blood Specimen (Polymerized) | 3 · Care Center: Main Building Insanity only: on the south-west benches of the Closet (Level 1 door off the Waiting Room), with an Empty Bottle. | R.I.P. Knife (Scrap + 110 Infected Blood) and Handgun Ammo ×30 (Scrap + 120 Infected Blood) recipes. 3-step puzzle: the second cube on the left, then the second cube on the right, then the second cube in the middle (Game8). It is not in the collectibles list (it only exists on Insanity). |
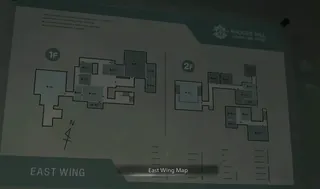 Care Center East Wing Map Care Center East Wing Map | 3 · Care Center: Main Building East Stairway: on the wall at the top of the stairs, by the door to the Lead Researcher's Office Lounge (2F). | Reveals the Care Center East Wing rooms on the map. |
| Crafting Recipes - Molotov Cocktail | 5 · Care Center: Basement Basement Bunkroom: silver case on the small middle table. The room opens with a Joint Plug in the Central Passage. | Teaches Grace the Molotov Cocktail recipe: Empty Bottle + 60 Infected Blood. The Molotov burns groups and freezes The Girl for a few seconds. There are 4 pre-made: Processing (ch05), the Water Treatment Plant Chemical Treatment (ch08), the Cleanroom and the Sterilization Chamber safe (ch14). |
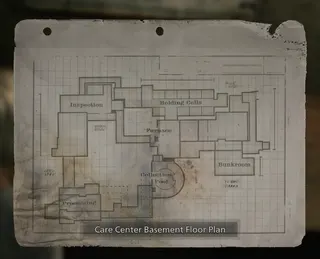 Care Center Basement Floor Plan Care Center Basement Floor Plan | 5 · Care Center: Basement Processing Office (Basement): the north bench, with Hip Pouch #3. | Reveals the Care Center Basement on the map. It comes late. Until then, use the Unlocking the Cells file, which marks the Joint Plugs on the map. |
 Raccoon Roundup Map (Rhodes Hill) Raccoon Roundup Map (Rhodes Hill) | 5 · Care Center: Basement The Basement safe (Construction Storage north-east room, on the Furnace side), with Handgun Ammo ×10. Code: R60 L40 R80 (Insanity: L70 R50 L20); L = clockwise, R = counter-clockwise. It comes from the Basement Safe Code file, which Leon takes from the Attic Stairway warped closet (ch04). | Marks on the map every Care Center Mr. Raccoon you haven't destroyed yet. Also sold in Special Content for 200 CP; the Raccoon City version costs 300 CP. Destroying all 25 Mr. Raccoons unlocks **Advanced Tuning**. |
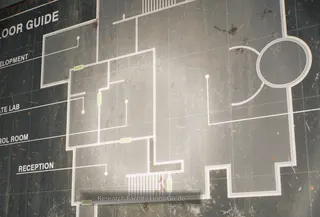 Research Facility Floor Guide Research Facility Floor Guide | 6 · Courtyard and Research Facility Research Facility Stairwell: on the wall by the Emergency Evacuation Route door. | Shows the Research Facility layout and its evacuation route. Learn it: there is no time during the escape. One source calls it "Floor Plan". |
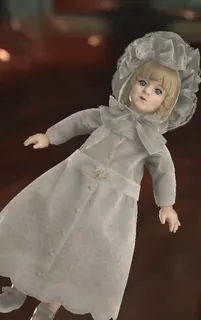 Marie's Doll Marie's Doll | 6 · Courtyard and Research Facility Conditional: during the Research Facility escape, at the foot of the Collection & Testing East stairs, just before Grace breaks into a panicked run. It only spawns if in this run you: 1) waited a full 15 minutes in Processing (ch05) before draining the water; 2) got through the conveyor without landing a killing blow yourself (hit their knees and push them into the grinder's teeth); 3) after the Basement, flushed the toilet in the Restroom by the Kitchen 8 times before heading out to the Courtyard. | The key to the Final Puzzle (hidden challenge, 20,000 CP). Carry the doll and Emily to the Lead Researcher's Office puzzle cabinet and enter the 12-symbol code. Put it in the Item Box: in a new game it shows up in Grace's Item Box. In that run, get the ID Wristband (Level 3), open Emily's cell and carry her to the cabinet with the doll. Counting 115 bodies dropping into the pit (about 8.5 minutes) doesn't work. If it doesn't appear, reload from before draining Processing. Description: "We'll be together forever and ever." The community worked the conditions out; not every source has tested them. It is easier on Casual. |
 Tracking Module Tracking Module | 9 · East Raccoon City 17 on the first run (ch09-ch15), about 74,700 credits in all; one of the first is in the open storage unit of the south kitchen in Café Oasis (Rare, 5,000). 9 more only appear on later runs (Wrenwood, Care Center and Courtyard). Each one is in the collectibles list. | Leon's treasure ("A device with stored combat data"): opening a Supply Box redeems it for credits automatically. Common: 1,000 to 3,700; Rare: 4,200 to 7,000; Legendary: 8,300 to 10,100. Requiem has no treasures to sell: credits come from these and from kills with the Tactical Tracker. They count for **Credit Where Credit Is Due** (200,000 credits cumulative across runs). |
| Crafting Recipes - Bottle of Acid/Various | 14 · ARK: Lower Levels Monitor Control Room (B2, first green door on the left in the Lobby): small case on the south side, left of the safe. | Grace recipes: Bottle of Acid (Empty Bottle + 80 Infected Blood) and Scrap (5 Antique Coins → 1 Scrap, per IGN). The Bottle of Acid kills a Licker β2 in one hit on every difficulty: craft at least 2 before the Operations Room exit. There are 4 pre-made: Chemical Storage (2), this room's safe and the Bioweapon Repository 05 Walkway. |
| ARK Lab Unit 01-02 Floor Plan | 14 · ARK: Lower Levels Operations Room (ARK B2): the computer on the south side, at the main monitors. | Reveals ARK Lab Units 01 and 02 on the map. |
Ammunition
5| Item | Where | Effect |
|---|---|---|
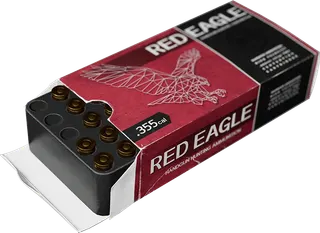 Handgun Ammo 30 Handgun Ammo 30 | 1 · Wrenwood (Prologue) The most common ammo. Leon starts with 30 and the Wrenwood zombies drop it (ch01). Grace finds her first 2 rounds on the south-east desk of the Filing Room (ch03). Big stashes: Security Manager's Office ×12 (ch03), the Basement safe ×10 and Processing ×15 + ×8 (ch05), the Sterilization Chamber safe ×15 (ch14) and the Gene Vault ×18 during Victor's second phase (ch15). | Ammo for the S&S M232, the B934 and Freya's Needle (Grace) and for the Alligator Snapper, the Silencer 9 and the Matilda IMP (Leon). Recipe: Grace: Scrap + 40 Infected Blood (×8) · Leon: Scrap + Gunpowder (Small) (×10) Grace unlocks her recipe by analysing the Blood Specimen (Denatured) (ch03). On **Insanity** the Blood Specimen (Polymerized) adds Scrap + 120 blood → ×30, and Parlor cabinet 2 sells ×30 for 5 Antique Coins. Leon buys it at the Supply Box for 500 credits per 10 (50 a round; limited stock that restocks as you progress) and sells it for 30 a round. There are only 2 Gunpowder (Small) in the game, so Leon hardly ever crafts it. |
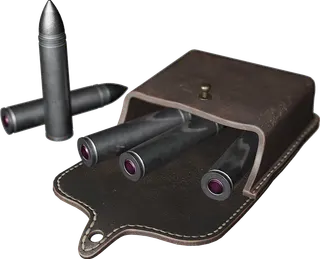 12.7×55mm Ammo 400 12.7×55mm Ammo 400 | 3 · Care Center: Main Building Grace: Pantry (north-east silver case, 1) and Closet (south-west silver case, 1) in ch03; at the Water Treatment Plant (ch08), Storage Bay (north bench, 5), Sedimentation (north-east container, 1) and Storage Area (south-west barrel, 1). In ch09 Leon receives all of Grace's rounds, Item Box ones included, and finds more: Cedarbrook Apartments Side Yard (2), Cedarbrook Garden (2), Ridgewood Station (3), Building 2 Rooftop (2), Side Street (2) and the Cedarbrook roof after blowing the wall with the mortar (2) in ch09; Blackthorn Station B3 (1, ch12); the ARK B4 Back Room (1) and Systems Management (2) (ch15). | Ammo for the Requiem and the Ghost Grudge. Recipe: Rare Metal + 80 Infected Blood (Grace only, ×2) Blood Specimen (Converged) recipe. Grace gets about 20 in all: 9 loose, 10 from the 5 Rare Metal and the one in the gun. The Supply Box doesn't sell it and Leon can't craft it; he sells it for 400 credits a round. Save it for bosses, for The Girl (1 round stuns her on Casual and Standard) and for lines of 3 zombies (**Bang for Your Buck**). |
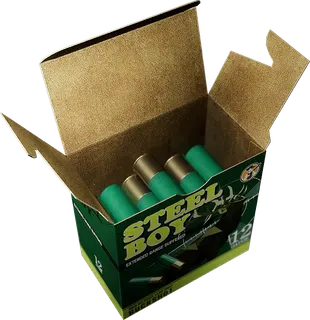 Shotgun Shells 50 Shotgun Shells 50 | 4 · Care Center: Attic The first ones are Leon's in the Attic (ch04): 4 on the upper level (Chunk uncovers them), 4 behind the wall he smashes and 5 to the north-west; plus the Gallery Corridor warped closet (4); on Insanity, also the Pantry (4) and Filing Storeroom (2) closets. Later: Raccoon City East (ch09), the rubble of the R.P.D. Main Hall balcony (6, ch10), the Raccoon City Center Side Street (10, ch12) and the final Gene Vault (8, ch15). | Ammo for the MSBG 500, the 990-TAC and the W870 Police. Recipe: Scrap + Gunpowder (Large) (Leon, ×3) Leon buys them at the Supply Box for 600 credits per 3 (200 a shell) and sells them for 50. The recipe appears once he owns a shotgun (the Attic MSBG 500), but on Standard there is no Gunpowder until Raccoon City East. Grace doesn't use shotguns. |
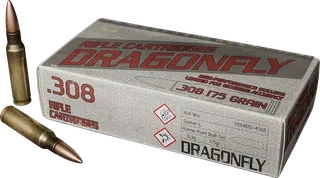 Rifle Ammo 100 Rifle Ammo 100 | 7 · Courtyard: Rooftops and Chapel On Insanity the first ones are in the Records Room (3) and Pantry (4) warped closets (Leon, ch04); on the other difficulties, in Courtyard East (ch07): West Overlook (10) and East Balcony (2 × 10, plus the Wooden Crate; only 5 on Insanity). Raccoon City East (ch09): BSAA Container 03 (4), Gas Station Storeroom (4), Construction Yard (4), the crate on the Grimstone Building roof (shoot it down, 4) and more. Later: the Parking Garage BSAA container (6) and Side Street (10) in Raccoon City Center and Blackthorn Station Train Carriage 1 (6) (ch12); Gene Vault (9, ch15). | Ammo for the Classic 70, the Marksman 1A and the Redemption. Recipe: Scrap + Gunpowder (Large) (Leon, ×5) Buy: 900 credits per 3 (300 a round, the priciest); sell: 100 a round. One source asks 2 Scrap; 4 say 1. The Courtyard East ones are for the Classic 70 sniping section (ch07). |
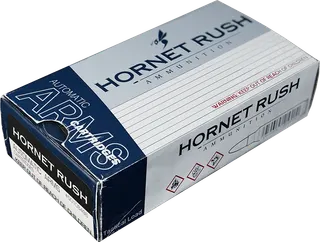 Machine Gun Ammo 20 Machine Gun Ammo 20 | 9 · East Raccoon City On Insanity the first ones are in the Gallery Corridor (20) and Filing Storeroom (40) warped closets (Leon, ch04), before he owns a gun that uses it; on the other difficulties, in Raccoon City East (ch09): the Underground Parking Garage trucks (20 + 20), Cedarbrook Foyer (20 + 10), Ridgewood Station (25), the Logistics Warehouse 4F Terrace (30) and Building 2 Rooftop (20). Raccoon City Center Side Street (60) and the Blackthorn Station B2 West Platform (30) (ch12); Gene Vault (70, ch15). | Ammo for the Gal, the Stiri REVO3 A1 and the Clatter Carbine. Recipe: Scrap + Gunpowder (Small) (Leon, ×40) Buy: 800 credits per 20 (40 a round); sell: 20 a round. Sources disagree on whether the recipe takes 1 or 2 Scrap: carry 2. There are only 2 Gunpowder (Small) in the game and you need this recipe for **Master Craftsman**. |