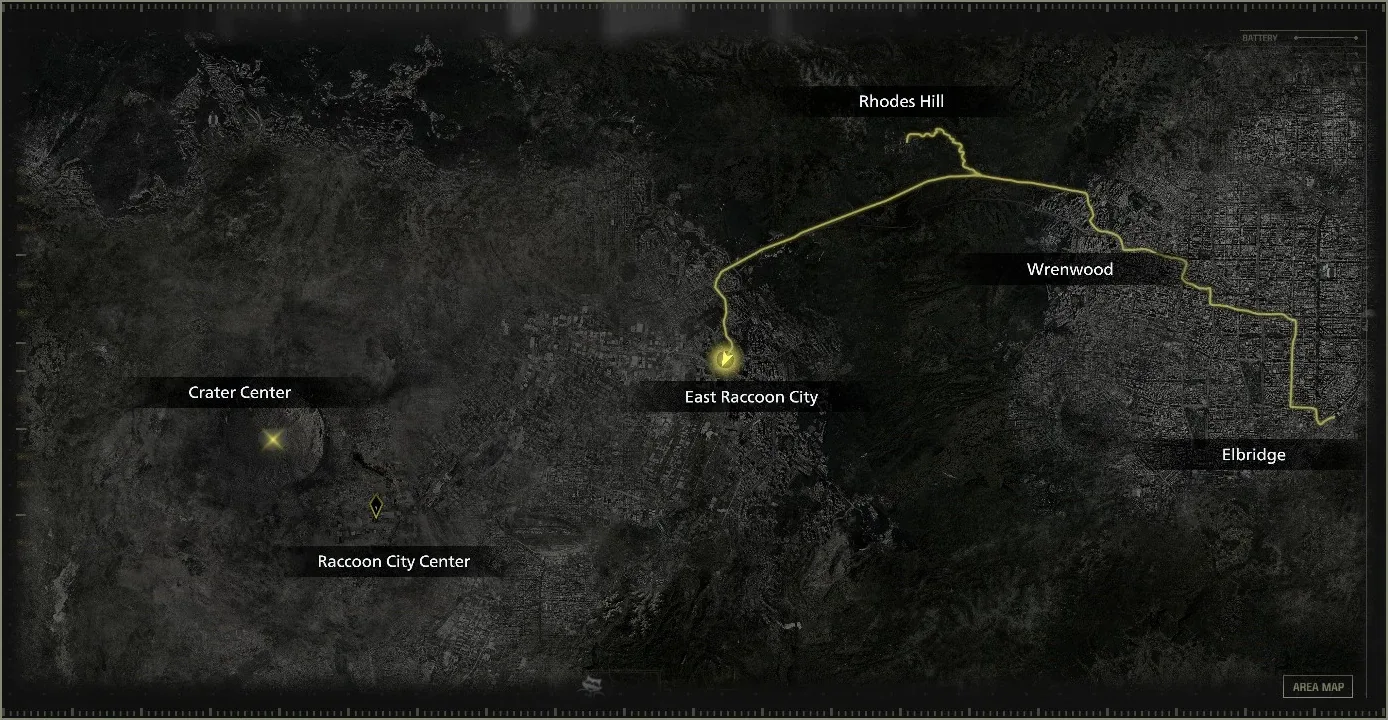
Chapter order: North West Street (files #48 and #49) → Café Oasis (Mr. Raccoon #11) → The Applegate Hotel → NF Building: Titan Spinner → Ridgewood Station → Main Street (the gate with the incomplete bomb) → Central Camp (laptop, Supply Box, Tactical Tracker, file #50) → Logistics Warehouse (Cedarbrook Apartments Key, Distributor, Mr. Raccoon #12) → Cedarbrook basement (Mr. Raccoon #13) → Underground Parking Garage (file #51, Battery, Gal) → Sewage Facility: Blister Borne and the second Battery → Main Street: BSAA Container Key, Container 01 (file #52, Mr. Raccoon #14), crane bridge (Mr. Raccoon #17) → BSAA Container 02 (Repair Kit) → Gas Station (Mr. Raccoon #16, Gas Can, 2 Chainsaw Zombies) → Construction Yard → Underground Pipe → Ridgewood Station (Mr. Raccoon #18) → BSAA Container 04 → BSAA Container 03 (Marksman 1A) → Cedarbrook Apartments (Rusty Crank, Mr. Raccoon #15, mortar rooftop: Broken Signal Receiver, file #53) → Side Street → Willis Tower (Mr. Raccoon #19) → Grimstone Building (Relay, laptop) → Building 4 (Chainsaw Zombie) → Maintenance Platform (Going Down?) → Detonator on the gate (point of no return) → motorcycle chase: Victor and Garmrs (Road Rage).
Prepare: on arrival Leon receives the Requiem and every round of 12.7x55mm Ammo Grace was carrying, her Item Box included. Leon can’t craft or buy it: this chapter gives you 13 more (2 in the Cedarbrook Side Yard, 2 in the Garden, 3 in Ridgewood Station, 2 on the mortar rooftop, 2 on the Side Street and 2 on the Building 2 Rooftop). Save them for the Titan Spinner’s cyst, the armored Chainsaw Zombie, the Building 4 one and the Blister Borne’s last pustule. Until you pick up the Tactical Tracker at Central Camp, kills give no credits: spend only what you must in the NF Building. Leon saves without limit on every difficulty (laptops next to every Supply Box; no Ink Ribbons). Don’t sell the Gunpowder (Small) from the Logistics Warehouse: there are only 2 in the whole game (the other is in Blackthorn Station, chapter 12; on Standard (Classic) it may not appear) and two Master Craftsman recipes call for it. With the save, craft and reload trick, one is enough. Buy Body Armor Lv.II before the mortar rooftop, keep grenades for Building 4 and the Maintenance Platform, and keep the Hatchet sharp (L + Y). After the gate there’s no way back and no chapter select: leave a manual save at Central Camp before you set the Detonator.
Walkthrough
You play Leon S. Kennedy for the whole chapter. Switch 2 controls as in chapter 4 (L parry, L + Y sharpen, A kick or throw, R heal). The Hatchet finisher and sneak attacks from behind destroy the head: that zombie won’t come back as a Blister Head. Raccoon City’s zombies pick up debris: spears (they charge from a distance; parry them), fire axes and rebar (parry, then throw the weapon back with A: trophy Can I Borrow This?), and some throw rebar from ledges (block it or shoot them first). Many play dead or rise out of the ground. If one carries a beeping canister or grenade, shoot the explosive in its hands.
North West Street. During the call with Sherry you get the file Report on the Raccoon City Incident (#48), the Requiem and its ammo. A few steps ahead, on the ground to the right by some trash bags, lies the Raccoon City Incident Newspaper (#49). The car park on the east side has a Wooden Crate. The stairs to the south lead down to a locked subway entrance (you open it later from inside).
Café Oasis. Turn right at the intersection: it’s the first open building on the left, before the hotel. Mr. Raccoon #11 sits on the cabinet behind the counter in the northern room. In the kitchen (southern room): Scrap on the metal bench in the southeast and a Tracking Module (Rare) worth 5,000 credits in the open storage unit in the southeast corner. On the way out you see BSAA Container 04 (blue, with a 4 on it): it doesn’t open yet.
The Applegate Hotel. In the lobby: Med Injector in the first-aid box behind reception, Scrap on the small table by the globe (west) and Shotgun Shells ×4 on the floor by the revolving door (south). The letter From Meryl to Mommy on the southwest sofa belongs to the Deluxe Kit: it doesn’t appear in the base game. Go through the rusted, cobwebbed revolving door. On the overpass (Applegate Hotel Parking) the Titan Spinner cutscene plays: Leon ducks into the NF Building and the entrance collapses.
NF Building: the chase. In the window corridor break the crate in the northeast and cut the webs with the Hatchet. When the spider blocks the corridor, don’t shoot: turn around and run back to the start of the first corridor (the red-brick wall). The spider smashes Leon through the wall into the next room. Run to the back, turn right and cut the web on the door. The 2F landing has a crate, and there’s another behind a side web on the right. In the large 2F room a swarm of Small Spiders drops on you (18; 22 on Insanity): back into the corridor you came from so they bunch up, then use the shotgun or a grenade; chop single ones with the hatchet. Keep right toward the fire escape: the Titan Spinner lunges out of the hole beside the doorway. Shoot or chop it until it pulls back (it can’t be killed yet, so don’t spend more), then climb the ladder. The fight takes place on 3F and 4F (see Boss — Titan Spinner). Grab these first: on 3F, Shotgun Shells ×5 on the east window sill, Gunpowder (Large) on the north window sill and a crate in the middle; on 4F, crates to the southwest and east. There’s a red explosive canister on each floor (3F north side, 4F northeast corner): don’t waste them.
Ridgewood Station. After the fight you fall into the subway. From the South Platform go up the stairs: the gate on the left is locked from this side. Go straight and right through the working turnstile and break open the door upstairs. You come out on Main Street by the walled-off on-ramp: the gate carries an incomplete BSAA bomb. Interact with it: the detonator is missing. Along the street: Rifle Ammo ×3 in the trunk of the car by the bus (southwest), Handgun Ammo ×10 on the passenger seat of the small truck to the north (by the Construction Yard gate), Handgun Ammo ×3 in the trunk of the car at the south end next to Central Camp (×5 on Insanity) and Handgun Ammo ×12 in a small case hanging from the highway, near the gate.
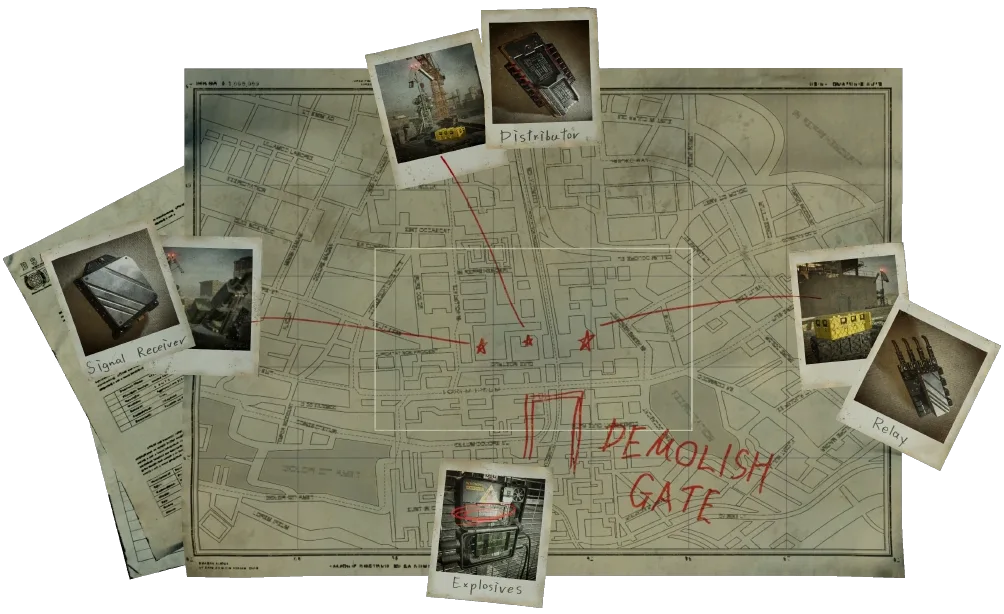
Central Camp. To the left of the gate. Start the yellow generator beside the blue tent: the lights come on, the laptop becomes a save point and the Supply Box switches on. The Tactical Tracker lies on top of it: from now on every kill gives credits, cashed in when you open a Supply Box. On the tent table is the file Orders for the Engineer Corps (#50): the Detonator needs three parts, the Signal Receiver at the East Point (Cedarbrook rooftop), the Distributor at the Mid Point (Logistics Warehouse rooftop) and the Relay at the West Point (Willis Tower and Grimstone). In the large weapons case to the south: Handgun Ammo ×10 and Shotgun Shells ×2. BSAA Container 02 (southwest corner) needs a key you get later. Redeem the Café module (5,000) and buy the Case Upgrade (8×13) (4,000): your first purchase earns the Retail Therapy trophy. The box doesn’t sell grenades or 12.7x55mm. Don’t buy an SMG: the Gal is free in the garage. Leon can’t store weapons: whatever doesn’t fit gets sold and can be bought back later at the same base price (the upgrades come back with the gun).
Logistics Warehouse. Press the red button on the wall behind Container 02 and crouch under the shutter. In the 1F Office (small room on the left): Hand Grenade in a silver case (south) and Gunpowder (Small) in the right locker (east). Don’t sell it. In the main hall 11 zombies rise out of the ground as you explore (plus 2 Raccoon City BSAA Zombies on Insanity). Now they do pay credits: finish them with the Hatchet (3 finishers = trophy Chop Chop), throw a grenade into the pack and throw axes and rebar back. There are crates in the middle and to the west. Shoot the yellow crane hook holding the hanging pallet (northeast) and climb onto it. Beyond the fence there’s a crate and 2 bodies that get up when you drop in, one with a spear. On the platforms by the windows 2 zombies burst out of boxes (3F Platform) and there’s a Green Herb on the north side; 4 more appear on the 2F south walkway. Shoot the second pallet to bridge over to the isolated southwest platform: 2 crates, one with a Green Herb. A zombie throws rebar from a high platform: take it out with the rifle. At the end, past a tarp, drop the last pallet and cross to the hole in the wall. 2 zombies come out of the small door on the right (you can shoot them through the window first). In the dark 3F Corridor, the Cedarbrook Apartments Key hangs in the key locker next to the storeroom door (northwest); 1 zombie wanders here.
Warehouse rooftop: the Distributor. Step out onto the lower roof. Shoot the zombies on the toppled skyscraper and the overpass: free credits. The 4F Terrace weapons case holds Machine Gun Ammo ×30 and a Hand Grenade. Climb the ladder: the orange generator by the zipline gate is out of fuel (you need it later for the Willis Tower). Cross the dark rooms and climb the last ladder: Green Herb on the wooden box by the fence (south) and the Distributor in the large yellow case (to the left). A binocular cutscene follows: look at the cell tower by the water tank (Cedarbrook), the gas station (down and to the left) and the tower by the collapsed building (Willis and Grimstone). Mr. Raccoon #12: from the rooftop, face west toward the service elevator: it’s on the roof of a van in front of a delivery truck on the elevated highway. Shoot it with the rifle. Take the service elevator down to Central Camp, save and buy Body Armor Lv.I (8,000). If you have more than 12,000, add the Case Upgrade if you don’t own it yet.
Cedarbrook basement. Go down the stairs by the service elevator and use the Cedarbrook Apartments Key on the gate with the “Cedarbrook Apartments” sign, right of the camp fence. In the Side Yard, shoot down the fragile hanging case (Hand Grenade), shoot the yellow-taped ladder on the far wall and climb it: 12.7x55mm Ammo ×2 and Gunpowder (Large) on the wooden box at the end of the platform (southeast). Go in through the door below. In the Basement Corridor a zombie stands with its back to you: it’s the stealth attack tutorial (sneak up crouched and press the button that appears). It drops a Tracking Module (Common) worth 1,200. The first door on the left is the Basement Storeroom: Mr. Raccoon #13 on the large box on the east side (to your right as you enter), Rifle Ammo ×2 in the left locker in the northeast, Green Herb on the left metal table (north) and a crate with Scrap on the northwest shelves. Further on, a zombie bangs on the gate in a flooded area: kill it. On the red-lit power-panel door by the gate is the file Battery Storage Locations (#51): the gate needs two Batteries, one from the garage and one from the sewage plant (on Insanity 2 zombies rise from the water here).
Underground Parking Garage: Battery and Gal. Turn 180 degrees and climb the ladder over the truck into the flooded garage: 12 zombies that rise from the water as you approach. Go slowly. Your goal is the Power Room in the northwest corner. The north route, up the right side, has only 2 wanderers and a spear zombie, and all three can be killed from behind; the west route is better guarded. Loot: Shotgun Shells ×2 on wooden boxes (east); an openable truck in the northeast with Machine Gun Ammo ×20 and Rifle Ammo ×2; a large weapons case (north) with Gunpowder (Large), a Tracking Module (Common) worth 2,300 and Shotgun Shells ×2; the southwest truck with Machine Gun Ammo ×20 and a Hand Grenade in a small case. The other west truck hides 2 zombies and a red canister: open it, back off and shoot the canister. There’s a crate by the Power Room door. Inside, 2 zombies stand around; the Battery is in the wall panel to the north and the Gal is in the silver case on the metal table (east), loaded with 40 rounds (first playthrough only; afterwards it costs 2,000). There’s another crate to the south. Climb the room’s ladder and follow the catwalks over the trucks back to the gate (1 zombie and a crate on the way). Insert the first Battery.
Sewage Facility: Valve Handwheel. Go up the stairs and through the blue door. The rooms are mostly empty. The Storeroom has a crate with Gunpowder (Large) and a sealed door that needs a crank (you come back later). Go down the hatch in the corner, walk past a sealed door (it doesn’t open) and grab the Green Herb in the Maintenance Passage. In the big room, drop into the empty circular tank (the Pit). Turn around: at the end of the west tunnel there’s a crate and the Valve Handwheel. Taking it makes 2 zombies rise from the ground (3 on Insanity): hit them with the Hatchet before they’re fully out. Place the wheel in the slot by the door and turn it only 20-25 %, then let go: it opens just enough to show the Blister Borne (see Boss — Blister Borne). The area holds 2 crates in the west-passage alcove, another by the destroyed east stairs, a red canister on the south side of the circle and, up on the north side, a Green Herb and a second canister. With the boss dead, finish turning the wheel: the wall becomes a bridge on the upper level and the alcoves it uncovers hold crates. Cross to the Power Room: the second Battery is in the panel in the northwest corner. A shortcut door takes you back to the ladder and the garage. Insert the second Battery: the shutter opens onto Main Street, on the far side of the giant hole.
Main Street east: BSAA Container Key. Go forward and left: the helmet-cam cutscene of the massacred BSAA squad plays in front of the Cedarbrook Foyer door. You receive the BSAA Container Key. Container 01, on your left, is already open: inside are the file Inventory List (#52) and a Med Injector in the medical case. Mr. Raccoon #14 sits in the driver’s seat of the rusted bus right next to it. More loot: Gunpowder (Large) in the trunk of the car by the Foyer door, Green Herb on the south side of the street by that door, Handgun Ammo ×10 in the trunk of the car mid-east, a Hand Grenade in the small case in the mid-east truck, a dead BSAA soldier in the northeast alley by the gas station gate (Med Injector and Hand Grenade), a Green Herb in the alcove west of the gas station with Rifle Ammo ×3 in the case hanging from the platform there, Handgun Ammo ×10 in the trunk of the car in the far northeast corner, another Green Herb on the south side of the east area and a crate in the southeast corner. 2 zombies wander around. At the construction site by the hole, pull the crane lever: the beam drops in and becomes a bridge to Central Camp. From the bridge look down and to the left, into the broken sewer pipe at the bottom: that’s Mr. Raccoon #17. Shoot it. Using the bridge brings 2 zombies into the middle of the street. Go back to Central Camp and open BSAA Container 02: the Repair Kit (required) and the motorcycle. Redeem your modules and buy what your credits allow. The guides’ priorities: the 990-TAC (7,000; sell the MSBG 500 for 2,500), the Silencer 9 (5,500; you can sell the Alligator Snapper for 1,000) and the Hatchet’s Improved Grip (3,000, a longer-lasting edge). Your first upgrade earns Tailor Made. Keep a margin: before the Cedarbrook rooftop you’ll want Body Armor Lv.II (15,000).
Gas Station: Gas Can. Opposite the Cedarbrook entrance (across from the dead soldiers), shoot the straps on the scaffold ladder, climb it, open the case at the north end of the platform (Hand Grenade), cross over and drop into the gas station. 1 zombie wanders; crates to the southeast and north. In the Gas Station Storeroom: Rifle Ammo ×4 in the right locker (east; missing on Standard (Classic)). The shop roof has a crate (stairs on the north side). In the Gas Station Shop, Mr. Raccoon #16 sits on the middle shelves, straight ahead as you enter; Scrap on the north shelves. A zombie plays dead on the floor and lunges. In the Small Yard (south, behind the shop) the Gas Can is on the wooden crate by the generator (southeast), with another crate holding a Green Herb. When you go back through the shop, a Chainsaw Zombie bursts out of the boxes and another zombie gets up: see Boss — Chainsaw Zombies. Outside, 7 zombies appear; one carries a beeping red canister: duck left behind the big truck and let it blow (the area catches fire). Alternative: stay in the shop doorway and shoot them as they come (the chainsaw on the floor draws them in). Then the armored Chainsaw Zombie breaks through the wrecked cars to the west; it drops a Tracking Module (Rare) worth 5,100. The Gas Station Shed has a crate. In the Refill Area (north) turn the tank valve and use the Gas Can on the faucet: Gas Can with Fuel. One fill runs every generator: the Small Yard one (opens the gate to the street), the one mid Main Street (Construction Yard) and the orange one at the Logistics Warehouse. Fuel the Small Yard generator and press the gate button. On Standard (Classic) and Insanity, 2 zombies and 2 Blister Heads now appear in the middle of Main Street: take them from behind or from range.
Construction Yard, Underground Pipe and Ridgewood Station (optional). Fuel the generator mid Main Street and open the gate. Climb the scaffolding: the weapons case on the middle platform holds Shotgun Shells ×3, Scrap, Rifle Ammo ×4 and a Mixed Herb (G+G). Shoot the 2 zombies below instead of wasting the canister. Shoot down the hanging case to the west and drop behind the red skip: Scrap and a Stacked Hand Grenade. Down below 4 zombies come out (2 from the ground, 1 from under the truck, 1 from some boxes): throw the red canister from the north side at them. The openable truck has Shotgun Shells ×3 and there’s a crate on the wood stack to the south. A shortcut gate leads back to Central Camp. The hatch takes you down into the sewers: east and then south is the Underground Pipe, with a Tracking Module (Common) worth 3,700 in a small case at its south end (you can also see Mr. Raccoon #17 from here). West and then north, another hatch drops into the Ridgewood Station tunnel: in the Tunnel Access, a Green Herb and a crate (not on Standard (Classic)); in Train Carriage 1, a crate at the east end; in the tunnel, 3 zombies you can sneak past. In Train Carriage 2, Mr. Raccoon #18 is on the seats in the middle of the carriage, with 4 Small Spiders. On the North Platform, 2 zombies and a large weapons case (west) with Machine Gun Ammo ×25, Rifle Ammo ×3 and 12.7x55mm Ammo ×3. The Concourse has 2 more zombies; the North Entrance has 3 that play dead and get up as you come back through. Upstairs you unlock the door and come out on North West Street.
BSAA Container 04. When you arrive with the key, 4 zombies appear around the container, including a spear zombie that charges out of the hotel; one may turn into a Blister Head. Clear them and open it: the BSAA Emblem Charm (more rifle firepower, only without a scope; it shines on the Marksman 1A) and a Tracking Module (Legendary) worth 8,600. To get back: after the first revolving door, keep left and take another revolving door that leads to Central Camp (PowerPyx).
BSAA Container 03. At the east end of Main Street, past the gas station, the road dips under a bridge through a maze of wrecked cars (Green Herb on the right). Loop around, climb the ladder behind the truck and drop into the enclosure (a crate on top of the container and a red canister beside it). Opening it releases 3 zombies: back off and shoot the canister or throw it inside. The weapons case at the back isn’t damaged: Marksman 1A (with 10 rounds; first playthrough only) and Rifle Ammo ×4. With all three containers open (02, 03 and 04; 01 doesn’t count) Crate Expectations pops (500 CP). Head back to Central Camp: buy Body Armor Lv.II (15,000) before Cedarbrook and keep only one rifle (sell the Classic 70 for 5,000 or the Marksman 1A for 6,500).
Cedarbrook Apartments: Rusty Crank. In the Foyer (the door by the dead squad): under the stairs, a body with a Green Herb (southwest) and a large weapons case (south) with Shotgun Shells ×2, Rifle Ammo ×2 and Machine Gun Ammo ×20 and ×10. A dark hallway leads to an exit you can unlock: a shortcut to Central Camp. In the Garden, shoot down the case hanging from the AC unit and jump through the window by the big mortar gun to collect it (12.7x55mm Ammo ×2). Upstairs, on the lower roof, there’s a gate that needs a crank: take the open doorway on its right. In the Stairwell (a tall inner courtyard) a small case hangs high up from the glass dome: you shoot it down from the rooftop and it lands here. A Raccoon City BSAA Zombie staggers up. Its helmet soaks up one headshot. Drop down to 1F: 3 BSAA Zombies. The first sweeps an SMG: take cover behind the boxes, close in and shotgun the helmet off. The other 2 drop from above, one grabs and one shoots. There’s a crate to the west. Turn the crank on the blue door (slot on the west wall): it opens back to the entrance and you keep the Rusty Crank. On the Foyer Stairs 1 BSAA Zombie smashes out of some boxes (it may hold a grenade: shoot the grenade). Go back to the crank gate on the lower roof (the 2F terrace), use the crank, climb the ladder and turn right. In the 4F Corridor: Rifle Ammo ×2 on the old cooker at the south end. Follow the balcony left and back: Mr. Raccoon #15 is inside the open fridge in the southwest corner of 4F. Get it before you go downstairs. Optional: 3F has a red canister (north), 1 zombie and 2 BSAA Zombies that sneak down the stairs behind you (save the canister for them); the southeast dead end on 2F holds Shotgun Shells ×2 and a Stacked Hand Grenade. Go up through the Roof Access (crate).
Cedarbrook Apartments Roof: the mortars. 11 BSAA Zombies and 3 or 4 mortars (PowerPyx counts 4; Game8, 3). One hit breaks your armor and a second can kill you; there’s no firing warning: move right after a shell lands, while they reload.
- As you arrive, look toward the red receiver, then up and left to the high roof with the water tank: shoot the first mortar’s operator (it goes quiet for a while).
- Shoot down the case tied to the glass dome: it falls to 1F of the Stairwell (the inner courtyard where you fought the 3 BSAA Zombies) with a Tracking Module (Rare) worth 5,100. Pick it up before you leave Cedarbrook.
- In the middle building, a first-aid kit with a Med Injector. 2 BSAA Zombies come from the left: shoot them or let the mortar hit them.
- Second mortar (southwest): shoot its operator from the next shelter; that one stays down.
- Don’t take the right-hand ladder (barricade, 2 SMG zombies, a grenadier and crossfire). Take the stairs up into the next building (crate on the right), wait under the roof for the shells to land, run out, turn left and climb the ledge ladder to the southern mortar. Shotgun its operator and knock the grenadier off.
- Take over the mortar and use it on the north mortar’s operator and its defenders. Watch the walkways and shoot anyone climbing your ladder.
- Loot the bodies (Machine Gun Ammo); one drops a Tracking Module (Common) worth 3,000. The small case with 12.7x55mm Ammo ×2 is in the back room of the southwest building: you have to blow the wall with the mortar to reach it. There are 2 crates in that building, 1 in the middle of the roof and 1 in the southeast building. Exploring the south side brings 2 more zombies in from the northeast.
- At the north end, go round the left side and climb the ladder: Broken Signal Receiver in the large yellow case on the northwest building and the file Engineer Corps Note (#53) in the case to its right. In the inventory, combine the Distributor with the Broken Signal Receiver and use the Repair Kit on the combined part.
- The wave on the way out: taking the part brings 6 zombies from the northeast, almost all already alerted. Run back to the mortar and shell them as they climb onto the lower roof. Back on Main Street 1 BSAA Zombie appears (it may carry a grenade).
Side Street. Go back to the Sewage Facility: enter through the Battery shutter on Main Street, go up the stairs and through the blue door to the Storeroom (the one with the Gunpowder (Large) crate). Use the Rusty Crank on its sealed door. The ladder goes up to the Side Street, right of Cedarbrook: 2 zombies play dead and there’s a crate by the fence near the hatch. The weapons case on the south side holds a Stacked Hand Grenade, a Tracking Module (Common) worth 3,600, 12.7x55mm Ammo ×2 and Shotgun Shells ×4. Unlock the gate to Main Street.
Willis Tower: Relay. Before you go up, raise your rifle and shotgun power and your pistol and SMG stability (IGN). From Central Camp take the service elevator up to the Logistics Warehouse rooftop, climb down the ladder on the right and fuel the orange generator. Press the red button: the gate opens onto a military crate and the zipline. On the Willis Tower Office Floor: Handgun Ammo ×10 on the northeast desk next to a zombie playing dead, Scrap in the trash can by the north desk and a Tracking Module (Rare) worth 4,200 in the case hanging from the pipe (northeast): shoot it down and go out through the gap in the north window onto the scaffolding to collect it. Office 1 has a barred door (break it with the Hatchet): Green Herb on the desk. Go up the stairs by the elevators and follow the sofas to the open room on the right: in Office 2, Mr. Raccoon #19 on the west shelves and Gunpowder (Large) on the south desk. Past the out-of-order elevator sign on 2F, the tower is collapsed and tilted: shoot or slash the yellow-striped boarded panels to open the way, cross the narrow beam (crate), shoot the panel across the gap and jump. Follow the “Exit” sign’s arrow up to a ceiling panel: shooting it drops debris that forms a platform. Make the running jump and pull open the elevator door in the floor. In the elevator shaft, climb; stay left until the right car drops, then move right at once as the left car drops. There’s a crate at the top.
Main Office (glass floor). 10 BSAA Zombies plus 4 on the upper levels. Two pistol shots break a pane: shoot the glass under the zombies to drop them, but don’t break the panes near you, and use the solid sections as your base. A downed BSAA Zombie behind a filing cabinet holds a lit grenade: shoot it. Break the glass under the rusty cabinet and the metal pillar holding up a walkway: it slides down into a ramp. On the concrete walkway above there are 2 BSAA Zombies and 1 with an SMG: detonate the grenadier as it walks past the others. Shooting the ceiling planks drops 1 more BSAA Zombie (south door) and a crate (north door). Drop onto the edge of the Grimstone Building rooftop and open the gate on the right: Relay in the large yellow case, Hand Grenade and a Tracking Module (Common) worth 2,500 on the weapon crates (east). Combine the parts: Detonator.
Grimstone Building: the way down. The door on the left is the Building 1 Storeroom: laptop, Supply Box and Green Herb (northeast corner). Save and spend your modules (the Silencer 9’s Add-on Suppressor and High-Capacity Mag., the 990-TAC’s Ceramic Coated Barrel and Carbon Tube Extension, the Marksman 1A’s Reinforced Bolt or the Classic 70’s PVD Barrel). Cross the small bridge to the north and shoot the ladder down: the military crate on the Building 2 Rooftop holds 12.7x55mm Ammo ×2, a Hand Grenade and Machine Gun Ammo ×20. Use the binoculars on the platform hanging between two cranes. The Grimstone Building Rooftop has 16 zombies: shoot the ones on the perimeter first. There’s a red canister on the west side of level 2 and crates on levels 3 and 4. The right-hand path runs behind the ruins past an explosive tank: throw it at the Blister Head that drops down. Ignore the left door on 3F (it drops you back down). At the top of the stairs, a zombie with a canister: blow it up in his hands. On the top floor, kill the zombies climbing up first, then shoot down the big crate hanging from the crane: 1 zombie and 1 Blister Head burst out (grenade). Inside, Rifle Ammo ×4 and a Green Herb. Slide down the concrete slab to the first crane valve and turn it. Along the left-hand path: Gunpowder (Large) on a barrel (Building 4 terrace) and a Green Herb (west terrace); the door opens a shortcut to the save room. Save again.
Building 4. A ruined building with holes in the floor: 11 zombies, 1 that mutates into a Blister Head, a Chainsaw Zombie upstairs, 2 red canisters upstairs and crates to the south and northwest. Shoot the rebar thrower upstairs. For the Chainsaw Zombie use the upper canister (see Boss — Chainsaw Zombies). Another zombie grabs the second canister: wait until its friend is close and shoot it. On the Building 4 Rooftop (the door on the right, second crane): crates, and a headless body with a Med Injector and a Tracking Module (Common) worth 3,000 (northeast). Turn the second valve and drop onto the platform.
Maintenance Platform. Press the button. On the way down up to 12 zombies and 1 Blister Head land on it. Stand with your back to the button, facing the opposite side: they land in front of you and one shotgun blast knocks each off. Ignore the ones pounding behind the boarded windows: they can’t get through. When the Blister Head lands, drop a grenade at your feet. When the platform stops, shoot anyone about to jump from the ledge. The cables snap: trophy Going Down?. The Grimstone Building Basement holds 13 zombies in the dark, a shallow pool on the right and a red canister to the northwest along the left path: throw it at the group in the pool or just run. Get into the broken pipe (they don’t follow) and unlock the gate: you come out on Main Street next to Central Camp.
The gate (point of no return). Setting the Detonator on the gate locks the whole chapter: the 3 containers, the 9 Mr. Raccoons, the 6 files and the 13 Tracking Modules. Save and shop at Central Camp (repair your armor; the Hatchet’s Fortified Blade, 5,000) and don’t spend on ammo: you get infinite rounds on the bike. Then set the Detonator.
Difficulty.
- Casual: assumed to have the same loot as Standard (Modern); no source confirms it room by room.
- Standard (Classic): Leon still saves for free (no Ink Ribbons). The Rifle Ammo ×4 in the Gas Station Storeroom and the Green Herb and crate in the Tunnel Access are missing; 2 extra zombies and 2 Blister Heads show up on Main Street after you fill the Gas Can.
- Insanity: Supply Box and credits from the start; the Gal and Marksman 1A are bought instead of found. Enemies hit much harder, take more damage and can mutate on death, with Blister Heads from the very first street. Extra zombies on North West Street (6), Café Oasis (2), the Logistics Warehouse (2 BSAA Zombies), the Battery gate (2), the Pit (3) and Sewage Facility East (5), 22 spiders and Classic’s Main Street reinforcements. The Handgun Ammo in the trunk by Central Camp goes up to ×5. Without Body Armor the BSAA Zombies will kill you.
- Later playthroughs: the Tactical Tracker, Gal, Marksman 1A and BSAA Emblem Charm don’t respawn if you already own them; there’s an extra Supply Box at the start of North West Street.
Boss — Titan Spinner
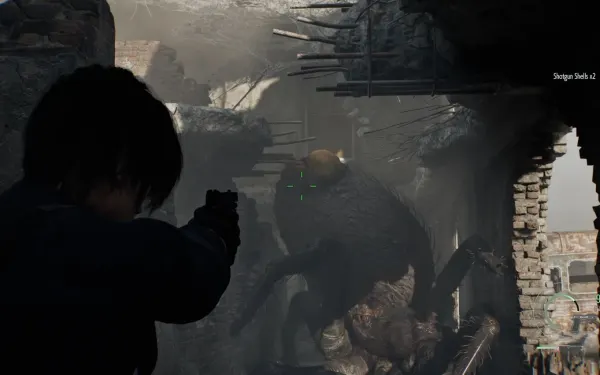
Arena: 3F and 4F of the NF Building, with windows, ladders and a big hole in the wall. Weak points: the orange cyst on the back of its abdomen (where the damage goes) and the mouth when it faces you. The head and body are armored. A hit to the mouth or an explosion knocks it down and exposes the cyst. Weapons: shotgun (there are shells in the room), the Requiem and the rifle on the cyst when it’s down, grenades. Reward: none; the floor gives way, Leon falls into the subway and finishes it with the Hatchet.
- Chase: until the objective reads “Defeat the giant spider” it can’t be killed: don’t spend ammo on it. The only exception is when it lunges out of the hole by the fire-escape doorway: shoot or chop it until it pulls back.
- Circle the arena clockwise, climbing the ladders to the upper ledge. It has to slow down and climb to follow you: that’s your chance to shoot the cyst.
- Use the canisters: there’s one on 3F (north) and one on 4F (northeast corner), and they don’t respawn. Don’t throw the canister (the spider may move away and the canister blows up on its own): lure the spider to the canister while you climb a ladder and shoot the canister when it’s alongside. A Hand Grenade also knocks it down.
- Downed: 4 or 5 Requiem shots to the cyst kill it fast. Without the Requiem, point-blank shotgun or the rifle.
- When it hides in the webs, watch its shadow on the walls: it usually drops near the opposite ladder. It comes back through the big hole, over the low walls, over the roof or through the windows.
- Grab: near a window it can catch Leon and try to drag him out: mash the button on screen to break free (with the Repeated Input option set to Hold, holding it is enough). Its blows have long wind-ups: parry if you’re in time.
- Spiderlings: if the fight drags on it releases Small Spiders. Kill them at once with the hatchet, the Gal or a grenade; one on your face locks you up and you eat the next hit. On Insanity, bring an SMG for this phase.
Boss — Blister Borne
Arena: Sewage Facility East, a circular tank with a pipe in the middle, an upper level with steps and 4 zombies standing or playing dead (5 on Insanity). Weak points: the orange pustules. Every pustule you burst turns nearby zombies into Blister Heads. Weapons: Gal, shotgun, an unscoped rifle from above, one Requiem round for the last pustule. Reward: a Tracking Module (Rare) worth 4,200.
- With the wheel at 20-25 %, give the pustules a Gal burst through the gap.
- Kill or behead the regular zombies first (stun, then Hatchet). Watch for any that get up after each pustule.
- Lead it into the tank and keep the centre pipe between you to dodge its grabs; when it turns, dash past it (or stun it with a grenade). Its charge can’t be parried.
- Retreat through the crack in the wall and climb to the upper perimeter (crate, Green Herb, second canister). Shoot from above, shotgun anyone climbing the ledge and blow the canister when it charges up the steps.
- Throw the weapons the zombies drop to stun it, then kick it. Finish the last pustule with the Requiem.
Boss — Chainsaw Zombies
Arena: the Gas Station (two) and Grimstone’s Building 4 (one). One chainsaw hit can kill Leon (it cuts him in half). Reward: the first one’s Chainsaw and a Tracking Module (Rare) worth 5,100 from the second.
- The shop one: backpedal while firing, parry the swing (it damages the Hatchet: sharpen afterwards) and give it a shotgun blast to the face: it drops the chainsaw. Pick it up: a running start gives a spinning slash, but you can’t put it away to shoot. Careful: a loose chainsaw still spinning on the floor cuts too, and a downed one can slide toward you with the blade running.
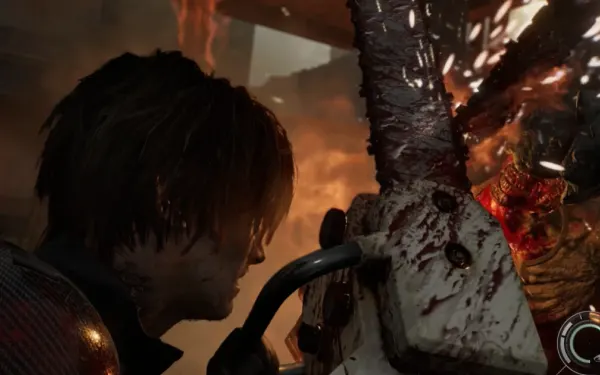
- The armored one from the west: headshots barely hurt it. With the Chainsaw, swing at the same time it does to clash the saws, land a few hits and step behind it; when it revs, back off. Without the saw: canister, grenades or the Requiem.
- The Building 4 one: blow the upper canister when it walks past and keep the floor holes between you. Requiem or a Stacked Hand Grenade. Never let it get into melee range.
Boss — Victor and Garmrs
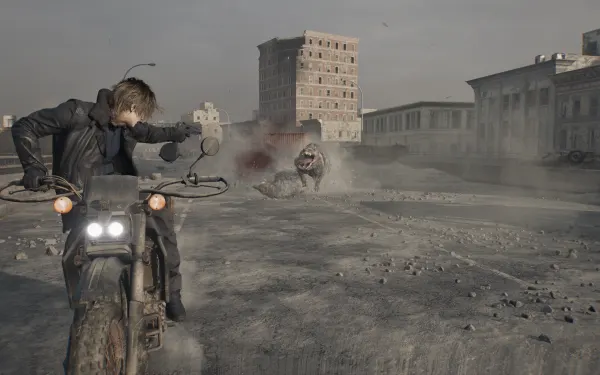
Arena: the elevated highway and Raccoon City’s streets, on the motorcycle. Leon steers himself; you only nudge left and right. You have infinite ammo but must reload (PowerPyx, IGN and a Steam guide say an SMG; Game8 says a pistol). The Garmrs attack one at a time by leaning in on the bike: the closest one is always next. Running dry when the red arrow appears is the most common way to die. Reward: the Road Rage trophy and the end of the chapter.
- Highway: 3 Garmrs. First the one leaping off the cars and the bus, reload, then the other two as they catch up. Two more leap over cars and peel off behind buildings: ignore them.
- Victor drops road signs to block you and 2 Garmrs jump onto them: they’re standing still, kill them.
- Rooftop detour: the closest Garmr first, then the far one after the landing.
- Back on the highway, Victor rides ahead with an RPG: shoot him while the red arrow is over his head to cancel the rocket. The first chance is the second time you see Victor on his bike: trophy Road Rage. The rocket hits hard, harder with broken armor.
- You ride through a building and up an escalator: a Garmr on the right, another on the left and two more. Reload between targets.
- Roadblocks: shoot the red gas canister to break the gate. Several more gates and canisters follow in the alleys: keep your magazine full. After these alleys you get the second chance at Road Rage.
- Main street: Victor and 3 Garmrs. Spread your fire and interrupt the RPG.
- Victor brings a building down in front of you and forces a detour. Then comes the joust: shoot him as you ride at each other. He goes off a cliff (cutscene). If you missed Road Rage, reload the last autosave.
Don’t leave without: before you set the Detonator, check Mr. Raccoon #11-#19 (#12 from the warehouse rooftop, #17 in the pipe at the bottom of the hole and #18 in the Ridgewood carriage are the easiest to miss), files #48-#53, BSAA Containers 02, 03 and 04 (Crate Expectations; 04 holds the BSAA Emblem Charm), the Gal from the garage, the Marksman 1A from Container 03 (not missable: if you skip them, on a first run they turn up in the Supply Box when you reach Raccoon City Center, with 40 and 10 rounds) and the 13 Tracking Modules (including the hanging cases at Cedarbrook and the Willis Tower). Keep the Gunpowder (Small) for Master Craftsman.