Skip to content
RE Guide Requiem
ES
Pick your current chapter ›

Enemies

Every common enemy: where it appears, where to hit it and how to handle it.

Wrenwood

Officer zombie (Wrenwood Hotel)

Chapter 1 (Grace): the Wrenwood Hotel Lobby. A single scripted encounter.

Weak point No real fight: it's a button-prompt scene.

The police officer who let Grace through (Norman Cole, per the wiki) comes back turned and armed with a shotgun; Grace's pistol flies away and she's stuck on a cart.

  • Hold the Interact button to work her free.
  • Each time you hear the shotgun click, let go and push the left stick to one side, away from the barrel. It fires about every 10 seconds.
  • You can't dodge and pull free at the same time: between shots, go back to holding the button.
  • Once free, Grace picks up a fire poker: mash ZR to finish him.

Drops: The Emergency Exit Key (picked up automatically).

Wrenwood Zombie

Chapter 1 (Leon): Wrenwood Main Street. 1 at the start and 1 mid-street, 9 attacking people in the northwest part and 8 in the north after the car crash.

Weak point The head. A leg shot staggers it for a kick or a finisher.

Leon's tutorial. The axe zombie in a construction uniform, just past the van, is there to practise the parry (L just before the hit; a perfect parry drops it to its knees for a ZR finisher). Once it's dead, pick up its axe and throw it (A) at another one: the Untouchable and Can I Borrow This? trophies.

At the crash junction, line up Requiem shots through the crowd (it pierces several bodies: Bang for Your Buck if you kill 3 with one shot) and kill the second axe carrier first so you can throw his axe too. Finish the ones that go down with the Hatchet: headless zombies don't come back as a Blister Head.

Drops: Handgun Ammo (IGN).

Rhodes Hill Care Center

Zombie Doctor

Chapter 2 (Leon): Rehabilitation Ward, 2 in the Main Office cutscene and 5 bursting out of the Storeroom with 1 Zombie Patient. Chapter 3 (Grace): Treatment Room (1), Connecting Corridor (3, red-lit; they walk at you), Conference Room (3, rise from the floor) and Parlor (1, rises after the ID Wristband (Level 1); on Insanity, as soon as you explore).

Weak point The head. Chainsaw carriers take far more shots.

Some carry a knife, a syringe (the nurse stabs), a big bonesaw (kills fast) or a chainsaw.

  • The chainsaw doctor (chapter 2): shoot him first and spend the Requiem here. A parry works but breaks the Hatchet: sharpen with L + Y while backing off. Wait for the dropped chainsaw to stop spinning before you pick it up, and kneecap zombies that go for it. Fall back to the raised area opposite the office.
  • Connecting Corridor (chapter 3): they walk in a line: a good spot for Bang for Your Buck with one Requiem round. You can also hide crouched behind the row of plants by the fireplace: the bonesaw surgeon walks on to the Treatment Room and the other two turn back.
  • As Grace, a Hemolytic Injector from behind kills them instantly.

Drops: Leon's Chainsaw (chapter 2; used up opening the door with the sliding bar). In chapter 3, a Med Injector in the Connecting Corridor, and a Hunting Knife and a Med Injector in the Conference Room.

Zombie Patient

Chapter 2 (Leon): Rehabilitation Ward (3 rise from the beds). Chapter 3: Treatment Room (springs up from the bed), Examination Room (the organless corpse wakes after the Artificial Lungs and the Artificial Heart), Isolation Ward (4 after the ID Wristband (Level 3), one with a Hunting Knife) and Isolation Rooms 2 and 3. Chapter 5: 'L' Passage, Furnace, Holding Cells, Inspection (2 fall off the conveyor), Processing and Furnace (2 after rescuing Emily). Chapter 6: Collection & Testing (18 burst from the cryotubes) and the Yard on the escape (4, and 5 more as you climb through the Entrance Hall window). Chapter 7: Cemetery Entry (1), Cemetery (14) and the Chapel.

Weak point The head. Some carry knives.

Standard zombie: a head or leg shot staggers it, then a shove with A (Grace) or a kick (Leon) and the finish. Destroy the head or inject it, or it comes back as a Blister Head.

  • Collection & Testing (chapter 6): use the wall-mounted Disposal Tanks: they spray hemolytic gas and an infected bursts after 3-5 seconds. Tanks run dry: move on to the next one. Without the gas, they mutate into Blister Heads.
  • Cemetery escort (chapter 7): Leon picks them off with the Classic 70 from the windows; reload only when nobody is near Grace.
  • If a zombie grabs Grace, she uses up the knife to break free (it stays stuck in the zombie; you get it back if it dies) or takes a bite.

Drops: Blood for Grace's Blood Collector; Transfusion Bags in some rooms.

Zombie Staff Member

Chapter 3 (Grace): West Corridor, Dining Room (2 feeding on the table + 1 under it), Records Room, NW Stairway, Bar & Lounge (2), Garage, Gallery Corridor, Chairman's Office, North East Corridor, Service Hallway and Filing Room (after the ID Wristband (Level 1)) and Isolation Ward (the defence). Chapter 4 (Leon): the NW Stairway 3F landing, the Director's Office and the Lounge. Chapter 5: Service Passage, Bunkroom (2), Construction Storage and Collection Pool.

Weak point The head.

They keep their work habits, which makes for some trick variants:

  • Light-switch zombies (West Corridor and North East Corridor): they turn lights off and go for any light you switch on. Lure them with a far switch. One makes good Chunk bait.
  • The bulldozer (Garage): after the Organ Transport Box, one drives a bulldozer through the east wall. Shoot the driver.
  • The wine bottle (Chairman's Office): swings it and throws it at you.
  • The canister (chapter 4, Leon): on the NW Stairway 3F landing one holds a beeping Red Explosive Canister: shoot the canister in his hands before he throws it.

Drops: Nothing fixed. Insanity: both light-switch zombies and the Chairman's Office one drop 1 Antique Coin each.

Zombie Cleaner

Chapter 3: Restroom (1, wipes the mirror, then scrubs) and Waiting Room (1, scrubbing the south floor).

Weak point The head.

The "maid" in the black dress cleans obsessively and spilled blood draws her in. Leave her alone or use her as the target for Internal Dispute (500 CP): in the Waiting Room, break the first vase on the right, hide in the corner and, when she and the Zombie Blind Patient stand together, throw an Empty Bottle at her. If you're slow, she leaves the Waiting Room to clean up the 3 corpses in the corridor.

Drops: Insanity: 1 Antique Coin each.

Zombie Blind Patient

Chapter 3: Waiting Room (1) and Records Room (1, north side; it hears you in the Office and comes through).

Weak point The head. It hunts purely by sound.

White gown, bandaged face and an IV stand that hits extremely hard: per the wiki, it kills much stronger zombies in one hit, including the Chef and Chunk. Crouch-walk and kill it with a Hemolytic Injector from behind.

It's the key piece of Internal Dispute (500 CP): throw an Empty Bottle at the zombie next to it and it lashes out. In the Waiting Room, at the Zombie Cleaner; easier alternative (PowerPyx comments): in the Records Room, at the zombie beside it.

Drops: A Transfusion Bag (50) (IGN). Insanity: 1 Antique Coin each.

Zombie Singer

Chapter 3: Bar & Lounge (West Wing 2F, white dress, with 2 Zombie Staff Members) and the Research Lab off the Conference Room (East Wing 2F, turquoise dress; after the ID Wristband (Level 1)).

Weak point The head. One Requiem headshot kills her on Standard.

Tougher than a normal zombie. She lets out a ranged screech on a timer that stuns Grace, throws off her aim and calls other zombies; up close she grabs Grace and screams in her face. Make her the priority target as soon as you hear the build-up: short, steady bursts, or a Requiem round to the head. The turquoise one screams on sight, breaks the windows and wakes the 3 Zombie Doctors in the room.

Drops: 1 Antique Coin each.

Mutations

Blister Head

Chapter 3: Isolation Ward Lobby (2, after you take Emily to the Security Manager's Office) and any zombie you left with its head on. Chapter 4: 3F, Lounge (1), Meeting Room (2) and the secret-lever wave. Chapter 5: Furnace (1). Chapter 6: Collection & Testing East (6) and Exit Passage (1). Chapter 7: the Chapel (from the Blister Borne's cysts). Chapter 9: Building 4, Maintenance Platform and Grimstone Building Rooftop (1 inside the hanging crate).

Weak point The head and tumour: the kill has to destroy the head or the whole body.

A double mutation: the corpse of a zombie whose head you didn't destroy stands up later (usually when you pass by again), with a tumour over its head, more strength and agility, and a lethal grab. Prevent it with a headshot kill that destroys the head, a Hemolytic Injector, a Hatchet finisher or a stealth kill.

  • Grace: a Requiem round before it charges, or stun it and inject it. Otherwise take another route.
  • Leon: about 3 shotgun blasts put one down, then the Hatchet finisher to the head (counts for Chop Chop). Parry (L) its punches and grabs, then pistol, kick and hatchet. Kicking it into a wall sets up the finisher. A thrown axe also staggers it.
  • Chapter 9, Grimstone Rooftop: shoot the hanging crate down.

Drops: Nothing fixed.

Raccoon City

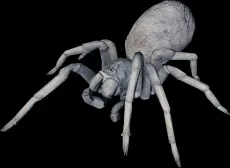
Small Spider

Chapter 9: NF Building, 2F (18) and during the Titan Spinner fight; Ridgewood Station, Train Carriage 2 (4, by Mr. Raccoon #18).

Weak point Any hit: they die easily.

The Titan Spinner's offspring: they jump, bite and swarm, and can latch onto Leon's face and lock him up. Hatchet swings kill them without spending ammo. Back into a corridor and use a shotgun's spread, a grenade or an SMG. Don't get surrounded.

Raccoon City Zombie

Chapter 9: Logistics Warehouse (11 rise from the ground on 1F, more on the walkways), Cedarbrook basement, Underground Parking Garage (12, plus more in the truck and the Power Room), Sewage Facility, Main Street (3 inside a BSAA container), Gas Station (7 after the Gas Can), Construction Yard, Ridgewood Station, North West Street, Cedarbrook (roof), Side Street, Willis Tower, Building 4 (11), Grimstone Rooftop (16), Maintenance Platform (up to 12) and the Grimstone Basement (13).

Weak point The head.

1998 residents, re-infected. Many play dead, rise from the rubble or burst out of piles of boxes. They pick up weapons:

  • Spears: they charge from range; parry (L).
  • Fire axes and rebar: parry, then throw them back (A). Some throw rebar from ledges: block with the Hatchet or snipe them.
  • Beeping canister or grenade: shoot the explosive in their hands.

Stealth hatchet kills from behind behead them (no Blister Head). Snipe distant ones with the rifle for extra credits.

Drops: Credits with the Tactical Tracker (no per-enemy value is published). The stealth-tutorial zombie drops a Tracking Module (Common) worth 1,200, and one on the Cedarbrook roof another Tracking Module (Common) worth 3,000.

Raccoon City BSAA Zombie

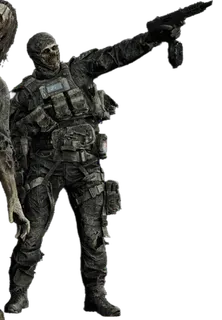
Chapter 9: Cedarbrook Apartments (stairwell, 1F, the foyer after the Rusty Crank and **11 on the roof**), Main Street (1, after the Broken Signal Receiver) and Willis Tower (10 in the Main Office, 1 in the ceiling and 4 upstairs). Chapter 12: the R.P.D. Parking Garage (2, one in the BSAA container).

Weak point Unarmoured areas; the helmet blocks one headshot.

Infected BSAA soldiers in thick body armour, still using SMGs and grenades. Some spray the SMG in a horizontal arc; others hold a primed grenade.

  • Take cover from the SMG arc, close in and shotgun the helmet off.
  • Shoot the grenade in its hand.
  • In Willis Tower, shoot the ceiling plank to drop the hidden one.

Drops: Machine Gun Ammo.

Garmr

Chapter 9: only in the highway motorcycle chase.

Weak point Any hit.

The Connections' dogs attack one at a time by leaning in on the bike: the closest one is always the next attacker. Shoot the closest first, in bursts, and reload between them. The ones that jump onto the road signs Victor drops stand still: easy targets.

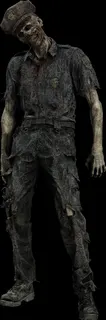
R.P.D. Zombie

Chapter 10: R.P.D., South West Hallway 1F (wandering) and West Central Passage (1, bangs on the vending machine after you examine Scavenger Hunt Clues 1 and 2). Chapter 12: Parking Garage (1, rises as you explore the south).

Weak point The head.

Zombie cops from the station: standard zombie tactics. A leg shot, a kick or a Hatchet finisher so it doesn't come back as a Blister Head.

Orphanage

The Children

Chapter 11 (Chloe): 2F Corridor, Main Hall, 1F Corridor, Director's Room and Underground Chapel (B2).

Weak point None: they can't be beaten. They regenerate instantly, even from a headshot.

Spencer's "Series 60" clones. If they catch you, they snap your neck: instant game over. Hide under or behind furniture; the game doesn't tell you when a search is over.

  • 2F Corridor (they come out of the Nursery): run to your Bedroom and hide under your bed.
  • Main Hall (when you try the 1F Corridor door): under the table in front of the door, northeast corner. If they guard the Director's Office door, let them spot you, lure them into the Main Hall, hide under the table and wait 1-2 minutes.
  • 1F Corridor: the ones waiting in the corner vanish if you go back into the Main Hall.
  • Director's Room (after the Hatch Key): crouch behind the white boxes by the wooden drawer.
  • Underground Chapel (after the Fire Poker): run to the altar, go round its right side and climb the ladder inside the wall.

ARK

Elite Guard

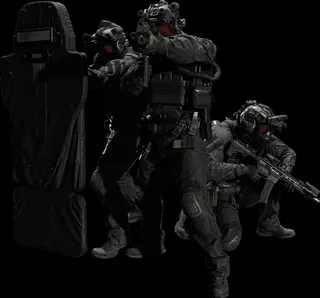
Chapter 13 (Leon): Server Room (3, when you come back from the Control Room) and Stockroom (4 + 4 reinforcements, one with a riot shield).

Weak point Unarmoured areas; for the shield carrier, his back, hands and feet.

The Connections' private force: Clatter Carbine, hatchet, ballistic shield, gas masks and night-vision goggles. Far deadlier than the BSAA zombies: they shred armour in seconds and flank you.

  • Server Room: grenade the doorway as it opens.
  • Shoot the white canisters for smoke and go for stealth kills.
  • Stockroom: stay behind the big container and snipe unscoped; after two die, the rest fall back. Reinforcements drop in pairs from the top-right ledges: a grenade under the drop point.
  • Shoot the red specimen tank (northeast of the north half): it frees a Licker β2 that fights the guards. Shoot the shield carrier's back while he turns to the Licker.
  • Between fights, heal, save and repair in the Staff Room.

Drops: Ammo.

Licker β2

Chapter 13 (Leon): Stockroom (1, in the tank). Chapter 14 (Grace): Sterilization Chamber, Bioweapon Repository 02, East Stairway, Bioweapon Repository 05 (4), its walkway and the Anteroom (2 + 2 that smash through the windows after the Noblesse Orb). Chapter 15 (Leon): Bioweapon Repository 12 walkway (1), Bioweapon Repository 12 (4), Generator Room (2) and Bioweapon Repository 11 (6, after you take its Override Key).

Weak point Blind: it hunts by sound. A Bottle of Acid kills it in one hit on every difficulty.

A Connections upgrade of the Licker β: it crawls along walls and ceilings and attacks with claws and a long, pointed tongue.

  • Grace: crouch-walk, avoid the clumps of broken glass (they make noise) and lure it with bottles. Bottle of Acid (Empty Bottle + 80 blood) = one-hit kill; a direct hit kills instantly, otherwise the damage lands after a few seconds. A Hemolytic Injector from behind also kills it instantly without alerting the others. 4-5 pistol headshots work, but the noise draws the rest; with the door shut, gunfire isn't heard outside.
  • Leon: every claw and tongue attack can be parried (L). Bait the leap and counter. In Repository 11, a Stacked Hand Grenade on the ceiling group, then the red canisters.

ARK Zombie

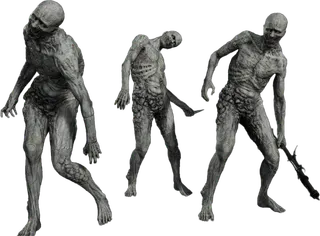
Chapter 14 (Grace): Sterilization Chamber (1, on the exam table), Bioweapon Repository 02 (4 in pods + 1 after the Override Key), Chemical Storage (2), Cleanroom (1 + 3 after the Animus Orb) and Bioweapon Repository 05 (2 + 2 in containers). Chapter 15 (Leon): Connecting Corridor (2 + 1), Bioweapon Repository 12 (3 in pods) and Bioweapon Repository 11 (**7 burst from the central pods when you use the Override Key**).

Weak point The head. A Molotov Cocktail kills one in a single hit.

Grey, stripped, pale test subjects. As Grace, each Molotov Cocktail kills one in a single hit. Don't break pod glass with stray fire: the Repository 12 ones stay put while the glass holds. One in the Connecting Corridor carries a weapon: parry its lunge.

Repository 11 (the game's last fight against rank-and-file enemies): take a corner, thin them out with the SMG, then rifle and shotgun, and use the red canisters.

Report an issue

Show diagnostics

Environment


Console errors


Failed requests