Skip to content
RE Guide Requiem
ES
Pick your current chapter ›

Arsenal

Every weapon with where to get it, its stats, its upgrades and whether it is worth the slot.

What to buy and when

in play order
When Buy Sell
3 · Care Center: Main Building Grace, Parlor (Care Center 1F, West Wing; the door opens with the Red Jewel from the Unicorn Trinket Box in the Chairman's Office). Pay in Antique Coins, in this order: Hip Pouch (3), Override Manual (6), Stabilizer (4) and Steroids (4) (Game8 ranks the Stabilizer on a par with the Override Manual). That is 17 of Standard's 22 coins. Buy the Override Manual before filling your first Empty Injector: the first recipe needs 110 blood and the base collector holds 100. ✕ Insanity changes the cabinets: Hip Pouch (3), Handgun Ammo ×30 (5), R.I.P. Knife (5) and Override Manual (6), 19 coins; no Stabilizer or Steroids for sale. The Parlor is lost once you take the VIP Suite elevator (ch06). Grace sells nothing. Leftover coins turn into Scrap (5 coins = 1) with a recipe found later.
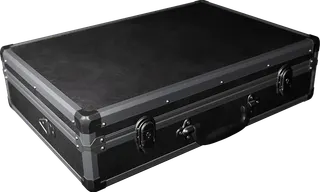
9 · East Raccoon City Leon, Central Camp (the blue BSAA tent; power the generator). Take the Tactical Tracker from the top of the box and redeem the Café Oasis Tracking Module (Rare) (5,000). Buy the Case Upgrade (8×13) (4,000), Game8's first buy; any purchase gives the Retail Therapy trophy. Fixed catalogue: Silencer 9 (5,500), 990-TAC (7,000), Stiri REVO3 A1 (6,000), Body Armor Lv.I (8,000) and Lv.II (15,000), Case Upgrade (4,000), Med Injector (1,500), Handgun Ammo ×10 (500), Shotgun Shells ×3 (600), Machine Gun Ammo ×20 (800) and Rifle Ammo ×3 (900). Ammo stock is limited and restocks as you progress. (4,000) ✕ An automatic: the Gal is free in the Underground Parking Garage (IGN). The Supply Box sells no grenades and no 12.7×55mm Ammo. Nothing yet: the Alligator Snapper and the MSBG 500 go once you can afford their replacements.
9 · East Raccoon City Central Camp, back from the Logistics Warehouse (after the Distributor). IGN usually arrives with over 10,000: buy Body Armor Lv.I (8,000). Sniping the highway zombies from the warehouse roof pays for it. (8,000) ✕ Spending on the MSBG 500: you are going to sell it.
9 · East Raccoon City Central Camp, with the BSAA Container Keys (after the Underground Parking Garage and the Sewage Facility Blister Borne). Redeem the modules from the way (1,200 + 2,300 + 4,200). Buy the Silencer 9 (5,500), the 990-TAC (7,000) and the Hatchet's Improved Grip (3,000). If there is spare, the Stiri REVO3 A1 (6,000) by selling the Gal. Open BSAA Container 02 here (Repair Kit and the motorcycle). (15,500) ✕ Selling the Hatchet: it is your parry weapon and uses no ammo. Alligator Snapper (1,000) and MSBG 500 (2,500). Gal (2,000) only if you buy the Stiri.
9 · East Raccoon City Central Camp, before Cedarbrook Apartments (IGN's order: Gas Station, Construction Yard, Ridgewood Station and BSAA Container 04 first). With the Gas Station (5,100), Underground Pipe (3,700) and Container 04 (8,600) modules, buy Body Armor Lv.II (15,000): one mortar hit breaks Lv.I. The Cedarbrook Foyer opens a shortcut back to Central Camp. (15,000) One rifle: keep the Marksman 1A (BSAA Container 03) and sell the Classic 70 (5,000), or the other way round (6,500). Two do not fit comfortably.
9 · East Raccoon City Building 1 Storeroom (Grimstone Building, the door on the left after the Relay; save and Supply Box). With the Cedarbrook (3,000 + 5,100), Side Street (3,600), Willis Tower (4,200) and Building 1 Rooftop Edge (2,500) modules, raise power: the Silencer 9's Add-on Suppressor (3,000) and High-Capacity Mag. (2,000), the 990-TAC's Ceramic Coated Barrel (4,000) and Carbon Tube Extension (3,000), and the Marksman 1A's Reinforced Bolt (6,000) or the Classic 70's PVD Barrel (5,000). (18,000) ✕ Using up grenades before Building 4 (Chainsaw Zombie and Blister Head) and the Maintenance Platform: they pay off most there. Ammo for guns you no longer use (Machine Gun Ammo 20 per round if you sold the automatics).
9 · East Raccoon City Central Camp, before setting the Detonator on the gate (East Raccoon City's point of no return). Redeem the Building 4 Rooftop module (3,000), repair your armor and buy the Hatchet's Fortified Blade (5,000). Before the gate, clear the 3 BSAA containers and any Mr. Raccoons and files left. (5,000) ✕ Buying ammo for the motorcycle chase: Leon has infinite ammo there.
10 · Raccoon City Center: R.P.D. R.P.D. Main Hall (the BSAA camp in the middle of the hall; save and Supply Box). Repair your armor, restock ammo and buy the Requiem's Ported Barrel (5,000): you pick up the Power Shades Charm this chapter. It is the same box you use in ch12, when the Tyrant chase ends in the Main Hall. (5,000) Not the 12.7×55mm Ammo: Leon can neither buy nor craft it.
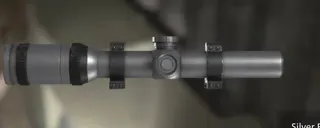
12 · Side Street and Blackthorn Station Side Street (the BSAA container behind Gun Shop Kendo, SW; save and Supply Box), before the Super Tyrant. Redeem the Parking Garage module (3,700). Pick your shotgun: the free W870 Police from Kendo or your 990-TAC. Buy the Hatchet's level 2 Improved Grip (6,000): Game8 and IGN raise durability before this boss. Repair your armor. (6,000) ✕ Walking toward the Orphanage before collecting the W870 Police, the Cute Bear Charm and the Silver Finish Scope: once you drop into the ruined Orphanage hole there is no way back. Blackthorn Station has no Supply Box on a first run. The shotgun you drop: 990-TAC (7,000) or W870 Police (3,000). Selling it shelves its upgrades until you buy it back.
13 · ARK: Arrival ARK, Staff Room (left off the Service Corridor; save and Supply Box in the NW corner). Redeem the Blackthorn module (4,900) and repair Body Armor Lv.II without fail: the 3 Server Room Elite Guards shred it (grenade the doorway the moment it opens). After the Stockroom, the Central Corridor shortcut brings you back here: redeem the Control Room module (4,500), repair again and raise the Requiem's power (level 2 Ported Barrel, 10,000). Bullets do nothing to The Commander: with spare credits, the Hatchet's level 2 Fortified Blade (8,000). (10,000) ✕ Looking for grenades in the box: it does not sell them. Craft them from 1 Scrap + 2 Gunpowder (Large) for the two Elite Guard fights.
15 · ARK: Finale ARK, B4 Staff Room (save and Supply Box in the NW corner): the last shop, before the lift. Redeem the Bioweapon Repository 11 Tracking Module (Legendary) (10,100). Spend it all on power, ammo and Med Injectors (1,500), craft every bit of gunpowder, Scrap and herbs, and repair your armor. Game8: max the Hatchet and carry the Mortal Edge as a backup. Save and repair before using the Override Key in Repository 11 (IGN). ✕ Spending every grenade on the Repository 11 defence: Game8 and IGN keep some for Victor's last phase. The Destroy Elpis ending has no Victor fight. Everything you will not use against Victor. If you fight with a maxed Hatchet, the Mortal Edge is worth 25,000.
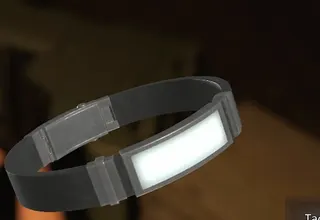
1 · Wrenwood (Prologue) Later runs (any difficulty). There is a Supply Box from Leon's first section (Wrenwood Main Street, east end) and the Tactical Tracker is already in the inventory; credits and upgrades start from zero. With the Wrenwood modules (5,000 + 3,000 + 3,000), buy a shotgun (MSBG 500, 2,500) at the Connecting Passage (3F) Supply Box before the Attic, and a rifle (Marksman 1A, 6,500) at the West Balcony one before the ch07 escort: neither the MSBG 500 nor the Classic 70 spawns. If you bought the Ghost Grudge with CP, it covers Leon while Grace has the Requiem. (9,000) ✕ On Insanity upgrades cost roughly double, with some far higher (one player saw 100,000 on the Requiem), and kills pay more; no price list is published. Body Armor Lv.III only exists there. One player says the game hands you 5,000 credits at the ch07 escort (unconfirmed). Nothing early on. The Compensator is already in the box (5,000); the Gallery Corridor and Pantry Warped Closets hold modules (3,000 and 7,000; the Pantry one replaces the Connoisseur Charm if you already own it).

Handguns

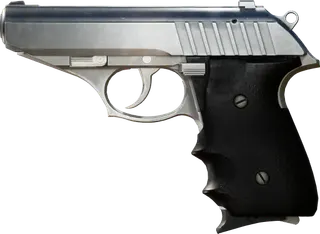
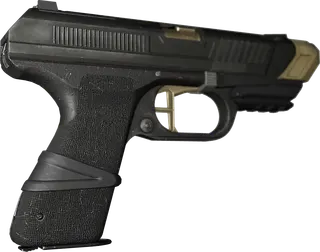
S&S M232 ★

Grace. She carries it in the prologue (ch01) with 9 rounds and loses it in the hotel police-zombie scene. Get it back in ch03: Care Center, Bar & Lounge (2F, West Wing, above the Dining Room), behind the bar next to the sink, loaded with 9. A Zombie Singer and 2 zombies with their backs turned guard it; if you are short on ammo, leave the room for later.

Who
Grace
Power (0–5)
1.1
Stability (0–5)
2.5
Precision (0–5)
2.3
Rate of fire (0–5)
2.3
Reload speed (0–5)
2.5
Capacity
9
Case size
1
Ammo
Handgun Ammo
Fire mode
semi-auto
Upgrades
none: Grace cannot upgrade weapons

Verdict Grace's pistol for the whole game: it beats the B934 in every bar. Go for it as soon as you can get into the Bar & Lounge.

Alligator Snapper

Leon starts ch01 with it (9 rounds loaded and 30 Handgun Ammo). It is a custom build by Joe Kendo. · 1,000 credits (buy-back)

Who
Leon
Power (0–5)
1 → 1.9 (2.3 ★)
Stability (0–5)
2.3 → 3.3 (3.8 ★)
Precision (0–5)
2.3 (4 with Dot Sight)
Rate of fire (0–5)
2.5
Reload speed (0–5)
3 → 4 (4.4 ★)
Capacity
9 → 15 (18 ★)
Case size
2×2
Ammo
Handgun Ammo
Sells for
1,000 credits
Full upgrade
25,000 (20,000 with the free Compensator); ★: 44,000 more

Verdict It holds out until Central Camp: fit the free ch04 Compensator, then sell it for 1,000 to pay for the Silencer 9. Only worth tuning if you decide not to buy another handgun.

Level-by-level upgrades

Compensator · power / stability

1 / 2.3 → 1.5 / 2.8 (free in ch04) (5,000) → 1.9 / 3.3 (5,000) → 2.3 / 3.8 ★ (18,000)

Slick Magazine Catch · reload

3 → 3.5 (3,000) → 4 (5,000) → 4.4 ★ (14,000)

High-Capacity Mag. · capacity

9 → 12 (2,000) → 15 (4,000) → 18 ★ (12,000)

Dot Sight · precision

2.3 → 4 (1,000)

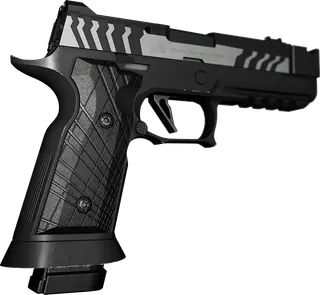
B934

Grace, ch03: Care Center, Dining Room (1F), on the floor on the east side, empty. When you take it a zombie crawls out from under the table holding the Hunting Knife: crouch along the right side. Its first rounds: Handgun Ammo ×2 on the Filing Room desk. Insanity: it is on the Waiting Room reception desk (1F, East Wing).

Who
Grace
Power (0–5)
0.8
Stability (0–5)
2
Precision (0–5)
2
Rate of fire (0–5)
1.5
Reload speed (0–5)
2
Capacity
7
Case size
1
Ammo
Handgun Ammo
Upgrades
none: Grace cannot upgrade weapons

Verdict Only useful until you get the S&S M232; after that, leave it in the Item Box.

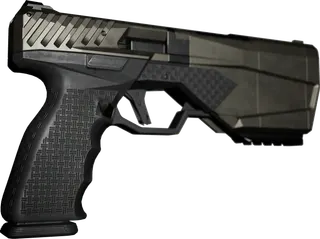
Silencer 9 ★

Leon, ch09: Supply Box, on sale from the first one (Central Camp). · 5,500 credits

Who
Leon
Power (0–5)
1.5 → 2.4 (2.7 ★)
Stability (0–5)
3
Precision (0–5)
2.6 (4 with Dot Sight)
Rate of fire (0–5)
≈2.5 → 3.5 (3.9 ★)
Reload speed (0–5)
4
Capacity
10 → 17 (20 ★)
Case size
2×2
Ammo
Handgun Ammo
Fire mode
semi-auto, suppressed
Sells for
5,500 credits
Full upgrade
19,000 credits across three parts (20,500 if the wiki-only 1,500 Dot Sight exists); ★: 25,000–31,000 more

Verdict Leon's best handgun: quiet, fast and the most ammo-efficient (Game8). Buy it as soon as you can afford it, selling the Alligator Snapper.

Level-by-level upgrades

Add-on Suppressor · power

1.5 → 2 (3,000) → 2.4 (5,000) → 2.7 ★ (12,000)

Aluminum Trigger · rate of fire

2.5 → 3 (2,000) → 3.5 (3,000) → 3.9 ★ (5,000 or 7,000)

High-Capacity Mag. · capacity

10 → 14 (2,000) → 17 (4,000) → 20 ★ (8,000–12,000)

Dot Sight · precision

2.6 → 4 (1,500, one source)

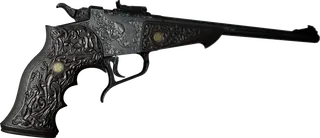
Matilda IMP

Leon. Special Content, 500 CP → Supply Box, where it also costs credits. Vandal says it is sold on a first run; Game8, GameRant and a Steam guide say it is a post-game unlock (used here). · 500 CP + 1,200 credits (only the wiki gives the price)

Who
Leon
Power (0–5)
1.3 → 2 (2.2 ★)
Stability (0–5)
1.8 → 3.3 (3.8 ★)
Precision (0–5)
2 (4 with Dot Sight)
Rate of fire (0–5)
2.8 → 3.8 (4.3 ★)
Reload speed (0–5)
3
Capacity
15 → 21 (24 ★)
Case size
2×2
Ammo
Handgun Ammo
Fire mode
3-round burst
Full upgrade
24,500 credits in parts (★: 37,000 more)

Verdict A cheap burst pistol for a second run; it sits below a tuned Silencer 9.

Level-by-level upgrades

Long Compensator · power / stability

1.3 / 1.8 → 1.8 / 2.3 (2,500) → 2 / 2.5 (5,000 or 6,000) → 2.2 / 2.8 ★ (15,000)

Burst Stock · stability / rate of fire

1.8 / 2.8 → 2.8 / 3.3 (3,500) → 3.3 / 3.8 (4,500) → 3.8 / 4.3 ★ (12,000)

High-Capacity Mag. · capacity

15 → 18 (2,000) → 21 (5,000) → 24 ★ (10,000)

Dot Sight · precision

2 → 4 (1,000)

Redemption

Leon. Special Content, 3,500 CP → Supply Box; on later runs it is already in the first one, in Wrenwood. · 3,500 CP + 25,000 credits (wiki only; low confidence)

Who
Leon
Power (0–5)
4.3
Stability (0–5)
2.8
Precision (0–5)
3.8
Rate of fire (0–5)
0.5
Reload speed (0–5)
2
Capacity
1
Case size
3×2
Ammo
Rifle Ammo
Fire mode
single shot, break action
Upgrades
no parts

Verdict More of a showpiece than a tool (Vandal): one rifle round per reload.

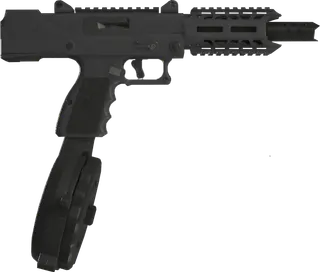
Freya's Needle

Grace. Special Content, 4,000 CP → it appears in the Item Box. It can be bought from the main menu at any time and shows up in your current save. · 4,000 CP

Who
Grace
Power (0–5)
0.9
Stability (0–5)
3
Precision (0–5)
1.8
Rate of fire (0–5)
4
Reload speed (0–5)
2.5
Capacity
30
Case size
1
Ammo
Handgun Ammo
Fire mode
machine pistol, full-auto
Upgrades
none: Grace cannot upgrade weapons

Verdict Fun but it eats Handgun Ammo; Game8 still prefers the S&S M232. Buy it for Insanity: Grace loses the Requiem in the ARK.

Scripted

Fire Poker

Scripted only. ch01: once Grace frees herself from the cart she grabs it automatically; mash Attack (ZR). In ch11 Chloe picks up another Fire Poker, but it is a key item (Crypt Storeroom, SE corner) used to pull down the Underground Chapel ladder, not a weapon.

Who
Grace
Ammo
none

Verdict You cannot keep it: use it when the game hands it to you.

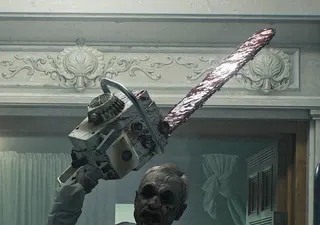
Chainsaw

Enemy weapon. ch02: the chainsaw zombie doctor in the Rehabilitation Ward drops it. ch09: the Gas Station Chainsaw Zombie drops it (the first time you come back through the shop).

Who
Leon
Ammo
none

Verdict Take it whenever it drops: one swing kills almost any zombie, but it is slow and cannot be kept.

Disposal Tank

Grace, ch06: wall-mounted tanks in Collection & Testing (Research Facility). During the escape 18 patients burst out of the cryotubes: grab the tank on the right wall as you enter.

Who
Grace
Ammo
hemolytic gas; it runs dry

Verdict Use them instead of your ammo: it is the safe way across the room.

Magnums

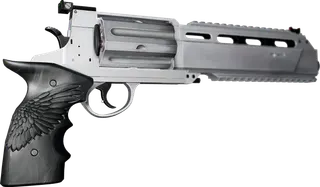
Requiem ★

Leon starts ch01 with it (5 rounds). Leon gives it to Grace at the end of ch02, in the Central Hall 2F, with 1 round, no matter how many he spent: fire all 5 in Wrenwood and the Rehabilitation Ward. Grace uses it from ch03 to ch08 and throws it back at the end of ch08; in ch09 Leon gets it with all of Grace's 12.7×55mm Ammo, Item Box rounds included. · not for sale (0 credits)

Who
Leon and Grace
Power (0–5)
4.3 → 4.7 (4.9 ★)
Stability (0–5)
0.5 → 1.8 (2.3 ★)
Precision (0–5)
0.8
Rate of fire (0–5)
0.8 → 1.5 (1.9 ★)
Reload speed (0–5)
0.8 → 1.8 (2.2 ★)
Capacity
5
Case size
3×2
Ammo
12.7×55mm Ammo
Fire mode
semi-auto; loads one round at a time; pierces enemies
Full upgrade
47,000 credits (★: 65,000–75,000 more)

Verdict Your boss gun for the whole game: never sell it. As Grace every round counts; as Leon, buy the Ported Barrel first.

Level-by-level upgrades

Ported Barrel · power

4.3 → 4.5 (5,000) → 4.7 (10,000) → 4.9 ★ (15,000)

Barrel Jacket · stability / rate of fire / reload

0.5 / 0.8 / 0.8 → 1 / 1.2 / 1.3 (7,000) → 1.3 / 1.5 / 1.8 (10,000) → 1.6 / 1.9 / 2.2 ★ (35,000)

Weighted Grip · stability

0.5 → 1.3 (5,000) → 1.8 (10,000) → 2.3 ★ (15,000 or 25,000)

Ghost Grudge

Leon. Special Content, 1,000 CP → Supply Box. No source gives its credit price. · 1,000 CP + credits (price unknown)

Who
Leon
Power (0–5)
4.5
Stability (0–5)
2.3
Precision (0–5)
2.5
Rate of fire (0–5)
3
Reload speed (0–5)
1
Capacity
5
Case size
2×2
Ammo
12.7×55mm Ammo
Fire mode
semi-auto; loads one round at a time
Upgrades
no parts

Verdict The best buy for a second run: it covers Leon in ch04 and ch07, while Grace has the Requiem.

Melee

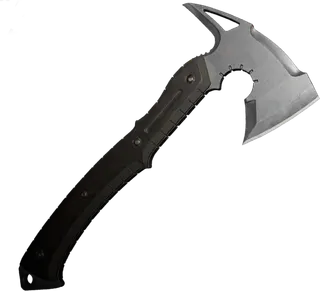
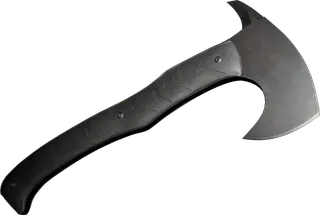
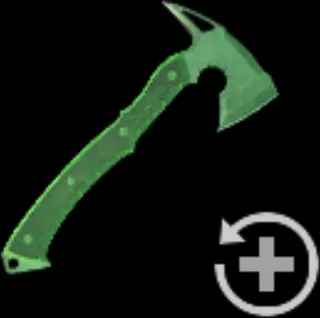
Hatchet ★

Leon starts ch01 with it. · 1,000 credits (buy-back)

Who
Leon
Power (0–5)
1.8 → 3.3 (4 ★)
Durability (0–5)
2.5 → 4 (4.7 ★)
Case size
3×1
Ammo
none
Sells for
1,000 credits
Full upgrade
22,000 credits (★: 37,000–45,000 more)

Verdict Leon's most important weapon: it parries, finishes and uses no ammo. Buy Improved Grip as soon as you have spare credits, then Fortified Blade.

Level-by-level upgrades

Fortified Blade · power

1.8 → 2.5 (5,000) → 3.3 (8,000) → 4 ★ (25,000)

Improved Grip · edge durability

2.5 → 3.3 (3,000) → 4 (6,000) → 4.7 ★ (12,000–20,000)

Makeshift Knife ★

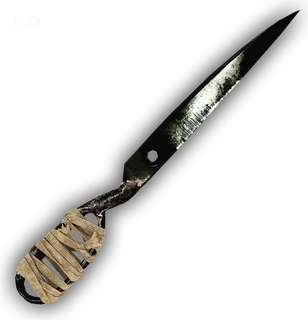
Grace, from ch03. Fixed: West Corridor 1F (cabinet); Filing Room (left locker); Records Room 2F (left locker); Basement Construction Storage and Inspection (body bags, ch05); the Courtyard fountain (ch06); ARK Sterilization Chamber (bench) and Bioweapon Repository 05 (container) (ch14). Also a random enemy drop, and craftable from 2 Scrap.

Who
Grace
Power (0–5)
1
Durability (0–5)
2
Case size
1
Ammo
none
Controls
ZR slash; L + ZR quick thrust

Verdict Always carry one: it is your grab-escape insurance, not an attack weapon.

Hunting Knife

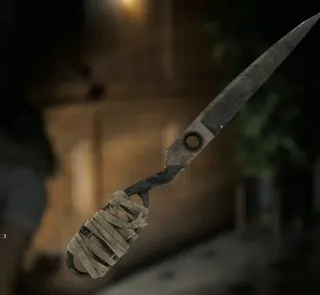
Grace, ch03. Three zombies carry one: the one that crawls from under the Dining Room table (when you take the B934), one in the Conference Room (2F) and one in the Isolation Ward (after the ID Wristband Lv3). Kill them and pick it up. Not craftable.

Who
Grace
Power (0–5)
1
Durability (0–5)
2
Case size
1
Ammo
none

Verdict Same as the Makeshift Knife in practice: keep it as a second knife for grabs.

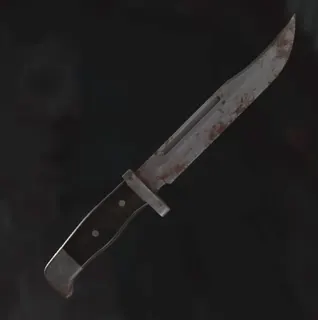
R.I.P. Knife

Insanity only, Grace, ch03: Parlor cabinet 3 (5 Antique Coins) and a small silver case in the Closet (1F, the level 1 door off the Waiting Room, SW corner). Also craftable: Scrap + 110 Infected Blood, after the Blood Specimen (Polymerized) in the same Closet. · 5 Antique Coins

Who
Grace
Power (0–5)
2
Durability (0–5)
4.5
Case size
1
Ammo
none

Verdict On Insanity it is worth the 5 coins: twice the power of the other knives and more blood from every enemy.

Mortal Edge ★

Leon, ch13: The Commander drops it when he dies in Storage (ARK B1); loot it from the body and equip it in place of the Hatchet. After a clear it is also sold for 3,000 CP in Special Content. · 25,000 credits (buy-back) or 3,000 CP

Who
Leon
Power (0–5)
2.5
Durability (0–5)
4
Case size
1×3
Ammo
none
Upgrades
no parts
Sells for
25,000 credits

Verdict Equip it the moment you get it: a much wider parry window and more power than an un-upgraded Hatchet.

Kotetsu

Grace. Special Content, 5,000 CP → Item Box. · 5,000 CP

Who
Grace
Power (0–5)
1
Durability (0–5)
5 (never breaks)
Case size
1
Ammo
none

Verdict Grace's first CP purchase: a knife that never breaks (Game8's top priority).

Shotguns

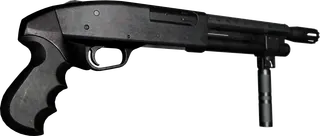
MSBG 500

Leon, ch04: Attic (Care Center 3F), on the floor next to the body on the west side, with 4 shells, as the Chunk fight starts. If you skip it, it waits on the Chapel altar (east side, ch07) and then goes into the Supply Box from Raccoon City East. First run only: on later runs (Insanity included) buy it at the Connecting Passage (3F) Supply Box before the Attic. · 2,500 credits

Who
Leon
Power (0–5)
2.5 → 3 (3.3 ★)
Stability (0–5)
1
Precision (0–5)
1.8
Rate of fire (0–5)
1 → 2 (2.5 ★)
Reload speed (0–5)
1 → 1.9 (2.3 ★)
Capacity
5
Case size
4×2
Ammo
Shotgun Shells
Fire mode
pump; the widest spread
Sells for
2,500 credits
Full upgrade
29,000 credits (★: 42,000 more)

Verdict Your only shotgun from ch04 to ch09: spend no credits on it and sell it for 2,500 when you buy the 990-TAC.

Level-by-level upgrades

Duralumin Bolt · power / rate of fire

2.5 / 1 → 2.8 / 1.3 (4,000) → 3 / 1.4 (7,000) → 3.2 / 2 ★ (20,000)

Duckbill Choke · power (wider blast)

2.5 → 2.8 (2,000) → 3 (3,000) → 3.3 ★ (6,000)

Duralumin Action Bar · rate of fire

1 → 1.5 (2,000) → 2 (3,000) → 2.5 ★ (6,000)

Balanced Spring · reload

1 → 1.5 (3,000) → 1.9 (5,000) → 2.3 ★ (10,000)

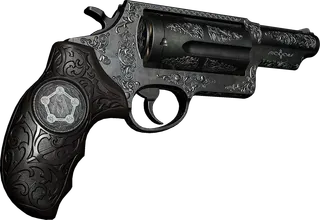
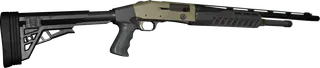
990-TAC ★

Leon, ch09: Supply Box, on sale from the first one (Central Camp). · 7,000 credits

Who
Leon
Power (0–5)
3 → 4 (4.5 ★)
Stability (0–5)
1.8 → 3.1 (3.7 ★)
Precision (0–5)
2 (4 with Dot Sight)
Rate of fire (0–5)
2.3
Reload speed (0–5)
1.5 → 2.4 (2.8 ★)
Capacity
7 → 9 (10 ★)
Case size
4×2
Ammo
Shotgun Shells
Fire mode
semi-auto; the tightest spread
Sells for
7,000 credits
Full upgrade
26,000 credits (★: 34,500 more)

Verdict Game8's and GameRant's best shotgun: semi-auto and tight. It is the shotgun you buy first, selling the MSBG 500.

Level-by-level upgrades

Ceramic Coated Barrel · power

3 → 3.5 (4,000) → 4 (7,000) → 4.5 ★ (14,000)

Stock · stability

1.8 → 2.5 (2,000) → 3.1 (4,000) → 3.7 ★ (8,500, disputed)

Carbon Tube Extension · reload / capacity

1.5 / 7 → 2 / 8 (3,000) → 2.4 / 9 (5,000) → 2.8 / 10 ★ (12,000)

Dot Sight · precision

2 → 4 (1,000)

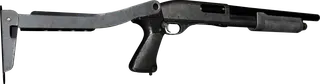
W870 Police

Leon, ch12: Gun Shop Kendo, Storage Building (Raccoon City Center), shelves in the SW corner, empty. After the cutscene, turn around (180°): it is on the shelves behind the door. The nearest Supply Box is the Side Street one, out the storage building's back door. It is lost once you drop into the hole in the ruined Orphanage. · 3,000 credits

Who
Leon
Power (0–5)
3.3 → 4.3 (4.7 ★)
Stability (0–5)
1.3 → 2.6 (3.2 ★)
Precision (0–5)
1.5
Rate of fire (0–5)
1.5
Reload speed (0–5)
1.3 → 2.1 (2.5 ★)
Capacity
5 → 7 (8 ★)
Case size
4×2
Ammo
Shotgun Shells
Fire mode
pump
Sells for
3,000 credits
Full upgrade
28,000–31,000 credits (★: 35,000–36,500 more)

Verdict The shotgun with the highest base power, free but late: if your 990-TAC is already tuned it is a sidegrade. Keep one of the two and sell the other.

Level-by-level upgrades

Chrome Barrel · power

3.3 → 3.8 (5,000) → 4.3 (5,000 or 8,000) → 4.7 ★ (15,000–16,000)

Chrome Stock · stability

1.3 → 2 (5,000) → 2.6 (5,000) → 3.2 ★ (7,000–8,500)

Silver Tube Extension · reload / capacity

1.3 / 5 → 1.8 / 6 (3,000) → 2.1 / 7 (5,000) → 2.5 / 8 ★ (12,000)

Throwables

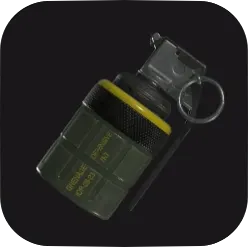
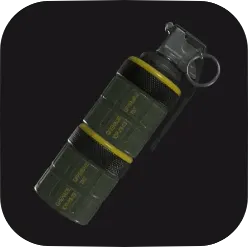
Hand Grenade

Leon. First ones: Chunk drops one in the Attic (ch04; Evil Resource and IGN say 1, Game8 says 2) and another sits on the Director's Office desk (ch04). Then: the Chapel silver case (ch07) and many cases in Raccoon City and the ARK. Craft it from 1 Scrap + 2 Gunpowder (Large); on Standard gunpowder first appears in East Raccoon City (ch09).

Who
Leon
Power (0–5)
60 (Gamer Guides 0–100 scale)
Case size
2×1 (up to 3 per slot)
Sells for
1,000 credits

Verdict Always carry at least one: crowds, Blister Heads, the descending platform in ch09 and Victor's last phase.

Stacked Hand Grenade

Leon. Combine 2 Hand Grenades in the inventory (first chance: the Director's Office, ch04). Loose ones: Construction Yard Storage Area, Cedarbrook Apartments Stairwell 2F and the Raccoon City East Side Street (ch09).

Who
Leon
Power (0–5)
100 (Gamer Guides 0–100 scale)
Case size
2×1
Sells for
2,000 credits

Verdict A bigger blast in one slot: use it where two tough enemies arrive together.

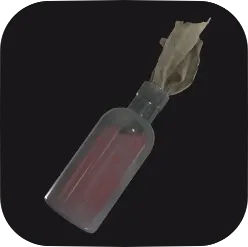
Molotov Cocktail

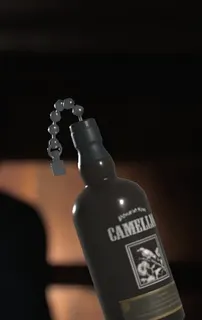
Grace. Recipe in ch05: "Crafting Recipes – Molotov Cocktail", silver case on the middle table of the Basement Bunkroom (it opens with a Joint Plug in the Central Passage slot). Recipe: Empty Bottle + 60 Infected Blood. Loose ones: the Processing ledge (Basement), the Water Treatment Plant Chemical Treatment trolley (ch08), the ARK Cleanroom exam bed and the Sterilization Chamber safe (ch14).

Who
Grace
Power (0–5)
50 (Gamer Guides 0–100 scale)
Case size
1

Verdict For groups in corridors and to stop The Girl; in the ARK it one-shots the grey ARK Zombies.

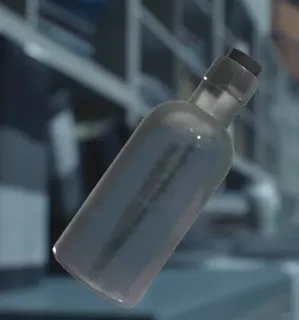
Bottle of Acid

Grace, ch14. Recipe: "Crafting Recipes – Bottle of Acid/Various", small case on the south side of the Monitor Control Room (ARK B2, Magnetic Key route): Empty Bottle + 80 Infected Blood. Loose ones: Chemical Storage (2 benches), the Monitor Control Room safe and the Bioweapon Repository 05 Walkway.

Who
Grace
Power (0–5)
70 (Gamer Guides 0–100 scale)
Case size
1

Verdict Save them for the Licker β2s: one kills any of them in a single hit on every difficulty.

Rifles

Classic 70

Leon, ch07: handed to you automatically in Victor's Private Office (Care Center 3F) as the Courtyard rooftop sniping section begins. First run only: on later runs (Insanity included) buy a rifle before the escort; those runs have a Supply Box on the West Balcony. · 5,000 credits

Who
Leon
Power (0–5)
3.1 → 3.9 (4.4 ★)
Stability (0–5)
2.5 → 3.8 (4.5 ★)
Precision (0–5)
4.5 (4.7 with Silver Finish Scope)
Rate of fire (0–5)
0.5 → 1.5 (2 ★)
Reload speed (0–5)
0.5 → 1.5 (2 ★)
Capacity
6
Case size
6×2
Ammo
Rifle Ammo
Fire mode
bolt action; loads one round at a time
Sells for
5,000 credits
Full upgrade
31,000 credits (★: 42,000 more)

Verdict Free in ch07 and the rifle with the most damage per shot (Game8's best). Keep it if you play slow and aim for heads; otherwise swap it for the Marksman 1A in ch09.

Level-by-level upgrades

PVD Barrel · power

3.1 → 3.6 (5,000) → 3.9 (7,000) → 4.4 ★ (18,000)

Premier Stock · stability

2.5 → 3.3 (2,000) → 3.8 (4,000) → 4.5 ★ (7,000)

Hair Trigger · rate of fire

0.5 → 1 (2,000) → 1.5 (4,000) → 2 ★ (7,000)

Enhanced Leaf Spring · reload

0.5 → 1 (2,000) → 1.5 (5,000) → 2 ★ (10,000)

Marksman 1A ★

Leon, ch09: BSAA Container 03, Main Street (Raccoon City East), east past the Gas Station. The road dips under a bridge between wrecked cars: loop around and climb the ladder behind the truck, then drop in next to the container. You need the BSAA Container Keys. Opening it releases 3 zombies: back off and shoot or throw the red canister inside. It holds 10 rounds + Rifle Ammo ×4. If you miss it, it goes into the Supply Box at Raccoon City Center. · 6,500 credits

Who
Leon
Power (0–5)
2.5 → 3.2 (3.5 ★)
Stability (0–5)
2
Precision (0–5)
4.8
Rate of fire (0–5)
2 → 2.9 (3.2 ★)
Reload speed (0–5)
2.8
Capacity
10 → 20 (25 ★)
Case size
6×2
Ammo
Rifle Ammo
Fire mode
semi-auto, integrated suppressor
Sells for
6,500 credits
Full upgrade
26,000 credits (★: 36,000 more)

Verdict The rifle GameRant, DualShockers and IGN prefer, and Game8's pick for Insanity: semi-auto, 10 to 25 rounds and quiet. Tune the Reinforced Bolt first.

Level-by-level upgrades

Reinforced Bolt · power / rate of fire

2.5 / 2 → 2.8 / 2.5 (6,000) → 3.2 / 2.9 (8,000) → 3.5 / 3.2 ★ (18,000)

High-Capacity Mag. · capacity

10 → 15 (5,000) → 20 (7,000) → 25 ★ (18,000)

Automatics

Stiri REVO3 A1

Leon, ch09: Supply Box, on sale from the first one (Central Camp). · 6,000 credits

Who
Leon
Power (0–5)
0.5 → 1 (1.3 ★)
Stability (0–5)
2.7 → 4.2 (4.7 ★)
Precision (0–5)
1.5 (4 with Dot Sight)
Rate of fire (0–5)
4.6 (highest base value; the Gal reaches 4.8 with the Titanium Bolt ★)
Reload speed (0–5)
3
Capacity
30 → 45 (50 ★)
Case size
3×2
Ammo
Machine Gun Ammo
Fire mode
full-auto
Sells for
6,000 credits
Full upgrade
24,000 credits (★: 31,000 more)

Verdict The best first-run automatic for crowds, but it hits weakly per bullet: it needs the Long Flash Guard. Buy it by selling the Gal.

Level-by-level upgrades

Long Flash Guard · power

0.5 → 0.8 (3,000) → 1 (5,000) → 1.3 ★ (15,000)

Folding Stock · stability

2.7 → 3.5 (2,000) → 4.2 (5,000) → 4.7 ★ (7,000)

High-Capacity Mag. · capacity

30 → 40 (3,000) → 45 (5,000) → 50 ★ (9,000)

Dot Sight · precision

1.5 → 4 (1,000)

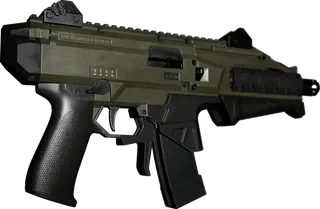
Gal

Leon, ch09: Underground Parking Garage, Power Room (Raccoon City East B1), small case on the metal table on the east side, with 40 rounds; it is the flooded room with the first Battery. If you miss it, it goes into the Supply Box when you reach Raccoon City Center. On later runs it is only sold. · 2,000 credits

Who
Leon
Power (0–5)
1.3
Stability (0–5)
2.3
Precision (0–5)
0.5
Rate of fire (0–5)
3.8 → 4.5 (4.8 ★)
Reload speed (0–5)
3 → 4.2 (4.7 ★)
Capacity
40 → 60 (70 ★)
Case size
3×2
Ammo
Machine Gun Ammo
Fire mode
full-auto
Sells for
2,000 credits
Full upgrade
25,000 credits (★: 34,000 more)

Verdict Free and a fine stopgap: it hits harder per bullet than the Stiri (1.3 vs 0.5) but is the least accurate gun in the game and less stable. Don't tune it, and sell it for 2,000 if you buy the Stiri.

Level-by-level upgrades

Titanium Bolt · rate of fire

3.8 → 4.3 (4,000) → 4.5 (6,000) → 4.8 ★ (15,000)

Titanium Magazine Catch · reload

3 → 3.8 (2,000) → 4.2 (4,000) → 4.7 ★ (9,000)

High-Capacity Mag. · capacity

40 → 50 (3,000) → 60 (6,000) → 70 ★ (10,000)

Clatter Carbine

Leon. Special Content, 6,000 CP → Supply Box. · 6,000 CP + 2,500 credits (unconfirmed)

Who
Leon
Power (0–5)
2
Stability (0–5)
4.3
Precision (0–5)
3.8
Rate of fire (0–5)
3.8
Reload speed (0–5)
3
Capacity
40
Case size
4×2
Ammo
Machine Gun Ammo
Fire mode
full-auto assault rifle, suppressed
Upgrades
no parts

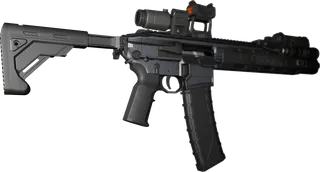
Verdict The best automatic in the game per Game8, GameRant and DualShockers, with no parts to buy.

Special

RPG-7

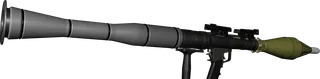
Leon. Special Content, 15,000 CP → Supply Box. In the story, ch15: in the final fight Victor pulls out an RPG-7; shoot him fast so he drops it, pick it up (make room: auto-sort the case) and fire its single rocket at him. You don't keep it. · 15,000 CP + 7,000 credits (wiki only)

Who
Leon
Power (0–5)
5
Blast radius (0–5)
5
Capacity
1
Case size
8×2
Ammo
rocket; discarded after firing
Upgrades
no parts

Verdict It one-shots anything, bosses included. With Infinite Ammo (RPG-7) an Insanity run becomes trivial.

Gear and upgrades

inventory, health and everything else that is not a gun

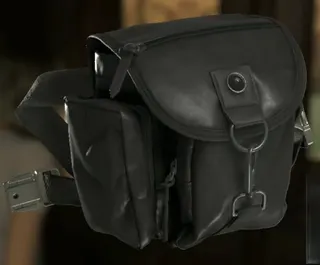
Hip Pouch Grace

+2 inventory slots each: from 8 to 16 with all four. They do not carry over to the next run.

4 in the whole game (Grace): - Parlor (1F, West Wing), cabinet 1: 3 Antique Coins (ch03). - Filing Room: the level 1 security room inside the Filing Room (Filing Storeroom), on the SW metal cabinet; needs the ID Wristband Lv1 (ch03). - Processing Office (Basement): use the Forklift Key to move the forklift and leave a Joint Plug in the console so the door stays open; it is on the N bench, next to the Basement floor plan (ch05). - ARK, Bioweapon Repository 05 (B3): first container on the left (the SE one); the white button alerts the Lickers (ch14). · 3 Antique Coins (Parlor one only); the rest are free

Grace's most important upgrade: the Parlor one is the first purchase (Game8's top priority). The two Care Center ones are lost once you take the VIP Suite elevator (ch06); the Basement one when you leave the Basement, and the ARK one at the Archives console.

Card →

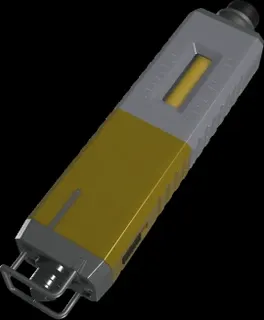
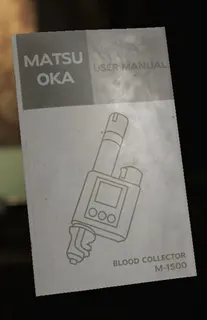
Blood Collector Grace

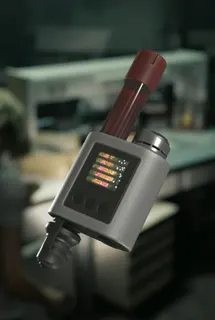
Collects Infected Blood from buckets, stains, dead infected and Transfusion Bags and turns it into items through recipes: Handgun Ammo, 12.7×55mm Ammo, Med Injector, Hemolytic Injector, Molotov Cocktail, Bottle of Acid, Stabilizer and Steroids. It holds 100 (150 with the Override Manual, 200 with the Matsuoka Master Manual too); whatever a bag overflows is lost. Recipes unlock when you analyse the Blood Specimens: Denatured (Blood Lab), Converged (1F Closet or Records Room) and Reversible (Blood Reports Room). Insanity adds a fourth, Polymerized.

Blood Lab (1F, East Wing), on the bench (ch03). If you never pick it up, a spare appears at the ARK Lab Entrance (B2). · free

Always pick it up, except on a run for the Minimalist challenge (35,000 CP), which asks you not to.

Card →

Stakeout Takeout Charm Grace

More knife power and durability. It works just by being carried (takes 1 slot).

Pantry (off the Kitchen, West Wing), cardboard box on the NE shelves. The Chef drops the Pantry Key (Order Up! trophy). Lost once you take the VIP Suite elevator (ch06). · free

Worth the slot if you fight with knives; with a second run's Kotetsu it is a strong combo (DualShockers).

Card →

Eye Spy Charm Grace

Raises the chance of surviving fatal damage. Works just by being carried (1 slot).

Dropped by the Chunk that appears after you take the ID Wristband Lv1 (East Wing 2F, Locker Room); Grace and Goliath trophy. Last chance: before you carry Emily to the Security Manager's Office puzzle box. He falls to 3 Requiem headshots on Standard (Game8); on Casual, to 1 Requiem headshot plus about 15 S&S M232 headshots (PowerPyx). On later runs, if you already own it, the Chunk drops 4 Antique Coins instead. · free

Carry it on Insanity, where almost any grab kills Grace.

Card →

Stabilizer Grace

Permanent: more firepower and shot stability for Grace; it cuts the Requiem's recoil a lot. No figures are published, and whether several stack is unknown.

- Parlor, cabinet 2: 4 Antique Coins (Casual and Standard; not sold on Insanity). It is the only ready-made Stabilizer in the game. - Crafted: Empty Injector + Infected Blood at the Blood Collector, after analysing the Blood Specimen (Reversible) (NE trolley of the Blood Reports Room). The first costs 110 blood and each one you craft adds 10. - Empty Injector (3 on Standard): Blood Reports Room, NE bench; Records Room (2F), NE shelves; Basement Holding Cells, bed of the 2nd north cell (a zombie breaks the door). Insanity adds one on the Kitchen counter (1F). · 4 Antique Coins or Empty Injector + 110 blood (+10 per craft)

Buy the Parlor one right away and craft Stabilizers before Steroids. Get the Override Manual before the first craft: 110 does not fit the base 100 collector.

Card →

Steroids Grace

Permanent: raises Grace's max health. No published figure.

- Parlor, cabinet 3: 4 Antique Coins (Casual and Standard; on Insanity that cabinet sells the R.I.P. Knife). - Crafted like the Stabilizer: Empty Injector + 110 blood, +10 for every injector you fill. Three fills cost 110 + 120 + 130 = 360 blood (IGN budgets 360–390). · 4 Antique Coins or Empty Injector + 110 blood (+10 per craft)

Buy it at the Parlor. On Standard you get 5 doses in all (2 bought + 3 injectors): split them by how often you get grabbed. On Insanity extra health matters more (Vandal).

Card →

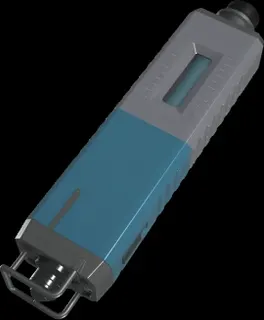
Compensator Leon

Alligator Snapper part: less muzzle rise. It is the Compensator's level 1 (power 1 → 1.5, stability 2.3 → 2.8).

The Attic Stairway Warped Closet (ch04), the first on the right as you come down from the Attic, next to the Basement Safe Code file. First run only; if you skip it, it is sold at the Supply Box from Raccoon City East, and from the start on later runs. · free (5,000 credits at the Supply Box)

Take it and fit it from the inventory: Tailor Made trophy for free.

Card →

Connoisseur Charm Leon

Hangs on any of Leon's guns: more firepower.

The Pantry Warped Closet (SW corner), ch04. You need the Pantry Key: if Grace did not kill the Chef, kill him as Leon. Lost once you climb the West Wing NW stairs to 3F. On later runs, if you already own it, the closet holds a Tracking Module (Rare) worth 7,000. · free

Do not skip it; DualShockers and Game8 hang it on the Marksman 1A.

Card →

Tactical Tracker Leon

Every enemy Leon kills pays credits. They are cashed in when you open a Supply Box. GameRant quotes 500 per kill, but it is the only published figure and looks high (unconfirmed).

On top of the Central Camp Supply Box (the blue BSAA tent; power the generator first), ch09. On later runs you have it from the start. · free

From here on, kill everything you can with Hatchet finishers and headshots: the credits pay for your guns.

Card →

Case Upgrade (8×13) Leon

Leon's attaché case grows to 8×13 (one source gives 7×10 as the base). It is his only inventory upgrade.

Supply Box, from the first one (Central Camp, ch09). In Leon Must Die Forever it is bought separately for 10,000 CP. · 4,000 credits (varies by difficulty, no figures)

Game8's first buy; IGN leaves it until after Body Armor Lv.I, once you are past 12,000 credits.

Card →

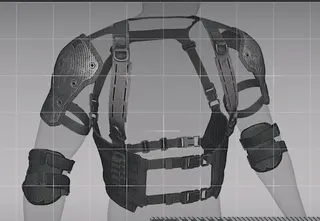
Body Armor Lv.I Leon

"Slightly reduces damage. Effective against explosions and gunshots." It loses durability with every hit and stops protecting at 0. Repair it at any Supply Box; the price depends on the damage.

Supply Box, from Central Camp (ch09). · 8,000 credits

IGN buys it first, on returning from the Logistics Warehouse. A single mortar hit breaks it: don't take it onto the Cedarbrook roof.

Card →

Body Armor Lv.II Leon

"Moderately reduces damage." Same durability and repair rules.

Supply Box, after buying Lv.I (ch09). · 15,000 credits

Buy it before the Cedarbrook mortar roof (IGN) and always repair it before the ARK Elite Guards (ch13), who shred it in seconds.

Card →

Body Armor Lv.III Leon · Insanity

"Greatly reduces damage." A Steam player: "massive damage reduction although it doesn't last long".

Supply Box, Insanity only, after Lv.II. It does not come from Advanced Tuning. No source publishes its price. · unknown

On Insanity, with the extra kill credits, it is worth it: BSAA Zombies and Elite Guards hit very hard.

Card →

BSAA Emblem Charm Leon

Sniper rifles: more firepower, only without a scope.

BSAA Container 04, outside The Applegate Hotel (North West Street), ch09, next to a Tracking Module (Legendary) worth 8,600. Route: fill the Gas Can at the Gas Station, put it in the crane generator on the road between the Gas Station and Central Camp, go through the gate and the construction site, take the ladder down to Ridgewood Station and exit at the start of the city. Lost once you set the Detonator on the gate. · free

Useful on a scopeless Classic 70 (Game8) or the Marksman 1A (IGN); the 8,600 module alone pays for the trip.

Card →

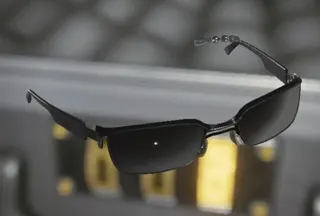
Power Shades Charm Leon

Requiem only: limitless bullet penetration and more firepower on the last round in the cylinder.

R.P.D., S.T.A.R.S. Office: the locker room (NW back room, left corner), a briefcase locked with the code RRR (ch10). You can also come back for it in ch12, while you are still inside the R.P.D. · free

Hang it on the Requiem and leave it there for the rest of the game.

Card →

S.T.A.R.S. Emblem Charm Leon

Automatic guns: more firepower at the cost of more sway while aiming.

Barry's scavenger hunt (R.P.D., ch10): examine both Scavenger Hunt clues; the Locker Key then appears on the ceiling TV in the Operations Room (climb the crate by the chalkboard). Open the West Office locker marked "!". · free

For the Stiri REVO3 A1 (Game8) or the Clatter Carbine (DualShockers).

Card →

Cute Bear Charm Leon

Shotguns: more mid-range firepower, less at point-blank range.

R.P.D. Parking Garage (ch12): on the ground on the east side, next to the van smashed into the wall, right of the lit container. Lost once you drop into the ruined Orphanage hole. · free

Hang it on your shotgun: W870 Police (VGC, DualShockers) or 990-TAC (Game8, Insanity).

Card →

Advanced Tuning Special Content

Adds the third tier (★) to every one of Leon's parts on the Supply Box Tune Up tab, for every later run.

Free for destroying all 25 Mr. Raccoons (they count across runs and saves). The Raccoon Roundup Maps (Rhodes Hill, 200 CP or in the Basement safe; Raccoon City, 300 CP) mark where they are. · free

Get it on your first or second run: without it there is no ★ tier. ★ tiers cost 5,000 to 35,000 each on Standard.

Card →

Tactical Tracker (Modded) Special Content

"A bootleg Tactical Tracker. The system has been modified to offer more credits per kill." Nobody publishes how much more. Once bought it cannot be switched off.

Special Content, after your first clear. · 3,000 CP

Steam players call it the most important CP unlock: it speeds up every upgrade on a second run.

Card →

Rugged Rookie Charm Special Content

More firepower for Grace. Works just by being carried.

Special Content → Grace's Item Box. · 6,500 CP

For a second run on Insanity, alongside the Stabilizer.

Card →

Trusted Companion Charm Special Content

Handguns: more bullet penetration.

Unlocks after 300 kills in total (the same count as the Seasoned Pro challenge); collect it from the Supply Box. · 300 kills

It arrives on its own as you play; hang it on the Silencer 9.

Card →

Infinite Ammo (Guns) Special Content

Infinite ammo for every Grace and Leon gun, Requiem and CP guns included, except the RPG-7. You still have to reload.

Special Content. Toggle it in Options → Controls → Infinite Weapons. · 50,000 CP

The priciest CP goal worth saving for; keep it for the Insanity run.

Card →

Infinite Ribbon Special Content

Grace saves at typewriters without using Ink Ribbons on Standard (Classic) and Insanity. Leon never needs them.

Unlocks by finishing the story in under 4 hours. · free (challenge)

It comes with a fast run (Casual makes it easier); use it on Insanity.

Card →

Mr. Raccoon Charm Deluxe Kit

Grace: more precision and critical hit rate. Works just by being carried.

Deluxe Kit only (paid; not in the base game): in Grace's inventory from the start. · Deluxe Kit

If you own it, Game8 pairs it with the Rugged Rookie Charm.

Card →

DSO Emblem Charm Deluxe Kit

Handguns: more precision and critical hit rate.

Deluxe Kit only: in Leon's inventory from the start. · Deluxe Kit

A paid extra; nothing needs it.

Card →

R.P.D. Charm Deluxe Kit

Any gun: more firepower when Leon is near death.

Deluxe Kit only: read all 5 Letters from 1998 in order (1–2 in East Raccoon City, 3–5 in Raccoon City Center). It appears in the SE corner of Back Street, next to Gun Shop Kendo (ch12). Lost once you drop into the ruined Orphanage hole. · Deluxe Kit

A paid extra; it does not exist in the Switch 2 base game.

Card →

Cloud 9 Leon Must Die Forever

It fills with kills. Every 100 points buys an Enhancer (Basic, Bronze, Silver or Gold); rerolling the offer costs 20. There are 8 Enhancer slots and 2 start locked. There are no weapon upgrades: guns come from 1- to 3-star chests or from red and blue enemies.

Leon's Blood Collector in Leon Must Die Forever (from the 8 May 2026 update, after finishing the story). · free

VGC recommends Parry Recovery, Scatter Shot, Sharpshooter and Unyielding Judge; drop Mixed Blessing before bosses.

Card →

Slot Expansion Leon Must Die Forever

Opens one of the 2 locked Enhancer slots.

Leon Must Die Forever: scattered randomly through the stages (VGC found one in the Rehabilitation Ward). · free

Always take them, except for the Leon's Purgatory challenge (beat Victor with none).

Card →

Hatchet Repair Leon Must Die Forever

Fully repairs your hatchets. Single use; as an Enhancer it takes no slot.

Leon Must Die Forever: in boxes and some boss arenas; also a Basic Enhancer. · free

Sharpening is not free in this mode: keep one for Victor.

Card →

Ammunition and grenades

Report an issue

Show diagnostics

Environment


Console errors


Failed requests