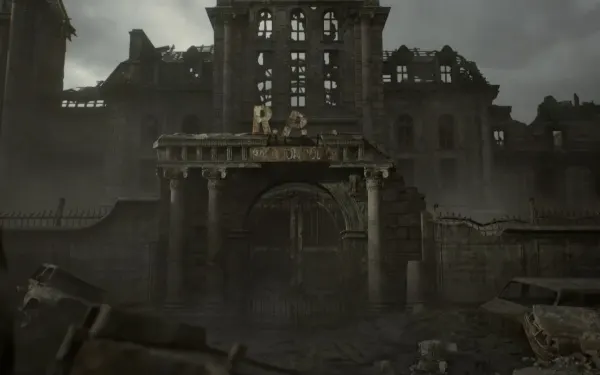
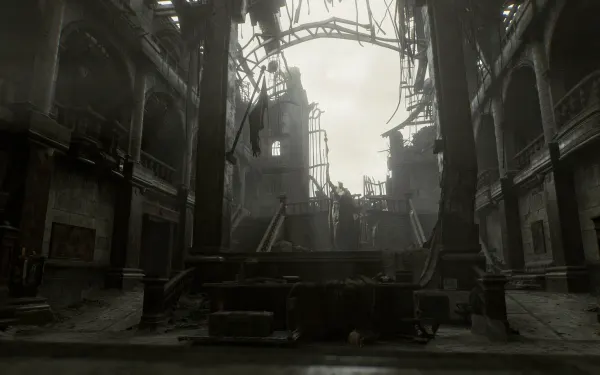
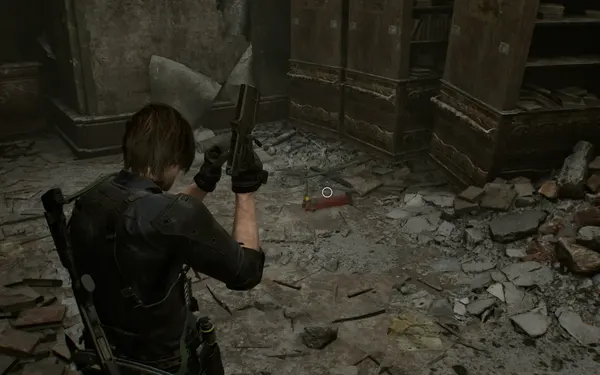
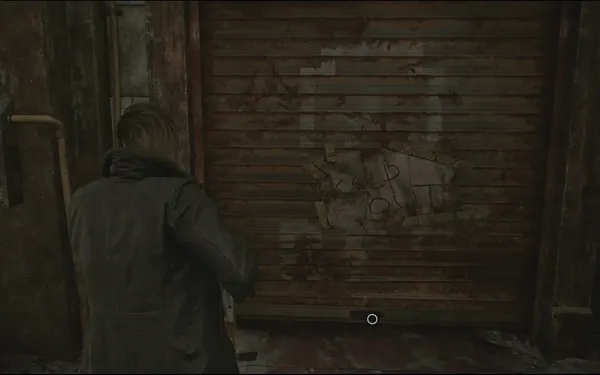
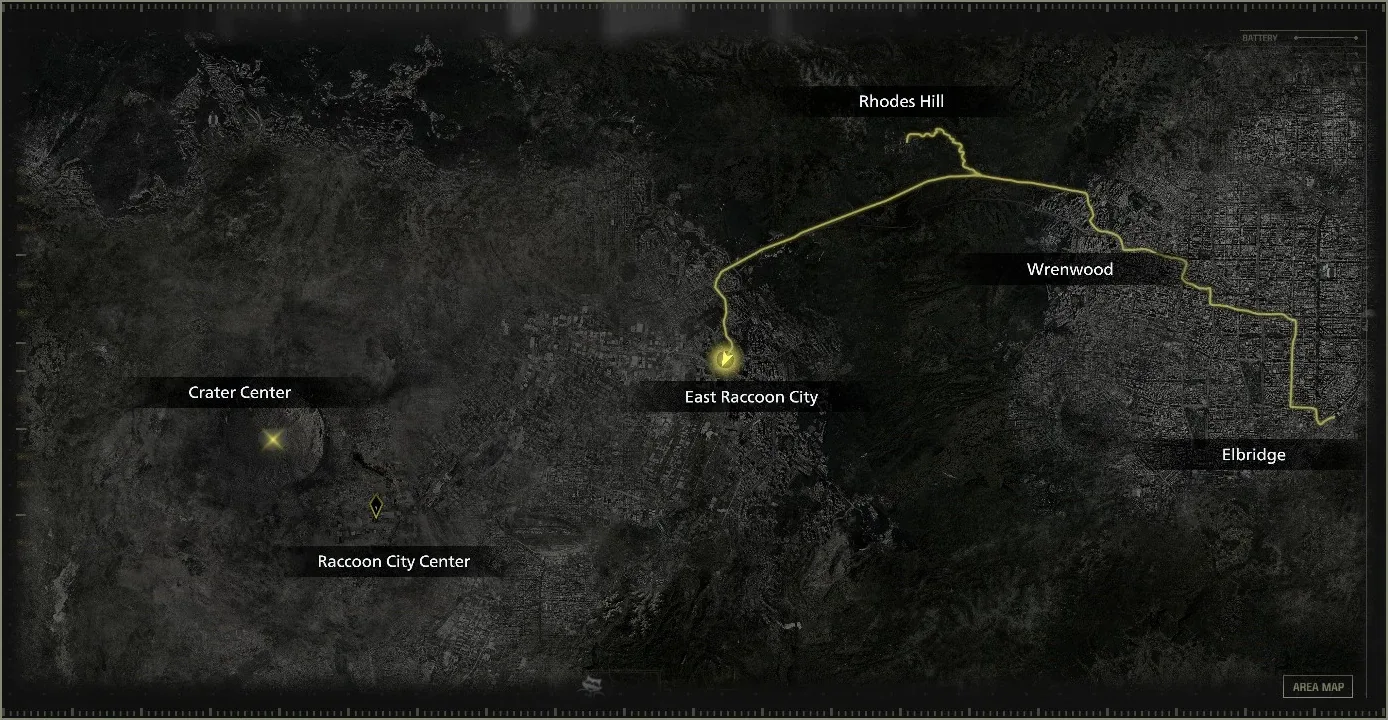
You play Leon S. Kennedy for the whole chapter. After the East Raccoon City gate, Leon leaves the bike downtown and walks back to the Raccoon City Police Department (R.P.D.), 28 years after his first day on the job. The BSAA uses it as a base, and through its cameras Leon sees that Grace and Zeno are in the east wing, behind two unpowered shutters. Your goal is the Mechanic Jack in the Library, which lifts them. Along the way, Barry Burton left a scavenger hunt for the 1998 rookies: two photo clues, a coded briefcase and a locker that hold the chapter’s two charms. This is an exploration chapter, not a combat one: 2 zombies, no boss and hardly any ammo.
Switch 2 controls (the same as chapter 4): ZL aim, ZR shoot or swing the axe, L parry with the Hatchet, L + Y sharpen it, A interact, kick a staggered enemy or throw a weapon an enemy dropped, R quick heal and X items. Stealth attacks from behind and the Hatchet finisher destroy the head: that zombie won’t get up again as a Blister Head.
Chapter order: rubble street (Mr. Raccoon #20 by the tanker truck) → alley → Street in Front of R.P.D. → gate → Main Hall (The Hero Returns; laptop, Supply Box, R.P.D. Perimeter Report) → West Office (Top Secret Operation; “JoJo” locker locked) → Supply Room → Operations Room (Record of Events, Mr. Raccoon #21) → South West Hallway (R.P.D. Zombie) → Reception (ladder to 2F) → S.T.A.R.S. Office (4 files, RRR briefcase: Power Shades Charm) → Library (Mechanic Jack, Mr. Raccoon #22, Photograph) → Main Hall balcony → West Office → Operations Room (Locker Key) → West Office (S.T.A.R.S. Emblem Charm) → Mechanic Jack on the shutters → East Hallway: Zeno and Grace → chapter 11 (the orphanage flashback).
Before you start
- Saving: the Main Hall laptop is the chapter’s only save point. Leon saves without limit on every difficulty, Standard (Classic) and Insanity included (he never uses Ink Ribbons). Save as soon as you walk in.
- Loot: the station has been picked clean. The whole chapter only gives you 15 handgun rounds (Handgun Ammo ×10 and ×5) and 6 shotgun shells; no Tracking Modules, gunpowder or 12.7×55mm Ammo. Don’t expect to redeem anything here.
- Enemies: 2 R.P.D. Zombies, neither of which you have to fight head-on. The handgun and the Hatchet are plenty.
- What you take away: two optional charms, the Power Shades Charm (for the Requiem) and the S.T.A.R.S. Emblem Charm (for automatic guns).
- Master Craftsman: a good time for the trophy. According to PowerPyx every Leon recipe is unlocked by Raccoon City Center: save at the laptop, craft whatever the case allows, reload and craft the next recipe. Don’t sell the Gunpowder (Small) from the Logistics Warehouse: there are only 2 in the whole game and two recipes need it.
- Nothing is lost when this chapter ends: Leon comes back to the Main Hall in chapter 12 and the station stays open until you leave through the north-east hole. The one touchy pickup is Mr. Raccoon #20 on the street, before you go in (see below).
The Main Hall Supply Box
It’s the same box you use again in chapter 12, when the Tyrant chase ends.
What’s new. On a first playthrough, if you didn’t pick up the Gal (the small case in the Underground Parking Garage Power Room) or the Marksman 1A (BSAA Container 03 on Main Street) in East Raccoon City (chapter 9), the game adds them to the Supply Box automatically when you enter Raccoon City Center (Evil Resource, on Standard (Modern) and (Classic)). They come loaded: the Gal with 40 rounds and the Marksman 1A with 10. They buy and sell for the same price: Gal 2000 and Marksman 1A 6500. On Insanity both are in the box from the start; on later playthroughs, at least the Gal is (Evil Resource).
The rest of the catalogue is unchanged: Silencer 9 (5500), 990-TAC (7000), Stiri REVO3 A1 (6000), Case Upgrade (4000), Body Armor Lv.I (8000) and Lv.II (15,000, after Lv.I), armor repair (the price depends on the damage), Med Injector (1500) and the ammo packs: Handgun Ammo ×10 (500), Shotgun Shells ×3 (600), Machine Gun Ammo ×20 (800) and Rifle Ammo ×3 (900). Ammo stock is limited and restocks as you progress. The box sells no grenades and no 12.7×55mm Ammo.
What to do here:
- Repair the Body Armor and top up ammo for the gun you use most.
- Requiem Ported Barrel (level 1: power 4.3 → 4.5, 5000; level 2: 4.7, 10,000). This is the recommended upgrade: you pick up the Power Shades Charm in this chapter, and it’s made for that gun, and the Super Tyrant waits in chapter 12.
- If you lack an automatic, buy the Gal (2000): it’s cheap, this chapter’s S.T.A.R.S. Emblem Charm fits it, and Game8 recommends an SMG or a shotgun against the Plant 43 boss in chapter 12 (you find Machine Gun Ammo ×60 and ×30 there). The Marksman 1A is only worth it if you don’t already carry a rifle (the Classic 70 from chapter 7): two rifles don’t fit comfortably.
- Don’t spend everything: you want to raise the Hatchet’s durability (Improved Grip) before the Super Tyrant, and the last Supply Box before it is the one on the Side Street by Gun Shop Kendo (chapter 12, not the Raccoon City East Side Street).
- Sell only what you don’t use; never the 12.7×55mm Ammo or the Gunpowder (Small).
Rubble street (downtown Main Street)
Leon leaves the bike and goes on foot. The game points you to an alley, but first turn slightly left: the huge rusted tanker truck is the same one that crashed into Leon and Claire at the start of Resident Evil 2.
- Mr. Raccoon #20: in the rubble and wrecked cars just right of the truck (the debris pile in the northwest of the street). Shoot it or hit it. It counts toward You Little Rascal! (all 25 Mr. Raccoons; they count across saves).
- Get it now: no guide confirms you can come back to this street in chapter 12, and the hole in the ruined orphanage (chapter 12) closes it for good on this run.
Alley and Street in Front of R.P.D.
Walk down the long alley until you see the ruins of the station. There are no enemies. Open the gate ahead and go in through the main door: Leon remembers his first day in 1998. You get the The Hero Returns trophy (bronze, 200 CP) on arrival at the R.P.D.
Main Hall (1F): the BSAA camp
The lobby is recognisable even in ruins. Walk further in for the cutscene. The shutters to both wings are down and unpowered. In the middle are the remains of a BSAA camp: the BSAA has used the station since 2023 as a base to watch ARK. Through the cameras, Leon finds out that Grace and Zeno are in the east wing.
- Laptop (save) on the desk in the middle and the Supply Box next to it. Save and shop (see Before you start).
- R.P.D. Perimeter Report (file #54) on the stack of equipment cases opposite the laptop, in front of the statue. It lists what’s left in the area: supplies in the 2F Armory, a working shotgun in the gun shop out back (the W870 Police in Gun Shop Kendo, chapter 12) and weapon parts in the Parking Garage (chapter 12).
- Where to go: with both shutters down, the only way on is the West Office. Facing the laptop, the West Office is the door on your right (Game8). Walk in, no key needed this time (IGN).
West Office (1F)
- Top Secret Operation (file #55) on Marvin’s desk, the first one on the right (north side): his 1998 plan for a surprise welcome party for “young Kennedy”.
- The safe in the corner office is empty (Leon looted it in 1998).
- Note the “JoJo” locker on the west side, marked ”!” on the map: it takes the Locker Key, which you find later. You come back at the end of the chapter.
Way out: leave through the door on the right (the north one) into the corridor and turn left: this is the West Central Passage. The safety deposit room and the darkroom hallway are blocked, so carry on through the only open door.
Supply Room and Operations Room (1F)
Supply Room. Handgun Ammo ×10 on the workbench (west corner), by the doorway to the Operations Room.
Operations Room.
- Record of Events (file #56) on the chalkboard in the middle: David Ford’s log from 25 to 27 September 1998.
- Mr. Raccoon #21: on the west side, next to the bigger hole in the wall, look in the rubble behind the bottom plank of a boarded-up window.
- Before you leave, look at the TV hanging from the ceiling in the southeast corner, above a pile of pallets and a crate by the chalkboard: that’s where the Locker Key will appear once you read Barry’s two clues. It’s still empty.
South West Hallway and Reception (1F)
South West Hallway. An R.P.D. Zombie walks the corridor: the first of the chapter’s 2 enemies.
- Tactic: sneak up for a stealth attack, or drop it with a leg shot or a headshot from the handgun and finish it with the Hatchet so it doesn’t get up as a Blister Head. On Insanity zombies can mutate on death (Game8): the finisher is a must.
- At the far end, on the right, lies the Licker corpse from Resident Evil 2 (just scenery).
Reception (the waiting room). Turn left at the end of the corridor.
- Handgun Ammo ×5 on the couch in the middle.
- The shutter to the Main Hall is still down; the Mechanic Jack opens it later too.
- Shoot the yellow strap on the ladder hanging above and climb to 2F.
2F corridor
You come out by the unicorn statue. The door on the right is the Library; the one at the end of the corridor is the S.T.A.R.S. Office. Go to the S.T.A.R.S. Office first: that way the Library already has Rebecca’s photo waiting when you get there (PowerPyx: if you walked into the Library, you took the wrong door).
S.T.A.R.S. Office (2F): Barry’s clues
The office is almost untouched. There are 4 files and a briefcase here; take them all before you go to the Library:
- Scavenger Hunt - Clue 2 (file #57): in the locker by the entrance door, on your right as you walk in (west side). Turn the photo over to read the back: “You kids have fun solving this one! – Barry”.
- Scavenger Hunt - Clue 1 (file #59): inside Chris’s brown leather jacket hanging on the wall between the desks, opposite the door (east side). Turn it over too. The two photos show a TV with an American flag below it, “Here” circled, and a chalkboard under a hanging TV: the Operations Room. Heads-up: Game8 and VGC swap the names (“Clue #1” is the locker one for them); the names above are the in-game ones.
- Barry’s To Do List (file #60): on the leftmost desk (northeast area). Barry notes he has to find the missing library book: “Looks like the captain checked it out last.”
- Library Card (file #58): step into Wesker’s small office, left of the entrance (northwest corner). Open the desk drawer and wait a few seconds: the card slides out from the back. It’s the slip for Medicinal Benefits of Herbs, borrowed by A. Wesker from 03/01 to 03/03. It’s one of the two files people miss most for Case Closed (all 75 files).
Armory (the back room): the RRR briefcase. In the northern locker room, inside a locker in the northwest corner, there’s a briefcase with a 3-letter lock.
- Code: R-R-R (“Rising Rookie Rebecca”, the back of the Photograph file).
- It works even if you don’t have the photo yet (PowerPyx, Game8), so open it now.
- Reward: Power Shades Charm, for the Requiem: limitless bullet penetration and more power on the last bullet in the cylinder. VGC suggests not reloading until it’s empty, so the last bullet comes up more often.
- The Perimeter Report mentions “supplies” in the Armory, but no guide lists anything beyond this briefcase.
While you’re here, examine Jill’s beret and the medical bag: nods to 1998. IGN says that after examining the beret you hear strange wobbling noises (see Tofu, below).
Library (2F and 3F)
Head back down the corridor and take the door on the right.
- Mechanic Jack (key item): on the floor in the northern half, by the bookcases that used to slide (the same spot as in Resident Evil 2 Remake). It’s hard to see. It opens the Main Hall shutters.
- Mr. Raccoon #22: in the tall central bookcase, north face, bottom row, second cubby from the left, behind a pile of books, next to where the Jack was. It’s the hardest one in the chapter to spot: follow the dancing sound and aim very low.
- Photograph (file #61): go upstairs (3F) and cross the walkway toward the broken wooden door of the West Storage Room (it won’t open). In the bookcase to its right, interact with the book (the Botany Book, Medicinal Benefits of Herbs) and open it: it’s Rebecca Chambers’ “sporty” photo from Resident Evil 2, with “Rising / Rookie / Rebecca” on the back. The book only appears if you’ve read the Library Card on this run (Evil Resource, VGC); PowerPyx says you need all 4 S.T.A.R.S. Office files. Read them all and you satisfy both versions.
Two ways back to the Main Hall:
- Over the balcony (recommended): leave by the upstairs door on the right side of the Library (Game8): you come out on the rubble of the Main Hall 2F balcony. Shotgun Shells ×6 on the rubble (northwest of the balcony). Drop down to 1F.
- Through Reception: climb back down the ladder to Reception and lift its shutter with the Mechanic Jack (Game8). It’s the more direct way if you already have the balcony shells or just want to get back fast; take it without visiting the balcony and you leave the Shotgun Shells ×6 behind.
Back on 1F: the Locker Key and the “JoJo” locker
With both Scavenger Hunt clues read, retrace the opening route: from the Main Hall, enter the West Office (the door on your right when you face the laptop), leave by its north door and turn left toward the West Central Passage, the Supply Room and the Operations Room.
West Central Passage. A second R.P.D. Zombie turns up banging on the vending machine. Deal with it like the first: from behind while it’s busy, or knock it down and finish it with the Hatchet.
Operations Room: the Locker Key. Turn right as you enter, climb the crate and the pallets in front of the corner chalkboard and turn to face the ceiling TV: the Locker Key sits in the monitor bracket (southeast corner). It only appears if you examined both Scavenger Hunt clues on this run; if it isn’t there, go back to the S.T.A.R.S. Office.
West Office: the “JoJo” locker. Head back down the same corridor and open it with the Locker Key (on your right if you come in through the north door).
- S.T.A.R.S. Emblem Charm, for automatic guns (the Stiri REVO3 A1, the Gal and the Clatter Carbine): more power at the cost of more sway while aiming.
- Two Raccoon City Zoo tickets. Turn them over: “Enjoy! And don’t say I never gave you anything! – Barry”.
- Examine the inside too: a Street Fighter Alpha poster, a console (IGN says an original Saturn) and Capcom games (Resident Evil, Street Fighter Alpha 2, Mega Man 3).
According to Evil Resource, on later runs the two charms don’t appear again if you already own them (Game8 says the opposite; if the locker or the briefcase is empty, check your inventory).
Tofu (optional easter egg)
Game8 sees it peeking out in 3 places: through the big crack in the wall on the left as you enter Reception; outside the broken wall at the west end of the west corridor; and through the big hole in the Operations Room wall, opposite the TV and chalkboard. IGN hears it after examining Jill’s beret; VGC places it after the chapter 12 chase (the Operations Room or the hallway behind the Waiting Room). No trophy or item.
Main Hall: the shutters and the East Hallway
Save at the laptop and stop at the Supply Box (see Before you start).
- Use the Mechanic Jack on the east shutter: the gate with the “Keep Out” sign at the lower right of the Main Hall (Game8). The west one (Reception) is the other shutter the Jack opens; it doesn’t lead on with the story.
- Go through the rusted east shutter and follow the corridor to the East Hallway: the cutscene starts.
- Zeno tells Grace that Elpis is a mind-control virus (that’s what he believes), that the Connections pushed for the missile strike to hide it, that Emily is one of many clones of Grace and that Grace is the original. Zeno plays Grace a 1990 recording from the Raccoon City orphanage, and the game cuts to chapter 11.
What locks and when
- Entering the East Hallway locks nothing. In chapter 12, after the Tyrant T-501 chase, Leon comes back to the Main Hall (laptop and Supply Box), and the whole interior (files #54-#61, Mr. Raccoon #21 and #22, both charms) is still open (IGN: “this is your chance to make sure you’ve done everything”).
- The likely cut-off is leaving the station through the north-east hole by the lion statue (unconfirmed whether you can get back in).
- The certain one is dropping through the hole in the ruined orphanage at the end of chapter 12: that also closes the Mr. Raccoon #20 street.
- PowerPyx still recommends finishing everything before the East Hallway: it’s the safest habit.
Difficulty
- Casual: assumed to have the same item layout as Standard (VGC: “item locations remain the same”; no guide confirms it room by room).
- Standard (Modern) and Standard (Classic): nothing changes in this chapter. Leon never uses Ink Ribbons. The Gal and Marksman 1A you missed appear in the Supply Box on both.
- Insanity: the same items and the same 2 zombies, but they hit much harder and take more punishment. Game8: zombies can mutate on death, so finish them with the Hatchet or from behind. The Gal and the Marksman 1A are in the box from the start. Kills give more credits (a Steam player puts it at double) and Supply Box upgrades cost roughly double; no price list has been published.
R.P.D. secrets, step by step
A summary so you don’t walk in circles. Everything is optional except the Mechanic Jack.
- S.T.A.R.S. Office: read Scavenger Hunt - Clue 2 (locker by the door), Scavenger Hunt - Clue 1 (Chris’s jacket), Barry’s To Do List (leftmost desk) and the Library Card (Wesker’s drawer, wait a few seconds).
- Armory, in the same office: R-R-R briefcase → Power Shades Charm.
- Library: Mechanic Jack (north floor), Mr. Raccoon #22 (central bookcase, bottom) and, on 3F, the book right of the broken door → Photograph.
- Go out over the Main Hall balcony (Shotgun Shells ×6) and drop to 1F, or go through Reception and lift its shutter with the Jack.
- West Office → north door → left → Operations Room: climb the pallets by the chalkboard → Locker Key in the ceiling TV.
- West Office: “JoJo” locker → S.T.A.R.S. Emblem Charm.
- Main Hall: save, Mechanic Jack on the east “Keep Out” shutter → East Hallway.
Before you go through the east shutter you should have: the Mechanic Jack (required), the Power Shades Charm and the S.T.A.R.S. Emblem Charm in your case, the Body Armor repaired, the Requiem with the Ported Barrel if you could afford it, an automatic (the Gal from the box if you were missing it) and the Gunpowder (Small) unsold. Credits saved for the Hatchet’s Improved Grip on the Side Street (chapter 12).
Don’t leave without: Mr. Raccoon #20 on the street (the only one in the chapter you may not be able to recover), #21 in the Operations Room and #22 in the Library; all 8 files (#54-#61), above all the Library Card and the Photograph, the two people miss most for Case Closed; the Power Shades Charm (RRR briefcase) and the S.T.A.R.S. Emblem Charm (“JoJo” locker); the Shotgun Shells ×6 on the balcony. If you missed anything inside, chapter 12 gives you another chance, before you leave the station.