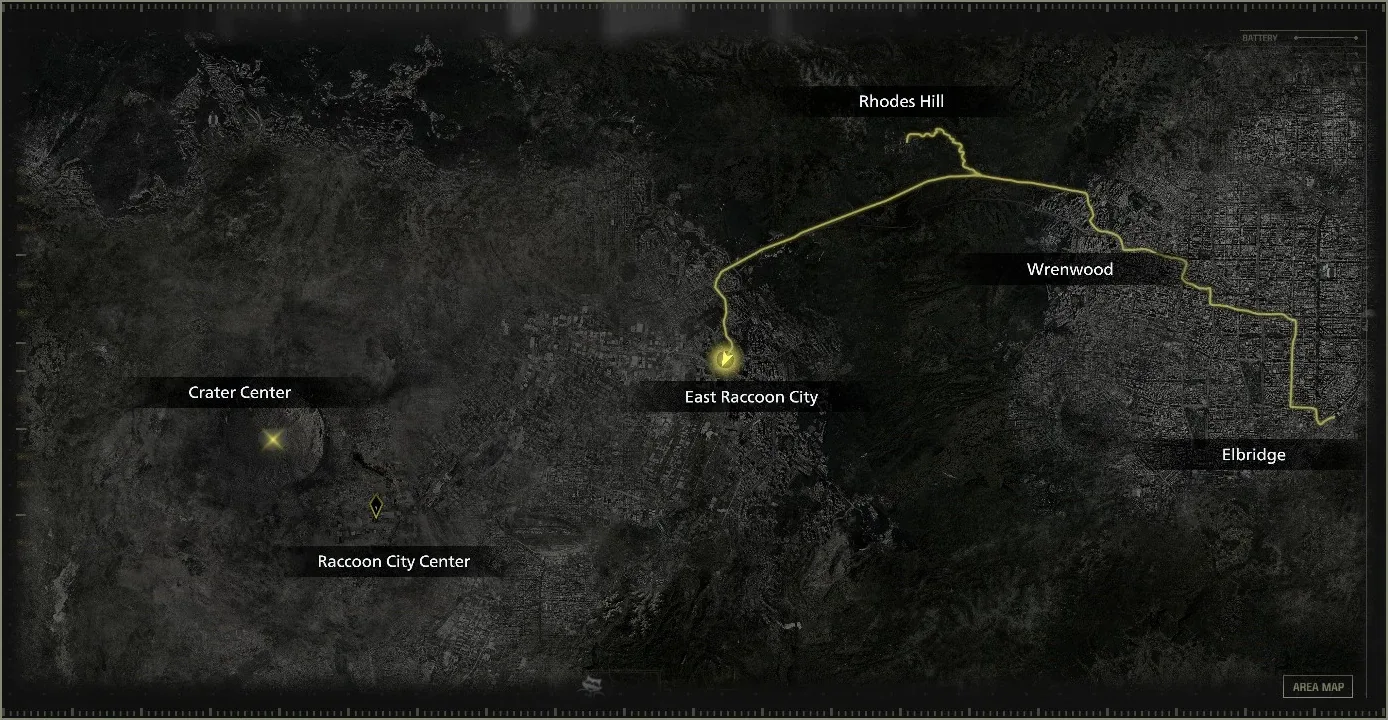
You play Leon S. Kennedy for the whole chapter. You come back from the orphanage memory (chapter 11) to the R.P.D. East Hallway: Zeno has already taken Grace to ARK and the Tyrant T-501 (“Mr. X”) chases you through the station. Then you head out to the streets behind it (the Parking Garage, Gun Shop Kendo and the Side Street), fight the Super Tyrant, drop through the hole in the ruined orphanage, which is Raccoon City’s point of no return, and cross Blackthorn Station, a subway station swallowed by Plant 43’s roots, to the Plant 43 boss at ARK’s service entrance. Three bosses in a row, two places to shop and the 9 seedlings of a trophy that’s gone if you walk past them.
Switch 2 controls: ZL aims, ZR fires or swings, L parries with the Hatchet, L + Y sharpens it, A interacts and R is the quick heal. Leon saves at laptops without limit on every difficulty: save at each one.
Chapter order: East Hallway: Tyrant T-501 chase (Press Room → East Stairway → Waiting Room → Chief’s Office → Private Collection Room) → Main Hall 2F balcony (Guide Pamphlet, laptop, Supply Box) → NE hole by the lion statue → Street Behind R.P.D. → Parking Garage (Cute Bear Charm, Silver Finish Scope, Tracking Module #14 (Common), 2 BSAA Zombies) → Gun Shop Kendo (W870 Police) → side alley and Back Street (Mr. Raccoon #23) → Side Street (laptop, Supply Box) → Super Tyrant (I Remember That, Too) → Basketball Court → ruined orphanage: hole in the floor (point of no return) → Blackthorn Station B1: train (Plant 43 Seedling #1) → B2: rappel → B3 Subterranean Passage (seedlings #2-#9, Tracking Module #15 (Rare), Not Today, Buds!) → ARK Service Entrance: Plant 43 → Umbrella door → chapter 13.
Before you start
- Where to shop: only two Supply Boxes, the Main Hall one (after the chase) and the Side Street one. That is the last box before the Super Tyrant and, on a first run, the last one until ARK: the Blackthorn Station B3 box only appears on later playthroughs.
- Requiem ammo: save the 12.7x55mm Ammo for the Super Tyrant; you don’t need it against Plant 43.
- Hatchet and armor: at the Side Street, raise the Hatchet’s durability (Improved Grip: 3000 for level 1, 6000 for level 2) and repair the Body Armor.
- The chase with the Tyrant T-501 can’t be won with bullets: spend nothing on it.
- Shotgun: pick between the free W870 Police from Kendo (more base power, arrives empty) and your 990-TAC, and sell the other.
- SMG and rifle: carry a loaded SMG (there’s Machine Gun Ammo ×60 on the Side Street and ×30 in Blackthorn B2): Game8 recommends an SMG or a shotgun against Plant 43. A rifle helps with the seedlings.
- Master Craftsman: don’t sell the Gunpowder (Small) in Blackthorn B2: together with the Logistics Warehouse one it completes the trophy.
- Wooden crates: there are about fifteen in this chapter (Parking Garage, Back Street, the Super Tyrant arena, Basketball Court, B3 and the ARK Service Entrance). Break them with the Hatchet or a kick. Their contents are randomised, “usually what you lack” (IGN), so there’s no fixed item to list. The exceptions: Evil Resource gives Gunpowder (Large) in the northern B3 crate and a Med Injector in one of the two crates on the east side of the Plant 43 platform.
- What you can miss: the 9 seedlings for Not Today, Buds! are lost once you reach the boss: get them on Casual or Standard (Insanity only has 7). All of Raccoon City Center locks when you drop into the ruined orphanage hole.
East Hallway: the Tyrant T-501 chase
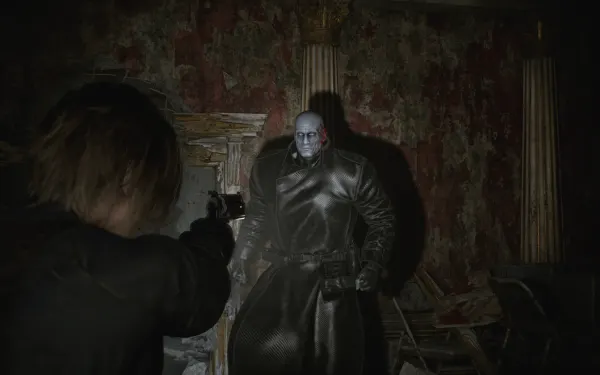
When you come back from the orphanage memory, Grace is gone: Zeno has taken her to ARK. The Tyrant T-501 (“Mr. X”) bursts through the wall and the chase through the R.P.D. begins.
- It cannot be killed: don’t spend ammo. If it catches you, parry (a full edge takes 2) or knock it down, and it gets back up quickly.
- The route is laid out step by step in Boss — Tyrant T-501 below: Press Room → stairs → Waiting Room → Chief’s Office → Private Collection Room.
- The only instant kill is the helicopter tail it rams through the wall on the way to the Waiting Room: the moment you see it, turn back.
- When you leave the Private Collection Room it is gone from the station for good.
Main Hall (2F balcony): the last save in the station
After the cutscene that ends the chase, turn around:
- Guide Pamphlet (file #65): on the bench on the south-east part of the balcony, by the door to the Waiting Room and next to a headless BSAA soldier. It’s a tourist guide: the R.P.D. used to be an art museum, and the Umbrella orphanage a few blocks away was known for its stained glass. It is the last Raccoon City file and counts for Case Closed.
- At the Main Hall BSAA camp, save at the laptop and use the Supply Box (repair the armor, restock).
- Last chance for the station: everything from chapter 10 is still open from here (files #54-#61, Mr. Raccoon #21 and #22, the Power Shades Charm and the S.T.A.R.S. Emblem Charm). IGN: “this is your chance to make sure you’ve done everything”.
- VGC places another Tofu sighting here (Operations Room or the corridor behind the Waiting Room); it gives nothing.
Out to the Street Behind R.P.D.
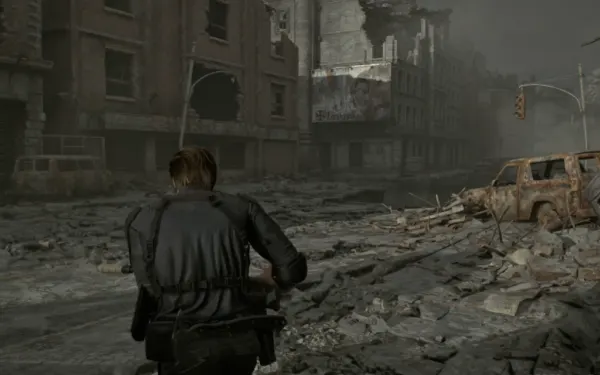
Climb the stairs to the right of the lion statue: the Tyrant opened a new hole in the north-east corner. Drop down to the street behind the station. No guide confirms you can get back in afterwards, so don’t leave anything unfinished inside.
Parking Garage (optional, but three prizes)
Go left and down the ramp into the dark R.P.D. garage. The R.P.D. Perimeter Report already said so: advance-team supplies and weapon parts.
- Tracking Module #14 (Common) (3700 credits) on the weapons case in the south-west corner.
- Med Injector on the rusty table in the middle.
- Wooden crates: 2 in the south-east and 1 in the north-east.
- Cute Bear Charm on the ground on the east side, next to the van smashed into the wall (the one Ada rammed into Mr. X in Resident Evil 2), by the driver’s side. For shotguns: more mid-range power, less at point-blank.
- Open BSAA container lit by a spotlight (south side): Silver Finish Scope (a Classic 70 scope: much more zoom, precision 4.5 → 4.7) and Rifle Ammo ×6.
Ambush. When you explore the south part, 2 Raccoon City BSAA Zombies and 1 R.P.D. Zombie rise. You must kill all 3 to leave.
- One soldier climbs out of the container; the other comes around the van from the north carrying an SMG: kill it first, from range (IGN: a rifle headshot before it starts spraying) or from cover against its sweeping burst.
- The helmet stops one headshot: a shotgun blast knocks it off, then go for the head.
- If one holds a grenade, shoot it in the hand.
- BSAA Zombies drop Machine Gun Ammo.
Gun Shop Kendo
Leave the garage, head down the road and cross to the other side to the gun shop. It has been picked clean. Entering the back building (Storage Building) triggers a cutscene of Leon remembering 1998.
- W870 Police: turn 180°: Robert Kendo’s shotgun is on the shelves behind the door, south-west corner. It comes with no shells. The W870 hits harder per shot; the 990-TAC fires faster and Game8 still rates it the best shotgun.
- If it doesn’t fit: the Supply Box PowerPyx sees “straight ahead” is the Side Street one, right outside this storage building’s back door (see below); Evil Resource lists no other. Go there, sell something to make room and come back for it, or leave it: per PowerPyx, a found weapon you can’t carry stays for sale at later Supply Boxes (3000).
- The Toy Uncle torso is here too (see Basketball Court).
Side alley and Back Street
After the cutscene, go back to the small courtyard between Kendo’s two buildings (the shop and the storage building). An open alley leads off to the side, into the Back Street.
- Mr. Raccoon #23: walk up to the big Umbrella billboard by a pit and look up, left of the billboard, at the 2F window of the building on the east side. Shoot it. It is the last Mr. Raccoon in Raccoon City.
- 2 wooden crates against the gun-shop wall (south-west of the Back Street).
- The From Meryl to Mommy letters 3, 4 and 5 and the R.P.D. Charm are Deluxe Kit content: they don’t appear in the base game. If you own it, follow the order in the Deluxe Kit section below.
Side Street: the BSAA camp
Leave through the back door of Kendo’s storage building: the Side Street BSAA container, with a laptop and a Supply Box, is right in front of you, in the south-west of the street (IGN, Game8). The long street leading off toward the orphanage is the Super Tyrant’s arena.
- Outside the container, on the weapons case on the ground: Med Injector and Machine Gun Ammo ×60.
- In the weapons case on the metal bench: Shotgun Shells ×10 and Rifle Ammo ×10.
- That much ammo means a boss.
At the Supply Box:
- Redeem the garage Tracking Module (3700).
- Hatchet: Improved Grip (3000 and 6000). Game8 advises raising it as far as you can, and PowerPyx warns that, unupgraded, a single parry can empty the edge.
- Repair the Body Armor. If you keep the W870, its Chrome Barrel (power 3.3 → 3.8) costs 5000.
- Sell the spare shotgun (990-TAC 7000, W870 3000). Selling it refunds only the base price, but if you buy it back it returns with its upgrades.
- Save.
What stays open after the boss. The street behind you is blockaded (IGN), but the Basketball Court (or the gate beside the building) takes you back to the Side Street and on to Gun Shop Kendo, where you check the Toy Uncle torso (VGC). Nobody confirms that the Parking Garage and the Mr. Raccoon #23 alley stay open, so grab them before the boss. The Super Tyrant appears when you reach the middle of the street (Evil Resource): don’t walk toward the orphanage until you’re done. The point of no return is the hole in the ruined orphanage.
Deluxe Kit: letters 3-5 and the R.P.D. Charm
Only if you own the Deluxe Kit and read letters 1 and 2 in East Raccoon City (chapter 9). They go in order: each one only appears once you’ve read the previous one (Evil Resource). Do it all before walking into the middle of the Side Street, where the Super Tyrant triggers; the letters are lost when you drop into the orphanage hole.
- From Meryl to Mommy 3: on the dashboard of the car parked by the Side Street BSAA container, near the laptop.
- From Meryl to Mommy 4: walk back to the Parking Garage from the Side Street (through Kendo). It’s on the ground behind the car parked on the north-east side of the entry ramp.
- From Meryl to Mommy 5: in the Back Street, on the ground halfway down the alley, next to a pair of child’s shoes.
- R.P.D. Charm: once you’ve read all 5 letters it appears in the south-east corner of the Back Street. It doesn’t appear if you already own it from a previous run.
The letters don’t count toward Case Closed.
The Super Tyrant
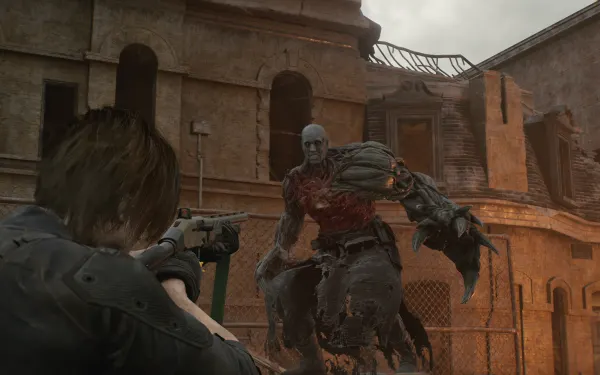
Walk down the street toward the orphanage. Halfway along, the Tyrant shows up holding a helicopter missile; Leon shoots the rocket before it can throw it, the blast breaks its limiter and it turns into the Super Tyrant (a claw on one arm, the heart exposed). The fight takes place on the street beside the Basketball Court.
Arena loot (handy mid-fight):
- A wooden crate on the west side.
- A Med Injector on the passenger seat of the van on the east side, by the court fence (IGN mentions Machine Gun Ammo on the driver’s seat).
- Another wooden crate on the north side of the barrier in the middle of the street.
Full strategy in Boss — Super Tyrant below. When you win: trophy I Remember That, Too.
Basketball Court
After the boss, the street behind you is blockaded: cut through to the right, across the court.
- Wooden crate in the south-east corner (not on Standard (Classic)).
- Toy Uncle (optional): kick the toy’s head around the court (IGN: “The results may surprise you”). According to VGC’s The Final Puzzle guide, putting it through the hoop gets you “There’s no time for playing around”, and the torso in Gun Shop Kendo then says “Just ignore A”: a clue for The Final Puzzle (the A is skipped in the mRNA code). Game8 describes it as a Mr. Charlie head in the middle of the court.
- Cut through the court or the fenced gate beside the building to get back to the Side Street laptop and Supply Box: save and restock what you spent.
The ruined orphanage (point of no return)
Walk between the pushed-aside buses to the present-day orphanage (the ruined building, not the one from chapter 11). Dropping into the hole in the floor locks all of Raccoon City Center: the R.P.D., the garage, Kendo, the streets and Mr. Raccoon #20 on the rubble street. Before you jump, check Before you drop into the hole at the end of the chapter.
The ravine. Follow the underground passage out the back: vault the sewer gate, cross the vent and walk the makeshift bridge over the ravine to the ruined entrance of Blackthorn Station.
Blackthorn Station B1
The Platform. Head down through the darkened hall and, before the broken turnstile, turn right (IGN): Gunpowder (Large) on the seats in the south-west of the platform. On Insanity, the Small Spiders wait here (see Difficulty).
The carriage bridge. Make your way back outside: a subway carriage bridges the ravine. Green Herb on the right, in the north-east corner of the platform, by the carriage entrance.
- Train Carriage 1: as you enter, turn around: Rifle Ammo ×6 on the south-west seats, behind you.
- Train Carriage 2: keep moving slowly.
- Train Carriage 3: a vine smashes in: it’s Plant 43 Seedling #1. Shoot the flower when its mouth opens: a few quick rifle or pistol taps. It can’t be missed. The carriage then falls.
Blackthorn Station B2
Slide down to the level below.
- East Platform: look for the Gunpowder (Small) on the air-conditioning unit in the south-east. It is the second and last one in the game: keep it for Master Craftsman.
- Train Carriage 1: enter the carriage: Scrap on the left, on the south-east seats. Then head right to another door into the next carriage.
- Train Carriage 2: Green Herb on the north-east seats. Leave by the other side. These three items (gunpowder, Scrap and herb) are not on Standard (Classic).
- West Platform: crouch under the girders: large weapons case (south side) with Handgun Ammo ×10, Shotgun Shells ×4 and Machine Gun Ammo ×30.
- Next to it is the BSAA rope: rappel to the bottom of the crater.
Blackthorn Station B3: Subterranean Passage
A one-way cave, overgrown with black vines, with 8 seedlings (7 on Insanity).
How the seedlings work: they sway, then open their mouth (that’s when they’re vulnerable) and strike fast, with almost no warning. The rifle works very well; the shotgun up close. A perfect parry severs them instantly, but the timing is tight. Writhing vines on the floor are traps: step on one and a plant grabs you (break free fast or it bites); shoot the vine from a distance to draw the plant out.
- Plant 43 Seedling #2: crouch through the tunnel on the right, near the start; the seedling strikes as soon as you’re through.
- Hanging case: round the corner and shoot the case hanging from the broken lamppost: Handgun Ammo ×5.
- The ledge case and the right-hand detour: further on you’ll spot a weapons case high on a ledge to the left: you reach it later, from the seedling #5 path. Before going straight on, take the right-hand path that curves: at its end (the north-west offshoot) there’s a small wooden crate.
- Plant 43 Seedling #3 and Plant 43 Seedling #4: in the next section, under a dangling car, two strike at once at very close range: shotgun. Mid-passage there’s Handgun Ammo ×7 on the ground. On later playthroughs a Supply Box appears in this central area.
- Plant 43 Seedling #5 (the only one off the main path): after those two, take the side path on the left, past the blue tarp. There’s Scrap in a broken pipe just past the tarp. The seedling grabs your feet: watch for floor vines. The path doubles back and climbs to the ledge you saw earlier: weapons case with a Med Injector, Rifle Ammo ×4 and 12.7x55mm Ammo ×1. On Standard (Classic), also a Mixed Herb (G+G) on the ground in the south-west of this path. Then return to the main path past the blue tarp, along the wall.
- Plant 43 Seedling #6: you enter a large flooded area with tangled wrecks; the seedling waits for you to drop down, so be ready. Go right for a wooden crate above the water, then take the left path back onto dry land.
- Plant 43 Seedling #7: directly left of #6, with a floor-vine trap: shoot it to draw the plant out. Before you leave, a wooden crate on a small ledge to the right (the end of the north-east offshoot).
- Northern area: a wooden crate with Gunpowder (Large). A small case hangs from the school bus (north-east): shoot it down for Tracking Module #15 (Rare) (4900). On Standard (Classic), Shotgun Shells ×3 on some rocks by a wrecked traffic signal.
- Plant 43 Seedling #8 and Plant 43 Seedling #9: follow the tunnel toward the light at the end. Green Herb on the ground at the north-east exit. The two seedlings strike together: quick back-to-back parries or the rifle. The ninth pops Not Today, Buds! (500 CP). On Insanity, 2 BSAA Zombies stand here instead.
There is no Supply Box in the cave on a first run (VGC mentions one, but Evil Resource lists it for later playthroughs only).
ARK Service Entrance
At the end, a large tunnel blocked by thick vines.
- 2 wooden crates in the south-east and a Green Herb in the south-west. Grab them before you move on.
- Two large vines with a flower at their base rise: leave them be and they slam down like hammers. Switch to the rifle and shoot each flower as soon as it opens, before they hit you. IGN counts two more that come up afterwards.
- Drop down to the boss platform: 2 wooden crates on the east side, one with a Med Injector (Evil Resource). Grab them before you move on: Boss — Plant 43 begins.
- After the fight, walk forward and activate the big Umbrella door: you enter ARK (chapter 13, trophy Umbrella’s Legacy).
Difficulty
- Casual: assumed to have the same item layout as Standard (Modern) (VGC; no guide checks it room by room). Enemies hit less hard and health recovers up to yellow.
- Standard (Classic): Leon still saves for free, no Ink Ribbons. Missing: the Basketball Court crate and the Blackthorn B2 Gunpowder (Small), Scrap and Green Herb (Evil Resource; the gunpowder may be an omission on their side). Without that gunpowder, for Master Craftsman save, craft one recipe with the warehouse gunpowder, reload and craft the other. In exchange, B3 has a Mixed Herb (G+G) and Shotgun Shells ×3.
- Insanity: same items as Standard (Modern), but enemies hit much harder and take more damage; keep the Body Armor repaired. PowerPyx: the RPG-7 with infinite ammo (buy the RPG-7, 15,000 CP, and Infinite Ammo (RPG-7), 35,000 CP, in Special Content) kills bosses in one shot. Two encounters change:
- B1 platform: 17 Small Spiders. 5 scurry around the south-west (where the Gunpowder (Large) is) and 12 more appear mid-platform. Back into the turnstile hall so they come at you from one side only and kill them with Hatchet swings, which cost no ammo; save the shotgun spread or a grenade for a tight group. Don’t get surrounded: they latch onto your face and lock you up.
- B3 north-east exit: 2 Raccoon City BSAA Zombies instead of seedlings #8 and #9. That run has 7 seedlings (Evil Resource data; nobody knows whether the trophy counts per run). The helmet blocks one headshot: shotgun it off, then go for the head. Some spray their SMG in a horizontal arc: take cover behind the wrecks and close in between bursts. If one holds a primed grenade, shoot it in its hand. They drop Machine Gun Ammo.
Boss — Tyrant T-501 (chase)
Arena: the R.P.D., 1F and 2F. It cannot be killed: you only run. Weapons: none; at most a parry (2 per sharpening, Game8) or a shot to knock it down if it corners you. Reward: getting out of the station.
- It throws you through the wall into the Press Room. Run to the northern part and turn right.
- It blocks your way: circle around it and go through the hole it just made to the East Stairway. It won’t follow you up the stairs.
- Upstairs, jump the gap, turn left and take the door on the right toward the Waiting Room.
- It rams a helicopter tail through the wall (other guides describe a beam): touching it is instant death. Turn around the moment you see it and sprint back toward the stairs. The Tyrant bursts into the area: duck into the Chief’s Office (on the right, per Game8; PowerPyx describes it as the dead-end room with the deer statue).
- The Tyrant breaks through the wall of the Chief’s Office: loop around it using the rubble in the middle and the desk, and run through the hole it opens into the Private Collection Room (the one with the stuffed bear).
- If it doesn’t follow you (IGN: it sometimes doesn’t): wait at the far end of the hall; it eventually rips the wall apart and opens the way through the Private Collection Room.
- Swing around the bear and the rubble in the middle and leave by the other side: take the door on the left to the Main Hall (Game8). Cutscene: the Tyrant is gone from the station.
Boss — Super Tyrant
Arena: the Side Street by the Basketball Court, with wrecked cars, a van and a barrier in the middle. Weak point: the glowing heart in its chest, the only one. Weapons: the Requiem (“don’t hesitate”, Game8; PowerPyx: the place to spend your saved rounds), then the rifle or shotgun. IGN opens with the SMG on the chest. The pistol is a poor trade. Reward: credits (just before the final cutscene) and I Remember That, Too.
- Before: save at the Side Street, with the Hatchet sharpened and upgraded and the Body Armor repaired.
- Dragging-claw charge: parry it or step aside. It slides past you: shoot its chest as it turns around.
- Parryable: the charge and the wide punches (Game8: the only ones). IGN also deflects the mid-range lunging stab and the 3-hit combo (the parry doesn’t stun it: counter after the third swipe). With an unupgraded Hatchet, a single parry can empty the edge (PowerPyx): sharpen after each one.
- Not parryable: the leap from a car roof and thrown cars. Near a car it may swat it into you: never stand between it and a car. If it lifts one, back off to the left and sprint across the arena, or hide behind another car.
- Car-top phase: it climbs onto a car and stays there a while (PowerPyx): put damage into its heart, but don’t get greedy (IGN). Enough of it (steady rifle fire or the Requiem) knocks it off the car, stunned. If you fall short, stop shooting in time to dodge the leap. Use the quiet moments to sharpen.
- Stunned → hatchet: enough heart damage drops it to one knee. Run in and use the prompt to drive the Hatchet into its heart. It takes 2 or 3 of these (IGN: the second one usually ends it). If you’re far away, use that window to heal or reload instead.
- If you run low: the Med Injector in the east-side van and the arena’s two wooden crates are close at hand (see The Super Tyrant above).
Boss — Plant 43
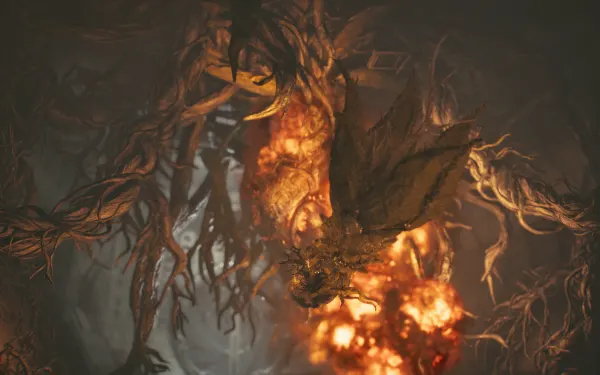
Arena: the ARK Service Entrance platform, with two side tendrils and the central bud. Weak point: only the open central bud takes damage. Weapons: an SMG or a shotgun (Game8), in short bursts. It has less health than the Super Tyrant: you don’t need the Requiem (Game8). Reward: the way into ARK.
- Stay in the centre. Shoot the bud only when it’s fully open, in short bursts between dodges. Avoid slow weapons and long sprays.
- Side tendrils: one rises and slams straight down onto its side of the arena, often both back to back or together. They can’t be parried. Watch which one lifts, step to the other side and return to the centre as soon as it lands: the other side usually follows right away.
- Bud lunge: the only tell is that it closes up and pulls back a little; then it launches forward and can reach the whole arena. Sidestep.
- Finish: after enough damage it thrashes, spews green goo and uncovers a container of explosive canisters below it. Shoot the canisters at once: the blast burns it and ends the fight.
Before you drop into the hole: the Guide Pamphlet (#65, Main Hall balcony); the Cute Bear Charm, the Silver Finish Scope and Tracking Module #14 (Common) from the Parking Garage (redeemed at the Side Street); the W870 Police from Kendo (even if you sell it); Mr. Raccoon #23 in the Back Street; with the Deluxe Kit, letters 3-5 and the R.P.D. Charm; the Hatchet upgraded, the Body Armor repaired and the game saved at the Side Street. If anything from chapter 10 is missing (files #54-#61, Mr. Raccoon #21 and #22, the two charms), go back for it before leaving the R.P.D. by the north-east hole.
Don’t leave without (before the Plant 43 boss): seedlings #2-#9 (especially #5 on the blue-tarp path), Tracking Module #15 (Rare) on the school bus, the ledge case (Med Injector, Rifle Ammo ×4, 12.7x55mm Ammo ×1) and the B2 Gunpowder (Small) unsold. Arrive with the SMG loaded.