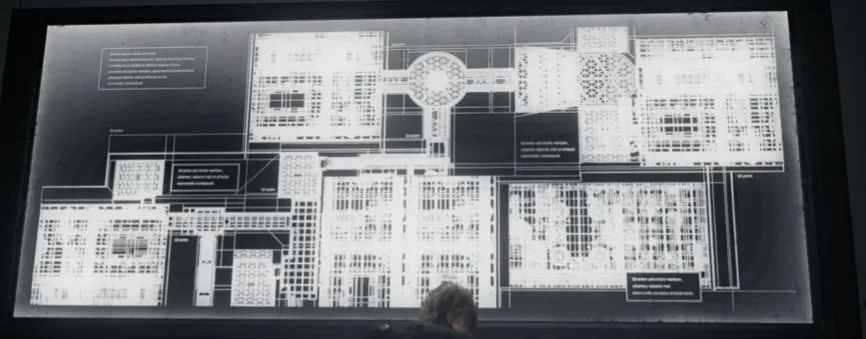
Chapter order: Loading Dock (Umbrella’s Legacy) → Sterilization Passage → Service Corridor → Staff Room (laptop, Supply Box, N0-AH Status Report, #66) → the pod walkway (Mr. Raccoon #24) → Server Room → Control Room (Tracking Module (Rare), terminal) → ambush by 3 Elite Guards in the Server Room → Stockroom: 8 Elite Guards and the Licker in the red tank → Central Corridor (shortcut to the Staff Room) → Entrance → Entrance Stairway → Guest Lounge (files #67, #68 and #69) → Guest Corridor (cutscene) → Storage Entry → Storage: The Commander (Mortal Edge) → PANDORA (cutscene) → chapter 14 (Grace).
Prepare: this is Leon’s stretch with the toughest human enemies in the game: the Elite Guards carry automatic weapons, flank you and shred Body Armor in seconds. Arrive with Body Armor Lv.II and repair it at the Staff Room Supply Box before every fight. The Supply Box does not sell grenades: craft a Hand Grenade or two (1 Scrap + 2 Gunpowder (Large)) or keep the ones you found; they’re the best answer to both guard fights. Redeem Blackthorn’s Tracking Module #15 (Rare) here if you haven’t yet (4,900); the Control Room Tracking Module (Rare) (4,500) you redeem later, when you come back through the Central Corridor shortcut. Raise the Requiem’s power (Ported Barrel: 5,000 and 10,000) and, with credits to spare, the Hatchet’s Fortified Blade (level 2, 8,000): against The Commander bullets are useless and only parries and hatchet hits count. Keep the Hatchet sharp (L + Y). A rifle helps a lot in the Stockroom (IGN uses the Marksman 1A with the BSAA Emblem Charm, unscoped). Leon saves for free on every difficulty, Standard (Classic) and Insanity included: save at the Staff Room laptop before each dangerous stretch.
Walkthrough
You play Leon S. Kennedy for the whole chapter. Switch 2 controls as in earlier chapters: L parry, L + Y sharpen the Hatchet, A kick or throw, R heal, ZL aim and ZR fire. Chapter 12 ended with Plant 43 at ARK’s service entrance; you arrive with whatever credits you earned in Blackthorn. The White Explosive Canisters (white tins) around ARK don’t explode: they release a white smoke cloud that gives you cover, useful for getting behind a guard. Evil Resource lists no pickup differences between Standard (Modern) and Standard (Classic) here; Insanity changes a few enemies (noted room by room).
Loading Dock (ARK West). The trophy Umbrella’s Legacy (200 CP, automatic) pops as you arrive. No enemies. On the right, on the south side, is a small blue plastic container with 1 Scrap. A White Explosive Canister sits in the NE corner: don’t waste it here. Go through the large door.
Sterilization Passage and Service Corridor. The decontamination tunnel is empty. In the Service Corridor the path splits: go left first, into the Staff Room.
Staff Room (safe room). Your base for this section:
- Laptop to save on the west side and Supply Box in the NW corner.
- Med Injector inside the medical case in the SW corner.
- A Plastic Crate in the NE corner: break it.
- N0-AH Status Report (file #66): examine the wall monitor in the SE corner. It covers the AI that runs ARK, N0-AH, the Lab Unit 01/02 zones and the restricted area PANDORA.
Repair your armour and save. You’ll come back here several times: the Central Corridor shortcut returns you to this room after the Stockroom.
Service Corridor: the pod walkway. Head out and go straight toward the stairs. The walkway overlooks a storage bay of pods; you can examine the two pods by the window, with Lickers inside. Turn around: on the opposite wall, behind the equipment and on top of a long green weapon crate, by the stairs down, is Mr. Raccoon #24. Shoot it or hit it with the Hatchet. In the B1 part of the corridor, opposite the Sterilization Passage door (NW), is another White Explosive Canister. Going down you pass a locked red door (the Stockroom; it opens after the ambush) and a green-lit door: the Server Room.
Server Room (B1). Grab everything before moving on:
- Gunpowder (Large) on the shelves in the NW corner.
- Green Herb on a small trolley on the east side.
- 2 White Explosive Canisters, one in the middle and one on the west side: don’t break them, you’ll need them in a minute.
- A Plastic Crate on the server cabinets, SE.
Control Room (B1). Through the Server Room. Tracking Module (Rare) (#16) on the desk on the east side: take it before touching the terminal. It’s worth 4,500 credits at the Supply Box. Then use the terminal at the far end: cutscene, Leon sees where Grace is and the terminal raises the alarm.
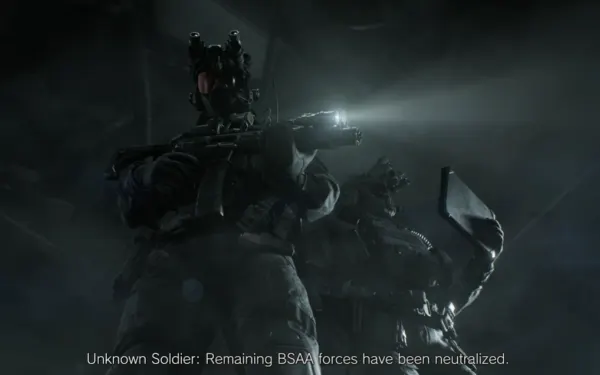
Server Room ambush: the Elite Guards. As you walk back through the Server Room the lights go out and Elite Guards come in through the far door. Evil Resource counts 3 (on every difficulty); PowerPyx mentions 4 and IGN says another 2 sometimes follow, so don’t relax when the third drops. How to fight:
- Throw a grenade at the doorway the moment it opens: it can kill the whole group at once (PowerPyx, IGN).
- With no grenade, shoot a White Explosive Canister to fill the room with smoke and sneak up for a stealth attack or a Hatchet finisher (VGC, Game8).
- Otherwise take cover and go for headshots with the rifle, or shotgun to the face and relocate: they try to flank behind you.
- If it goes badly, fall back to the Staff Room: heal, repair and save between waves.
The guards drop ammo.
Stockroom (B1): the firefight. Leaving the Server Room, the door on the right is now open. The Stockroom is the chapter’s longest fight: 4 Elite Guards dug in across the northern half, beyond a small chasm, so you can’t rush them. Positions per IGN: the 1st far right behind a black barrier; the 2nd at the same distance, on the left edge of that barrier, behind a crate; the 3rd further back, behind a large crate and a small black-tarped one; the 4th out of sight on the far left.
- Stay behind the large container (not the small crates), peek and go for headshots. Once 2 are down, the rest fall back.
- Go right, break the crate on the stairs and climb the ladder to the catwalk (Stockroom Walkway). Fire down from above; watch for guards walking under the grating. Drop down at the front or far left near cover, or ambush them with the Hatchet.
- Reinforcements: 4 more Elite Guards. They drop in two pairs from the ledges at the top right, one with a riot shield; PowerPyx also sees a pair come through the far door. Hide bottom left, behind the crates where the catwalk ends.
- The Licker trick: shoot the red specimen tank in the NE corner of the northern half (where the reinforcements land). A Licker β2 comes out and attacks the guards. You have to kill it yourself afterwards; VGC warns it can be more of a hindrance than a help.
- Shield guard: wait for him to turn toward the Licker and shoot his back, or shoot his hands or feet to stagger him. A grenade right where the reinforcements land works too (PowerPyx).
Stockroom pickups: Green Herb in the SW corner of the northern half; Plastic Crate in the SE corner of the southern half, by the ladder; another in the SE corner of the northern half; another in the NW corner of the northern half, next to a White Explosive Canister; more white tins on the south side of the southern half and in the middle of the northern half. Collect the guards’ ammo and leave by the north door.
Central Corridor: the shortcut. Keep left and climb the stairs: you open the shortcut to the Staff Room. Use it now: redeem the Tracking Module (Rare), repair your armour again, buy upgrades and save. Then take the stairs back down heading east: on the shelves at the SE end of the corridor is a Gunpowder (Large); together with the one from the Server Room (if you haven’t used it) and 1 Scrap it makes a Hand Grenade (the recipe takes 2 Gunpowder (Large)).
Entrance and Entrance Stairway. At the end of the hall, by the Gunpowder, turn left into the Entrance, an exhibition hall with human mannequins and odd sculptures; the AI, N0-AH, speaks. No danger. Climb the Entrance Stairway, between golden skeleton statues. At the top, the first green door on the right is the Guest Lounge.
Guest Lounge (ARK East). Three files on wall monitors and 2 Plastic Crates (one on the unit on the south side, one in the SE corner):
- Raccoon City Bioweapon Research - Report (file #67): monitor in the NE corner. ARK uses Raccoon City’s zombies as test stock for the mutated T-Virus.
- Product Catalog 1 (2026) (file #68): monitor in the SW corner. Prices for the Garmr ($30 million), the Licker β2 ($14 million) and Plant 43 ($100 million), with a note on the service entrance infestation: the chapter 12 boss.
- Product Catalog 2 (2026) (file #69): monitor in the NW corner. Tyrant T-501 ($120 million) and Nemesis-γ, price “negotiable”.
The numbers follow the in-game list as PowerPyx gives it; Push Square numbers them differently within ARK.
Mind what you leave behind. Neither Leon nor Grace comes back to these rooms (inferred from every guide’s route): Mr. Raccoon #24 and files #66-#69 are lost for this playthrough once The Commander knocks you into Storage. Destroyed Mr. Raccoons and read files count across saves (You Little Rascal! and Case Closed), so a miss can be fixed by loading an earlier save or on your next run. There are no charms, BSAA containers, safes or Letters from 1998 in this chapter.
Guest Corridor and Storage Entry. Before going through the main door into the long corridor, save in the Staff Room with your armour repaired, the Hatchet sharp and full health. Point of no return: once you go through that door, The Commander knocks you into Storage and you never come back to this part of ARK. Before that, check you have Mr. Raccoon #24 and files #66-#69, and spend your credits (redeem the Tracking Module (Rare)) on upgrades for the duel. In the corridor, as Leon heads for the eastern door, a cutscene plays and The Commander knocks him down into Storage (B1).
After the boss. Pick up the Mortal Edge from The Commander’s body. Storage has two Plastic Crates: one in the middle and one in the NE corner holding a Med Injector. Insanity: 2 Elite Guards storm in as soon as The Commander dies and there’s 1 more on the Storage Entry stairs, the ones you climb to get back to the corridor (Evil Resource): heal and get to cover at once. Climb the stairs to the corridor and take the door on the left: the Central Refining System: PANDORA. Cutscene: Leon’s illness flares up, Zeno wins and Grace and Leon fall into the Dump. Control passes to Grace (chapter 14).
Boss — The Commander
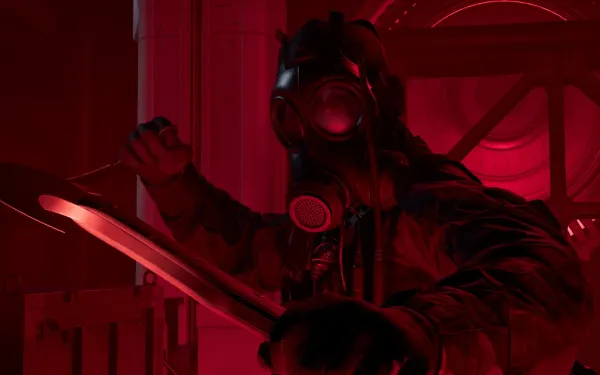
A soldier in a red-lensed gas mask who leads the Elite Guard. He looks a lot like HUNK, but the game never confirms it. He fights with a hatchet and a curved knife and, when he breaks away, a submachine gun. The arena is Storage (B1), a warehouse of crates and pipes. VGC compares it to RE4 Remake’s knife fight with Krauser.
Core rule: guns don’t work. Game8 says bullets do no damage even when you see them hit, and drawing a gun lets him close in and knock it aside (IGN). Some guides (Automaton and others) say a quick shot lands while he’s stunned after a parry or a kick; in practice the fight is won with parry (L) + 1 or 2 hatchet hits, then reset. If you swing without a parry first, he parries you.
- Opening segments. He closes in and attacks: parry at the last moment and answer with 1 or 2 hits, no more. Each segment ends in a clash with on-screen prompts. After the first he attacks twice in a row (parry both); after the next, three times. If you swing just as he does, the blades lock, you grapple and everything resets (IGN).
- Feints. He fakes to your right, then slashes upward with the knife; the spinning slash has a delayed parry timing (Automaton). Don’t parry early. If you play in first person, tilt the camera slightly down: he strikes low (Game8).
- Flashbang and neck grab. Mid-fight he throws a flashbang and goes for your neck: mash the button the screen asks for or it’s instant death. Heal (R) as soon as he lets go.
- Fog. He slashes a pipe and fills the room with low steam, crouches and runs off; he throws smoke grenades and shoots from range. When he runs to the opposite corner to shoot, chase him immediately: if you keep up he’s open to several free hits (IGN). The other option is to wait for him to come back to you.
- Last part. More feints (a delayed feint then a spin to the other side), spinning slashes and a three-hit hatchet combo ending in a delayed jump attack: wait for the jump to parry. After enough parries and hits, a prompted finisher ends the fight.
Between segments, sharpen the Hatchet (L + Y): a blunt edge can’t parry. Reward: the Mortal Edge, a melee weapon with more base power than the Hatchet and a much wider parry window. Loot it from the body and equip it in place of the Hatchet; it makes the Licker parries of chapter 15 much easier. IGN warns its maximum power sits below a fully upgraded Hatchet. The Mortal Edge sells for 25,000 credits. On Insanity The Commander is faster and more aggressive and, when he dies, 2 more Elite Guards come in.
Don’t leave without: Mr. Raccoon #24 (on the green weapon crate by the Service Corridor stairs), the Control Room Tracking Module (Rare) (before the terminal), files #66 (Staff Room) and #67-#69 (Guest Lounge) and the Mortal Edge from The Commander’s body. Everything in this part of ARK is lost once The Commander knocks you into Storage: Leon never comes back to these rooms.