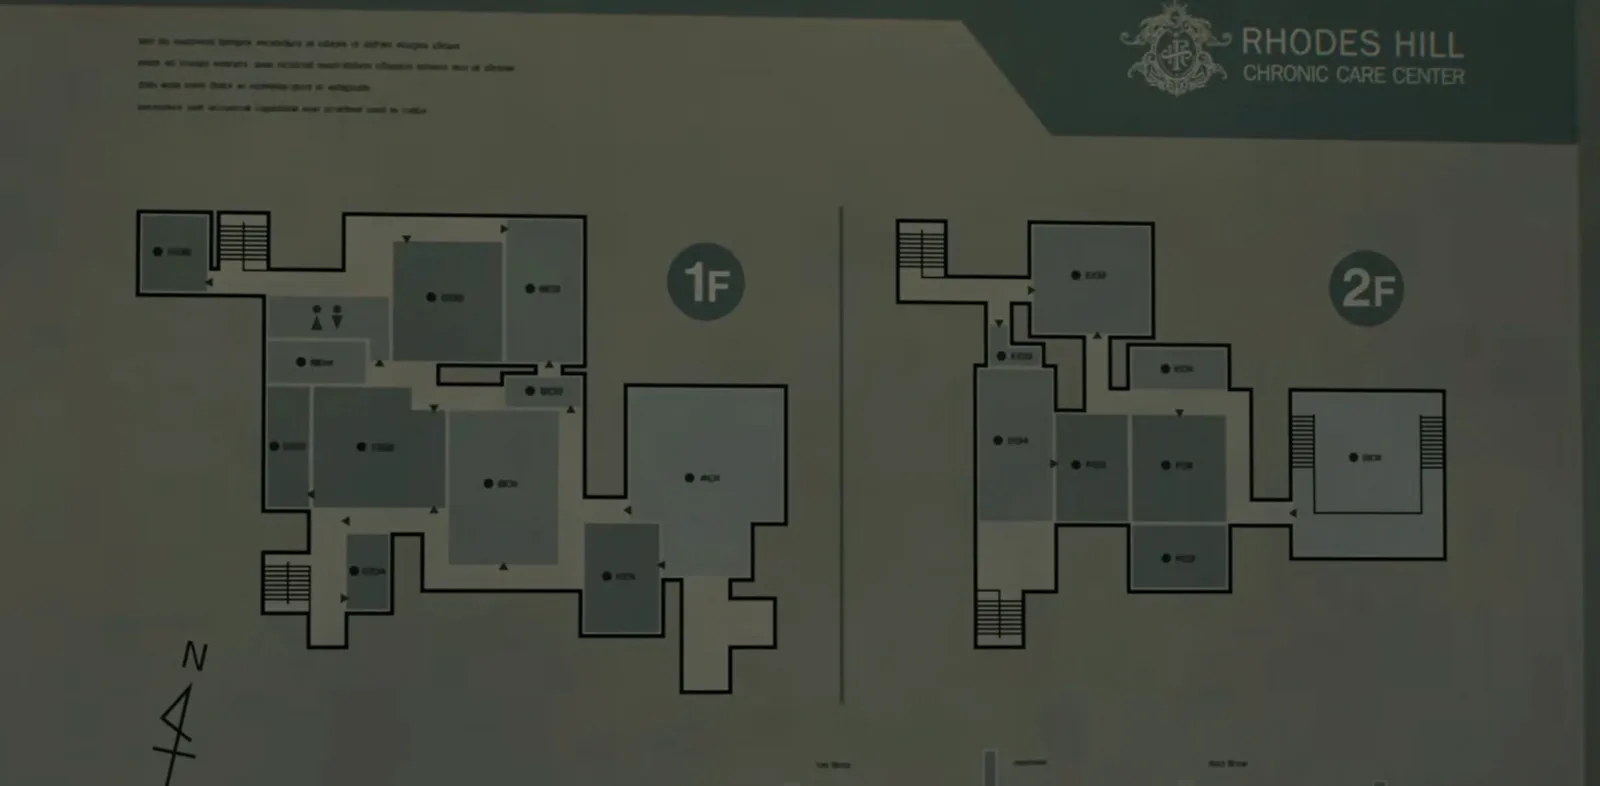
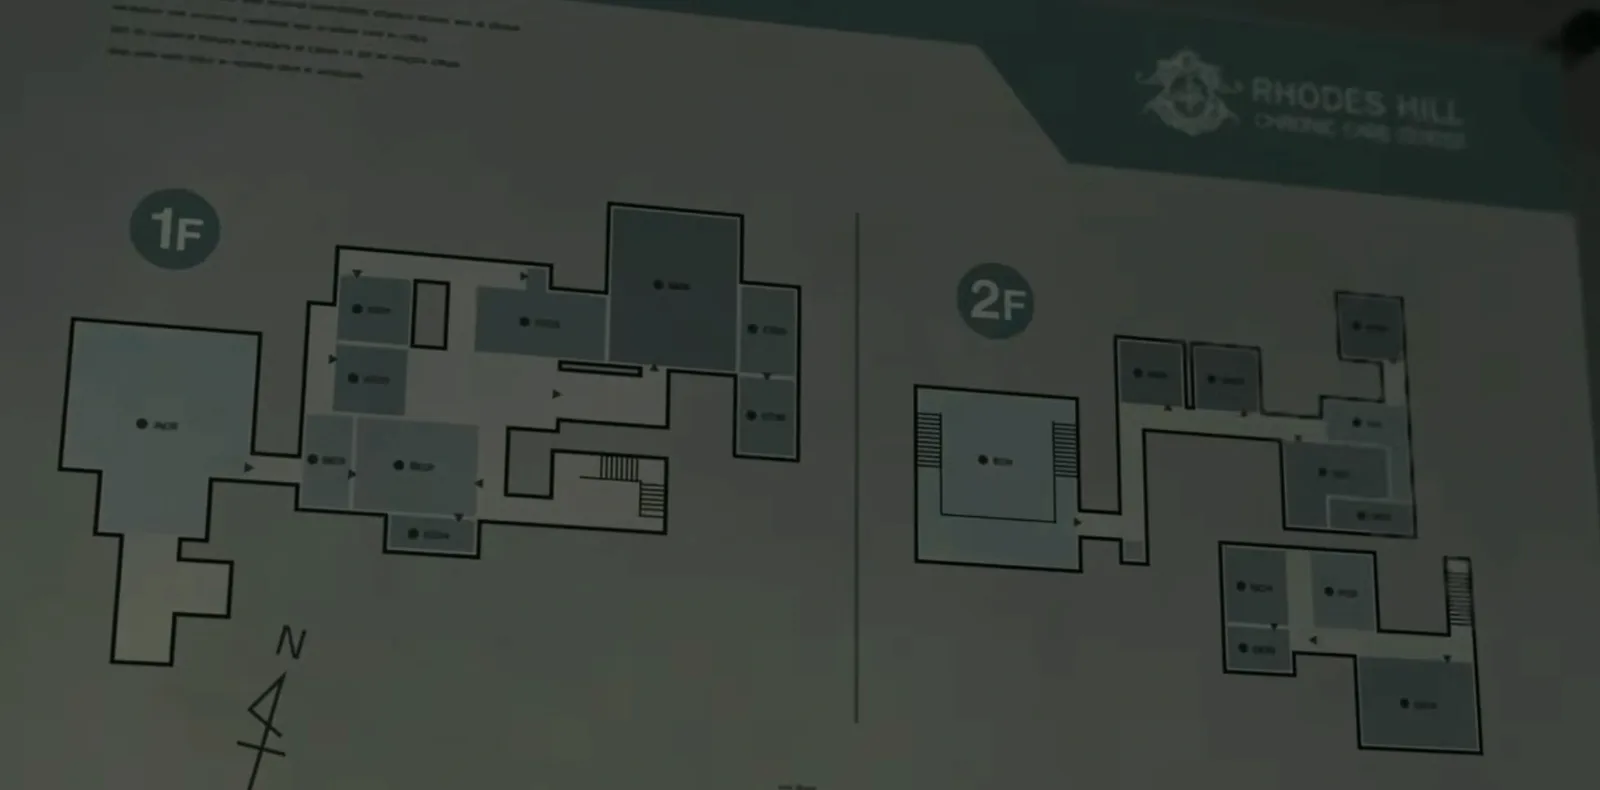
You play Grace Ashcroft for the whole chapter. Leon left her the Requiem with a single round, and now Grace has the main building of the Rhodes Hill Chronic Care Center to herself: a West Wing (kitchen, dining room, bar, the Chairman’s offices and the garage) and an East Wing (labs, waiting room, the Lead Researcher’s offices and the Isolation Ward), joined by the Central Hall. The goal is the reception door, which takes three quartz: the Moon Quartz (Chairman), the Sun Quartz (Lead Researcher) and the Star Quartz (Security Manager). Along the way you get the Blood Collector and the crafting recipes, open the Level 1, 2 and 3 ID wristbands, dodge or kill the Chef and Chunk, and rescue Emily. The chapter ends when The Girl drags her into the basement.
Chapter order: Central Hall (Requiem with 1 round) → Guard Office (first item box) → Medication Room: West Wing Keycard → Kitchen: the Chef → West Corridor → Dining Room (B934) → North West Stairway → Bar & Lounge (Singer, S&S M232, safe) → Gallery → Chairman’s Office: Red Jewel and Moon Quartz → Parlor (East Wing Keycard, lockers) → East Wing: Examination Room, Blood Lab (Blood Collector), Isolation Ward Lobby, Connecting Corridor, Waiting Room → Lead Researcher’s Office → ID Wristband (Level 1): Chunk appears → Closet, Blood Reports Room, Locker Room → Conference Room (second Singer, Corrosive) → Sun Quartz → Custodian’s Office (Wrench) → Garage: Artificial Lungs → Office and Records Room → Cold Storage: Artificial Heart → (Pantry if you kill the Chef) → ID Wristband (Level 2) → Isolation Ward: ID Wristband (Level 3) → Emily → Isolation Ward defence → The Girl takes Emily → hole to the basement.
Before you start:
- Ammo. You arrive with the Requiem and a single round: don’t spend it on the Chef (on Standard it doesn’t kill him); keep it for three zombies in a line (Bang for Your Buck), a Singer or a Blister Head. Turn the 3 Rare Metal from the lockpick drawers into Requiem rounds (1 + 80 blood = 2) as soon as you have the recipe. For the Chef and Chunk, craft the Hemolytic Injector (1 Scrap + 60 blood).
- Shop (Parlor coin lockers). The Hip Pouch comes first; then the Override Manual (blood capacity 100 to 150: without it you can’t craft Steroids or a Stabilizer, which cost 110 or more) or the Stabilizer and Steroids. The Care Center’s 21 coins buy everything with 4 to spare.
- Bottle. Keep one Empty Bottle (the Dining Room one or one from chapter 2) for Internal Dispute.
- Saving. There are 3 safe rooms with a typewriter: Guard Office, Lead Researcher’s Office Lounge and Custodian’s Office. There is no chapter select: keep a separate manual save. On Standard (Classic) and Insanity saving costs an Ink Ribbon: there are ribbons in the Guard Office, West Corridor, Closet, Custodian’s Office, Pantry and Security Manager’s Office, and Ink Ribbon Tins (tin + 40 blood = 1 ribbon) in the Guard Office (2), Parlor (2), Lead Researcher’s Office Lounge, Records Room, Cold Storage (2) and Isolation Ward Lobby.
- Missables. Almost everything is still there after the basement (the point of no return is the VIP Suite elevator, chapter 6), but these don’t wait: Chunk (he’s gone once you leave Emily in the Security Manager’s Office), the Internal Dispute pair in the Waiting Room, and the Chef if you want the Pantry as Grace.
- Challenges. Switch 2 has no trophies: these are Challenges under Bonuses > Challenges, paid in CP. This chapter gives Internal Dispute, Order Up!, Deadly Duet and Bang for Your Buck (500 CP each), Grace and Goliath (1,000 CP) and, at 200 CP, Out of Sight, Out of Mind, Fatal Dose, Science!, The Power of Blood, Blood! More Blood!, Like Mother, Like Daughter and Descent Into Darkness.
- Difficulty. On Casual your health refills on its own to yellow, enemies have less health and hit softer, and items sit in the same places as on Standard. Insanity changes coins, keys, codes and enemies: read “If you play Insanity” before you start.
Grace’s rules (Switch 2)
- Controls. ZL aims, ZR shoots or slashes, right stick click crouches, A interacts. A head or leg shot staggers: shove with A and finish.
- Hemolytic Injector. ZR from behind an enemy that hasn’t seen you, or on a staggered one: it kills instantly and leaves no corpse to mutate.
- Blister Heads. Any zombie you kill without destroying its head or injecting it can come back as a Blister Head: fast, tough, with a lethal grab.
- Doors. Level 1 doors are blue and the Level 2 door is green; cherub doors are safe rooms. If something chases you, cross into the Central Hall: it loses track of you (the Chef included).
- Map. Blood pools you’ve seen, locked drawers you’ve walked near and Level 1 doors are marked on the map: use it to backtrack once you have the Blood Collector or a lockpick.
Knives and basic crafting. A summary of the “How Grace fights” card on the Guide page:
- Knives (Makeshift Knife, Hunting Knife) have durability and wear down with every slash.
- When a zombie grabs you, Grace automatically uses a knife from her inventory to break free, and the knife stays lodged in that enemy: you only get it back by killing it. With no knife, a grab means a bite.
- With no recipe or blood you can: break down 1 Makeshift Knife → 1 Scrap, 1 Hunting Knife → 1 Scrap (even at 1 durability), make 2 Scrap → 1 Makeshift Knife, and combine herbs: 2 Green Herb → Mixed Herb (G+G), 3 Green Herb → Mixed Herb (G+G+G).
- Rule of thumb: always carry 1 knife for grabs, and turn spare or worn knives into Scrap. Scrap is what limits everything: every Hemolytic Injector and every bullet recipe needs one.
Central Hall
You have the Requiem with 1 round. In the SW corner of the 2F, by the statue, there’s a Green Herb. Behind the reception desk is the door with three slots (Sun, Moon, Star): the goal of the chapter. Both wing doors need keycards. The Guard Office is on the ground floor, off the Central Hall.
Guard Office (safe room: typewriter + Item Box)
- Antique Coin #2 on the desk (NE), by the monitor.
- Care Center Pamphlet (file #9) on the coffee table: it introduces the three executives and their quartz (Chairman = Moon, Lead Researcher = Sun, Security Manager = Star).
- Whiteboard Scrawl (#10) on the SW wall, by the steps to the Medication Room.
- Green Herb by the fireplace (W).
- On Standard (Classic) and Insanity, an Ink Ribbon + 2 Ink Ribbon Tins on the card cabinet (NW).
Store anything in the box: the Out of Sight, Out of Mind Challenge.
Medication Room (red-lit door)
Go up the Guard Office steps. Emily sits in the glass cell (Observation Room 1); the one next to it (Observation Room 2) needs Level 3. The man who looks dead gasps: in the cutscene you take the West Wing Keycard. There’s Infected Blood (70) on the floor by the body: come back once you have the Blood Collector. Careful: that man may get up later.
South West Corridor and Service Hallway
The keycard opens the West Wing door (left of the Central Hall stairs) into the South West Corridor. Its exits: the Central Hall, the Parlor (the unicorn door, needs a red jewel), the Service Hallway, the West Corridor (that door opens from the other side) and the South West Stairway. Go left to the Service Hallway, with the Level 1 gate to the garage, and go through the swinging door into the Kitchen.
Kitchen: the Chef
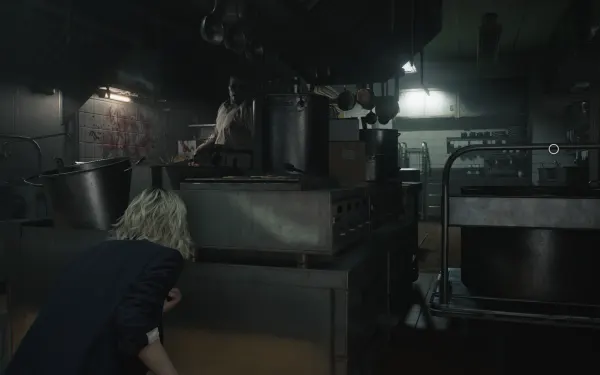
The Chef chops meat in the NW area and a cart with a stew pot blocks the exit to the West Corridor. Don’t fight: one hit of his cleaver knocks Grace down.
- Push the cart only while he chops (3 to 6 chops).
- When he mutters “Next… is…” or says “Wrong…”, he turns to the pot: let go and hide.
- About 3 pushes open a gap.
Skip: let him see you, let him swing 4 times, and run past right after the fourth without touching the pot. Blood: 60 in the bucket (W) and 100 from his corpse if you kill him.
The Pantry door is the Kitchen’s third exit (the other two lead to the Service Hallway and the West Corridor), and it stays locked until you have the Pantry Key, which the Chef drops when he dies (on Insanity it’s in the Closet). See “Pantry” below.
West Corridor and Restroom
The corridor is dark. A Zombie Staff Member turns lights off and attacks if you use the flashlight too much or walk past him.
- Take the Makeshift Knife from the SW cabinet: it’s your first knife (read “Knives and basic crafting” above; keep it for grabs).
- Flip the switch at the far end, hide behind the small partition on the left while he goes to turn it off, then pass.
In the NW area there’s a locked drawer (Rare Metal, needs a Lockpick). Ink Ribbon on the cabinet (NE) (Standard (Classic) and Insanity). On the SE floor, a Green Herb (Modern only). Unlock the door at the far end: a shortcut to the South West Corridor and the Central Hall, so you never need the kitchen again.
In the Restroom, the Zombie Cleaner alternates between wiping the mirror and scrubbing the far stalls: when she goes to the far end, take the Green Herb on the sink (NE). The bathtub in the last cubicle holds 100 blood for later.
Dining Room
Three Zombie Staff Members: two feed on the table and a third crawls out from under it with a Hunting Knife, which it drops when killed (all difficulties). Crouch along the right side.
- B934 on the floor (E): it comes empty.
- Empty Bottle on the cabinet on the west side, behind the table: keep it for Internal Dispute.
- 60 blood on the floor (E).
If they chase you, leave by the far door and hop through the broken window in the corridor into the Filing Room.
Filing Room, North West Corridor and North West Stairway
Filing Room. Handgun Ammo ×2 on the desk (SE), the first rounds for the B934, and a Makeshift Knife in the left locker (E). The Filing Storeroom at the back is Level 1.
North West Corridor. In the small lounge, Antique Coin #3 on the cabinet (NW).
North West Stairway. A Wooden Crate by the 1F flight (break it; it holds random items, usually what you’re short of). The Cold Storage door’s valve breaks off in your hands: you come back once you have the Wrench (Custodian’s Office). A zombie crawls out from behind the stairs: head and legs, shove, knife. On 2F, a bucket with 50 blood. On 3F, a Green Herb by the couch and Handgun Ammo ×4 on the cabinet by the Lounge door (stuck: Leon opens it in chapter 4). On Landing 2F is the West Wing map (SW wall); the Kitchenette door is locked from the other side. Landing 2F leads to the Bar & Lounge.
Bar & Lounge
The Zombie Singer in the white dress dances; her screech stuns you and calls zombies, and up close she grabs you and screams in your face. There are 2 Zombie Staff Members with their backs turned.
- Stealth: wait for her to dance to the left, crouch to the piano and take Antique Coin #4 from the keys (they make noise: move off at once).
- Fight: on Standard one Requiem headshot kills a Singer, and she drops Antique Coin #5 (1/2 of Deadly Duet); a thrown Empty Bottle distracts all three.
Loot:
- Behind the bar, by the sink, the S&S M232 (loaded with 9): better than the B934 in every way.
- Safe #1 on the bar: Left 10 → Right 80 → Left 30 = Antique Coins #6-#8 (the code file comes later, but you can open it now).
- Green Herb on the table (N) and a large vase (SE).
You’ll pass through here several times: zombies you kill without destroying the head can come back as Blister Heads.
Gallery Corridor and Gallery
A Zombie Staff Member in the SE part of the Gallery Corridor. To the right of the Chairman’s Office Lounge door is another locked drawer (Rare Metal). The Warped Closet in the W corner is Leon’s. In the Gallery (the balcony over the dining room, no enemies) follow the blood trail to the lab coat: Folded Note (#11). Handgun Ammo ×6 on the round table (S) and a Green Herb on the east table.
Chairman’s Office Lounge and Chairman’s Office: the Moon Quartz
Chairman’s Office Lounge. The Unicorn Trinket Box is on the drawers NE of the entrance: examine it, turn it and press the hidden button on the back → Red Jewel (you can leave the box). The light switch is next to it. Copy of an Email to a Manager (#12) on the SW drawers, left of the puzzle cabinet; Scrap inside the small breakable on the coffee table; and on the same table, the notebook with a torn page.
Chairman’s Office. A zombie is choking the dead secretary with a wine bottle (he swings and throws it). Before he stands up, take Handgun Ammo ×2 from the desk drawer (×3 on Insanity); then circle the desk, shoot him down and finish him. Pencil on the desk, Note to the Chairman (#13) in the waste bin (NW) and 70 blood (SW).
Moon Quartz puzzle:
- Go back to the Chairman’s Office Lounge and use the Pencil on the notebook on the coffee table.
- Shade the page → Chairman’s Note (#14): Moon, Sun, Star, Moon.
- Enter it on the puzzle cabinet in that room’s SW corner (by the fireplace, next to the Copy of an Email drawers) → Moon Quartz.
Leave by the white door at the end of the Gallery Corridor (a zombie guards it): it opens onto the Central Hall 2F and stays as a shortcut. Put the Moon Quartz in the reception door and save at the Guard Office.
Parlor: the coin lockers
From now on the Chef patrols the South West Corridor towards the dining room; he’s noisy: wait at the West Wing entrance for him to pass. Put the Red Jewel in the unicorn door and close it behind you.
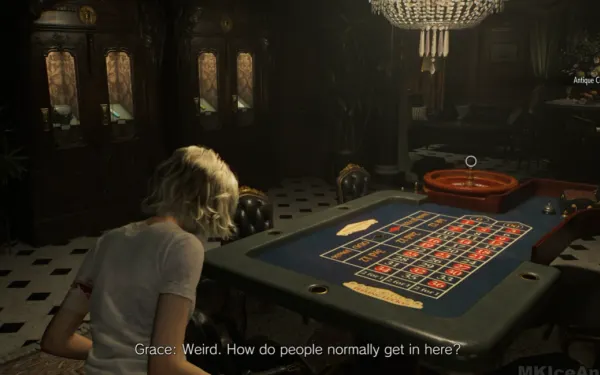
- Antique Coin #9 on the edge of the roulette table, #10 on the edge of the bar (N) and #11 inside the small green breakable urn on the bar (NE); also smash the big blue vase behind the bar.
- Green Herb on the shelf (NW) and 2 Ink Ribbon Tins on the round table (SE) (Standard (Classic) and Insanity).
- The East Wing Keycard is in the hand of the severed arm under the table (NW): rotate the arm to take it.
- The “dead” doctor in the NW corner gets up once you have Level 1 (on Insanity, already on this first visit: see below).
Roulette: shoot 7, 15 or 29 on the betting table and spin the wheel; if the ball lands on your number, a bonus coin appears (it doesn’t count among the 22, once per playthrough, pure luck: save first).
Coin lockers (west wall): 1 Hip Pouch (3), 2 Stabilizer (4), 3 Steroids (4), 4 Override Manual (6); 17 in total. If you took #1-#11 you hold 11: the Hip Pouch (+2 slots) goes now, and with the rest you choose between the Override Manual or the Stabilizer and Steroids.
East Wing Lobby
The East Wing Keycard opens the East Wing door from the Central Hall. Mr. Raccoon #2 on the corner of the reception desk (E): shoot or slash it. Locked drawer in the SE corner (Rare Metal). Green Herb on the floor, NW of the north corridor.
Examination Room
On the table, the Organless Corpse: it wears the ID Wristband (Level 2) but is missing organs. Safe #2 in the SE corner cabinet: Right 30 → Left 10 → Right 50 = Antique Coins #12-#14. Hemolytic Injector on the white bench (E). To the left, a Zombie Doctor with his back turned: crouch, sneak up and press ZR → the Fatal Dose Challenge. From here on, save injectors for the big threats.
Treatment Room and North East Corridor
A Zombie Doctor by the operating table and a Zombie Patient that springs up from the bed (leave its head intact and it can come back as a Blister Head). A bucket with 50 blood.
The North East Corridor joins the Treatment Room, the Blood Lab and the Isolation Ward Lobby. There’s another light-switch zombie: flip a light on the Treatment Room side and let him walk past, or ignore him.
Blood Lab: the Blood Collector and the first analysis
On the middle bench, the Blood Collector and Blood Compound Synthesis (#15); on the east bench, the Blood Specimen (Denatured) (purple). Scrap in the locker (NE) and 60 blood in the bucket (SE of the bench).
Analyzer. Turn every cube into a sphere; clicking a cube flips it and every node connected to it.
- Denatured = click the middle cube (1 step) → recipes Handgun Ammo (1 Scrap + 40 = 8 rounds) and Hemolytic Injector (1 Scrap + 60), the Science! Challenge.
Collect blood, craft anything and The Power of Blood pops; 60 blood makes 8 rounds or 1 injector, not both. Spending 300 blood in total earns Blood! More Blood!. The Blood Reports Room door is Level 1. A second analyzer sits in the West Wing 2F Office.
Isolation Ward Lobby and Connecting Corridor
From the North East Corridor, step into the Isolation Ward Lobby: it’s an open passage between the North East Corridor and the Connecting Corridor, not a Level 2 area. Only the door from the Lobby to the Isolation Ward Entry needs the ID Wristband (Level 2). On Standard (Classic) and Insanity, take the Ink Ribbon Tin from the bed (NE) now.
Connecting Corridor (red-lit, south of the Blood Lab). It joins the Lobby, the Waiting Room and the East Stairway. Three Zombie Doctors walk towards you, one with a big bonesaw (it kills fast: give it room). One drops a Med Injector.
- Stealth: crouch behind the row of plants by the fireplace; the bonesaw surgeon walks on to the Treatment Room and the other two turn back.
- Aggressive: they walk in a line, ideal for Bang for Your Buck with your Requiem round.
Waiting Room: Internal Dispute
Save first and kill nobody here. Enter through the corridor door on the right. The Zombie Blind Patient (white gown, IV stand) hunts by sound; the Zombie Cleaner scrubs by the Closet.
- Break the first vase on the right and hide in the corner: both come over.
- When they stand side by side, throw the Empty Bottle at the cleaner: the blind one hits her → Internal Dispute.
- Don’t let them hear your footsteps and don’t dawdle: if you take too long, the cleaner leaves to clean up the three corpses in the corridor.
- Afterwards, finish the blind one with an injector from behind: she drops a Transfusion Bag (50).
Loot: Antique Coin #15 on the table facing the east door; Safe Replacements (#16) on the SW bench, next to the open safe holding Antique Coins #16-#17; Scrap in the reception desk drawer and in a small breakable (NW of the seating area); 2 large vases (N and NW); 30 blood by the spilt bucket (S). The Closet is Level 1. Unlock the door to the East Wing Lobby (shortcut).
East Stairway
In the lounge at the foot of the stairs (1F): Mr. Raccoon #3 on the round table (SE), Antique Coin #18 on the coffee table between the sofas and Antique Coin #19 inside the small vase on top of the big cabinet (E). Going up, 2 zombies wait (a nurse with a syringe): headshots from range and back off. On the 2F is the East Wing map, by the Lead Researcher’s Office Lounge door.
Lead Researcher’s Office Lounge and Lead Researcher’s Office
Lounge (safe room: typewriter, no item box). Lockpick #1 on the small cabinet (E), left of the typewriter, and Scrap in the large vase (NE); Ink Ribbon Tin on the cabinets along the south side (Standard (Classic) and Insanity). Use the lockpick on the East Wing Lobby drawer → Rare Metal and the Like Mother, Like Daughter Challenge.
Lead Researcher’s Office. Green Herb on the chest of drawers (SW), Lead Researcher’s Picture 2 (#17) on the cabinet (S), Picture 1 (#18) and Picture 3 (#19, framed) on the desk (E) and Lead Researcher’s Message (#20) on the NE cabinet: it points to a corrosive in the Conference Room. The padlocked cabinet (NW) holds the Sun Quartz.
ID Wristband (Level 1) and Chunk
At the end of the East Stairway 2F corridor, a body in the Locker Room doorway wears the ID Wristband (Level 1) (you need a free slot). As you approach, Chunk smashes through the archway and chases you: grab the band and get into the Lead Researcher’s Office or down to the Waiting Room, where he can’t follow. From now on he patrols the long East Wing 1F hallway (see the boss section).
Closet (Level 1, in the Waiting Room)
- Blood Specimen (Converged) (green) on the medical cabinet (S).
- Handgun Ammo ×8 and Scrap on the benches (SW).
- A silver case with 12.7x55mm Ammo ×1 (SW corner).
- Ink Ribbon on the table (N) (Standard (Classic) and Insanity).
Where to analyse it. The Closet has no analyzer. The nearest is the Blood Lab one: Waiting Room → Connecting Corridor → Isolation Ward Lobby → North East Corridor → Blood Lab. The other sits in the West Wing 2F Office.
Converged (2 steps): click the top middle cube, then the second cube from the bottom → Med Injector (1 Green Herb + 60, or 1 Mixed Herb (G+G) + 30) and 12.7x55mm Ammo (1 Rare Metal + 80 = 2 rounds).
Chunk trick: make noise at the Waiting Room door so he follows, then switch on a light as you enter the Blood Lab corridor: the light-switch zombie walks into his path and Chunk squashes it.
Blood Reports Room (Level 1, inside the Blood Lab)
Empty Injector #1 and Victor’s Journal Entry (#21) on the NE bench; Blood Specimen (Reversible) (white) on the NE trolley; Transfusion Bag (50) in the cabinet (N); Green Herb on the floor (SE); Scrap on the middle shelves (E). On Insanity there’s also a Zombie Patient in the NE corner.
Reversible (4 steps): bottom-left corner cube → middle cube → top-right cube → second cube from the top → Steroids and Stabilizer (1 Empty Injector + 110 blood, and each one you craft costs 10 more).
Locker Room and Conference Room
Getting there. The Conference Room can only be reached through the Locker Room: take the East Stairway up to 2F, go through the doorway where the Level 1 wristband body lay, and continue through the Conference Room Entry to the Conference Room. The second Singer’s back room (the Research Lab) opens off the Conference Room.
Locker Room (2F). Wait for Chunk to wander off towards the Blood Lab, then go up. Examination Room Safe Code (#22) on the collapsed locker (S), 80 blood on the floor, Scrap in the right locker (E) and a Wooden Crate (N).
Conference Room and Research Lab. As you enter, Antique Coin #20 on the white table (N). When you move in, 3 Zombie Doctors rise (knife, syringe and bonesaw); they drop a Hunting Knife (the chapter’s second) and a Med Injector. There are 2 Wooden Crates (SE). The second Zombie Singer (turquoise dress) screams on sight, breaking the windows and waking the others.
- Back into the Conference Room Entry and let the three doctors come to you in a line (another Bang for Your Buck chance).
- The Singer stays put unless you go further in or shoot her.
- In the Research Lab, kill the Singer → Antique Coin #21 and the Deadly Duet Challenge (if it doesn’t pop, restart and open the Challenges menu).
Patient Medical Records (#23) by the computer and the Corrosive (the tall, thin blue bottle) on the medical cabinet (NW).
Sun Quartz
Go back to the Lead Researcher’s Office: a Victor cutscene, which also takes Chunk off the halls for a while.
- Use the Corrosive on the padlock.
- Press Star, Sun, Moon, Sun (the two halves are in the backgrounds of pictures 2 and 1) → Sun Quartz + Leatherbound Notebook.
- Examine the notebook and open the clasp → Unlocking the Organ Transport Box (#24) and Spencer’s Research I (#25); then store the notebook in the box.
Put the Sun Quartz in the Central Hall.
Filing Storeroom and Service Hallway (Level 1, West Wing)
In the Filing Storeroom: Hip Pouch #2 + Handgun Ammo ×10 on the metal cabinet (SW). Open this door no matter what: if Grace doesn’t, Leon can’t reach the Warped Closet inside. After Level 1, a Zombie Staff Member appears in the Filing Room and another guards the Service Hallway gate: inject it from behind or blow its head off while it stands still; kill it with the head intact and it rises as a Blister Head when you come back from the garage.
Garage Entry and Custodian’s Office (safe room: typewriter + Item Box)
The Service Hallway’s Level 1 gate leads to the Garage Entry, which joins the Service Hallway, the Custodian’s Office, the Garage and the South West Stairway.
- Garage Entry: Green Herb (NW cabinet) and Construction Notice (#26) on the west wall.
- Custodian’s Office: Wrench in the green tray on the desk (NW), Lockpick #2 in the left locker (E) and Scrap on the card catalogue (S); Ink Ribbon by the printer (W) (Standard (Classic) and Insanity).
Use that lockpick on the West Corridor drawer → Rare Metal.
Garage: the Artificial Lungs and the bulldozer
Go around the partitions to the van at the end (NW, cold mist). In the back, the Organ Transport Box: examine it, turn it, open the back panel with A and do, in this order:
- Dial AUTO to HAND.
- Raise the right-hand slider to the middle.
- Switch 5.
- Switch 2.
- Dial HAND to AUTO → Artificial Lungs (use Reset if you slip).
There’s a Wooden Crate (NW).
The bulldozer. On the way out, a Zombie Staff Member drives a bulldozer through the east wall. Back off around the partitions and shoot the driver (on Standard one shot through the window is enough). On Insanity that isn’t enough: then also shoot the flaming area under the plough to stop it moving. Once it stops against the truck, climb over or crawl under the treads on the left side; you can’t get back to the van after that. The broken gate opens the SE bay, which was closed before: 2 Wooden Crates.
South West Stairway, Office and Records Room
South West Stairway. From the Garage Entry, this stairway climbs to the 2F Office and has a door onto the South West Corridor: use it as your shortcut back to the Central Hall. A Wooden Crate on the 1F and 2 at the 3F dead end (Handgun Ammo and Scrap).
Office (2F).
- The second analyzer.
- Empty Bottle on the east desk (by the Records Room door).
- Lockpick #3 on the NW desk.
- Bar & Lounge Safe Code (#27) on the rightmost desk on the west side (the first one you reach) and Background Check (#28) on the NE desk.
- Don’t break the Wooden Crate here unprepared: the noise brings the Records Room blind patient charging in.
Records Room. A Zombie Staff Member and a Zombie Blind Patient on the north side; throw a bottle so the blind one kills the other (an alternative Internal Dispute spot) and finish it from behind → Transfusion Bag (50). Makeshift Knife in the left locker (N), Empty Injector #2 on the shelves (NE), Disposal Team Report (#29) on the cardboard box at the end of the middle row, Ink Ribbon Tin on the filing cabinet (NE) (Standard (Classic) and Insanity) and a Wooden Crate (SE). On Insanity, also a Transfusion Bag (100) on the south shelves. The Mr. Raccoon you hear inside the Warped Closet (NW) is Leon’s.
Kitchenette
It’s the north door of the 2F Office, by the NE desk. Mr. Raccoon #4 on the coffee machine (NE) and a Green Herb on the bench (N). Unlock the door to Landing 2F (shortcut to the Bar & Lounge). If she’s still alive, the bar Singer may be wandering that hallway: inject her from behind or avoid her. If you skipped the Bar & Lounge, clear it now, and use Lockpick #3 on the Gallery Corridor drawer → Rare Metal.
Cold Storage (North West Stairway 1F)
Use the Wrench on the valve. The Artificial Heart hangs from the hooks in the middle; Scrap on the bench (NE), Transfusion Bag (80) in the metal cabinet (SW), a Wooden Crate (NW) and 2 Ink Ribbon Tins on the middle bench (Standard (Classic) and Insanity). On the way, the zombie you killed on the stairs rises as a Blister Head, and the Chef’s patrol now covers the whole West Corridor down to the dining room: bring a Requiem round, or stagger and inject.
Pantry (optional, with the Pantry Key)
The door is inside the Kitchen. On Standard the Chef drops the key (how to kill him under “Boss — Chef”, below); on Insanity it’s on the Closet’s medical cabinet.
- Stakeout Takeout Charm in the cardboard box on the shelves (NE): while you carry it, your knife gains power and durability.
- A silver case with 12.7x55mm Ammo ×1 (NE), Scrap (E), 2 buckets with 50 blood each (E), a Wooden Crate (W) and an Ink Ribbon on the shelves (W) (Standard (Classic) and Insanity).
- The Warped Closet (SW) holds Leon’s charm; if Grace opens the Pantry, it stays open for him.
Insanity ambush: 3 Zombie Patients lie on the floor and rise as soon as you enter. Go in with a Requiem round or injectors, or back out into the Kitchen doorway and shoot them in the legs one at a time.
Examination Room: ID Wristband (Level 2)
Put the Artificial Lungs, then the Artificial Heart, into the Organless Corpse. It wakes as a Zombie Patient: shoot it in the head and it drops the ID Wristband (Level 2). If the corridor surgeon has wandered in, inject him from behind. Spend your remaining coins at the Parlor now.
Isolation Ward (Level 2)
Go to the Isolation Ward Lobby (between the North East Corridor and the Connecting Corridor) and use the Level 2 wristband on the green door to the Isolation Ward Entry. Inside: a bucket with 70 blood and a Wooden Crate (S; leave it for the fight later).
- Security Team’s Office (on the right, with the broken window): Double Mutation (#30) on the boxes (N) explains Blister Heads; Nurse’s Log (#31) on the desk; Scrap on the gas trolley (SW) and a Green Herb (SE).
- Security Manager’s Office: Handgun Ammo ×12 on the whiteboard (W) and an Ink Ribbon on the sofa (E) (Standard (Classic) and Insanity). Read the note on the desk (fold its corner): Star, Star, Moon, Sun. The cabinet’s buttons (S) only have braille (left to right: Sun, Moon, Star), so Grace takes the ID Wristband (Level 3) from the security manager’s body and the game sends you to fetch Emily.
Leaving the Isolation Ward
4 Zombie Patients leave an isolation room (one with a Hunting Knife, which it drops when killed): two head for the Waiting Room and two for the Blood Lab corridor. Shoot them from behind while they walk in a line: a third Bang for Your Buck chance.
- Isolation Room 1: Scrap and a Wooden Crate.
- Isolation Room 2: Transfusion Bag (60) and a seated zombie.
- Isolation Room 3: Transfusion Bag (50), Handgun Ammo ×9 and a zombie lying down.
Medication Room (Level 3)
Open the empty cell first (Observation Room 2): Mr. Raccoon #5 on the floor behind the bed (the doll has no use). Then open Emily’s cell.
Carrying Emily
You have to take her to the Security Manager’s Office (in the East Wing’s Isolation Ward). While carrying her you can’t fight, crouch or move fast, and the only place to set her down on the way is the Guard Office couch, next to the Medication Room: leave her there, clear the route, then come back for her.
- The zombies you killed leaving the Isolation Ward rise as Blister Heads (usually 1, often 2): a Requiem round, or stagger and inject.
- Chunk returns to block the hallway to the Isolation Ward: this is your last chance for Grace and Goliath. Sometimes you can bait him into trampling the stragglers.
- It’s also the last safe chance to kill the Chef as Grace before the basement.
Isolation Ward defence
Emily goes to work on the Security Manager’s Office cabinet and you cover her.
- Wave 1: a zombie from the small room on the right and the turned security manager flanking from the left. Use the small room before the office and its window (you can vault it) to make space.
- Wave 2: one more in the right-hand room and another on the opposite side (on Insanity there are 2 Zombie Staff Members in the Isolation Ward instead of 1); shove staggered zombies into the others.
- Finale: one of the first two corpses rises as a Blister Head (injecting one body makes the other turn, so don’t spend two): a Requiem round, or work the door and the window.
There’s a Transfusion Bag in the right-hand room, and behind the door that opens by the exit gate there’s another Transfusion Bag and Handgun Ammo. When it’s over, The Girl snatches Emily and the Star Quartz and dives into a pit. Pick up whatever is left (2 Blister Heads appear in the Isolation Ward Lobby after this) and interact with the hole to go down (the Descent Into Darkness Challenge). The game cuts to Leon (chapter 4) before the basement.
If you play Insanity
Enemies. Per Game8, regular zombies can mutate into Blister Heads on the spot after being killed, and a grab can kill Grace from full health: always carry a knife and finish every kill by destroying the head or with an injector. Extra enemies that change your routes:
- North West Corridor: one more Zombie Staff Member, wandering the Antique Coin #3 route.
- Blood Reports Room: a Zombie Patient in the NE corner.
- Parlor: the “dead” Zombie Doctor in the NW corner gets up while you explore on your first visit, not after Level 1: if you closed the unicorn door behind you, you face him alone.
- Pantry: 3 Zombie Patients that rise as you enter.
- Isolation Ward defence: 2 Zombie Staff Members instead of 1.
- The Singer survives a Requiem headshot.
Items that change.
- B934 on the Waiting Room reception desk; the Unicorn Trinket Box by the model ship in the Chairman’s Office; Handgun Ammo ×3 (not ×2) in the Chairman’s Office desk drawer.
- Transfusion Bag (70) on the Dining Room west cabinet and Transfusion Bag (100) on the Records Room south shelves.
- An extra Empty Injector on the kitchen counter (E).
- Closet: the medical cabinet (S) holds the Pantry Key; the benches (SW) hold the Blood Specimen (Polymerized) and an Empty Bottle; the silver case holds the R.I.P. Knife; the Ink Ribbon is still on the table. The Converged specimen is on the Records Room NE filing cabinet.
- The Chef drops 2 coins instead of the key. The Chef skip still works.
Blood Specimen (Polymerized) (Insanity only). Take it to the Blood Lab analyzer and click: the second cube on the left, then the second cube on the right, then the second cube in the middle (Game8; a reader sums it up as left-middle, right-middle, centre). It unlocks the R.I.P. Knife (1 Scrap + 110 blood: you need the Override Manual for 150 capacity) and Handgun Ammo ×30 (1 Scrap + 120).
Safes: Bar & Lounge Right 20 → Left 50 → Right 30; Examination Room Left 50 → Right 30 → Left 90; the Waiting Room one is empty. Parlor lockers: Hip Pouch (3), Handgun Ammo ×30 (5), R.I.P. Knife (5) and Override Manual (6).
Coins. They move and many are dropped by specific enemies. 12 Standard coins are gone: the Guard Office desk, the North West Corridor cabinet, the piano, all 3 in the Parlor (roulette table, bar and urn), the Waiting Room table and the 2 in its open safe, both East Stairway 1F coins and the Conference Room table. Where they are in this chapter (28, plus the roulette one):
- Kitchen: the Chef (2) and inside the scales in the NE corner.
- West Corridor: the light-switch zombie.
- Restroom: the Zombie Cleaner and the toilet in the middle stall.
- Dining Room: the breakable teapot on the west side of the table.
- Bar & Lounge: the Singer and the safe (3).
- Chairman’s Office: the zombie at the desk.
- Parlor: the roulette (luck, once per playthrough).
- East Wing Lobby: the cabinet drawer halfway along the north corridor.
- Examination Room: the safe (3).
- Treatment Room: the bloody gurney in the middle.
- North East Corridor: the light-switch zombie.
- Blood Lab: the breakable teapot on the floor, south of the middle bench.
- Connecting Corridor: the bonesaw surgeon.
- Waiting Room: the Zombie Cleaner, the IV-stand Zombie Blind Patient and the spilt bucket (S).
- East Stairway 2F: the plant pot in the SE corner, by the Lead Researcher’s Office.
- Locker Room: the breakable in the open locker (NE) (Chunk drops 4 more only if you own the Eye Spy Charm from an earlier run).
- Research Lab: the Singer.
- Records Room: the Zombie Blind Patient and the breakable on the NE shelves.
Without killing anyone you collect 20 coins (counting the 2 Wrenwood coins, which wait in the item box, the chapter 2 Nurses’ Station coin and the chapter 6 Courtyard chair coin), one more than the 19 the Parlor needs.
Boss — Chef (optional)
Arena: his patrol of the West Wing 1F. Weak point: his back (injector) and his head. Danger: his cleaver, as long as Grace is tall, knocks her down in one hit. Reward: Pantry Key, 100 blood from the corpse and the Order Up! Challenge.
- Get the Blood Lab recipe and craft 1 Hemolytic Injector (1 Scrap + 60 blood). It’s the cheapest and safest method.
- Wait crouched where his route walks past you; a good spot is as he passes the Filing Room, by the dining room. When his back is turned, crouch up to him and press ZR: instant kill.
- If he spots you, don’t fight: run to the Central Hall. He loses track of you and moves elsewhere; try again.
- Gun alternative: bait him down the hall towards the Central Hall door; at the door he stops chasing and turns, giving you free shots. One Requiem round is not enough on Standard: on Casual it takes 1 Requiem headshot + 4-5 pistol headshots, and more on Standard. The S&S M232 alone works, but costs a lot of ammo.
- Pick up the key and open the Pantry (Stakeout Takeout Charm). If Grace doesn’t kill him, Leon can in chapter 4; on Insanity he drops 2 Antique Coins and the key is in the Closet.
Boss — Chunk (optional)
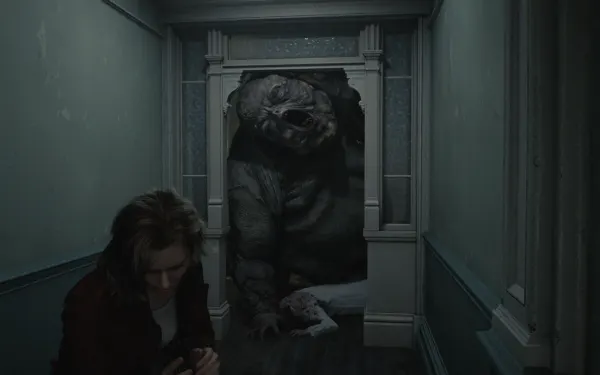
Arena: the long East Wing 1F hallway, between the Examination Room, the Blood Lab and the Waiting Room; his route shifts with the story. He’s slow, charges in a straight line and fills the corridors; he can’t enter the Lead Researcher’s Office, the Examination Room or the Waiting Room, gets stuck in narrow door frames and squashes zombies in his path. He disappears after the Victor cutscene and returns when you open Emily’s cell: that’s the last window. Reward: Eye Spy Charm (carrying it raises your chance of surviving fatal damage) and Grace and Goliath (1,000 CP). If you already own the charm from an earlier run, he drops 4 Antique Coins.
- Prepare 3 attacks: 3 Hemolytic Injectors (3 Scrap + 180 blood; with 100 capacity, craft them one at a time), or 2 injectors + 1 Requiem round. With the Requiem alone, count on 3 hits on Standard (one source says 2 are enough).
- Wait in the doorway of a safe room (Examination Room or Waiting Room) for him to shuffle past.
- Crouch out behind him and stab the injector (ZR) into his back.
- Duck back into the safe room, wait for him to calm down and resume his route, and repeat up to 3 times.
- With the Requiem, go for the head from the Level 2 corridor towards the Isolation Ward, where he can’t get through, or from a door frame that gets him stuck. On Casual, 1 Requiem headshot + 15-16 S&S M232 headshots is enough.
- He dies by shrivelling and exploding: pick up the Eye Spy Charm.
Don’t leave without:
- Antique Coins #2-#21 (plus the roulette one) and Mr. Raccoon #2-#5.
- Files #9-#31 and both safes.
- The Filing Storeroom Hip Pouch (and that door opened for Leon).
- The 3 Rare Metal drawers, the 3 Blood Specimens (4 on Insanity) and the 2 Empty Injectors.
- Deadly Duet, Internal Dispute and, before you leave Emily in the Security Manager’s Office, Chunk.
- At least 1 knife in your inventory for the basement’s grabs.
- Kill the Chef before going down if you want the Pantry as Grace (otherwise Leon can do it in chapter 4); the rest of the Care Center stays open after the basement, until the VIP Suite (chapter 6).