You play Grace Ashcroft, then Leon S. Kennedy. Grace wakes up on 2F of the Rhodes Hill Chronic Care Center, strapped to a machine that draws her blood, unarmed, with The Girl (the “Shadow Ghost” of the children’s book) hunting her through the ceilings. Her part is a stealth escape through five rooms and one corridor: get the Cherub Key, the Lighter, the Screwdriver and the Fuse to open the gate to the Central Hall. When The Girl catches her at the gate, the game switches to Leon, who comes in on 1F, survives a Code 6 with a chainsaw-wielding Zombie Doctor in the Rehabilitation Ward and climbs to the Central Hall to rescue her and hand her the Requiem.
Chapter order: Grace: Room 203 (Progress Notes) → Nurses’ Corridor (light switches, horse statue, barred gate with the fuse box) → Cherub Key → Room 201 (typewriter, Lighter) → Room 202 (Note on Cardboard Box) → Prep Room → Nurses’ Station: The Girl appears → shelter in Room 203 → Nurses’ Station (Antique Coin #1, Screwdriver) → chase → Room 201 (Fuse) → the gate. Leon: Central Hall → Elevator Corridor → Rehabilitation Ward (Code 6, chainsaw doctor) → the Storeroom wave → door cut open with the chainsaw → Rehabilitation Overflow Ward → South East Stairway (Mr. Raccoon #1) → Central Lounge → Central Hall 2F: Leon rescues Grace.
Before you start:
- Grace’s kit. She starts unarmed, with no way to hurt The Girl: this section is about hiding, not fighting. Move crouched (right stick click: it makes less noise). There are 3 Empty Bottles in the chapter (Prep Room, Room 201 wardrobe and the Nurses’ Corridor round table): use one or two to distract her and keep at least one for the Internal Dispute Challenge in chapter 3.
- Saving. The only typewriter is in Room 201. Save there before you take the Fuse: the final sprint is where most deaths happen. On Standard (Classic) and Insanity each save uses an Ink Ribbon (there are 2 here: the Room 201 table and the Nurses’ Station drawer). As Leon there is no save point: it all rides on the autosave.
- Leon’s kit. He arrives with the Alligator Snapper, whatever is left of the Requiem and the Hatchet. Spend every Requiem round on the chainsaw doctor: Grace gets the revolver with 1 round whatever you do.
- Shop. Grace has no shop in this chapter. Neither does Leon on a first run: the Central Hall and Elevator Corridor Supply Boxes only appear on later runs (what to buy there is below).
- Missables ahead. Antique Coin #1 is lost if you move the Nurses’ Station trolley before climbing onto it. Mr. Raccoon #1 sits on a stairway Leon never walks through again.
- Challenges, not trophies. Switch 2 has no trophies: the goals are Challenges, under Bonuses > Challenges, and each one pays CP for Special Content. This chapter gives The Ol’ Fashioned Way, Untouchable, Chop Chop and The Hunt Begins (200 CP each).
- Speed Demon (finish the story releasing Elpis in under 4 hours): PowerPyx reaches the attic as Leon (chapter 4) around 0:45:00 on a 3-hour route, with an hour to spare.
The Girl’s rules (Grace)
- Light burns her. The Girl won’t enter lit rooms: only a room with its ceiling light on (a wall switch) protects you.
- The Lighter does not protect you. Its flame only lets you see; per IGN, it isn’t enough to stop her attacking. Keep it off except in the dark Prep Room or when you search for items: its light won’t save you and makes you easier to spot.
- She hunts by sound. Running, pushing furniture and knocking things over bring her. Crouched, she barely hears you.
- She travels through the ceiling. She moves through holes in the ceiling: you hear chains and dust falls just before she drops. If you hear chains, don’t stand under a hole.
- She kills your shelters. As you progress, she breaks the lights in the rooms you hid in.
- Bottles. An Empty Bottle thrown far away sends her to the noise.
Room 203
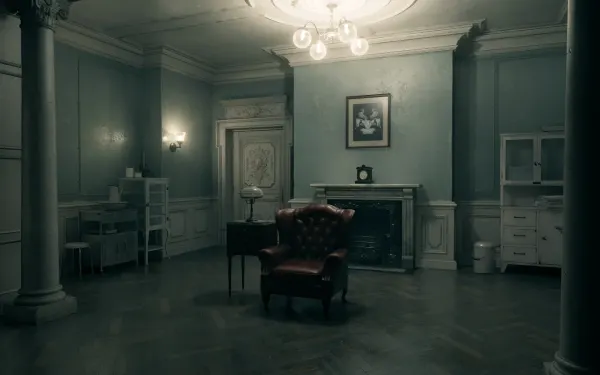
Grace wakes up strapped to a machine that draws her blood. The Progress Notes (file 7) are on the small set of drawers next to the armchair. The light switch is by the door: leave the light on, this room is your first shelter. Leave by the only door, into the Nurses’ Corridor.
Nurses’ Corridor
Out of Room 203, to the right is a red light and the Prep Room. If you switch its light on before you have the Lighter, it shorts out and an Empty Bottle rolls towards you (bottle 1 of 3).
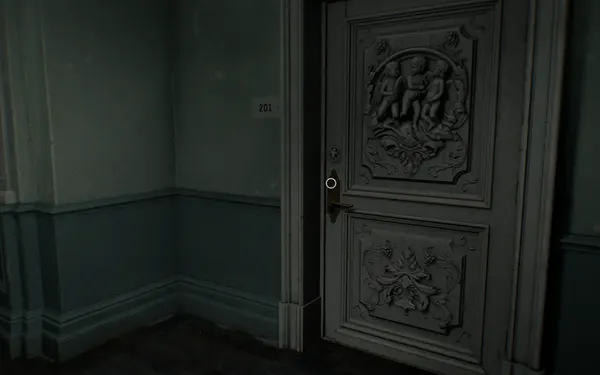
Take the long hall to the left of the red light and flip the switch under the second red light: it lights the far end, where the horse statue is. The Room 201 door (with a cherub) is locked. Turn left at the statue to reach the barred gate and its half-empty fuse box. A “Code 6” announcement plays over the speakers.
Third Empty Bottle. It sits on the small round table in the central offshoot of the corridor, but you only see it with the Lighter equipped. Pick it up on your way back from Room 201 or 202, once you have the Lighter.
Cherub Key
In the drawer of the small table with a lamp next to the gate, at the southwest end of the corridor. It opens Room 201. The gate needs a single Fuse, the one in Room 201 (one guide mentions two; the other sources agree on one).
Room 201 (typewriter)
Walk back down the hall to the horse statue and open the cherub door with the Cherub Key.
- Typewriter: the game’s first, and Grace’s only one in this chapter.
- Empty Bottle in the wardrobe, southwest of the main room (bottle 2 of 3).
- Lighter on the shelves of the small west room (the walk-in closet).
- Fuse behind that closet’s wall panel: you need a screwdriver. You don’t have one yet.
- Ink Ribbon on the round table (north), Standard (Classic) and Insanity only: saving with it gives the The Ol’ Fashioned Way Challenge (200 CP).
On the way out chains rattle and the chandelier sways: it’s only a jump scare.
Room 202
The lit room full of toys, by the flickering light in the corridor; equip the Lighter to see properly. There is a picture book, “The Shadow Ghost”, with the advice that matters: “stay in the light!”. Open the northwest wardrobe: a lamp falls (jump scare) and inside is the Note on Cardboard Box (file 8). It says the screwdriver is in a toolbox in the Nurses’ Station. On the way out, take the third Empty Bottle from the corridor’s round table.
Prep Room: The Girl’s first appearance
Go back down the hall past the red light and into the Prep Room with the Lighter lit: it is pitch dark and you can’t see anything without it. Cross to the west door, which leads into the Nurses’ Station. As you open it, a body falls on Grace and The Girl appears (cutscene).
Run back to Room 203 (lit) and wait there until the noise in the ceiling hole outside stops. Shortcut: if you stand by the Nurses’ Station door you can slip through it as she passes.
Nurses’ Station: Antique Coin #1 and the Screwdriver
Come back through the Prep Room crouched, with the Lighter off unless you need it. In this order:
- Med Injector on the floor, in the pool of blood to the southwest.
- Before you move the trolley, climb onto it from the far side: Antique Coin #1 is on top of the north locker. If you move the trolley first, The Girl knocks it against the other wall and no source says it can be put back next to the locker: treat it as missable. It isn’t serious: there are 22 coins and the Parlor shop asks for 17.
- Push the trolley towards the shelves. The noise brings The Girl: hide under the small table or the barricade in the corner and keep the debris between you and her. She smashes the trolley into the shelves and leaves.
- Green Herb in the north locker.
- Ink Ribbon (Standard (Classic) and Insanity) in the drawer on the north side: drag the body slumped over the desk away first.
- Climb the trolley and reach the red toolbox on the south shelves: rotate it, open the latch and take the Screwdriver. Shortcut: if you stand under the shelf during the chase, she knocks the trolley into place for you.
The Nurses’ Corridor chase
On the way to Room 201, The Girl smashes through the Nurses’ Station door into the corridor.
- Go back to Room 203: this time she breaks the light and the room stops being safe.
- She then drops at the end of the hall. Loop through the Nurses’ Station and the Prep Room, which form a circuit with the corridor.
- Throw an Empty Bottle east down the hall to pull her away, or crouch in the small corner opposite the red light until she passes.
- Once the corridor is clear, go to Room 201 and save before you touch the panel.
Room 201: the Fuse and the sprint
Go into the closet (the lights go out; watch the ceiling hole) and use the Screwdriver on the panel to take the Fuse. The Girl drops from the ceiling. Run without stopping: out of Room 201, right to the horse statue, left to the gate, and insert the Fuse. Don’t detour for pickups: have everything collected beforehand. Grace dives through the gate, The Girl grabs her and control switches to Leon.
Leon: Central Hall and Elevator Corridor
You play Leon. Switch 2 controls: ZL aim, ZR shoot or swing the Hatchet, L parry with the Hatchet, L + Y sharpen it, R quick heal. No typewriter and, on a first run, no Supply Box.
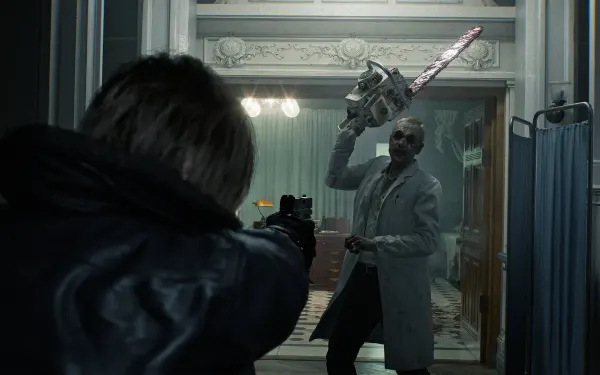
The Admissions Nurse leads Leon from the Central Hall through the Elevator Corridor to the Rehabilitation Ward and its Main Office. Code 6 sounds and a Zombie Doctor with a chainsaw kills the nurse.
On later runs (any difficulty): there is a Supply Box halfway up the Central Hall stairway and another in the middle of the Elevator Corridor, plus a common Tracking Module (1,000 credits) on the wheelchair in the Elevator Corridor’s northwest corner. Both come before the Rehabilitation Ward fight. Sell the Tracking Module and, if you didn’t buy it in Wrenwood, buy the MSBG 500 (2,500) here: on a later run it doesn’t spawn in the chapter 4 attic, and it makes the chainsaw doctor and the Storeroom wave much easier.
Rehabilitation Ward: the chainsaw doctor
2 Zombie Doctors appear in the Main Office cutscene, 3 Zombie Patients rise from the ward beds and, later, 5 Zombie Doctors and 1 Zombie Patient burst out of the Storeroom (about four at once). Some doctors carry a knife, a syringe or a bonesaw (that one kills fast).
- Shoot the chainsaw carrier right away. He takes far more shots than the rest: this is where your Requiem rounds go.
- You can parry the chainsaw with L (if it’s your first parry, the Untouchable Challenge pops, 200 CP), but it ruins the Hatchet’s edge. Sharpen it with L + Y (about 3 seconds) while backing off; a dull Hatchet can’t parry.
- The chainsaw he drops keeps spinning on the floor and hurts you: wait for it to stop before picking it up. The other zombies go for it: shoot them in the knees so they stumble. Careful: a grab from a zombie with the chainsaw stuck in its body is an instant kill.
- With the chainsaw in hand most zombies go down in one swing, but it is slow and can get stuck in a body: Leon kicks the zombie off and has to recover it. Isolate zombies before you use it: every swing leaves you open.
- If they surround you, fall back to the raised area opposite the office and use the Alligator Snapper: head or leg shot, kick, Hatchet finisher (it counts towards the Chop Chop Challenge, 3 finishers, 200 CP, and stops them rising as Blister Heads).
- Pickups: Mixed Herb (G+G) in the glass cabinet in the upper southwest part of the ward (not on Insanity); Handgun Ammo ×5 in the Storeroom’s glass cabinet (southeast); Wooden Crates in the ward (southeast), in the Storeroom (east) and by the Storeroom door.
The barred door and the Rehabilitation Overflow Ward
Once the room is clear, use the chainsaw on the door with a sliding bar next to the Storeroom. Opening it uses up the chainsaw. Cross the Rehabilitation Overflow Ward (no enemies or pickups) to the stairway with the sheet-covered furniture.
South East Stairway: Mr. Raccoon #1
On the fireplace mantel (1F, west side), right in front of you as you walk in, Mr. Raccoon #1 is dancing: shoot it or hit it with the Hatchet. It’s the The Hunt Begins Challenge (200 CP). It is missable: Leon never comes back this way.
Central Hall 2F: the end
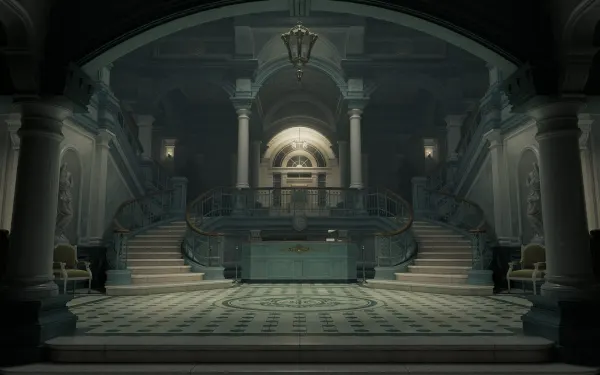
Climb the stairs, cross the Central Lounge and reach Central Hall 2F. Leon saves Grace from The Girl at the gate and hands her the Requiem (with 1 round). Victor appears. End of the chapter.
Difficulty and later runs
- Casual: health refills on its own up to yellow, aim assist has a wider range and enemies have less health and hit softer (it matters for Leon; Grace doesn’t fight here).
- Standard (Classic): the same pickups as Modern, plus the 2 Ink Ribbons; every save uses one.
- Insanity: per Game8, The Girl moves much faster, takes more damage before she’s stunned and recovers much faster, and per IGN Grace dies to about 2 hits from most things. That changes all three waits:
- Room 203: only come out once the ceiling has been quiet for a while; she returns sooner.
- The corridor loop: carry 2 Empty Bottles for the loop instead of 1 (the third is still for chapter 3).
- The Fuse sprint: save at Room 201 first (it costs an Ink Ribbon), have everything collected and know the route: Room 201 → right to the statue → left to the gate, no detours.
- As Leon, the cabinet has no Mixed Herb (G+G), enemies take more punishment and every kill Leon makes already pays credits.
- Later runs: Supply Boxes in the Central Hall and the Elevator Corridor and the wheelchair Tracking Module (see “Leon: Central Hall and Elevator Corridor”).
Boss — The Girl (first encounter: escape)
You can’t fight: Grace has no weapon and in this chapter there is no way to stun or kill her (later the Requiem stuns her and a Molotov freezes her briefly; she doesn’t die until chapter 8). Your defence is the ceiling light, silence and bottles; the Lighter doesn’t count. She appears at 4 fixed points: the Prep Room after the Lighter, the Nurses’ Station when you move the trolley, the Nurses’ Corridor after the Screwdriver and Room 201 when you take the Fuse.
- First appearance (Prep Room): as soon as the cutscene ends, run to Room 203 with the light on and wait until the ceiling goes quiet.
- The Nurses’ Station trolley: the noise brings her. Get under the small corner table until she leaves; then climb the trolley for the Screwdriver.
- The corridor: watch the hall that leads to Room 201. Shelter in Room 203, come out once she breaks the light and throw an Empty Bottle far away (east) to pull her off the hall. If you are out of bottles, crouch in the corner opposite the red light.
- The Fuse: the moment you take it, she drops from the Room 201 ceiling. Run without stopping to the gate left of the horse statue and insert the Fuse.
Reward: the open gate and the handover to Leon. The Bring Out the Big Guns Challenge (stun her with the Requiem, 200 CP) has to wait: the best moments are the chapter 5 elevator and the chapter 8 Control Room.
Don’t leave without:
- Antique Coin #1 (on top of the Nurses’ Station’s north locker, before you move the trolley).
- Both files: Progress Notes (Room 203) and Note on Cardboard Box (Room 202 wardrobe, with the Lighter).
- At least one spare Empty Bottle for chapter 3 (there are 3: Prep Room, Room 201 wardrobe and the Nurses’ Corridor round table).
- As Leon, Mr. Raccoon #1 on the South East Stairway fireplace, and every Requiem round spent.
- On Standard (Classic) and Insanity, the 2 Ink Ribbons (Room 201 table and the Nurses’ Station drawer).