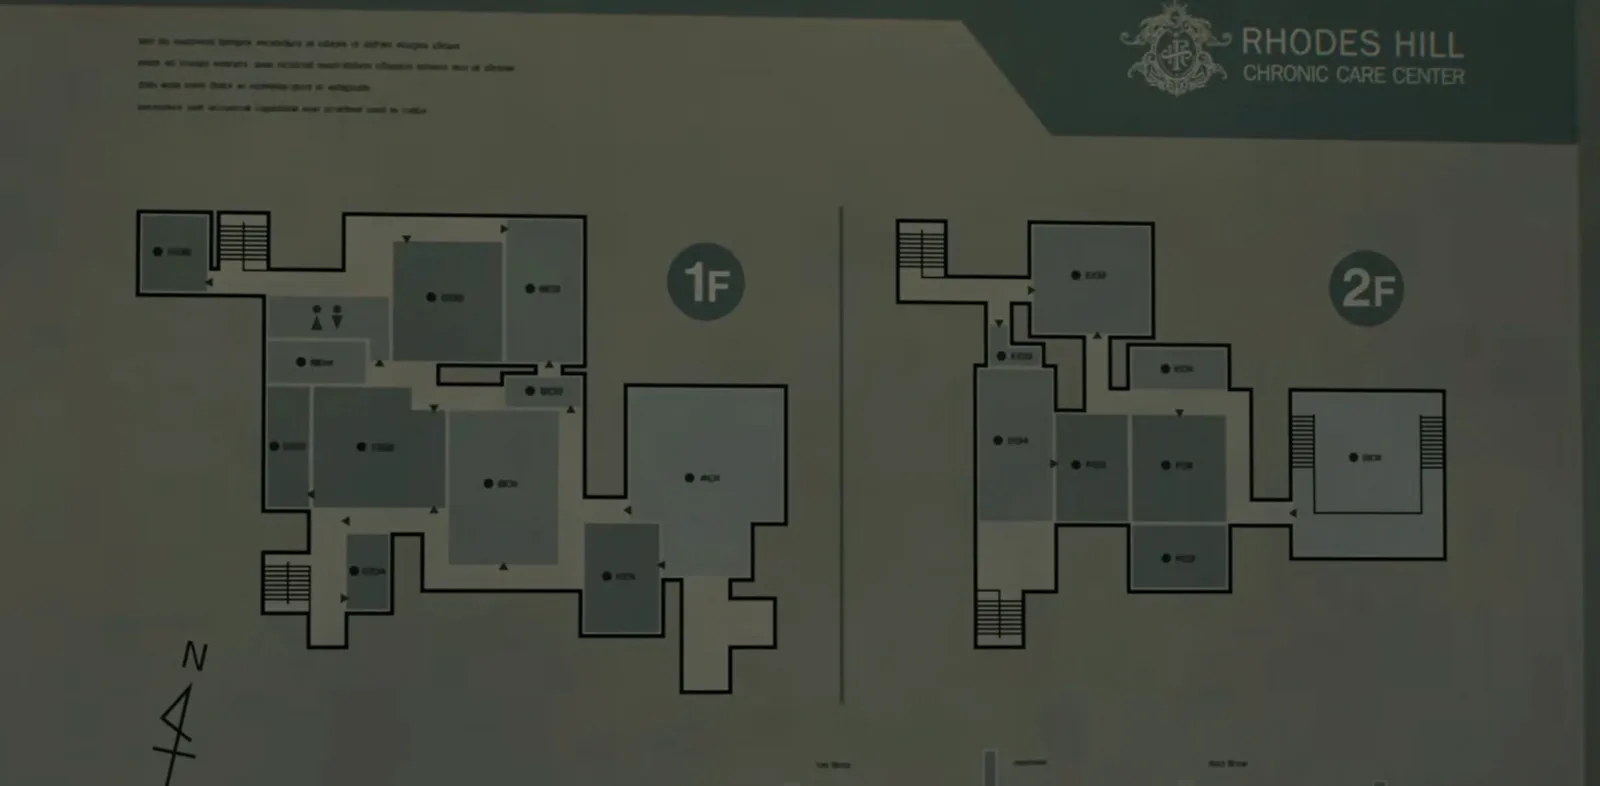
You play Leon S. Kennedy. While Grace goes down to the basement, Victor holds Leon tied up on the Care Center’s 3F (the West Wing attic). Leon frees himself, gets his Alligator Snapper and Hatchet back, finds the MSBG 500 in the attic and kills Chunk (Timothy), brother of the Chunk Grace could run into in the East Wing. Then he drops down a folding ladder into the Chairman’s Office and has the West Wing to himself: 4 of the 5 warped closets (Warped Closets) that only his Hatchet opens are there, along with Leon’s last Mr. Raccoon in the Care Center and his only chance to kill the Chef. The chapter ends on 3F: Blister Heads in the Lounge, a holdout in the Director’s Office and the secret elevator to Victor’s private office.
Chapter order: Medical Supply Room (Victor interrogates Leon) → Connecting Passage → Attic Lounge (Satiety Suppression Medical Records, #32) → Attic: MSBG 500 → Chunk → Attic Stairway (closet 1: Compensator and Basement Safe Code, #33) → Attic Storage (red button) → Chairman’s Office → West Wing free roam: Gallery Corridor (closet 2: Dishwasher’s Note, #34), Records Room (closet 3: Mr. Raccoon #6), the Chef and the Pantry (closet 4: Connoisseur Charm), Filing Storeroom (closet 5) → North West Stairway to 3F (canister zombie) → warped door → Lounge (3F): Blister Heads → Meeting Room → Director’s Office (lever behind the painting, defence) → Elevator Passage → Victor’s Private Office (#35 and #36).
Before you start:
- Gear. Leon gets back the Alligator Snapper and the Hatchet, but not the Requiem, which Grace now carries. The MSBG 500 lies next to Chunk and is your weapon for the boss: keep every shell you don’t need on him for the Blister Heads on 3F. Also keep both Hand Grenades (Chunk’s drop and the one on the Director’s Office desk) for the final defence: together they make a Stacked Hand Grenade.
- Saving. There is no typewriter and, on a first run, no Supply Box: everything relies on autosaves. Since there is no chapter select, keep a manual save from Grace’s last typewriter before this chapter.
- What Leon can’t do. He can’t pick up Antique Coins or blood, doesn’t solve Grace’s puzzles and can’t enter the Isolation Ward. He can take ammo and herbs Grace left behind, but remember she needs them from chapter 5 on: Grace’s things (blood, coins, Grace’s charms, Hip Pouch) stay where they are until she returns in chapter 6.
- Shop. On a first run on Standard there is no shop in this chapter. On a second run or on Insanity the MSBG doesn’t spawn: buy a shotgun at the Connecting Passage Supply Box before the attic.
- Missables ahead. Mr. Raccoon #6 (closet 3), the Connoisseur Charm (closet 4) and Order Up! (the Chef) are Leon’s and only in this chapter. The items Chunk hides behind the attic walls are lost if you kill him too early. Treat the climb to 3F as your last chance: no source confirms that Leon can come back down, and the secret elevator in the Director’s Office ends the chapter.
- Speed Demon (PowerPyx): reach the attic as Leon before 0:45:00.
Leon’s controls (Switch 2)
ZL aim, ZR shoot or swing, L parry with the Hatchet, L + ZR strong attack, L + Y sharpen the Hatchet (about 3 seconds; a dull Hatchet can’t parry), A kick a staggered enemy or throw a weapon an enemy dropped, R quick heal, X items menu. The Hatchet finisher (ZR when the prompt appears over a kneeling or downed enemy) destroys the head: that zombie will never get up as a Blister Head. Stealth attacks from behind do the same. The Hatchet also smashes Wooden Crates, whose contents are random (per IGN, usually ammo or whatever you’re short of).
Medical Supply Room and Connecting Passage
Medical Supply Room. Leon wakes up tied up and Victor interrogates him (cutscene). He frees himself and takes back his belongings. There is nothing else to pick up in the room. Victor left down stairs you can’t reach: go out through the open door.
Connecting Passage. Break the Wooden Crate on the southwest side. On a first run that’s all; on later runs there is a Supply Box in the southeast section (buy the shotgun here if the MSBG doesn’t spawn).
Attic Lounge
Green Herb on the northwest desk. The Satiety Suppression Medical Records (file #32) are on the southeast desk, on the table opposite the fallen cabinet: easy to walk past, so take them before you move anything. They tell the story of the Jackson brothers, Thomas and Timothy, whose satiety centre was suppressed: the two Chunks. Hold the button to push the fallen cabinet aside (on the right) and go through to the attic.
Attic: the MSBG 500 and Chunk
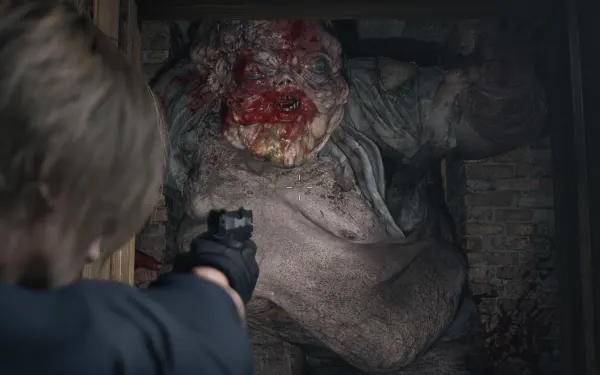
As you walk in you see Chunk (Timothy) eating a security guard on the west side. On the floor next to the body lies the MSBG 500 (pump shotgun, 5-shell capacity, comes with 4 shells; Power 2.5, the highest of anything you carry). Grab it while he feeds, before he turns. The fight is mandatory: full tactics in “Boss — Chunk” below.
If for some reason you don’t pick it up, the MSBG shows up again on the altar on the east side of the Chapel in Courtyard East (chapter 7), only on Standard (Modern or Classic) and never on later playthroughs; it is later added to the Supply Box. On Insanity there is no second chance: don’t leave the gun on the floor.
Attic pickups. Collect them during the fight, while Chunk is stuck or down:
- Handgun Ammo ×5 in the southwest corner, along the narrow side path (an opening in the wall on the left).
- Handgun Ammo ×5 on the cardboard boxes in the middle.
- Shotgun Shells ×5 in the small back room, northwest corner, next to 2 Wooden Crates.
- Shotgun Shells ×4 and a Wooden Crate on the southeast upper level. The ladder up there only opens once Chunk smashes the wooden panelling that covers it.
- Med Injector behind the north wall and Shotgun Shells ×4 behind the northeast wall. Chunk has to charge through those walls to open them: if you kill him before he breaks them, those items are lost.
Attic Stairway: warped closet 1
After killing Chunk, leave by the far door near where you found him (if you didn’t take the Handgun Ammo through the hole on the left, do it now). On the stairway, the first closet on the right before you go down is a Warped Closet: only Leon’s Hatchet opens it (press interact in front of it). Inside:
- Compensator, an Alligator Snapper part that reduces muzzle rise: Power 1.0 → 1.5 and stability 2.3 → 2.8. It normally costs 5,000 credits at the Supply Box, so it saves you the first purchase. Attach it to the pistol from the items menu (X): the Tailor Made Challenge (200 CP).
- Basement Safe Code (file #33): right 60 → left 40 → right 80. It’s for the safe in the basement’s Construction Storage, which Grace opens in chapter 5 (Raccoon Roundup Map and Handgun Ammo ×10). On Insanity the code is left 70 → right 50 → left 20.
Attic Storage and Chairman’s Office
Wooden Crate on the west desk. Press the red button to lower the ladder: it drops into the Chairman’s Office (2F). From here the West Wing is yours.
The West Wing as Leon (optional, but strongly recommended)
You can go anywhere Grace has already opened, except the Isolation Ward. The other 4 warped closets are here, and so is Leon’s only chance at the Chef. The easiest order follows the sections below: Gallery Corridor → Office and Records Room (2F) → down to 1F: Kitchen and Pantry → Filing Room → back via the North West Stairway and up to 3F.
Wooden Crates along the way. The Hatchet breaks them, and it’s worth it, since their contents lean towards whatever you’re short of:
- On the recommended route: Records Room (southeast corner), the 2F Office (next to the east desks), Pantry (west side) and North West Stairway (1F, next to the stairs).
- If you detour: South West Stairway (1 on 1F next to the stairs and 2 on the 3F landing), the 2F Locker Room (north side), the 2F Conference Room (2, southeast corner), Garage (northwest corner) and Cold Storage (northwest corner).
Gallery Corridor: warped closet 2
Leave the Chairman’s Office and turn left; the closet is in the west corner, between the office and the Bar & Lounge. Inside: Dishwasher’s Note (file #34: the Chef has the Pantry Key) and Shotgun Shells ×4. Only Leon can open it, and only in this chapter.
Office and Records Room: warped closet 3
Break the Wooden Crate by the east desks of the Office (2F) and go through to the Records Room: the closet is in the northwest corner, behind the desk, and there is another Wooden Crate in the southeast corner. Grace could hear something inside the closet, but only Leon can open it: Mr. Raccoon #6 (shoot it or hit it with the Hatchet), Mixed Herb (G+G) and Handgun Ammo ×15. It is Leon’s last Mr. Raccoon in the Care Center (the first was #1 on the South East Stairway in chapter 2), and you can only get it in this chapter. If this room’s Zombie Blind Patient is still alive, kill it here (see “Clean-up for Grace”).
Kitchen and Pantry: the Chef and warped closet 4
If Grace killed the Chef, the Pantry is already open. If not, the Chef still patrols West Wing 1F (SW Corridor, the Kitchen entrance, West Corridor and, later, the Dining Room): kill him as Leon (see “Boss — Chef”) for the Pantry Key and the Order Up! Challenge. His remains leave 100 blood in the Kitchen, but only Grace can collect it (it isn’t confirmed whether the remains stay there when Leon kills him).
The Pantry is the door in the Kitchen. On Insanity, 3 Zombie Patients lying on the floor get up as soon as you walk in: finish them one by one with the Hatchet at the door. The warped closet is in the southwest corner: inside is the Connoisseur Charm, a charm for any of Leon’s guns that increases firepower. Also break the Wooden Crate on the west side.
The rest of the Pantry belongs to Grace. Outside Insanity there is no ammo for Leon here. Per Game8, if Leon opens the Pantry, Grace can only collect her items after escaping the basement (chapter 6). Leave her everything:
- Stakeout Takeout Charm on the cardboard box on the northeast shelves (more damage and durability for Grace’s knife).
- 12.7x55mm Ammo ×1 in the small silver case in the northeast corner.
- Infected Blood 2×50 in the buckets on the east side.
- Scrap on the east shelves.
- On Standard (Classic) and Insanity, an Ink Ribbon on the west shelves.
In short: open the Pantry as Leon, take the Connoisseur Charm and the crate, and leave the rest for Grace in chapter 6.
Filing Storeroom: warped closet 5
In the Filing Room, behind the Level 1 door Grace opened with her wristband (where her Hip Pouch was). The closet is on the west side: Handgun Ammo ×10 and Med Injector. On the metal cabinet in the southwest corner, Handgun Ammo ×10 and Grace’s Hip Pouch may still be there if she didn’t take them: Leon can take the ammo; the Hip Pouch is Grace’s. If Grace never opened that door, Leon can’t get in and this closet is out of reach.
Clean-up for Grace (optional)
Whatever you kill now won’t be there when Grace returns to the building after the basement. Stealth attacks with the Hatchet destroy the head, so they leave no Blister Heads. IGN’s suggestions:
- The Bar & Lounge Zombie Singer and her 2 zombies, if they’re still alive, so Grace can loot the safe and the S&S M232 in peace. Careful: no source confirms whether a kill by Leon counts for Deadly Duet; if you want the Challenge, leave her to Grace.
- Both Zombie Blind Patients (Waiting Room and Records Room): Grace can then collect their Transfusion Bags.
- The Zombie Cleaner in the Restroom, who guards 100 blood.
Last chance: before you climb to 3F. Check all 5 closets, Mr. Raccoon #6, the Chef and the Connoisseur Charm. No source confirms that Leon can come back down once he goes through the warped 3F door (Evil Resource’s map links the stairway to Landing 2F and the North West Corridor, but that doesn’t prove the game lets you return), and the secret elevator at the end cuts the chapter off for good. Do everything before you climb.
North West Stairway to 3F
Climb from 1F. On the way, if Grace didn’t take them: the Wooden Crate by the stairs on 1F, a bucket with 50 blood on 2F (Grace only) and, on 3F, a Green Herb next to the couch and Handgun Ammo ×4 on the small cabinet next to the Lounge door. If Grace left the Zombie Staff Member who wanders between 1F and 2F alive, he’s still there: finish him with the Hatchet.
On the last flight, on the 3F landing, another zombie waits with a beeping Red Explosive Canister. Shoot the canister before he throws it: it blows up in his hands.
Lounge (3F): Blister Heads
Open the warped 3F door with the Hatchet (Grace found it shut in chapter 3). In the Lounge, the corpses rise as Blister Heads. A note lies on a headless body in the middle: “Burst their heads if you want to survive”. The order: one on the left turns first, another bursts out of the far office door and a third joins shortly after. Take out the second one first. Against each Blister Head:
- About 3 shotgun blasts put it on the floor; head or leg shots with the pistol also work.
- Finish it with the Hatchet to the head (ZR) as soon as the prompt appears: it counts for Chop Chop (3 finishers, 200 CP).
- Parry (L) its grabs and punches, shoot it point-blank, kick it (A) and finish it. Its grabs are dangerous: don’t get cornered.
Pickups: Shotgun Shells ×3 (southeast) and 2 large vases (southwest and west) with shells inside.
Meeting Room
The other 2 Blister Heads of the Lounge fight are corpses from this room, which rise while you explore the Lounge (Evil Resource: 1 from the Lounge + 2 from here); if one is still standing, same recipe. Smash the large vase in the northeast. A fire axe lies on the floor: pick it up and throw it (A) at an enemy to stagger it (the Can I Borrow This? Challenge if you don’t have it yet). If you can, keep it for the defence in the Director’s Office.
Director’s Office: the lever and the defence
Victor’s main office. Shotgun Shells ×3 on the conference table; on the desk (east), a Hand Grenade and a Med Injector (in the medical box). Combine the 2 Hand Grenades in the items menu (X → Combine) to get a Stacked Hand Grenade (bigger blast). Before you touch the painting, reload everything and heal.
Point of no return: the painting’s lever starts the holdout and the secret elevator ends the chapter. The West Wing clean-up (closets 2-5, Mr. Raccoon #6, the Chef, the Connoisseur Charm) should already be done before you climb to 3F.
Behind the painting over the desk is a hidden lever. The secret door takes a while to open and you have to hold out:
- When you pull the lever, one of the corpses on the floor rises as a Blister Head (IGN saw it come in through the window) and the one in the northeast corner as a Zombie Staff Member: turn around, throw the Stacked Hand Grenade between them (it takes about 2 seconds to go off: throw it when they stand still or close together) and finish the survivor with the Hatchet.
- Then another Blister Head and another Zombie Staff Member come in from the Lounge (IGN: one carries an axe; parry it, kill him and throw his axe or the Meeting Room one).
In all: 2 Blister Heads and 2 Zombie Staff Members. If the door still isn’t open, watch the Lounge entrance.
Elevator Passage and Victor’s Private Office
Ride the secret elevator (point of no return) up to Victor’s private office on the roof. The call with Sherry plays: the word Elpis comes up and the Special Directive for Raccoon City (file #35) and the Report on Raccoon City Syndrome (file #36) are added automatically; the latter explains the deaths in the game’s first file and what is happening to Leon. End of chapter.
Difficulty and later runs
- Casual: health refills on its own up to yellow and aim assist is wider. Pickups are the same as on Standard.
- Standard (Classic): nothing changes for Leon here: there is no typewriter, so you spend no Ink Ribbons, and pickups are in the same places as on Modern. The Pantry Ink Ribbon is Grace’s.
- Insanity: Leon earns credits for every kill from his very first section and the Supply Box is there from the start. The MSBG 500 doesn’t spawn (not in the chapel either) and closet 1 holds only the Basement Safe Code (the Compensator is sold at the Supply Box): buy a shotgun before the attic. Attic Lounge: Gunpowder (Large) instead of the Green Herb and 2 Wooden Crates (northwest corner and southeast desk). Attic: a Hand Grenade on a table (west), Scrap on the piano, Scrap in the northwest corner instead of the Shotgun Shells ×5, Gunpowder (Large) upstairs (southeast) instead of the Shotgun Shells ×4, Wooden Crates in the southwest corner (instead of the Handgun Ammo ×5) and upstairs in the middle; the Handgun Ammo ×5 on the middle boxes is missing. Chunk has more health. Closets: 2 adds Machine Gun Ammo ×20, 3 Rifle Ammo ×3, 4 Shotgun Shells ×4 and Rifle Ammo ×4, and 5 Machine Gun Ammo ×40 and Shotgun Shells ×2. The Chef drops 2 Antique Coins instead of the Pantry Key (the key is in the Closet, the Waiting Room’s Level 1 door, on Grace’s route) and, when you enter the Pantry, 3 Zombie Patients lying on the floor get up.
- Second run on any difficulty: there is a Supply Box in the Connecting Passage (southeast), the MSBG 500 and the Compensator don’t spawn (the Compensator is on sale if you owned it), and Chunk is worth 1,500 credits. Tracking Modules (redeemed for credits at the Supply Box): a Common worth 3,000 in closet 2 and a Rare worth 7,000 in closet 4, replacing the Connoisseur Charm if you already own it. Saving as Leon: per Game8, after you finish the game Leon can save manually by default on new runs, with laptops “as early as the Prologue”; Evil Resource’s list of Leon save points starts at Central Camp in Raccoon City East and shows no laptop in the Care Center. Unconfirmed: don’t count on one, and keep a Grace save before the chapter anyway.
Boss — Chunk (Timothy)
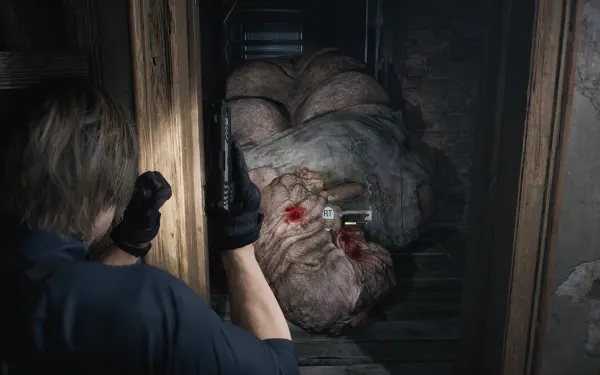
Arena: the 3F attic, a maze of rafters, boxes and narrow passages with 2 yellow ladders (north and south) up to the rafters, a small back room to the northwest and a southeast upper level covered by wooden panelling. Weak point: the head (some guides add the belly and hands). He is slow, doesn’t dodge and charges in a straight line; he gets stuck in doorframes and between the beams. Weapons: the MSBG 500 to knock him down, the Alligator Snapper while he’s stuck and the Hatchet for the finishers. Reward: a Hand Grenade (one guide says 2; three sources say 1), which also unlocks the grenade recipes.
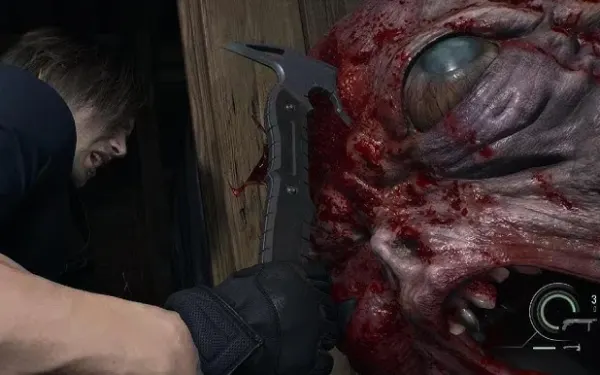
- Take the MSBG 500 off the floor while he feeds. Backpedal and shoot him in the face: about 3 shells on Standard drop him onto all fours. Run in and press ZR for the Hatchet finisher to the face (heavy damage).
- After the first finisher, run down the small path on the right, turn and wait. He wedges himself between the beams: empty a pistol magazine into his head while he’s stuck.
- Make him charge the wooden panelling near the start, by the ladder: breaking it frees the ladder to the southeast upper level (Shotgun Shells ×4 and a Wooden Crate).
- Climb onto the rafters from the ledge by the northwest back room or up the yellow ladders. When he climbs after you, shoot him in the head (or the hands) and he falls: as he drops, a leaping hatchet chop prompt appears (heavy damage). Climb the other ladder and repeat.
- Final phase: he goes berserk, flopping and thrashing along the floor very fast. Go back to the narrow corridor where he first got stuck and let him break the 2 wall sections (Med Injector to the north and Shotgun Shells ×4 to the northeast). If the doorframes are already broken, use the ladders and the upper area to keep damaging him until he tears down the ceiling.
- About 3 knockdowns with 3 finishers kill him. When he starts spewing blood from the holes in his body he’s done: stop shooting and wait for him to explode.
- Pick up the Hand Grenade and anything left in the attic before you leave by the far door.
On Insanity he takes more punishment and there is no MSBG on the floor: arrive with a bought shotgun and make use of the Hand Grenade on the west table and the attic’s Gunpowder (Large).
Boss — Chef (optional, only if Grace didn’t kill him)
Arena: his patrol on West Wing 1F (SW Corridor, the Kitchen entrance, West Corridor and the Dining Room). If you go back into the Central Hall he stops chasing you and moves elsewhere. Weak point: the head and the legs (they stagger him). Danger: his cleaver has a long reach. Reward: the Pantry Key (Connoisseur Charm in closet 4) and the Order Up! Challenge (500 CP).
- Read his tell: hands on his hips, then he raises the cleaver and staggers in with two sets of two-hit swipes with long reach. Back off at that moment.
- Keep your distance. If he catches you, a parry (L) saves you, but the cleaver dulls or breaks the Hatchet, like the chapter 2 chainsaw: then back off and sharpen with L + Y before he attacks again.
- Use windows, doors and debris to keep him away and shoot his head or legs with the Alligator Snapper: count on 15-20 rounds, fewer if you land headshots.
- When he staggers, run in and finish him with the Hatchet (ZR).
- A Hand Grenade works too (it takes about 2 seconds: throw it when he stands still), but you need it for the Director’s Office defence. Don’t spend the MSBG on him: its shells are for the 3F Blister Heads.
- Pick up the Pantry Key and open the Pantry from the Kitchen.
This is Leon’s only chance and the Challenge’s last confirmed one: if you don’t kill him now, expect to miss Order Up! in this save (no source confirms Grace can kill him when she returns to the building after the basement).
Don’t leave without:
- the Satiety Suppression Medical Records (#32, southeast desk of the Attic Lounge);
- letting Chunk break the north and northeast walls before you kill him (Med Injector and Shotgun Shells ×4);
- all 5 warped closets: Compensator and Basement Safe Code #33; Dishwasher’s Note #34; Mr. Raccoon #6; Connoisseur Charm; the Filing Storeroom Med Injector;
- the Chef if Grace didn’t kill him (Order Up!), with the Pantry open and Grace’s items left intact for chapter 6;
- 2 Hand Grenades (or the Stacked Hand Grenade) for the final defence.
Files and Mr. Raccoons count across saves, so you can recover them by loading an older save; the Connoisseur Charm doesn’t: climb to 3F without it and don’t count on another chance in that run (on later runs, once you own it, closet 4 holds a Tracking Module instead).