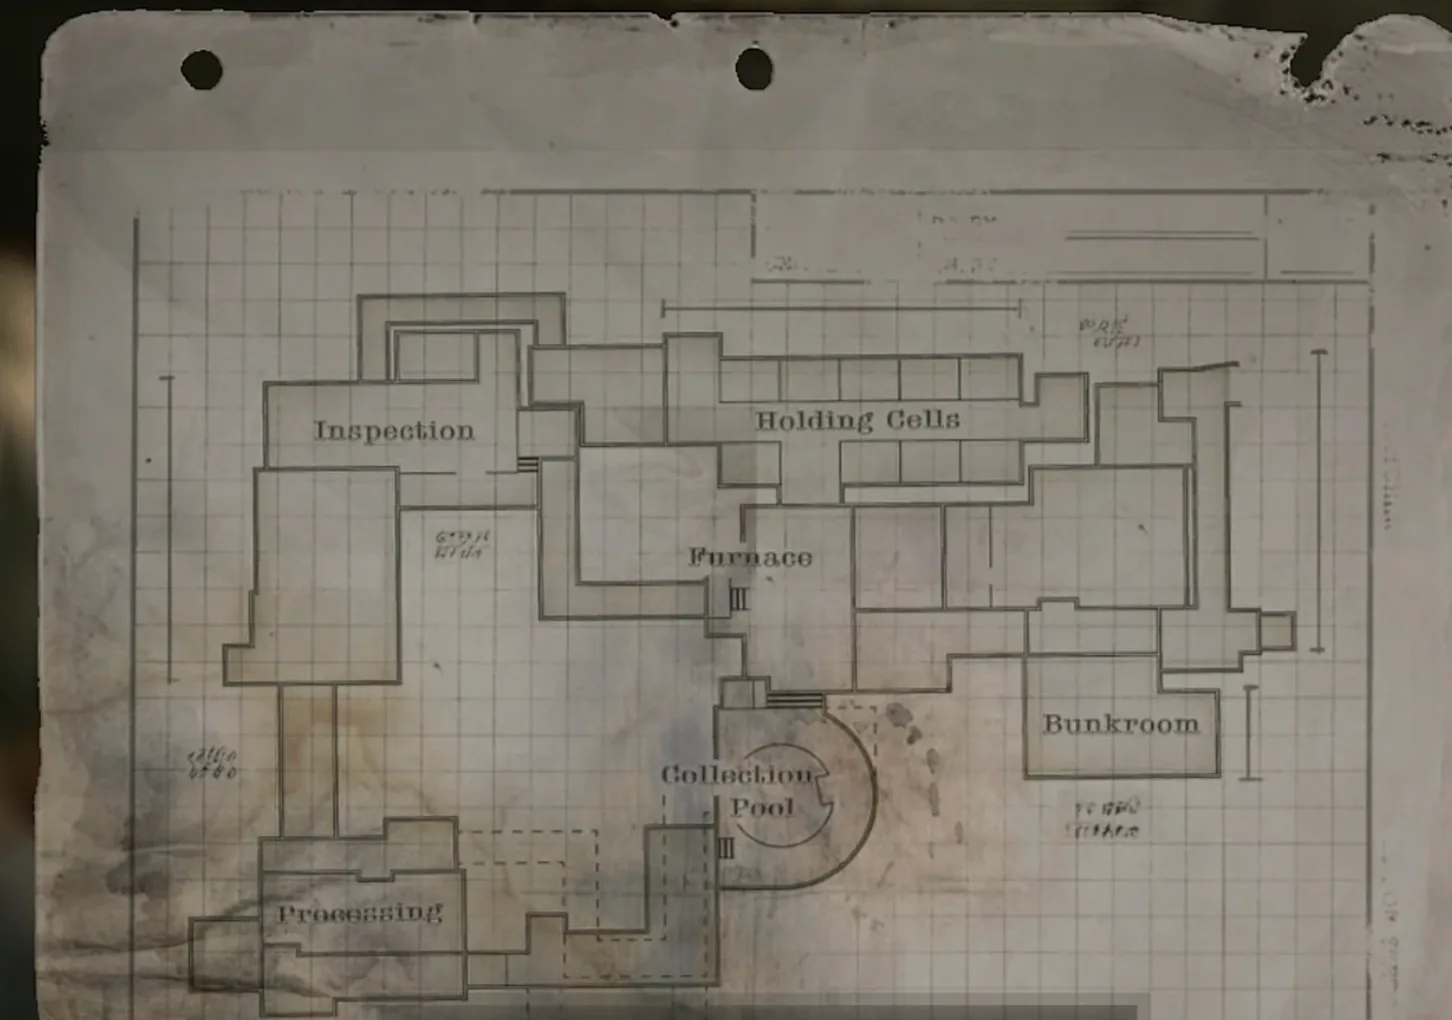
You play Grace Ashcroft for the whole chapter (Leon returns in chapter 7). Grace rides the elevator down into the Care Center basement, a network of dark tunnels where The Girl hunts by sound and flees from light. Emily is locked in the Holding Cells and her cell only opens with 3 Joint Plugs; every plug you put in a slot lights an area and opens a door, and every plug you pull leaves it dark again. The chapter is a back-and-forth puzzle with the plugs: safe 3, the Boiler Room’s Square Socket Wrench, the Processing Forklift Key, the Inspection conveyor and the grinder, before you leave with Emily in your arms and face The Girl in the elevator. The hardest part of the Final Puzzle also happens here.
Chapter order: Elevator Passage (file #37) → Central Passage → Security Room (save) → Holding Cells: Joint Plug #1 and The Girl → Workshop (Mr. Raccoon #7) → Furnace → ‘L’ Passage → Construction Storage: safe 3 and Joint Plug #2 → Service Passage (Lockpick) → Bunkroom (Mr. Raccoon #8, Molotov recipe) → Fuel Storage → Boiler Room: Square Socket Wrench and The Girl → Collection Pool (2 plugs) → Processing: Forklift Key → Processing Office (Hip Pouch #3) → Construction Storage: forklift and The Girl → Inspection (the body-bag conveyor) → Processing north (save, valve) → the grinder → Joint Plug #3 → lower Collection Pool (blood) → Empty Injector → Holding Cells: Emily → elevator: The Girl → 1F: Star Quartz and Severed Hand.
Before you start:
- Nothing big dies here. The Girl can’t be killed in the basement: she is only avoided or stunned. Bring the Requiem with at least 1 round (stunning her gives Bring Out the Big Guns), 1 or 2 Hemolytic Injectors for the zombies guarding Construction Storage, the Bunkroom and the Collection Pool, and an Empty Bottle or a Molotov Cocktail to lure or freeze her.
- Inventory. Keep slots free: at one point you carry up to 3 Joint Plugs, the Square Socket Wrench and the Forklift Key (the Processing Office Hip Pouch #3 adds 2). Arrive with your Blood Collector nearly empty: the lower Collection Pool hands you about 240 at the end.
- Saving. In the Security Room as soon as you arrive, and again in Processing before you turn the valve (above all if you want the Final Puzzle, in a separate slot). On Standard (Classic) and Insanity, saving uses an Ink Ribbon: 1 ribbon + 1 Ink Ribbon Tin on the Security Room east desk and another tin on the boxes in its south-west corner; 1 ribbon in the cardboard box on the Processing north table; 1 ribbon on the Processing Office north bench and 1 tin on its barrels.
- Shop. There is no Parlor or shop in the basement: Antique Coins are spent in chapter 6.
- Missables ahead. Empty Injector #3 (don’t kill the zombie in the second northern cell, and take it before you insert all 3 plugs). Inserting the 3 plugs and pulling the lever in the Holding Cells is, in practice, a point of no return: you never walk the basement again. If you’re going for the Final Puzzle, the wait and the grinder can only be done here.
- Casual: one Requiem round still stuns The Girl and your health refills to yellow on its own.
Basement rules
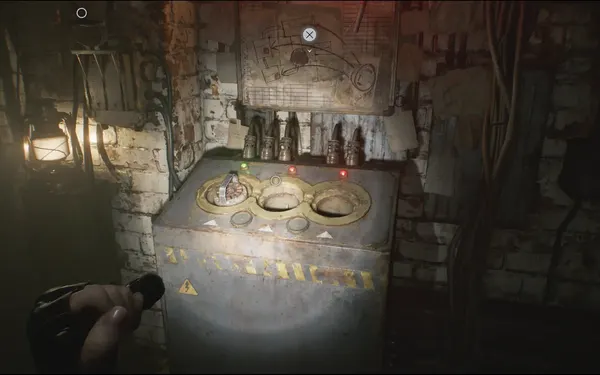
There are 3 Joint Plugs: in the Holding Cells, in Construction Storage and in Processing. A plug in a slot lights that area and opens its door; pull it and the door shuts and the area goes dark again. Slots:
- the west end of the Holding Cells (Workshop);
- the Furnace (‘L’ Passage → Construction Storage);
- the Central Passage (Bunkroom and the east side of the Boiler Room);
- the Elevator Passage (Fuel Storage → the west side of the Boiler Room);
- the Collection Pool (needs 2 plugs at once and the Square Socket Wrench);
- Construction Storage (light by the Inspection forklift);
- Processing south (Processing Office).
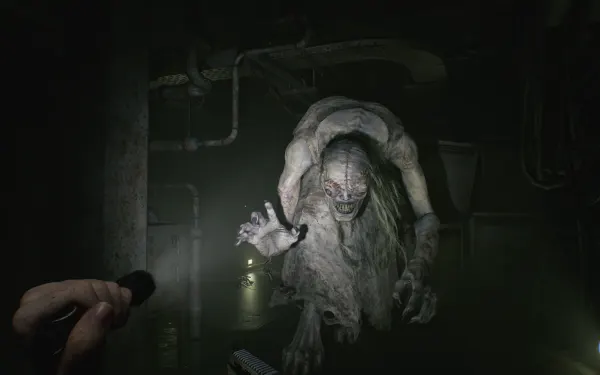
Opening Emily’s cell takes all 3 at the east end of the Holding Cells. The Girl hunts by sound and won’t enter lit rooms: move crouched (click the right stick), switch the flashlight off when she is near and, if she spots you, run to the nearest light. A thrown Empty Bottle draws her away; a Molotov freezes her for a few seconds; 1 Requiem round stuns her on Casual and Standard. The pistol only slows her.
Grace’s zombies. A head or leg shot staggers; shove (A) and finish with the knife or another shot. A Hemolytic Injector from behind (or on a staggered zombie) kills instantly and stops it coming back as a Blister Head. Any zombie you kill with its head intact can return as a Blister Head after plug #3.
Elevator Passage
You land in the north-east tunnel (the Descent Into Darkness Challenge already popped at the end of chapter 3, when you went down the hole). A few steps in, by the headless corpse in the north-east cavern: Staff Member’s Last Words (#37). Special Directive for Raccoon City (#35) and Report on Raccoon City Syndrome (#36) were already added during the Sherry call in chapter 4; if they weren’t, they are added now, as you return to Grace. You pass a door with a slot (Fuel Storage), the lift up to 1F (the chapter’s exit) and more slotted doors.
Central Passage and Security Room (safe room: typewriter + Item Box)
Green Herb on the floor opposite the Security Room door. Inside, the monitors show Emily in her cell. Operation to Eliminate “The Girl” (#38) on the bench on the west side: it confirms she can’t stand light and mentions the UV lamps. Save.
Furnace
Head out to the right: the central room is full of bodies. Outside of scripted events they only get up if you shoot near them or knock another enemy into them: cross without firing. The ‘L’ Passage slot is here. The Furnace also has fixed spawns (Evil Resource); keep them in mind every time you cross it:
- 1 Zombie Patient after you take the second Joint Plug;
- 1 Zombie Patient after you take the Forklift Key;
- after plug #3, one of the bodies becomes a Blister Head and another rises as a zombie;
- 2 Zombie Patients once you’re carrying Emily.
Holding Cells: Joint Plug #1
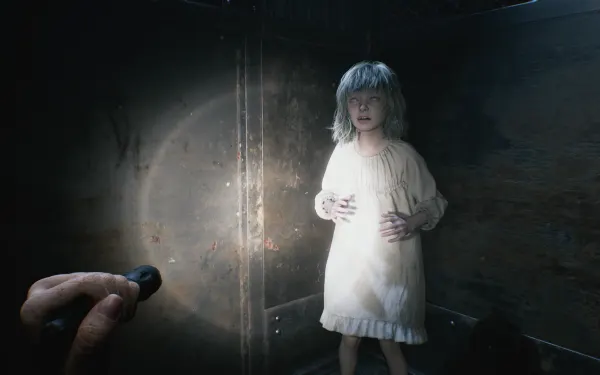
The zombies are behind bars and can’t reach you (one lunges at them as you enter). Emily is in the third cell on the south side, surrounded by dolls. Don’t kill the zombie in the second cell on the north side (the one at the intersection): later it breaks its door open and its bed holds the Empty Injector. In the north-west corner of the west end, 40 blood on the floor. The fifth northern cell is open: Scrap on the bed and 50 blood on the floor. At the east end: Unlocking the Cells (#39) on the wall above the lever, and Joint Plug #1 in the power distributor.
Taking it drops The Girl into the middle of the block: switch the flashlight off, crouch in the open cell or in the corner crevice by the distributor and stay still until she heads off toward the central room.
Workshop (Mr. Raccoon #7)
Put the plug in the slot at the west end of the Holding Cells. Mr. Raccoon #7 on the south-west workbench, right in front of you as you enter, with Technician’s Note (#40) beside it: the toolbox was taken to the Boiler Room. Scrap on the south-east workbench. While it has the plug the room is lit, which makes it a good hiding spot.
‘L’ Passage and Construction Storage: safe 3 and Joint Plug #2
Pull the plug from the Workshop and put it in the Furnace slot (it lights the Furnace too). In the ‘L’ Passage, a zombie slumped against the wall gets up once you take the second plug. A Zombie Staff Member wanders Construction Storage: inject it from behind with a Hemolytic Injector so it can’t come back as a Blister Head. Makeshift Knife stuck in a body bag in the south cages and 30 blood on the north floor.
North-east side office: Security Guard’s Report (#41) on the desk, Scrap on the shelves and safe 3: right 60 → left 40 → right 80 (right is counter-clockwise; pull the handle only after all 3 turns, or the dial resets). Inside: Handgun Ammo ×10 and the Raccoon Roundup Map (Rhodes Hill), which marks every Care Center Mr. Raccoon you are still missing. You don’t need the Basement Safe Code file Leon found in chapter 4.
Joint Plug #2: in the south-west, next to the forklift that blocks the way to Inspection, in the distributor, with an Empty Bottle on the floor. If you leave through the ‘L’ Passage with plug #2, The Girl appears in Construction Storage (Evil Resource): take the vent on the wall opposite the slot (the Service Passage) instead.
Service Passage (the vent)
Head back toward the Workshop through the vent out of Construction Storage (crouch). Inside, a Lockpick on the floor (north-west corner). Scripted event: a zombie crawls in from the Workshop side and The Girl grabs it and drags it off. Don’t shoot and don’t move until she leaves. The vent comes out in the Workshop and stays open as a two-way shortcut. If the Workshop has no plug, its door is sealed: climb the box in the corner and vault through the gap above into the Holding Cells.
Crossing the Furnace toward the Central Passage: with the second plug taken, a Zombie Patient has appeared in the Furnace. If it spots you, stagger it with a leg shot away from the bodies on the floor and finish it, or inject it from behind: firing next to the corpses wakes them.
Bunkroom (the Central Passage slot)
Put the plug you carry in the slot in the corridor to the right of the Security Room: it opens the Bunkroom and the east side of the Boiler Room, but while that slot is powered the Boiler Room water is electrified: don’t go in that way.
The 2 Zombie Staff Members. They wander the Bunkroom, which stays lit while the slot holds the plug (so The Girl keeps away). It’s Grace’s biggest fight before the grinder. Hold the doorway so they come one at a time:
- Wait for the first to turn its back and inject it with a Hemolytic Injector (instant kill, no Blister Head).
- Shoot the second in the legs (or head) to stagger it, shove it (A) and finish it on the floor with the knife or the pistol.
- Destroy both heads (or inject): a zombie with its head intact can return as a Blister Head after plug #3.
Pickups: Crafting Recipe: Molotov Cocktail in the silver case on the centre table (Empty Bottle + 60 blood; it doesn’t count as a file). 50 blood by the south-west corpse, Handgun Ammo ×6 on the south bunk and Mr. Raccoon #8 on the TV (south). East lockers: the right one has Scrap; the left one is locked (lockpick lock 4): use the Lockpick → Rare Metal.
Fuel Storage and Boiler Room: the Square Socket Wrench
Pull the plug from the Central Passage (so the water stops shocking) and take it to the Elevator Passage slot at the start of the tunnel. In Fuel Storage, push the wooden crate and squeeze through the gap in the fence.
In the Boiler Room: Green Herb (north floor), a second Lockpick (east floor, in the puddle that used to be electrified), 60 blood inside the western fenced area and, in the red toolbox there, the Square Socket Wrench and an Empty Bottle.
Taking the wrench drops The Girl between you and the exit, and she starts feeding on the corpse by the fence; then she moves on to the one by the toolbox. Crouch with the central boiler between you, watch which way she circles (usually the side nearer to you) and slip out the other way. If she spots you, throw a Molotov and run to the light by the slot. Take the plug with you as you leave. On the way back toward the Security Room she may show up again: plug the Bunkroom slot to switch its light on, wait for her to retreat, then take the plug back.
Collection Pool and Ventilation Passage
The Collection Pool is south, to the left of the Furnace. Before you go in, pull plug #1 from the Furnace slot (the room goes dark again: cross it without firing), so you carry both. Once you carry 2 plugs, a white-suited Zombie Staff Member appears and guards the distributor: inject it from behind (gunfire here draws The Girl, and the room is too cramped to dodge her). Scrap on the north-west floor (not on Standard (Classic)) and 30 blood by the east corpse. Open the distributor panel with the Square Socket Wrench and insert 2 plugs: the lights come on and the door opens.
Ventilation Passage. Don’t walk the corroded catwalk (it collapses): crouch into the idle fan instead. The tube inside is the Ventilation Tunnel: Scrap on the floor in its south-east corner. As you come out, a Green Herb in the north-west corner of the Ventilation Passage, next to the ladder up to Processing.
Processing (south platform) and Processing Office
50 blood halfway along the south platform. Joint Plug #3 is in the distributor, but don’t take it yet: pulling it shuts the door behind you. The Forklift Key is on the floor by the corpse in the north-west corner of the south platform.
Use the key on the forklift here → Processing Office:
- on the bench on the north side: Hip Pouch #3 (+2 slots) and the Care Center Basement Floor Plan map (on Classic and Insanity, an Ink Ribbon too);
- on the barrels on the west side: Handgun Ammo ×6 (on Classic and Insanity, an Ink Ribbon Tin too);
- a tank diagram showing the drain valve on the far side.
Leave plug #3 where it is (it keeps this door open), go back through the Ventilation Passage and take the 2 plugs from the Collection Pool. In the Ventilation Tunnel, The Girl smashes through the south-west grate (a jump scare): keep walking.
Construction Storage (second visit): the forklift
As you come back from Processing with the Forklift Key, a zombie rises in the Furnace. Put one of your 2 plugs in the Furnace slot (it lights the room and opens the ‘L’ Passage), or in the Workshop slot if you’ll come in through its vent, and keep the other for the distributor here.
The Girl now waits in the dark by the forklift. Two ways past: come in through the Workshop vent, wait for her to move off (when she turns left) and sprint to the distributor; or hide in the side office until she passes and rush the slot. Once the light comes on, she leaves. One Requiem round stuns her too (Bring Out the Big Guns). Insert the plug, use the Forklift Key on the forklift to raise it, and the way to Inspection is open. In the tunnel from the Furnace to Inspection the lights go out (just a scare).
Inspection (the body-bag conveyor)
In the north-east corner there are 2 lockers: the right one has Scrap; the left one is locked (lockpick lock 5) → Rare Metal, the last one in the Care Center.
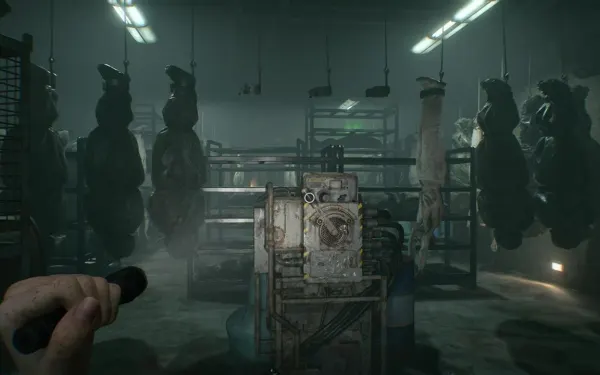
Walking in starts the conveyor of hanging bags. Move inside the wide gaps (2 or 3 clear spaces): bagged bodies do nothing, but unbagged hanging zombies grab you if you pass too close. Don’t touch the lever yet.
- Ride the belt hugging the right wall to the middle of the room: 50 blood, Handgun Ammo ×10 on the shelf and a wheeled cart: push it to open a shortcut.
- A zombie falls off the belt here: kill it in the open space.
- Sprint back to the entrance, pull the lever to reverse the belt, go back through the shortcut and ride the gaps up the stairs to the Processing north platform.
- A second zombie drops in the south section; there is a Makeshift Knife in the south-east body bag and 30 blood in the south-east corner.
Processing, north platform (safe room: typewriter)
Save here. Green Herb (north) and 50 blood (north-east). Grab the ledge items before anything starts: Handgun Ammo ×15 (north-west), a Molotov Cocktail (south) and Handgun Ammo ×8 (south-east). If you’re going for the Final Puzzle, save in a separate slot and wait here 15 real minutes before you touch the valve (see “Final Puzzle” below). Then turn the drain valve (the wheel).
The grinder
The pit drains and you drop into it. When you near the far ladder, the conveyor starts carrying everything toward the blades and the bodies wake up.
- Hug the wall farthest from the blades and keep backing up.
- Shoot their knees or legs to stagger them and shove them (A) into the blades.
- If 2 or more get up far from the blades, throw a Molotov.
- Watch for spawns beside and behind you.
- When the system says it’s almost done, hold on a little longer. When the belt stops, climb the ladder and take Joint Plug #3.
Final Puzzle: here don’t kill anyone yourself. Stagger with leg shots, shove, and let the grinder do every kill, and make sure every zombie that gets up ends in the blades before the sequence ends (Game8, TheGamer). No Molotovs and no finishers on that run.
Lower Collection Pool (blood)
Go back to the typewriter side (you can save again) and crawl into the vent next to it: you slide down to the lower level of the Collection Pool. Green Herb in the south-east corner (not on Standard (Classic)).
Pull the “Collection & Testing” lever in the north-east corner: the water drains and leaves blood clumps of 10, 20, 30, 60, 80 and 40, about 240 in total (Insanity lacks the 80 and 40).
Final Puzzle check. Read the message as it drains: a normal run shows “a lot of blood flowed out”; if you met the wait and the grinder conditions it shows “a ton of blood flowed out” (PC Gamer, quoting the solvers). If you see “a lot”, reload the separate Processing save right away and redo it.
The collector holds only 100 (150 with the Parlor’s Override Manual): craft between clumps. Good things to craft: Steroids or Stabilizer (Empty Injector + 110, only with the Override Manual), 12.7x55mm Ammo from your Rare Metal (1 + 80 = 2 rounds) and Hemolytic Injectors (Scrap + 60).
Take the red elevator up. Once you hold plug #3, one Furnace body rises as a Blister Head and another as a zombie: a Requiem round for the Blister Head, or stagger and inject. Any zombie you left with its head intact can come back the same way (QuestDuo warns about the Construction Storage Zombie Staff Member, by Inspection, if you didn’t finish it properly).
Collect the plugs and Empty Injector #3
The plugs. Take back the ones you left in Construction Storage and the Furnace. When you pull the Construction Storage one, The Girl drops and blocks the vent: put the plug back in at once; the light sends her back up into the ceiling. Then take it again and leave through the vent.
Empty Injector #3 (missable). If you didn’t kill the zombie in the second northern cell of the Holding Cells, by now it breaks its door open (QuestDuo already found it loose when coming back with the Forklift Key). It’s weak: kill it and go in: Empty Injector on the bed and 70 blood on the floor. Take it before you insert all 3 plugs: after that you can’t come back. With all 3 in the run you can craft Steroids and Stabilizer.
Rescuing Emily
Point of no return: once you insert the 3 plugs and pull the lever, you can’t roam the basement again. Before that: Empty Injector #3, Mr. Raccoon #7 and #8, safe 3, both Rare Metal and the blood.
Insert the 3 plugs in the distributor at the east end of the Holding Cells and pull the left lever. Every cell opens and you carry Emily: you can’t fight, crouch or run, and if you hesitate you get grabbed. Route:
- Cell corridor → turn left at the mine cart.
- Cross the Furnace hugging the left wall (zombies spill out of the Collection Pool doorway and 2 Zombie Patients appear in the Furnace).
- Run past the Security Room → the elevator, now showing a green light.
The elevator fight is below, in “Boss — The Girl”.
Elevator Corridor (1F): Star Quartz and Severed Hand
Upstairs, Emily hands Grace the Star Quartz. In front of the elevator door lies the Severed Hand (The Girl’s hand): it’s optional, but part of the Final Puzzle. Take it to a blood analyzer (Blood Lab or the 2F Office):
- Game8’s method: press the central black cube, then the two at the far ends (left and right).
- If it doesn’t trigger, try TheGamer’s: select the three nodes in the middle from left to right until they turn red.
Both end on the “Let’s play.” screen with the code GGC-AAG-AUA-ACG-UGU-CAU (the amino-acid initials spell GLITCH). It does nothing for the story. You can never return to the basement. The rest of the Care Center is still open: chapter 6 starts here.
Final Puzzle (optional, hidden 20,000 CP challenge)
It takes 2 playthroughs and its hardest part happens here. Steps on this run:
- Wait. Reach Processing north (through Inspection, after using the Forklift Key), save in a separate slot you won’t overwrite, and wait 15 real minutes without turning the valve: bodies keep dropping into the pit (counting 115 bodies, about 8.5 minutes, wasn’t enough).
- Grinder. Don’t kill anyone yourself: only stagger with leg shots and shove into the blades; no zombie may be left standing when it ends.
- Check. Draining the lower Collection Pool must show “a ton of blood flowed out”; if it says “a lot”, reload the step 1 save.
- 3a. Analyse the Severed Hand at the Blood Lab on this same run, before the flushes in chapter 6. Game8 lists it as a requirement for the doll to spawn; TheGamer and PC Gamer only analyse the hand on the second run, and a Game8 commenter says it isn’t needed. It costs nothing: do it on both runs.
- Chapter 6: leave Emily on the Guard Office sofa and flush the toilet in the Restroom’s middle cubicle 8 times.
- Lab escape: Marie’s Doll appears; if it isn’t there, reload the Processing save and redo it.
The rest happens on the next playthrough (see chapter 6).
Difficulty
- Casual: one Requiem round stuns The Girl and health refills to yellow on its own.
- Standard (Classic): saving uses Ink Ribbons (ribbons and tins: see “Before you start”). There is no Scrap on the Collection Pool floor and no Green Herb in the lower Collection Pool.
- Insanity: The Girl roams far more outside her scripted spots, moves faster, recovers sooner and needs 2-3 Requiem rounds or 2 Molotovs to stun. Safe 3: left 70 → right 50 → left 20. The lower Collection Pool lacks the 80 and 40 clumps (about 120 blood). Insanity adds a recipe: Scrap + 120 blood = Handgun Ammo ×30.
Challenges in this chapter
- Descent Into Darkness (200 CP): you already have it; it pops on its own when you go down the hole at the end of chapter 3.
- Bring Out the Big Guns (200 CP): stun The Girl with the Requiem (Construction Storage or the elevator).
- Bang for Your Buck (500 CP), if you didn’t get it in chapter 3: kill 3 or more enemies with a single Requiem round, which pierces. The grinder crowds and the basement corridors work, but on a Final Puzzle run don’t try it in the grinder: the blades must do all the killing there.
Boss — The Girl (basement)
Arena: the whole basement, and finally the Elevator Passage lift. She can’t be killed until chapter 8. Weak points: light (she won’t enter lit areas), sound (it guides her), the Requiem (1 round stuns her on Casual and Standard) and the Molotov (it freezes her briefly). Reward: getting out with Emily, the Star Quartz and the Severed Hand; stunning her with the Requiem gives Bring Out the Big Guns (200 CP).
- Holding Cells (when you pull plug #1): stay still and crouched in the open cell or the crevice by the distributor, flashlight off, until she leaves.
- Construction Storage, plug #2: if you leave through the ‘L’ Passage she appears here; use the vent.
- Service Passage (scripted): she grabs a crawling zombie. Don’t shoot and don’t move.
- Boiler Room (after the Square Socket Wrench): keep the central boiler between you; leave on the side opposite the one she circles. If she spots you, Molotov and head for the light.
- Ventilation Tunnel (after the Forklift Key): she bursts through the grate; it’s a scare, keep walking.
- Construction Storage, second visit: wait in the vent or the side office and rush the distributor; or shoot her with 1 Requiem round (the Challenge).
- Construction Storage plug, at the end: if she drops and blocks the vent, put the plug back in at once and wait for her to climb back to the ceiling.
- Elevator. Grace puts Emily down. The lift won’t start because pallets and bags jam the door: interact and press A repeatedly to clear them while The Girl and a zombie close in.
- Near the top, The Girl bursts through the ceiling and grabs Grace. While the lift is moving you can’t hit her; when it stops, shoot her: 1 Requiem round stuns her (and counts for the Challenge); several pistol shots to the face also make her let go.
- Interact with the door and press A repeatedly to force it open. The cable snaps, The Girl falls and loses her arm.
- Insanity: 2-3 Requiem rounds or 2 Molotovs for each stun; bring plenty of ammo for the elevator.
Don’t leave without:
- files #37-#41 and the Processing Office map;
- Mr. Raccoon #7 (Workshop) and #8 (Bunkroom);
- safe 3 (Raccoon Roundup Map and Handgun Ammo ×10);
- Hip Pouch #3 from the Processing Office;
- both Lockpicks (Service Passage and Boiler Room) with their Bunkroom and Inspection locks (2 Rare Metal);
- the Molotov recipe;
- Empty Injector #3 (before you insert all 3 plugs);
- the lower Collection Pool blood, already turned into Steroids, Stabilizer, Requiem rounds or Hemolytic Injectors;
- the Severed Hand (analysed, if you’re going for the Final Puzzle).
If you’re going for the Final Puzzle: the 15-minute wait in Processing, the grinder with no kills by your own hand and the “a ton of blood flowed out” message.