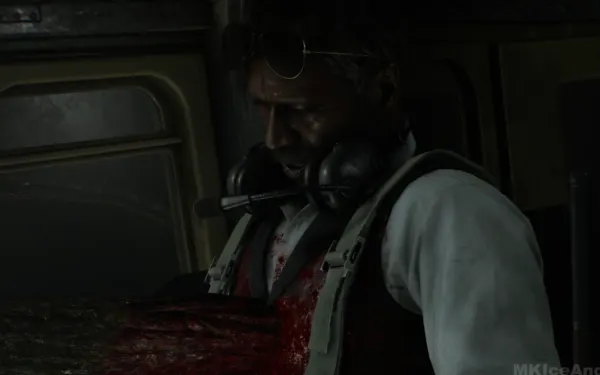
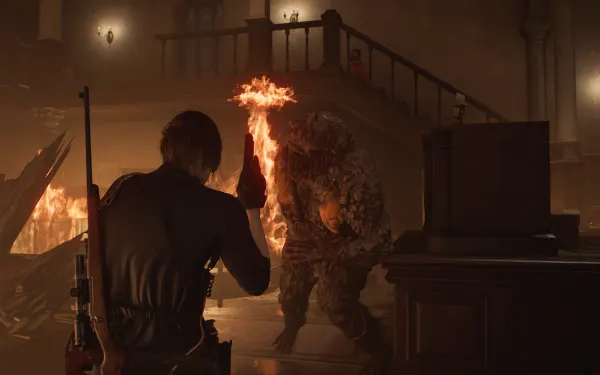
You play Leon S. Kennedy for the whole chapter. It’s 6:03 AM on 9 October and you’re in Victor’s private office, at the top of the Care Center, when Grace’s helicopter goes down on the east courtyard cemetery. From the rooftops, balconies and windows you cover Grace with a rifle as she carries Emily between the burning graves to the chapel, while the zombies (and a second Chef) close in on her. Then Leon jumps down into the cemetery, clears the way to the Chapel and holds out inside against the Blister Borne so that Grace can escape toward the water treatment plant. It’s a short, linear chapter with no typewriter and no shop on a first run, and a single missable collectible: Mr. Raccoon #10.
Chapter order: Victor’s Private Office (the helicopter goes down; Classic 70) → Rooftop → West Balcony (Mr. Raccoon #10 from the staircase, before you go through the wooden door) → West Overlook (Rifle Ammo ×10; the escort starts) → East Overlook → East Balcony (Rifle Ammo) → the Chef and the canister by the Chapel entrance → Leon jumps (point of no return) → Cemetery Entry and Cemetery (LPG cylinder, Handgun Ammo at the helicopter) → Chapel: Blister Borne.
Before you start
- Weapons. On a first run the Classic 70 arrives by itself in the opening cutscene: a bolt-action rifle with a 6-round magazine and the hardest-hitting rifle shot in the game, but a slow reload. You also carry the Alligator Snapper, the Hatchet, the MSBG 500 (if you took it in the attic; if not, it waits on the Chapel altar) and whatever Hand Grenades you kept from chapter 4. The Requiem is still with Grace.
- Split your ammo. Rifle for the escort and the boss’s back cyst; MSBG shells and grenades for the Chapel. Don’t spend shells or grenades in the Cemetery: the LPG cylinder is enough.
- Saving. There is no typewriter, Supply Box or laptop for Leon on a first run: everything relies on autosaves. Your last manual save is the one at the Research Facility Reception (chapter 6): don’t overwrite it until you’re past the Chapel.
- The cemetery canisters. There are only two red canisters in the Cemetery: one by the Chapel entrance (for the Chef) and one in the southwest corner, next to the steps down from the Cemetery Entry. That second one is almost certainly the LPG cylinder Leon throws at the 2 zombies after the jump: if you spend it during the escort, you’ll miss it down there (see “The Chef and the canisters”).
- Missable: Mr. Raccoon #10. Once Leon drops into the cemetery you can’t get back to the balconies, and according to PowerPyx he jumps by himself as soon as the last escort zombie dies. The safe bet is to shoot it before you go through the West Balcony wooden door.
- Second run and Insanity: the Classic 70 and the MSBG 500 don’t spawn. Buy the rifle (and the shotgun, if you didn’t buy one in chapter 4) at the West Balcony Supply Box before the escort (see “Rooftop and West Balcony”).
- Speedrun reference (PowerPyx): start sniping from the roof around 1:14:00.
Leon’s controls (Switch 2)
Same as chapter 4: ZL aims (the scope, with the rifle), ZR fires or swings the hatchet, L parries with the Hatchet, L + Y sharpens it, A kicks a stunned enemy or throws a weapon an enemy dropped (and picks up and throws canisters), R quick-heals and X opens the items. The Hatchet finisher (ZR when the prompt shows over a kneeling or downed enemy) destroys the head: that zombie won’t get back up as a Blister Head.
Victor’s Private Office
The cutscene from the end of chapter 4 continues: through the window, Leon watches Grace’s helicopter spin down onto the cemetery. On a first run the Classic 70 is added to your inventory automatically here. Rifle facts: Power 3.1, Stability 2.5, Precision 4.5, Rate of Fire 0.5, Reload 0.5, 6-round magazine, loads one round at a time and takes 6×2 slots. Game8 calls it the best rifle in the game. Its upgrades (from Raccoon City on, with credits) and the Silver Finish Scope (R.P.D. Parking Garage) come later. Files #35 and #36 come from the Sherry call in chapter 4 (the New File popup appears when chapter 5 starts).
Rooftop and West Balcony
Climb out through the window, walk straight or right along the roof tiles and drop down on the left onto the West Balcony, with a staircase ahead. On a first run there is nothing to pick up here.
Later runs (any difficulty). There’s a Supply Box in the balcony’s southeast corner and a Tracking Module (Rare) worth 5,000 credits on the wooden boxes at the foot of the stairs: cash it in at the Supply Box. Since the Classic 70 doesn’t spawn and the MSBG 500 isn’t on the Chapel altar either, the chapter’s plan needs a rifle and a shotgun. Supply Box prices (Evil Resource and Game8):
| Weapon | Credits | What for |
|---|---|---|
| Marksman 1A (semi-auto rifle) | 6,500 | Game8’s pick: bigger magazine, ideal for the escort |
| Classic 70 (bolt-action rifle) | 5,000 | The hardest-hitting round, but a slow reload |
| MSBG 500 (pump shotgun) | 2,500 | The Blister Borne’s front cysts |
If you already bought a shotgun at the Connecting Passage Supply Box (chapter 4), the rifle is all you need here. Another option Game8 suggests: the Ghost Grudge magnum (1,000 CP in Special Content after beating the game; takes 12.7x55mm Ammo) fills the gap left by the Requiem, which is still with Grace.
Mr. Raccoon #10 (missable)
It’s the chapter’s only collectible and the only thing you can miss here. It sits in the garden west of the Cemetery (visible through its west gate), on the southern pillar under the second lit garden lamp. You can only reach it by shooting it with the rifle from above: once Leon jumps down into the cemetery there is no way back to the roof, and according to PowerPyx the jump is automatic as soon as the last escort enemy dies (see “The jump”). How to find it:
- Climb the West Balcony staircase, but don’t go through the wooden door yet. Turn 90° left and look through the gap between the staircase and the metal fence, aiming slightly down: you’ll see the lit garden lamps. The figure is on the right corner of the pillar, under the second lamp (PowerPyx).
- If you can’t see it from there, Evil Resource puts it on the southern pillar by the lamp, visible through the cemetery’s west gate, and says it’s easier to spot from the southern balconies where Leon starts. QuestDuo describes it from the room with the broken window (the rifle ammo room): look north of that window at the stone column with a lamp.
- Aim with ZL, centre the reticle and fire: one Classic 70 round does it. It counts toward You Little Rascal! (all 25 Mr. Raccoons; counts across saves).
West Overlook: the escort starts
Go through the West Balcony wooden door. Rifle Ammo ×10 on the window ledge (every difficulty). The escort starts from this window.
Insanity: there are bodies on the floor near Leon, and the West Overlook one rises as a Blister Head while you cover Grace from the East Overlook. PowerPyx recommends shooting the 2 bodies near Leon while they’re still on the ground, before they turn; do it before you move to the East Overlook.
The escort: cover Grace
Grace carries Emily across the burning Cemetery to the Chapel door while you shoot from the windows and balconies. Evil Resource counts 14 Zombie Patients and 1 Chef in all. If the Chef reaches Grace, you lose and go back to the last autosave (QuestDuo); don’t let any zombie get near her. The waves, in order (IntoIndieGames):
- A few zombies block her path at the start. Shoot the one closest to her first.
- While Grace bangs on the Chapel door, more come from the left.
- One shows up behind her.
- A couple come from the right.
- The Chef (the giant with the cleaver) arrives from below Leon’s position, with the last group.
- Reload only when nobody is near Grace. The Classic 70 loads its rounds one by one and a full reload is long: if you empty it mid-wave, switch to the Alligator Snapper for the nearest zombie.
- Headshots. The zombies walk slowly: put the reticle on the head of the leading one and let the others come to you one at a time.
- Tip for a retry: the bodies already lying visibly on the ground (one by the door, one against the fence) can be killed before they get up (PowerPyx).
East Overlook and East Balcony
When Grace moves on, change position: the route is West Overlook → East Overlook → East Balcony (Game8: the window first, then that balcony). From the West Overlook window, cross the next room, the East Overlook, and step out onto the East Balcony, which looks over the cemetery and leads to the Cemetery Entry.
- East Overlook: empty on Standard. On Insanity its east-side shelves hold Gunpowder (Large) (with 1 Scrap it becomes Rifle Ammo ×5).
- East Balcony: on the small round table on the west side there’s Rifle Ammo ×10 twice, and on the balcony’s east side a wooden crate you can break for more rifle ammo (Game8; on Standard (Modern) and Standard (Classic)). On Insanity the table only has Rifle Ammo ×5, there’s no crate, and a Zombie Staff Member lying there wakes up: kill it on the ground before you start shooting into the cemetery.
The Chef and the canisters
- Save the red canister by the Chapel entrance for the Chef. When the Chef walks past it with the last group, shoot the canister: the blast kills him outright, “even on Insanity” (PowerPyx), and takes the zombies with him. Don’t hit it early by mistake.
- Try not to spend the southwest canister, the one next to the steps down from the Cemetery Entry. Evil Resource counts only two canisters in the Cemetery in every mode, and Leon goes down exactly those steps after the jump: the LPG cylinder he finds “on the right side” at the bottom of the stairs is almost certainly this one (an inference from the two descriptions; no source says it in those words). Only use it during the escort if the Chef comes in on that side and there’s no other way to stop him.
- If you spent it, the Cemetery’s 2 zombies go down to a headshot, kick and Hatchet, or to the Alligator Snapper.
- Evil Resource and the wiki say this Chef spawns even if Grace or Leon killed the first one. No source confirms whether killing him here counts for Order Up!: if you still need that trophy, don’t rely on it.
The jump (point of no return)
Once the last zombie is dead and Grace is inside the Chapel, Leon drops from the balcony into the cemetery. The guides disagree on how: according to PowerPyx, Leon jumps down by himself (“Leon will automatically jump down to the lower level”); QuestDuo and IntoIndieGames say you jump, and Game8 even sends you back to the West Overlook window for the Mr. Raccoon first. This is where Mr. Raccoon #10 is lost: to be safe, shoot it before the last escort zombie falls, ideally before you go through the West Balcony wooden door. If you missed it, Mr. Raccoons count across saves: reload the autosave from the start of the chapter (the game autosaves when the character switches) or your chapter 6 save and shoot it before the escort.
Cemetery Entry and Cemetery
Cemetery Entry. Leon lands on top of a zombie. Carry straight on to the steps down into the cemetery.
Cemetery. There are 3 zombies (5 on Insanity).
- Go down the stairs: on the right is the LPG cylinder (the red explosive canister, if you didn’t spend it in the escort). Pick it up with A.
- Two infected come from the left: throw the cylinder at them and shoot it in the air or as soon as it lands next to them.
- The third guards the Chapel door: headshot, kick and Hatchet finisher (Chop Chop if you still need it).
- On Insanity 2 more show up: finish every body that drops with the Hatchet so it can’t mutate.
The helicopter wreck has Handgun Ammo ×5 (Standard (Modern) and Insanity; not on Standard (Classic)).
Chapel
Cutscene: Leon calms Grace down and sends her and Emily ahead to the water treatment plant while he holds the doors. The Blister Borne fight starts (see below). Reload everything before you go through the door: there is no break after it.
Difficulty and later runs
- Casual: aim assist is stronger, enemies have less health and hit softer, and there’s more ammo and healing (Game8), and health refills to yellow on its own (VGC); Evil Resource doesn’t list Casual items room by room.
- Standard (Classic): almost nothing changes for Leon: there’s no typewriter, so no Ink Ribbons to spend. Only the helicopter’s Handgun Ammo ×5 is missing.
- Insanity: 5 zombies in the Cemetery instead of 3, Rifle Ammo ×5 instead of 2 × 10 on the East Balcony and no crate, Gunpowder (Large) on the East Overlook shelves, a Zombie Staff Member waking up on the East Balcony, a Blister Head in the West Overlook, and in the Chapel an extra Wooden Crate (northwest corner) and a large vase (east). Ordinary zombies can mutate into Blister Heads when they die.
- Second run on any difficulty: neither the Classic 70 nor the MSBG 500 spawns (not even on the Chapel altar). That’s what the West Balcony Supply Box and the 5,000-credit Tracking Module (Rare) are for: a rifle and a shotgun (price table above), or the Ghost Grudge.
Boss — Blister Borne
Arena: the Courtyard East Chapel, with the nave on 1F and a gallery on 2F reached by a narrow staircase. The chapel gradually catches fire during the fight and the staircase ends up blocked: use 2F early. Arena pickups (Evil Resource): a red canister on the south side of 1F and another at the top of the 2F stairs; a silver case on the cloth-covered materials on the north side of 1F, with a Med Injector and a Hand Grenade; 2 Wooden Crates in the northwest corner of 2F; and the MSBG 500 on the altar (east side) if you never picked it up in the attic (first run only).
What it is: a rare secondary mutation of a Blister Head. Slow, but it soaks up a lot. It attacks with claw swipes, grabs that take a big chunk of health and a full-speed charge that can’t be parried: it roars and rushes. Sidestep as soon as that animation starts. Its swipes can be parried with the Hatchet, but the parry knocks you off balance with no counter window: only do it when cornered.
Weak points: 4 glowing orange cysts: 3 on the front (chest and stomach) and 1 on the back (the wiki says “3 to 4”; Automaton, KeenGamer and QuestDuo agree on 4). Burst all four and it dies. Each burst cyst staggers it briefly, but also releases a red gas cloud that turns nearby zombies and bodies whose heads are still intact into Blister Heads (PowerPyx: “any other zombies with intact heads”; Evil Resource: the zombies and dead bodies around the room mutate whenever you destroy a blister). A zombie with no head never gets back up. According to Game8, the first cyst also kicks off the zombie waves. Zombie Patients keep dropping into the chapel throughout, some carrying axes. Weapons: the MSBG 500 for the front cysts, the Classic 70 for the back one and at range, and Hand Grenades (or a Stacked Hand Grenade) for groups. Grenades, red canisters and thrown axes stun it instantly. Reward: none.
- Burst the back cyst first. It’s the hard one: once it faces you, you can’t see it. Look for any moment it turns its back on you and hit it with the Classic 70 from a distance.
- Get up to the 2F gallery early. The narrow stairs and hallway force the zombies to come one at a time: that’s your kill zone. Use the canister at the top of the stairs on the group coming up.
- Before you burst each cyst, take the heads off the nearby zombies. Hatchet-finish (ZR on the prompt) or blow the head off every zombie and body close to you: a destroyed head never rises as a Blister Head. Then stand next to a canister and shoot the cyst (shotgun point-blank for the chest ones). If Blister Heads still rise and rush you, blow the canister among them. QuestDuo’s combo: shoot a cyst to stagger it, throw the canister at it with A and shoot the canister next to it.
- Kill the Blister Heads before you go back to the boss. They’re fast and hit hard. Stagger each one (a head or leg shot, or a thrown axe) and finish it with the Hatchet (ZR): it counts for Chop Chop (3 finishers). When an axe zombie dies, pick up the axe and throw it (A) at the Blister Borne or a Blister Head: it staggers them and earns Can I Borrow This? if you don’t have it yet. Parry (L) the Blister Heads’ punches (Untouchable if it’s your first).
- When 2F gets crowded, drop to 1F. Open the silver case on the north side (Med Injector and Hand Grenade) and use the south-side canister or the grenade on the next group. If the MSBG is still on the altar, take it now.
- Keep circling the nave and never let it corner you: in a corner the charge and the grabs chain into each other. When it staggers after a cyst or a blast, kick it (A): the wiki says several Leon kicks bring it down fast. Heal with R between cysts, not in the middle of a charge.
- Last cyst → melee finisher prompt. Press the button shown on screen and the Blister Borne dies. Clear the remaining zombies; the chapter ends on its own or when you head for the door Grace left through.
On Insanity far more Blister Heads show up and ordinary zombies can mutate on the spot when they die: finish every body that drops with the Hatchet and keep the grenade for the second half. There’s a second Blister Borne later on, in the Raccoon City sewers (chapter 9).
Don’t leave without:
- Mr. Raccoon #10 (from the West Balcony staircase, before you go through the wooden door and, in any case, before the last escort zombie dies);
- the Rifle Ammo on the West Overlook and the East Balcony (plus the East Balcony wooden crate on Standard);
- the Chapel-entrance canister spent on the Chef, and the southwest one saved for the Cemetery’s 2 zombies;
- the helicopter’s Handgun Ammo ×5 (not on Standard (Classic));
- the Chapel’s silver case (Med Injector and Hand Grenade) and the MSBG 500 on the altar, if you didn’t have it;
- on later runs: the West Balcony Tracking Module (Rare) cashed in and a rifle and a shotgun in your inventory before the escort.
If you’re tracking Leon’s trophies, the Chapel is a good place for Chop Chop, Can I Borrow This? and Untouchable.