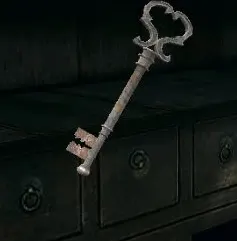
 Old Building Key Old Building Key | 1-2 · Urban District and Furnace Facility Urban District, top storey of an abandoned building. At the second broken ladder in the back alleys, give your partner an assist jump: they climb up, run left and enter the building.
- With AI Sheva: she picks the key up by herself and radios that she has it.
- In co-op: the boosted player has to find it, on a cabinet on the far north-west side of the building. The player below walks round through the building opposite the ladder (door on the right, the fruit-box Majini) to meet up. | Opens the small house with the blue door on the quiet street (past the joint-kick gate): inside, the Ithaca M37 on the wall plus a few items. The roof ladder of that house has nothing. Taking it makes 3 Majini appear on a two-storey balcony (skip the key and they stay put). Evil Resource says green door; three sources say blue. |
| Furnace Key | 1-2 · Urban District and Furnace Facility Furnace Facility, furnace room: on the corpse in front of the control panel (Evil Resource: on the floor of the room). The same room has a Herb (Green) and Handgun Ammo. | Opens the locked door of the building where Alpha Team died: a straight corridor, an elevator and the end of the chapter.
- Taking the key and heading back to the door brings out the Uroboros test subject in the main passage. You have to beat it to get through.
- Kill it without using the furnace and it drops a Gold Ring (₦5,000).
- Past the door, an open briefcase holds 3 boxes of Handgun Ammo (not on Professional). |
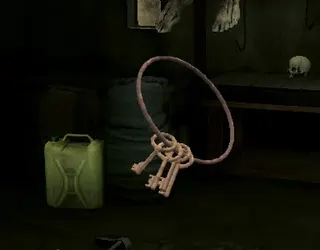 Port Key Port Key | 2-1 · Port and Shanty Town The Port: inside the lone house whose front door is padlocked. The keys hang from the hook of a hanged corpse.
- Don't shoot the padlock. Go round the house and vault in through the back window.
- Shoot the keys off the hook. | Opens the metal gate in the market to the port docks. Taking it brings a wave. With the padlock intact they can only come in through the window: both stay inside and cover that opening. The wave includes a **Big Man Majini** who drops a Jewel Bangle (₦1,000). |
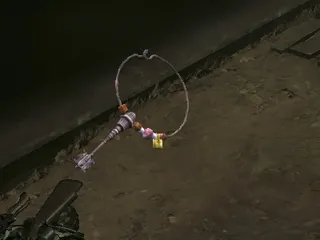 Guard's Key Guard's Key | 2-1 · Port and Shanty Town Shanty Town: dropped by the Chainsaw Majini, who appears when you climb the stairs toward the exit gate. | Opens the gate at the top of the alley past the old apartment block: a chest with Gold bars (₦3,000) and 4 gems (Ruby (Square), Emerald (Pear), Topaz (Pear) and Sapphire (Square)), then Kirk's downed helicopter and the end of the chapter. On Veteran and Professional (and on Normal if you haven't died) the Chainsaw Majini revives once in a berserk rage. You can grab the key and run: there are no more enemies past his door. |
| Slate Map | 3-1 · Marshlands and Village Marshlands, west dock: on the deck next to the locked wooden four-slate door. | Marks where the 4 slates are on your map (Beast Slate, Shaman Slate, Raptor Slate and Warrior Slate). Optional: if you know the spots, you don't need it. It only appears if you don't already have all four slates. |
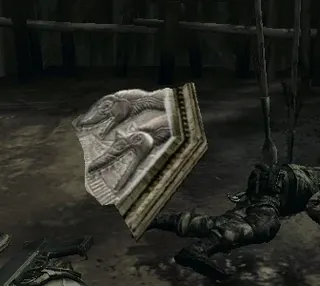 Beast Slate Beast Slate | 3-1 · Marshlands and Village Marshlands, south dock (the starting one): on the ground beside the butchered BSAA soldier, in front of the locked gate. The Schedule Report file is on his body. | One of the 4 slates for the wooden door at the west dock, which leads to the Ndipaya village (Settlement). **Farming:** if you take no slates, the Marshlands have no enemies. Sweep the docks for their treasures (about ₦19,000), save and quit before the door, and repeat. |
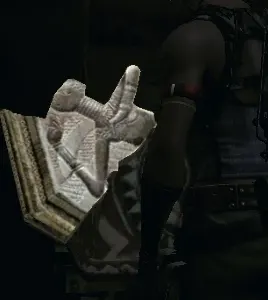 Shaman Slate Shaman Slate | 3-1 · Marshlands and Village Marshlands, north-east dock: chest in a hut on stilts reached with an assist jump. The HAND-TO-HAND COMBAT file is on the shelves by the altar on that dock. | One of the 4 slates for the west-dock door. Sources disagree on which hut: Evil Resource says the left one; IGN and Fandom say the right-hand chest. Open both. Taking it starts a fight with about 12 Wetlands Majini (some with shields), and one turns into a **Duvalia**: keep a Flash Grenade ready. |
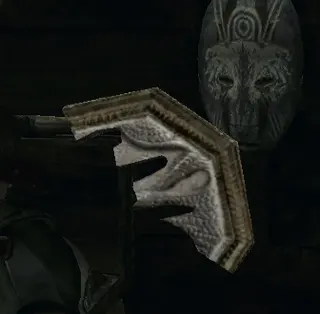 Raptor Slate Raptor Slate | 3-1 · Marshlands and Village Marshlands, east dock: chest in the second small hut. To get there you wade across a pool with about 8 crocodiles (keep walking along the edge) and climb the ladder at the back to the huts on stilts; 4 Majini ambush you in the first one. | One of the 4 slates for the west-dock door. Leaving spawns bow and bomb Majini on the platforms. |
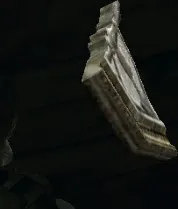 Warrior Slate Warrior Slate | 3-1 · Marshlands and Village Marshlands, south-west dock (end of the long channel): chest in the north-east hut, the far-left one. | The fourth slate: with all 4, the wooden door at the west dock opens to the Ndipaya village. |
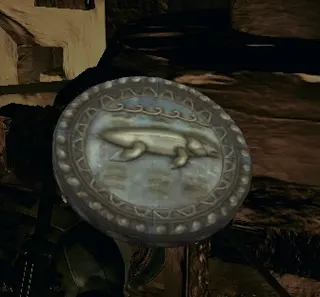 Sea Emblem Sea Emblem | 4-2 · Worship Area and Pyramid Worship Area, west / south-west altar. The emblem is shaped like a fish. | One of the 3 emblems for the stone gate past the temple, which leads to the ornate doors and the Pyramid. Taking it brings reinforcements through the room's entrance, **led by a Giant Majini** who drops a Blue Enigma (₦3,000). Leave fast and he may not come: wait a moment if you want the gem. The 3 emblems can be taken in any order. |
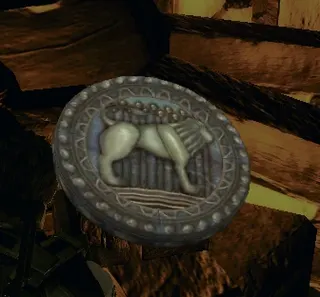 Earth Emblem Earth Emblem | 4-2 · Worship Area and Pyramid Worship Area, east section: on the altar with the mutant skull over the bonfire. The emblem shows a running beast. | One of the 3 emblems for the temple's stone gate. Taking it brings archers and torch-bearing Majini. On the way, shoot down the Sapphire (Pear) on the wall up the stairs opposite this altar. |
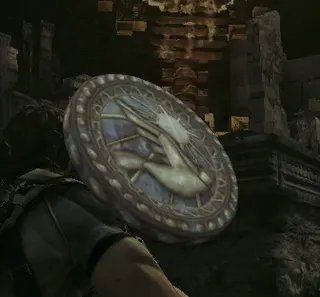 Sky Emblem Sky Emblem | 4-2 · Worship Area and Pyramid Worship Area, north-west: across the broken bridge. Chris propels Sheva with an assist jump; only she gets there. The emblem is a bird in flight. | The third emblem for the temple's stone gate. **Sheva only** (the AI or whoever plays her). A Giant Majini comes with this emblem (drops a Blue Enigma, ₦3,000): Chris covers her with a rifle from the other side. |
 Crane Keycard Crane Keycard | 6-1 · The Tanker: Deck and Hold Ship Deck, cage-ambush area: your partner runs ahead and gets locked in a cage; Majini pour out of a container and from above (one stays in the container throwing explosives: kill him first). One of them mutates into a Duvalia; kill it and it drops the card. | Opens the door to the crane control panel, which frees your partner. **It only exists if the trap happens.** If you snipe the Majini on the crane mast from the observation tower, your partner isn't caged and the card never appears. Those two Majini also drop Topaz (Oval): it's the faster route. |
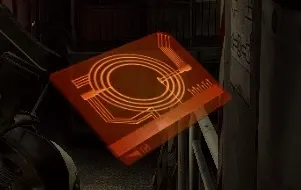 Tanker Keycard A Tanker Keycard A | 6-1 · The Tanker: Deck and Hold Ship Hold: dropped by the Gatling Gun Majini. It is the brown card. | One of the 2 cards for the hold's double electronic door (with Tanker Keycard B). Both players swipe together. The Gatling Gun Majini drops no treasure, only the card. Bring Hand Grenades or a magnum to stun him before the barrel spins up. |
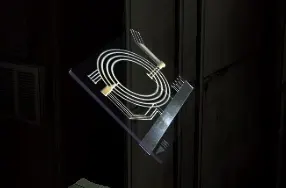 Tanker Keycard B Tanker Keycard B | 6-1 · The Tanker: Deck and Hold Ship Hold, cargo area: safe on the upper level, north-east corner (an isolated platform). It is the silver card. | The second card for the hold's double electronic door, with Tanker Keycard A. |
| Serum PG67A/W | 6-1 · The Tanker: Deck and Hold Ship Hold, lab: you receive it automatically in the Excella cutscene, when Chris shoots one of her briefcases loose. | Used in 6-3, in the Hangar, against Wesker (second fight):
- When Wesker drops to his knees ("Ignorant cretins!"), one player restrains him and the other injects the serum; the prompt appears by itself.
- The first time fails: he breaks free and throws you off. Repeat the cycle at least once more.
- How long you can hold him depends on the damage you dealt. A Progenitor-based serum that keeps Wesker's virus stable; the wrong dose acts as a poison. In Desperate Escape, Jill learns that an overdose weakens him. |
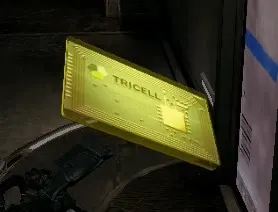 Bridge Keycard Bridge Keycard | 6-2 · The Tanker: Bridge Ship interior, the corpse corridor: several "dead" Majini are alive (fall back to the previous corridor and meet them with a shotgun). Then an armoured Majini comes and, after taking some damage, mutates into a Duvalia; the Duvalia drops the card. | Opens the bridge control room (where the Report on Project W and Spencer's Notebook files are). Later, on the Bridge Deck, turn round as you enter: the wall panel with the Tricell logo opens with this card and holds the L.T.D. for Uroboros Aheri. One guide's tip: don't shoot his head; shoot a leg and do the rear finisher before he mutates. If he mutates, use a Flash Grenade or Flash Rounds. The card is discarded by itself after use. |
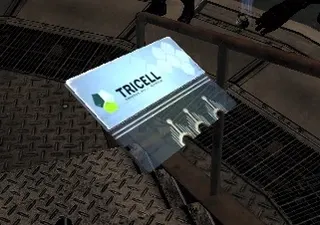 Hangar Keycard A Hangar Keycard A | 6-3 · Hangar and Volcano Engine Room: dropped by one of the two Gatling Gun Majini that come after the 2 Reapers. It is the blue card with the Tricell logo. | With Hangar Keycard B, opens the exit to the Hangar, where the second Wesker fight takes place. Against the Gatling Gun Majini pair, a Rocket Launcher fired at the ground between them works. Fandom spells it "Hanger". |
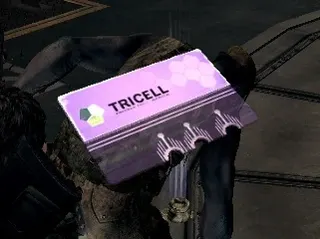 Hangar Keycard B Hangar Keycard B | 6-3 · Hangar and Volcano Engine Room: dropped by the other Gatling Gun Majini. It is the purple card. | The second card for the exit to the Hangar, with Hangar Keycard A. |
| Password 3 | LiN · Lost in Nightmares: The Spencer Estate Mansion, 2F: up the main stairs, right-hand door, corridor to the bedroom. It sits between the last pages of the Keeper's Diary copy on the desk. | One of the 3 passwords for the study computer. The bedroom's weapon or ammo depends on the run's item pattern (there are 3). |
| Password 1 | LiN · Lost in Nightmares: The Spencer Estate Dining Hall: the small arched office behind the table, on the side away from the fireplace. Read Patrick's Memoirs 1 there. | One of the 3 passwords for the study computer. The numbers are on the paper but hard to read. |
 Centaur Emblem Centaur Emblem | LiN · Lost in Nightmares: The Spencer Estate Piano room (door left of the dining-hall fireplace, then up the stairs). Jill plays "Moonlight Sonata" on the piano; a wall slides open and the emblem sits in its recess.
- Playing as Jill, press the on-screen buttons while she plays.
- Shoot the red button in the passage to open it fully at once: in co-op it spares Jill the piece.
- Trick: a Hand Grenade thrown at the right angle goes through the wall, hits the button and opens it with no piano. | Opens the iron door on the far side of the main hall, into the Centaur corridor (east wing). On higher difficulties a Blob may wait outside the room. The same room holds Patrick's Memoirs 2, a Herb (Green) and Handgun Ammo. |
| Heat-Sensitive Paper | LiN · Lost in Nightmares: The Spencer Estate Storeroom (second door down the Centaur corridor; first let Jill pick the lock of the first one, the study): on top of the trunk at the back. | Burn it in the dining-hall fireplace and it becomes Password 2. The storeroom also has 2 Hand Grenades + 2 Incendiary Grenades on a box to the left, a weapon per the item pattern, and Score Star #8 in the corner cage. One door here won't open from this side: you use it during the spike-ceiling trap. |
| Password 2 | LiN · Lost in Nightmares: The Spencer Estate Made by burning the Heat-Sensitive Paper in the dining-hall fireplace. | The last password. With all 3 in the study computer (the room Jill lockpicks) you get the Patrick's Memoirs 3 and Test Subjects files and a secret passage opens. **Before stepping into the passage**, shoot Score Star #9, high on the south wall above the safe: it's worth 1,000 and can't be shot once the ceiling drops. Stepping in drops a gate and traps your partner under the **spiked ceiling**. |
| Square Crank | LiN · Lost in Nightmares: The Spencer Estate Spike-ceiling trap: the free player goes back to the storeroom door that wouldn't open; the trapped player shoots its lock off from their side. Inside, pull the lever that stops the ceiling. The trapped player collects the crank in the spike room (in a safe, per Japanese guides). | Fits the gate socket under the main-hall stairs. One player turns it, the other goes through and turns the crank on the far side to let the first through. Carry on to the metal door and down to the underground prison. Score Star #10 is on the ceiling of the lever corridor. Fandom calls it "Square Crank"; the exact in-game name is unconfirmed. |
| Jail Key | LiN · Lost in Nightmares: The Spencer Estate Underground prison, at the top of the spiral staircase beside the assist-jump spot: one player turns a crank while the other opens the chest. | "A simple old key. It opens a door in the prison": the metal door a little way back along the path. Go through, drop down and jump the gap to a barrel with ammo. |
 Silver Crest Silver Crest | LiN · Lost in Nightmares: The Spencer Estate Prison, after the Jail Key door and the drop: down the stairs on the right to a chest. Fandom: shortly after the first Blob past the spiral staircase. | One of the 2 pieces for the round indentation at the top of the area; with the Gold Crest it opens the way to the Maze. Spend your ammo before placing the 2 crests: doing so **strips all your equipment** (see the Gold Crest). |
| Gold Crest | LiN · Lost in Nightmares: The Spencer Estate Carry on past the Silver Crest, turn left and give Jill an assist jump up to the chest on the ledge. It is engraved with a goddess. | With the Silver Crest, in the round indentation: the floor gives way and you drop into the Maze. **Placing both strips ALL your weapons and items.** Spend your ammo and healing first. Score Star #17 is behind the grate at the foot of the stairs left of the gate: the last one before the point of no return. |
| Crank (Red) | LiN · Lost in Nightmares: The Spencer Estate One of the Maze's 4 fixed chests. Which crank is in which chest is random. The first chest, on the north side (climb from the red square platform in the north-east to a higher ledge with a barrel), always holds the red or the blue crank, since those are the only two traps you can reach at first. | Fits the red trap's socket, by the red room (north-east). Your partner turns it and the spiked platform rises; lure the Blob underneath (don't stand under it yourself) and press the prompt to drop it. The crushed Blob drops the Sun Eater Serpent Shard. Before climbing to the chest, cross the red platform to the far side (back in the water): a crate there has a Flash Grenade. |
| Crank (Blue) | LiN · Lost in Nightmares: The Spencer Estate One of the Maze's 4 fixed chests (each chest's colour is random). If it wasn't in the first, northern chest, check the others: one is along the passage down from the red room and over a railing toward the green-room side; another is up the step from the purple platform. | The blue trap: the blue room behind bars in the north-west, reached by climbing and jumping. The crushed Blob drops the Serpent Tail Shard. Fandom pairs the blue trap with the Dual-Head Serpent Shard; two sources (Berserker's FAQ and game-kouryaku) say Serpent Tail Shard. It doesn't matter: any shard counts toward the goal. |
| Crank (Green) | LiN · Lost in Nightmares: The Spencer Estate One of the Maze's 4 fixed chests (random colour). One of them is in the square room in the north-west: get on the green room's platform and climb higher; a barrel by the chest has a Flash Grenade. | The green trap: the green platform in the south, near the start. Use the small recess on the east side to lure the Blob. The crushed Blob drops the Tri-Head Serpent Shard. |
| Crank (Violet) | LiN · Lost in Nightmares: The Spencer Estate One of the Maze's 4 fixed chests (random colour). One of them is in the square room between the purple and green rooms, reached by two passages. | The purple trap: from the purple platform in the south-west, climb the step and jump along the ledges to the crank socket. The crushed Blob drops the Dual-Head Serpent Shard. Fandom also calls it "Purple Crank". The exact in-game name is unconfirmed. |
 Sun Eater Serpent Shard Sun Eater Serpent Shard | LiN · Lost in Nightmares: The Spencer Estate Dropped by the Blob crushed with the red trap (north-east of the Maze). | Place it in the central goal (the flashing circle on the map, north side). Each shard placed opens more of the maze and spawns a new Blob that smashes a wall.
Shards needed to open the exit: Amateur 1, Normal 3, Veteran 4, Professional 4. Place it as soon as you have it: each placed shard updates the checkpoint. Your first shard is always this one or the Serpent Tail Shard. |
 Tri-Head Serpent Shard Tri-Head Serpent Shard | LiN · Lost in Nightmares: The Spencer Estate Dropped by the Blob crushed with the green trap (south, near the start). | Place it in the central goal (the flashing circle on the map, north side). Each shard placed opens more of the maze and spawns a new Blob that smashes a wall.
Shards needed to open the exit: Amateur 1, Normal 3, Veteran 4, Professional 4. On Veteran and above a Blob may **hold the ceiling up with its weapon**: throw a Flash Grenade or hit it in melee, then get out fast. |
 Dual-Head Serpent Shard Dual-Head Serpent Shard | LiN · Lost in Nightmares: The Spencer Estate Dropped by the Blob crushed with the purple trap (south-west), per Berserker's FAQ and game-kouryaku. Fandom says the blue trap. | Place it in the central goal (the flashing circle on the map, north side). Each shard placed opens more of the maze and spawns a new Blob that smashes a wall.
Shards needed to open the exit: Amateur 1, Normal 3, Veteran 4, Professional 4. |
 Serpent Tail Shard Serpent Tail Shard | LiN · Lost in Nightmares: The Spencer Estate Dropped by the Blob crushed with the blue trap (north-west), per Berserker's FAQ and game-kouryaku. Fandom says the purple trap. | Place it in the central goal (the flashing circle on the map, north side). Each shard placed opens more of the maze and spawns a new Blob that smashes a wall.
Shards needed to open the exit: Amateur 1, Normal 3, Veteran 4, Professional 4. On Professional the map shows no Blob icons and they move faster: this is the hardest part of the episode. |
 Transport Area Key Transport Area Key | DE · Desperate Escape: Out of the Tricell Facility Act 1, Transport Area 1. Its spot is random, one of 3 patterns:
- The safe in the small room right below the start (south side; kick the door).
- The safe in the small room up the ladder outside that door.
- Dropped by the Majini in front of the locked gate, who turns into a Duvalia. | Opens the locked gate in Transport Area 1. Opening it brings a big group from both sides: each player covers the side opposite their partner. The gate Majini always mutates unless an instant-kill melee finishes him: shoot one leg, then do the rear finisher. If the key is downstairs, a rifle is placed upstairs; if it is upstairs, a shotgun. Fandom calls it "Transportation Area Key". |
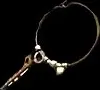 Emergency Exit Key Emergency Exit Key | DE · Desperate Escape: Out of the Tricell Facility End of Act 1 (Transport Area 2): dropped by the boss that bursts out of the big container to the north. Depending on the run it is 2 Chainsaw Majini or a (yellow) Gatling Gun Majini. | Opens the locked door behind the truck and, after opening the one at the end of the corridor together, leads to the turret area and the communications facility. Fall back toward the entrance and blow the oil drums to clear the crowd. The roof of the shack you reach by assist jump has 3 Hand Grenades, and a fixed 1,000-point Score Star sits on top of the container the boss leaps out of. |
 Herb (Green) 100
  Herb (Red) 200
  Herb (G+G) 400
  Herb (G+R) 500
  First Aid Spray 100
  Egg (White) 250
  Egg (Brown) 500
  Egg (Gold) 1,000
  Egg (Rotten) 2,000
  Gold (Small)
 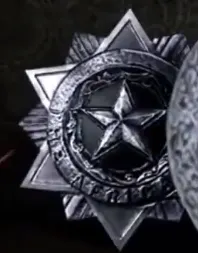 Score Star
  Handgun Ammo 2
  Machine Gun Ammo 1
 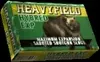 Shotgun Shells 5
  Rifle Ammo 6
  Magnum Ammo 20
 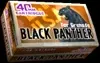 Explosive Rounds 40
 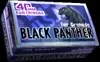 Flash Rounds 5
 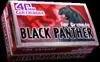 Flame Rounds 20
  Acid Rounds 20
  Electric Rounds 10
  Nitrogen Rounds 40