Collectibles One checkbox per piece, grouped by type and in play order, with the exact spot. What you tick here shows as ticked in each chapter.
BSAA Emblems · 30 Treasures · 149 Lost in Nightmares: Score Stars · 18 Missables: don’t leave without them BSAA Emblem #17 — It only exists during the 2-minute countdown. Replay 3-2 to get it. BSAA Emblem #29 — Explosives only. Replay 6-1 to get it. Topaz (Marquise) — Only if you stay and fight the horde and kill the dynamite Majini; run for the house and it never drops. Replay 1-1 to get it. Gold Ring — Only if you kill the Executioner Majini before Kirk blows the gate. Replay 1-1 to get it. Gold Ring — Only if you kill the Uroboros without using the furnace. Replay 1-2 to get it. Diamond (Pear) — The Majini carrying it runs off within seconds: kill him before he gets away. Replay 2-1 to get it. Topaz (Pear) — Take it before you open the port gate with the Port Key: you can't come back afterwards. Replay 2-1 to get it. Blue Enigma — Only if you kill this Giant Majini; flee and there is no gem. Replay 3-1 to get it. Blue Enigma — Only if you kill this Giant Majini; flee and there is no gem. Replay 3-1 to get it. Venom Fang — Only if you kill this Chainsaw Majini (he can be avoided). Replay 3-2 to get it. Venom Fang — Only if you kill this Chainsaw Majini (he can be avoided). Replay 3-2 to get it. Gold Ring — He appears during the 2-minute countdown: run to the boat without killing him and there is no ring. Replay 3-2 to get it. Soul Gem — Only if you defeat Popokarimu; flee and there is no gem. Replay 4-1 to get it. Blue Enigma — Only if you kill this Giant Majini, who may not arrive if you leave the altar quickly. Replay 4-2 to get it. Blue Enigma — Only if you kill this Giant Majini; flee and there is no gem. Replay 4-2 to get it. Power Stone — Only if you kill this Reaper, which can be avoided. Replay 5-2 to get it. Sapphire (Oval) — Take it before Wesker leaves (at 7 minutes, or sooner if you drive him off). Replay 5-3 to get it. Emerald (Oval) — Take it before Wesker leaves (at 7 minutes, or sooner if you drive him off). Replay 5-3 to get it. Sapphire (Brilliant) — Take it before Wesker leaves (at 7 minutes, or sooner if you drive him off). Replay 5-3 to get it. Emerald (Brilliant) — Grab it in the Wesker phase; at the latest, before the Jill fight ends. Replay 5-3 to get it. Heart of Africa — Only appears if you drive Wesker off before the 7 minutes are up; pick it up before you tear the device off Jill. Replay 5-3 to get it. Topaz (Oval) — Only if you snipe the lone Majini to the south and then go through the cage trap (leave the crane operator alive): with no trap you never reach the walkway where it appears. Replay 6-1 to get it. Topaz (Oval) — Only if you kill this Majini on top of the crane from the observation tower (sniper rifle or Rocket Launcher); no kill, no gem. Replay 6-1 to get it. Topaz (Oval) — Only if you kill this Majini on top of the crane from the observation tower (sniper rifle or Rocket Launcher); no kill, no gem. Replay 6-1 to get it. Diamond (Marquise) — Only if you shoot the rock outcrop down before the bridge collapses, and only as Chris. Replay 6-3 to get it. Score Star #9 — Only until the spiked ceiling drops too far. Replay Lost in Nightmares to get it.
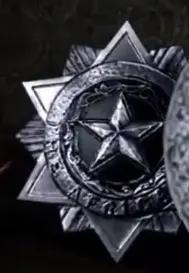
BSAA Emblems 30/30 Reward: Figurines in Bonus Features; with 25 and a clear, Chris's S.T.A.R.S. costume; with all 30, Sheva's Tribal costume and the “Badge of Honor” award.
You shoot the emblem (nothing to pick up). In co-op it counts for both players.
1-2 · Urban District and Furnace Facility0/3 2-1 · Port and Shanty Town0/5 BSAA Emblem #4 Storage Facility · Starting room: upper right corner of the wall with the exit door, beside the closed metal roller door. — Handgun. Solo, AI Sheva waits at the exit: sweep the room yourself (the H&K MP5 case, the gold chest on the containers and 3 files). BSAA Emblem #5 The Bridge · After the runaway-truck bridge, before the sewers, go down the steps on the left and turn to face the bridge: it is on a dirty white sheet on the middle support beam under the bridge. — Handgun. It can only be hit from those stairs. BSAA Emblem #6 The Port (market) · The small green booth marked "CHARGE", in front of the Port Key house: look inside through its screen at the rafters of its roof. — Handgun. Easiest from behind the booth. BSAA Emblem #7 The Port, past the port gate · After using the Port Key, when Kirk's helicopter arrives: climb the ladder on the right, kill the Molotov Majini on the roof and climb the ladder beside him to the balcony with the spare tyre. Look at the long white building opposite: it is in a 2F doorway between columns. — A rifle helps. BSAA Emblem #8 Shanty Town, 3F · At the assist-jump spot where you throw your partner to the building opposite: turn your back to the gap and look up and slightly right. It leans on a broken beam at the roof corner. — Handgun. Shoot it before the throw: it is the same spot. 2-2 · Train Station and Mines0/3 3-1 · Marshlands and Village0/4 BSAA Emblem #12 Marshlands, south dock · A lone wooden pole standing in the water on the east edge of the main waterway, past the sharp turn into a dock. — Solo: sniper rifle or Rocket Launcher from the **starting dock**, or from the chicken-farm dock beside the moored boat. Co-op (split-screen too): the passenger shoots it from the moving boat. Leaving split-screen restarts the chapter, but the emblem stays counted. BSAA Emblem #13 Marshlands, chicken farm (centre island) · Underneath the hut, under its stairs: on the right when you face the hut from the dock. — Sniper from the dock or from the far-left dock, or a grenade or rocket rolled under the hut. In co-op, one player can shoot it from behind the hut. BSAA Emblem #14 Marshlands, north-west fish farm · Dock at the north-west corner, walk into the hut and look up: it is in the rafters. — Handgun. BSAA Emblem #15 Village entrance · After opening the four-slate door, drop into the creek and turn around to the right: it is in an opening under the platform you stepped off. — Handgun. 3-2 · Execution Grounds and Oil Field0/2 3-3 · Drilling Facilities0/1 4-1 · Caves, Ancient Village and Labyrinth0/3 4-2 · Worship Area and Pyramid0/1 5-1 · Underground Garden and Experimental Facility0/1 5-2 · Power Station and Missile Area0/1 5-3 · Uroboros Research Facility0/3 6-1 · The Tanker: Deck and Hold0/3 BSAA Emblem #28 Ship Deck · Climb the first tower (the observation tower) at the start and look back over the ship: the emblem is near the top of the radar mast at the far (south) end. — Sniper rifle with zoom (the H&K PSG-1 helps) or Rocket Launcher. It can also be seen from the starting point. The 3 Topaz (Oval) are set up from this same tower: see their rows under treasures. BSAA Emblem #29 missable Ship Deck, cage area · After the chapter's first partner action (pushing the container), don't drop down: it is inside the raised open container on the left, next to the cargo lift, that the Majini jump out of (the bomb thrower's one; the rising-platform cutscene shows it). — **Explosives only**: a Hand Grenade thrown inside, the Grenade Launcher or the Rocket Launcher. Explosives only. Replay 6-1 to get it. · Bring a grenade into this chapter. One player reports getting Badge of Honor without this emblem, which is unconfirmed: get it anyway. BSAA Emblem #30 Ship Hold, Excella's lab · After the Excella cutscene, in the lab: a small glass-fronted cupboard high on the north wall. Break the glass, then shoot the emblem. — Handgun: 2 shots (glass, then emblem). If you already have the other 29, Badge of Honor pops here.
Treasures 149/149 Reward: Sold at the shop between chapters (they can't be combined). Getting one of each of the 50 types gives the “They Belong in a Museum” award.
149 checkboxes: 135 guaranteed (fixed pickups, fixed enemy drops and conditions) and 14 random (Lion Heart, the 3rd Reaper in 5-3 and the Big Man at the Port Key). For the award, one of each of the 50 types is enough.
1-1 · Kijuju: checkpoint and town0/2 1-2 · Urban District and Furnace Facility0/3 2-1 · Port and Shanty Town0/12 Jewel Bangle The Bridge (container maze) · The Big Man Majini in the open area past the booby-trapped container maze, before the gate you open together, drops it. — Make him your first target: his punches send you flying. One shotgun shell or a burst to a leg, then the melee combo. Sapphire (Pear) The Port, sewer exit · Right out of the dog sewer, before you go near the 4 "dead" bodies in the water: turn left into the dead end. It glints on the floor in the shallow water. Diamond (Pear) missable The Port (market view) · Secret: when you reach the market view, keep left and don't enter the docks yet. When Sheva says "Someone's here...", a black-shirted Majini who doesn't attack runs off to the right through the market. Kill him before he escapes and he drops the diamond. — You only get a few seconds. On a replay, have a rifle ready; on a first run you do not have the S75 yet (it comes later in the Port), so aim carefully with the handgun. The Majini carrying it runs off within seconds: kill him before he gets away. Replay 2-1 to get it. · One guide says killing him stops the Port Key Big Man Majini (and his Jewel Bangle) from spawning; a 149-treasure list has both in the same run. It is unconfirmed: if one is missing, replay 2-1. In co-op it is unknown whether Sheva's line plays, but the Majini still runs. Topaz (Pear) missable The Port · Underwater next to the boat, left of the port gate (along the dock on your right as you come in). — Take it **before you open the port gate**: afterwards you end up on the wrong side of the boat. Take it before you open the port gate with the Port Key: you can't come back afterwards. Replay 2-1 to get it. · There is loose gold in the water too. Ruby (Marquise) The Port (market) · Chest boxed in by the ring of stalls in the middle of the market, right of the "CHARGE" booth and opposite the Port Key house door. — Blow the stalls apart with an explosive. A Hand Grenade is hidden in a fruit pile on the nearby stalls: slash it with the knife. Bring a Hand Grenade from the shop just in case. Emerald (Square) The Port · On the roof of the Port Key house: climb the ladder and cross the rooftops. Jewel Bangle The Port, Port Key house · The Big Man Majini in the wave that arrives when you take the Port Key (padlocked house: go in through the back window and shoot the keys off the hanged corpse's hook) drops it. He comes in through the window. — Don't shoot the front-door padlock: that way they can only come through the window, one at a time. He may not spawn: this is the Big Man who sometimes fails to show, above all if you killed the Majini running through the market (and, per one player, sometimes even without that). If he doesn't come, replay 2-1 without killing the runners. Jewel Bangle The Port, past the port gate · Open the port gate, clear the boat and jump into the water on the far side: the group that comes at you includes another Big Man Majini. Jumping in also lures that group to you; there is more gold in the water. Ruby (Square) Shanty Town, chapter end · Chest in the alley behind the door the Guard's Key opens, on the way to the double gate that ends the chapter. It holds gold and 4 gems: this one and the next 3. — The Chainsaw Majini drops the Guard's Key. You can grab it and run: there are no enemies past his door. Careful: he can get back up while his chainsaw is still running. Emerald (Pear) Shanty Town, chapter end · Same chest as the Ruby (Square), behind the Guard's Key door. Topaz (Pear) Shanty Town, chapter end · Same chest as the Ruby (Square), behind the Guard's Key door. Sapphire (Square) Shanty Town, chapter end · Same chest as the Ruby (Square), behind the Guard's Key door. Evil Resource leaves this chest out; IGN and a 149-treasure list name all 4 gems. 2-2 · Train Station and Mines0/11 Jewel Beetle Train Station · Instead of climbing onto the trains, walk around them to the dead end by the chain-link fence on the east side: it is on the wooden boards on the right. It is off the route: AI Sheva waits further on and won't fetch it. Jewel Beetle Train Station · On your right just after you climb the pile of planks and crates onto the carriage roofs, across from the ladder, stuck in the boards. Ruby (Pear) The Mines · Ceiling of the first long tunnel, just round the curve from the start. **It doesn't sparkle**: once Sheva picks up the Lantern, by the sandbags on the left and before the second one, aim up until your laser dot changes (turns red). — Shoot it and pick it up from the floor. Another landmark: just before the tracks fork (the right branch has a Herb (Red)). Ruby (Pear) The Mines · Ceiling after the first wade through water, above where the second Majini stood, on a thin support stick. — Shoot it and pick it up from the floor. Ruby (Pear) The Mines · At the wooden suspension bridge (the one with BSAA Emblem #10): above the entrance at the far end of the bridge, in the rocks. — Shoot it and pick it up from the floor. Diamond (Oval) The Mines · Just before the crank: an easy-to-miss U-turn to the left before the pillar, into a dark side tunnel (keep to the left wall). Chest at the dead end, with a barrel and a crate that hides a snake. The snake can drop an egg: one of the earliest for Egg Hunt. Ruby (Square) The Mines (big lit chamber) · Stuck in a top gear of the central mill/crane machine in the chamber past the crank gate. — Shoot it from the top level (left path to its end) and pick it up from the walkway below. Ruby (Square) The Mines (exit) · From the top of the big chamber, take the farther tunnel. At the ledge where a Majini drops down (and sprouts a Plaga), look up: ceiling and left wall of the rock tunnel. — Shoot it and pick it up. Diamond (Brilliant) Mining Area · Once Irving escapes, leave the building, turn left at once and climb the short ladder by the red container (rusty truck and tyres). Turn left: chest on the ledge. GamesRadar says ₦4,500; Evil Resource and Fandom say ₦4,000. Diamond (Pear) Mining Area · A glint on the rock wall at the top right of the first tall (red) ladder. — Shoot it and pick it up from the floor. Walking up to that ladder triggers a wave with plenty of dynamite Majini: kill them first. Diamond (Square) Mining Area · Above the broken ladder at the assist-jump spot, further down the Mining Area. — Shoot it, then follow the path round to the ledge where it lands; or boost Sheva up and let her grab it. There are 30 machine-gun rounds next to it. 3-1 · Marshlands and Village0/19 Ruby (Pear) Marshlands, south dock (start) · Animal skull on the left, by two vases. — Shoot it or slash it. Open map: visit the docks in any order. If you don't pick up the slates, the docks stay quiet: it is the best chapter for farming treasure. IGN calls this one a Topaz (Pear); the other sources say Ruby (Pear). Beetle (Brown) Marshlands, south dock (start) · On a tree or post on the right side of the clearing, east of the Beast Slate. Beetle (Brown) Marshlands, chicken farm (centre island) · On the post left of the dock, right of the worn canoe. Chalice (Silver) Marshlands, chicken farm (centre island) · Chest inside the lone hut. The chickens here lay eggs (all 4 types possible): wait 30-40 s. Drive off in the boat and come back to reset them. Beetle (Brown) Marshlands, sunken ship (north-west) · On the submerged end of the wrecked boat (the one with the Rocket Launcher case), in the water. Beetle (Brown) Marshlands, north-west fish farm · On the wall beside the ladder in the pool: drop into the water and it is on the right. Chalice (Silver) Marshlands, north-west fish farm · Chest at the top of the other ladder. Evil Resource puts the second Chalice (Silver) in 6-2; Fandom, IGN and Steam put it here. Beetle (Brown) Marshlands, near the north-east dock · On a tree among the wooden stakes just south of the north-east dock (the lone tree with purple flowers by the barricades). — Bring the boat up to the tree: Sheva grabs it from the boat. Emerald (Pear) Marshlands, north-east dock (altar) · Animal skull above the altar, as soon as you dock. — Shoot it or slash it. Ruby (Pear) Marshlands, north-east dock · Animal skull on the left post of the first hut's doorway. — Shoot it or slash it. Idol (Silver) Marshlands, north-east dock · Chest in one of the two huts on stilts; the other holds the Shaman Slate. — Assist jump: Chris boosts Sheva up to each hut. Open both chests. Most sources put it in the left chest (Evil Resource says the right one). Open that one first: taking the slate springs the ambush. Beetle (Brown) Marshlands, east dock (crocodile pool) · The tree at the far left of the pool, the one with a boat beside it: turn left as you enter the water. The crocodiles can put you in DYING or kill you on any difficulty: don't stand still in the water. Ruby (Pear) Marshlands, east dock · On the wooden post outside the underpass, as you come back into the main pool after the huts. Beetle (Brown) Marshlands, south-west dock · A tree along the narrow channel leading to the landing pier. — Steer the boat close: Sheva grabs it from the boat. Idol (Silver) South-west dock village · The first chest of the village area: turn left off the dock and fight the tribesmen; it is in the rectangular clearing with no building. Blue Enigma missable Village · One of the two Giant Majini in the village at the end of the chapter drops it. — Kill it: if you run, there is no gem. Only if you kill this Giant Majini; flee and there is no gem. Replay 3-1 to get it. Blue Enigma missable Village · The other Giant Majini in the village drops it. — Kill it: if you run, there is no gem. Only if you kill this Giant Majini; flee and there is no gem. Replay 3-1 to get it. Jewel Beetle Village · Right-hand side of the locked gate, the side with the hand crank you turn. The crank: one player holds it while the other crosses. With AI Sheva, don't let go early. Ceremonial Mask Village · Before you turn left to the gondola, go straight into the cave tunnel: chest at its end. This is its only location in the game. 3-2 · Execution Grounds and Oil Field0/11 Ruby (Pear) Execution Grounds, cave · After the raft and the bridge, enter the cave: the first hanging torch (climb the first ledge and hit the fire). — Shoot it or slash it. Sapphire (Square) Execution Grounds, cave · The second hanging torch in the same tunnel. — Shoot it or slash it. Jewel Beetle Execution Grounds, Tricell camp · On top of the first barrel in the rainbow oil pool in the middle of the camp. A snake roams the camp and the long grass: it can drop an egg. Ruby (Square) Execution Grounds exit · Facing the door to the refinery, turn around: it is on the cliff wall (on the right as you approach). Venom Fang missable Oil Field: Refinery · The first of the refinery's two Chainsaw Majini drops it. — Shoot the head or hands until he staggers, then melee. Any chainsaw hit kills you. Only if you kill this Chainsaw Majini (he can be avoided). Replay 3-2 to get it. · There are only 2 in the whole game, both here. Venom Fang missable Oil Field: Refinery · The second Chainsaw Majini drops it. — Shoot the head or hands until he staggers, then melee. Only if you kill this Chainsaw Majini (he can be avoided). Replay 3-2 to get it. Jewel Beetle Oil Field: Refinery · Upper level of the central tower, on the metal frame opposite the valve wheel, at about Chris's shoulder height. Jewel Bangle Control Facility · One of the 2 Big Man Majini who come in through the windows during the first elevator defence drops it. Jewel Bangle Control Facility · The other Big Man Majini of that same defence drops it. Fandom mentions only one Big Man here; Evil Resource, Steam and a 149-treasure list count 2. Gold Ring Control Facility · The Chainsaw Majini in the second defence (the elevator door) drops it. Gold Ring missable Oil Field: Dock · The Big Man Majini who comes out of the cabin with 4 Adjule on the way to Josh's boat, with the 2-minute timer running, drops it. — Kill him and his dogs fast: the clock doesn't stop. He appears during the 2-minute countdown: run to the boat without killing him and there is no ring. Replay 3-2 to get it. · Evil Resource says he drops a Jewel Bangle; five other sources say Gold Ring. Same stretch: BSAA Emblem #17 and a ₦3,000 case. 3-3 · Drilling Facilities0/2 4-1 · Caves, Ancient Village and Labyrinth0/27 Topaz (Trilliant) Caves · At the start, don't take the ladder: follow the path left to the dead end (north end of the map) and climb the ledge on the left: chest. Its only location. Sapphire (Pear) Caves · Stuck to the ceiling just before that dead end. Look up before you climb back down. — Shoot it down and pick it up. Emerald (Pear) Caves · The first brazier on the right after the ladder and the bridge. — Shoot it or slash it. Sapphire (Square) Caves · The second brazier. — Shoot it or slash it. Fandom says Emerald (Square); Evil Resource and the Steam guide say Sapphire (Square). Ruby (Pear) Caves exit · Animal skull on the ground on the right, before the ancient door. — Shoot it or slash it. Sapphire (Pear) Caves exit · The animal skull on the left, by the fire left of the door. — Shoot it or slash it. Topaz (Pear) Caves exit · The torch next to the exit door. — Slash it. Topaz (Square) Ancient Village · On the lintel of the first ruined archway. — Shoot it down and pick it up. Emerald (Pear) Ancient Village · A brazier along the path: past the gold-filled tomb, in the doorway on the left. — Shoot it or slash it. Topaz (Pear) Ancient Village · A brazier on the stairs, between two flights of steps, where Chris and Sheva are split up when the bridge collapses. — Shoot it or slash it. Whoever crosses the bridge first ends up on the far side. Sapphire (Pear) Ancient Village · The second two-person stone casket, past the bridge collapse (it holds gold too). — It takes both partners to open (partner action). The first stone chest holds only gold (7 Gold (Large)). Sapphire (Square) Ancient Village · Same stone casket as the previous Sapphire (Pear). Sapphire (Pear) Ancient Village · A brazier behind a doorway, next to the mummified remains. — Shoot it or slash it. Ruby (Pear) Ancient Village · The mummy in the standing sarcophagus. — Examine it a couple of times. Emerald (Trilliant) Ancient Village, four-way corridor · West chest, after the chest trap drops you into the four-way corridor. Its only location, like the other two chests in this corridor. Ruby (Trilliant) Ancient Village, four-way corridor · South chest of the four-way corridor. Sapphire (Trilliant) Ancient Village, four-way corridor · East chest of the four-way corridor. Emerald (Square) Labyrinth · Entering the north-west quadrant at ground level (turn around after the Grenade Launcher case): on the side of the overhanging walkway above. — Shoot it down and pick it up. Sapphire (Square) Labyrinth · On the ground after pulling the cords of the **first** statue (the blue one). Idol (Gold) Labyrinth, south-west quadrant · After the first statue: climb the stairs and jump across to a small chest on the isolated platform, left of the statue with the second set of cords. Emerald (Square) Labyrinth · On the ground after the **second** statue (the green one). Topaz (Square) Labyrinth · Ceiling of the north-east part of the cave: from the entrance go right, jump onto the boards and follow the path round; look up. — Shoot it down and pick it up. Topaz (Square) Labyrinth · On the ground after the **third** statue (the gold one). Sapphire (Pear) Labyrinth · Upper level, after the pair of **purple** statues. The purple statues split the pair across two floors and AI Sheva ignores this one: fetch it yourself. Ruby (Pear) Labyrinth · Lower level, after the purple statues. Ruby (Oval) Labyrinth · On the ground after pulling the cords of the **red** statue. Its only location. Soul Gem missable Labyrinth (boss) · Popokarimu (the second encounter) drops it if you **defeat** it. Killing it during the escape cutscene doesn't count. — A Proximity Bomb sits in one of the pots before the fight. On Normal the Grenade Launcher's starting load should be enough; on Veteran and up you need more. Only if you defeat Popokarimu; flee and there is no gem. Replay 4-1 to get it. · The fight is optional: run and there is no Soul Gem. Rushing it clears the other enemies, so it is a quick ₦10,000 farm. 4-2 · Worship Area and Pyramid0/14 Topaz (Pear) Worship Area (start) · On the wall above the closed door directly behind you at the start. — Shoot it down and pick it up. Sapphire (Square) Worship Area · A brazier in one of the safe alcoves on the east sunbeam path. — Shoot it or slash it. The sunbeams burn: move from alcove to alcove. AI Sheva sometimes walks into the beam. Sapphire (Pear) Worship Area · On the wall up the stairs opposite the Earth Emblem spot (the ruins on the right after the horde). — Shoot it down and pick it up. Emerald (Pear) Worship Area · The brazier in the far north-east: after the second beam, go right. — Shoot it or slash it. Ruby (Pear) Worship Area · Under the bridge at the north edge, embedded in a ruined shelter between beams. — Shoot it down and pick it up. Blue Enigma missable Worship Area · The Giant Majini that arrives when you take the Sea Emblem (west altar) drops it. Only if you kill this Giant Majini, who may not arrive if you leave the altar quickly. Replay 4-2 to get it. · The emblems can be taken in any order; each Giant Majini drops one. Topaz (Square) Worship Area · A brazier in an alcove on the west beam path: 2nd corridor on the left, 2nd alcove. — Shoot it or slash it. Blue Enigma missable Worship Area · The Giant Majini that arrives when Sheva takes the Sky Emblem drops it. Only if you kill this Giant Majini; flee and there is no gem. Replay 4-2 to get it. · The Sky Emblem is Sheva-only (assist jump): Chris covers her with a rifle. Diamond (Trilliant) Worship Area exit · After placing the 3 emblems, climb the long stairs: above the ornate exit door. — Shoot it down and pick it up. Its only location. Ruby (Pear) Pyramid, first level down · On the raised platform Sheva runs onto by herself (stairs on the left). AI Sheva may grab it before you do. Idol (Gold) Pyramid, second level down, east room · On the altar of the east side room. — Third light puzzle: shine the beam into the crystal on the skull instead of the target mirror; that opens both side rooms. The pots in this room hide snakes that can drop eggs. Ruby (Pear) Pyramid, east room · In the skull hanging right of the Idol (Gold). — Shoot it or slash it. Emerald (Pear) Pyramid, east room · In the skull hanging left of the Idol (Gold). — Shoot it or slash it. IGN says Sapphire (Pear); Evil Resource and the rest say Emerald (Pear). Beetle (Gold) Pyramid, second level down, west room · In the west side room, opened by the same trick of shining the light into the skull's crystal. Its only location. 5-1 · Underground Garden and Experimental Facility0/7 Ruby (Square) Underground Garden · Right at the start, climb the stairs, turn around and look up: in the crevice in the rock above the entrance you came through. — Shoot it down and pick it up. Jewel Beetle Underground Garden · On the floor on the west (left) side, down the steps by the water-purification tanks. Emerald (Pear) Underground Garden · High on the rock face on the north side of the garden, above the exit of the flower-altar room. Look up before you leave. — Shoot it down and pick it up. Lion Heart Progenitor Virus House · A random drop from the first 2 Licker β, as you turn left after the animal pens. — Kill them on the ground, not on a wall or the ceiling, or their drop can't be collected. Their pounce can kill you outright: shotgun, magnum or grenades. Random drop: a real run can give fewer (or more if you farm). The slot is nominal, based on what the guides got. In 5-1 the Steam guide got 4 and IGN 3. A quick 5-1 run (6-7 minutes) nets ₦7,000-10,000 in Lion Hearts. Lion Heart Licker corridor (Progenitor Virus House) · The corridor lined with glass pens full of Licker β. A random drop if you fight them (about 10). — Walk slowly with no weapon drawn and they ignore you: for the Lion Heart, fight. Kicking open the far door (with your partner) sets them all loose anyway. Random drop: a real run can give fewer (or more if you farm). The slot is nominal, based on what the guides got. Lion Heart Licker corridor (Progenitor Virus House) · A second random drop from the Licker β in the same corridor. — Kill them on the ground, not on a wall or the ceiling, or their drop can't be collected. Their pounce can kill you outright: shotgun, magnum or grenades. Random drop: a real run can give fewer (or more if you farm). The slot is nominal, based on what the guides got. Lion Heart Elevator to the Experimental Facility · A random drop from the last batch of Licker β that arrives while you wait for the elevator (it takes about 1 minute). — Rifle while they approach, then shotgun or handgun up close. How many come depends on the difficulty. Random drop: a real run can give fewer (or more if you farm). The slot is nominal, based on what the guides got. 5-2 · Power Station and Missile Area0/8 Lion Heart Experimental Facility Passage · The U-shaped corridor split by a chain-link fence, with about 10 Licker β: a first wave, 2 more round a corner and a big group bursting from the ventilation ducts at the far end. A random drop from those Licker β. — Kill them all instead of running for the door: snipe from range, shotgun up close; fall back round the corner if you get flanked. Kill them on the ground, not on a wall or the ceiling, or their drop can't be collected. Their pounce can kill you outright: shotgun, magnum or grenades. Random: IGN and a GamesRadar reader get 5 "every time"; the Steam guide got only 3. It is the best money farm in the game: quit and save before the next checkpoint and repeat (about ₦100,000 in 20 minutes). Lion Heart Experimental Facility Passage · The U-shaped corridor split by a chain-link fence, with about 10 Licker β: a first wave, 2 more round a corner and a big group bursting from the ventilation ducts at the far end. A random drop from those Licker β. — Kill them on the ground, not on a wall or the ceiling, or their drop can't be collected. Their pounce can kill you outright: shotgun, magnum or grenades. Random drop: a real run can give fewer (or more if you farm). The slot is nominal, based on what the guides got. Lion Heart Experimental Facility Passage · The U-shaped corridor split by a chain-link fence, with about 10 Licker β: a first wave, 2 more round a corner and a big group bursting from the ventilation ducts at the far end. A random drop from those Licker β. — Kill them on the ground, not on a wall or the ceiling, or their drop can't be collected. Their pounce can kill you outright: shotgun, magnum or grenades. Random drop: a real run can give fewer (or more if you farm). The slot is nominal, based on what the guides got. Lion Heart Experimental Facility Passage · The U-shaped corridor split by a chain-link fence, with about 10 Licker β: a first wave, 2 more round a corner and a big group bursting from the ventilation ducts at the far end. A random drop from those Licker β. — Kill them on the ground, not on a wall or the ceiling, or their drop can't be collected. Their pounce can kill you outright: shotgun, magnum or grenades. Random drop: a real run can give fewer (or more if you farm). The slot is nominal, based on what the guides got. Lion Heart Experimental Facility Passage · The U-shaped corridor split by a chain-link fence, with about 10 Licker β: a first wave, 2 more round a corner and a big group bursting from the ventilation ducts at the far end. A random drop from those Licker β. — Kill them on the ground, not on a wall or the ceiling, or their drop can't be collected. Their pounce can kill you outright: shotgun, magnum or grenades. Random drop: a real run can give fewer (or more if you farm). The slot is nominal, based on what the guides got. Power Stone missable Missile Area 1F · The Reaper that hatches when you restore power (the two switches by the missiles, flipped together with your partner) drops it. It drops from the ceiling on the way back, where organic goo covers the left wall. — Shoot the belly; when it falls, hit the white sacs on its back; repeat. Its grab kills you: keep your distance and use explosives or Proximity Bombs. Only if you kill this Reaper, which can be avoided. Replay 5-2 to get it. · It can be avoided, but then there is no Power Stone. Higher difficulties need more belly-back cycles. Dead Bride's Necklace Missile Area 1F, third conveyor · Left-hand side of the third conveyor belt: some of the "corpses" lying on the belt, the ones that grab you, carry one. — If they don't show, stand in the middle of the belt and wait for more bodies to spawn. Evil Resource counts 2 fixed ones on the left side; Fandom and Steam describe random bodies. Dead Bride's Necklace Missile Area 1F, third conveyor · The second necklace from the bodies on the left of the third belt. — If they don't show, stand in the middle of the belt and wait for more bodies to spawn. 5-3 · Uroboros Research Facility0/17 Sapphire (Marquise) Uroboros Research Facility · Safe under a table on the right, in the small office overlooking the 5-2 boss room (where Excella watched from): at the start, climb the ladder and go on to the dead end. The easiest money in the game: start 5-3, grab it, quit and save, repeat. Its only location. Power Stone Missile Area 2F · The Reaper that drops from the ceiling as you turn left after jumping the gap in the catwalk drops it. — Back off and shoot from range: belly, back, belly. Power Stone Missile Area 2F, cargo platform · The Reaper in the cargo-platform ambush, which comes with the Big Man Majini after you power the generator in the H&K PSG-1 room, drops it. — Keep moving and snipe; a strong rifle pierces several enemies. Jewel Bangle Missile Area 2F, cargo platform · The Big Man Majini in that same ambush drops it. Power Stone Missile Area 2F · A third Reaper, only sometimes: there are 4 egg sacs along the catwalk and each run hatches 2 or 3 Reapers. Random: the slot may stay empty. IGN and the Steam guide only saw 2. If it hatches, every Reaper drops a Power Stone. Royal Necklace Missile Area 2F, control room · The control room just before the map exit (the room the enemies poured out of), on the right, past the rocket-launcher Majini on the catwalk and in the booth. — Keep moving between cover and hit them while they reload; shoot into the booth through its side window before you go in. Its only location. Ruby (Brilliant) Monarch Room Entrance · Off the rotating platform, go through the door at the end of the catwalk: on the tunnel ceiling at the end of the rocky stretch, before the main chamber. — Shoot it down and pick it up. Its only location. Lion Heart Monarch Room Entrance · A random drop from the Licker β that arrive after the small lift ride: 2, then 3, then 10 or more climbing out of a hole in the wall. — Only one player rides the lift: the one left below snipes them off the walls. Kill them on the ground, not on a wall or the ceiling, or their drop can't be collected. Their pounce can kill you outright: shotgun, magnum or grenades. Random: IGN and Steam each got 3 here. Lion Heart Monarch Room Entrance · A second random drop from the Licker β in this area. — Kill them on the ground, not on a wall or the ceiling, or their drop can't be collected. Their pounce can kill you outright: shotgun, magnum or grenades. Random drop: a real run can give fewer (or more if you farm). The slot is nominal, based on what the guides got. Lion Heart Monarch Room Entrance · A third random drop from the Licker β in this area. — Kill them on the ground, not on a wall or the ceiling, or their drop can't be collected. Their pounce can kill you outright: shotgun, magnum or grenades. Random drop: a real run can give fewer (or more if you farm). The slot is nominal, based on what the guides got. Chalice (Gold) Monarch Room Entrance, small building · A locker in the small building the blue container drops into when you push it along the upper catwalk; the bridge control is in there. — Push the container (hold the button) with the Licker β on your tail and drop a Proximity Bomb every few steps. Topaz (Brilliant) Monarch Room Entrance · After lowering the bridge, cross it and look up: embedded in the rock above the exit door. — Shoot it down and pick it up. Its only location. Sapphire (Oval) missable Monarch Room (Wesker phase) · A small vase in the north-west room: once Wesker kicks you through the door, follow the corridor to the coffin room; vase on the right. — As soon as the fight starts, run to the east door (right) and examine it: after a few seconds Wesker kicks you through and the upstairs corridors open. Take it before Wesker leaves (at 7 minutes, or sooner if you drive him off). Replay 5-3 to get it. · **Take it before Wesker leaves** (at 7 minutes, or earlier if you make him flee). Otherwise replay 5-3. Emerald (Oval) missable Monarch Room (Wesker phase) · The stone sarcophagus in the next room (upper west). Inside: this gem, the Sapphire (Brilliant) and the L. Hawk magnum. — It opens with a partner action: your partner has to be with you. Take it before Wesker leaves (at 7 minutes, or sooner if you drive him off). Replay 5-3 to get it. · **Take it before Wesker leaves** (at 7 minutes, or earlier if you make him flee). Otherwise replay 5-3. Sapphire (Brilliant) missable Monarch Room (Wesker phase) · Same sarcophagus as the Emerald (Oval). Take it before Wesker leaves (at 7 minutes, or sooner if you drive him off). Replay 5-3 to get it. · **Take it before Wesker leaves** (at 7 minutes, or earlier if you make him flee). Otherwise replay 5-3. Emerald (Brilliant) missable Monarch Room · A vase at the far end of the east (right) balcony, next to a Tricell container: take the right-hand stairs and go all the way back. Grab it in the Wesker phase; at the latest, before the Jill fight ends. Replay 5-3 to get it. · Sources disagree on when it goes; at the latest it stays until the Jill fight ends. Safest: grab it in the Wesker phase with the others. Heart of Africa missable Monarch Room · It lies on the floor between the two staircases when the Jill phase starts, **only if you made Wesker flee within 7 minutes** (the same condition as the Bad Blood award). — Break his line of sight and shoot him in the back (3 shots per opening at most; on the 4th he charges), then do the melee combo when he staggers. With the Rocket Launcher: if he catches the rocket, switch weapons and shoot it in his hand. In co-op, one player baits and the other shoots his back. Only appears if you drive Wesker off before the 7 minutes are up; pick it up before you tear the device off Jill. Replay 5-3 to get it. · Pick it up before you tear the device off Jill's chest. Easier on a replay with an upgraded magnum. 6-1 · The Tanker: Deck and Hold0/9 Topaz (Oval) missable Ship Deck · From the start, turn south and kill the lone Majini (helmet and Stun Rod) through the narrow gap; he can also be seen from the observation tower, down and to the right. His gem appears on the crane walkway: after opening the Crane Keycard door, climb the stairs and it is on the right. — Sniper rifle. Only if you snipe the lone Majini to the south and then go through the cage trap (leave the crane operator alive): with no trap you never reach the walkway where it appears. Replay 6-1 to get it. · No kill, no gem. If you killed the crane operator, the trap never happens and this gem is lost for this run. Topaz (Oval) missable Ship Deck · From the observation tower, snipe one of the 2 Majini at the top of the crane. His gem appears just before the two parallel yellow cargo lifts. — Sniper rifle. Only if you kill this Majini on top of the crane from the observation tower (sniper rifle or Rocket Launcher); no kill, no gem. Replay 6-1 to get it. · These are the 2 Majini at the top of the crane, not the operator by the controls: kill the operator and the cage trap never happens, so you lose the walkway Topaz. Evil Resource and Fandom say killing "the crane guards" skips the trap; game2 and several players tell the two on top apart from the operator. Safest: kill the south one and the two on top, leave the operator alive and check all 3 spots. Topaz (Oval) missable Ship Deck · The other crane Majini. His gem appears on the deck between the two yellow cargo lifts (near the Big Man Majini). — Sniper rifle. Only if you kill this Majini on top of the crane from the observation tower (sniper rifle or Rocket Launcher); no kill, no gem. Replay 6-1 to get it. · This treasure's only location: all 3 are in 6-1. Jewel Bangle Ship Deck · The Big Man Majini on the next platform after you come down the tower, with Adjule and Majini, drops it. — Flash Grenade or Stun Rod, then the melee combo. A good spot for The Works. The Adjule after him can drop eggs. Jewel Bangle Ship Deck · One of the 2 Big Man Majini by the two yellow cargo lifts (back at the junction, turning left) drops it. Evil Resource counts a single bangle in 6-1; IGN, Steam and Fandom count 3. Jewel Bangle Ship Deck · The other Big Man Majini at the cargo lifts drops it. To ride the lifts, your partner needs a gun equipped to shoot your lift's button. Dead Bride's Necklace Ship Hold, last room · One of the 3 rocket-launcher Majini in the last room (past the Tanker Keycard A and B door) drops it. — They are armoured and slow to reload: hit the exposed parts while they reload. Your crate cover can be destroyed. One source says the room's Bui Kichwa drop them; three say the rocket-launcher Majini. Dead Bride's Necklace Ship Hold, last room · The second rocket-launcher Majini drops it. Dead Bride's Necklace Ship Hold, last room · The third rocket-launcher Majini drops it. 6-2 · The Tanker: Bridge0/2 6-3 · Hangar and Volcano0/5 Dead Bride's Necklace Engine Room, second area · One of the 2 rocket-launcher Majini firing from the left, in the area between the two bulkheads, drops it. — Clear the nearby rifle Majini first so you can stay behind a pillar; then deal with the rocket launchers. Dead Bride's Necklace Engine Room, second area · The other rocket-launcher Majini drops it. Power Stone Engine Room, primary bulkhead · One of the 2 Reapers that hatch from the cocoons and come at you from behind when you pull the two primary-bulkhead levers drops it. — Kill them fast, with Acid or Explosive rounds from the Grenade Launcher, before the bulkhead finishes opening: the fight with the 2 Gatling Gun Majini gets much easier. Power Stone Engine Room, primary bulkhead · The other Reaper drops it. Diamond (Marquise) missable Volcano (final Wesker fight) · As soon as you have control, turn around and run up the slope, but **stop before the weak rock bridge**. Shoot the bottom right edge of the off-colour rock outcrop right of the bridge until it falls into the lava. When the bridge collapses and you land below, don't head to the centre: turn left, jump to the new stepping stone and the diamond is at the end. — Any weapon works if you hit the bottom part. **Chris only**: Sheva lands on the other side. Only if you shoot the rock outcrop down before the bridge collapses, and only as Chris. Replay 6-3 to get it. · Wesker follows you there and can kill you in one hit: have your partner cover you. Trick: grab it, then quit and save; you keep the treasure. In co-op, the Chris player has to do it.
Lost in Nightmares: Score Stars 18/18 Reward: All 18 give the “Wish Upon a Star” award; they also add points toward the episode rank.
LiN · Lost in Nightmares: The Spencer Estate0/18 Score Star #1 Mansion: main hall · On the back of the ceiling lantern under the main stairs, facing the barred crank gate: go down either side of the stairs to the little room with the lever. Do them on a separate run, Amateur for example: the S rank wants speed. Points of no return: the jump from the "Jump Down" ledge (by star 11) and crossing the crest gate (after star 17). Missed one? Replay Lost in Nightmares. Score Star #2 Mansion: main hall · The middle wall alcove right above the front doors. — Best from the 2F walkway (once the lever opens the upstairs gates); the chandelier can block it. Score Star #3 Mansion: main hall · On top of and behind the central chandelier, on the entrance side. — Look from the 2F side without the gap. A rifle helps. Score Star #4 Mansion: 2F right-hand corridor · On the cabinet with decorative plates at the end of the hall, outside the bedroom that holds Password 3. Score Star #5 Mansion: dining hall · The south-west corner of 2F, left of the clock (above right of the fireplace). — Jill reaches it upstairs after Chris throws her over the broken hallway; solo, Chris snipes it from the ground floor. Score Star #6 Mansion: dining hall · Inside the grandfather clock, behind the chimes. — The knife works. Score Star #7 Mansion: restroom (off the dining hall, under the stairs) · High on the wall above the urinal. Score Star #8 Mansion: storeroom · The Heat-Sensitive Paper room: inside a small cage half covered by a white sheet, next to a crate. Score Star #9 missable Mansion: study secret room (spike ceiling) · High on the south wall above the wall safe, in the room the 3 passwords open. — **Shoot it before the spiked ceiling drops too far**: after that it can't be hit. Only until the spiked ceiling drops too far. Replay Lost in Nightmares to get it. · The only one worth 1,000 points; the rest are 500. Score Star #10 Mansion: lever corridor · On the ceiling above left of the door of the room with the lever that stops the spikes. — It is visible through the bars on the way to the storeroom: you can snipe it from there. Score Star #11 Descent below the mansion · Right after the crank passage, at the "Jump Down" ledge: lean over and look to the side, at the wall above the shelves, partly behind a beam. You can see it by leaning out before the jump (look right; one guide says left) or, once down, by looking left above the shelves where you land. **Point of no return**: once you jump, stars 1-10 are out of reach. Score Star #12 Prison cells · The floor of the 5th cell on the right after the first stairs, under a dead test subject's hand. Score Star #13 Prison cells · Before the staircase that turns left going up: the closed cell straight ahead, on its left inner wall. Score Star #14 Prison cells · From star 13's spot (past the two corpses on tables), turn around and look up at the 2F wall above the cells. Score Star #15 Prison cells, 2F · At the top of the stairs (where the first Blob shows up): the first sealed cell on the right, on its wall. — Shoot through the bars. Score Star #16 Prison: left path down from 2F · The bottom shelf by a dead test subject, just before the wall the Blob smashes. — It needs a careful angle. Score Star #17 Prison: water area (crest gate) · After placing the Gold Crest and Silver Crest, don't go through: take the stairs left of the gate. It is behind a grate at the bottom (the 6th barred alcove past the Silver Crest chest, 2nd from the back, under a staircase). **Point of no return**: going through drops you through a trap and strips all your weapons; use up your ammo first. Score Star #18 Mansion: corridor before Wesker · High on the back wall at the head of the stairs, after the trap maze and the two staircases. — No gun? Take an M92F from the bodies further on and come back. Jill can also knife it by aiming up. 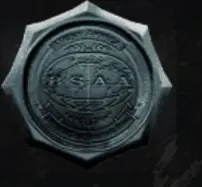
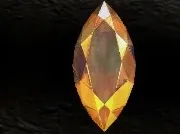 Topaz (Marquise)
  Gold Ring ×4
  Antique Clock
 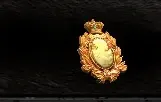 Ivory Relief
 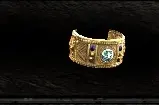 Jewel Bangle ×9
  Sapphire (Pear) ×8
  Diamond (Pear) ×2
  Topaz (Pear) ×5
 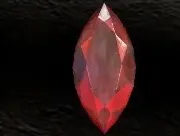 Ruby (Marquise)
  Emerald (Square) ×3
  Ruby (Square) ×5
  Emerald (Pear) ×7
  Sapphire (Square) ×6
 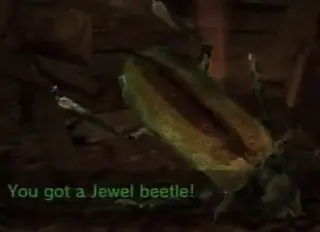 Jewel Beetle ×6
  Ruby (Pear) ×13
 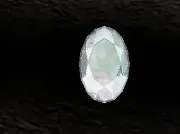 Diamond (Oval)
 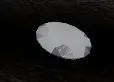 Diamond (Brilliant)
 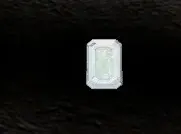 Diamond (Square)
  Beetle (Brown) ×7
 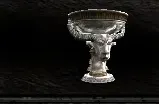 Chalice (Silver) ×2
  Idol (Silver) ×2
  Blue Enigma ×4
  Ceremonial Mask
  Venom Fang ×2
 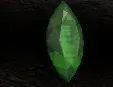 Emerald (Marquise)
 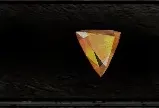 Topaz (Trilliant)
  Topaz (Square) ×4
 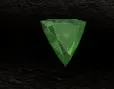 Emerald (Trilliant)
 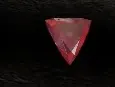 Ruby (Trilliant)
  Sapphire (Trilliant)
  Idol (Gold) ×2
 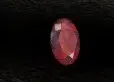 Ruby (Oval)
 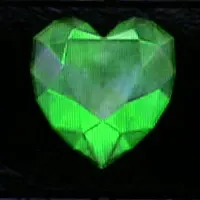 Soul Gem
  Diamond (Trilliant)
  Beetle (Gold)
  Lion Heart ×12
  Power Stone ×6
  Dead Bride's Necklace ×7
  Sapphire (Marquise)
  Royal Necklace
  Ruby (Brilliant)
  Chalice (Gold) ×3
  Topaz (Brilliant)
  Sapphire (Oval)
 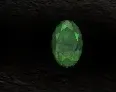 Emerald (Oval)
  Sapphire (Brilliant)
  Heart of Africa
 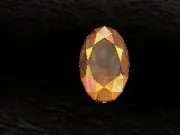 Topaz (Oval) ×3
 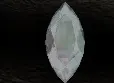 Diamond (Marquise)