You are still Chris with Sheva, the morning after the siege. Kirk has pulled you out of the square, and Captain DeChant of the BSAA Alpha Team radios you to link up with his squad. You cross the Urban District, where you learn the assist jump to get the Old Building Key and, with it, the Ithaca M37, your first shotgun. On the way Allyson, a Majini who seems to be calling for help, is waiting, and at the Alpha Team’s building you only find DeChant, dying. The chapter ends in the Furnace Facility with your first Uroboros: you can burn it in the furnace (easy, no reward) or shoot it dead (hard, pays a Gold Ring).
Chapter order: Public Assembly by day (no enemies, grenades on the roof) → Urban District: broken ladder #1 (look only) → broken ladder #2: assist jump, Old Building Key → Majini behind the fruit boxes → Antique Clock building (emblem 1) → joint kick on the gate → blue-door hut: Ithaca M37 → building across the street, 2nd floor: Allyson (Ivory Relief) → Abandoned Building: emblem 2, chest across the gap, DeChant → elevator → Furnace Facility: Furnace Key → Uroboros → ammo case (emblem 3) → elevator.
Before you start
Shop. This is the game’s first shop (Item Management). With the Gold Ring and Topaz (Marquise) from 1-1 (₦8,000), buy the whole first M92F tier: firepower 170, reload 1.62 s, capacity 13 and critical ★2 for ₦7,000 in total. Critical is the best thing about this pistol: aim for the head. Buying Capacity refills the magazine instantly.
- First Aid Spray (₦1,000): the only healing item on sale.
- Melee Vest (₦10,000, halves melee damage; takes 1 of the 9 slots): shows up here or at 2-1, depending on the source.
- Ithaca M37: you find it in this chapter. Its first upgrades (₦8,000) can be bought at a checkpoint restart or before 2-1.
Anything you left in the 1-1 square is gone.
Saving. There are no typewriters: the game saves at the chapter start and at invisible checkpoints (“Checkpoint” on screen). The most useful one is the elevator after DeChant, right before the boss.
What you can lose (heads-up now):
- The Uroboros’s Gold Ring: only if you kill it without the furnace. Burn it and the ring melts. On a first run you will normally burn it; come back for the ring on a replay.
- The 3 BSAA Emblems can only be seen from specific spots: #2 from the top of the wooden ladder in the Abandoned Building, #3 from the corridor at the end. If you skip them, replay the chapter.
S rank (Famitsu): accuracy ≥70%, ≥15 kills, 0 deaths and ≤13:00. Tips: ignore items and burn the Uroboros in the furnace (far quicker than shooting it dead).
Difficulty. On Professional there is no placed ammo or grenades (neither the square-roof grenades nor the ammo case at the end), and Majini weapon attacks do 10 times the damage (DYING almost every time). On Veteran the Uroboros can survive one pass through the furnace, and on Professional two, if you’ve done little damage to it first.
Clearing 1-2 unlocks the BSAA library file.
Public Assembly by day
Radio call with Kirk. The square has no enemies now. If Sheva runs ahead, you meet her again as you go round the house.
- Hand Grenades: there are grenades on the roof of the structure behind you at the start. Climb up and take them: they pay off later in the chapter. Since they sit right at the start, replaying 1-2 is a way to farm grenades.
- Next to the wrecked gate there is a small storeroom with a crate.
- Just before that gate there is a hole you can drop through to a flooded area with some gold. Apart from that hole, a second ladder leads down to an isolated sewer area with a single barrel to break.
All of it is optional. If you are going for the Lifeguard award in co-op, this is the moment (see 1-1). Leave through the red gate.
Urban District: first house and broken ladder #1
DeChant keeps radioing. Enter the first house through the blue door in front of you, pick up money and handgun ammo (in the barrels and on the tables) and leave by the back door.
Right outside is broken ladder #1: boosting your partner up only shows the house that holds the key. It is optional; skip it.
Head left: a female Majini feeding on a corpse lunges at you, go for the head. A few more Majini follow; once they are down, break the barrels on the right side of that street: ammo and gold. To the right of the alley there is another Majini you can kill safely from behind a fence.
Clear the area now. The Majini in this district come from behind the fences at the edge of the level or wait hidden behind cover. Walk around to draw them all out before the assist jump: otherwise they pile on while you and Sheva are apart.
The woman behind the fence. On the way to ladder #2 you see Majini drag a woman away behind a chain-link fence as she screams for help. You can’t save her: shooting them changes nothing, so don’t waste bullets. She is Allyson; you will see her again shortly.
Broken ladder #2: Old Building Key
To the right of the alley you came through is the second broken ladder. Assist jump: Chris boosts Sheva, she runs left to the building that holds the key (the one you saw from ladder #1) and takes the Old Building Key. The key opens the Ithaca M37 hut; you can finish the chapter without it, but you do want the shotgun.
- Solo: AI Sheva grabs it on her own and tells you over the radio.
- Co-op: the player up top has to find it in a cabinet at the north-west end of that building. The player below goes round through the building opposite the ladder (right-hand door) to meet up.
The ambush. Taking the key spawns 3 Majini on a two-storey balcony, and more come from behind fences and cover. While you are on your own:
- Hold where you are until Sheva comes down and rejoins you. Don’t go looking for her.
- If they bunch up, throw a Hand Grenade (the ones from the square’s roof).
- If you never take the key, those 3 Majini just loiter on the balcony and can be killed later.
Majini behind the fruit boxes
Enter the building across from broken ladder #2 by the right-hand door and follow the path until a Majini leaps out from behind some fruit boxes. Kill him and search the corner he came from: ammo and a few Herb (Green).
Antique Clock building
To the right of that fight is a two-storey building with three doors: two locked, one open. Search both floors:
- Handgun ammo and your first Shotgun Shells (the Ithaca M37 is a little further on, in the blue-door hut).
- Herb (Green), Herb (Red) and a First Aid Spray.
- Money.
The 2nd floor has two balconies:
- BSAA Emblem 1/30: step out onto the balcony straight ahead as you come up, turn right and look at the houses across: the emblem sits on the wall between the houses. There are no enemies on that balcony, so take your time. The handgun is enough.
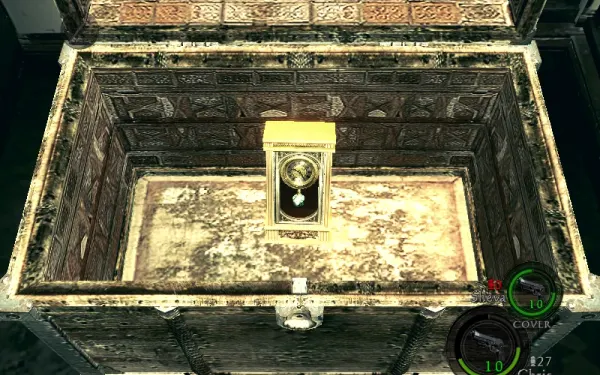
- Antique Clock (₦2,000): chest on the other balcony. As you approach, 2 Majini come in from the balcony. An Incendiary Grenade burns both of them together.
Jump down from the balcony and carry on through the door.
The district’s grenades. The Urban District has at least one Hand Grenade and one Incendiary Grenade placed, but no source says which barrel or cabinet. Break every barrel and crate you see.
The gate and the blue-door hut
The broken gate by the building opens with a joint kick (both at once). Kicking it triggers a cutscene of the Majini dragging the woman back into a building. No fight starts yet: it starts when you go up to that building’s 2nd floor.
Carry on down a quiet street. On the left is a hut with a blue door: open it with the Old Building Key. Inside, the Ithaca M37 hangs on the wall, with more items. The ladder to the roof leads nowhere. Solo, the shotgun is your tool for Allyson and the boss: keep it, or give it to Sheva depending on who will block the Uroboros (see Boss — Uroboros).
Allyson
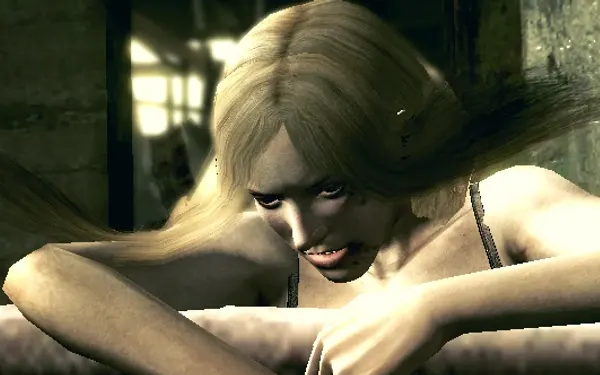
Leave the hut, cross the street and climb the outside stairs of the building opposite to the 2nd-floor entrance: cutscene “Damsel in Distress”. The blonde is Allyson and she comes with a male Majini: full tactic in Boss — Allyson below. She always drops the Ivory Relief (₦2,000).
Afterwards the noise draws more Majini through the windows and both doors, and from outside the building as well: back into a corner. Grenades help in the small room, but mind the self-damage.
Leaving the building
Leave through the door you haven’t opened yet; Majini come in through it, so open it with your gun ready. On the way down the stairs a radio call spawns 4 more Majini, and more keep arriving outside: use melee and a Hand Grenade if they surround you. Once you kill enough of them, they stop coming.
The red doors ahead are locked from the other side: go through the hole in the wall to the left (you can also shoot the padlock off from this side). Knock over the barrels at the end of the path and go through the red door on the left.
Abandoned Building
No enemies. The ground floor is a makeshift maze: head for the opposite corner and take the stairs up. Follow a wooden ladder and circle the upper floor, which forms a square. There are dead Alpha Team soldiers, a black substance and a soldier who suddenly slumps (a scare, no danger). The table by the dead teammate has items.
- BSAA Emblem 2/30: climb the wooden ladder from the dead soldier’s spot, turn 180° and look up: it is on a beam of the water tank, above the big blue metal container (the building has no roof). It can only be seen from near the top of that ladder. The handgun is enough.
- Gold chest: jump across the gap. It is full of money.
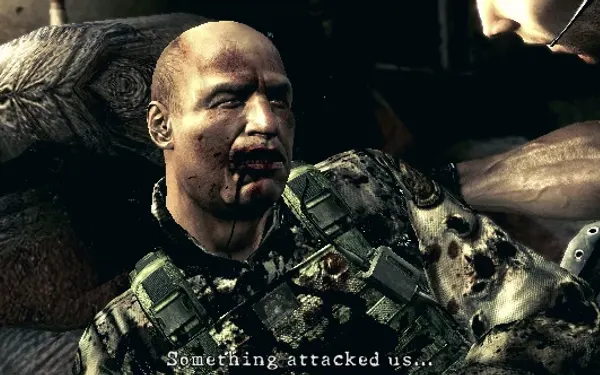
At the end, a partner-action door: both of you together. Cutscene: Captain DeChant dies and hands over the USB data. Collect the items (handgun ammo), follow the corridor and ride the elevator down (checkpoint). Check your gear before going down: the boss is below.
Furnace Facility
The corridor leads to a locked door: take the other corridor, on the left, and break the barrels along the way. You reach the furnace room: a square room with the furnace (a chamber you can walk into) at the top end, a control panel with a lever in front of the furnace, and 2 gas cylinders that can be knocked over.
- Furnace Key: on the body in front of the control panel. It opens the locked door from the start.
- Herb (Green) and handgun ammo.
Before you head back, examine both cylinders to knock them over: they are useful in the fight. On the way back to the locked door the Uroboros appears in the main corridor: tactic in Boss — Uroboros below. Burn it in the furnace and it drops nothing; shooting it dead pays a Gold Ring (₦5,000).
Solo shortcut: on entering the Furnace Facility, at the red door, set Sheva to Attack. She hangs back breaking barrels and collecting items instead of following you. Meanwhile, run for the Furnace Key yourself; the boss appears when you start back. If Sheva did follow you, step back towards the first room to trigger the cutscene.
Exit
Open the locked door with the Furnace Key and follow the path; no more enemies. There is an open case with 3 boxes of handgun ammo (not on Professional).
- BSAA Emblem 3/30: from the case, look through the metal fence on the right side of the corridor to the elevator, at the back wall. The handgun is enough.
Ride the elevator up: cutscene and end of chapter.
Co-op and AI Sheva
- 1-2’s partner actions: the assist jump at ladder #2 (a short split: one goes up for the key, the other walks round and holds off the ambush), the joint kick on the gate by the Antique Clock building, and the door before DeChant’s cutscene.
- Sources always describe Chris boosting Sheva; one guide says that if you play Sheva solo it is AI Chris who goes up, unconfirmed.
- The only confirmed AI auto-pickup is the Old Building Key.
- Set Sheva to Attack once an area is clear (she goes for loose items) and to Cover during the ambushes around Allyson’s building.
- Furnace: decide beforehand who carries the Ithaca M37. Whoever blocks the Uroboros needs it; whoever pulls the lever does not.
Figures
Finishing chapter 1 unlocks the Majini (Town A) and (Town D) figures in Bonus Features. With 5 emblems in total and chapter 1 cleared you get DeChant, Kirk, Reynard, Majini (Agitator) and Big Man Majini; with 10, the Executioner Majini. Chapter 1 only has 3 emblems: the rest come in 2-1 and 2-2.
Boss — Allyson
Where: 2nd floor of the building across the street from the blue-door hut. You go in by the outside stairs after taking the Ithaca M37.
The blonde who seems to be calling for help is a Majini with more health than normal. After taking damage her head bursts and a Cephalo comes out: a long-reach Plaga that lashes like a whip. It hurts you even if you are just close by.
- Kill her before the Plaga comes out. Shoot a leg (the thigh), run behind her and press the prompt: Chris Neck Breaker, Sheva Throat Slit. She dies instantly with no Cephalo. In co-op, one shoots the leg and the other circles round. Careful: a shot anywhere else cancels the stun.
- With the Ithaca M37 she goes down fast and from a safe distance. Some guides advise skipping the fight if you don’t have the shotgun.
- If the Cephalo comes out: back off (it reaches far) and shoot the Plaga, not the body. Leg shots no longer stop her. A Flash Grenade kills it instantly.
- On replays, the Stun Rod, the Rocket Launcher or a Nitrogen round from the Grenade Launcher also kill her before the Plaga emerges.
- Don’t forget the male Majini or the ones who come in through the windows and doors afterwards.
Reward: Ivory Relief (₦2,000), always.
Boss — Uroboros
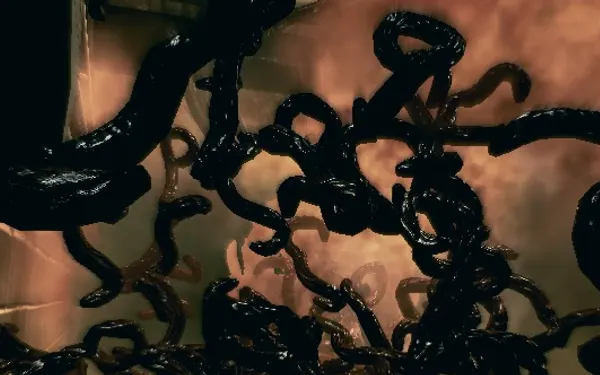
A Kijuju man the masked woman injected with Uroboros. His body rejected the virus and became a mass of tentacles: this is what killed the Alpha Team. Weak point: the orange core that sometimes shows in the arm-shaped part. If it catches you, it sticks health-draining leeches on you for a while. The furnace room is the trap.
Method A: the furnace (first run and S rank).
- Turn around at once. When the fight starts, quick-turn and run back to the furnace room: you can’t slip past it in the corridor. Don’t waste bullets.
- The shutter. Once you are both in with the Uroboros behind you, a shutter closes behind it: you are locked in with it.
- Knock over the cylinders. If you didn’t earlier, examine both gas cylinders to knock them over.
- Make it absorb one. Lead it over a fallen cylinder: the Uroboros absorbs it as it passes.
- Get it into the furnace and stun it. Lure it into the furnace chamber and, as soon as it is in, shoot the cylinder it is carrying (not one that is merely near it): the blast knocks it down for a moment.
- Get out and pull the lever. Leave the chamber at once and pull the lever in front of the furnace. Before you pull it, make sure Sheva is not inside the furnace. While the door closes, shotgun blasts keep it inside.
- The route. Circle the room clockwise and lure it into the furnace from the passage opposite the lever: that way you reach the lever right after the stun.
Who pulls the lever solo (pick one):
- You lure it in, step out, hold it in with the shotgun and order Sheva to pull the lever.
- You are the bait inside the furnace and Sheva is at the lever. When the Uroboros comes in she pulls it, the doors start closing slowly and you must get out very fast. The riskiest option.
- You do it all yourself: lure it in, stun it with the cylinder, run to the lever and pull it straight away (the sequence above).
Co-op is much easier: one player is the bait and blocks it with the shotgun, the other waits at the lever. If AI Sheva only has to pull the lever she needs nothing; if she is the one blocking, give her the Ithaca M37.
Difficulty: on Amateur and Normal one trip into the furnace kills it even at full health. On Veteran it may survive one if you’ve done little damage, and on Professional two: shoot the core and use the cylinders before locking it in, and repeat the whole cycle if it comes out.
The furnace melts the Gold Ring: this method gives no reward.
Method B: shoot it dead (replays). Kill it without the furnace: the 2 cylinders, grenades and heavy weapons (Gatling Gun, Rocket Launcher, S&W M500) aimed at the orange core. Reward: Gold Ring (₦5,000). It is the only treasure you can miss in this chapter.
Don’t leave without:
- the Hand Grenades on the square’s roof, at the start;
- the Old Building Key (broken ladder #2) and the Ithaca M37 (blue-door hut);
- the 3 BSAA Emblems (balcony across from the Antique Clock one, water-tank beam, fence along the final elevator corridor);
- the Antique Clock and Allyson’s Ivory Relief;
- the gold chest in the Abandoned Building and the ammo case at the end;
- on a replay, the Uroboros’s Gold Ring by killing it without the furnace.
All of it comes back by replaying 1-2 from Chapter Select.