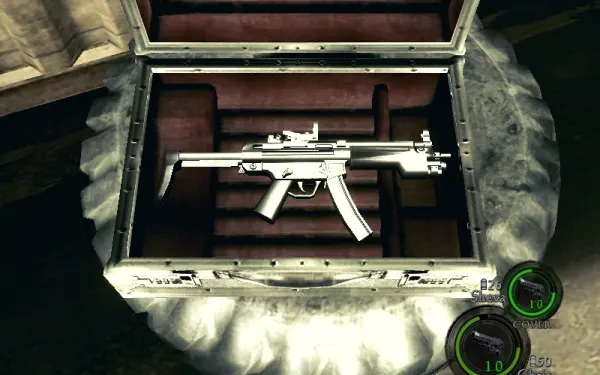
You are still Chris with Sheva, now on Irving’s trail with DeChant’s USB data. The chapter is long and the first really demanding one: you leave a storage facility with the H&K MP5, cross a container maze full of tripwires, face the first Big Man Majini and the first Adjule (Plaga dogs), stop a truck on a bridge and go down into a sewer. Then comes the Port, with the first Kipepeo (flying insects), a market full of gems, the Port Key and Kirk’s air support, which leaves you the S75. In Shanty Town Kirk’s helicopter goes down, Sheva has to cross alone to another building (or you avoid it with a grenade), and the chapter closes with the Chainsaw Majini and a Rider Majini ambush in front of the station.
Chapter order: Storage Facility (H&K MP5, emblem 4, 3 files) → container maze (tripwires, Adjule) → open area: Big Man (Jewel Bangle) → two-person gate → bridge: the truck (emblem 5) → sewer (5–6 Adjule) → the Port: Sapphire (Pear), Kipepeo → market: Diamond (Pear) from the runaway Majini, Topaz (Pear), emblem 6, Ruby (Marquise), Emerald (Square) → Port Key (Big Man) → port gate (Big Man) → Kirk’s helicopter (emblem 7, S75) → Shanty Town: Kirk goes down → 3rd floor (emblem 8): Sheva crosses alone → Chainsaw Majini (Guard’s Key) → chest with 4 gems → two-person gate → Train Yard: QTEs and Josh Stone.
Before you start
Shop: what is new at 2-1. These upgrade levels open now (in brackets, what each one costs):
- M92F: firepower 190 (₦3,000), reload 1.53 s (₦2,000), capacity 16 (₦500) and Critical ★3 (₦8,000; the shop shows it as the second gold star, because level ★1 is the stock one). The whole tier: ₦13,500. The critical is the best buy of the chapter if you aim for heads.
- Ithaca M37: firepower 260 (₦2,000), reload 2.70 s (₦1,000), capacity 8 (₦500). All of it: ₦3,500.
- VZ61: firepower 80, reload 2.55 s, capacity 80 and critical ★3. All of it: ₦18,500.
- H&K MP5, once you have it: firepower 80, reload 2.40 s, capacity 65 and piercing 4 (goes through 4 targets). All of it: ₦24,000.
- S75, once you have it: firepower 850, reload 3.30 s, capacity 8. All of it: ₦6,000.
What to sell. The Antique Clock and the Ivory Relief (₦2,000 each) are good for nothing else: sell them. If you killed the Uroboros without the furnace, sell its Gold Ring (₦5,000) too.
Priority on a first run. If you didn’t buy the first M92F tier (₦7,000) in 1-2, that comes first. After that you usually have little left (a few thousand plus loose gold): buy the M92F’s capacity 16 (₦500, and it fills the magazine) and save toward Critical ★3. The MP5 and S75 upgrades can wait: buy them when you restart from a checkpoint after picking the guns up, since the Item Management screen opens on a restart.
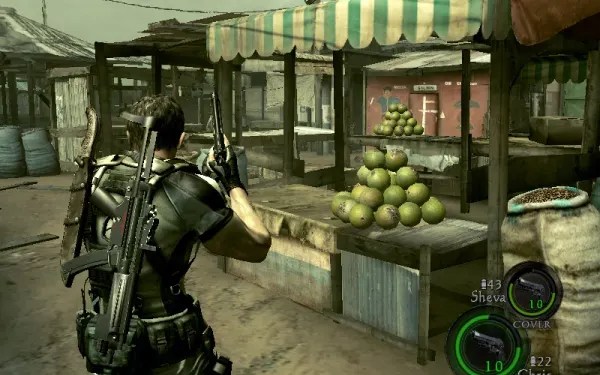
Loadout. Bring the Ithaca M37 loaded: it handles the Big Man, the sewer Adjule and the Kipepeo. Bring Hand Grenades if you have them: one opens the market stalls (Ruby (Marquise)) and another breaks the Shanty Town padlock without splitting from Sheva. As soon as you pick up the H&K MP5, give it to Sheva: it goes through several enemies in a row and is the cheapest machine gun to fully upgrade. The S75 arrives mid-chapter: use it to cover Sheva in Shanty Town and on the Chainsaw Majini.
What you can lose (heads-up now):
- Diamond (Pear): carried by a black-shirted Majini who runs away as you enter the market. If he escapes, it is lost for this run.
- Topaz (Pear): underwater by the boat in the market. Take it before you open the port gate with the Port Key.
- S75: in the port storeroom; take it before leaving through the red gate.
- BSAA Emblem 8: only visible from the assist-jump spot on the Shanty Town 3rd floor.
Saving. No typewriters. There are checkpoints at the open-area gate, in the sewer tunnel, when Sheva lands in Shanty Town, at the Chainsaw Majini’s iron door and at the Train Yard gate.
S rank on Normal: accuracy ≥70%, ≥60 kills, 0 deaths and ≤23:00. Switch weapons to suit the situation (the S75 included). Treasures and placed gold add up to about ₦16,400–19,400.
Difficulty. On Professional the game removes fixed ammo and grenade placements (don’t count on the one in the market’s fruit pile), Majini weapon attacks do 10 times the damage (DYING almost every time) and a wrong button in the final QTEs fails at once. The Chainsaw Majini gets back up berserk on Veteran and Professional (and on Normal if you haven’t died).
Storage Facility
No enemies, only rats. AI Sheva waits by the exit, so sweep the room yourself.
- H&K MP5: silver case in the middle of the storage area, on the left as you face the exit door.
- Crates: gold or ammo, and machine-gun ammo only after you take the MP5. There is plenty of money: break them all.
- Three files, all in sacks: BSAA Emblems by the parked jeep, DIRECTIONS FOR PARTNER by the big container on the west side, and ITEM MENU by the exit door (south-west corner).
- Gold chest (about ₦1,000): climb the ladder onto the containers at the back right and walk over to it. In two minutes you can repeat it by restarting the chapter.
- BSAA Emblem 4/30 (2-1 #1): on the exit-door wall, high up on the right, next to the metal shutter. It is easier to aim at from on top of the containers. The handgun is enough.
Leave through the white door.
Container maze
It is full of tripwires with explosives: shoot the device from a distance or lure Majini into them. Look up too: there are enemies on top of the containers.
- First bend: kill the crossbowman on the crates to the left and set off the tripwire.
- Past it, two more Majini: one charges and the other, a crossbowman, retreats higher up if you get close or aim at him.
- The path splits: straight on leads to a room with ammo; go right, kill the ambusher and search the metal boxes before the second tripwire: First Aid Spray + Herb (Green).
- Climb the ladder and drop into the ammo room. Another ladder on a container lets you shoot an unreachable explosive and reach a nook with items.
- After the third tripwire, cutscene: a crossbowman and 3 dogs; one mutates into an Adjule. Adjule are fast and hit harder than a Majini: kill them first. They can’t climb onto the containers: get on top of one and shoot down at them. The Ithaca M37 drops them in groups; lead them into any tripwires left.
Break the loose barrel on the left, then go right, climb the ladder onto the containers and go through the open container to the open area.
Big Man open area
A big fight: several crossbowmen, a Molotov-throwing Majini, a Big Man Majini and Adjule.
- Don’t step into the open area. Wait in the entrance passage and ambush from there: they come to you one at a time. Kill the Adjule first.
- Big Man: his punches send you flying, and regular shots barely slow him. A shotgun blast makes him guard (arms crossed): step in and finish (Chris Uppercut, Sheva Somersault). From range, shoot a leg until he kneels (Chris Straight, Sheva Roundhouse). He always gets back up: repeat. He drops a Jewel Bangle (₦1,000).
- 3-hit combo: with your partner close you can chain up to 3 melee hits on the Big Man. Set Sheva to Cover so she stays at your side.
- Oil barrels in the middle: they burn groups if you light them. Keep yourself and your partner out of the blast.
- Out of ammo: you can ignore the enemies and open the gate at the far end.
Three awards fit here:
- The Works: take Sheva’s weapons away, throw a Flash Grenade at the Big Man, strike, let Sheva follow up and land the third hit yourself. Only whoever lands the third hit gets it.
- Be the Knife: the crossbowmen on the containers. Kill the others, leave one and deflect a bolt with the knife by timing the slash.
- Fireworks: shoot the Molotov while the Majini is still holding it.
Open the big gate with your partner (checkpoint). An Adjule attacks as it opens; you can dodge it.
The bridge
Jump the broken gap and a truck comes at you head-on. If it reaches you, it is a death cutscene. There are 4 explosive barrels on the bridge.
How to stop it (any one works; walking toward it yourself saves bullets and is safer):
- The easiest: stand on the left side and shoot the front-right barrel. The blast flips it. It is also the recommended way on Professional.
- Shoot the driver until he dies.
- Shoot out one of the front tyres.
- Blind the driver with a Flash Grenade.
- A Hand Grenade as it passes.
Then waves of Majini come from the far end of the bridge: use the barrels that are left. It is the best spot for Baptism by Fire (3 Majini with one barrel) and Meat Shower (3 Majini with one grenade).
At the end of the bridge, a building with crates and barrels: ammo, money and a Herb (Red). Stock up here; there is a long way to go.
- BSAA Emblem 5/30 (2-1 #2): go down the steps on the left at the end of the bridge and turn back toward it: the emblem is on the central support beam, above a dirty white sheet. It can only be seen from those steps.
Sewer
Go down the stairs by the bridge. Adjule wait in a narrow corridor: 3 right at the entrance and 2 further in according to Kamigame; IGN counts two groups of 3. Expect 5–6. Equip the shotgun before going down.
- Option 1: a Hand Grenade into the first group as soon as it shows.
- Option 2: if a barrel is left on the bridge, go back up and lure the first 3 to it; shoot it as they pass.
- Option 3: shotgun, backing off as you fire.
They drop items. In the room at the end, break the two crates. Checkpoint in the tunnel; a few rats before you leave by the white door.
The Port: shallow water
On the way out, turn left to the dead end: Sapphire (Pear) (₦1,000) on the ground, before you reach the bodies.
The Kipepeo. There are 4 “corpses” in the water on your right: three release a Kipepeo on their own and the fourth gets up and releases one when damaged.
- They can’t fly into low-ceiling spaces or roofed buildings. When they come out, back into the covered passage you came out of (the sewer exit) and shoot them from inside.
- A few handgun shots kill a Kipepeo; the shotgun is better up close and a Flash Grenade kills them instantly.
- They dodge when you aim at them (more on higher difficulties).
- Kill a carrier under a roof and it just loses its head, with no Kipepeo.
Shoot (or knife) the padlock on the door to the next sewer (3 rats) and climb the ladder.
Port market (quiet at first)
This is where the chapter’s secret treasure is. Sweep the market before you take the Port Key: it fills with enemies afterwards.
- Diamond (Pear) (₦2,000): when you look out over the market, stay left and don’t go down to the docks. When Sheva says “Someone’s here…”, a Majini in a black shirt runs off to the right. Kill him before he escapes (on a replay, with a rifle; on a first run you don’t have the S75 yet, so aim carefully with the handgun): he drops the diamond, which ends up near the green shed and the stalls. Two more runners by the chest in front of the locked door only drop random items.
- Careful with the runners: killing them now reduces the Majini in the Port Key wave. According to one guide, that is exactly why the Port Key Big Man may not show up, losing you that Jewel Bangle; a video seems to get both in the same run, and sometimes the Big Man doesn’t show even if you leave them alive. Nobody has tested whether killing only the black-shirted one is enough. The diamond is worth more than the bangle: prioritise the diamond.
- Topaz (Pear) (₦1,000): wade into the water by the boat, along the dock on your right as you enter; it is underwater. Get it before opening the port gate or you’ll be stuck on the other side. There is loose gold in the water.
- BSAA Emblem 6/30 (2-1 #3): facing the closed docks, near the entrance, the small green shed with the “CHARGE” sign: walk up to the front and look through its window at the inside of the roof (it also works from behind). Handgun. Take it now: once enemies show up it is hard to aim.
- Ruby (Marquise) (₦3,000): a chest walled in by the ring of stalls in the middle, to the right of the emblem. Blow the stalls open with a Hand Grenade. There is one hidden in a fruit pile at the stalls: slash it with the knife (not on Professional).
- Emerald (Square) (₦1,000): climb the ladder and cross the rooftops: it is on the roof of the Port Key house.
The Port Key
It is the lone house with the padlocked front door. Don’t shoot the padlock: while it stays locked, Majini can’t come in through that door in the fight that follows.
- Go round the house and jump in through the back window.
- Shoot the keys hanging from the hook of the hanged corpse on the ceiling and take the Port Key.
- A wave arrives. With the door locked they can only get in through the window: turn round at once, aim there and pick them off one by one.
- The wave usually includes a Big Man (sometimes two, and sometimes none: see the Diamond (Pear)) carrying another Jewel Bangle.
Port gate and Kirk’s helicopter
Go back to the market and open the metal gate on the boat side with the Port Key. Clear the boat: a Majini on board releases a Kipepeo. Herb (Green) on deck.
On the other side, jump into the water: there is gold and a Gold (Large), and the next group wades in after you. Among them comes another Big Man (Jewel Bangle, guaranteed).
The helicopter. Past the boat landing, as you climb the step, Kirk’s helicopter arrives and strafes the area with rockets. The rockets land at random and hurt you too.
- Where to stand: take cover against the wall (the wall-hug action) at the corner of the first building and let the Majini come to you until the helicopter stops firing.
- The cheap way is to hang back and let Kirk kill everything (the Majini still drop items). To save ammo, fall back to the boat landing and let him cover you.
- The big wave: when you cross the wooden fence, a large group pours out of the far hut. Throw a grenade into the group and retreat toward the exit door to finish the rest away from the rockets.
Items:
- BSAA Emblem 7/30 (2-1 #4): once the fire dies down, climb the ladder on the right to the rooftop with the tank (there is a Molotov Majini on that roof), reach the spare-tyre balcony and look at the white building opposite: the emblem is in the 2nd-floor doorway, between columns. A rifle helps.
- S75: in the silver case in the hut the Majini came out of (the small storeroom with the red steel door, in the north-east corner). The same hut has Rifle Ammo. Take it all before you leave.
Leave through the big red gate on the left.
Shanty Town
A big house blocks the way. The alley straight ahead is a dead end but holds items, and entering it draws the Majini out of the house (3 in the first building, on your right): shoot them from outside the window, climb in through it, loot and leave by the other side.
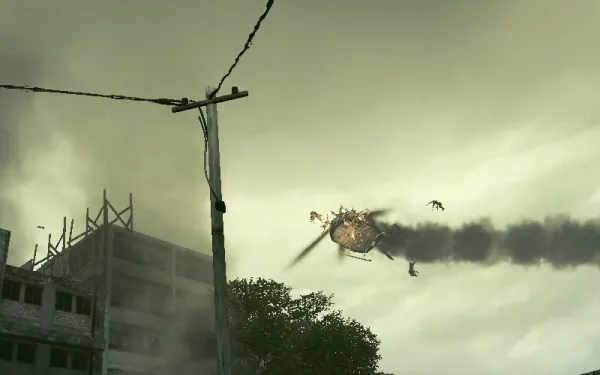
The helicopter’s Kipepeo. Cutscene: the Kipepeo bring down Kirk’s helicopter, and two Kipepeo attack you. Fight them under a low roof or from inside a building: they can’t get in there.
Uphill broken ladder (optional). At the back of where the Kipepeo appeared you can boost Sheva onto a roof. There is ammo on that roof: send her up so she collects it and covers you from above when the Majini pour out of the next building’s entrance. It is optional, and according to Kamigame staying together is safer. With or without the boost, lots of Majini come out of that entrance as you move on: a grenade into the group.
Second building. Majini hide to jump you: one in the ground-floor toilets, another behind the stairs. Check every corner.
- Herb (Green) and Herb (Red).
- Hand Grenade on the left balcony of the 2nd floor: don’t spend it if you want to avoid the 3rd-floor split.
- Handgun ammo.
Go up floor by floor and let them come to you.
3rd floor: the split
The door of the building opposite is padlocked on the far side. First:
- BSAA Emblem 8/30 (2-1 #5): at the assist-jump spot, turn round (back to the gap), look up and slightly right: the emblem rests on a broken beam between the roof and the door’s eave. Handgun.
Then you have two options:
A) No split (grenade). Fewer Majini and no risk to Sheva. Two ways to aim the Hand Grenade from the balcony:
- From the 2nd floor, right side of the balcony: put the crosshair just below the green banner, above the blue banner opposite (it lines up with the padlocked door) and throw: it bounces down to the door and breaks the padlock.
- From the 2nd floor, at the yellow “ANIMAL HEALTH” sign on the outside wall of the building opposite: the grenade bounces down and the blast breaks the padlock on the ground-floor door.
- Trick to land it: aim your gun at the exact spot first, then switch weapon to the grenade and throw straight away: it goes where the gun’s crosshair was.
B) With the split. Chris throws Sheva across to the building opposite (checkpoint on landing). She fights down through a dozen Majini to the ground floor, crosses the street and breaks the padlock on Chris’s door.
- Before the jump, give her a loaded gun, ammo and healing: the AI burns through supplies on its own.
- Chris covers her: drop straight from the jump spot to the 2nd floor, which is the best angle, and use the S75 (the handgun works too) on whatever blocks her way.
- Barrels: Sheva’s building has explosive barrels. Shoot them when a group bunches up, never with Sheva next to them.
- In co-op, Sheva’s player makes that descent.
When you regroup a fresh group spawns: back into a corner. Then sweep the ground floor of Sheva’s building: the AI doesn’t pick anything up on the way down.
Leave the building, turn left and climb the sloping path to the locked iron door (checkpoint). Get ready for the Chainsaw Majini: full tactic in Boss — Chainsaw Majini below. Heal both of you and reload before you go near.
After the Guard’s Key
The key opens the alley gate. Behind it, a chest with Gold bars (₦3,000, doubled on Professional) and 4 gems: Ruby (Square), Emerald (Pear), Topaz (Pear) and Sapphire (Square) (₦1,000 each). There are no more enemies past the Chainsaw. At the end, a gate the two of you open together.
Train Yard (in front of the station)
Crows. Herb (Green) in a small shed before the crash site; checkpoint at the gate. Cutscene: Kirk’s burned body and the Rider Majini attack.
The 3 QTEs. Press what the screen shows at these three moments:
- When the first Rider Majini jumps out.
- When the chain drags Chris (Sheva shoots the chain off his ankle).
- When two motorbikes wheelie toward you. This one is different: two buttons at the same time; pressing only one fails. (Kamigame, on PS4: □, □ and L2 + R2 together.)
A miss is a game over, but you retry on the spot. On Professional, a wrong button fails at once. In newer versions, Options > Game Settings > Action Assist can handle the QTEs for you.
Josh Stone’s Delta Team arrives and the chapter ends (award Completed Chapter 2-1).
Co-op and AI Sheva
- Splits: the optional uphill boost (Sheva collects ammo on the roof) and the 3rd-floor split, which the grenade avoids.
- Partner actions: the open-area gate and the one after the Chainsaw Majini, both together.
- AI Sheva: set her to Cover for the Big Man fights (so you chain the 3-hit combo) and the Chainsaw Majini; to Attack when you want her to collect items in cleared areas.
- Weapons: the H&K MP5 for her; you on the shotgun and the S75. Before sending her across alone, fill her inventory with ammo and healing.
Boss — Chainsaw Majini
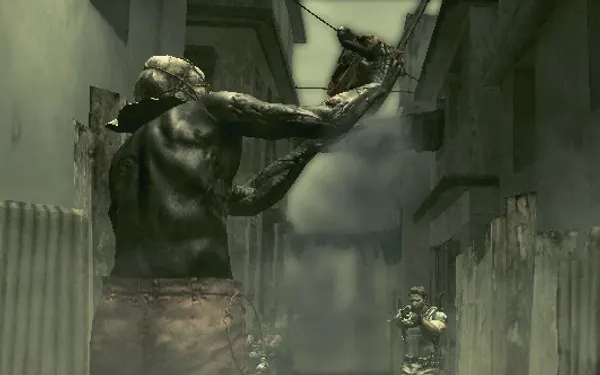
He bursts through the iron door at the top of the slope. He is tall, wears a sack over his head and any chainsaw hit beheads you (a graze from the tip puts you in DYING). 5–6 Majini come with him and seem to keep respawning, and if one grabs you, you’re at the saw’s mercy. The area has a transformer on a pole at the foot of the east stairs, plus explosive crates and red barrels. If you lose sight of him, open the map: his position shows as a white mark.
- Keep your distance. He is slower than a normal Majini. Learn his tells: the swing with a scream or laugh has a clear windup (step out of the arc); the silent swing is faster and kills too. Knife him in the back or linger behind him and he spins 180° with the saw.
- The shotgun always stops him. A blast at close range just as he raises the saw staggers him every time; follow up with melee. To dodge, just as he raises the saw, slip past him on your left.
- Head. From range, shoot his head with the S75, the H&K MP5 or the Ithaca M37; also the head or hands when he raises the saw. When he staggers, finish: on a head stun, Chris Hook or Sheva Twist Kick, and as he recovers, Straight or Roundhouse. If he kneels (from a blast, a Flash Grenade or a leg shot), Uppercut or Somersault. Repeat.
- Explosives. Lead him past the transformer, the explosive crates and the barrels, and set them off as he passes. An Incendiary Grenade burns him and the group; a Hand Grenade also works well.
- The other Majini. Kill them whenever you get a breather so they can’t grab you. In co-op, stay close to your partner so they can free you.
- Really dead? On Veteran and Professional, and on Normal if you haven’t died (dynamic difficulty: the better you play, the higher the rank), he gets back up berserk: he falls slowly with the saw in both hands, lands face up and the chain keeps running. Then he chases you spinning the saw non-stop. He has little health left: rifle or machine gun from range; one grenade stops him and another kills him. He is dead when the saw goes quiet. On Amateur he never gets up.
- Reward: he drops the Guard’s Key. If he is about to get up, or you are short on health or ammo, grab it and run for the gate: past his door there are no more enemies.
Don’t leave without:
- the H&K MP5 (storage facility) and the S75 with its rifle ammo (port hut);
- the 5 BSAA Emblems (storage facility, under the bridge, “CHARGE” shed, 2nd-floor doorway past the gate, assist-jump beam);
- the 3 files in the storage facility;
- the Diamond (Pear) from the runaway Majini and the Topaz (Pear) before opening the gate;
- the Ruby (Marquise) with a grenade and the rooftop Emerald (Square);
- the Sapphire (Pear) in the alley and the Gold (Large) in the water;
- the Big Men’s Jewel Bangles;
- the chest with the 4 gems behind the Guard’s Key.
All of it comes back by replaying 2-1 from Chapter Select.