Skip to content
RE Guide RE5
ES
Pick your current chapter ›

Enemies

Every common enemy: where it appears, where to hit it and how to handle it.

Majini

Town Majini

1-1 (back alleys and Public Assembly), 1-2 (Urban District), 2-1 (container maze, bridge, Port and Shanty Town; the opening Storage Facility has no enemies), 2-2 (Train Station, Mines and Mining Area), 3-2 (Refinery and Control Facility), 3-3 (Drilling Facilities) and Desperate Escape.

Weak point The head (stun: melee) and the legs (kneel: from behind, an instant kill). Barrels, oil canisters and transformers.

Kijuju residents implanted with Type 2 Plagas. They keep their intelligence: they talk, use tools and attack in groups. The rear grab does no damage, but leaves you defenceless while the others hit you: have your partner free you.

  • Leg, then rear finisher: Chris does a Neck Breaker, Sheva a Throat Slit. Instant kill, and no Plaga can emerge.
  • Head: Chris Straight, Sheva Roundhouse. Leg from the front: Uppercut / Somersault. Arm from the front: Hook / Twist Kick; if you both pincer him, a tag-team finisher follows (Haymaker / Skull Crusher). On the ground: Stomp / Impale.
  • Crowds: shotgun and the environment. Awards: Ride the Lightning (transformer), Stop, Drop, & Roll (3 Majini with oil canisters), Baptism by Fire (3 with a drum or gas tank) and Meat Shower (3 with one grenade or Proximity Bomb).
  • Weapons: axe, kukri, megaphone, club or wrench (strike, heavy charge and throw); pick or shovel (charge with knockback); crossbow (deflect a bolt with the Knife: Be the Knife); Molotov (shoot one mid-air: Fireworks); dynamite (heavy throw and a kamikaze charge with the fuse lit).

Drops: ₦, ammo and herbs. The 1-1 alley horde drops nothing except the dynamite Majini, who arrives after about 30 kills: Topaz (Marquise) (₦3,000).
Agitator Majini

1-1 (Public Assembly) and Desperate Escape (3 hidden ones).

Weak point Like a Town Majini (leg, then rear finisher), but he takes 20% less damage.

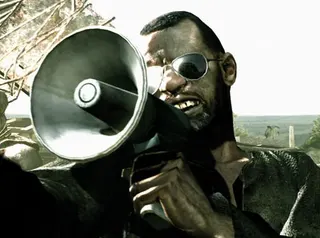
The megaphone Majini who whips up the crowd; he hits you with it too. Kill him like any Town Majini: leg shot and rear finisher.

Shoot the Messenger (DLC): kill the 3 Agitator Majini in Desperate Escape in one run, all by the same player (megaphone Big Man Majini don't count). Easiest on Amateur. - Dock: after the first partner jump, if you cleared every wave in Transport Area 1 before using the Transport Area Key. The hardest one, and it may take several tries; if you are slow he escapes behind the fence. He turns into a Cephalo: leg and finisher. - Turret slope: keep killing the Majini that come out on the high southern walkway before opening the door for Josh. Kill him with the turret or a rifle. - Helipad: he comes up the elevator with 2 Big Man Majini with 26–30 s left, if you killed every boss in time. He turns into a Cephalo: keep a Flash Grenade.

Drops: Nothing in the campaign (the body disintegrates). In Desperate Escape, a large Score Star (1,000).

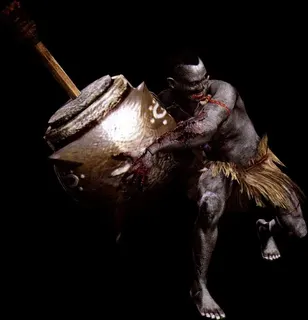
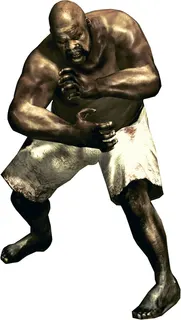
Big Man Majini

2-1 (the yard past the container maze ×1, Port ×2), 3-2 (Dock ×1 with Adjule, Control Facility ×2), 5-3 (Missile Area 2F ×1), 6-1 (Ship Deck: one with Adjule and 2 at the cargo lifts) and Desperate Escape.

Weak point The legs (he kneels). One shotgun blast to the body makes him block, which opens the melee.

Built like a wrestler, tougher than a normal Majini, and he always gets back up. Unarmed in the campaign. His punches send you flying: make him your first target.

  • Shotgun: one semi-upgraded shell → he blocks with crossed arms → Chris Uppercut / Sheva Somersault, and your partner carries the combo on.
  • Leg (or Stun Rod, or Hand Grenade) → he kneels → Straight / Roundhouse; hit him again while kneeling → he blocks → another hit → 3-hit finisher (Chris Backhand / Sheva Spinning Back Kick).
  • Fast: one S&W M500 head shot kills him, or freeze him with Nitrogen Rounds and shatter him. A Flash Grenade also works.
  • The Works: chaining combos on him is the easy route to the award.

Drops: Jewel Bangle (₦1,000) each. The one at the 3-2 Dock drops a Gold Ring (₦5,000). In Desperate Escape, the one in Transport Area 2 drops Hand Grenades.

Motorcycle Majini

2-1 (Train Yard: QTE cutscene) and 2-3 (the Savannah chase).

Weak point The rider or the bike. The thrower's arm.

Bikers attacking in groups with Molotovs and tomahawks. Red-shirted riders are leaders with more health.

  • 2-1: a cutscene with 3 QTEs on random buttons (Sheva shoots the chain round Chris's ankle).
  • 2-3: from the Gambit's Mounted Machine Guns, shoot riders or bikes. Shoot the thrower's arm before he throws and he drops the Molotov on himself. Flatbed trucks try to ram the Gambit and carry Molotov throwers: focus fire until they explode and watch both sides.
  • Drive By: stop an armoured truck by taking out the driver. The 2-1 bridge truck can be stopped by shooting the driver, the truck or an explosive barrel (the easiest, recommended on Professional).

Wetlands Majini

3-1 (Marshlands and Village), 3-2 (Execution Grounds), 4-1 (Ancient Village and Labyrinth) and 4-2 (Worship Area). The ruins ones (4-1 and 4-2) wear ceremonial masks.

Weak point Head and legs. Shield carriers kneel on their shields. A head shot while one is jumping earns Lead Aspirin.

Ndipaya warriors with Type 3 Plagas: war paint, ancestral weapons, great endurance and an incredible jump. Ladders won't save you: they leap up.

  • Archers first: snipe the longbow users (a slow explosive arrow with very long range that also hits other Majini) and the bomb throwers (they explode on ground or water, with a wider radius than arrows).
  • Torch: fire breath (a long stun) and the rampage (a crouching run, then spinning torches), probably the most damaging Majini attack. Kill him before he closes in.
  • Spear: the impale (running start, lifts and slams you) hits hard; the leaping stab has a dodge prompt, and walking forward also avoids it.
  • Shield: shotgun up close or leg shots.
  • Up close, shotgun. If one holds you from behind while the others attack, have your partner free you.

Drops: ₦, ammo and herbs.

Base Majini

5-2 (Power Station and Missile Area 1F), 5-3 (Missile Area 2F), 6-1 (Ship Deck and Ship Hold), 6-2 (ship interior), 6-3 (Engine Room) and Desperate Escape.

Weak point Exposed flesh: helmets stop head shots. The grenade belt explodes if you hit the upper body or a blast catches it.

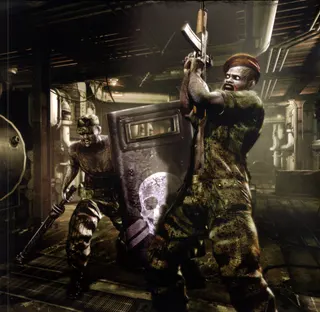
Former soldiers and mercenaries guarding the Tricell base, far better trained than other Majini: handguns, AK-74s, grenades, Stun Rods, rocket launchers, armour, helmets and bulletproof shields.

  • Rocket launchers: one rocket puts you in DYING on any difficulty. Only in 5-2, 6-1 and 6-3. They reload slowly: that's your window. Kill them first, along with the Stun Rod carriers.
  • AK-74: bursts that knock you down if several hits land in a row. Take cover and shoot while they reload. Up close they club you with the butt. After downing you they fire into the air to taunt: take the opening.
  • Stun Rod: the backhand always stuns; the running swing knocks you back.
  • Shield: a shove, often followed by a Stun Rod swing.
  • Grenades: thrown behind your cover to flush you out.
  • Gas-mask wearers are immune to Flash Grenade blinding.
  • Some swell up and explode before dying (small radius, catastrophic up close).

Drops: ₦ and ammo. Rocket-launcher Majini drop a Dead Bride's Necklace (₦2,000): 3 in the last room of the 6-1 Ship Hold and 2 in the 6-3 Engine Room.

Plagas

Cephalo

1-2 (Allyson), 2-2 (the Mines), 3-2 (refinery exit), 4-1 (the "+" crossroads), 4-2 (Earth Emblem corridor), 6-1 (Ship Hold) and Desperate Escape; it can come out of almost any Town, Wetlands or Base Majini.

Weak point The Plaga, not the body. Flash Grenade or Flash Rounds: instant death. A fully upgraded magnum kills it in one shot anywhere.

The Plaga bursts from the Majini's neck after enough damage; it's the same species as the Ganado Plaga from RE4 and, like it, weak to light. Its body stretches a long way: back off.

  • Prevent it: knee shot and rear finisher on suspected carriers (use it a lot in the 2-2 Mines). The Stun Rod, the Rocket Launcher and Nitrogen Rounds also stop it.
  • Once it's out: shotgun to knock it back, then shoot the Plaga. It can still be downed and meleed, but that is no longer an instant kill.
  • Go into the Light: kill 2 enemies with one Flash Grenade.

Adjule

2-1 (container maze, the Big Man yard and the sewer after the bridge), 2-2 (Train Station, among the trains), 3-2 (Dock, once the countdown starts) and 6-1 (Ship Deck).

Weak point The head, especially once it splits open to show the Plaga (then it's weaker to head shots, and a Flash Grenade kills it instantly). Fire.

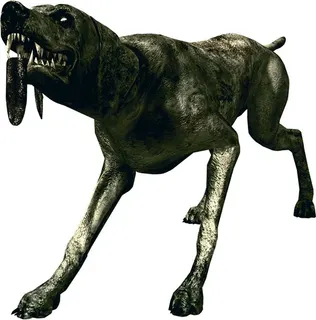
Large dogs with a Plaga; their heads split in two. They come in packs of 2 or more.

  • Incendiary Grenade: very effective against the pack.
  • Shotgun in narrow corridors: one blast hits and knocks down several.
  • They can't climb: get on high ground (in 2-2, onto the railcars). In 2-2 you can also wait by the tripwire explosives and shoot them as the dogs arrive.
  • With the head split they grapple you; some grow tentacles from it.

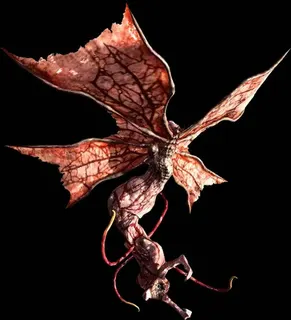
Kipepeo

2-1 (Port: out of Town Majini once you enter the north side; and flying in Shanty Town), 2-2 (from 2 crossbow Majini), 3-2 (swamp docks, from a Wetlands Majini) and 3-3 (Drilling Facilities).

Weak point Head and wings. Flash Grenade or Flash Rounds. A few handgun shots kill one.

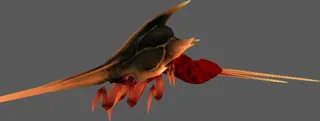
A Plaga that ejects from a badly damaged Majini and flies on four wing-like limbs. It's clumsy, but its tail brought down the Alpha Team's helicopter. It sidesteps when you aim at it (strafes on higher difficulties).

  • Shotgun: the best option.
  • Prevent it: rear finisher on the carrier. A carrier killed indoors only loses its head: no Kipepeo comes out.
  • If it wraps its tail round your neck it strangles you, and if you are already badly hurt, it snaps your neck.

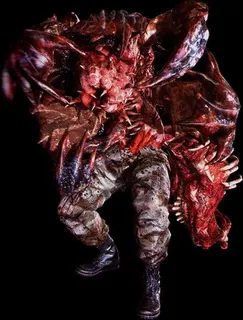
Duvalia

3-1 (the Marshlands' north-east dock, when you take the Shaman Slate), 6-1 (Ship Deck ×2 and Ship Hold ×1), 6-2 (ship interior corridor ×1) and Desperate Escape.

Weak point The core (when the mouth opens) and the legs (even armoured, the ankles and feet are vulnerable). Instant kill: Flash Grenade, Flash Rounds, Rocket Launcher, Proximity Bomb, or a Hand Grenade exploding right under it.

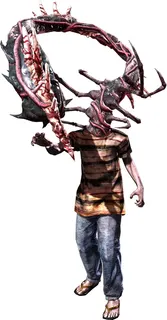
A Plaga bursting from the upper half of a Majini, leaving the torso hanging below. Hard exoskeleton; up close it opens into a mouth that swallows its victim.

  • Its bite puts you in DYING, and a second bite before you are revived kills you. Its headbutt (320) is slow and easy to read.
  • Prevent it: a Majini covered in bubbles is turning into a Duvalia: rear-finish it or freeze it with Nitrogen Rounds. A Majini killed on the ground can't transform.
  • Once it's out: shotgun the feet so it kneels and opens up, then magnum the core. Or climb a ladder: with no arms it can't follow.
  • Don't mix them up: a Base Majini that inflates like a balloon, clutches its head and smokes from the back is about to explode; one more shot sets it off at once.

Drops: The 6-1 cage one carries the Crane Keycard, and the 6-2 ship interior one the Bridge Keycard.

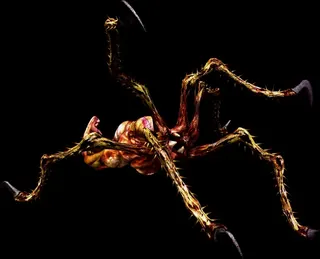
Bui Kichwa

4-1 (Caves, Ancient Village and Labyrinth), 4-2 (Pyramid, 3rd floor: a group that comes out of the north room when you open the centre chest per Fandom and Evil Resource, or out of the floor as you enter per IGN), 6-1 (last room of the Ship Hold, per IGN) and Desperate Escape.

Weak point The body. Flash Grenade: instant death.

A Plaga that leaves its host to hunt alone, spider-like; they come in packs and many burrow out of the ground. They have one attack: leaping on you and wrapping their legs round you to drain health. The damage is low (lower with the Melee Vest), but you can't defend yourself and you move slowly, and there is no button to break free: wait, or have your partner knife it off.

Drops: Ammo.

Wildlife

Snake

Inside pots and crates (2-2 Mines, the 3-1 fort, the 4-2 Pyramid's east room and elsewhere) and one loose near the Tricell tents in 3-2.

Weak point Any hit: the Knife is enough.

It lunges once when you break its hiding place (tiny damage) and is harmless after that. Kill it with the Knife to save bullets. Killing a Majini with a thrown Egg (Rotten) earns Egg on Your Face.

Drops: Eggs; sometimes an Egg (Rotten).

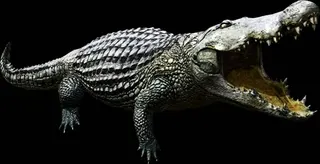
Crocodile

3-1 (the water round the Marshlands' east fort: about 8 spawn points, plus 1 near the airboat ramp on the way back) and 3-2 (Execution Grounds: it attacks the raft, QTE only).

Weak point Resistant to firearms. If you must shoot: rifle, grenade or an upgraded shotgun, from range.

15–20 ft crocodiles in waist-deep water. Their bite is instant death, they respawn and give nothing: avoid them. AI Sheva and the crocodiles ignore each other. On the 3-2 raft follow the QTE: that one can't be killed.

Drops: Nothing.

Tricell B.O.W.s

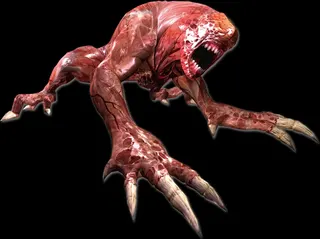
Licker β

5-1 (Progenitor Virus house and the elevator wait), 5-2 (Experimental Facility Passage) and 5-3 (Monarch Room Entrance).

Weak point The exposed brain. Once it's down, a Stab with the Knife kills it in one hit. Shotgun, magnum, Hand Grenades and Acid Rounds for groups.

A Progenitor Virus refinement of the Licker: nearly blind, hunting by hearing and smell, and clinging to walls and ceilings. Its pounce pins you and tears your throat: instant death, with a single counter prompt; miss it and your partner has to save you.

  • Stealth: walk, holster your weapon and don't kick doors open: they won't notice you.
  • One or two: handgun to the brain → it coils back and shows the weak spot → shoot it → it falls and sometimes stays down → Stab.
  • Hordes: grenades, shotgun, magnum or Acid Rounds. Shoot them while they are still on the walls. In 5-3, Proximity Bombs while you push the container.

Drops: Lion Heart (₦2,500) at random. IGN: killing them usually returns more ammo than you spend.

Drone

5-1: the U-8 releases them during the fight.

Weak point Any shot; the shotgun is best.

Small flying bugs that come out of the U-8's abdomen. They die easily. Don't ignore them when you are short on ammo: wait for a swarm to gather and clear it with the shotgun.

Drops: Ammo, herbs and grenades (handy for the U-8 mouth trick).

Uroboros

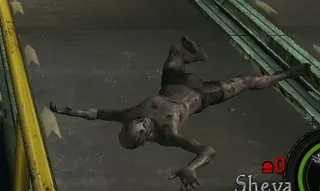
Disposed Body

5-2 (the third conveyor belt in Missile Area 1F). Similar ones in Lost in Nightmares: the test subjects lying in the prison and in the Maze's water.

Weak point They are weak: any weapon. It isn't worth it, though.

Emaciated failed Uroboros test subjects lying on the belt. They only lunge when you are close: follow the dodge prompts and save your ammo (IGN). Kill the area's Reaper first so you don't face both at once.

In Lost in Nightmares, knife them to stun them or sidestep past; if one grabs you, your partner helps or you rotate the stick.

Drops: Some carry a Dead Bride's Necklace (₦2,000): 2 on the left side of the third belt. If they don't show, stand in the middle of the belt until more bodies come.

Report an issue

Show diagnostics

Environment


Console errors


Failed requests