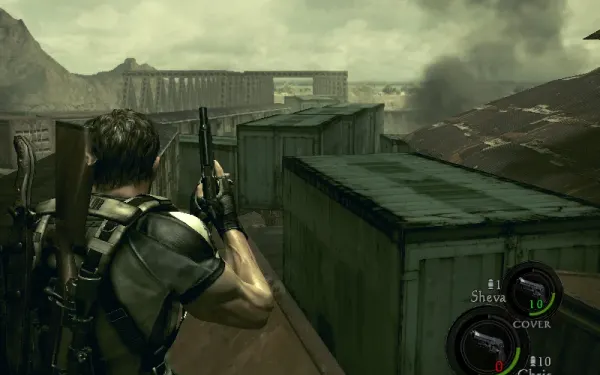
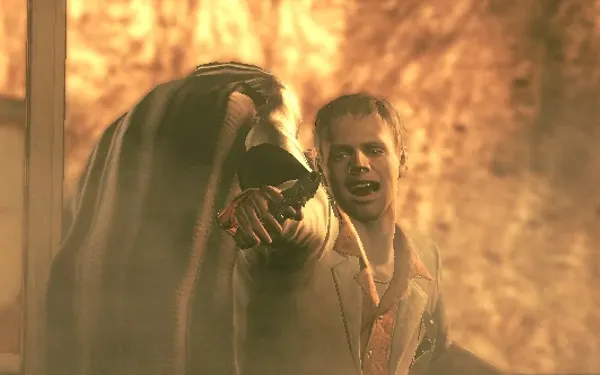
You play as Chris and Sheva, following Irving’s trail to an old train station on the outskirts of Kijuju. The chapter runs in a straight line, always down or forward: a graveyard of carriages with tripwires, Adjule dogs and crossbowmen; an elevator down into pitch-dark mines where one of you carries the lantern and can’t shoot; a crank gate that splits you up for a moment; a second elevator up to the Mining Area, where Irving escapes and the Dragunov SVD turns up; and a descent down the rock face, wave after wave, to the Popokarimu’s arena. Every elevator and every drop is a point of no return: below, you get a warning before each one listing what you must not leave behind.
Chapter order: Train Station (Type 2 Plagas file) → train graveyard: tripwires, Adjule, crossbowmen on the roofs (emblem 9, 2 Jewel Beetles) → mine cart → the Mines in the dark: Lantern, 3 Ruby (Pear), wooden bridge (emblem 10), Diamond (Oval) → crank gate (split) → lit chamber (2 Ruby (Square)) → elevator → Mining Area: Irving escapes, Dragunov SVD, mounted gun → Diamond (Brilliant), Diamond (Pear), emblem 11, Diamond (Square) → two-person green container → Popokarimu → Dave arrives in the Gambit.
Before you start
Shop before you begin.
- M92F: the Critical ★4 (₦13,000) opens now, the last critical level (★2 costs ₦3,000 and ★3 ₦8,000, which opened in 2-1). With it, head shots blow heads off far more often. Capacity 20 costs ₦500.
- Ithaca M37: firepower 230 (₦2,000) helps with the early Adjule and the Majini in the Mines.
- Proximity Bomb: on a first playthrough it is not on sale before 2-2. The shop adds it once you clear this chapter (from 2-3 on). Evil Resource lists it at ₦300 per bomb (it sells for ₦30) and Fandom at ₦1,500: both fit the 5-bomb pack for ₦1,500. For this boss you rely on the fixed ones in the arena sheds. On a later playthrough (New Game+) the shop already has it and you can arrive with a pack.
- Flash Grenade: bring a couple. They kill any Cephalo and any Kipepeo outright, and the Mines have several Cephalo (the crates there give more).
Inventory. Keep a couple of slots free: the Dragunov SVD comes in the Mining Area. Give Sheva the H&K MP5 and a handgun. Solo, Sheva will carry the lantern and can’t shoot while she does, so the Mines are yours to clear.
Difficulty. On Professional the game removes fixed ammo and grenades. A Steam player reports that on a new-game Professional run he found no Proximity Bombs at all, neither in the level nor in the shop (which doesn’t sell them until you finish 2-2 on any difficulty): don’t count on the ones in the sheds, and read the no-mine plan in the boss section before you get there. On Veteran and Professional enemies hit much harder, so the Adjule packs and the Mining Area’s dynamite waves punish any rushing.
S rank on Normal: accuracy ≥70%, ≥50 kills, 0 deaths and ≤22:00. Treasures add up to ₦21,000, plus two Gold (Large).
No way back in this chapter: the elevator by the mine cart (down to the Mines), the elevator in the lit chamber (up to the Mining Area) and each drop down the rock face. Each one gets a warning below.
Train Station (start room)
You start inside a small building. On the table is the Type 2 Plagas file. Also take the Herb (Green) and the handgun bullets. Leave by the only door onto the tracks.
Train graveyard
There are tripwires between the carriages and packs of Adjule: about 9 dogs in three groups. According to Fandom, 3 come at the first tripwire, 2 more at the corner of the path and 4 by the second tripwire, just as the crossbowmen appear on the carriages (other sources split the groups differently). Two of them are larger Adjule that take more damage and hit harder.
- Stay put and kill each pack before moving on: wait by the tripwires and shoot the charge as they pass.
- Adjule can’t climb. If you’re overwhelmed, run to the end, blow the traps and get up on the carriages.
- The Incendiary Grenade and the Ithaca M37 are best against them. With the head split open, a Flash Grenade kills them too.
Jewel Beetle #1 (₦2,000): instead of climbing onto the trains, go around them to the dead end at the chain-link fence on the east side. The beetle is on the wooden boards on the right, at the far end of the area you can reach without climbing the ladder onto the middle train. Sheva won’t fetch it: she waits on the route.
Jewel Beetle #2 (₦2,000): on your right just after climbing the pile of planks toward the roofs, stuck in the wood across from the ladder.
Carriage roofs
Climb the stacked boards and the ladder. Up top are 3 crossbowmen, and two of them release a Kipepeo when killed.
- Crossbowmen: kill them from the roofs, crouched behind whatever cover you have, so the Kipepeo come to you instead of catching you running between carriages. A finisher from behind on a crossbowman stops the Kipepeo from coming out.
- Kipepeo: it dodges when you aim at it, but it is fragile. A few handgun shots to the head or wings kill it, and a Flash Grenade kills it outright. The shotgun works very well too. Don’t let it wrap its tail round your neck when you’re hurt.
A Gold (Large) sits on one of the roofs. BSAA Emblem 9/30 (2-2 #1): from the roofs, look back toward the start building: the emblem is at the top of the electricity pylon with no wires behind it. Easy with the S75; hard with a handgun. There is machine gun ammo at the end of the area. Carry on over the roofs, jump left and go down the dirt ramp (another tripwire).
The mine cart
Drop into the mine cart: it rolls on its own past 2 tripwires on the right. Keep your handgun loaded, aim right and pop both before you roll past them. When it stops, walk back to where the cart started: another Gold (Large) lies there.
No way back: the mine-cart elevator. The elevator is the “Down” command next to the cart, and it takes you down to the Mines. Before you use it, check you have both Jewel Beetles, BSAA Emblem 9 and both Gold (Large) (the one on the carriage roof and the one where the cart started). No source says you can ride it back up.
The Mines (dark, no map)
The map doesn’t work here. On the ground at the start are the Lantern and a Herb (Green).
The lantern. Whoever holds it can’t use weapons or items (they can only aim the light), but it takes no slot and can be put down and picked up again. Solo, give it to Sheva: she lights wherever you aim, and the Partner Action button tells her to put it down. In co-op, the lantern carrier is unarmed: the other one shoots, and stay together. If a big fight starts, drop the lantern and draw a gun. The lantern goes out at the end of the dark tunnel and can’t leave it.
Ruby (Pear) #1 (₦1,000), no sparkle: in the first long tunnel, round the curve from the start. Once Sheva picks up the lantern you’ll see sandbags on the left; before the second one, sweep the ceiling with your aim until the laser dot changes colour (red). It’s just before the track fork.
First fork. Right is a dead end with a Herb (Red); carry on left.
Ruby (Pear) #2 (₦1,000): after the wade through water, on the ceiling, on a thin wooden prop, above where the second Majini in the Mines is. Like the first, it sits a little before the second fork.
Majini and Cephalo. From the water section on, Majini come at you and some burst into a Cephalo when they die.
- Flash Grenade: instant Cephalo kill.
- Prevent it: leg shot and a finish from behind (Chris’s Neck Breaker, Sheva’s Throat Slit). It kills with no Plaga coming out.
- If it hatches: a Cephalo has long reach. Back off and shoot the Plaga, not the body.
- Crates: they often hold Flash Grenades, but some hide a snake: knife it. Snakes can drop eggs, so this is a place to start the Egg Hunt achievement (all 4 egg types).
Second fork. Right is a dead end with breakables; then go left.
The wooden bridge
BSAA Emblem 10/30 (2-2 #2): stop in the middle of the bridge and look right: the emblem is in the rock, behind a thin waterfall. A handgun is enough.
Ruby (Pear) #3 (₦1,000): above the far entrance of the bridge, in the rocks.
Past the bridge come more Majini and Cephalo; both branches hold items and rejoin. Take it slowly and use the finishers from behind.
Diamond (Oval) (₦4,000). Just before the lit area with the crank there is a hidden U-turn to the left, before the pillar. Hug the left wall into the dark side chamber: at the end is a chest with the diamond, a barrel and a crate with a snake (another egg chance).
The crank gate (short split)
A wooden gate blocks the way. One player turns the crank and holds it; the other runs through and turns the second crank on the far side, which reopens the gate.
- About 3 Majini drop in behind the one left behind. A fast runner avoids them. You can also open the gate and shut it again at once to escape them.
- Solo: whoever turns the first crank is the one left behind with the Majini. If you crank, Sheva runs to the second one. If you’d rather run, let her crank first and give her ammo and healing beforehand.
- Whoever stays should be armed, stocked and carrying healing, and should put the lantern down first.
Main chamber (lit, several levels)
When you regroup there’s a cutscene and crossbowmen rush in. It’s a checkpoint. All told, a dozen-plus Majini and about 6 Cephalo come, plus dynamite and crossbow stragglers.
- Where to fight: fighting in the open centre is dangerous. The safest option is to fall back into the tunnel you came from once you’ve regrouped and let them come through the bottleneck. Otherwise, tuck into a ground-floor corner or hold at the gate for head shots.
- Priorities: the dynamite carriers first (one stick in the wrong hands takes a huge chunk of health), then the crossbowmen.
- Keep your partner close and stocked with healing.
Ruby (Square) #1 (₦1,000): stuck in a gear of the central machine (the crane). Shoot it from the top level (end of the left path) or from below, and pick it up on the 2nd-level walkway.
Ruby (Square) #2 (₦1,000): leave by the farther tunnel, on the top level. At the ledge where a Majini drops down (he sprouts a Plaga), look up at the ceiling.
At the end of the tunnel are 2 crossbowmen and 1 dynamite Majini: shoot the dynamite in his hand for the Fireworks achievement. Both tunnels reach the elevator.
No way back: the elevator to the Mining Area. Before you ride up, check you have all 3 Ruby (Pear), BSAA Emblem 10, the Diamond (Oval) and both Ruby (Square). The lantern can’t leave the dark tunnel, so you can’t go back for the first Ruby (Pear) without light.
Mining Area
Out of the elevator there’s rifle ammo right of the stairs and a Herb (Green). Go up the building’s stairs: cutscene, Irving escapes with the hooded woman. Then comes a checkpoint, and a horde converges from the whole map.
Inside the building.
- The Dragunov SVD is in the locker on the left.
- On the table in the middle, the file Irving’s Note on Las Plagas (it opens “Looks like a message…”: Irving’s note on the Plagas’ weakness to light).
- There is also a Herb (Green) and handgun ammo.
From the window. Kill the Majini on the mounted gun first (on the truck, ahead to the right) with the Dragunov. Others will man it again: keep an eye on it. Then the crossbowmen. Stay in cover: the building is the best place to clear this wave.
Outside. A Hand Grenade on the back of a truck and another behind the gun truck. Herb (Red) across from the chest.
Diamond (Brilliant) (₦4,000): leave the building, turn left at once and climb the short ladder by the red container, the rusty truck and the tyres. The chest is on the left.
The red ladder
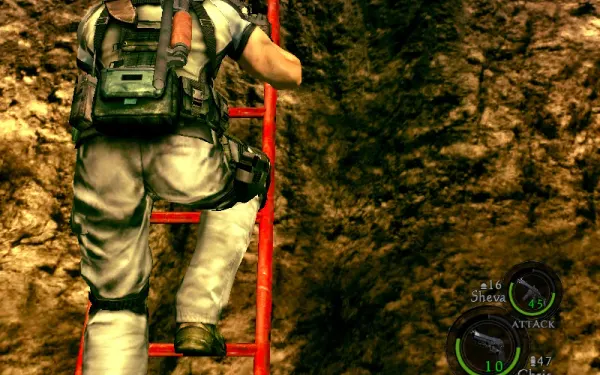
How the waves work. From here to the boss, enemies come in waves depending on where you are as you work down the rock face: one as you near the red ladder, another at the first drop and another at the second. Don’t rush: kill each wave before moving on, or it merges with the next one and drains your ammo and health. In every wave, the dynamite Majini go first.
Walking to the cliff with the big (red) ladder brings the wave with lots of dynamite Majini. A Majini slams out of the portable toilet (as you walk by or examine it). A shack holds rifle and handgun ammo.
Diamond (Pear) (₦2,000): a sparkle at the very top of the first tall ladder, on the right. Shoot it and pick it up from the ground.
BSAA Emblem 11/30 (2-2 #3): climb that ladder, go left and look back at the building you came out of: the emblem is on the lower roof of the building to its right. If you can’t see it, walk along the chasm past the gun truck until you can’t go on, then look back again. Easier with a rifle.
No way back: the first drop. The first drop down the rock face is a checkpoint and you can’t climb back up. Before you jump, check you have the Dragunov SVD from the locker, the Diamond (Brilliant), the Diamond (Pear) and BSAA Emblem 11 (from the top of the red ladder).
Down to the boss
First drop: checkpoint. Second drop: the camera pans up to your destination and another horde appears; it’s another one-way jump, but nothing is left behind here. Where you land there are 2 × 10 handgun rounds. Clear the wave from where you land before heading down the path.
Diamond (Square) (₦2,000): above the broken ladder at the assist-jump spot (Chris boosts Sheva). Shoot it and collect it when the path curves round above it, or boost Sheva up. Machine gun ammo ×30 lies next to where it falls.
Green container: at the end of the path, push it off the ledge with your partner. It takes both of you. Getting past it is a checkpoint.
Before the last drop: there’s a Hand Grenade, a Herb (Green) and 5 shotgun shells. Heal, reload and share out ammo.
No way back: the last ledge. Dropping starts the Popokarimu fight. Before you do, check you have the Diamond (Square) from the broken ladder, plus the ledge’s Hand Grenade, Herb (Green) and 5 shells. Set Sheva to Attack.
Boss — Popokarimu
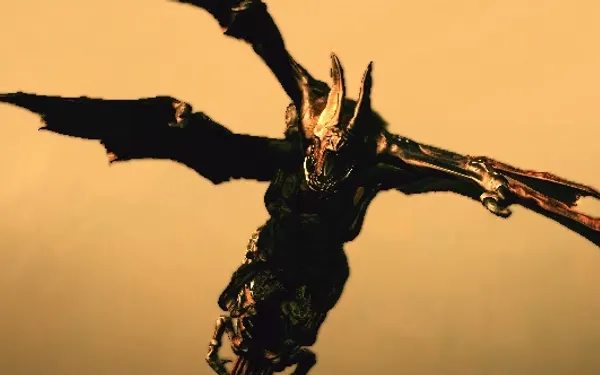
An armoured truck crashes as you drop into the arena and the Popokarimu comes out of the wreck: a Tricell bat with a Plaga in its tail. The arena is circular and ringed with sheds holding Proximity Bombs (a Steam guide counts 5 or 6), plus a Hand Grenade, handgun ammo, a Herb (Green) and a Flash Grenade.
Weak point. Its front armour deflects bullets. The weak point is the soft part of the tail (the underside of the belly and tail), which glows red in the sunlight. The body takes damage too, but very little: only worth it with ammo to spare or when it needs just a few more shots.
Attacks.
- Claw swipes and charges. One swipe brings a shed down: don’t hide inside, except for a few seconds to heal or reload.
- Flying swoops: dodge with the QTE.
- Sticky string: if you stay behind it too long, it shoots a string from the tail that pins you. Press the prompted button or let your partner free you.
With Proximity Bombs (Amateur, Normal and Veteran).
- Mines. Collect the Proximity Bombs from the sheds. Plant one in the middle of its path, draw it over and stay outside the blast. In co-op, one player kites it in a circle while the other collects and plants.
- Belly. When it triggers a bomb it falls on its side and shows its underside: empty your strongest gun into it, both of you at once. The shotgun does much less damage to it (Fandom: “around 40%”), so the H&K MP5, the S75 or the Dragunov SVD do better. With a stock Dragunov it takes about 15–20 shots to the weak point.
- Fire. Fire does double damage: save your Incendiary Grenades for it. Hand Grenades knock it out of the air, and a strong hit on the tail while it flies drops and stuns it.
- Getting away. A Flash Grenade stuns it long enough for you to get clear. It isn’t fast, even in the air: running to gain room is usually enough. If the string pins you, shake free or have Sheva free you before it reaches you.
- Repeat bomb and belly. If it takes off, the bombs are useless until it lands again.
Without Proximity Bombs (new-game Professional). If you have no mines (a Steam player found none on a new-game Professional run), you can still win:
- Bring it down in flight. One strong shot to the tail while it flies drops it and stuns it in one hit: the Dragunov SVD or the S75 are best for this.
- Grenades. Several Hand Grenades in a row also flip it onto its side. The Incendiary Grenade does double damage. Save the ledge’s grenade and any you bring.
- Both on the tail. While it’s down, both of you shoot the soft underside of the tail with the S75, the Dragunov or the M92F, not the shotgun. In co-op, one player drops it while the other is already moving to its side for the punish.
- Never go into the sheds, and use the arena’s Flash Grenade to get away if it corners you.
- On a run with your arsenal unlocked: a Rocket Launcher rocket to the head, without stunning it first, usually kills it in one shot, and the S&W M500 kills it with 5–6 head shots.
The end. After enough damage it screams, flies up and dives. In the cutscene Chris shoots it, it lands on the truck and both go over the cliff. No treasure (the Soul Gem is the 4-1 rematch). Dave Johnson arrives in the Gambit and the chapter ends (achievement Completed Chapter 2-2).
Before you leave you should have: the Dragunov SVD (with rifle ammo), the H&K MP5 or the S75 for Sheva and whatever healing is left. In 2-3 you only use the Gambit’s turrets, so don’t spend on grenades or mines for the next chapter: sell the 2-2 treasures and upgrade the shotgun and Sheva’s guns for 3-1.
Don’t leave without: the 3 BSAA Emblems (wire-less pylon, behind the waterfall, lower roof) · the 2 files (Type 2 Plagas and Irving’s Note on Las Plagas) · both Jewel Beetles · both Gold (Large) (carriage roof and mine-cart start) · the 3 Ruby (Pear) (the first one doesn’t sparkle) · the Diamond (Oval) in the hidden U-turn · both Ruby (Square) · the Mining Area’s Diamond (Brilliant), Diamond (Pear) and Diamond (Square) · the Dragunov SVD in the locker.