You play Chris Redfield, just arrived in Kijuju with his new BSAA partner, Sheva Alomar (in co-op the second player is Sheva; solo, the AI runs her). You are here to meet your contact, Reynard Fisher, before going after the arms dealer Ricardo Irving. The chapter is short and linear: you cross the hostile town unable to draw a weapon, Reynard arms you with the M92F, you fight your first Majini and run from a horde through the back alleys to the Public Assembly (the square). There you watch the Executioner Majini behead Reynard and hold out through a timed siege until Kirk Mathison’s helicopter blows the gate and ends the chapter. Everything that matters in 1-1 is in that square: the VZ61, the grenades and the executioner’s Gold Ring.
Chapter order: Civilian Checkpoint (no enemies) → butcher shop: Reynard, case with the M92F and 3 files → back alley (Herb (Green) ×2, goat-altar file) → first Majini → out the window: horde (run, or fight for the Topaz (Marquise)) → house: joint kick on the metal door → tunnel → Public Assembly: Reynard beheaded → siege in the house (1:30 to 2:20, depending on the guide) → the Executioner Majini smashes the gate → out into the square (case with the VZ61, grenades, Gold Ring if you kill him) → about 4 minutes later, Kirk blows the second gate.
Before you start
Loadout. On a first run your first gun is the M92F from Reynard’s case. On a replay from Chapter Select you arrive with your whole inventory: bring the upgraded shotgun, grenades and, if you have them, a Rocket Launcher or the Stun Rod to clear the horde and drop the Executioner Majini fast. Break crates and barrels with the knife: it costs no bullets.
Saving. RE5 has no typewriters and no manual save. The game saves on its own at the start of each chapter and has invisible checkpoints: when you cross one, “Checkpoint” flashes on screen. If you die and choose Continue, or use Restart from the pause menu, you go back to the last checkpoint through the Item Management screen (buy, sell, upgrade and reorganise).
What you can lose (heads-up now). Anything you don’t pick up in the square is gone in 1-2. Specifically:
- VZ61: case in the square; if Kirk arrives before you open it, it is lost for this run (it is still added to the shop when the chapter ends).
- Topaz (Marquise): only if you stay and fight the alley horde before entering the house.
- Gold Ring: only if you kill the Executioner Majini before Kirk arrives.
All three come back by replaying 1-1 from Chapter Select.
S rank (Famitsu): accuracy ≥70%, ≥20 kills, 0 deaths and ≤12:00. Route tips: ignore optional items, run from the alley horde instead of fighting it, and make the 20 kills in the square, where Majini are plentiful.
Difficulty. On Professional there is no placed ammo or grenades in the level (healing stays), enemies don’t drop herbs and Majini weapon attacks (axes, machetes) do 10 times the damage: nearly all of them put you in DYING. The siege changes a lot: see the Professional note in the square.
Civilian Checkpoint
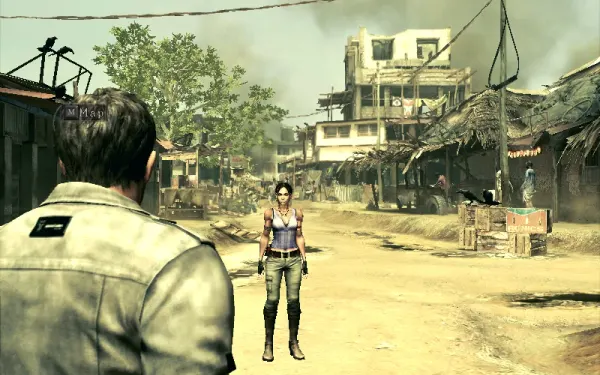
No enemies, items or files, and you can’t draw a weapon. The villagers stare: one beats a man in a sack, another is dragged into an alley, but nobody attacks. If both players stand idle for a while, Chris and Sheva chat. Before you reach Reynard you can spot the Agitator Majini (the one with the megaphone) on a rooftop.
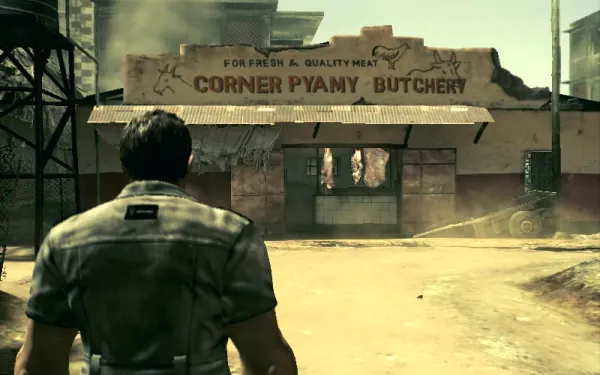
Getting through: walk up the road, turn left and reach the butcher shop (“Corner Pyamya”). Look in at the front and Reynard tells you to go round: enter by the side door.
Reynard’s butcher shop (Back Alley)
Cutscene with Reynard Fisher. Open the glowing silver briefcase on the table: it arms both of you with an M92F (on a replay you just equip the one you have). You must equip a weapon to move on.
- Money in a crate in the shop.
- Files 1 and 2 of 30: CONTROL TYPES and DYING, on the kitchen bench on the north side of the shop.
Back alley
Leave by the back door and go down the ramp past the butchered animal (“the body is still warm”). Straight on and to the right is a dead end.
- Herb (Green) ×2: in the building next to the carcass. Combine them (G+G heals 60%) or keep them to mix with a Herb (Red) (G+R heals 100%).
- File 3: The writing is erratic…, in the room with a sacrificed goat on the central table, on the counter on the west side.
Follow the screams to the red door.
First Majini
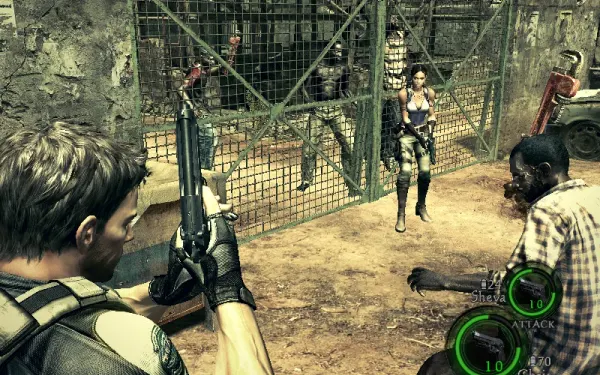
Cutscene: two Majini force a Type 2 Plaga into a man, and he becomes your first enemy. He will likely grab you: waggle the stick to break free. Shoot the head or a leg and finish with the melee prompt that appears.
In the next room, 5 handgun rounds on a shelf. There is no door: jump out of the window Sheva stands next to.
The alley horde (Back Alley 2)
When you land in the alley a huge Majini horde spawns. The normal play is to run: up the path and the stairs into the house. If you want the Topaz (Marquise), don’t go in yet: once you enter, you are both locked in and the horde ends. By the door and inside there is a Hand Grenade and a Herb (Red).
- Topaz (Marquise) (₦3,000): only if you stay and fight the whole horde. It is carried by the dynamite-throwing Majini, who comes in from the right after a minute or two, among the last spawns (about 30 Majini before him). Some guides say “the last one you kill”: in practice, fight until the dynamite Majini shows up and kill him. The rest of the horde drops nothing, so it is no money farm. Grab the Hand Grenade by the door first; it helps against the crowd.
- Tactic: fight with your back to the house stairs so they only come at you from the front, and let Sheva cover the other side. Knee shots and melee finishes save ammo.
- Do it on a replay with upgraded guns. It can be done on a first run but it is long: one player managed by aiming the knife straight down and swinging non-stop. The horde also works for Meat Shower (3 Majini with one grenade).
- S rank: don’t fight here; run straight to the house.
The house and the tunnel
You lock yourselves in. The reinforced metal door opens with a joint kick (partner action: both at once).
- Giant-axe room: 10 handgun rounds and barrels with money: break them with the knife.
- Tunnel: drop through the open hatch (corpses; rats sometimes drop something, not reliably). At the end, by the ladder: Herb (Green) and 20 handgun rounds in two stacks.
Go out, down the path and drop to the house below; grab the goods outside before you enter. That house is where the siege starts.
Public Assembly: the siege house
Cutscene “Hospitality”: the Executioner Majini beheads Reynard and the Agitator Majini points you out with his megaphone. You are shut in the house, inside a yard closed off by a metal chain-link fence the Majini climb. This phase lasts 1:30 to 2:20 depending on the guide (Kamigame says about 90 seconds, StrategyWiki about 2:20): after that, Chris radios Kirk for help and, soon after, the Executioner appears.
Items inside the house (Normal). About 50 rounds and 1 Hand Grenade, which you will want for the executioner:
- Hand Grenade: hidden in a pile of fruit. Slash it with the knife.
- Handgun Ammo ×10 in a wooden barrel.
- Handgun Ammo ×10 in a drawer.
- Handgun Ammo ×10 at a third spot in the house.
- Handgun Ammo ×10 in a second pile of fruit (knife again).
- Handgun Ammo ×10 in a wooden crate.
On Professional none of these are there: no rounds, no grenade.
The two shelves. They block two openings: the door and a window. To push one, walk up to it from the side you want to push it from and press the button when the action shows. They hold the entry for a while, then break.
Step by step:
- Take the grenade first from the fruit pile and push the shelf against the window next to it.
- Step out the door into the yard and shoot the Majini climbing the fence. Heads first; knees to set up melee finishes and save ammo.
- Once you have killed a few, leave the fighting to your partner: go back in and collect the rest of the ammo while Sheva holds the door.
- Go back out. Now they come in over the roof and the walls, and some drop in through a hole in the ceiling: kill them as soon as they are in and don’t let them surround you.
- If a window breaks, kill the Majini in front of it and climb out through it. Hold the spot to the left of that window until the Executioner breaks the fence.
Public Assembly: the square
The Executioner Majini appears next to the explosive barrel to the right of the fence and smashes it: he cannot be killed before that. The area then opens up: a crashed bus with a single entrance (a safe spot from the Executioner, who can’t get in), two buildings with rooftops and walkways.
The hidden timer. The square’s clock only runs once you step out through the broken fence: stay inside the yard and the chapter never moves on. From then, Kirk Mathison’s helicopter blows the far gate about 4 minutes later (some guides say 4:20), and that ends the chapter. Added to the house siege, that is about 6 minutes; some guides say up to 8. The in-game cue: during the fight, Chris and Kirk talk on the radio a couple of times before the helicopter arrives. Treat the first call as your warning that the clock is running.
Recommended order:
- VZ61 first. As soon as the fence falls, ignore the Executioner and run straight across the square to the silver case to the right of the locked far gate (a small building in the north-east corner, next to a wrecked car).
- Go back to the bus. It has a single entrance and the Executioner can’t get in: shoot whatever comes close from inside.
- Another refuge: a roof with no stairs. Kamigame recommends the building’s 3rd floor, but another guide says that on Normal the Executioner does climb stairs (what he won’t do is jump far): if he follows you, move to a roof you can only reach by jumping. Regular Majini do follow you across the rooftops.
- If you want the Gold Ring, start on the Executioner as soon as you have the VZ61 and the grenades (tactic in Boss — Executioner Majini below).
Items in the square:
- VZ61: solo, keep it or hand it to Sheva: with a 50-round magazine it carries the square.
- Hand Grenade: several on the roof and upper floors of the building near the start (reached by a walkway). Save them for the Executioner.
- Herb (Green) and an Incendiary Grenade, loose in the square.
Traps in the level:
- The small red piles of oil cans between the bus and the buildings: shoot them when a group walks through.
- The transformers on the poles: shoot them down; they electrocute anyone nearby and recharge to discharge again.
- Explosive barrels and burning barrels.
The Agitator Majini. The megaphone Majini joins the square fight after the execution. He takes 20% less damage than a regular Town Majini and clubs you with the megaphone; otherwise he acts like any Majini. His body disintegrates when he dies and no special drop is known. Headshot him as soon as he is in range: he counts toward the 20 kills for S rank.
Professional. Here Majini melee-weapon attacks (axes, machetes, the megaphone) do 10 times the damage and almost always put you in DYING; bare-handed hits hurt less, but still more than on Normal. The DYING window lasts under 3 seconds before you die. There are no placed grenades either. Fight from inside the bus (single entrance, the Executioner can’t get in) or skip the Executioner on this difficulty.
Awards in the square
It is the best spot in the game for several:
- Ride the Lightning: kill a Majini with a transformer’s current (megaphone Majini area).
- Stop, Drop, & Roll: 3 Majini at once with the oil cans; use the ones just outside the fence the Executioner smashes.
- Baptism by Fire: 3 Majini with one barrel explosion; the barrel on the roof behind the transformer building (jump to the small roof next to it first).
- Lead Aspirin: a headshot on a Majini in mid-jump. Stand on the small square roof (after blowing its barrel) and aim at the ones leaping over from other roofs or from the bus; a shotgun aimed high helps.
- A Cut Above (5 knife kills) comes easily here. On replays the square is also a farm for Cattle Prod (Stun Rod), Crowd Control (Gatling Gun, Chris only) and Bull’s-eye (Longbow, Sheva only).
- Lifeguard (save your partner 10 times from DYING): one award guide suggests doing it in co-op in the square once the helicopter has cleared it. There is no time in 1-1, because Kirk’s arrival ends the chapter; do it at the start of 1-2 (Public Assembly by day), before leaving through the red gate. One player hits a downed transformer with the Stun Rod and the other revives them.
Co-op and AI Sheva
1-1 has no splits: you are together the whole chapter. The only partner action is the kick on the metal door; your partner marks the exit window by standing next to it.
- In the house siege: one of you collects the items inside while the other holds the door.
- In the square: whoever carries the grenades takes the Executioner Majini, and the other clears Majini from the bus or a rooftop, where he can’t reach.
- Healing: use it next to your partner: herbs and First Aid Spray heal both of you.
- AI Sheva: set her to Cover during the siege (she stays close and covers you). She hands you ammo when you run low and a Herb (Red) if you hold a Herb (Green).
Boss — Executioner Majini (optional)
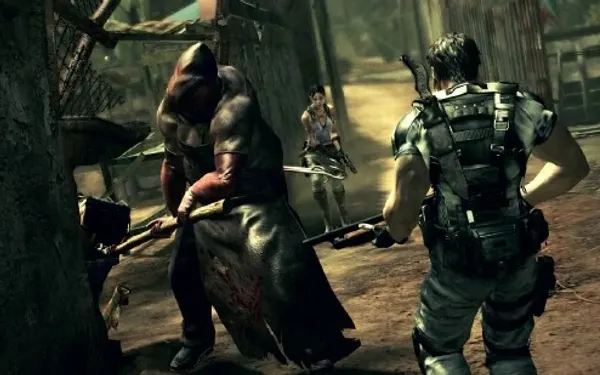
He stands 2.35 m, weighs 130 kg and swings a guillotine blade as an axe. He is slower than a regular Majini and in the campaign he doesn’t climb or jump far: the bus (the refuge every guide gives) or a roof with no stairs let you ignore him; on higher difficulties he walks faster and is more likely to jump. Weak point: the big nail in his back. The Japanese guides say one shot there staggers him at once: get round him and follow up with the melee. From the front, once he takes enough damage (head shots especially) he drops to one knee, which is also your melee opening. His swings also kill any Majini next to him.
Attacks and tells:
- Slam: he raises the blade overhead and brings it down. Puts you in DYING.
- Double Swing: two wide swings, usually as payback when you melee him. DYING.
- 180° turn: if you turn your back or stay behind him after a combo, he spins round with a fast swing.
- Berserk: at low health he swings non-stop. DYING.
- Grab: lifts you (QTE); fail and he throws you (second QTE); fail again and it is instant death.
Strategy:
- Let him clear the square. Lead him into groups of Majini: his swings kill them for you.
- Use the traps on him. Walk him through the oil cans and light them, or drop a transformer while he is under it.
- Hand Grenade = knee, every time. Throw one, run in and press the prompt: Chris Uppercut, Sheva Somersault. Hit him while he recovers for the second prompt: Chris Straight, Sheva Roundhouse. Your partner can chain their own melee while he is still stunned.
- Back off right after the combo, especially if his back is turned.
- Without grenades, shoot the nail in his back (while he chases your partner) or his head until he kneels. With an upgraded shotgun (replays) a few head shots do it.
- From the bus: if you run out of grenades, shoot him from inside; he can’t get in.
- Watch the clock. He is a bullet sponge: if Kirk arrives first, the chapter ends and the ring is gone. When Kirk’s first call plays, go all in. On a first run with an unupgraded M92F there may not be time; on a replay with a shotgun, magnum or Rocket Launcher it is much easier.
By difficulty: on Professional there are no placed grenades and any swing is lethal or close to it; fight from the bus or don’t try. On replays, Proximity Bombs and most Grenade Launcher rounds also make him kneel.
Reward: Gold Ring (₦5,000).
Don’t leave without:
- the VZ61 (case in the small building to the right of the far gate, before Kirk arrives);
- the Topaz (Marquise) (fight the horde and kill the dynamite Majini, before entering the house);
- the Executioner Majini’s Gold Ring;
- the 3 files (CONTROL TYPES and DYING in the butcher’s kitchen, The writing is erratic… by the goat);
- the Hand Grenade in the fruit pile and the 50 rounds in the siege house.
All of it comes back by replaying 1-1 from Chapter Select. The Topaz and the Gold Ring (₦8,000) buy the whole first M92F upgrade tier in the 1-2 shop (₦7,000, including the first Critical step).