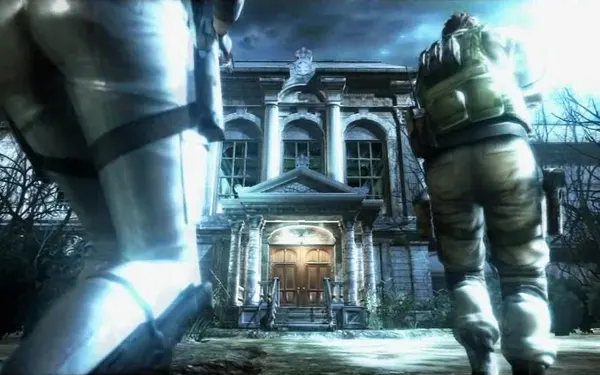
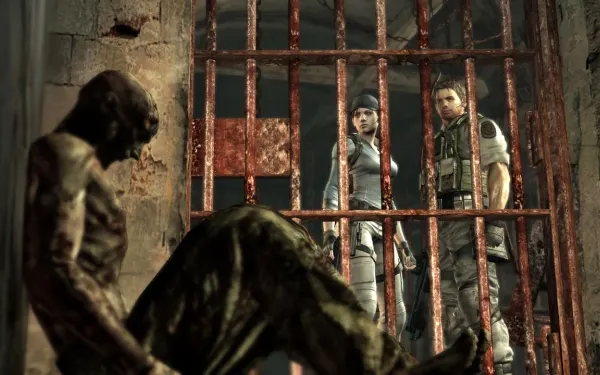
A downloadable episode set in 2006, a flashback from the campaign: Chris Redfield and Jill Valentine raid the Spencer Estate in Europe to arrest Ozwell E. Spencer, Umbrella’s founder. The mood is a homage to the first Resident Evil: mansion puzzles (the piano, the passwords, the spike ceiling), scarce ammo and enemies you can’t simply gun down, the Blobs. The core of it is an underground prison and a weaponless maze where your only defences are the knife, Flash Grenades and the spike traps. It ends with Albert Wesker. There’s no money and no shop: everything you pick up adds points (Score Stars) towards your rank.
Chapter order: main hall (lever, stars 1–3) → 2F bedroom (Keeper’s Diary, Password 3) → broken walkway (Jill jumps) → dining hall (Patrick’s Memoirs 1, Password 1) → toilet and piano room (Moonlight Sonata, Centaur Emblem) → Centaur corridor → storeroom (Heat-Sensitive Paper) → dining-hall fireplace (Password 2) → study (Spencer’s Memoirs 1–4, computer) → spike ceiling (lever, Square Crank) → gate under the stairs → underground prison (Blob, Jail Key, Silver Crest, Gold Crest) → fall into the weaponless maze (coloured cranks, spike traps, serpent shards) → back to the estate (2 M92F) → Albert Wesker.
Before you start:
- Unlocking it. Lost in Nightmares unlocks after you clear 3-1. Your first run is Chris only (solo, with an AI Jill); clearing it unlocks Jill for solo play. In co-op, online or split-screen, one player is Chris and the other Jill. Amateur, Normal and Veteran are open from the start; Professional opens after a Veteran clear.
- No shop, no money. The loadout is fixed: Chris starts with an M92F (30 rounds) and a First Aid Spray, and Jill also carries an M92F. You can’t bring campaign weapons or infinite ammo, and Score Stars replace money. You can’t save, there are only checkpoints.
- Random weapons. Mansion weapons are random (3 patterns): look after whatever you get, because the prison has few pickups and entering the maze strips all your equipment.
- Missables: once you jump from the “Jump Down” ledge, stars 1–10 are gone (#9 goes earlier, if the spike ceiling is stopped before anyone has shot it). Going through the crest gate costs you 12–17 and all your equipment. #18 sits right before Wesker. Kung Fu Fighting can only be earned within the 3 minutes of the Wesker fight.
- Difficulty differences. Maze serpent shards: 1 on Amateur, 3 on Normal, 4 on Veteran and Professional. On Veteran and Professional a Blob can hold the spike trap up with its anchor, and one can appear in the spike-ceiling area or the storeroom. On Professional the map doesn’t show the Blobs, they move faster, and the basement’s key items may be in different spots (Fandom says so without naming which): if an item isn’t where this guide says, search the rest of that area.
- S rank (any difficulty): accuracy ≥70%, ≥6 kills, ≤5,000 damage taken, ≥13,000 in score items and ≤40:00 (A: 60–69.9%, 5 kills, up to 10,000 damage, 10,000–12,950 points, up to 50:00). Deaths don’t count toward the rank. Guides recommend a separate Amateur run for the 18 stars and a fast run for the S.
Main hall
Easter egg: classic camera. Right at the start, examine the front doors 3 times (the prompt turns into ”?”): the camera switches to fixed angles with tank controls, like the first Resident Evil. Dying, changing area or examining the doors 3 more times turns it off.
Ground floor. Break the vases: on the left side two hold Handgun Ammo and one a small star; on the right, two small stars and one Handgun Ammo. Go round either side of the main stairs, through the archway and down to the small room with an iron gate and a lever.
- Score Star #1: behind the ceiling lantern right above the lever.
- Pull the lever: the two gated doors on 2F unlock. The gate in this room needs a crank (you get it later).
2F. Go up to the walkway. There’s Handgun Ammo by the corpses (the exact spot shifts a little by pattern) and, depending on the pattern, on the desk at the right end (Handgun Ammo or a Herb (Green)) and on the middle of the walkway (Handgun Ammo).
- Score Star #2: in the middle wall alcove, right above the front doors. The chandelier can hide it: move along the walkway until you see it.
- Score Star #3: on top of the back of the chandelier, entrance side. You see it from the 2F side without the gap; a rifle helps, but the M92F does it with patience.
Right-hand corridor and bedroom
Take the right-hand door on 2F and follow the corridor.
- Score Star #4: on the cabinet with decorative plates at the end of the corridor, outside the bedroom door.
- Keeper’s Diary on the bedroom desk: an abridged copy of the first game’s animal keeper’s diary. The Password 3 is between its last pages. Unlike RE1, no zombie bursts out of the wardrobe.
- Random bedroom weapon: S&W M29 magnum (pattern A), Handgun Ammo (B) or M3 shotgun (C). This episode’s random weapons come loaded: M29 with 6 rounds, PSG-1 with 7, M3 with 8, MP5 with 100.
Broken walkway and dining hall
Broken walkway (left-hand 2F door). The walkway is cut. Use the partner action so Chris boosts Jill over the gap. Jill picks up a weapon on the dining-hall balcony (H&K PSG-1 rifle, M3 shotgun or H&K MP5 machine gun, by pattern), goes down and unlocks the dining-hall door for Chris.
- Score Star #5: in the dining hall’s 2F south-west corner, left of the clock (above-right of the fireplace). Jill shoots it from the balcony; solo, Chris can hit it from the ground floor by the fireplace, looking up into the corner.
Dining hall.
- Score Star #6: inside the grandfather clock, behind the chimes. The knife works.
- Patrick’s Memoirs 1 in the small arched office on the far side from the fireplace, behind the table: it gives Password 1. Patrick is Spencer’s butler.
- Remember the fireplace: you’ll burn the Heat-Sensitive Paper here.
Toilet and piano room
Take the door left of the fireplace.
- In the toilet: Herb (Red). Score Star #7: high on the wall, above the urinal.
- Go up the stairs to the piano room: Patrick’s Memoirs 2, Herb (Green) and Handgun Ammo. The file tells how Patrick injected the basement prisoners with the virus: that’s where the Blobs come from.
- Piano puzzle: examine the piano as Jill: she plays the Moonlight Sonata. If you’re playing Jill, press the on-screen buttons while she plays. Part of a wall slides open; shoot the red button/lamp in the passage behind it and it opens fully at once (so in co-op Jill doesn’t have to keep playing). Take the Centaur Emblem from its recess.
- Shortcut: a Hand Grenade thrown at just the right angle goes through the wall, hits the red button and opens the passage without the piano.
- On repeat runs or higher difficulties a Blob may wait outside the room (sources disagree on what triggers it, but none puts it in a first Amateur or Normal run). You don’t have to fight it: it can’t run.
Centaur corridor and storeroom
Centaur corridor. Go back through the dining hall to the main hall and set the Centaur Emblem in the iron door on the opposite side. In the three-window corridor a bat bursts through the last window and a dog howls, a nod to RE1’s Cerberus. The paintings show the underground ruins and the garden from 4-2 and 5-1.
- Have Jill pick the lock of the first door (the study). Don’t solve anything yet: go on to the next door.
Storeroom.
- Score Star #8: inside the small cage in the right-hand corner, half under a white sheet, next to a crate.
- 2 Hand Grenade + 2 Incendiary Grenade on a box on the left (fixed).
- Random weapon or item: Herb (Green) (A), S&W M29 (B) or H&K PSG-1 (C); pattern C also puts 3 Proximity Bomb next to the star.
- Heat-Sensitive Paper on the trunk at the back. Taking it sets off a metal clank. One door here won’t open from this side: you’ll use it in the rescue.
Dining-hall fireplace. Go back to the dining hall and burn the Heat-Sensitive Paper in the fireplace: Password 2 appears.
Study and spike ceiling
Study. Enter the room Jill unlocked. Four documents sit on the bookshelf: Spencer’s Memoirs 1, 2, 3 and 4 (Spencer, his obsession with immortality, Alex and “Albert”). At the computer, enter Passwords 1, 2 and 3: it gives Patrick’s Memoirs 3 and Test Subjects (the list of the 13 Project W candidates, with Alex as 012 and Albert as 013) and opens a secret passage.
- Score Star #9 (1,000 points, double almost every other star): high on the south wall of the secret room, above the wall safe. Shoot it before you step in or, at the latest, while the ceiling is still high (trapped Jill can still hit it). If Chris pulls the lever that stops the ceiling before anyone has shot it, you can’t hit it any more.
- Stepping in drops a gate: Jill is trapped and the spike ceiling starts coming down (an RE1 homage).
Spike-ceiling rescue. Chris runs back to the storeroom, to the door that wouldn’t open: Jill shoots the lock off from the other side. Inside, pull the lever that stops the ceiling.
- Score Star #10: on the ceiling, above-left of the door of the lever room. It’s also visible through the bars on the way to the storeroom: you can shoot it from there.
- Jill, in the spike room, collects the Square Crank from the safe and whatever the vases hold.
- On Veteran and Professional a Blob can appear in this area or in the storeroom.
The gate under the stairs
Go back to the main hall’s lever room and fit the Square Crank into the gate: one player turns it while the other goes through, then the one who went through turns the crank on the far side so the first can cross. Continue to the metal door and go down.
- Score Star #11: on the wall above the shelves by the “Jump Down” ledge, which you reach right after the crank passage. You can see it by leaning over before you jump (look right) or, once down, by looking left above the shelves where you land. Point of no return: once you jump, stars 1–10 are gone.
Prison: the cell corridor
Blobs appear from here on (see the boss section below). Their placement varies a little between runs. Go through the left-hand doorway and take the stairs down on the right, along the walkway.
- The open cell on the left has a barrel with ammo or a small star.
- Score Star #12: on the floor of the 5th cell on the right after the first stairs, under a dead test subject’s hand (before the first bend).
- At the next opening, a crate with a Hand Grenade. A Blob is visible on the upper floor. An opening on the left has a barrel with a small star.
- The 4 rats in the cell corridor always drop a small star when shot: free points for the rank. A Flash Grenade on the group kills them all.
- Score Star #13: before the up-staircase that turns left, past the two corpses on tables: in the closed cell straight ahead, on its left wall inside.
- Score Star #14: from that same spot, turn round and look up at the 2F wall above the cells.
Prison: 2F
Take the only staircase up. This area’s Blob is always there, but it can be in four places: (1) behind the left corner of the first flight, (2) behind the left corner of the second flight, (3) wandering the 2F cells or (4) coming up behind you from the ground floor. Go up with your weapon ready. Killing it drops a large star (2,000); if you’d rather not fight, the wooden ledge in the middle of the 2F gap lets you escape when it corners you on one side.
- Score Star #15: at the top of the stairs, first sealed cell on the right, on its wall. Shoot through the bars.
- There’s a barrel in the left-hand cell (with a test subject lying beside it: slash it before you break the barrel, or it grabs you) and another at the end of the right-hand row of cells.
- Professional only (one source): a Blob walks the upper walkway; killing it is worth 4,000. Pin it with Incendiary Grenades so it stays put while you run up the stairs.
At the far end of 2F, take the stairs down on the right.
- Handgun Ammo on the shelf to the left, at the foot of the stairs.
- Score Star #16: on the bottom shelf of the shelves opposite, beside a dead test subject (taking the left path). It needs a careful angle.
- The barrel down the right path sits against a brick wall that a Blob smashes through in one swing: break it carefully and back off. It’s worth killing this Blob so you don’t have two on your tail in the next area.
Prison: the spiral staircase and the Jail Key
The right-hand tunnel leads to the spiral staircase. A Blob drops from an overhead ledge.
- Partner jump: at the broken ladder, Chris boosts Jill to a wooden platform with 2 barrels. From there, Jill leaps across to the top of the spiral staircase; Chris walks up the stairs.
- At the top are a crank and a chest in an alcove behind a gate: one turns the crank while the other goes in and opens the chest: Jail Key. Solo, order the AI to turn the crank (action in front of it): it’s quicker, because if you turn it, the AI won’t go in until the gate is fully up.
- The Jail Key door is at the bottom of the spiral staircase: go down, unlock it, drop off the ledge beyond and jump the gap in the wooden bridge to a barrel with ammo. Any Blobs that were following you usually follow you into the next area too.
Prison: the water area and the crests
A Blob roams this area and usually shows up from the left as you enter. Both the straight path over the wooden bridge and the left path (with barred alcoves in the wall) lead to a locked gate; to its right, in the south part of the area, is the round indentation for two crests.
- Silver Crest: go down the stairs on the right and follow the path with the barred alcoves: the chest is on the left, halfway along it (just after the first Blob past the spiral staircase).
- Gold Crest (engraved with a goddess): in the middle of the area is another broken ladder: boost Jill with the partner action up to the chest on the ledge. When she takes it, a Blob appears beside her and drops down to Chris. Solo, AI Jill stays up there shooting at it: give the “Come on” command to bring her down with you.
- Score Star #17: with the crests set the gate unlocks, but don’t go through yet: go down the stairs to the left of the gate and check the barred alcoves on the left wall: the star is behind the grate of the 6th past the Silver Crest chest (2nd from the back, right below a staircase).
- Use up your ammo before you go through the crest gate. The two crests unlock the gate; going through it (partner action in front of it) drops you and you lose all your equipment. Point of no return for stars 12–17.
The maze: how it works
The execution ground ruins. The only weapons placed here are Flash Grenades; everything else is the knife and the traps. Open the map often: you navigate by the traps’ coloured squares.
- Goal: kill Blobs with the coloured spike platforms, collect the serpent shards they drop, and place them in the central circle (the gate with the octagonal indentation that flashes on the map, north side). Each placed shard releases a new Blob that smashes walls and opens more of the maze. Blobs only start breaking walls after the first shard is placed.
- Shards required: 1 on Amateur, 3 on Normal, 4 on Veteran and 4 on Professional. On Professional the map doesn’t show the Blobs and they move faster: this is the hardest part.
- Checkpoints: placing a shard is the maze’s only checkpoint. If you die after picking up cranks but before placing a shard, you go back to the last checkpoint and must collect those cranks again. Place every shard as soon as you have it.
- Where each trap and its crank socket are: the red trap is east and the blue trap west, each with its socket on the ground floor right next to it. The purple one has its socket on the 2F walkway, reached by the ledge above the trap. The green one has its socket walled off from the trap: one player works the crank while the other runs round to the trap (use the small recess on the east side to lure the Blob).
- How a trap works: fit the coloured crank into the matching coloured socket; your partner turns it and the spike platform rises. Lure the Blob underneath (don’t stand there yourself) and drop it. Solo: with the right crank, stand at the socket and use the “Ready the trap” command: the AI turns the crank. Lead the Blob under the platform, step out and press the partner button (○/B) for “Deploy the trap”. Co-op: hold the partner button and press D-pad up (“Go”) to cue your partner to drop it. On Veteran and up a Blob can hold the ceiling up with its anchor: throw a Flash Grenade or melee it (Jill: Flip Kick; Chris: Haymaker), then get out fast. Take the shard from the flattened Blob.
- Which shard each trap gives: red → Sun Eater Serpent Shard, green → Tri-Head Serpent Shard, purple → Dual-Head Serpent Shard, blue → Serpent Tail Shard. One source swaps blue and purple; what matters is collecting as many as your difficulty needs. The first is always Sun Eater or Serpent Tail.
- The cranks: there are 4 chests in fixed places, but the colour in each is random. The first one (by the red trap) always holds the Crank (Red) or the Crank (Blue), because only those two traps can be reached at first.
- Test subjects in the water: they grab you as you pass and stay hidden until they lunge. A knife slash stuns them, or run past and sidestep. They lie north of the green mechanism, by the bars next to the green-trap chest, and halfway along the corridor to the last chest. Remember where they are: a grab with a Blob nearby leaves you in DYING.
- The 3 spiders on the high corridor above the red trap: one knife slash each gives a small star. The snakes drop a random egg and don’t count as kills.
The maze: the crank route
Where each of you starts. Chris starts beside the green crank socket, north of the green trap: on his right, a barrel with a Flash Grenade and a crate with a First Aid Spray. Jill starts south of the purple trap, with two crates behind her: First Aid Spray and Flash Grenade. Solo, the AI doesn’t break its own crates: it joins you straight away, so go back to its starting spot yourself for those items. In co-op, Jill heads north to the blue trap, climbs onto it and onto the ledge beside it, and you meet on the high walkway.
- First chest (by the red trap). Round the right-hand corner: barrel against the right wall = medium star. Go north to the red section of the map. Don’t go west yet: there’s a Blob there. Before climbing, if you like, cross the red square to the far side (back in the water) for a crate with a Flash Grenade. Climb onto the red trap platform and from there onto the high ledge on its left. Knife the 3 spiders (small stars). The chest is at the end of the corridor, on the right, next to a barrel = small star. It holds the red or the blue crank.
- First shard. Go to the trap of that colour (red east, blue west), fit the crank and crush a Blob. Place the shard in the slot left of the central gate: checkpoint, and the Blobs start breaking walls (slowly). Now break the barrel opposite the gate and the crate to the right of the blue socket: a Flash Grenade each.
- Second chest (by the green trap). Go back to Chris’s starting area (the one with the green socket). The wall to the west, just outside that area, is now broken: go down the narrow corridor, break the crate on the block on the left (small star) and carry on to the right. Hop the bars: the chest is left of a coffin. Mind the test subject in the water by the other bars. On the way back, the barrel in the corner west of the green trap holds a small star.
- Third chest (high walkway). Climb onto the green trap and from there onto the ledge on its south side. Follow the walkway: the chest is in an alcove on the left, with a barrel = Flash Grenade next to it. A snake roams here (it drops a random egg).
- Fourth chest (tunnel west of the purple trap). Follow the walkway west and hop the gap: on the left, a crate with a snake inside (it gives nothing) and a barrel = medium star, above the purple trap. The purple socket is just across when you hop to the walkway on the right. Come back, drop onto the purple trap and off its west side: barrel = medium star by the tunnel. Enter the tunnel: a test subject waits halfway along; run past and turn quickly. The chest is on the left. Leave the tunnel by its north end and you’re in the blue-trap area.
With the cranks you still need, repeat the cycle at each trap and place each shard as soon as you have it. Once the required shards are placed the gate opens: climb the ladder and the stone stairs back into the estate.
The maze’s fixed barrel stars (not part of the 18): medium in the barrel round the first right-hand corner from Chris’s start; medium in the barrel on the 2F walkway above the purple trap (next to the snake crate); medium in the barrel by the tunnel west of the purple trap; small in the barrel by the red-trap chest; small in the crate east of the green trap, on the way to its chest; small in the barrel in the corner west of the green trap.
Back in the estate
At the top of the stairs, a little way along the right-hand corridor, lie two M92F and a First Aid Spray by the corpses.
- Score Star #18: high on the back wall at the head of the stairs, just to the left as you enter the building. Pick up an M92F first, then come back and shoot it. Jill can knife it by aiming up and save the bullet. Worth 500 or 1,000 points depending on the source.
Follow the long corridor: cutscene with Spencer’s body and Albert Wesker. There’s Handgun Ammo around the room.
Boss — Blob
Basement prisoners infected on Spencer’s orders: over 7 ft tall, dragging an anchor. They appear in the prison (the upper floor, the second staircase and the spiral staircase) and in the maze; the mansion ones only on repeat runs or higher difficulties. The map shows them as triangles, except on Professional. It can’t run: you’re never forced to fight the mansion or prison ones; they stalk you until they lose sight of you.
Weak point: the yellow eye on the back of the growth on its right arm. A shot to the eye always stuns it. Hitting the growth without hitting the eye makes it spray acid that stuns anyone nearby.
- Don’t get grabbed. An anchor hit (sweep or slam) puts you in DYING. Its grab has no dodge prompt: your partner has to free you (solo, press the partner button so Jill or Chris helps) or the anchor impales you: instant death. On higher difficulties the impale comes sooner.
- Flank it. In co-op, pincer it: one player keeps it busy from the front while the other shoots the eye on its back. Careful as you reach the top of a staircase: it likes to wait there and swing.
- Weapon: a magnum to the eye drops it in about 3 shots on Normal. The shotgun does big damage to the shoulder growth. Unbroken barrels can snag it and give you an opening.
- Finishers: when it kneels, melee it (Jill: Sweep Kick or High Kick; Chris: Uppercut or Straight). If you both strike, back off after the second hit: it answers with two horizontal swings.
- Reward: a 2,000-point large star each. With or without Kung Fu Fighting, killing Blobs is the reliable way to reach the S rank’s 13,000 points and 6 kills. Whether a Blob crushed in the maze also drops the large star, the sources don’t say.
Boss — Albert Wesker
The room at the end of the estate, with Handgun Ammo on the floor. Wesker dodges bullets even from behind and at range: you only hit him in a short window mid-attack. The fight ends on its own after 3 minutes or once you deal enough damage. When he hits you, you sometimes have to rotate the stick to recover, and you can rescue your partner while he attacks them.
- Waiting it out: if you just want to finish, dodge his charges with the prompts and let the time run out. No bonus. If you’re going for Kung Fu Fighting and the clock nears 3 minutes, restart the fight from the pause menu: if it hits zero, the fight ends with no reward and you’ll have to replay the episode up to here.
- Kung Fu Fighting (3,000 points + achievement): from long range, fire at him with the handgun. After he dodges two or three shots, he usually answers with a short cut-in and a dash at the shooter.
- Dodge the dash with the prompt. On PS3 the first button is □ or × at random (always □ on Amateur). If the first hit lands, dodge the follow-up with L1+R1 (sometimes □+× on Veteran) or you may die outright. On Xbox 360 it’s X or A depending on difficulty.
- Counter: run in and use the melee prompt. Dodging a dash he started on his own gives the stronger tag-team prompt. A full combo ends the fight at once: Chris Left Hook → Right Hook → Body Blow → Heavy Blow → Finishing Combo; Jill Reverse Kick → High Kick → Front Kick → Knee Strike → Double Heel Hop. The prompts are Action, Action, Partner, Run, Action+Run (PS3 □ □ ○ × □+×; 360 X X B A X+A).
- Repeat until he leaves: 3–4 good counters usually do it.
- Co-op: when your partner dodges, don’t shoot (it cancels the melee opening); if you both strike together, both hits count. One guide says Jill’s taunt baits his charge (unconfirmed).
- Solo: the AI’s shots break the three-dodge pattern. The AI only picks up an M92F if you tell it to: don’t, and it reaches Wesker with just the knife.
- Trivia: dodging his punch-then-stomp shows “Flip Kick”, but Jill does a Cartwheel Kick.
Reward: the ending cutscene (Jill tackles Wesker out of the window). Clearing it gives the Must’ve Got Lost achievement and the Chris and Jill figurine; with an S, It’s Just a Bad Dream!; on Professional, Night Terrors; all 18 stars, Wish Upon a Star.
Points plan for the S (≥13,000): the 18 stars are worth 9,500 or 10,000. Kung Fu Fighting (3,000) takes you to 12,500–13,000: add one Blob (2,000) or the maze’s 3 fixed medium stars and you’re safely over. Without Kung Fu: the 18 stars + 2 Blobs = 13,500.
Don’t leave without:
- stars 1–10 before you jump at the “Jump Down” ledge (#9 before the spike ceiling drops; #11 right after you land);
- 12–17 before you go through the crest gate, and your ammo spent before you cross it;
- the Jail Key, the Silver Crest and the Gold Crest;
- in the maze, the shards your difficulty needs (1/3/4/4), placed one by one to lock in the checkpoint;
- #18 before Wesker, and the 2 M92F in the corridor;
- the 9 files: Keeper’s Diary, Patrick’s Memoirs 1–3, Spencer’s Memoirs 1–4 and Test Subjects;
- Kung Fu Fighting within Wesker’s 3 minutes.