This is the last chapter of the campaign. Chris and Sheva are still aboard the Tricell ship, right where Uroboros Aheri fell, and have to reach Wesker’s bomber before it takes off with the Uroboros missiles. It’s three fights almost back to back: the burning Engine Room (two bulkheads, 2 Reapers and 2 Gatling Gun Majini), Albert Wesker in the dark hangar, where you weaken him with the RPG-7 NVS and the Serum PG67A/W, and Uroboros Wesker in the volcano, after an unforgiving QTE on the bomber. There are no emblems: the chapter gives 5 treasures (about ₦19,000) and one file.
Chapter order: Bridge Deck → bridge: cutscene “A Message from Jill”, Uroboros Plan file → elevator → Engine Room: secondary bulkhead lever (hold out) → second area (2 rocket-launcher Majini: Dead Bride’s Necklace ×2) → the small rooms on the walkway (12 Nitrogen Rounds) → the two primary bulkhead levers → 2 Reapers (Power Stone ×2) → 2 Gatling Gun Majini (Hangar Keycards A and B) → loot by the door (12 Acid Rounds) → Hangar: Albert Wesker with the RPG-7 NVS and the Serum PG67A/W → bomber (QTE) → volcano: Diamond (Marquise) (Chris only) → Uroboros Wesker → final helicopter QTE.
Before you start:
- Shop (between 6-2 and 6-3). Sell the 2 Chalice (Gold) from 6-2 (₦3,000 each). Buy 2 packs of Proximity Bombs (₦1,500 per pack of 5) for the Gatling wave, and a Rocket Launcher (₦10,000) if you no longer have the one from the swamp: one rocket on the exposed weak spot kills Uroboros Wesker. Don’t spend on Grenade Launcher ammo: the Engine Room gives you 12 Nitrogen Rounds (not on sale yet: they reach the shop once you clear 6-3) and 12 Acid Rounds for free. The one exception: if you have no Acid Rounds left for the Reapers, buy one pack (₦2,400), because the 12 free ones come after that fight. Nothing new enters the stock at 6-3: the last weapon upgrades opened in 6-2.
- Loadout. A rifle (the Engine Room Majini, the Gatlings’ heads and Wesker in the volcano), the Grenade Launcher with Acid Rounds or Explosive Rounds for the Reapers, Proximity Bombs for the Gatling wave, a handgun (it detonates the rocket Wesker catches in the Hangar and pushes Uroboros Wesker back) and a magnum or rifle for the final boss. In co-op, split it: one carries the rifle, the other the magnum, and both a handgun.
- Missables: the Diamond (Marquise) can only be taken with Chris, at the very start of the volcano, before crossing the rock bridge. The 2 Dead Bride’s Necklaces drop where the rocket-launcher Majini die: pick them up before pulling the primary bulkhead levers. The bomber QTE is a game over if you miss a single button.
- S rank on Normal: accuracy ≥70%, ≥25 kills, 0 deaths and ≤22:00 (A up to 26:00, B up to 30:00).
Bridge Deck and bridge
You start where Uroboros Aheri died. Go back through the metal door on the right (out through the red gate, then open the orange door) to the bridge. Cutscene: they see the bomber on the monitor, then “A Message from Jill”: Jill radios that an overdose of the PG67A/W serum weakens Wesker (the same call you see from Jill’s side in Desperate Escape).
- File Uroboros Plan: on the terminal in the west half of the bridge, the panel Jill appears on. It’s Wesker’s manifesto: Uroboros missiles released from the bomber.
- Trivia: examine the captain’s seat in the middle of the bridge (“Always wanted to be a captain, but now’s not the time.”).
Take the elevator at the top end of the bridge (locked in 6-2) down to the Engine Room.
Engine Room: the secondary bulkhead
The ship is on fire; an alarm announces that the area is being sealed off with the primary bulkhead. There are two bulkheads: the secondary one opens with one lever (one player) and the primary one needs two levers pulled together (both players).
- Starting platform. Before you move, snipe the Majini visible ahead and to the right. One of those on the left doesn’t need shooting: when you get close, the fire or an explosion on the walkway kills him. Where the path turns right there’s an explosion from the left that hurts you too. Herb (Green) on the walkway. Before you go down, shoot the Majini waiting below.
- Flooded area. Jump off the edge of the platform into the water and climb the ladder at the side of the pool. Another Majini here, and an Incendiary Grenade nearby.
- The first lever. Climb the stairs to the raised platform and pull the lever (a Majini guards it, usually already sniped). Herb (Green) by the lever.
- Hold out while the secondary bulkhead opens. Majini come from behind the bulkhead and from behind you (the way you came in). They’re melee and explosive Majini, some with Stun Rods, no firearms. Keep your distance or funnel them through a narrow spot. In co-op, one watches the bulkhead and the other the entrance. When it opens, a second group attacks from the front: snipe what you can, then jump the gap into the next area.
Engine Room: between the bulkheads
On arrival, a Flash Grenade and a Herb (Green). Here there are Majini with automatic rifles, explosives and 2 Rocket Launcher Majini.
- Where the rocket Majini stand: one at the far middle, on the catwalk above the primary bulkhead; the other on your left. Their rockets put you in DYING or kill you: don’t stay in the open for either of them.
- Tactics: clear the nearby rifle Majini first so you can stay behind a pillar or crate without being flushed out; then pick off the rocket Majini with the rifle, headshots from cover. In co-op, one draws fire and the other shoots.
- Dead Bride’s Necklace ×2 (₦2,000 each): one per rocket-launcher Majini. The middle one drops it on the catwalk above the bulkhead: grab it when you go up to the small rooms.
Engine Room: the small rooms and the primary bulkhead
Loot before you pull the levers. On the upper walkway over the primary bulkhead are two small rooms:
- Right-hand room: 12 Nitrogen Rounds (one pack of 12) and a Herb (Red).
- Left-hand room: a First Aid Spray and 2 Proximity Bombs.
Note the Reaper cocoons on the walls: they hatch when you pull the levers.
The two levers are under the stairs. Before you pull, lay the Proximity Bombs around you (the 2 from the small room plus the ones you bought) and have Acid or Explosive Rounds ready. Pull both together with your partner; solo, stand at one and Sheva takes the other. Then hold your ground: 2 Reapers hatch from the cocoons behind you and, when the bulkhead finishes opening, the Gatling Gun Majini arrive with support Majini (see the boss).
After the Gatlings: the loot and the door
With both Gatlings dead, pick up Hangar Keycards A and B (one per Gatling). Before the keycard door there’s one last cache you shouldn’t leave behind:
- On your left: 3 Flash Grenades.
- On your right: 12 Acid Rounds, a First Aid Spray and a Herb (Green).
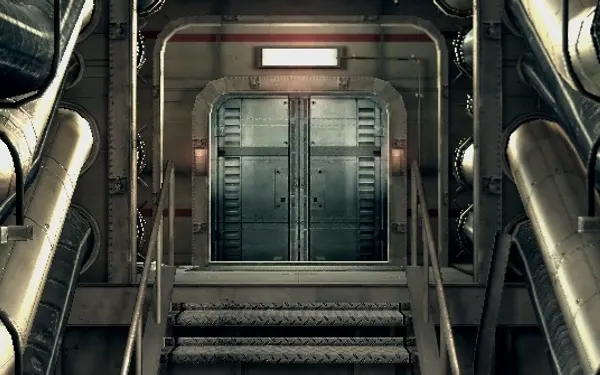
Use both cards on the door (“Looks like we need two keycards…”), go up the corridor and open the door at the end: the Hangar. Heal up and sort your inventory now: the Wesker fight starts right away.
Hangar
The fight with Albert Wesker in the dark (see the boss). Getting your bearings from the entrance:
- RPG-7 NVS: to the left, by the broken north-west console, inside a glass case: shoot or smash it to take the launcher.
- RPG Rounds: 1 on the ground floor and 5 in a glass case on the upper walkway (climb the ladder and follow the walkway).
- Light consoles: one in each corner; the crates by each hold random items.
The first restraint always fails. After the first cycle, reload from the ground-floor RPG Round, fire again and detonate the caught rocket with the handgun.
The bomber (QTE)
After the Hangar, a cutscene full of button prompts: any miss is an instant game over. Keep the controller in hand when the Hangar fight ends. The prompts come: (1) right after Wesker says he’ll spread Uroboros across the world; (2) when he clings to the ceiling and aims his gun; (3) when he catches Sheva’s knife and chokes her; (4) when Chris goes for the hatch lever, Wesker chases him and Sheva turns to cover him; (5) when Jill’s face appears on screen and Sheva lets go. One guide says the Action Button setting in the options simplifies or removes this QTE; unconfirmed.
Volcano
Wesker absorbs the Uroboros from a missile.
- As soon as you crawl out of the bomber wreck, turn around: some crates with a Herb (Red), Rifle Ammo and a Hand Grenade. Pick them up before walking up the path, which triggers Wesker’s cutscene.
- Diamond (Marquise) (₦5,000), Chris only: as soon as you have control after the cutscene, turn round and run up the slope, but stop before the weak rock bridge. Shoot the bottom-right edge of the off-colour rock outcrop to the right of the bridge until it falls into the lava (any weapon, as long as you hit the bottom). When the bridge collapses and you fall, don’t go to the centre: turn left, jump to the new rock and the diamond is on the ground at the end. Sheva lands on the other side, so in co-op whoever plays Chris has to do it. Wesker follows you there and can kill you in one hit: have your partner cover you. Trick: grab it, then save and quit; the treasure is kept and you can replay the fight in peace.
- Chris’s Herb (Green): when the bridge collapses and he jumps to the small island, there’s one on the path to the left.
- Sheva’s Herb (Green): after she climbs back up from hanging, straight ahead along her path, while she waits for Chris to push the boulder.
The fight carries on without a break: see Uroboros Wesker below.
When you finish
Achievement Completed Chapter 6-3 and the Albert Wesker library file. If you played every chapter on the same difficulty, you get that difficulty’s achievement (Recruit, Soldier, Veteran or War Hero). Clearing the game unlocks The Mercenaries, Desperate Escape, new costumes, filters and infinite-ammo purchases with Exchange Points; if the total of your best times for the 16 chapters drops under 5 hours, the Infinite Rocket Launcher too (sources disagree on whether they must all be on one difficulty: do them all on the same one). With Chapter 6 cleared, Bonus Features sells the Majini (Duvalia) and Reaper figurines (5 emblems), Spencer and Gatling Gun Majini (10 emblems) and Uroboros Aheri (30 emblems), 500 points each. Nitrogen Rounds go on sale in the shop.
Boss — Reapers ×2 and Gatling Gun Majini ×2 (Engine Room)
When you pull the two primary bulkhead levers, 2 Reapers hatch from the cocoons and attack you from behind after the cutscene. When the bulkhead finishes opening, 2 Gatling Gun Majini come through with an endless stream of Majini carrying grenades and Stun Rods. Each Gatling carries a keycard. Kill the Reapers before the bulkhead finishes opening: otherwise they fight alongside the Gatlings.
- Lay the mines. Before you pull the levers, set Proximity Bombs around your position: the small Majini won’t interrupt you.
- The Reapers. Never let them reach melee range: their grab kills in one hit. Keep moving. Wait for it to rear up and show the glowing sac on its belly: shoot it (shotgun or magnum). It curls up and shows the two white sacs on its back: shoot those and it shows its belly again, which is where you finish it (belly → back → belly, as in 5-2). On higher difficulties you repeat the cycle more times. The Grenade Launcher’s Acid Rounds work well; Explosive Rounds (or a Hand Grenade or Proximity Bomb) won’t kill it but drop its health to almost nothing, so one belly shot finishes it. A Flash Grenade or Flash Round stuns it.
- Power Stone ×2 (₦5,000 each): one per Reaper.
- Tactic 1 — the mounted gun. On a tower on the left of the area is a fixed machine gun. Once the Reapers are dead, go to the left edge of the platform, as close to the bulkhead as possible, and take the jump down prompt; jump onto the next platform as soon as the bulkhead opens and climb the ladder on its left side to the tower. If you open fire as soon as the Gatlings reach your level, they stay in the gun’s arc and can only reach you with grenades. In co-op, one player mans the gun and the other distracts them.
- Tactic 2 — at range. Clear the small Majini first without standing still (the Gatlings fire at a fixed area), then snipe the Gatlings’ heads from cover and relocate when they close in. Another option: fall back to the secondary bulkhead area and fight at range. A rocket between the two before they split up kills both.
- Tactic 3 — holed up in a small room. Get inside one of the two small rooms on the upper walkway and shoot the Gatlings as they come to the door. Kill one first, then the other. When one covers his head (stunned), close in for the tag-team melee: in co-op, Chris and Sheva one after the other.
- Finishers. As in 6-1: a rifle or magnum headshot stuns them (finisher from the front); a leg shot makes them kneel (finisher from behind). When they down someone they taunt by firing into the air: a free opening.
- Reward: Hangar Keycard A (blue) and Hangar Keycard B (purple), one per Gatling. Pick each one up (or note where it fell) before fighting the other.
Boss — Albert Wesker (Hangar)
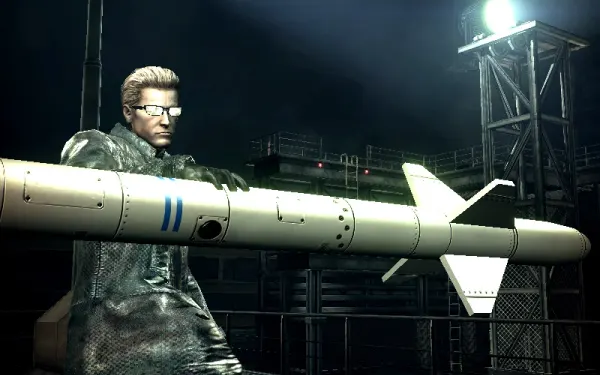
A dark, square hangar with the bomber in it. Wesker dodges any shot he sees coming, as in 5-3: you only hit him from behind, in the dark or mid-attack. His attacks: the Knee Cannon (a dash from range: sidestep or counter with the prompt), a melee combo (dodge prompts), a grab that drains your health fast, a gunshot that stuns and deals heavy damage, and the Rhino Charge: up to 5 strikes with dodge prompts; dodge them all and you counter; miss one and he puts his arm through your chest (instant death). When he’s in front of the bomber he throws a missile (one-hit kill): shoot the missile in his hand so it blows up on him.
The lights: there are 4 floodlight consoles, one in each corner. You can switch off the north-east, south-east and south-west ones; the north-west one is broken (“It’s broken!”). Wesker switches the lights back on if left alone, and afterwards tends to attack with explosives. When he says “You can’t hide forever” or “You’re merely postponing the inevitable”, he has lost track of you.
The RPG-7 NVS: it’s left of the entrance, in the glass case by the broken console; break the glass to take it. It doesn’t go in the inventory; you hold it in your hands and put it down when you switch weapons. It holds one rocket at a time and you reload by hand from an RPG Round (1 on the ground floor, 5 in the case on the upper walkway). Your partner can reload you with the partner-action button if they carry a round. The rounds don’t fit the normal Rocket Launcher and disappear after the fight. Fandom says each RPG Round takes a slot; a Japanese guide says they take no slot and you can carry only one. Either way, it’s one shot per reload.
- Switch off the three working lights. In co-op, one kills a light and the other runs to the next; the Sheva AI moves on to the next by herself.
- Fire the rocket at his back while he can’t see you. In co-op, one distracts him and the other fires. He turns and catches the rocket in his hand.
- Immediately put the launcher down or switch to a handgun and shoot the rocket in his hand (any gun, anywhere on the rocket). It explodes and stuns him. If you’re slow, the fuse dies and he throws it away.
- When he drops to his knees yelling “Ignorant cretins!”, run in and use Restrain: Chris holds him (mash the button) and your partner injects the Serum PG67A/W. The first time always fails: Wesker breaks free and throws Chris. You need another full cycle (IGN: repeat the process twice): reload from the ground-floor or walkway RPG Round, switch the lights off again if he turned them on, and repeat. How long you can hold him depends on the damage you’ve dealt: one rocket may not be enough.
- Rare variant: sometimes the explosion only stuns him without dropping him to his knees: you get a melee combo prompt instead. He takes damage, but you can’t restrain him. If all the lights are off and he’s on the ground, get behind him unseen and fire another rocket.
- Timing trick: shoot him exactly as he attacks; 3 hits in a row open a melee attack. A 4th shot before the melee gets dodged and countered.
- Reward: the second injection weakens him and the action moves to the bomber. No drop.
Boss — Uroboros Wesker (Volcano)
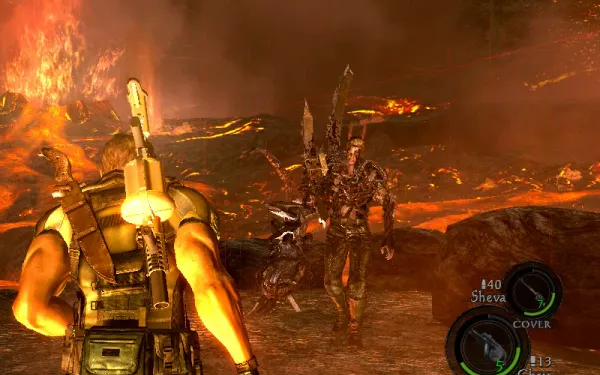
Weakened by the overdose, Wesker merges with the Uroboros: tentacles on both arms and metal debris from the container fused to his right arm. His orange weak spot is on his back, behind the left shoulder; in phase 2 the chest core opens too. His attacks: an arm sweep that knocks you into the lava (instant death), ooze projectiles (run, or follow the prompt), a raised-arm slam (dodge prompt) and, in phase 2, a 360° tentacle whirlwind that kills instantly up close. Fandom says that on higher difficulties he takes 10% damage outside his weak spots (single source).
Phase 1 — separated.
- Chris runs up the slope to the rock bridge; it collapses and he falls to the level below (before that, if you want it, do the Diamond (Marquise)).
- Chris climbs to the circular high ground (“Chris! Get to high ground!”). When Wesker raises his arm to slam, dodge with the prompt, flank him and shoot the orange spot on his back.
- Sheva, across the gap, shoots his back from range to bait him towards her. Shortcut (Fandom): Chris can run straight ahead, grab the herb and push the boulder while Sheva shoots Wesker’s back from her side. Another guide says not to start pushing until Sheva is safe (step 5); if you’d rather not risk it, follow the steps in order.
- After enough damage he mutates his other arm and jumps to Sheva’s side. She runs, the bridge collapses under her and she’s left hanging (mash to climb). Chris shoots Wesker to keep him off her for about 30 seconds, with the rifle; stop shooting when the “HELP” tag disappears from Sheva’s weapon icon. Meanwhile Wesker attacks Chris at range: dodge the prompts. If Chris had already damaged him before Sheva fell, she climbs up without mashing.
- Once Sheva is safe, Chris goes down, round the island to the boulder in the south-east and follows the prompts to push it into the lava. Don’t start pushing before Sheva is safe, but don’t dawdle: if Wesker kills her, the mission fails. Sheva crosses on the new stepping stone. Checkpoint as you head back up to the high ground.
Phase 2 — together on the high ground.
- When he raises his right arm, shoot the back core: he flinches and does the whirlwind. Get away immediately.
- After the whirlwind the chest core opens: shoot it until it closes. Repeat.
- Keep your distance: two handgun shots to the head stagger him back a step or two. Repeat so you never end up in whirlwind range.
- Finish A: when he staggers after a chest hit, get behind him and Restrain with Chris (mash the button); Sheva stabs the chest core and Chris impales his back. If the restrain fails, Chris falls and Wesker impales Sheva (death). On higher difficulties you need full health to restrain him: the hold drains your health and can fail even then.
- Finish B: shoot the chest core until he has no health left, with no restrain risk.
- Weapons: IGN recommends a fully upgraded magnum (about 6 well-placed shots) with all its ammo and a shotgun backup; Fandom says magnums do 60% less damage to him and recommends a rifle or Grenade Launcher. The rifle is the option both sources accept.
- One rocket and done: one Rocket Launcher hit on an exposed weak spot kills him. IGN’s method: when Chris recovers from the fall and Sheva shouts to get to higher ground, run straight up the hill, go left to the farthest point and aim downhill: Wesker walks up with the orange spot on the back of his left shoulder showing. Fandom adds that in phase 1 his heart is also exposed when he raises an arm. Without the Infinite Rocket Launcher, replay 3-1 to stock rockets.
- Final QTE: Wesker falls into the lava and grabs Jill and Josh’s helicopter. When Chris says “Take this, Wesker!” and looks through the scope, press the prompt: Chris and Sheva fire the two RPGs. Missing it is death.
Don’t leave without:
- the Uroboros Plan file on the bridge;
- the 2 Dead Bride’s Necklaces from the Engine Room’s rocket-launcher Majini (one on the catwalk above the primary bulkhead);
- the 12 Nitrogen Rounds and Herb (Red) from the right-hand room, and the First Aid Spray and 2 Proximity Bombs from the left-hand one;
- the 2 Power Stones from the Reapers and both Hangar Keycards;
- the 3 Flash Grenades and the 12 Acid Rounds (with a First Aid Spray and a Herb (Green)) by the keycard door;
- the RPG-7 NVS from the glass case and the ground-floor RPG Round;
- the Herb (Red), Rifle Ammo and Hand Grenade by the bomber wreck;
- the Diamond (Marquise) in the volcano (Chris only, at the start: shoot the outcrop before crossing the rock bridge).