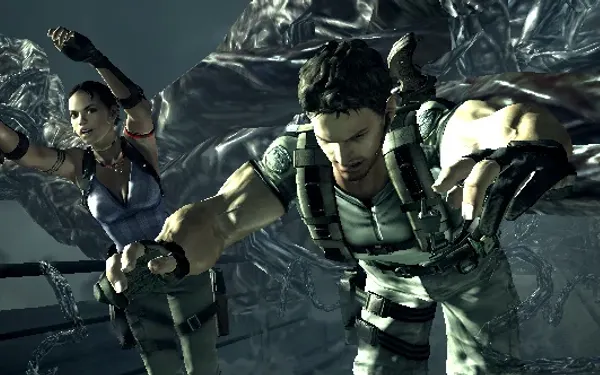
You play as Chris and Sheva, who step out of the elevator onto the tanker’s deck just in time to watch Wesker inject Excella with Uroboros. She becomes Uroboros Aheri, a mass of tentacles that devours the pile of corpses on deck and hunts the pair through the whole ship. The chapter is short: a QTE escape, the ship interior with corridors blocked by tentacles, Majini playing dead and a Duvalia carrying the bridge keycard, and the Bridge Deck, where you finish Aheri with the Shango satellite laser. There are no emblems and nothing you can miss.
Chapter order: Main Deck (pile of corpses) → cutscene: Wesker injects Excella, who becomes Uroboros Aheri → QTE escape → ship interior: tentacles, lockers (Chalice (Gold) ×2) → corpse corridor (Majini playing dead) → Duvalia (Bridge Keycard) → control room (2 files) → bridge (Shango laser file) → outer deck → Bridge Deck: L.T.D. and Uroboros Aheri.
Before you start
Shop (the 6-2 Item Management screen). This is the last time new upgrades open: nothing is added at 6-3.
- Upgrades that open at 6-2 (the last level of every long ladder): M92F capacity 100 (₦12,000) · Ithaca M37 capacity 25 (₦10,000) · VZ61 capacity 300 (₦10,000) · S75 firepower 2,000 (₦12,000) · M3 firepower 900 (₦12,000) · S&W M500 firepower 5,000 (₦15,000) · AK-74 firepower 250 (₦10,000) · SIG P226 firepower 480 (₦15,000).
- M93R and Hydra on a first run: maxing the M92F (about ₦85,000 in upgrades) unlocks the M93R (₦30,000), and maxing the Ithaca M37 (about ₦70,000) unlocks the Hydra (₦30,000). If you have money to spare, now is the time; if not, they can wait for the replay.
- No new weapons in 6-2.
- If your magnum is lagging: the S&W M500 at firepower 3,500, 3,700 and 3,900 (₦6,000 + ₦6,000 + ₦8,000) is enough for Aheri: each minor core takes 10,000 damage.
- Sell the 6-1 treasures: 3 Topaz (Oval) (₦2,000 each), 3 Jewel Bangles (₦1,000 each) and 3 Dead Bride’s Necklaces (₦2,000 each). The Gold bars from the safes were already added as cash.
- Avoid upgrading the Jail Breaker (free in 6-1): it’s excellent, but it’s over ₦80,000 at the end of the game.
What to bring. A shotgun for the Majini playing dead, a magnum or rifle for Aheri’s bulbs and, if you have one, a Rocket Launcher: one rocket into the exposed core destroys it outright. Keep a Flash Grenade (or the Grenade Launcher’s Flash Rounds) for the corridor Duvalia. You don’t need to spend much on healing: the small Uroboros the boss spits out drop ammo, herbs and grenades, and one guide calls it the best place in the game to stock up.
Difficulty.
- Escape QTE: the window to press shrinks on higher difficulties, and on Professional pressing the wrong button is an instant fail too.
- Professional: the fixed ammo and grenades are gone from the stage (the Bridge Deck’s 5 Flame Rounds and Incendiary Grenades included), and enemies don’t drop herbs: arrive with a loaded magnum and your own healing. Majini melee-weapon hits do 10 times the damage, the DYING window is under 3 seconds and you deal 85% damage.
What you can miss. Nothing. Both Chalice (Gold) are in lockers and the 3 files are fixed pickups; if you leave something behind, replay 6-2 from Chapter Select. Nothing depends on a timer or on killing a specific enemy. The only must-do: take the L.T.D. from the Tricell panel (with the Bridge Keycard) as you enter the Bridge Deck.
S rank on Normal: accuracy ≥70%, ≥35 kills, 0 deaths and ≤23:00 (A up to 28:00, B up to 33:00). For the kills, clear everything inside the ship and shoot some of the spawn Aheri spits out, without losing too much time.
Main Deck: the QTE escape
Out of the elevator, walk right to the pile of corpses. Cutscenes: Wesker injects Excella with Uroboros and she becomes Uroboros Aheri. An interactive QTE chase follows at once: any missed button is death and you restart from the checkpoint. Watch the prompts, not the scenery. There are no items here.
Ship interior (Bridge): lower floor
Checkpoint on entry. Tentacles block the corridors: go round through the side rooms, or shoot them away (it takes at least 10,000 damage, not worth it). Don’t touch the static tentacle parts: they deal small, steady damage while you’re in contact. Tentacles burst from walls and ceilings with an on-screen dodge prompt; if you miss it, the damage is small. A few Majini are still around the ship: move with your gun ready.
- Herb (Green) at the end of the first corridor.
- Room on the right: handgun ammo and the first Chalice (Gold) (₦3,000) in the locker on the right.
Cross the long corridor (you see Aheri through the window). In the room on the left, rifle ammo in a locker. In the next room: a Proximity Bomb, shotgun shells and handgun ammo. Open every locker: many are empty, but not all.
Upper floor
Climb the stairs. In the room on the left: Herb (Green) and the second Chalice (Gold) (₦3,000) in the middle locker. Evil Resource lists one Chalice (Gold) and one Chalice (Silver) in 6-2; Fandom, IGN and Steam say 2 Chalice (Gold): check every locker.
Corpse corridor and the Bridge Keycard
Several of the “dead” Majini on the floor are alive (3, per one guide). Don’t walk in among them: back into the previous corridor and meet them with the shotgun as they come one at a time.
The Duvalia and the card. Sources tell it two ways: Fandom says an armoured Majini comes from the nearby corridor and turns into a Duvalia after a little damage; IGN says one of the Majini playing dead may become a Duvalia and the last enemy you kill drops the keycard. In practice: keep killing until the Bridge Keycard drops, whoever carries it, and don’t move on without it.
- To stop the mutation, one guide says don’t headshot the armoured Majini: shoot his leg, get behind him and use the neck-breaker (a kill like that doesn’t let the Plaga out).
- If it mutates, a Flash Grenade or Flash Round kills the exposed Duvalia. Otherwise, shoot its legs or crotch so it bends over and opens its mouth, and shoot the exposed flesh.
Control room
It opens with the Bridge Keycard. Ammo and a Herb (Red). Two files:
- Report on Project W - Aug. 28, 1998: on the control panel in the north-east corner. It reveals that Wesker was one of Spencer’s experiments.
- Spencer’s Notebook: in a briefcase in the south-east corner.
Main bridge
Machine-gun and handgun ammo, shotgun shells and a Herb (Red). On the whiteboard in the north-west corner, the file Satellite Laser Shango Operating Manual: it explains the weapon you’ll use on the boss. The elevator to the Engine Room is locked in emergency mode: you’ll use it in 6-3.
Outer deck
Climb the stairs: 2 crates in the corner (rifle ammo and an Incendiary Grenade). Check your inventory and go through the door: the boss.
Bridge Deck: the L.T.D.
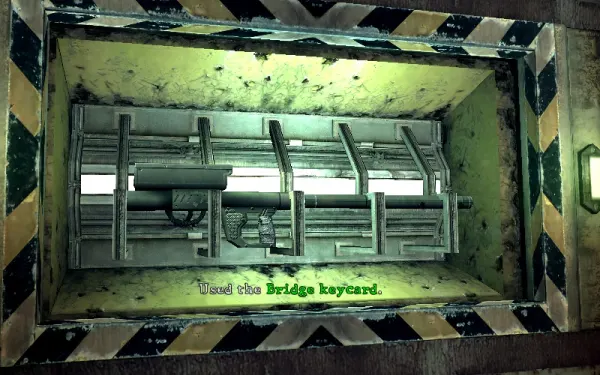
As soon as you enter, turn round: the wall panel with the Tricell logo opens with the Bridge Keycard (“Used the Bridge Keycard”) and gives you the L.T.D., the targeting device for the Shango satellite laser. The arena holds rifle and handgun ammo, an Incendiary Grenade, a Herb (Red) and 5 Flame Rounds for the Grenade Launcher (one guide recommends them against the Uroboros).
Boss — Uroboros Aheri
Excella’s body rejects the Uroboros: she absorbs the pile of corpses on the deck and grows huge. She has glowing orange or yellow bulbs at the tips of her tentacles: her minor cores (Fandom counts four, at 10,000 damage each: two shots from an upgraded S&W M500). Breaking them opens the central core (a large yellow bulb); destroying the core kills her. A single Rocket Launcher rocket on the exposed core is enough; in the story she dies after three laser hits on the core. The fight has two rounds: 2 bulbs in the first (per one guide) and 4 tentacles in the second.
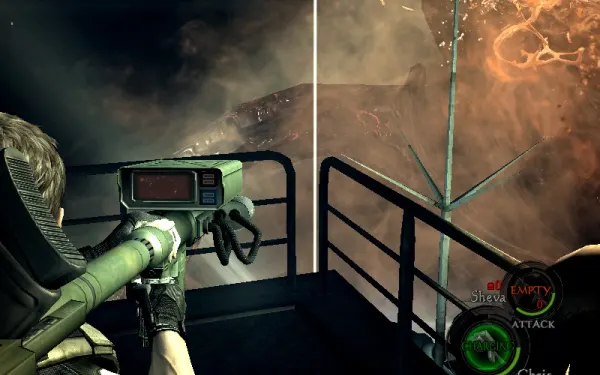
The L.T.D.: look through its scope and keep the red ring on the target for about 5 seconds until LOCK ON appears; then pull the trigger and the laser fires (if you lose the target, the lock is cancelled). It then recharges for about 1 minute (another guide says 1.5 minutes), even while it’s on the ground. It takes no slot, but while you hold it you can’t use other weapons: put it down to switch. If you give it to Sheva (AI), she fires at once at the bulbs or the core and puts it down to recharge.
Attacks: tentacle sweeps and jabs, and crushes with a dodge prompt. In the second round a short cutscene warns of a new crushing slam: per Fandom it kills outright if you don’t dodge it. After taking damage she spits small Uroboros onto the upper walkway and the deck: they hurt, but killing them drops ammo, herbs and grenades.
- Take the L.T.D. and climb one of the two ladders to the upper platform, above where the panel was. It’s the best spot for most of the fight. Break the crates up there.
- Round one: the bulbs. The first glowing bulbs appear (2, per one guide). Shoot them with your own weapons (rifle or magnum): it’s much faster than waiting for the laser. Laser one meanwhile if it’s already charged.
- The core. With the bulbs gone, the central core opens. Hit it with the laser, the magnum or the rifle; one Rocket Launcher rocket destroys it outright. Tip: break the last bulb with your own gun so the laser is charged for the core; if you’re quick you can hit it twice before it dives.
- Round two. 4 bulb tentacles come out. Same method: guns on the bulbs, laser or rocket on the core. When the core turns from yellow to red, she’s nearly dead.
- While the laser recharges, put it down, kill the Uroboros spawn on the deck for ammo and healing, and pick it back up.
- Method in dispute. IGN says use only the laser, never normal weapons; Fandom says the laser is best kept for the core because guns and rockets do more damage. The mix (guns on bulbs, laser or rocket on the core) is the fastest.
- In co-op: split the work. One player stays up top with the L.T.D. and only fires at the core; the other breaks bulbs with the magnum or rifle and clears the spawn on the deck. If one of you goes into DYING, revive them before carrying on: if you both go down, the game is over.
- Length: a quick player finishes it in under 10 minutes; many people take about 20. No drop.
When you finish. Achievement Completed Chapter 6-2 and the Excella Gionne library file.
Before you leave you should have: a rifle (Engine Room, the Gatlings and Wesker at the volcano), a magnum, a handgun to burst the rocket Wesker catches in the hangar, Proximity Bombs for the Gatling Gun Majini wave and, if you have one, a Rocket Launcher to finish Uroboros Wesker. In the 6-3 shop: sell the 2 Chalice (Gold) (₦3,000 each).
Don’t leave without: the 2 Chalice (Gold) in the lockers (right-hand room on the lower floor; middle locker upstairs on the left) · the files Report on Project W - Aug. 28, 1998 and Spencer’s Notebook in the control room · the Satellite Laser Shango Operating Manual on the bridge whiteboard · the 5 Flame Rounds on the boss deck.