You play as Chris and Sheva, who follow Wesker and Excella onto the Tricell tanker sailing off with the Uroboros missiles. The first half is the Ship Deck: an open-air maze of containers with snipers, Adjule dogs, Big Man Majini, a crane that drops a cage on your partner and two yellow cargo lifts. The second half is the Ship Hold: the lab where Excella leaves the serum you’ll use on Wesker, a hold with an alarm, a tunnel and the Gatling Gun Majini. It’s a rifle chapter: almost everything you can miss (three Topaz and emblem 28) is decided through the scope from the starting platform.
Chapter order: starting platform (snipers, emblem 28, Topaz (Oval): the lone Majini and the 2 on top of the crane) → observation tower → isolated platform → Adjule, Big Man Majini and the first Duvalia → container maze (green button) → push the container together (emblem 29) → cage trap (Crane Keycard) → crane tower (Topaz 1/3 on the walkway) → staggered containers (safe) → 2 Big Man Majini and the yellow cargo lifts (Topaz 2/3 and 3/3) → second safe → yellow door → Ship Hold: stairwell (Jail Breaker) → Excella’s lab (Serum PG67A/W, file, emblem 30) → alarm hold → tunnel (Duvalia) → Gatling Gun Majini (Tanker Keycard A) and safe (Tanker Keycard B) → rocket-launcher room → elevator.
Before you start
Shop (the 6-1 Item Management screen).
- New stock: the Jail Breaker (buy ₦4,000 / sell ₦400) is added to the shop as soon as you pick it up at the foot of the Ship Hold stairwell.
- Upgrades that open at 6-1: M92F capacity 70 (₦5,000) · Ithaca M37 capacity 22 (₦7,000) · M3 firepower 700 (₦10,000) · VZ61 capacity 280 (₦7,000) · AK-74 firepower 220 (₦10,000) · SIG P226 firepower 430 (₦10,000) · S75 firepower 1,700 (₦8,000) · S&W M500 firepower 4,500 (₦10,000).
- Buy now: the H&K PSG-1 scope, ★1 and ★2 (₦3,000 + ₦8,000), for emblem 28 and the distant Majini. If you’ve maxed the S&W M29 (that’s what unlocks the S&W M500, ₦30,000) and have money to spare: fresh from the shop it’s weaker than a maxed M29 (2,100 against 3,200), but its upgrades overtake it from 3,300; at 6-1 it already reaches 4,500 (5,000 at 6-2). The Bulletproof Vest (₦10,000) helps a lot against armed Majini if you’re not wearing one yet.
- Sell the 5-3 treasures: Heart of Africa ₦10,000, Royal Necklace ₦5,000, Power Stones ₦5,000 each, Sapphire (Marquise) and Chalice (Gold) ₦3,000, the Brilliant gems ₦2,500 and the Oval ones ₦2,000, Lion Hearts ₦2,500 and the Jewel Bangle ₦1,000.
- Avoid maxing the L. Hawk if you already have the M29 or M500: another ₦71,000 for a second magnum.
What to bring. The rifle is this chapter’s weapon: the H&K PSG-1 with the upgraded scope is the best tool for emblem 28, which looks tiny (one player advises against the Dragunov for its sway and prefers the PSG-1 or S75). Bring at least one Hand Grenade, or the Grenade Launcher: emblem 29 only breaks to explosives. Carry a shotgun for the Adjule and the cage trap, and a magnum for the Gatling Gun Majini (a head or leg shot opens a melee finisher). A Flash Grenade kills exposed Duvalia instantly and stuns the Big Man.
Difficulty.
- Professional (Fandom’s rules): all fixed ammo and grenades are removed and crates give random contents (fixed healing stays). Don’t count on the Hand Grenade at the start of the Ship Hold, the 2 Incendiary Grenades after the tunnel or the Proximity Bombs in the Gatling area: bring your own explosive for emblem 29 and your own mines for the Gatling.
- Also on Professional: no herbs drop from enemies or crates; melee-weapon hits do 10 times the damage, which matters most in the cage trap, where every Majini carries a Stun Rod or explosives; the DYING window is under 3 seconds; you deal 85% damage; and money is doubled (each Gold bars safe pays ₦6,000). In solo, enemies only target you, not Sheva.
What you can miss this run.
- The 3 Topaz (Oval) depend on sniping specific Majini from range before they move, and on not killing the crane operator (see the starting platform). If one fails, replay 6-1 from Chapter Select.
- The yellow door into the ship leads to the Ship Hold (checkpoint): before you go through, check you have the 3 Jewel Bangles, both safes and the Topaz.
PC (Steam) warning: there’s a well-known bug in the cage trap: the Majini carrying the Crane Keycard sometimes spawns on a high walkway and never comes down, and you can’t progress. The fixes are in the cage trap section. The safest way to avoid it costs one Topaz: killing the crane operator at the start.
S rank on Normal: accuracy ≥70%, ≥40 kills, 0 deaths and ≤26:00 (A up to 31:00, B up to 36:00).
Starting platform (Ship Deck): the snipers
Don’t move, and get your rifle out. Everything important in the first area is done from here or from the top of the observation tower. There are four kinds of target:
- The observation tower Majini (two, one above the other, ahead and slightly right of the staircase; Fandom places them to your left from the start) throw grenades as soon as they spot you. Snipe them first. When they fall, their friends arrive with Stun Rods: finish those from range too.
- BSAA Emblem 28/30 (6-1 #1): per Fandom, at the start look to the right and aim a rifle (or the Rocket Launcher) at the southern end of the ship, near the top of a radar mast. It’s tiny at that range: you need zoom (the PSG-1 with the upgraded scope is ideal). If you can’t see it from here, try from the top of the observation tower, looking back over the ship. Last chance on the deck: from the yellow cargo lift nearer the old cage, facing the bow and the yellow door, slightly to the right; the mast is very far and the emblem barely visible (use the full scope). GameWith also suggests any tall platform, such as the crane’s.
- Topaz (Oval) 1/3 (₦2,000): the lone Majini to the south, the one you see at the start if you turn around to face south, through a narrow gap, on the right (with a helmet and Stun Rod; you may have to step aside to see him). From the top of the observation tower you can also spot him, down to the right. His gem appears later, on the crane walkway: after opening the Crane Keycard door, climb the stairs and it’s on the right. It only appears if you go through the cage trap (see below).
- Topaz (Oval) 2/3 and 3/3 (₦2,000 each): the 2 Majini on top of the crane, the ones you see in the scope next to emblem 28 from the top of the observation tower. Each drops a gem that appears later: one near where Sheva rejoins you, just before the two yellow cargo lifts, and the other on the deck between the two lifts.
- The crane operator: leave him alive. He’s another Majini, by the crane’s control panel (the lever); one player says he hides behind a pillar next to the switch. If you kill him, the cage trap never happens: no Crane Keycard, no crane tower, and you lose the walkway Topaz (Oval) for this run. A Steam treasure guide warns it plainly: kill the guy on the right and don’t kill the crane operator.
The safe order for all 3 Topaz: snipe the lone Majini and the 2 on top of the crane, leave the operator alive and let the trap spring. Warning (conflict): Evil Resource and Fandom (6-1) say killing “the guards on top of the crane” is what prevents the trap, while game2 and several players separate the two on top (who carry Topaz) from the operator at the controls (who prevents it). If the cage doesn’t drop after you kill the two on top, you’ve lost the walkway Topaz this run: replay 6-1 for it.
Observation tower and the isolated platform
Drop off the platform: there are 2 crates. Climb both tiers of the observation tower and collect what its Majini dropped (and shoot any targets you still need from up there). Jump down the far side of the tower and climb the ladder to an isolated platform: crates and a Herb (Green).
Among the deck’s crates, between this platform and the container maze, Fandom also lists a fixed First Aid Spray and Flash Grenade, along with rifle, machine gun and handgun ammo, shells and random items; no source says which crate holds them: break every crate along the way.
Adjule, the first Big Man and the Duvalia
The stairs on the left. Equip the shotgun. As you climb, 2 Adjule burst out of a container behind you while a pair of Majini attack from ahead (one may burst into a Cephalo): turn around and kill the dogs first, since they’re faster, then let the Majini come to you.
The next platform. More Adjule, Majini and a Big Man Majini arrive. Back off if you need room.
- Jewel Bangle 1/3 (₦1,000): the Big Man drops it. Stun him with a Flash Grenade or a Stun Rod, or shoot his legs to drop him to a knee, and finish him in melee.
- The Works achievement: this Big Man is a good chance. Stun him with the Flash Grenade and chain the hits: you land the first, your partner the second and you the third (only whoever lands the third gets it; in solo, take Sheva’s gun away so she doesn’t shoot him dead).
- The Adjule after the Big Man may drop an egg (how often isn’t confirmed).
The Duvalia. Carry on ahead and to the left: a Duvalia blocks the way (you have to kill the Majini form first for it to emerge). Avoid the pincer on its head: use a Flash Grenade, or shoot its legs so it bends over and opens its mouth, then pump rounds into the exposed flesh or the appendage on its side. It hits hard: dodge everything you can. Afterwards there’s a Herb (Red); drop down to the area below.
Container maze and the debris bin
The left path is blocked by debris. Go right: there’s a crate on the left. Press or shoot the green button to lift the obstruction. On the other side, to the right, you’ll see a locked door with a card reader (“It’s locked. I need a keycard”): that’s the Crane Keycard door, which leads to the crane tower.
- Second chance at the lone Majini: before pushing the bin, stand in front of it and turn around: the Majini carrying Topaz (Oval) 1/3 is on the left of the screen. Rifle headshot.
Climb the ladder on the right and push the debris-filled bin together with your partner (partner action).
- BSAA Emblem 29/30 (6-1 #2): after the push, don’t drop down yet. To the left, next to the cargo lift, is an open, raised container (the one the bomb-thrower uses in the trap). The emblem is inside, and only explosives break it: toss a Hand Grenade in, or fire a Grenade Launcher round or a rocket. One guide says someone got Badge of Honor without it, but that’s unconfirmed: break it anyway.
The cage trap (Crane Keycard)
If the crane operator is still alive, when you drop down your partner runs ahead and gets locked in a cage dropped from above (in solo, Sheva). Majini pour out of the containers on both sides and drop from above.
- Kill the explosive-thrower first, up in the raised container.
- The rest carry Stun Rods and explosives, not firearms: shotgun and distance. On Professional, every Stun Rod hit is devastating.
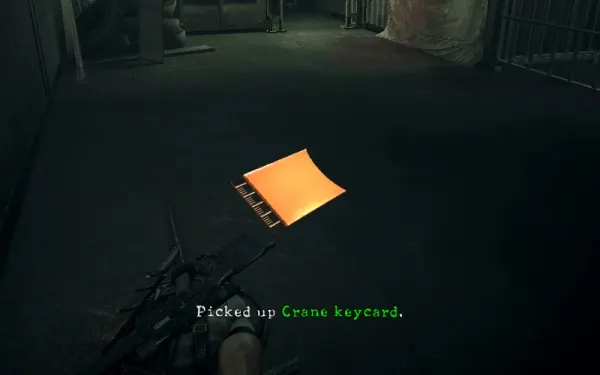
- A shield Majini mutates into a Duvalia when damaged: killing it drops the Crane Keycard (one source says the last enemy to fall drops it). Kill it near the cage so your caged partner can reach the card if it lands on their side.
If the card never drops (PC/Steam bug). On the PC version, the keycard Majini (the shield one who becomes the Duvalia) often spawns on the walkway above and runs in circles: you only see his shadow and can’t hit him. Players’ fixes:
- Work the container switch. Shoot the switch that raises and lowers the container that lets you out of the area, wait a few seconds and shoot it again; repeat 2–3 times (or more) until the Majini drops. Kill him near the cage.
- Pause and “Restart” from the checkpoint: sometimes he spawns properly.
- One player says whoever isn’t caged can run back to the start of the ship to make the enemy come down.
- Replay 6-1 and kill the crane operator from the observation tower: the trap never happens. You only lose the walkway Topaz (Oval).
- The Steam community fan patch (guide 864823595) makes that Majini spawn from the containers like the others.
After the trap. Shoot the raised green switch by the open container to lift the obstruction, open the keycard door with the Crane Keycard and climb the stairs: on the right is Topaz (Oval) 1/3 if you killed the lone Majini. Cross the long walkway to the crane tower (a Majini ambushes you from the right) and snipe the tower guards before climbing the two ladders. At the top a Majini guards the controls: the switch moves the crane and lifts the cage. Hurry: Adjule attack your partner, who escapes up a ladder. Head back to the cage to regroup: Fandom says the crane moves the trap container out of the way and opens access to a safe with ₦3,000, which may be the same one as the staggered-container safe.
If you killed the crane operator (no trap)
There’s no cage, no Crane Keycard, and you don’t need the crane tower. From the area where you dropped down, shoot the raised green switch to lift the obstruction and take the ladder at the far end of the cage area, toward the herbs and the staggered containers. The walkway Topaz (Oval) is lost for this run. The Topaz (Oval) type still counts for They Belong in a Museum thanks to the two on top of the crane. One player claims skipping the trap also costs gold bars, but that’s unconfirmed.
Staggered containers (first safe)
Climb the ladder at the far end of the cage area: Herb (Red) and Herb (Green); leave the right-hand branch for later. Ahead are staggered containers: go straight, take the second right at the back and jump across three containers. At the end, a safe with Gold bars (₦3,000, ₦6,000 on Professional). About 4 armoured Majini attack while you jump: duck behind the edges and use the magnum or rifle on whatever’s exposed.
The two Big Men and the yellow cargo lifts
Go back across the containers to the branch you left by the herb ladder and take it to the left: 2 Big Man Majini with a Majini escort. Flash Grenade and finisher, or leg shots; don’t let the pair pin you between them.
- Jewel Bangle 2/3 and 3/3 (₦1,000 each): one per Big Man. Evil Resource counts only one bangle in 6-1; IGN, Steam and Fandom count 3.
- Topaz (Oval) 2/3 and 3/3: the two crane-top Majini’s gems appear here if you killed them: one near where you regroup with your partner, before the lifts, and the other on the deck between them.
The lifts. There are two yellow cargo lifts. Step onto one: your partner must have a gun equipped to shoot your lift’s button (the AI does it on its own); then, once they’re on the other one, shoot theirs. Adjule wait around the corners on the upper level. Explore both areas the lifts drop you at: there are items in each.
Second safe and the yellow door
The yellow door into the ship is close, to the right. Before you go through:
- Second safe (Gold bars, ₦3,000): on the left, directly ahead of the door, is an obstruction lifted with a button (climb the northern ladder if needed): press it, follow the path it was blocking and drop down where there’s a container you can lift: the safe is on the left.
- Last chance at emblem 28: from the yellow cargo lift nearer the old cage, facing the bow (slightly right of the yellow door).
Go back and through the yellow door.
Ship Hold: the stairwell and the Jail Breaker
Checkpoint on arrival. At the start: machine gun ammo, a Herb (Green) and a Hand Grenade (not on Professional). Go down the stairs and turn around: crates.
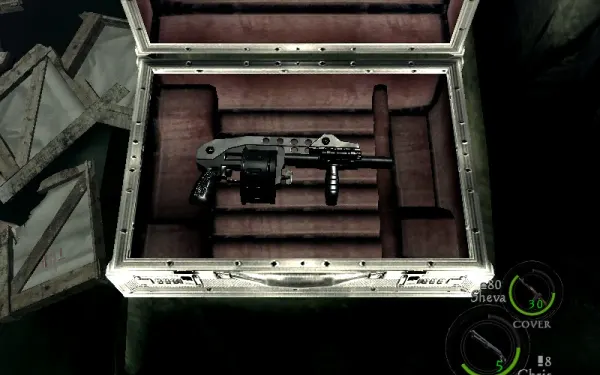
Long stairwell. Chris and Sheva talk about Wesker on the way down. At the very bottom, items and a weapon case with the Jail Breaker (drum-magazine shotgun: low firepower on paper, but each range upgrade adds pellets and widens the shot, it reloads faster than any other shotgun and has the second-best rate of fire; buy ₦4,000 / sell ₦400).
Excella’s lab
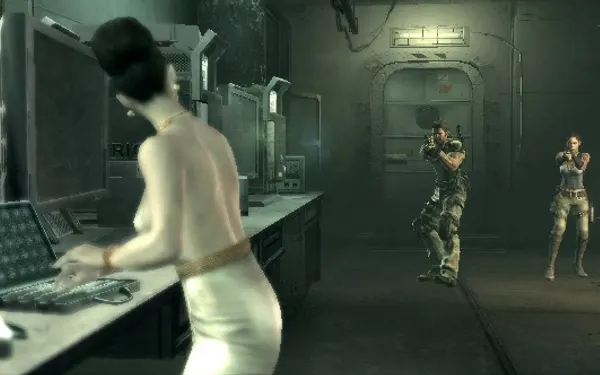
Open the partner door. Cutscene: Excella is in the lab; Chris shoots one of her briefcases loose and you get the Serum PG67A/W automatically. It’s the serum you’ll use against Wesker in 6-3. In the lab:
- Herb (Green), rifle ammo and other items.
- File Tricell Researcher Miguel’s Journal - No. 2: on the computer on the south side.
- BSAA Emblem 30/30 (6-1 #3): among the cabinets, look for a small glass-doored cupboard high on the north wall, near the ceiling. It takes two shots: one to break the glass and one for the emblem. If you have the other 29, Badge of Honor pops here.
The alarm cargo hold
You enter on a high catwalk. If they spot you, the alarm goes off and timed waves of Majini keep coming until you move on. Stay on the catwalk in front of the door and drop 2 or 3 before they notice you. Watch your left flank (melee Majini) and beware: once you go down, the grenadiers take your old spot above. There are flammable barrels below: use them when enemies bunch up.
- Skipping the alarm (rifle headshots, in this order): (1) the Majini straight ahead; (2) the one above and to his left; (3) the one below, 45° to the left of the start, by the green containers; (4) the one below and to the left of the start; (5) the one on the walkway, round the right-hand corner. Then approach the ladder without going down and kill (6) as he climbs up. No alarm.
- Below: Herb (Green), machine gun ammo and a shield Majini.
Tunnel
Drop through the open hatch. Majini come from both ends and one through another hatch: use the wall as cover and don’t get surrounded. Some burst into Cephalo, and the last one always turns into a Duvalia (keep a Flash Grenade handy). Climb the ladder and turn right: gas canisters to detonate, 2 Incendiary Grenades, shotgun shells and a Herb (Red). There are also fixed Proximity Bombs in this area: save them for the Gatling (on Professional they’re gone).
Boss — Gatling Gun Majini
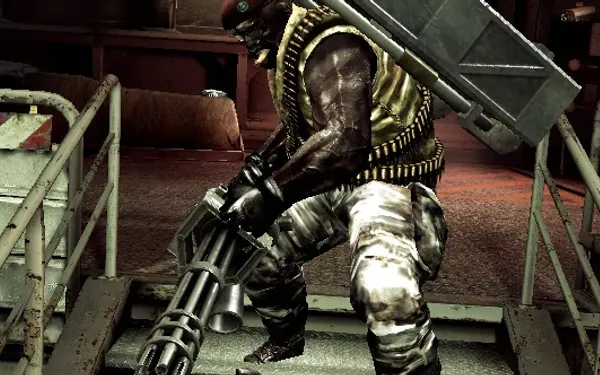
The boss of the base Majini: cigar, beret, gold chain and vest, an ammo belt on his back and the rotary gun in his hands. He has 8,000–14,000 HP. He appears in the cargo hold as you approach the stairs to the upper level, with Majini backup. There are two looks: the one with sunglasses may ignore the Flash Grenade. Evil Resource mentions 2 Gatlings here; Fandom, IGN, GameWith and another guide describe one (the other two are in 6-3).
Attacks: the burst (360–480 damage, starting weak and building until it knocks you down or puts you in DYING), the barrel strike (320, knocks you down) and a grenade (over 400; you can shoot it in the air). The ammo drum on his back is bulletproof.
- Prepare the ground. Plant the area’s Proximity Bombs (or your own) on the narrow upper walkway and lure him onto them. The gas canisters do the same as a magnum shot to him.
- Move sideways. Dodge the burst by strafing. He’s slow, but he can jump up onto the walkways: switch between the two upper walkways. His grenades flush you out of cover.
- Stun him. A rifle or magnum headshot stuns him: step in from the front and use the melee finisher (no partner needed). A leg shot drops him to a knee: finisher from behind. A shotgun blast to the torso makes him guard: melee strike. One guide sums it up: one shot, Chris’s hit, Sheva’s hit, repeat.
- The corner trick. Get him firing at a wall corner and shoot him in the head from close range meanwhile. You can also shoot him from behind the crates when he isn’t firing.
- Use his pauses. When he downs someone, he fires into the air to taunt: a free opening. If you get far enough away he loses sight of you and stands still.
- In co-op: one lures him along one walkway while the other shoots his head from the other; whoever does the melee finisher must be close when he’s stunned.
- Reward: the Tanker Keycard A. No treasure.
The two cards. The Tanker Keycard B is in the small safe on the upper level, north-east corner (an isolated platform). The exit door needs both cards: each player swipes one.
The rocket-launcher room
3 or 4 armoured Majini with Rocket Launchers wait here. They reload slowly: shoot their exposed parts while they reload. Your crate cover can be destroyed: change cover if you see it damaged. Bui Kichwa leap out as you cross the room (Flash Grenade).
- Dead Bride’s Necklace ×3 (₦2,000 each): one per rocket-launcher Majini. One source says the Bui Kichwa drop them; three sources, the rocket-launcher Majini. Kill them all.
Follow the path to the elevator: cutscene of Wesker’s memory (Spencer’s death). End of the chapter.
When it’s over. Completed Chapter 6-1 achievement. The deck is the Ship Deck map in The Mercenaries. If you shot every emblem, you now have all 30: with the game finished they unlock Sheva’s Tribal outfit (and at 25, Chris’s S.T.A.R.S. one).
Before you leave you should have: a Flash Grenade or Flash Rounds for 6-2’s corridor Duvalia, a shotgun for the Majini playing dead, a magnum or rifle for Uroboros Aheri’s bulbs and, if you have one, a Rocket Launcher. In the 6-2 shop: sell the 6-1 treasures (3 Topaz (Oval), 3 Jewel Bangles, 3 Dead Bride’s Necklaces).
Don’t leave without: all 3 Topaz (Oval) (the lone Majini to the south and the 2 on top of the crane, sniped from the start; with the operator alive) · BSAA Emblem 28 on the mast at the south end · BSAA Emblem 29 inside the raised container (explosives only) · the Jewel Bangle from each of the 3 Big Men · both Gold bars safes · the Jail Breaker at the foot of the stairwell · the Tricell Researcher Miguel’s Journal - No. 2 file and BSAA Emblem 30 in the lab · the 3 Dead Bride’s Necklaces from the rocket-launcher Majini.