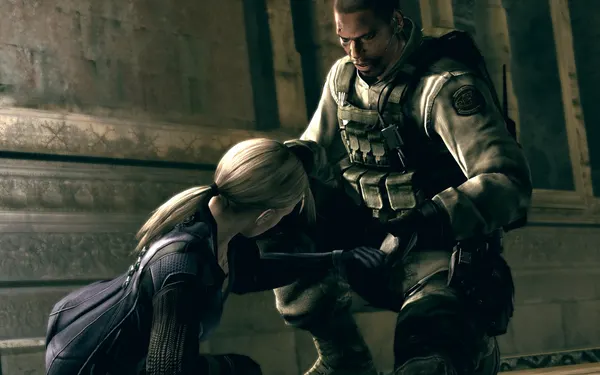
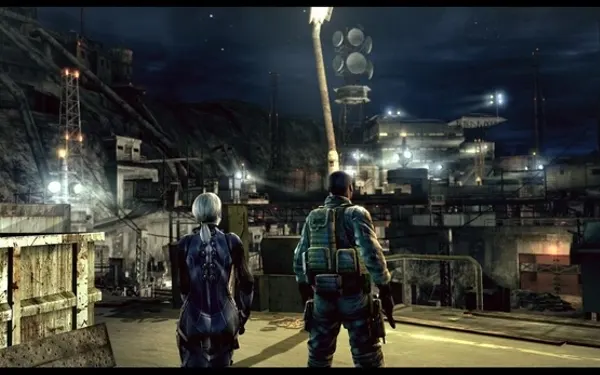
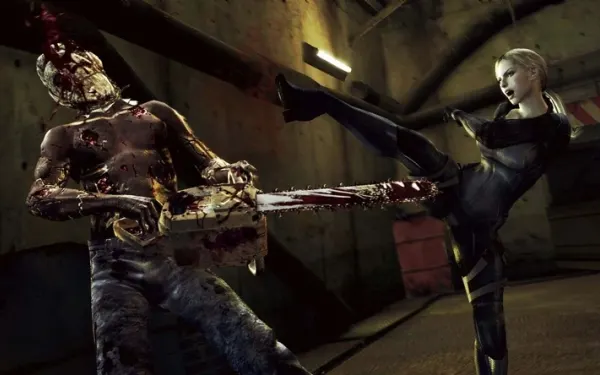
The second downloadable episode, told alongside the end of the campaign. You play Jill Valentine, just freed from Wesker’s control, and Josh Stone, who finds her in the Monarch Room of the Tricell facility. The two have to get out of the complex while every Majini in the area comes after them: the dock (two keys and two bosses), the communication facility, where you blow gates open with the towers’ mounted launchers, and a timed survival of about 7 minutes on the landing pad until Doug arrives with the helicopter. It’s pure action: enemies that keep coming, random bosses and tight ammo.
Chapter order: elevator down from the Monarch Room → dock, Transportation Area 1 (Transport Area Key, guarded gate; Agitator 1) → rooftops (Jill jumps) → metal door kicked open → Transportation Area 2: Chainsaw Majini ×2 or Gatling Gun Majini (Emergency Exit Key, Score Star 1) and the second boss → communication facility: Score Star 2 → mounted launchers A, B, C and D against the red gates (Executioner Majini or Reaper) → final slope (Agitator 2) → “A Message from Jill” → landing pad: countdown survival (about 7 minutes), 3 or 4 bosses from the elevator and the west tower, Agitator 3 → Doug and the helicopter.
Before you start:
- Unlocking it. Desperate Escape unlocks after you clear 6-3. Your first run is Jill only (she starts with a VZ61); clearing it unlocks Josh (he starts with an M92F). In co-op, online or split-screen, one player is Jill and the other Josh; solo, the AI plays the other. Professional opens after a Veteran clear.
- No shop, no money. The loadout is fixed: no campaign weapons, no infinite ammo, and no money, only Score Stars. You can’t save, there are only checkpoints.
- Random weapons. They turn up in safes and lockers (H&K P8 with 15 rounds, H&K MP5 with 100, H&K PSG-1 with 7, M3 with 8, S&W M29 with 6, Rocket Launcher with 1 rocket, every grenade type and Proximity Bombs): make a shotgun at the dock and a magnum before the landing pad your priorities. If the dock safe gives you the H&K P8, hand it to Josh.
- Endless enemies. Almost every area spawns enemies until you move on: kill what’s in your way and keep going.
- Missables: Score Stars 1 and 2 are lost once you leave their area. For Shoot the Messenger, Agitator 1 has to be set up before you use the Transport Area Key and Agitator 2 before you open the slope’s last door. Save rockets and heavy ammo for the landing pad.
- Difficulty differences. On Amateur the two launcher-area bosses don’t appear (nor do their points). One source says the landing pad’s Executioner Majini (Red) only appears on Veteran or higher (unconfirmed). Professional tips at the bottom of the page.
- S rank: accuracy ≥70%, ≥150 kills, ≤10,000 damage taken, ≥10,000 in score items and ≤40:00 (A: 60–69.9%, 130–149 kills, 10,001–18,000 damage, 8,000–9,950 points, up to 50:00). Deaths don’t count. One guide says the S comes with an overall score of 80,000 and that one weak category can be offset by another; this is unconfirmed.
Tactics for the whole episode
- Knee shot + rear melee (Jill: Head Grab; Josh: Suplex): an instant kill that saves ammo and spawns no Plaga. It’s the most ammo-efficient combo.
- Duvalia and Cephalo. A Flash Grenade, or a Hand Grenade that lands right under it, kills one outright, even mid-mutation, when bullets barely hurt it (a mutating Duvalia is immune to gunfire until it starts walking). Transformer sparks also hurt them badly. With no grenades, wait until the Duvalia walks before spending bullets.
- Iron-shield Majini (after the rooftops and on the final slope): shoot a leg for the stun, run behind it and do the instant-kill melee.
- Big Man Majini: shoot the legs until it kneels, melee, then the tag-team finisher. A shotgun blast makes it block and slide back: the melee works there too.
- The AI when solo. The AI will not melee a Majini that you stunned with a shot. It will follow up on one that it stunned, or one you hit with a stun melee, if it’s standing close. Trick: shoot an arm, hit it with the stun melee and use the “Go” command so the AI runs in for the second hit. On Big Man and bosses (the Chainsaw Majini included): melee once, then run into the enemy with the AI on “Cover/Come on”: it adds the second melee and the tag-team finisher prompt appears. It saves ammo, which matters for the rank (150 kills at ≥70% accuracy).
Transportation Area 1 (dock)
Josh finds Jill in the Monarch Room and they ride the elevator down to the dock Wesker left from. Walk down the corridor, open the door on the right, kill the Majini in sight (there may be one in the east guard tower) and climb down the ladder. Enemies come in two random sets: Town Majini (with bowgun Majini on the high walkways) or Base Majini (with AK Majini up top), plus the odd Big Man Majini. The set is rerolled in each area.
- The gate guard (back-left corner) always turns into a Duvalia unless you kill him with an instant-kill melee or a ground melee. Shoot him once in the leg with the machine gun and do the rear melee; if he falls, rush in for the ground melee.
- Transport Area Key (random, 3 patterns): (A) in the safe of the small room right below the start (ground floor, south side: kick the door open); (B) in the safe of the room upstairs, up the ladder outside that door (the south-west room of the top floor); (C) dropped by the Majini in front of the door you’re heading for (the one that becomes a Duvalia). Whichever safe doesn’t hold the key holds something else: the lower one often gives the H&K P8 (give it to Josh); the upper one, 3 Flash Grenade or a magnum.
- The Majini in the rooms: there may be one inside each safe room. The one in the upstairs room can also mutate (Duvalia or Cephalo) when damaged: kill it with the instant-kill rear melee.
- The toilet (stall with its door at the back): a random weapon or item, usually the H&K PSG-1 or the M3; otherwise 2 Incendiary Grenade. A hint from one source: if the key is on the ground floor, the rifle appears; if it’s upstairs, the shotgun.
- Depending on the pattern: a Herb (Green) on the upper level, straight ahead from the start; a Herb (Red) on a box near the exit, on the lower level.
- Tall crates with random items: 5 before the gate, 2 by the locked gate, 2 behind it and 5 around the barred gate and on the roofs.
- Waves: climbing any ladder again after dropping down brings a group from the north (with cocktail or bowgun Majini who camp on the high walkway); taking the key brings another from the building behind the gate.
- Agitator 1: if you’re going for Shoot the Messenger, set it up before you use the key (see the Agitator section).
Open the gate with the key: big groups attack from both sides, and some hop out of an opening in the building to the east (one may mutate into a Cephalo). Each player covers the side opposite their partner.
The rooftops
Past the gate, the door ahead is barred from the other side. At the broken ladder, use the partner action: Josh boosts Jill up.
- Before hopping, Jill shoots the two bowgun or cocktail Majini on the far-east rooftop. Meanwhile Josh deals with two Majini that spawn on top of the building opposite Jill.
- Jill jumps from roof to roof (there’s a tall crate on the middle rooftop). On the east rooftop, she drops through the opening on the right. As she leaves the building, bowgun or iron-shield Majini wait on the right (leg shot and rear melee).
- When Jill reaches the barred door and unbars it for Josh, bowgun, dynamite or rocket Majini come out of the building she just left. Back toward the gate and shoot them as they step out; or have Josh cover them while Jill unbars the door.
- Together again, go into that building, break the crates and kick the locked metal door open together: a radio call from Doug follows.
Transportation Area 2 (the Emergency Exit Key area)
As you come out of the corridor, shoot the red barrel on the left to thin out the first group. If there’s a Big Man, the blast won’t kill him: legs, melee and tag-team finisher. This area’s Big Man Majini drops Hand Grenades, a big help against the bosses.
- Partner jump at the broken ladder on the right: Jill climbs to the high walkway, with 3 Hand Grenade on a small crate and a good sniping perch. There’s usually a bowgun or cocktail Majini up there, and another by the fans on the south walkway (with a bowgun or a rocket launcher).
- The safe in the building behind the truck (door on the right): a random weapon. A Majini may be inside, and more spawn outside when you go in.
- The locker in the shack Jill climbs onto with the partner jump (the one with the 3 Hand Grenade): shotgun, machine gun or rifle by pattern. Taking it can bring a Chainsaw Majini up behind you.
- Oil canisters and explosive drums are everywhere: use them on the crowds, and lead a Chainsaw Majini through the burning oil to stun it. If you can, fall back toward the entrance and blow the drums when the mob arrives.
- As you push past the drums, Majini pour out of the containers by the far door and the first boss bursts out of a big container to the north (see the boss section). If it’s a Gatling Gun Majini, hide behind the truck.
- Score Star 1 (1,000 points): on the top of the metal container the first boss leaps out of; you can see it in the cutscene itself. Shoot it before you go: it’s lost once you leave the area.
- Second boss: drops from the 2F walkway above the truck (south side). It’s another version of the first one.
The exit is the locked door behind the truck, to the south: open it with the Emergency Exit Key and open the door at the end of the corridor together. Alarms go off: Jill says she has to reach the communication facility.
Communication facility: arrival
Walk past the Tricell crates on the street, to the west, and a cutscene plays. The area is huge and lets you split up. Your goal is the bridge in the far north. There are four mounted launchers (Mounted Launcher) in towers, manned by Majini who take turns: at least two per launcher, so after killing two, wait before moving on. They fire along a white laser sight: break line of sight. One launcher hit destroys a red gate and also the boulders with red markings. With the Base set, Bui Kichwa show up here too. Japanese guides call the launchers A, B, C and D; the game doesn’t name them, so below they carry their compass point.
- Start: drop down to the right (there’s ammo) and jump left to a side ledge, the far-south platform: safe with 2 First Aid Spray (one each).
- Score Star 2 (1,000 points): from that same platform, look far west at a group of crates in front of a tunnel: the star hangs on the side of the top-right crate. The machine gun or the handgun with careful aim is enough. It’s lost once you leave the area.
Communication facility: the mounted launchers
- The tower ahead. Go back to the starting point. Straight ahead, by the Herb (Green) at the edge, kill the two Majini who take turns on the launcher in the tower in front of you (the one with the searchlights): with the rifle if you got one; otherwise with the machine gun and patience. The AI partner’s aim is very good.
- Toward the north bridge. Drop off the north side of the platform: Machine Gun Ammo + Handgun Ammo on the boxes by the stairs. Go down and cross the bridge; behind the sandbags by the big red gate wait bowgun or shield Majini. Keep left (west) to the north gate (or, in co-op, have Josh boost Jill across at the broken ladder: it’s quicker).
- The area’s first boss (not on Amateur): drops from the ledge above that gate, by the bridge. It’s an Executioner Majini or a Reaper (see the boss section).
- The lower bridge. Drop into the narrow passage and cross the bridge at a run: the north-east launcher fires at you. A hit knocks you over the edge: you hang there and have to mash the button; your partner can pull you up with the help prompt (partner button). The alternative: rifle the north-east Majini before you cross.
- Launcher A (south-west). On the far side, climb the ladder, kick the door at the top open together and take the south-west launcher. From there, blow up: the big red gate to the north-east (checkpoint), the red-marked boulder in the east tunnel (behind it, 2 tall crates and a train cart) and the rock by the Tricell crates at the foot of the north-east tower (a Herb (Green) is behind it). You can also take out the two north-east launcher Majini from here.
- Optional partner jump (Jill’s path). At the broken ladder west of the bridge, Jill reaches a shack with a safe (First Aid Spray, or 5 Flash Grenade in pattern C) and a locker (rifle, or the Rocket Launcher in pattern B). That way Jill passes launcher B, on the far side of the gate, and comes out on the railroad bridge; the main route uses A, C and D.
- The east gate. Kick it open together: checkpoint. Get the rifle out right away: a Majini is about to man the north launcher. Majini come from the north and up the ladder on the left.
- The area’s second boss (not on Amateur): crosses the north bridge with several Majini. Plant a Proximity Bomb at the foot of the north-east tower’s ladder for anyone who follows you, and shoot at them from the launcher if you like.
- Fixed Rocket Launcher: past that gate, drop down to the left: the partner jump up the ladder in the middle of the east area leads along the high walkway to a platform with a Rocket Launcher + First Aid Spray (always). The building below it has 2 Handgun Ammo, 2 Machine Gun Ammo, 1 Rifle Ammo and 1 Shotgun Shells on the desk and an M3 in the locker; Josh can unbar its door from his side. One guide suggests leaving this rocket for later.
- Launcher C (north-east). Climb the stairs on the left to the north-east launcher and blow the big red gate in the far west, the one blocking the way to the north-west launcher. From here you can also blow (or already have, as soon as the north-east gate falls) the red-marked boulder on the railroad bridge, to the north-west: behind it, on the bridge’s west side, is a metal crate with 5 Proximity Bomb. Blowing the gate brings Majini down from the north gate.
- Launcher D (north-west). Go down: the shack ahead on the left is full of ammo and has a weapon (the locker in the shack between launchers C and D: a shotgun, or the Rocket Launcher in pattern C). Cross the destroyed gate to the north-west launcher: its safe holds a magnum (patterns A and B) or a First Aid Spray (C). From D, blow up the last red gate (below to the left): checkpoint. Go down, cross the bridge and through the gate: the slope.
Speed shortcut: with the Rocket Launchers (the fixed one on the east-area platform and, depending on the pattern, the one in the locker of the partner-jump shack —B— or the one in the shack between launchers C and D —C—) you blow gates without climbing up to the mounted-launcher nests; according to one guide, done right, you only have to get through two gates this way.
The final slope
Dodge the shells from the two launchers at the top by using the walls. The third Executioner Majini or Reaper turns up early here: kill it first, and from a distance; lead it behind the Tricell crates or back through the destroyed gates so you don’t step out into the launchers’ fire.
- Trick: just past the destroyed gate, look over the stacked Tricell crates. There’s a spot where the two launcher Majini’s rockets hit the crates while you can still see their heads: rifle them both. Press toward the edge of the crates for the Take cover prompt and tap aim to lean out.
- With the Base set there may be two rocket-launcher Majini at the foot of the two ladders to the north. Go up the ladders or the ramp on the right.
- The tent under the two launchers: First Aid Spray plus rifle, handgun, machine-gun and shotgun ammo (fixed). It’s a good spot to take cover from the Majini who keep coming.
- Partner jump at the broken ladder on the west side, left of the tent: Jill goes round above (a shield Majini may attack her, and a Big Man Majini waits by the exit) and unbars the last door (the north one, on the right) so Josh can rejoin her. If the two Majini are still on the launchers, Jill can climb onto their platform and kill them.
- Agitator 2: set it up here, before you open the last door (see the Agitator section).
Open the last door, to the north, together: the “A Message from Jill” cutscene, the radio call to Chris about the serum overdose that weakens Wesker (the same call Chris gets at the start of 6-3).
The landing pad (survival)
Walking past the blue metal crate on the west side triggers a cutscene and starts the countdown. Before that, pick up everything and sort your inventory: there’s no time later.
- First Aid Spray on the fan across from the elevator doors.
- Rifle Ammo and Machine Gun Ammo on the right-hand shelf of the ruined room.
- 2 Hand Grenade on the middle crate on the left.
- Tall crates with random items (12 before the cutscene): 2 on the east rooftop by an explosive barrel, 2 in the room with the broken wall, 1 in the middle, 3 on the south side of 2F and 2 on the north side of 2F (up the ladder) and 2 inside the big blue metal crate. Break the 2F ones first: you’ll be standing there for the fight anyway. Five more are only reachable once the clock is running: 1 along the west side of the blue crate, 1 in the far north-west corner and 3 inside the west building.
Once the clock is running: 2 Machine Gun Ammo + Shotgun Shells inside the west building.
The clock: it starts at 5:00; at about 0:40, Doug radios and the clock jumps to about 2:40. You hold out for about 7 minutes in all. The bosses come up the north-east elevator or leap down from the west tower (see the boss section). Agitator 3 comes up the elevator with 2 Big Man when 26–30 seconds are left on the extended clock, and only if the earlier bosses are dead.
- Where to stand: climb either of the two ladders on the east side to the 2F walkway, one player per ladder, and knock climbers off. From there, shoot the cocktail, bowgun and machine-gun Majini on the western crates. The east tower above the walkway is a spawn point: keep an eye on it. Other guides prefer the roof on the west side or the half-ruined building by the start; all agree on staying off the open ground.
- Plant Proximity Bombs a little in front of the elevator and on the narrow 2F walkway: they stun the bosses.
- There are plenty of explosive objects: use them.
- Ride the Lightning (a base-game achievement that also counts here): climb onto the roof by the sparking transformer wire and shoot it when a Majini is close.
Ending
Doug lands, a rocket knocks Jill down, a heat-seeking missile kills Doug and Jill takes out the shooter. Josh flies the helicopter to Chris and Sheva. Clearing it gives Getaway and the Jill and Josh figurine; with an S, The Great Escape; on Professional, Run the Gauntlet.
Boss — Chainsaw Majini ×2 or Gatling Gun Majini (dock)
The big container at the north of Transportation Area 2, with the truck, drums and oil all around. What comes out depends on the rolled set: 2 Chainsaw Majini (Town set) or a Gatling Gun Majini in a yellow outfit (Base set). The second boss, who drops from the walkway above the truck, is another Chainsaw Majini or a Gatling Gun Majini in a red outfit, which is tougher. In this mode bosses have less health than in the campaign: the shotgun and the machine gun are enough.
- Chainsaw Majini: shoot a leg to stun it, then the head; melee only at the end of the stun. The ones in red pants are weaker and die outright. The ones in blue pants can fall and get back up in a berserk rush, and their swings put you in DYING: shoot one as it gets up (it counts as dead once it’s fully up), or stop the rampage with fire (Incendiary Grenade, burning oil) or a Flash Grenade. Solo: melee once and run into it so the AI adds the second hit.
- Gatling Gun Majini: it’s invulnerable while firing: stun it with a grenade or a magnum before it spins up and finish it with the tag-team melee. Get behind the truck while it fires. It has two stuns (kneeling, or clutching its head); both give you free shots before the finisher, and in co-op both players can do the finisher one after the other.
- Every boss except the Reaper swells and explodes as it dies: shoot it as it falls so the blast can’t reach you.
- Reward: the first boss drops the Emergency Exit Key (with the two Chainsaws, the sources only say “the boss”: check both). Each boss leaves a 1,000-point large star.
Boss — Executioner Majini or Reaper (launcher area)
Three encounters: two in the launcher area (not on Amateur) and one on the final slope. With the Town set they’re Executioner Majini; with the Base set, Reaper.
- Executioner Majini: any axe hit puts you in DYING; keep your distance. A magnum shot anywhere always stuns it; so does a Hand Grenade. Without a magnum, bait its overhead swing, get behind it and shotgun its back; when it kneels, shoot the head and finish it with melee.
- Reaper: a grenade or a Proximity Bomb knocks it down. As it turns back toward you, shoot the weak point in its open chest: one well-placed shot kills it (a magnum makes sure). Don’t let it grab you.
- On the slope: kill it before you climb toward the launchers, or it will corner you under the rocket fire.
- Reward: a 1,000-point large star each. Don’t skip any if you’re after the S.
Boss — Landing-pad survival
The bosses arrive in order during the countdown; the line-up changes between runs. The most common one, per two Japanese tables:
| Town set | Base set | |
|---|---|---|
| Boss 1 (elevator, around 4:40–4:00) | Gatling Gun Majini (yellow) | Executioner Majini (Red) |
| Boss 2 (from the west tower) | Chainsaw Majini | Reaper |
| Boss 3 (west tower) | Chainsaw Majini (blue pants) | – |
| Boss 4 (elevator) | Gatling Gun Majini (red) | Executioner Majini (Red) |
| End of the clock (elevator) | Agitator Majini + 2 Big Man | Agitator Majini + 2 Big Man |
An English guide sees more mixing (a Chainsaw as the last boss, for example) and says that solo the third can be the last. Another source says the Executioner Majini (Red), with its huge flaming axe, only appears on Veteran or higher (unconfirmed).
- Set the stage before you pass the blue crate: inventory sorted, Proximity Bombs ready, magnum and rockets saved for here.
- Bosses fast. If they don’t die in time, Agitator 3 never shows. Spend the magnum, grenades and Rocket Launcher on them, not on the rank and file.
- From the walkway on 2F: Proximity Bombs on the narrow walkway stun them. Against a blue-pants Chainsaw rising berserk on the walkway, 2 Hand Grenade as it gets up. If one of you goes into DYING in front of a berserk Chainsaw, the other has to stun it (Incendiary or Flash Grenade) before reviving.
- The last half minute: the Agitator mutates into a Cephalo: keep one Flash Grenade for it, or stun its leg and do the instant-kill rear melee. If it’s still alive at 0:00, the episode ends anyway.
- Reward: 1,000 points per boss, another 1,000 for the Agitator, and the ending.
Boss — Agitator Majini ×3 (Shoot the Messenger)
Megaphone Majini, each with its own appearance cutscene. For the Shoot the Messenger achievement all three must die at the hands of the same player in a single run; Amateur is the easiest. Big Man with megaphones don’t count. Each drops a large star (1,000).
- Agitator 1 (dock, the hardest; may take restarts): before using the Transport Area Key, trigger and clear all 5 groups of Transportation Area 1: (1) the one already there (some climb the gate); (2) the one from the building behind the gate when you drop down; (3) the one from the crate on 2F opposite the locked gate when someone climbs back up a ladder (don’t take the key until this wave is dead); (4) the one on the roof of the building behind the gate when you take the key; (5) the one that appears there when you walk to the far right of the fence next to the gate. The Japanese guides also ask you to climb the ladder in the centre of the circular roof and the one beside it, pass between the truck and the fence in front of the gate and kill 10 or more Majini. Then open the gate and boost Jill up the broken ladder: cutscene. Run back through the gate and shoot him as he climbs the ladder, before he escapes behind the fence. He’s a scripted Cephalo: leg shot and instant-kill rear melee. He seems to appear more often when the guard drops the key (unconfirmed).
- Agitator 2 (final slope): once Jill unbars the last door, clear the area and both of you get on the two launchers on the platform. Blast the Majini that step out on the high walkway to the south (the top of the wall you came through): two, then two more. The Agitator’s cutscene plays with four Majini: blow them up with the launcher (or the rifle). His star is credited automatically. Solo, order the AI to stay on a launcher: Majini keep coming as long as someone uses one. Don’t open the last door until he’s down.
- Agitator 3 (landing pad): arrives with 2 Big Man with about 26–30 seconds left, only if you’ve killed the bosses. A Flash Grenade for the Cephalo, or the rear melee.
Way of the Warrior (150 kills by one player in one run): on Amateur, take your partner’s weapon at the start and kill everything; it pops before the end. You can also go back and forth in the launcher area to farm kills. The 150 kills are the same number the S asks for.
Points plan for the S (≥10,000): the 2 fixed stars (2,000) + every boss (2–3 at the dock, 3 in the launcher area, 3–4 on the landing pad) already make 10,000–12,000 on Normal and up, without counting Agitators. On Amateur the two launcher-area bosses are missing (8,000–10,000): there you need the Agitators or small stars (150 each, dropped now and then by Majini and crates).
Professional tips: don’t split up, and cover each other’s blind spot. Run past fights you don’t need and, right after each checkpoint, quit and continue to shed pursuers. Must-haves: the dock shotgun (restart if it didn’t spawn) and a magnum before the finale. Save rockets and heavy ammo for the landing pad.
Don’t leave without:
- the Transport Area Key and, if you’re after the achievement, Agitator 1 before you use it;
- the shotgun or rifle from the dock’s toilet and safes;
- Score Star 1 on the first boss’s container, and the Emergency Exit Key;
- Score Star 2 on the western crate at the start of the launcher area, and the 2 First Aid Sprays in the south platform’s safe;
- the fixed Rocket Launcher on the east-area platform, the 5 Proximity Bombs on the railroad bridge and the magnum in the north-west launcher’s safe;
- Agitator 2 before you open the last door;
- every boss, for the S points;
- on the landing pad, before you pass the blue crate: the First Aid Spray, the ammo, the 2 Hand Grenades and the 2F tall crates.