You play as Chris and Sheva, out of the 4-1 labyrinth and into the Ndipaya’s underground ruins. A cutscene shows Wesker, Excella and Jill further ahead. The first half is the Worship Area: a huge chamber crossed by deadly sunlight beams, with a gate that needs three emblems spread over three altars full of Majini, two of them guarded by a Giant Majini. The second half is the Pyramid, three floors of mirror puzzles leading down to the Underground Garden where the chapter ends. There are no files and no new weapons: this is a treasure chapter (14 pieces) and home to the game’s only Diamond (Trilliant).
Chapter order: cutscene (Wesker, Excella and Jill) → entrance (Topaz (Pear)) → three-emblem gate → west: Sea Emblem (first Giant Majini) → east: beam corridor, Cephalo corridor and Earth Emblem → north-west: Sky Emblem with Sheva’s assist jump (second Giant Majini) → the gate opens → Diamond (Trilliant) above the ornate doors → Pyramid: 3 floors of mirrors (Ruby (Pear), emblem 22, Idol (Gold), Beetle (Gold)) → Underground Garden (end of the chapter).
Before you start
Shop (the 4-2 Item Management screen). RE5 has no merchant: you buy, sell and upgrade when the chapter starts or when you continue from a checkpoint.
- Sell the 4-1 treasures: about ₦33,000, plus the Soul Gem (₦10,000) if you killed Popokarimu.
- Finish the S&W M29. The last three levels are capacity 11 (₦7,000), firepower 3,200 (₦10,000) and capacity 12 (₦10,000). A maxed M29 floors a Giant Majini in one shot and makes the rest of the game easy.
- Don’t buy the S&W M500 yet. A maxed M29 adds it to the shop (₦30,000), but fresh out of the box it hits weaker than your M29 until you spend about ₦20,000 more on it.
- 1 pack of Flash Rounds (₦600) for the Grenade Launcher from 4-1: they instantly kill the Pyramid’s Bui Kichwa and the exposed Cephalo in the Earth Emblem corridor.
- Possibly new: Bulletproof Vest (₦10,000; sells for ₦1,000). Halves gunfire and projectile damage and takes a slot; it stacks with the Melee Vest. Sources disagree on when it enters the shop: Evil Resource says “after 4-1” (so here, at 4-2), while a Japanese guide and GameWith say from chapter 5 (so at 5-1). If it is already listed, here it only protects you from arrows, since there are no gun Majini yet; if you can’t afford it after the M29, buy it in 5-1: it’s essential before 5-2.
- If you didn’t take the Grenade Launcher in 4-1, it’s in the shop now (₦10,000).
What to bring. Grenades and a shotgun for the altars, which fill up with Majini; a rifle to clear the archers before they spot you and to kill the giants’ escorts at range; a magnum, Hand Grenades or Proximity Bombs for the two Giant Majini; and a Flash Grenade for the Pyramid’s Bui Kichwa.
Difficulty.
- The sunlight beams kill you or leave you at death’s door on every difficulty.
- Professional: every Majini attack (the torch rush, the spear, the arrows, the giant’s club) puts you straight into DYING. Per Fandom, only crossbow bolts and thrown weapons leave you in the yellow band, and only if you wear both vests. Since the Giant Majini’s stomp instantly kills anyone in DYING, one hit from his escort followed by the stomp is a game over. On Professional, kill the whole escort with the rifle from range before the giant closes in, and never fight him near a downed partner.
- On Professional the money you find is worth double, but many fixed ammo and grenade pickups are gone (Fandom says all of them; there’s no per-chapter list) and enemies no longer drop herbs: bring your own grenades and healing.
What you can miss this run: the 2 Blue Enigmas (you have to kill both Giant Majini, and per one source the first only shows up if you linger at the sea altar), the Diamond (Trilliant) (shoot it before you go through the ornate doors: there’s no way back after), and everything in the Worship Area once you enter the Pyramid. Nothing is lost for good: the chapter can be replayed from Chapter Select.
Go into the Light achievement (kill 2 enemies with one Flash Grenade): the easy spot is the Pyramid’s third floor. Open the central chest, let the Bui Kichwa bunch up and throw a Flash Grenade; the flash kills any exposed Plaga instantly. (Flash Rounds kill them too, but the achievement names the grenade.)
S rank on Normal: accuracy ≥70%, ≥35 kills, 0 deaths and ≤16:00 (A up to 20:00). Treasures add up to about ₦25,000 (14 pieces).
The sunlight beams and the ruins’ Majini
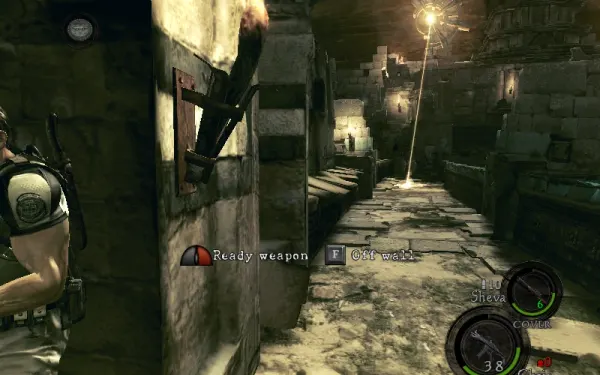
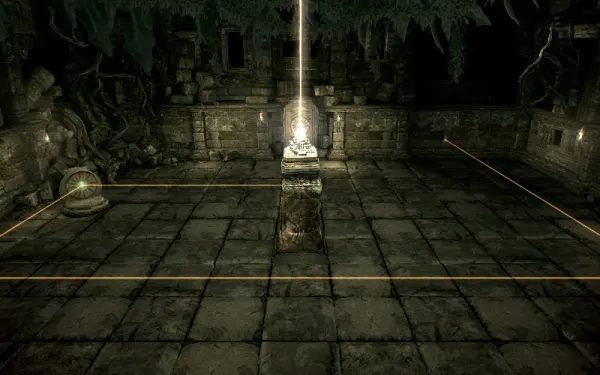
The sunlight beams. Shafts of light sweep back and forth along the north–south walkways and the northernmost east–west walkway. Touching one kills you outright or wounds you badly, on every difficulty. How to get past:
- Wait in the wall alcoves for the beam to pass, then dash to the next one. Watch your partner: the AI gets burned easily.
- Lure Majini into a beam: it disintegrates them instantly.
- Turn the beams off. East side: from the platform at the far east, get onto the east–west walkway and kill the Ndipaya standing by a bonfire. West side: kill the matching Ndipaya at the other end of that walkway. You can turn off one side or both.
The ruins’ Majini. They wear ceremonial masks and carry shields, spears, bows and torches. Torch carriers breathe fire at range and do a spinning rush with both torches, probably the hardest-hitting Majini attack: kill them before they close in. Bow arrows explode on landing and hurt other Majini too. They jump very high: a ladder won’t protect you.
Entrance and the three-emblem gate
Cutscene of Wesker, Excella and Jill. At the start:
- Topaz (Pear) (₦1,000): turn around: it’s on the wall above the closed door behind you. Shoot it.
- Climb the stairs: 2 barrels on the left with a Hand Grenade and a Gold (Small).
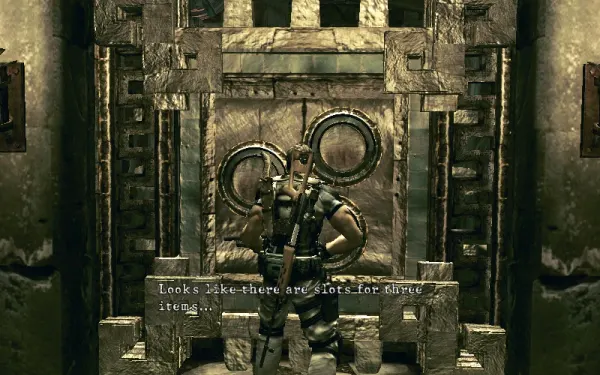
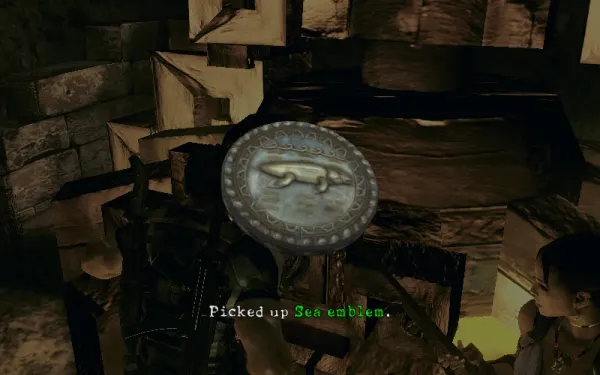
The stairs turn into a rubble-strewn corridor that opens onto the chamber. You reach a gate with 3 round slots; a cutscene lights up the lenses and shows you the whole room. You need the Sea Emblem (a fish), the Earth Emblem (a running beast) and the Sky Emblem (a bird). Any order works; this guide goes west → east → north-west. Each emblem you set in the gate is a checkpoint. Facing the gate, the Sea Emblem is to the left, the Earth Emblem to the right and the Sky Emblem to the north-west, at the back.
Sea Emblem (west, south-west altar): first Giant Majini
Facing the gate, go left down the corridor guarded by a beam; duck into the left side when it passes and loot the 2 vases at the dead end. Then backtrack and enter the big room on the left.
- Topaz (Square) (₦1,000): in the brazier in an alcove on the west beam path. One source pins it down: second corridor on the left, second alcove on the left, in the fire. Knife it or shoot it.
Cross the wooden bridge over the pond to the altar shaped like a human torso with a skull face. Majini guard it, with archers on the small stairs. You’re far away: snipe them before they notice you and finish whoever reaches you with the handgun or shotgun.
Before you take the emblem, plant a Proximity Bomb at the room’s entrance, which is where the reinforcements come in. Taking the Sea Emblem brings Majini led by a Giant Majini (see the boss), which drops a Blue Enigma (₦3,000). One source says this first one only comes if you stay in the area a little while: if you want the treasure, don’t run off. Go back to the gate and set the emblem (checkpoint).
Earth Emblem (east)
Facing the gate, the Earth Emblem is to the right. Take the long beam corridor on the right-hand side: it’s longer than the west one, but it has alcoves along it to hide in. Per Fandom, the altar is reached from an upper or a lower walkway, depending on whether you come from the Pyramid bridge or from the east–west walkway.
- Sapphire (Square) (₦1,000): in the brazier of one of the alcoves on the east beam path.
At the very top, bear right: what looks like another alcove is the way into a corridor packed with Majini that burst into Cephalo. In such a tight space use explosives or the shotgun; a Flash Grenade or a Flash Round kills exposed Cephalo. In the ornate room they flank you from behind: turn around on the altar stairs and kill the archers. Shield and spear Majini guard the altar, and there’s a Herb (Green) nearby. The Earth Emblem sits on the altar with the mutant skull over the bonfire. Taking it brings another attack of archers and torch Majini: stay on the stairs and hold out.
- Sapphire (Pear) (₦1,000): on the wall up the stairs opposite the Earth Emblem spot (on the right, in the ruins, after the horde). It’s on your way to the Sky Emblem: shoot it.
Set the Earth Emblem now or later? You can go back to the gate and set it: that’s another checkpoint. The shorter route is to head straight for the Sky Emblem and set both together at the end, but then a death at the second Giant Majini sends you back to before the earth altar. If you’re short on healing, or on Veteran or Professional, set the Earth Emblem first.
Sky Emblem (north-west): second Giant Majini
From the Earth Emblem side, go down the stairs and, instead of going back to the Cephalo corridor, go up the other staircase to a beam walkway you haven’t walked yet. Wait for the beam to pass and dash right from alcove to alcove. At the bridge heading left there’s a checkpoint the first time. Three beams sweep this stretch: watch their rhythm before you move.
- Midway, an alcove with a Herb (Green) has stairs down to some parallel beam passages: that’s your way back to the gate. Ignore it for now.
- Emerald (Pear) (₦1,000): in a brazier in the far north-east; after the second beam, go right.
- Ruby (Pear) (₦1,000): under the bridge at the north edge, embedded in a ruin that serves as shelter between two beams.
At the far end is a broken bridge: an assist jump, and only Sheva can make it across. In co-op (online or split-screen), the Sheva player goes for the emblem; as Chris, cover her with the rifle, because Majini come out of the woodwork to stop her. Solo, Sheva takes it on her own; you get the rifle out. Taking the Sky Emblem brings an Ndipaya attack with the second Giant Majini, which drops another Blue Enigma (₦3,000). Sheva drops down from the raised area and comes back on her own, but any Majini you didn’t kill from range chase her. The vases here hold ammo and a Hand Grenade.
The gate and the ornate doors
Go back to the Herb (Green) alcove, take its stairs down and cross the parallel beam passages to the gate. Set whatever emblems you still carry: the gate rises. Climb the long stairs to the heavy ornate doors (you open them together).
Don’t skip it: the Diamond (Trilliant) (₦4,000) is above the double doors. Shoot it down BEFORE you go through: it’s the only one in the game and the chapter’s most valuable treasure, and there’s no coming back once you’re through.
- There’s a snake near the door; it may drop an egg.
Pyramid: the lobby and puzzle 1
The first floor is a lobby with a staircase; murals of the Ndipaya rise and fall on the east and west walls. Climb the stairs and go through the gem-encrusted door. Beams kill on contact here too, including the ones you redirect with the mirrors yourself. In co-op, one player should stand on a raised platform while the other turns the mirrors; solo, Sheva usually stays put, but check where she is before you turn a mirror.
Puzzle 1. The target is the elevator in the north-west corner (far left). Turn the mirror closest to the elevator so the beam hits the elevator’s pedestal instead of the wall. Another way to see it: go to the mirror the light doesn’t reach and turn the one opposite it. The elevator stone lights up: ride it down.
Puzzle 2 (one floor down)
The target elevator is straight ahead of where you enter the room. Two pillars block the beam.
- Knock down both pillars blocking the beam (a prompt appears at each).
- Turn the middle mirror clockwise.
- Turn the north-east mirror anticlockwise.
If this reads better: IGN sums it up as “turn the peripheral mirrors to face the centre of the room”, and gamepressure as “turn the mirror that throws the light onto the right-hand wall, then the one to the left of the stairs”. It’s the same solution.
- Ruby (Pear) (₦1,000): on the raised platform (stairs on the left). Your partner picks it up automatically on the way up: check her inventory before you go looking for it.
Then ride the elevator down to the next floor.
Puzzle 3 (two floors down): four targets
There are three doors (north, west and east) and the elevator at the end of a long hallway. In the centre is a chest: it holds nothing and only releases a group of Bui Kichwa from the north room. Open it only if you want the Go into the Light achievement and have a Flash Grenade ready.
North room and BSAA Emblem 22. From the elevator you arrive in, walk straight across the room, past the central chest: the door opposite is the north room, and it opens without the beam. (Gamepressure calls it “the room on the left”.) Inside are human remains and a hanging corpse, killed by a booby trap.
- Bui Kichwa: the sources disagree on when they come out. Fandom and Evil Resource say they come out of the north room if you opened the central chest; IGN says they rise from the ground as you walk in. Either way, one Flash Grenade kills the whole group (and 2 with one flash earns Go into the Light). A single one dies easily to any gun; if one latches onto you, there’s no button to shake it off: wait, or have your partner knife it off.
- BSAA Emblem 22/30 (4-2 #1): walk towards the hanging corpse and turn around inside the room: it’s above the door arch, on the inside. A handgun is enough.
Opening the treasure rooms. Turn the two mirrors on either side of the north room’s door, then aim the last mirror you haven’t touched at the crystal on the skull (the open mouth of the skeleton statue) outside the north room, instead of at the destination mirror. This opens all the doors.
- East room (gold-adorned): the Idol (Gold) (₦3,000) on the altar. Shoot the two animal skulls on either side of it: the right one gives a Ruby (Pear) and the left one an Emerald (Pear) (₦1,000 each; one source says Sapphire (Pear), but four say Emerald). The pots hold gold and snakes that can drop eggs (Egg (White) or Egg (Brown); Fandom’s infobox also lists Egg (Gold), but Evil Resource only gives it from the 3-1 chickens): knife them.
- West room (burning altar, a dead Ndipaya pinned to the wall): the Beetle (Gold) (₦3,000), the only one in the game.
The elevator. The final beam has to run down the long hallway to the elevator.
- Turn the mirror nearest the final-mirror room to break the beam so you can walk to the centre safely.
- Point the centre mirror at the room on the left, the one with the final mirror.
- Turn the first mirror back to its original position. This is the step people forget: without it, the beam stays broken.
- The beam then runs down the long hallway to the elevator. Rule of thumb: connect the middle one first, then the one at the far end. Walk down the long hallway and ride it.
Underground Garden and the end
Walk into the big chamber: a cutscene ends the chapter. The garden’s treasures (Ruby (Square), Emerald (Pear) and Jewel Beetle) and its emblem belong to 5-1, not to this chapter.
Afterwards. Achievement Completed Chapter 4-2 and the Ndipaya Tribe Library entry. With Chapter 4 cleared you can buy the Majini (Wetlands B), Kipepeo and Bui Kichwa figurines in Bonus Features; with 5 emblems, the Adjule; with 10, the Giant Majini (500 points each). If you’ve collected every emblem so far, you have 22. The Worship Area is also The Mercenaries’ Ancient Ruins stage.
Boss — Giant Majini (×2)
Two mini-bosses: the first arrives when you take the Sea Emblem and the second when you take the Sky Emblem. They’re Ndipaya grown to almost 3 metres by Type 3 Plagas, with spiked maces. Their war cries call more Majini. The head is completely bulletproof: shoot the torso, back or legs. Handguns and machine guns barely hurt them. Attacks:
- Club smash: huge damage. Double club swing: also kills the Majini around him.
- Kick: little damage, but it sends you flying.
- Stomp: if you’re in DYING, he crushes your head and you die instantly.
- Lunge after a war cry: throws back everyone nearby.
- Escort first. The reinforcements come in through the room’s entrance. With the rifle, kill the escort’s archers and spearmen before they close in, and leave the giant for last. If you can, plant a Proximity Bomb in his path before taking the emblem. On Professional this isn’t optional: any hit from the escort puts you in DYING and the stomp finishes you.
- Keep your distance. Stay as far away as you can: his melee hits are what kill you.
- Bring him to his knees. One magnum shot makes him kneel; Hand Grenades and mines also hit him hard. Without a magnum, use a shotgun or rifle on the body or legs.
- Melee. When he kneels, guards or staggers, step in from the front and use the melee move the screen offers. Back off right away and repeat.
- Watch out for DYING. If one of you goes into DYING near him, the other has to revive them now or draw the giant away: the stomp is instant death. Solo, make sure Sheva carries herbs or a First Aid Spray.
- Second giant. Sheva is up in the Sky Emblem area and comes back on her own: cover her with the rifle while she drops down, and use the same method. His mace swings also kill the Majini on his side.
- Reward: a Blue Enigma (₦3,000) each.
Before you leave you should have: the S&W M29 maxed (or the money to finish it), the Grenade Launcher with Flash Rounds, a shotgun and a rifle with ammo, and healing. At the 5-1 shop: sell the 4-2 treasures (about ₦25,000) and buy the Bulletproof Vest if you don’t have it yet.
Don’t leave without: the Topaz (Pear) above the starting door · the 2 Blue Enigmas from the Giant Majini · the alcove braziers (Topaz (Square) and Sapphire (Square)) · the Sapphire (Pear) opposite the Earth Emblem · the north-east Emerald (Pear) and the Ruby (Pear) under the north bridge · the Diamond (Trilliant) above the ornate doors (before you go through) · the Ruby (Pear) on puzzle 2’s platform (check Sheva’s inventory) · BSAA Emblem 22 above the north room’s door, on the inside · the east room’s Idol (Gold), Ruby (Pear) and Emerald (Pear) · the west room’s Beetle (Gold).