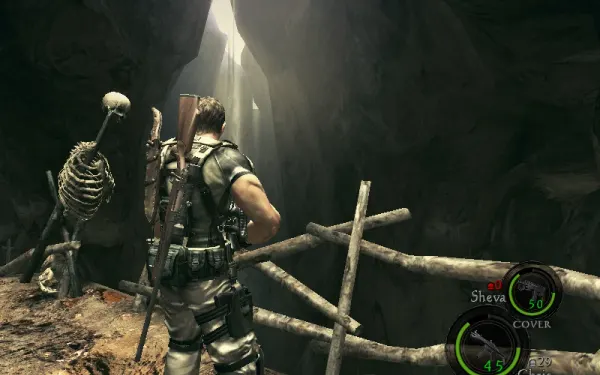
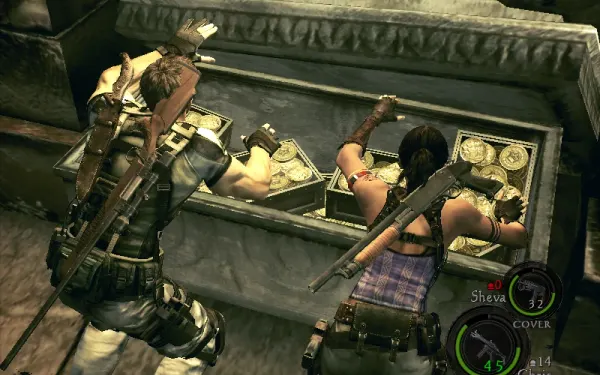
You play as Chris and Sheva, whom Josh drops on the shore of the Caves Irving mentioned as he died. The caves are infested with Bui Kichwa, Plagas that hunt on their own like spiders. Beyond them is the Ndipaya Ancient Village: ruins with sarcophagi full of gold, a bridge that splits the pair, a trapdoor, a ”+” crossroads with gem chests and a hall of flaming boulders. Then comes a run down a collapsing hall and the Labyrinth, a huge puzzle of chained statues that rearranges the stairs and bridges. The Grenade Launcher is there, and so is the second Popokarimu, which you can kill (Soul Gem) or escape. There are no key items or files, but this is one of the richest chapters in the game.
Chapter order: Caves: landing hut → first Bui Kichwa waves → hidden alcove (Topaz (Trilliant)) → emblem 19 → ladder and braziers → ornate door (2 skulls and a torch) → Ancient Village: overlook (emblem 20) → first gold sarcophagus (7 Gold (Large)) → the bridge collapses (split) → second sarcophagus and the mummy → trap chest with a trapdoor → ”+” crossroads (3 Trilliants) → big hall of archers → flaming-boulder hall → collapsing hall (QTE) → Labyrinth: emblem 21, Grenade Launcher, 5 chained statues (blue → green → gold → purple pair → red) → second Popokarimu (kill it or flee) → Wesker and Excella cutscene.
Before you start
Shop (Item Management at the start of 4-1). Sell the 3-3 treasures (₦4,000: Emerald (Marquise) ₦3,000 + Sapphire (Pear) ₦1,000). What’s new:
- M3 (₦4,000) if you missed it in 3-3. New level: firepower 480 (₦4,000).
- S&W M29: fully upgradable (₦78,000 in total) from 3-3, or from 4-1 at the latest. Finishing it opens the S&W M500 (₦30,000), which now adds firepower 3,500 (₦6,000).
- S75: firepower 1,200 and capacity 20 (₦6,000).
- Dragunov SVD: firepower 1,000 and capacity 18 (₦11,000).
- H&K P8: firepower 300 and capacity 25 (₦11,000).
- Ithaca M37: capacity 15 (₦1,500). H&K MP5: capacity 120 (₦4,000). M92F: capacity 37 (₦1,000). VZ61: capacity 180 (₦2,000).
- Not yet: the Grenade Launcher (₦10,000) and its rounds enter the shop after 4-1; the Bulletproof Vest, at 4-2 per Evil Resource or at 5-1 per other sources.
What to buy: upgrades for whichever shotgun you use (the M3 or the Ithaca) for the Bui Kichwa and Labyrinth Majini waves, and for your magnum for the boss.
Loadout. The chapter is full of Bui Kichwa, and the Flash Grenade kills them outright: bring every one you have. Killing 2 with one grenade earns Go into the Light. The Melee Vest cuts the damage when one latches on. Keep Proximity Bombs or Hand Grenades for the boss, and if you still have the Rocket Launcher from 3-1, this is a good place to spend it: a rocket to the second Popokarimu’s head usually kills it in one shot. Keep a slot free: the Grenade Launcher comes in the Labyrinth.
What you can miss. Six treasure types exist only in 4-1: Topaz (Trilliant) (the caves alcove chest), Emerald (Trilliant), Ruby (Trilliant) and Sapphire (Trilliant) (the three chests in the ”+” crossroads), Ruby (Oval) (red statue) and the Soul Gem (you have to kill the second Popokarimu). Miss any of them and you’ll have to replay 4-1 for They Belong in a Museum. The trap chest’s trapdoor and the collapsing hall are points of no return: sweep each area before moving on.
Difficulty. On Normal, the Grenade Launcher’s starting ammo should be enough to kill the Popokarimu; on Veteran and Professional you’ll need other weapons too. Professional doubles money and removes some fixed ammo. The trapdoor and the collapsing hall have QTEs that can kill you.
Money and rank. Per Fandom, this is the richest chapter in the game: 27 treasures worth about ₦43,000, plus several chests of Gold (Large). S rank on Normal, from a single source: accuracy ≥70%, ≥50 kills, 0 deaths and ≤23:00.
The Bui Kichwa
These are Plagas that left their hosts to hunt on their own, like spiders, and many burrow out of the ground. They have one attack: they leap on you, wrap their legs around you and drain your health. The damage is low, but while one is latched on you can’t defend yourself and you move slowly. There’s no button to shake it off: wait for it to let go, or have your partner knife it off. A sidestep dodges the lunge, because they don’t track your movement. Handgun body shots are enough; use the shotgun for big waves, and a Flash Grenade kills every one it reaches. They drop ammo.
Caves: the landing and the big cavern
The landing. Josh drops you on the shore. The hooded figure’s motorboat is moored by the hut; examine it and it’s missing its key. Outside the hut are 2 pots and a vase with a Herb (Green) and a Flash Grenade.
The big cavern. The first Bui Kichwa wave comes in the big cave, and another by the ladder. Don’t climb yet. Walk past it to the dead end (the north end): another group spawns there, and there’s a vase in the nook.
- Topaz (Trilliant) (₦2,000, found only here): left of the vase, climb the ledge. Behind it is a hidden alcove with a chest.
- Sapphire (Pear) (₦1,000): stuck to the ceiling of that alcove, just before the dead end. Look up as you turn to leave and shoot it.
- BSAA Emblem 19/30 (4-1 #1): before climbing, stand by the makeshift wooden fence left of the ladder and aim across the chasm at the far rock face. If you can’t see it from there, it’s also visible after you climb: cross the bridge and, by the second skeleton, look over the railing to the right and down at the rock across the ravine. A handgun can hit it, though a rifle is easier.
Ladder, braziers and the ornate door
Ladder and braziers. One Bui Kichwa waits at the top of the ladder, and there are 2 vases on the rock bridge.
- Emerald (Pear) (₦1,000): in the first brazier on the right after the ladder and bridge. Look through the big hole on your right: it’s the torch on the left. Shoot it or knife it. Getting close spawns a lot of Bui Kichwa crawling up the tunnel: a good moment for a Flash Grenade.
- Sapphire (Square) (₦1,000): in the second brazier.
The ornate door (Caves exit). In front of the door are 2 animal skulls on the ground and a torch. Break all three: they give a Sapphire (Pear), a Ruby (Pear) and a Topaz (Pear) (₦1,000 each). Sources disagree on which item comes from which, but it’s always those three. Quick farm: you’ve picked up about ₦8,000 in gems by now. Quitting and saving keeps what you collected, so you can repeat this stretch if you need money.
Ancient Village: the overlook and the first sarcophagus
The overlook. A cutscene shows the village from above.
- BSAA Emblem 20/30 (4-1 #2): under the structure holding the big crystal (the giant lens). Snipe it with a rifle from the entrance, before you move. If you miss it, there’s a second chance later (see “Big hall”).
Go left and drop down: 2 vases.
- Topaz (Square) (₦1,000): on the lintel of the first ruined doorway. Shoot it and pick it up off the floor.
The first gold sarcophagus. Drop down again: a vase and a spider on the wall. In the room with the hanging bodies is a stone sarcophagus that opens with both of you (partner action): 7 Gold (Large), ₦400 or more each.
- Emerald (Pear) (₦1,000): in the next room, in a brazier, through the left doorway after the gold tomb. Then 2 vases. Moving on is a checkpoint.
The bridge collapses (split)
The bridge gives way and whoever crosses first is cut off from the other. The one left behind has 2 vases and then drops down; enemies spawn when they do. Below are a Herb (Green) and a treasure:
- Topaz (Pear) (₦1,000): in a brazier between the two sets of steps. If you’re solo and want to take the lower route yourself, let Sheva cross first.
The one below climbs the stairs alone, against archers, shields and spears. Kill the archers first: their arrows explode and knock you down. The Majini in these ruins wear ceremonial masks and jump very high: don’t count on a ladder or a ledge to get away from them. You regroup at the top.
Second sarcophagus and the mummy’s tomb
Second stone sarcophagus. Another two-person stone chest: Sapphire (Square) + Sapphire (Pear) (₦1,000 each), plus 4 Gold (Large) and 2 Gold (Small).
The mummy’s tomb (next room).
- A Herb (Green) in an open chest and ammo in a jar.
- Ruby (Pear) (₦1,000): examine the mummy in the standing sarcophagus a couple of times.
- Sapphire (Pear) (₦1,000): in the brazier next to it, behind a doorway.
Egg Hunt. According to Evil Resource, the Ancient Village Majini have a higher chance of dropping an Egg (Rotten). If you still need one for Egg Hunt (all 4 types in your inventory at once), keep the first one that drops.
The trap chest and the ”+” crossroads
The trap chest. Across from where your partner was stranded, go right to another stone chest. Opening it drops you through a trapdoor. Hit the landing QTE: miss it and you take heavy damage or die. The landing is a checkpoint.
The ”+” crossroads (cross-shaped passage). Lots of Bui Kichwa and Majini pour in, and some Majini burst into Cephalo. Call your partner and back into the end of one of the dead-end arms, so everything comes from the front. This is where Flash Grenades pay off most: they wipe out the Bui Kichwa and any exposed Cephalo at once, and it’s the best spot in the game for Go into the Light. When the fight ends, open the chests at the end of the three dead-end arms (all three types exist only here):
- West: Emerald (Trilliant) (₦2,000).
- South: Ruby (Trilliant) (₦2,000).
- East: Sapphire (Trilliant) (₦2,000).
The fourth arm leads on.
Big hall and the flaming-boulder hall
Big hall. The door opens (cutscene) onto a hall full of Majini at range: archers and shields. Open with the rifle before they notice you, because reinforcements arrive fast. Shoot shield carriers when they turn their backs, or in the legs. BSAA Emblem 20/30, second chance: from this doorway, look at the far wall: the emblem is above a doorway, about halfway up the building. It’s visible from several spots. You need a rifle.
Flaming-boulder hall. Dropping down and walking to the centre is a checkpoint. As you head for the far end, Majini start rolling flaming spiked boulders at you. Dodge them by hugging the sides; on the way they smash the jars, which spill gold and ammo: a great place to restock.
- The crank in the centre (partner action) opens the far door, but it closes quickly. If you don’t make it, turn it again.
- Trick: stepping on the floor switch in the doorway keeps the door open and stops the boulders. In co-op, one turns the crank and the other runs to the switch.
- The exit door opens with both of you.
The collapsing hall
Past the door, drop to the path below and walk on. A long running QTE begins: the floor falls away behind you, with three jumps over gaps on the way. Press what the screen asks; on a controller, the third jump asks for both triggers (left and right) at once. In the newer releases, the Action Assist option (on by default) makes QTEs easier. There’s a checkpoint at the end, and two ropes or pulleys on either side of the door that you both pull to enter the Labyrinth.
Labyrinth: how it works and what to grab first
No enemies at first. Each statue has chains on both sides: you both pull at once, the statue retracts into the wall, leaves a treasure on the floor, and the room’s stairs and bridges move. The order is fixed: blue → green → gold → purple pair → red. After each statue, look for the new staircase that appeared: it’s the way to the next one.
Before touching any statue, collect these, in this order:
- Vases: there’s a vase on the left as you enter. Then go right from the door and follow the path to the rubble-strewn dead ends: there are jars with items.
- Topaz (Square) (₦1,000): go back to the entrance, go right again and jump onto the isolated wooden platform; follow it round to the north-east area. It’s on the ceiling; it’s easiest to see from that path.
- BSAA Emblem 21/30 (4-1 #3): from that same path, climb to the highest point and look west toward the green statue. The emblem is on the ruined rock wall next to a tree, above and right of the green statue and slightly higher than you, just over a roof line. You need a rifle (a handgun is harder). If you can’t get it now, the upper path you jump to after statue 2’s ambush also has a view of this emblem and of the Topaz (Square).
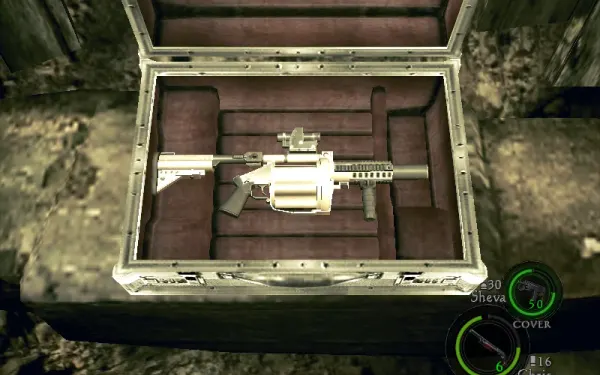
- Grenade Launcher: take the entrance stairs down to the south-west ground-floor corner (down, left and left again): it’s in a silver case, loaded with 12 Explosive Rounds. It fires in a straight line, not an arc, and detonates on impact: aim at the floor by the enemy’s feet. It holds one round type at a time; to switch, combine the other rounds with the launcher. It can’t be upgraded.
- Emerald (Square) (₦1,000): entering the ground-floor north-west quadrant (the space under the walkway, near the launcher), turn round and aim up: it’s on the side of the walkway, on the low overhanging ledge.
- A vase with a First Aid Spray in that same north-west lower area.
Statue 1 (blue)
It’s on the ground floor, in the north-west area under the walkway, at the foot of the stairs you came down: go straight until you can’t, then turn left. It’s in the corner, by the Emerald (Square) on the ceiling and the First Aid Spray vase. Each chain is on one side of the rubble: one of you pulls the near one and the other has to take a long way round, near the stairs, to reach the other.
Pulling leaves a Sapphire (Square) (₦1,000). The stairs you came down disappear and a new staircase rises to the right: that’s the way to statue 2.
- Idol (Gold) (₦3,000): before pulling the second statue, climb the new stairs, go left round the bend and jump to the isolated platform in the south-west quadrant, next to the new stairs. There’s a small chest there. It’s only reachable after the first statue. (IGN says “left, round the bend”; Fandom says “on the right of the staircase”: the fixed reference is the isolated south-west platform next to the new stairs.)
Statue 2 (green) and the ambush
The green statue is at the top of the new stairs. It leaves an Emerald (Square) (₦1,000). Checkpoint.
The ambush. Turn round: the stairs you climbed are now a bridge. Cross it and go right, back toward the entrance door: that sets off the Labyrinth fight, about a dozen Majini with bows, spears and shields.
- Jump the gap to the upper path (“Jump” command): from there you command the room.
- Kill the archers and spear throwers first; together they do the most damage. Then the rest; the rifle works well on the distant ones.
- Pick up their drops before moving on.
Statue 3 (gold)
It’s at the north end. From the entrance go right and straight ahead: there’s now a new staircase leading down. Take it and find the next new staircase, which climbs to the statue. Before pulling, open the chest of Flash Rounds next to it, for the launcher (2 packs of 3, about 6 in all). One source places it in the upper area during the purple step: it’s the same chest, so if you don’t see it now, look later. The statue leaves a Topaz (Square) (₦1,000). Checkpoint.
Statue 4 (purple pair)
Go back down to the ground floor. With your back to the way you came:
- To the right is an area with jars: nothing important, but break them for ammo.
- To the left is the lower purple statue, with a single chain. The other purple statue is directly above, on the walkway that rings the area, with the other chain.
You have to split up and pull at the same time. With the AI, grab the lower one and Sheva runs up to the upper one on her own. Majini and Bui Kichwa spawn while you’re apart.
The wave. Pulling both chains brings about 10 Majini with mixed weapons plus Bui Kichwa. Use the shotgun on the group and a Flash Grenade on the spiders (another shot at Go into the Light). When it’s over, pick up the drops.
The treasures. Check the recess of both statues:
- Sapphire (Pear) (₦1,000): upstairs (Evil Resource says the opposite, but most sources put it upstairs).
- Ruby (Pear) (₦1,000): downstairs.
- Solo, Sheva doesn’t pick up the one on her floor. Go up and get it yourself.
- Proximity Bomb: in a vase in the room next to the lower purple statue. Save it for the boss.
- The south-east lower area opens: 3 vases.
Statue 5 (red)
It’s in the south-west, reached over a broken fragment of stairs. Before pulling the chains, plant the Proximity Bomb in the middle of the room, roughly where the red statue stands (see the boss). The statue leaves the Ruby (Oval) (₦2,000, found only here), opens the exit and triggers a checkpoint. As you try to leave, the second Popokarimu drops through a hole in the ceiling.
Co-op and Sheva AI
- Splits: at the collapsing bridge (whoever crosses first stays up top) and at the purple pair (one per floor).
- Partner actions: both stone sarcophagi, the boulder-hall crank, the Labyrinth pulleys and every statue.
- Latched Bui Kichwa: only your partner can remove it, with the knife. When you see HELP over Sheva, press the partner button.
- A Friend in Need (rescue your partner 10 times when HELP appears): solo, this is the best chapter for it. Take Sheva’s weapons, let the Bui Kichwa latch onto her and pull them off with the partner button.
- Solo treasures: Sheva doesn’t pick up the purple-statue treasure on her floor.
Boss — Popokarimu
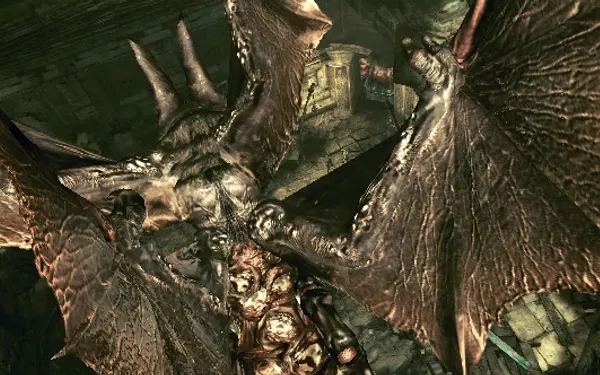
The second Popokarimu is optional: you can flee, but only killing it drops the Soul Gem (₦10,000), the chapter’s most valuable treasure and one you need for They Belong in a Museum. The arena is the statue room. Its armoured front deflects bullets; the weak point is the soft underside of the tail, which glows red. Attacks: a charge, a body slam and a sticky spray from the tail that pins you. It can fly, and while it’s airborne only tail hits hurt it. A strong enough hit to the tail knocks it down and stuns it.
Option A: flee. Run up the stairs to the exit. After a short scene it follows you and you can’t go back down. Near the top a QTE (mash the button) comes up: pass it and it gets stuck in the tunnel and the ceiling crushes it. Fail it and you die. No Soul Gem this way.
Option B: kill it.
- The mine. If you planted the Proximity Bomb in the middle before pulling the red statue, the second Popokarimu walks over it before it attacks even once. By now your weapons should kill it during that first stun: empty your strongest gun into the tail.
- Stun it. Otherwise stun it with the Grenade Launcher’s Explosive Rounds (a few direct hits), Hand Grenades or more mines. Don’t fire the launcher up close: the blast hurts you too. On Normal, the launcher’s starting load should be enough to kill it; on Veteran and Professional you’ll need other weapons as well.
- Tail. When it falls on its side and shows its underside, both of you hit the tail. One source says shotguns do 40% less to it; another says a well-upgraded M3 finishes it in half a dozen shots once it’s flipped. If you have a magnum or a machine gun, use those first.
- Other options. According to Fandom, the S&W M500 kills it in 5–6 head shots. Flash Rounds kill it in about 12–13 direct hits. A Rocket Launcher to the head, without stunning it first, usually kills it in one shot. Fire (Incendiary Grenade) is said to do double damage, but that’s unconfirmed.
- Watch the spray. Don’t stay behind it for long. If it sticks you, shake free with the prompted button or have your partner free you. In co-op, one keeps it busy and the other hits the tail while it’s stunned.
- Reward: the Soul Gem (₦10,000). If you flee and the ceiling crushes it, it drops nothing: it has to die in the fight. If it gets away, replay the chapter from Chapter Select.
End of the chapter. Go through the door: a cutscene of Wesker and Excella with the serum, and a flashback to Spencer. Achievement Completed Chapter 4-1. From now on the Grenade Launcher and its Explosive Rounds, Flash Rounds and Acid Rounds are in the shop (if you missed the launcher, it costs ₦10,000 according to most sources).
Don’t leave without: the 3 BSAA Emblems (chasm rock by the ladder, under the big crystal, by the tree above the green statue) · the Topaz (Trilliant) in the hidden alcove and the Sapphire (Pear) on its ceiling · the 2 skulls and the torch at the Caves door · the mummy’s Ruby (Pear) · the 3 Trilliants in the ”+” crossroads · the Idol (Gold) on the isolated platform · the purple treasure on Sheva’s floor · the Ruby (Oval) · the Grenade Launcher and the Flash Rounds · the Soul Gem (you have to kill the second Popokarimu). The six types found only here (4 Trilliants, Ruby (Oval) and Soul Gem) are the ones that would send you back to 4-1.