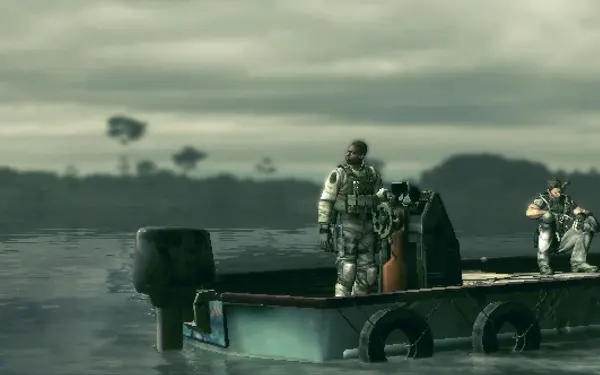
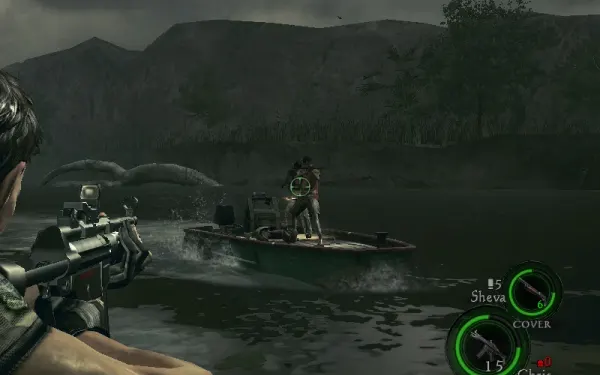
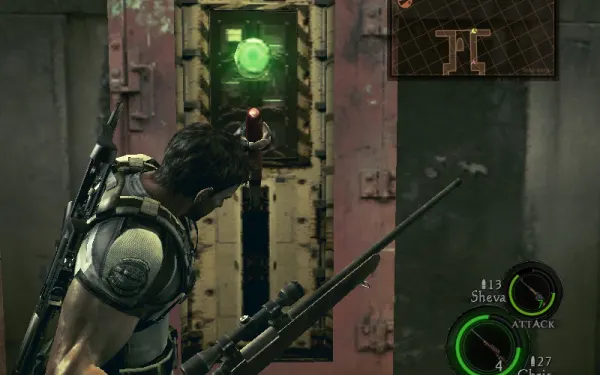
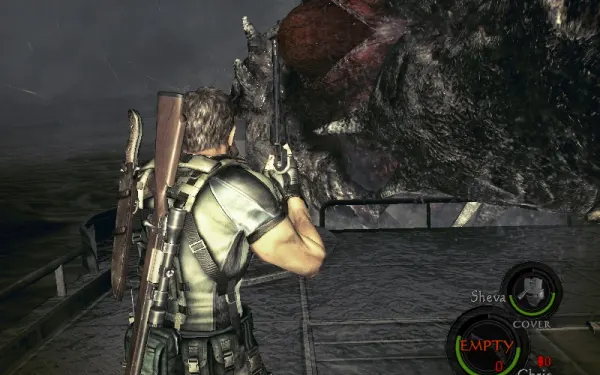
You play as Chris and Sheva, aboard Josh Stone’s boat as he takes you through the Drilling Facilities (Oil Field - Drilling Facilities) after Irving’s patrol boat. Almost everything is shot from the moving boat: red tanks, barrels and Majini on bridges and walkways. You only go ashore twice, at two floodgates you have to open: the first with a lever, and the second, guarded by two mounted Gatling Guns, with two switches at once. The M3 shotgun is at the second one. The chapter ends with transformed Irving, a sea creature circling his patrol boat, the fight that closes the swamp arc. The boat doesn’t turn back: whatever you leave behind at a floodgate stays behind in this run.
Chapter order: Josh’s boat: the chase, red tanks → emblem 18 under the overpass → floodgate 1: Kipepeo, the base’s red tanks, lever across the gap, crossbowmen → low pipes (“Duck” QTE) → floodgate 2: two Gatling Gun nests, Emerald (Marquise), Sapphire (Pear), M3, two switches at once → Irving’s patrol boat: Irving.
Before you start
Shop (Item Management at the start of 3-3). Sell the 3-2 treasures (₦25,000 between the gems, the 2 Jewel Beetle, the 2 Venom Fang, the Jewel Bangles and the Gold Rings); the dock’s gold suitcase was already added as cash. Upgrades that open now:
- S&W M29: firepower 3,200 and capacity 12 (₦20,000). It can now be fully upgraded (₦78,000 in total). One source opens these levels at 3-3 and Fandom at 4-1: count on 3-3, or 4-1 at the latest.
- S&W M500: finishing the M29 unlocks it in the shop for ₦30,000, with ₦26,000 of upgrades open (firepower up to 3,300). Freshly bought it hits softer than a maxed M29 (2,100 vs 3,200) and only overtakes it with ₦20,000 of firepower: if money is tight, finish the M29 and leave the M500 for later.
- S75: firepower 1,120 and capacity 17 (₦5,000).
- Dragunov SVD: firepower 950 and capacity 16 (₦8,000).
- Ithaca M37: firepower 400 and capacity 13 (₦10,000).
- H&K P8: firepower 260 and capacity 21 (₦8,000).
- H&K MP5: capacity 110 (₦3,000). M92F: capacity 33 (₦1,000). VZ61: capacity 160 (₦1,500).
Rocket Launcher. If you spent the free one from 3-1, buy one for ₦10,000: one hit ends Irving’s first phase at once. M3. You pick it up in this chapter and it already has ₦25,000 of upgrades open (firepower 450, reload 2.70, capacity 10). You can buy them when you continue from a checkpoint (the Item Management screen comes up there too) or at 4-1. What to buy now: rifle upgrades (S75 or Dragunov) and machine-gun upgrades, the guns this chapter uses; the shotgun barely comes out.
Loadout. Most of this chapter is shot from a moving boat, so the shotgun is no use: bring a machine gun or, better, a sniper rifle for the red tanks and the distant shooters. A Flash Grenade or the Stun Rod helps with the Kipepeo. Against Irving, use the mounted guns on his boat; they don’t spend your ammo.
What you can miss. Emblem 18 can only be reached around floodgate 1: once you’re back on the boat and it goes through the gate, there’s no way back. The M3 is at floodgate 2 and is lost (for this run) if you board without it. The Emerald (Marquise) exists only here. If you miss something, replay 3-3 from Chapter Select.
Difficulty. Missed QTEs often mean instant death: on Professional the first button you press counts, so don’t mash. Irving’s bite does 300 damage or kills outright (sources don’t say what decides it). Professional removes some fixed ammo.
S rank on Normal (one source only, unconfirmed): accuracy ≥70%, ≥30 kills, 0 deaths and ≤19:00. There are only 2 treasures (₦4,000) and 1 emblem.
The boat chase
Josh drives the boat; the two of you shoot. Two boats with two Majini each chase you from behind: deal with them with any gun.
- Turn around with the rifle: the bridge has four large red oil tanks. Shoot them to kill the nearby Majini in one go.
- The barrel on the wooden bridge, beside a crossbow Majini.
- A Majini on the left with a barrel.
- Two more on a bridge with tanks beside them: shoot the tanks.
Red tanks and barrels do the work the whole way; save your ammo. Killing 3 Majini with one drum or tank explosion earns the Baptism by Fire award, and these groups by the tanks look like a good spot (no source confirms it here; the safe spot is 2-1).
Before you get off the boat: BSAA Emblem 18/30 (3-3 #1). Just before the first floodgate, the boat passes under a metal overpass. The emblem is on its underside. Before you get off, turn to the back of the boat and shoot it. If you miss it, you get two more chances, both before you reboard: with the rifle from the top of the path, just before the jump across the water, or on foot on your way to the lever. Some see it as a silver glint and others as a blue one; it’s the same emblem. Once the boat passes floodgate 1 you can’t go back.
Floodgate 1
The boat stops at a base with a door blocking the way. Climb up and take either path (left or right): both lead up top.
- Red tanks: the top corners of the base have red oil tanks. Let the Majini bunch up near them and shoot.
- The Kipepeo. Among the Majini is a Kipepeo (100–1,000 HP), which sidesteps when you aim at it. Its head and wings are weak points, a Flash Grenade kills it and the shotgun works well. It strangles you with its tail and, if you are already badly hurt, snaps your neck. To stop a host releasing more Kipepeo, drop it and finish it from behind (Neck Breaker or Throat Slit) or kill it with the Stun Rod. A host that dies indoors doesn’t release one either.
- Loot: 3 barrels and a pack of 15 handgun rounds.
- The lever is across the gap at the end of the path: jump the gap. Pulling it brings more Majini, 2 Kipepeo and crossbowmen: kill the crossbowmen first, since they hit you from range while you fight the rest.
Be the Knife. The crossbowmen at this gate (and at floodgate 2) are a chance at this rare award (4.9% on Steam): deflect a bolt with the knife. Kill all but one, stand in his line of fire with the Knife out and slash just as the bolt arrives. If you get hit, heal and keep going: the crossbowman doesn’t run out. The best spot is still 2-1’s container maze.
Getting back on the boat is a checkpoint. Last call for emblem 18.
The pipes
The boat passes under two low pipes: press the “Duck” QTE or take a very heavy hit. There are more red tanks between them: keep shooting the barrels and tanks you see.
Floodgate 2: the Gatling Guns
Next to where you climb up: 2 barrels, 15 handgun rounds, 10 rifle rounds and a Herb (Green). When you reach the low wall, look left and up: Majini pour out of the cabin above the gate and man two mounted Gatling Guns. About 15 Majini in total.
- Take cover behind the vertical wooden planks or press against the wall with the “Against wall” command, and use the rifle. Only peek for a moment: the gatlings shred you.
- Kill order: gunners → dynamite Majini → crossbowmen → the rest.
- If you get through the door fast enough you can skip the gunners, but you lose kills for the rank.
- According to Fandom, a transformer on the left side of this gate can be dropped onto Majini. It might count for the Ride the Lightning award, but that is unconfirmed; the usual spot is 1-1.
The two switches. Two switches sit side by side and must be pulled at the same time (partner action; with the AI, Sheva takes the other). They open the gate and bring a second wave of Majini and Kipepeo. Trick: pull them before you loot, so both waves come back to back and you can then loot in peace.
Floodgate 2 loot
Sweep all of it before boarding the boat: once it leaves, floodgate 2 is behind you.
- Left, through the door toward a switch: 2 barrels and 10 shotgun shells.
- Up the ladder: 1 barrel and a Herb (Green).
- The cabin between the two Gatling nests: a barrel and the Emerald (Marquise) (₦3,000) in a drawer. It is the only Emerald (Marquise) in the game.
- Right: 2 barrels, a Herb (Red), 50 machine-gun rounds on the tyres and 15 handgun rounds on the sandbags.
- Small shack on the left: 10 shells, 50 machine-gun rounds, 15 handgun rounds, a First Aid Spray and a barrel.
- M3: head away from the two switches to the opposite side and follow the west pier to its end (it’s behind where the boat moors): the silver case is outside a small cabin, next to a barrel. Miss it and it enters the shop from 4-1 for ₦4,000. It comes with 300 firepower, a 3.00 s reload and 5 shells; fully upgraded it reaches 900 firepower, the highest of any shotgun.
- Sapphire (Pear) (₦1,000): straight across the water from the M3, on the ground by the shack at the end of the right-hand boardwalk. From where the boat stops: go left to the bridge, jump it, drop to the right, cross the boards and turn left at the “T”; it is right of the building. A barrel on the right-hand pier sometimes holds magnum rounds.
Back on the boat: cutscene on Irving’s patrol boat, and the boss begins.
Co-op and Sheva AI
- From the boat you both shoot: split the sides so no tank gets missed.
- Floodgate 2: the switches need both of you together. In co-op, one covers the gunners with the rifle while the other moves up along the wall.
- Irving: each of you on a different mounted gun (see the boss).
Boss — Irving
Irving injects a parasite derived from the control Plaga and becomes a giant sea creature with tentacles and a toothed mouth. He fights from the water around his patrol boat. The boat has 2 mounted machine guns and 2 mounted launchers at the front, plus a First Aid Spray at the back. HP by part: parasite (the bulb on his head and back) 12,000, tentacle A 8,500, tentacle B immortal, and Irving’s body 13,000. Damage: spiked tentacle 200, slap 180, bite 300 or instant death.
Gun split: take the machine gun on the side he comes from. Your partner takes the other machine gun if Irving is behind, or a launcher if he is at the side. The mounted guns are enough: don’t spend your own ammo. But to dodge you have to get off the machine gun.
- Phase 1, the sides of the boat. Irving dives and raises spiked tentacles (about four) on one side. They aim where you stood when the attack began: keep moving and dodge with the QTE when it appears. Shoot the bulging middle (the black mark) of each tentacle until it breaks.
- He surfaces. Once enough tentacles are down, Irving comes up. Shoot the pale circular patch / pulsing bulb on his head and back: it flashes red when hit.
- His other attacks. Squid tentacles that ram or grab one of you (shoot them to make them let go); a quick slap-down from above (QTE or shoot it); and, now and then, a bite over the deck (QTE or step away). Watch his map icon: if it charges straight at the boat, the bite is coming. Repeat it all on the other side.
- Shortcut: one hit from the Rocket Launcher (the one in your inventory, not the mounted launcher) anywhere on Irving during phase 1 ends it at once.
- Phase 2, the stern. After enough damage, a cutscene: Irving grabs the stern and opens his mouth, and Irving’s human body shows on his tongue. Fire both machine guns at the body on the tongue and at the tentacles holding the boat.
- His phase 2 attacks: he lets go, dives and lunges to bite (back off or QTE), or raises spiked tentacles while still exposed. If you don’t deal enough damage, the cycle repeats.
- Ammo: if you run low, damaged tentacles can drop ammo. An infinite Rocket Launcher finishes him quickly.
- Reward: he drops nothing. Before dying, Irving mentions “the cave”. You earn the Completed Chapter 3-3 award and the Ricardo Irving Library file. With chapter 3 cleared and 5 emblems, Bonus Features lets you buy (500 points each) the Crocodile and Irving (Transformed) figurines; with 10 emblems, Josh.
Don’t leave without: emblem 18 under the overpass (turn around before getting off the boat; last chance before reboarding at floodgate 1) · the Emerald (Marquise) in the drawer between the Gatlings (found only here) · the Sapphire (Pear) on the right-hand boardwalk · the M3 on the west pier before returning to the boat · the ammo in floodgate 2’s two shacks. For 4-1, bring every Flash Grenade you have and a free slot for the Grenade Launcher.