You play as Chris and Sheva, following Excella and Wesker through Tricell’s underground lab after finding Jill’s empty pod. The chapter starts on the platform where you fought the U-8 and crosses the base’s industrial heart: a Power Station guarded by the first gun-toting Majini, a Licker β passage, the Missile Area with its three conveyor belts running into an incinerator and the first Reaper, and the lab of Uroboros Mkono, which only dies to fire. This is the chapter where the game switches from hordes to firefights: learn to use cover.
Chapter order: Experimental Facility (file) → Power Station: 3 firefights with armed Majini → elevator (Wesker and Excella cutscene) → Experimental Facility Passage: Licker β → Missile Area 1F: first wave → belt 1 (crates) → partner door → belt 2 (explosive tanks) → emblem 24 + SIG 556 → powerless belt 3 → switches by the missiles → Reaper → belt 3 (bodies) → point-of-no-return corridor → Uroboros Research Facility: Uroboros Mkono.
Before you start
Shop (the 5-2 Item Management screen).
- Sell the 5-1 treasures (Ruby (Square) ₦1,000, Jewel Beetle ₦2,000, Emerald (Pear) ₦1,000) and the Lickers’ Lion Hearts (₦2,500 each). The safe’s Gold bars (₦3,000) were already added as cash.
- Bulletproof Vest (₦10,000; halves gunfire damage and takes a slot), if you don’t have it. This is where it pays off most.
- M92F: capacity 50 opens up (₦4,000). If you have capacity 37 from 4-1, you still need 40 (₦2,000), 45 (₦2,000) and 50: ₦8,000 in all. If it isn’t at full firepower yet (250, on sale since 3-2), that comes first. Each capacity upgrade refills the magazine for free: buy them with the gun empty.
- Don’t buy Flame Rounds. Mkono’s room hands you 5 Flame Rounds, 4 Incendiary Grenades, 3 gas canisters and the flamethrower. The sources also disagree on whether they’re sold yet (Fandom says they’re added in 5-2 at ₦2,400; another source says not until after 6-3). On Professional, though, don’t count on those fixed pickups: bring the Rocket Launcher.
- New stock: the SIG 556 (₦4,000), which you also find for free in this chapter.
What to bring. A rifle to open every firefight from range, a shotgun or magnum for the Licker β, and something explosive for the Reaper (Hand Grenades or a Proximity Bomb). The Stun Rod (₦3,000, on sale since 3-1) is a shortcut against the Reaper, but only if you bought one. For the boss the easy play is a Rocket Launcher: one direct hit kills Mkono, even on Professional.
Difficulty.
- Professional: every Majini attack puts you straight into DYING, not just the Stun Rod. The three Power Station firefights and the Missile Area wave are the deadliest part of the chapter: always fight from cover and let your partner pick you up.
- Rocket Launcher Majini: a rocket puts you in DYING on every difficulty. They reload very slowly: shoot the carrier while he reloads and keep solid cover between you and him. Fandom places them in 5-2, but no walkthrough meets them in this chapter: the ones the walkthroughs confirm are on Missile Area 2F in 5-3, in 6-1 and in 6-3.
- Reaper: higher difficulties need more belly-and-back cycles. Its grab is instant death on every difficulty.
- On Professional the money you find is worth double, but many fixed ammo and grenade pickups are gone (Fandom says all of them) and enemies no longer drop herbs.
What you can miss this run: BSAA Emblem 24, the SIG 556, the Reaper’s Power Stone and the 2 Dead Bride’s Necklaces are left behind once you drop down the ledge in the boss antechamber. Items you leave in the boss room are gone by 5-3.
S rank on Normal: accuracy ≥70%, ≥40 kills, 0 deaths and ≤22:00 (A up to 26:00). Treasures: up to 8 (about ₦21,500), most of them enemy drops.
The Base Majini
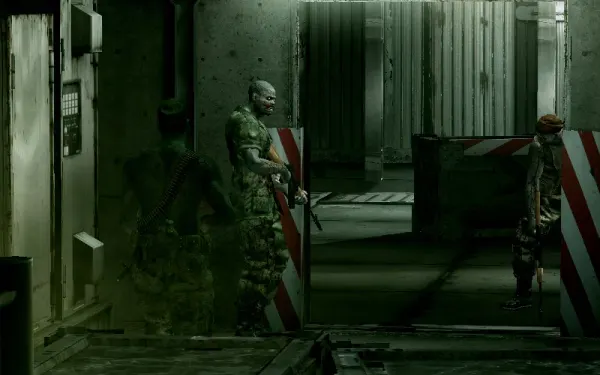
The Majini of the Tricell facilities, far better trained than the ones before: they carry AK-type rifles, handguns, grenades, Stun Rods, rocket launchers and bulletproof shields, and many wear helmets, leg guards or vests. Some mutate into Cephalo, Duvalia or Bui Kichwa. How to fight them:
- Get into cover. In these areas a prompt lets you peek out and fire from a wall. Several hits in a row from an AK burst knock you down: stay behind cover and shoot while they reload. After downing you they sometimes fire into the air as a taunt: that’s your opening to hit back.
- Priority: first the Stun Rod carriers (more aggressive, with the hardest hit) and the grenadiers (they lob grenades behind your cover to flush you out), then the riflemen.
- Helmets: they stop head shots. Aim at the exposed face, the legs or the body, or use the magnum, which pierces armour.
- Grenade belts: many wear one, and it explodes when shot or caught in a blast. Shoot it when others are close.
- The swellers: some inflate, clutch their heads and explode just before dying. The radius is small, but up close the damage is catastrophic: back off from one that’s swelling (one more shot sets it off at once). Don’t confuse it with one covered in bubbles: that one is turning into a Duvalia.
- Gas masks: wearers are immune to Flash Grenades.
- Bulletproof shields: they shove with it, often followed by a Stun Rod swing. Use explosives (on belt 2, the tanks under their feet) or flank them.
Experimental Facility (start)
You start on the U-8 platform, facing the way you need to go; the other path leads nowhere. Turn around: the panel on the central pillar holds the Test Subject Data file. Then carry on forward through the steel door: a storeroom with 4 breakable crates on the right. Leave through the door on the left.
Power Station
Checkpoint.
Firefight 1. At the foot of the stairs are 3 armed Majini (at first you may only see 2). Sneak halfway down the stairs, headshot the nearest one with the rifle and move on to the others before they react; if you can’t, go down and finish them with the handgun or shotgun. Don’t call it done after three: IGN counts 2 more that attack as you go into the next room (5 in all, one with a Stun Rod), and Fandom a 4th that comes through a door. Expect 1–2 more and keep the Stun Rod carrier at bay. Herb (Green) on a crate.
The side corridor. Break the crates on the left: ammo and items.
Firefight 2. As you move on you take fire from ahead and to the left: step into the line of fire only to reach cover. It’s a big room with up to a dozen Majini, most with rifles and some with Stun Rods. Take cover behind the crates and take out the Stun Rod carriers first. There’s a crate with machine-gun ammo. In the closet on the left, before the door with the two green switches, there’s another Stun Rod Majini, ammo crates and a Herb (Red) (break both crates).
Door with two green switches. Opened together. Behind it is a checkpoint and a Herb (Green) in the corridor. The corridor is too quiet: it drops you straight into firefight 3.
Firefight 3. About 7–8 gunmen and Stun Rod carriers in a room with no proper cover. Hug the wall left of the entrance and use the peek-and-fire prompt, exposing yourself only in short bursts. There are explosive gas tanks in the area: shoot them when Majini are near. Search the lower floor (Herb (Green)), then creep up the stairs and clear 3–4 more on the upper floor.
The tanks in this room and on belt 2 are good places to try for Baptism by Fire (kill 3 Majini with one drum or tank explosion), though no source confirms either as a tested spot. At the far end, the elevator: a cutscene of Wesker and Excella discussing Uroboros.
Experimental Facility Passage
Checkpoint. Straight ahead, a crate with a Herb (Green) and handgun ammo; another crate down the right-hand corridor. Swing left into the passage. It’s U-shaped, split by a chain-link fence. It holds about 10 Licker β: first a big wave, then 2 more round a corner and finally a group bursting from the ventilation ducts on the far side. You can run for the exit door, but fighting pays: at range, rifle headshots while you keep walking; up close, the shotgun; and if they surround you, fall back round the corner.
- Lion Heart ×5 (₦2,500 each, random): two guides got 5 “every time”; another only 3. Kill them on the ground so you can pick up their drops.
- Farm: kill every Licker and, without going through the exit door, open the pause menu, quit the game and answer “Yes” to save what you picked up; then pick “Continue” and repeat. One guide claims about ₦100,000 in 20 minutes (₦12,500 per run).
- You can also get Heart Stopper here: knock a Licker onto its back and stab its heart.
Missile Area 1F: the first wave
Checkpoint. Right as you enter, on the left, 2 crates (handgun ammo and Gold (Small)). Go down the metal grating to the ladder and drop down. Below wait 2 Base Majini: kill them fast and quietly and the area doesn’t go on alert. If they spot you, around a dozen pour in (machine guns, Stun Rods and grenadiers): grenade throwers and Stun Rod carriers first. The crates on belt 1 make moving cover, and the music stops when the last one is dead. There’s a crate and a Herb (Red) at the back.
Next, climb the ladder, cross the walkway and drop down again. Turn left: 3 crates with items.
Belt 1 (crates)
Take the stairs up to the raised platform opposite where you dropped in: it overlooks the stretch of belt just before the incinerator. Run against the belt using the fixed centre strip to dodge the crates. Stay on too long and you end up in the incinerator. Jump to the side platform on the right, pull the switch that stops the belt (so your partner can cross), climb the stairs and open the door together.
Belt 2 (gas tanks), emblem 24 and the SIG 556
This belt carries explosive gas tanks (one shot each). Grab the items on the left first, pop the nearest tanks from range, then run; to shoot, stand in the fixed gap in the middle. Ignore the Majini above and ahead of you while you run. When shield Majini step onto the belt, fall back and blow a tank up under their feet. Stop the belt with the lever at the far end and go down the stairs next to it.
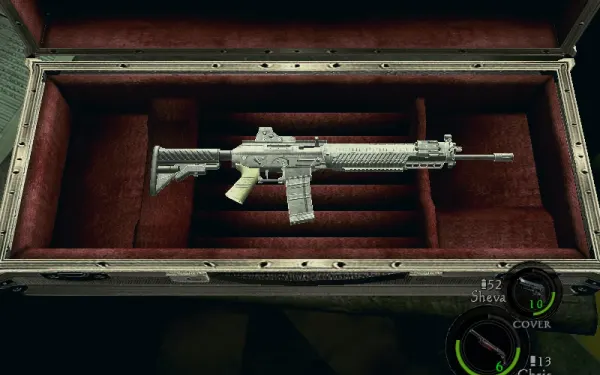
At the bottom of the stairs, turn round: there are 2 crates, the emblem’s dumpster and the SIG 556 case.
- BSAA Emblem 24/30 (5-2): from the bottom of those stairs, look ahead and left at the open dumpster (the left one): the emblem is inside. The handgun has no angle on it. Toss a Hand Grenade into the dumpster, or find the angle with a sniper rifle.
- SIG 556: in a silver case on a table right next to the emblem, between belts 2 and 3. Machine gun: buy ₦4,000 / sell ₦400; firepower 80 up to 180, magazine 40 up to 80, and the fastest reload of the machine guns (2.55 s down to 1.42 s). Expensive to upgrade for what it offers, but a good support gun if your partner runs a shotgun.
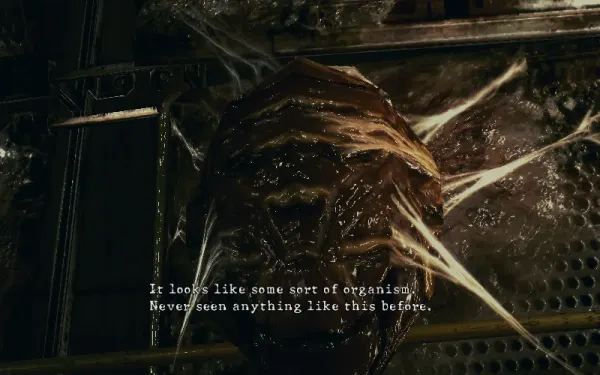
- Regarding the Mutant Organism Found in the Facilities: on a bench between belts 2 and 3, next to the case. It warns you of what’s next: the Reaper.
Powerless belt 3 and the switches
From the SIG 556, walk left along the stopped belt 3, climb its stairs and try the lever: there’s no power (“The power’s out”). Don’t board the belt yet. Head right through the passages and catwalks: the way is linear and enemy-free. The walls carry egg sacs (“some sort of organism”) and you pass the stored Uroboros missiles. To the right of the missiles are two switches: flip them at the same time (solo, Sheva takes the other one). Nearby: 2 crates and a Herb (Red).
Mini-boss — Reaper
On the way back, where organic goo covers the left wall, the Reaper hatches from its sac and drops from the ceiling. It’s a cockroach-like thing with blades; its shell deflects standard bullets, and its grab runs you through: instant death on every difficulty. When its armour shifts it vents a gas (Evil Resource: it spits a caustic substance) that briefly blinds you and blurs your aim: when it vents, back off instead of trying to aim. It takes 2,000–3,000 damage.
- Keep your distance and let it come down a corridor where you can back off.
- Explosives first: Hand Grenades, Explosive Rounds or a Proximity Bomb don’t kill it (it curls up and rolls away), but they drain its HP from the inside: one or two grenades or one mine leave it at 1 HP.
- Finish it on the sacs: when it rears up on its hind legs it shows the glowing sac on its belly. Shoot it there; it curls up and exposes the two white sacs on its back; shoot those and the belly is exposed again. Belly → back → belly. Higher difficulties need more cycles.
- Shortcuts: if you bought the Stun Rod (₦3,000, in the shop since 3-1), it stuns it instantly. Flash and Acid Rounds (on sale since 4-2) work well, and on a replay so do Electric Rounds (found in 5-3); a direct Rocket Launcher hit kills it (a near miss only makes it roll). Fire does nothing to it, but the incinerator’s constant heat does: lure it to the belt and you can finish it there.
- In co-op: one keeps it busy from the front while the other goes for the back sacs from behind.
- Reward: a Power Stone (₦5,000). You can dodge it and move on, but you lose the gem. Kill it before you board belt 3.
Belt 3 (bodies)
Pull the lever: the belt starts. Hop on, go left and turn right at the end of the metal barrier. The belt carries test subjects that look like corpses; some lunge to grab you as you pass (follow the dodge prompt). Don’t waste ammo on them, except for what they carry:
- Dead Bride’s Necklace ×2 (₦2,000 each): kill the bodies on the left-hand side of the belt that lunge to grab you; the necklaces drop from them. If they don’t show up, stand in the middle of the belt and wait for more bodies to spawn.
At the gap on the right, wait for a crate to pass and climb onto the ledge. Stop the belt with the switch up the stairs (if Sheva gets stuck, turn it back on and off again). At the top, a partner door.
Uroboros Research Facility: the antechamber
A corridor with no enemies that ends at a ledge: you drop down to the area by the boss door.
Point of no return: before you drop down the ledge, make sure you have BSAA Emblem 24, the SIG 556, the Reaper’s Power Stone and the 2 Dead Bride’s Necklaces: once you drop there’s no going back to the rest of 1F.
Down there, in the crates: 5 Flame Rounds, 1 Incendiary Grenade, handgun and rifle ammo; more handgun ammo in the left corner by the door and on the computers. Take everything: items you leave in the boss room are gone by 5-3. Load the Flame Rounds into the Grenade Launcher before you go through. The door with two switches leads to the cutscene: a test subject in a chair mutates while Excella watches from the observation room.
Boss — Uroboros Mkono
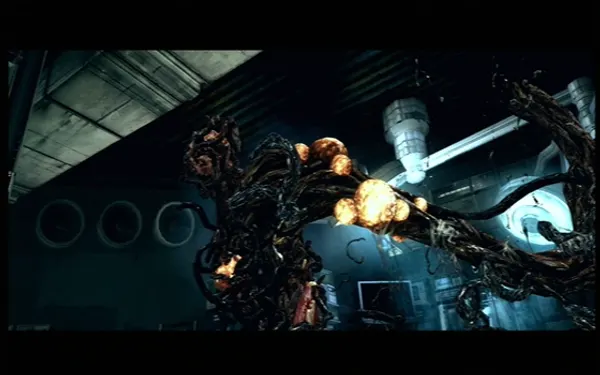
A test subject who seemed compatible with Uroboros and then went berserk: bigger and more aggressive than the first Uroboros, with two cores. Bullets alone won’t kill it. Fire makes it sprout 3 tentacles with bulb tips from its back: they’re the only thing that hurts it. Shoot them before it pulls them back in.
Arena items: a First Aid Spray beside the boss’s chair and another behind glass on the shelf right of the flamethrower; handgun, rifle and machine-gun ammo on the shelf left of the chair; a Herb (Green) in a hallway; 1 Incendiary Grenade on the monitor table left of the chair and 2 more left of the ammo shelf; 2 crates left of the flamethrower; and 3 gas canisters you can knock over.
Attacks: a whip lash with a hugely long arm (20–30 ft, with a dodge prompt); it tears off its left arm and sends it crawling at you (a hit covers you in leeches that drain your health; the dodge prompt avoids it); a sideways swipe that knocks you down; and a grab that covers you in leeches, which it can do even with no arms.
- The fast way. A direct Rocket Launcher hit kills it, even on Professional. Trick: restart from the checkpoint carrying only the launcher, loot the room and fire.
- Fire first. The Grenade Launcher’s Flame Rounds and Incendiary Grenades work surprisingly well. You can also knock over a gas canister: the Mkono absorbs it, and then you shoot it so it blows up inside.
- The flamethrower. It hangs on the east wall and only starts charging once the fight begins; you can lift it when all 5 lights are green. While it charges, dodge and loot. It holds about 100 fuel, burns about 5 per second of fire and has to go back on the wall to refuel.
- Take its arms off. Before using the flamethrower, shoot its arms until one is left; grab the flamethrower and have your partner blow off the last one. With no arms it can’t hit whoever holds the fire. The arms grow back.
- Burn and shoot. One keeps it bathed in fire (that keeps it vulnerable) and the other shoots the bulbs with the strongest gun: shotgun, magnum or rifle. In solo, let Sheva carry the flamethrower and do the shooting yourself. With good aim you shouldn’t need more than one refuel.
- Opinions: one guide says use only the flamethrower and save your items; another rates the flamethrower the least effective tool, because Mkono attacks whoever holds it while it still has arms. In practice: spend the room’s free fire first (grenades, Flame Rounds, canisters) and use the flamethrower as an endless refill.
- Reward: it drops nothing. Completed Chapter 5-2 achievement and the Tricell Library file.
Before you leave you should have: the Bulletproof Vest on, the M92F upgraded, a shotgun, magnum and rifle with ammo, and healing. Anything you want to keep from the boss room in your inventory (whatever stays on the floor is gone by 5-3). At the 5-3 shop: sell the Power Stone, the necklaces and the Lion Hearts.
Don’t leave without: the Test Subject Data on the central pillar · the Lion Hearts in the Licker passage · BSAA Emblem 24 in the dumpster (grenade or rifle) · the SIG 556 and the file on the bench beside it · the Reaper’s Power Stone · the 2 Dead Bride’s Necklaces on belt 3 · the 5 Flame Rounds in the corridor before the boss.