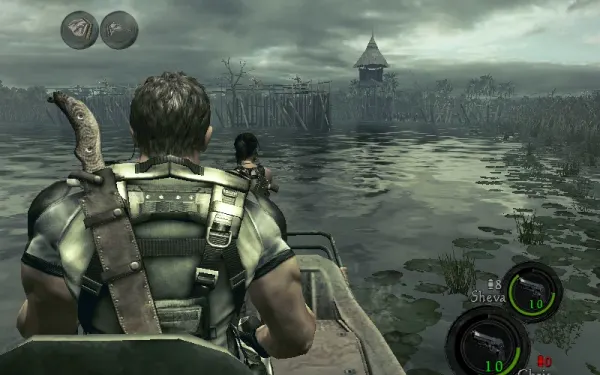
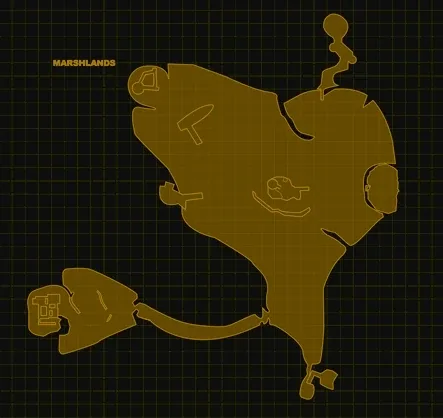
You play as Chris and Sheva, following Irving into Kijuju’s Marshlands, the Ndipaya tribe’s territory. The first half of the chapter is open: you roam the swamp by airboat hunting for the four slates (Beast, Raptor, Shaman and Warrior Slate) that open the west door, spread over docks with crocodiles, tribal Majini ambushes and a Duvalia. Along the way there are optional stops with emblems, treasures, eggs and the Rocket Launcher. The second half is linear: the Ndipaya village, with the S&W M29 and two Giant Majini, a crank bridge, a fort and the gondola that ends the chapter. The four-slate door is a point of no return: everything in the Marshlands has to be done first.
Chapter order: south dock (Beast Slate, emblem 12) → airboat → east dock: crocodiles, Raptor Slate → north-east dock: Shaman Slate, Duvalia → sunken boat: Rocket Launcher → north-west fish farm (emblem 14) → poultry farm (emblem 13, eggs) → south-west channel: Warrior Slate, blockade ambush → four-slate door → village (emblem 15): S&W M29, 2 Giant Majini → bridge crank → fort (file) → cave: Ceremonial Mask → gondola.
Before you start
Enemies. The tribal Majini (Wetlands Majini) are tougher and some carry shields: bring an upgraded shotgun. Also bring a Flash Grenade or a Hand Grenade: either one kills the north-east dock’s Duvalia in one go (the hand grenade if it goes off right under it). A sniper rifle makes emblems 12 and 13 easier (12 has alternatives: a rocket, or in co-op from the boat; 13 can be done with a pistol or a grenade under the hut).
Shop. According to most sources, from this chapter the shop sells the H&K P8 (₦4,000) and the Stun Rod (₦3,000; whatever it kills sprouts no Plaga); Evil Resource holds the Stun Rod back until after 3-2. 2-3 paid nothing, so there are no big buys: save up for the S&W M29, which you pick up here and which has ₦43,000 of upgrades on sale as soon as you own it. The H&K P8 is surplus if you’re already upgrading the M92F.
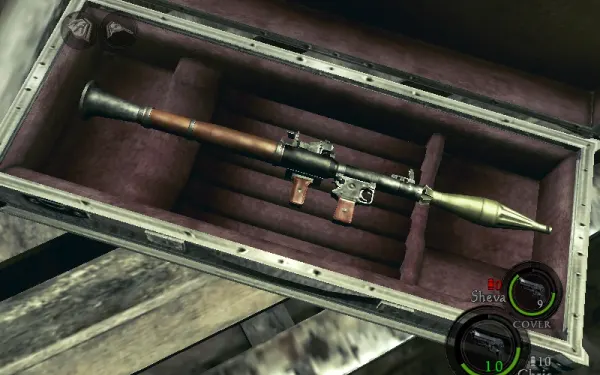
Rocket Launcher. The one you find here is single use (30,000 damage): save it for Irving in 3-3, where it skips his whole first phase. Don’t sell it: you’d get ₦1,000.
Difficulty. Professional removes the fixed ammo and grenades, but the money you pick up is doubled (treasures keep their value).
S rank on Normal: accuracy ≥70%, ≥30 kills, 0 deaths and ≤18:00. The 19 treasures add up to about ₦31,000, and the docks have no enemies until you take the slates, which makes this the best farming chapter (see Farming near the end).
What you can miss: everything in the Marshlands (emblems 12 to 14, the 7 Beetle (Brown), both Chalice (Silver), both Idol (Silver), the Rocket Launcher) is left behind once you open the four-slate door. After that, in the village, the 2 Blue Enigma (kill both Giant Majini) and the Ceremonial Mask in the cave, just before the gondola.
South dock (start)
No enemies here. The Beast Slate is on the ground next to a butchered BSAA soldier, in front of a locked gate. Examine the body for the file Schedule Report (Delta Team’s unsent message).
- Beetle (Brown) (₦1,000) on the tree on the right of the clearing.
- Ruby (Pear) (₦1,000): break the animal skull on the left, by two vases (shoot or knife it).
- BSAA Emblem 12/30 (3-1 #1): face the water from the dock. Following the wires to your left, past the first pole, a lone electric pole stands in the lake. The emblem is at the top and it is tiny: stand around the middle of the dock, look between the fence bars and use the sniper rifle with patience.
Other ways to get emblem 12: the Rocket Launcher from here, if you come back after taking it from the sunken boat or bring one from an earlier run (but you’d rather keep it for Irving); solo, from the middle dock of the poultry farm, aiming at the same pole; in co-op or split-screen, the passenger shoots it from the moving boat as you pass the pole (solo you can’t shoot from the boat this way). Leaving split-screen resets the chapter, but the emblem counts the moment you hit it.
The airboat and its stops
One player drives and the other rides with a gun ready. There are six stops besides the start dock, and the slates can be taken in any order. This route runs counter-clockwise: east → north-east → sunken boat → north-west fish farm → poultry farm (centre) → south-west → west door.
Checkpoints. Landing at any slate dock is a checkpoint, and taking the slate and getting back in the boat is another. Each slate you place in the door is one more.
Slate Map. If you go to the west door (the glowing marker) first, the Slate Map on its dock marks the stops you still need. Picking it up is a checkpoint too. It only appears while you’re still missing a slate.
East dock (3 o’clock): Raptor Slate
Park and wade through a waist-deep pool. About 8 crocodiles live here. They only surface when you get close, kill in one bite on every difficulty, respawn and give nothing. Don’t fight them: keep walking along the edge. AI Sheva and the crocodiles ignore each other.
- Beetle (Brown) on the tree at the far left of the pool (the one with a boat beside it), on the back of the trunk.
- Ruby (Pear) on the wooden post at the underpass entrance, before the first ladder; two crocodiles sit nearby.
Climb the ladder at the far end to the stilt huts: 4 Majini ambush you in the first hut. Wait for them at the door with the shotgun. That hut has a Herb (Red), ammo and an Egg (White). In the second hut one Majini waits by the window; the Raptor Slate is in its chest.
On the way back another crocodile appears near the boat ramp, and archers and bomb throwers show up on wooden platforms in the water: shoot them from the boat or speed past.
North-east dock (1 o’clock): Shaman Slate and Duvalia
There are no enemies until you take the slate, so loot everything first:
- Emerald (Pear) (₦1,000): break the antelope skull above the altar of skulls and masks straight ahead as you land. The knife works.
- HAND-TO-HAND COMBAT (file): on the wooden shelves next to the altar.
- Ruby (Pear) (₦1,000): the skull on the left pole at the doorway of the first hut.
- There are chickens (eggs), and one guide found an Egg (Brown) in the shed left of the skulls (it may be random).
- At the back are two broken ladders, each with an assist jump (Chris boosts Sheva). Each leads to a chest: one holds the Idol (Silver) (₦2,000) and the other the Shaman Slate. Most sources put the Idol (Silver) in the left chest and the Shaman Slate in the right one (Evil Resource says the opposite). Open the left one first, since taking the slate starts the ambush; if the slate comes out, get ready before going for the other.
The Shaman Slate ambush. Taking it brings about a dozen Wetlands Majini, some with shields.
- First, the ones inside. Kill the Majini that come into the back of the settlement.
- Then the fenced entrance. Take up a spot at the fenced entrance at the rear of the settlement and hold it: that way they can’t get behind you.
- Shields: shotgun, or wait for them to turn their backs.
The Duvalia. One of the Majini becomes a Duvalia (6,000 HP). Its headbutt does 320 and is slow. Its bite puts you in DYING, and a second bite before you are revived kills you.
- Instant kill: a Flash Grenade, a Proximity Bomb, a Flash Round (if you already have the 4-1 Grenade Launcher), a Hand Grenade going off right under it, or a rocket (don’t spend the Rocket Launcher here).
- Without a grenade: shoot its legs until it kneels, then empty your gun into the part that opens up. You can also shoot the side appendage so the “mouth” opens, or hit the core with the magnum.
- Stop it hatching: drop the host with a knee shot and finish it from behind (Chris’s Neck Breaker or Sheva’s Throat Slit). A Majini that dies on the ground can’t transform either.
South of the north-east dock
Beetle (Brown) on a lone tree with purple flowers among wooden stakes, on the way to the poultry farm. Pull up close in the boat and Sheva picks it up from the boat, the AI too.
Sunken boat (north-west water, a small dot on the map)
No enemies here. The Rocket Launcher is in a silver case on the half-sunk boat. The Beetle (Brown) is on the end that sits under water. From the end of this chapter the Rocket Launcher is also sold in the shop (₦10,000).
North-west fish farm (11 o’clock)
No slate or enemies here, and the perch in the water are harmless.
- BSAA Emblem 14/30 (3-1 #3): on the underside of the open roof of the main hut facing the dock. Look up as you walk under it; a handgun is enough.
- Chalice (Silver) (₦2,000) in the chest up the ladder.
- Beetle (Brown): drop into the pool ringed with canoes; it is on the wall to your right, next to the ladder.
- Spare cash: shoot the fish jumping in that pool: they drop small amounts of money.
Poultry farm (centre island)
No enemies here either.
- BSAA Emblem 13/30 (3-1 #2): under the hut. Stand at the boat end of the dock, as far back as you can, face the hut and aim under its floor (pistol or rifle); step closer and it disappears. A grenade or rocket going off underneath also works, or, in co-op, one player drives round behind the hut and shoots it from there.
- Chalice (Silver) (₦2,000) in the chest in the lone hut.
- Beetle (Brown) on the decorated pole by the dock: on the left, right of the worn canoe.
- 2 Egg (White) on the wooden shelves right of the dock.
Eggs and Egg Hunt. The chickens lay random eggs: White, Brown and, rarely, Gold (the north-east dock’s chickens too). The Egg (Rotten) never comes from chickens: enemies drop it from 4-1 on. The Egg Hunt award needs all 4 types (White, Brown, Gold and Rotten) in your inventory at the same time. Wait 30–40 s by the chickens for a lay; drive off and come back to reset them.
South-west channel (7 o’clock): Warrior Slate
A wooden gate leads into a long channel. Before you get off the boat:
- The first outposts have a box of 30 machine-gun rounds and, on the other side, 10 handgun rounds.
- The second wooden wall has 10 handgun and 5 rifle rounds, and there is a Herb (Green) in the bottom-left corner.
- Beetle (Brown) on a tree right of the landing; Sheva grabs it from the boat.
The settlement. It has three huts and an open worship area. The worship area’s chest holds the Idol (Silver) (₦2,000), with a Herb (Green) beside it. Approaching the far huts (or taking the idol) makes a lot of Majini jump out of the water.
- Back up to the worship area or the landing with your back to something they can’t get round, so both approach paths are in front of you.
- Shotgun the shields and headshot the rest.
- Kill them all: survivors join the next event, and they drop a lot of loot here.
The Warrior Slate is in the chest in the far hut.
The blockade
On the way out, spiked barriers close the channel and archers and bomb throwers attack.
- Don’t stop the boat: drive in circles while the passenger shoots.
- Kill the ones at the barrier. Majini are perched up high beside the blocked passage: killing them opens the exit. Some guides say it also opens on its own after a while (a couple of minutes of circling), but aiming at the ones by the barrier is quickest.
- The narrow exit: Majini stand in the water with flaming arrows. Dodge them or run them over.
West door (9 o’clock, glowing marker)
If you still need slates, the Slate Map is on the deck by the door. If you come here first, archers ambush you in the pool. Examine the door four times to place all four slates: each one is a checkpoint.
No way back: the fourth slate. Beyond the door the path drops off the dock into the stream, and all that’s left is the village: the Marshlands don’t come back. Before placing the fourth slate, check you have:
- South dock: BSAA Emblem 12, Ruby (Pear), Beetle (Brown) and the Schedule Report file.
- Sunken boat: the Rocket Launcher and its Beetle (Brown).
- North-west fish farm: BSAA Emblem 14, Chalice (Silver) and Beetle (Brown).
- Poultry farm: BSAA Emblem 13, Chalice (Silver), Beetle (Brown) and both Egg (White) (and the Gold Egg if you’re going for Egg Hunt).
- From the boat: the Beetle (Brown) on the purple-flowered tree (south of the north-east dock) and the one in the south-west channel.
- Slate docks: the Emerald (Pear), Ruby (Pear), Idol (Silver) and HAND-TO-HAND COMBAT file in the north-east; the Ruby (Pear) and Beetle (Brown) in the east; the Idol (Silver) in the south-west.
If you’re going to farm the Marshlands, save and quit before opening the door.
Village approach
BSAA Emblem 15/30 (3-1 #4): right after the door, walk along the small dock, drop into the shallow water on the right and turn around. The emblem is in an opening in the wall under the platform you stepped off. Handgun.
The wet path has crows and a Longbow Majini on a tower that you can ignore or pick off with the rifle. Reaching the village is a checkpoint.
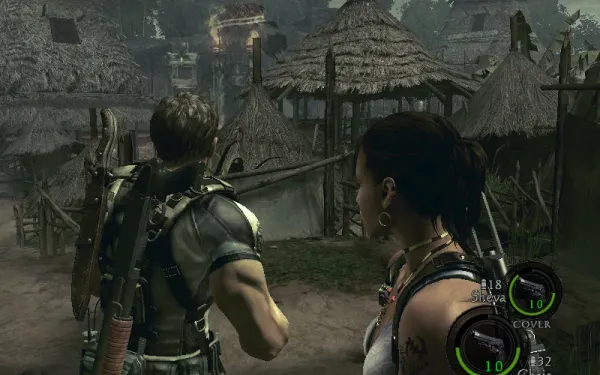
The Ndipaya village (Settlement)
The ambush has 3 triggers: walking into the north-west open area, taking the north-east path, or picking up the S&W M29. Any of them unleashes a horde with two Giant Majini (see the boss).
What’s here.
- West (left) side: a Herb (Green) and a Herb (Red), plus plenty of cash and ammo lying around. The building nearby holds another Herb (Red), 6 magnum rounds and 10 handgun rounds. On its upper floor, the “Knock down” prompt drops two torches on the enemies below.
- More magnum: according to the weapon card, there’s another pile of magnum ammo in a pot at the back of the stake plaza. A Steam guide counts 12 magnum rounds and 2 Herb (Red) in the whole village. Break every pot and crate: they give random ammo and cash.
- North-west: there is gold on the ground, but the holes are a spike trap that fires if you stand over them. Don’t walk over them: climb onto the platform and drop down.
- S&W M29: it lies by a dead BSAA soldier in the open-air hut on the east side (right of the central fire). It comes loaded with 6 rounds.
The M29 trap. If you take the M29 before the horde has been triggered, spiked poles rise and trap you in the hut while arrows rain in and the horde arrives. If the horde has already come out and you’ve cleared it, the trap doesn’t fire.
Safe order.
- Clear the west side (herbs, building, ammo) without stepping into the north-west open area.
- Trigger the horde by walking into the north-west open area.
- Fight from a spot where you can’t be surrounded: the watchtower stairs, the village entrance or the west building’s doorway. From its upper floor, drop the torches with “Knock down” when they bunch up below.
- Take the M29 once the village is clear: no trap any more.
Alternative (game2.sub.jp). Climb to the M29 hut by the ladder, not the steps. Once your partner is up too, jump down: the Majini then don’t ambush you inside. If it traps you anyway, kill the first wave and get out as soon as you can: stay inside and you get cornered.
The crank bridge (north-east path)
Do it with the horde dead. Climb up and turn the crank. Your partner runs across the lowered bridge and opens the locked door from the other side (and moves the bar). Don’t let go of the crank until they are across; with the AI, just wait. Jewel Beetle (₦2,000) on the right-hand side of the locked door, on the crank side. Crossing the bridge is a checkpoint.
The fort
Upstairs: Gold (Large), 5 rifle rounds and the file Village Youth’s Diary, on the bench on the top floor of the main hut (a Ndipaya youth’s diary: the oil-plant foreman “inoculates” the village). Downstairs are two pots, each with a snake: kill them for a chance at an egg.
The cave and the gondola
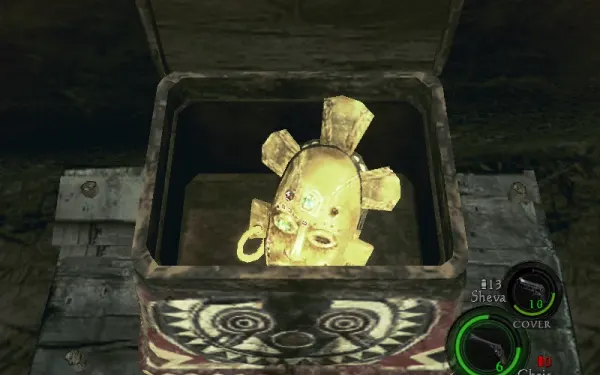
Don’t skip it: the Ceremonial Mask. Before turning left to the gondola, go straight into the cave: at the end is a chest with the Ceremonial Mask (₦4,000, found only in this chapter).
Then board the gondola: chapter over (award Completed Chapter 3-1, and the Chris Redfield Library file).
Farming
If you don’t take the slates, the docks stay quiet: visit the docks, the poultry farm (eggs), the fish farm (the fish drop cash) and the sunken boat (beetle and Rocket Launcher). Save and quit before opening the village door; quitting and saving keeps your loot and money. GameWith puts it at up to about ₦10,000 in a short time.
Boss — Giant Majini
Two Ndipaya almost 3 m tall with spiked maces, arriving with the village horde. The head is completely bulletproof: shoot the torso, back or legs. Handguns and machine guns barely scratch them. They hit other Majini freely.
Attacks: club smash (huge damage); kick (low damage, knocks you far back); stomp, which instantly kills anyone in DYING; a lunge after a war cry that throws back everyone nearby; and a double club swing that also kills Majini.
- Keep your distance and use the hut walls. Never lie in DYING within its reach: your partner must revive you as soon as you drop, or lure it away.
- Magnum. One S&W M29 shot drops it to its knees. Without it, use a shotgun or rifle on the body and above all the legs: several hits in a row make it stagger.
- Kneeling → melee. Step in from the front and press the melee prompt as soon as it shows. If it crosses its arms and slides back (blocking), a different prompt appears, and when it recovers, a finisher: use those too. Then back off again.
- Explosives. Hand Grenade and Proximity Bomb work very well: plant bombs in its path and let it walk over them.
- The other Majini. Kill the archers first. Let the giant’s swings clear the ones near it.
- In co-op: split up so each giant chases one of you, or have one player act as bait while the other shoots its legs from behind. Whoever drops it does the melee.
- Reward: each one drops a Blue Enigma (₦3,000). Leave either alive and that treasure is lost for this run.
Before you leave you should have: the S&W M29 with all the village’s magnum ammo, the unused Rocket Launcher (for Irving in 3-3), the shotgun and rifle with ammo, and healing. At the 3-2 shop: sell the 3-1 treasures (₦31,000) and start upgrading the M29.
Don’t leave without: the 4 BSAA Emblem (lake pole, under the poultry-farm hut, fish-farm roof, under the village dock) · the 7 Beetle (Brown), the 2 Chalice (Silver) and the 2 Idol (Silver) (found only here) · the 3 files · the Rocket Launcher · the S&W M29 · both Blue Enigma · the Ceremonial Mask in the cave. If you still need a Gold Egg for Egg Hunt, this is the best chapter to replay.