Items
Key items (where they are and what they open), healing and crafting, and everything else you pick up.
Key items
71| Item | Where | Use |
|---|---|---|
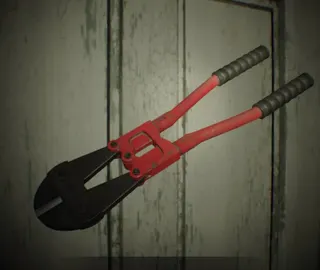 Bolt Cutters Bolt Cutters | 1 · Prologue · Guest House Guest House B1, Guard's Area: on the workbench (the same one as the List of Names). | Cut two chains: the one on the cell door in the Guard's Area (where Mia is) and the one on the chained wardrobe in the Back Corridor (1F, next to the Kitchen door), which holds the Fuse. They take 2 slots. No further use after the Guest House. |
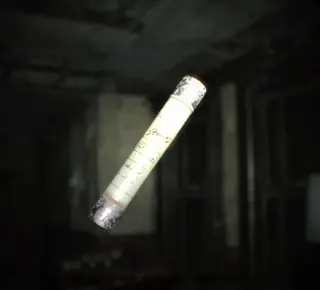 Fuse Fuse | 1 · Prologue · Guest House Guest House 1F, Back Corridor: inside the chained wardrobe next to the Kitchen door (needs the Bolt Cutters). | Fit it in the Living Room fuse box: it powers the "Stairs" button on 2F, which lowers the staircase to 3F (Store Rooms A and B, the attic and the Mia fight). |
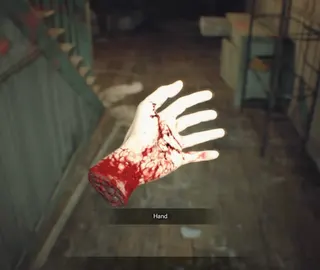 Hand Hand | 1 · Prologue · Guest House Guest House 1F, Stairway Corridor: on the floor after Mia's second attack, when she cuts off Ethan's left hand with the chainsaw. | It has no use: the hand is reattached later, in a cutscene. It is a story item only. |
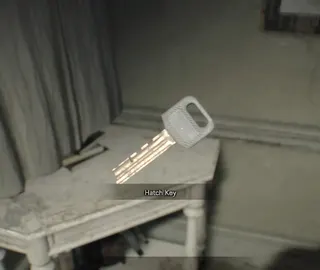 Hatch Key Hatch Key | 2 · Main House · Processing Area Main House 1F, Main Corridor: on the small white table in the NE corner, at the end of the long corridor. Jack cuts you off the first time. | Opens the floor hatch in the Pantry → crawlspace under the house (Antique Coin #2) → Laundry Room, the first safe room. Jack does not follow you into the crawlspace. If Jack catches you at the hatch he cuts off your leg: see Leg. |
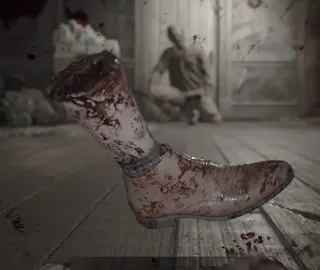 Leg Leg | 2 · Main House · Processing Area Event: if Jack catches you at the Pantry hatch, he cuts off your right leg. His low swipe in the Morgue fight can also do it. And with a Blade Molded's special slash if you don't block or dodge it. | Pick the leg up and use a First Aid Med to reattach it before you bleed out (Jack leaves one on the Pantry floor). A Strong First Aid Med works too. One source mentions only the Strong First Aid Med; two others confirm the normal First Aid Med is enough. |
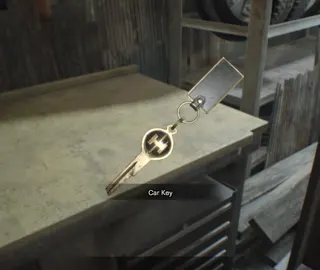 Car Key Car Key | 2 · Main House · Processing Area Main House 1F, Garage: on the workbench, east side. Text: "You must have dropped it when you were attacked in the attic." On Madhouse it is in the locked toolbox on that workbench (the pick is in the yellow cabinet SW in the same Garage). | Just carry it: in the Jack fight in the Garage it lets you start Ethan's car and ram him. It is optional; you can win with guns. In Daughters (Banned Footage Vol. 2) Marguerite, lucid for a moment, gives Zoe another Car Key: escaping by car is the bad ending. |
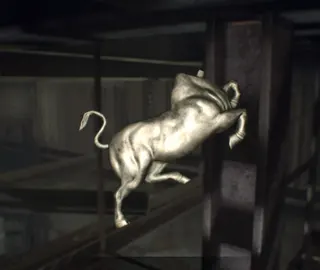 Ox Statuette Ox Statuette | 2 · Main House · Processing Area Main House 1F, Garage upper walkway (ladder by the workbench, open after the Jack fight): inside the picture frame on the metal shelves. Turn the frame around, undo the screw, turn it back and take it. | Fits the indentation on the ornate door at the end of the Main Corridor → Main Hall. |
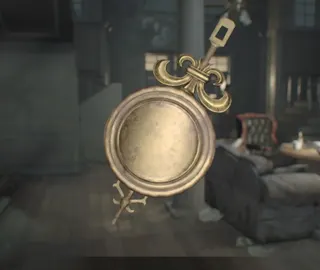 Clock Pendulum Clock Pendulum | 2 · Main House · Processing Area Main House 1F, Main Hall: inside the grandfather clock in the NE corner. The label reads "Living room". | Hang it in the Living Room grandfather clock (Main House 1F): it opens and gives you the White Dog's Head. Achievement "Nice Try": put an unrelated item on a shadow plinth, this pendulum for example. |
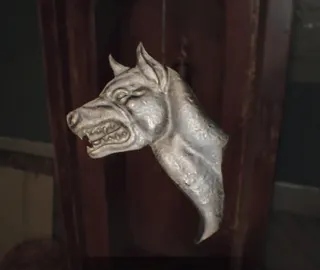 White Dog's Head White Dog's Head | 2 · Main House · Processing Area Main House 1F, Living Room: inside the grandfather clock, after hanging the Clock Pendulum. It is the cupronickel relief. | One of the 3 reliefs for the Main Hall front door (the three-dog door) → Yard, chapter 3. The Memo About Relief (Grandma's Room) says where each relief is. |
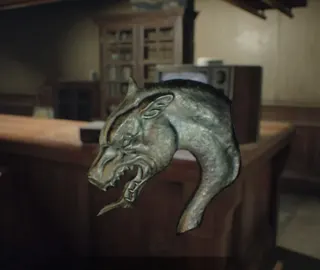 Blue Dog's Head Blue Dog's Head | 2 · Main House · Processing Area Main House 2F, Recreation Room: inside the large orange book on the cabinet in the SW area. Examine its pages. | Another of the 3 reliefs for the Main Hall front door. It is the bronze one. |
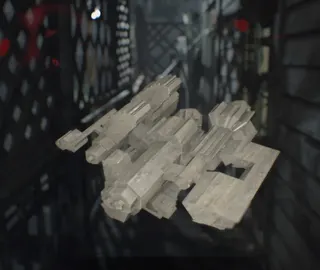 Wooden Statuette Wooden Statuette | 2 · Main House · Processing Area Main House 2F, Bathroom: inside the black bathtub. Drain the water to see it. Taking it triggers Jack's bathroom ambush. | Place it on the shadow plinth in the Main Hall alcove ("Sky Hunter" painting) and rotate it until the shadow is a hawk → crawlspace to the Drawing Room. Required on Easy and Normal. On Madhouse you can skip it if you buy the Scorpion Key from the Main Hall birdcage. |
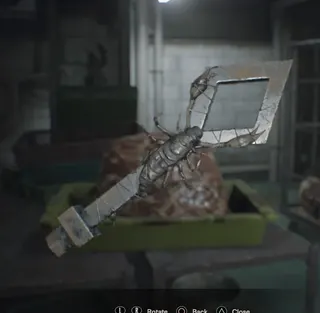 Scorpion Key Scorpion Key | 2 · Main House · Processing Area Processing Area, Meat Storage: stuck in the hunk of meat on the centre table. Pulling it out drops a Molded from the Tool Storage ceiling. On Madhouse it is not here: you buy it from the blue armchair birdcage in the Main Hall for 3 Antique Coins. | Opens the scorpion doors: - Main Hall 1F → Stairway Entry, a shortcut to the Processing Area. - Recreation Room → Grandma's Room (the Broken Shotgun and 2 files: Memo About Relief and Doctor's Letter). Not strictly needed to finish the game, but Grandma's Room has the shotgun: get it. |
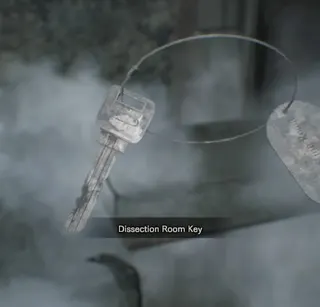 Dissection Room Key Dissection Room Key | 2 · Main House · Processing Area Processing Area, Incinerator Room: inside the leftmost incinerator, with Travis (already a Molded). | Opens the Dissection Room door (Processing Area). Incinerator Room Memo puzzle, "3 a's and a handprint": open the far-right drawer (Tamara, the only name with three a's) and leave it open; then open the drawer with the bloody handprint. The leftmost incinerator opens. |
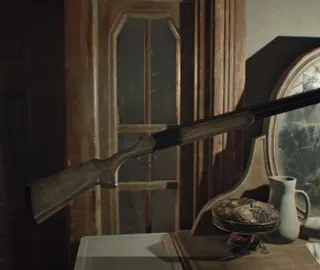 Broken Shotgun Broken Shotgun | 2 · Main House · Processing Area Main House 2F, Grandma's Room (Scorpion Key): propped on the boxes next to the door. Same on every difficulty. | Two ways: - Swap it for the shotgun held by the Display Room statue (Main House): you take the M37 Shotgun and the door does not lock. - Combine it with a Repair Kit → M21 Shotgun. The statue takes either this or the Model Shotgun, so you can end up with both the M37 and the Broken Shotgun. Recipe: Broken Shotgun + Repair Kit |
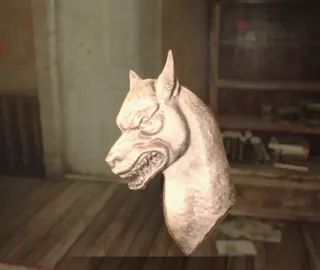 Red Dog's Head Red Dog's Head | 2 · Main House · Processing Area Processing Area: you first see it in the Dissection Room; trying to take it makes Jack move it. It ends up hanging above the Morgue, in the Morgue Entry. Taking it in the Morgue starts the second Jack fight. | The last of the 3 reliefs for the Main Hall front door. It is the copper one. With all three, head out to the Yard (chapter 3). Stock up on ammo and heals before taking it: the chainsaw duel starts the moment you grab it. |
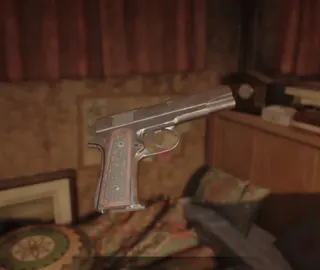 Broken Handgun Broken Handgun | 3 · Yard & Old House Yard, Zoe's Trailer: on the bed. On Madhouse, Old House (West) 2F, Potting Room: table in the NE. | Combine it with a Repair Kit → M19 Handgun (7 rounds, stronger than the G17). Recipe: Broken Handgun + Repair Kit There are only 2 Repair Kits: one fixes this handgun or the Broken Shotgun, not both. |
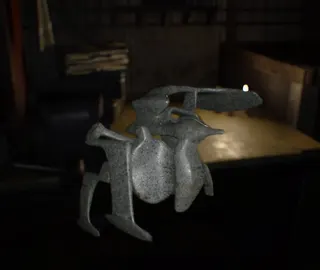 Stone Statuette Stone Statuette | 3 · Yard & Old House Old House 1F, Cellar: on the workbench. Taking it makes Marguerite start roaming the house (she shuts the door as you leave the Living Room). | Place it on the Gallery shadow plinth ("Venomous Predator" painting) and rotate it until the shadow is a spider → hidden passage to the west side of the Dilapidated Room. |
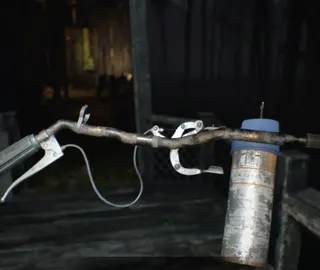 Burner Grip Burner Grip | 3 · Yard & Old House Old House 1F, Back Porch: inside the trash bin opposite the Gallery doors (the torch glimpsed in the "Mia" tape). | Combine it with the Burner Nozzle → Burner, the flamethrower: the key weapon against Marguerite's insects. Recipe: Burner Grip + Burner Nozzle |
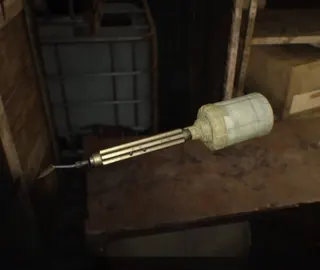 Burner Nozzle Burner Nozzle | 3 · Yard & Old House Old House 1F, Water Station: on the table opposite the door. | Combine it with the Burner Grip → Burner. Recipe: Burner Grip + Burner Nozzle |
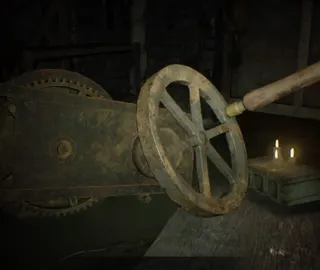 Crank Crank | 3 · Yard & Old House Old House 1F, crawlspace under the Dilapidated Room: on the floor at the far end (where the "Mia" tape ends). | Turns the gear mechanisms that raise walkways and bridges: the one on the west side of the Dilapidated Room and the one at the end of the outside Walkway (bridge to the Outhouse, with the Crow Key). Per the wiki it also works the bridge from the Testing Area to the piers and the last bridge to the Boat House (chapter 5, Molded appear). Do not leave it in the box until you reach the Boat House. |
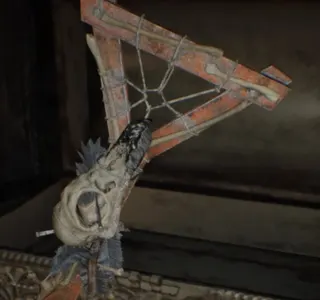 Crow Key Crow Key | 3 · Yard & Old House Old House 1F, Outhouse: inside the large ornate white chest. | Opens the doors with the dead two-headed crow: - Old House, Dilapidated Room west door → stairs to the Altar (2F). Approaching it starts the first Marguerite fight. - Main House, Drawing Room → Supplies: the Grenade Launcher, Solid Fuel, Gunpowder and a Flame Round. |
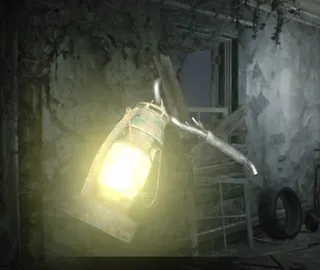 Lantern Lantern | 3 · Yard & Old House Dropped by Marguerite when you beat her in the Greenhouse (in whichever room you defeat her). "She used its light to control the insects." | Hang it on the lantern scale lock at the end of the Old House 2F hall (the door past the Altar) → the Kid's Room, Detention Room and Hidden Room wing (D-Series Arm). In Bedroom (Banned Footage Vol. 1) Clancy uses another Lantern: it must hang on its hook before Marguerite comes back, and later goes into the projector box. |
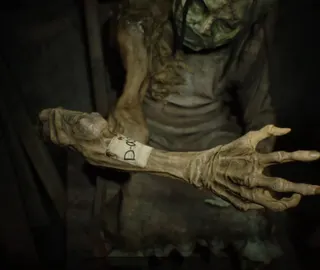 D-Series Arm D-Series Arm | 3 · Yard & Old House Old House 2F, Hidden Room: on the body of the dead child in the chair. To get there, examine the Detention Room dollhouse and crouch through the cut in the wall behind the bed. Label "D-002". | Give it to Zoe with the D-Series Head (chapter 5) so she can make the Serum. Having it makes the Memo on Deputy's Head appear in the Trailer fridge and the Snake Key in the Dissection Room. |
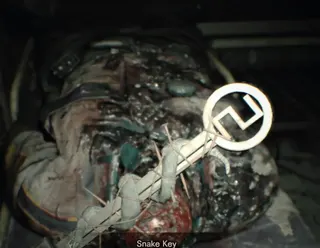 Snake Key Snake Key | 4 · Back to the Main House & Testing Area Processing Area, Dissection Room: inside the body of the headless police deputy (reach down his neck). It only appears once you have the D-Series Arm. | Opens the 3 snake doors: - Processing Area, Morgue Entry → Back Passageway. - Main House 2F, Main Corridor → Kid's Room. - Main House 2F, Main Hall → Master Bedroom (clock at 10:15, Backpack #2). In Bedroom (Banned Footage Vol. 1) the Snake Key is the escape key: it comes out of the birdcage after the shadow puzzle (Iron Statuette and Fork) and opens the hatch under the bed. Equip the Knife when Marguerite bursts in. |
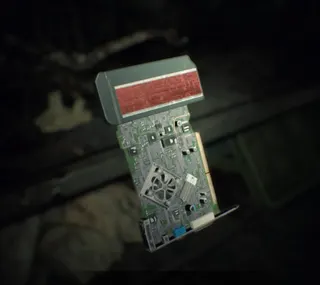 Keycard (Red) Keycard (Red) | 4 · Back to the Main House & Testing Area Processing Area, Workshop: on the central workbench. You reach it by the hidden stairs under the Master Bedroom bed: set the bedside clock to 10:15, the time on every clock in the house (Clock Memo). | With the Keycard (Blue), opens the electronic gate in the Yard, Courtyard → Testing Area. It is a computer expansion card repurposed as a key. |
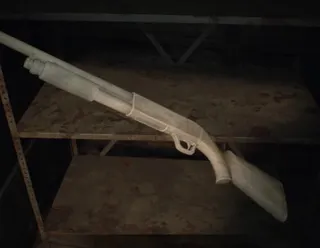 Model Shotgun Model Shotgun | 4 · Back to the Main House & Testing Area Main House attic: metal shelves in the SE corner. On Madhouse it comes earlier, in the Processing Area Dissection Room (the shelves that divide the room, chapter 2). | A replica the Display Room statue accepts in place of the real shotgun, without the door locking you in. On Easy and Normal, use it to get the Broken Shotgun back (and make the M21 with a Repair Kit) without giving up the M37. On Madhouse it is how you take the M37. It takes 2 slots. |
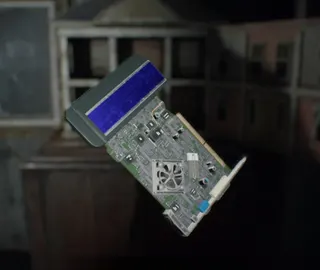 Keycard (Blue) Keycard (Blue) | 4 · Back to the Main House & Testing Area Main House attic: secret compartment in the north wall (the dollhouse). It opens with the "Judgment" shadow plinth: rotate the statuette until the shadow is the executioner raising the axe. | With the Keycard (Red), opens the electronic gate in the Yard, Courtyard → Testing Area. The attic ladder comes down with the remote hidden in the lamp-shaped trophy in the Kid's Room (clues: Lucas' Journal and Torn Page from Journal). |
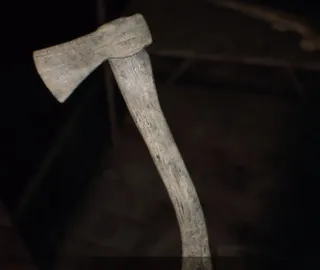 Toy Axe Toy Axe | 4 · Back to the Main House & Testing Area Main House attic: metal shelves in the SE corner. | Place it on the shadow plinth hidden in the bushes, SW corner of the Yard, Courtyard, by the numbers 1, 3, 5, _, 9. Rotate it until the shadow is a 7: the silver chest opens with a Stabilizer. Optional and very easy to miss. Same on every difficulty. |
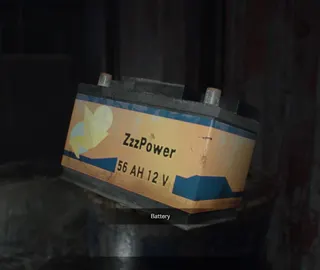 Battery Battery | 4 · Back to the Main House & Testing Area Testing Area 2F, Platform: on the barrel near the top of the stairs. | Fit it in the control panel on the east side of the Barn (1F): it powers the elevator and the Fat Molded comes out (2 on Madhouse). Come in with Neuro Rounds or Flame Rounds ready. |
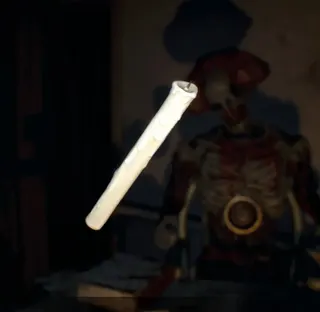 Candle Candle | 4 · Back to the Main House & Testing Area Testing Area 1F, Dummy Room: in the hand of the mechanical dummy (the clown) in the chair. | The centrepiece of the Party Room: light it at the Party Room gas stove, burn the rope on the Balloon Room door with it and pop the balloons. Finally, place it lit on the cake in the Cake Room. In the Happy Birthday tape it also burns the Straw Doll. |
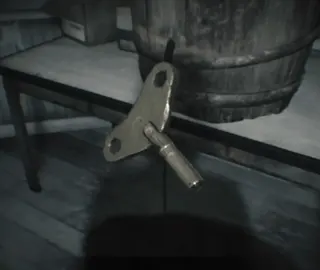 Winding Key Winding Key | 4 · Back to the Main House & Testing Area Testing Area 1F, Cake Room: inside the barrel (keg) on the east side. | Trap. In the Happy Birthday tape it winds up the clown. In the real Party Room do not take it: opening the keg spills fuel and lighting the cake then kills you. It is what kills Clancy in the tape. |
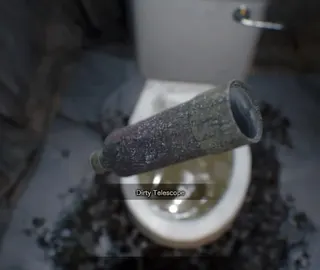 Dirty Telescope Dirty Telescope | 4 · Back to the Main House & Testing Area Testing Area 1F, Toilet (behind the clown): flush it, then examine the bowl. | Equip it and walk through the automatic shower between the Party Room and the Cake Room: it comes out clean as the Telescope. |
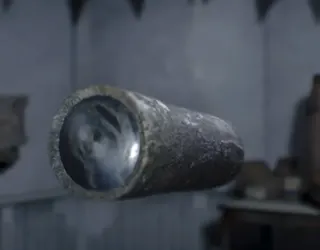 Telescope Telescope | 4 · Back to the Main House & Testing Area From the Dirty Telescope, after washing it in the Cake Room automatic shower. | It has a polarising filter: look at the Party Room wall screens through it to see 3 symbols, the code for the picture padlock on the Cake Room cabinet (Straw Doll). Guides describe the symbols differently (a hanged man or the chainsaw man, a tombstone or a crow in a hat, a baby): read them in your own game. |
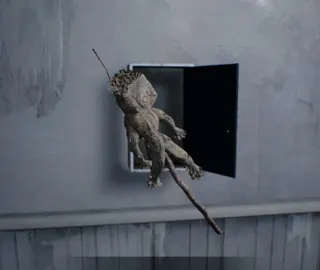 Straw Doll Straw Doll | 4 · Back to the Main House & Testing Area Testing Area 1F, Cake Room: the cabinet with the picture padlock, SE corner (Telescope code). | Burn it on the Party Room gas hob → Dummy Finger. Needed in the tape; optional in the real Party Room. |
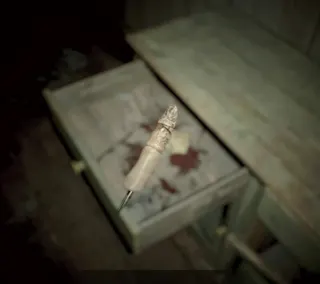 Dummy Finger Dummy Finger | 4 · Back to the Main House & Testing Area Inside the Straw Doll, when you burn it on the hob. | Put it back on the clown's hand in the Dummy Room. A Happy Birthday tape step. |
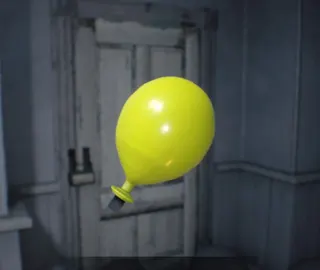 Balloon Balloon | 4 · Back to the Main House & Testing Area Testing Area 1F, Balloon Room: on the floor NW, among the grey balloons; pop them with the Candle to find it. | Fill it at the gas outlet on the NW wall of the Party Room: it bursts and drops the Quill Pen. A tape step. |
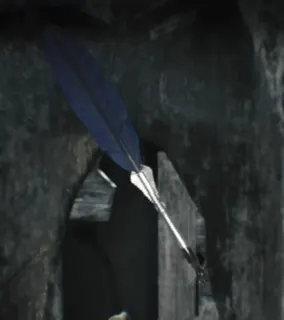 Quill Pen Quill Pen | 4 · Back to the Main House & Testing Area Drops from the Balloon when it bursts at the gas outlet. | Give it to the clown with the Dummy Finger and the Winding Key: he carves LOSER on your arm, the password for the Back Room door. A tape step. |
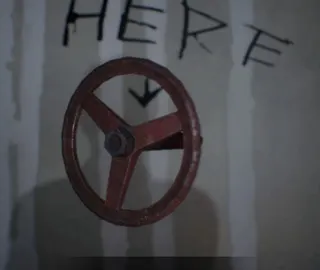 Valve Handle Valve Handle | 4 · Back to the Main House & Testing Area Testing Area 1F, Back Room (behind the LOSER door off the Balloon Room): on the wall. | Fit it in the valve slot at the Cake Room doorway to stop the water, so the Candle reaches the cake still lit. The one essential item in the real Party Room. |
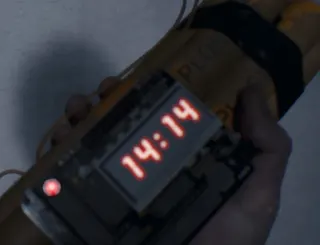 Time Bomb Time Bomb | 4 · Back to the Main House & Testing Area Drops into the Cake Room when you place the lit Candle on the cake. | Pull the loose boards off the wall left of the barrel and drop the bomb through the gap: the blast opens the exit. Keep holding it and you die. |
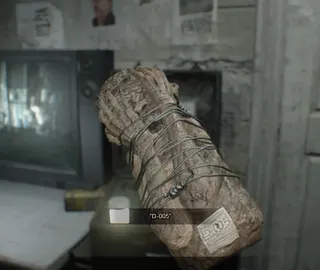 D-Series Head D-Series Head | 4 · Back to the Main House & Testing Area Testing Area 1F, Monitoring Room (the safe room after the Party Room): inside the specimen case next to the TV. Label "D-005". | Give it to Zoe with the D-Series Arm (chapter 5) so she can make the Serum. |
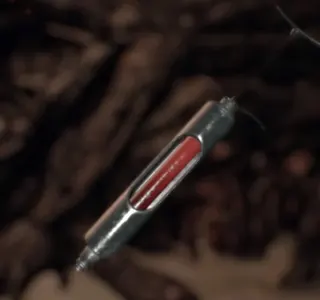 Serum Serum | 5 · The Boat House Boat House (Storage) 2F, Storage Entry: untie Zoe while carrying the D-Series Arm and D-Series Head; she makes 2 doses and hands them over. Taking them starts the Mutated Jack fight. | - Dose 1: injected into Mutated Jack with a button prompt to end the fight. - Dose 2: the choice. Curing Mia gives ending 1 ("End of the Night"); curing Zoe, ending 2 ("Just A Memory Now"). Point of no return: handing the pieces to Zoe closes the estate until the finale. Collect the Treasure Photos, coins and anything else first. |
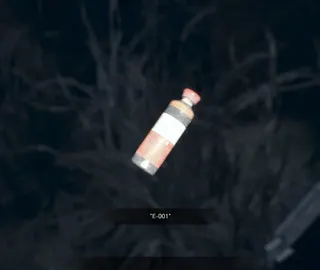 Strange Bottle Strange Bottle | 6 · The Wrecked Ship (Mia) In Mia's pocket when you take control on the Wrecked Ship. It is marked "E-001". | It holds Eveline's tissue sample: later it becomes the Eveline Tissue Samples Ethan carries into the mine. The exact point where it changes name is unclear. |
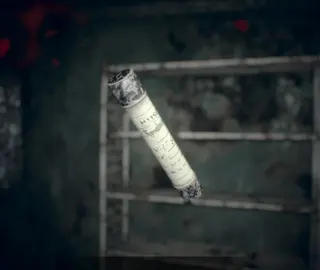 General Purpose Fuse General Purpose Fuse | 6 · The Wrecked Ship (Mia) Wrecked Ship 1F, Laundry Room: inside the fuse box on the south wall. | Two uses: - Powers the door lock in the 1F Main Corridor → Stairwell. - Later take it back out (that door locks again) and fit it, with the Power Cable, in the panel inside the elevator → the elevator reaches S2. |
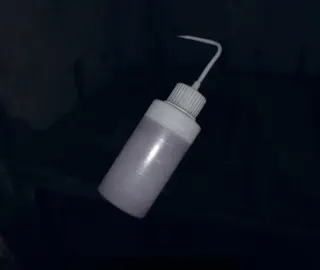 Corrosive Corrosive | 6 · The Wrecked Ship (Mia) In the flashback (2014): Cargo Bay S2 ×3 (table behind the green gate) and Store Room S2 ×1. In the present: Lounge 2F ×3 (in the picture-puzzle safe), Guest Room 2F ×1 (foot of the bed), Sick Bay 3F ×1 (NE medicine cabinet) and Recreation Room 1F ×1 (bench by the door; not on Madhouse). | Melts padlocks and wall panels. In the present: - 3F Control Room → Main Corridor. - 2F Main Corridor → south half of the Bunk Room (Captain's Cabin Locker Key). - 1F Main Corridor → Recreation Room (Backpack #3). - Workers Access Passage 2 panel (S2) → Antique Coin #18. - Cargo Bay panel (S2). In the flashback they open the door to the No. 2 Engine Room, the Store Room and two panels holding Remote Bombs. Lounge safe: rotate or flip each of the 3 pictures on the right wall until it matches its twin on the left wall. The present has 6 for 5 uses: one is spare. |
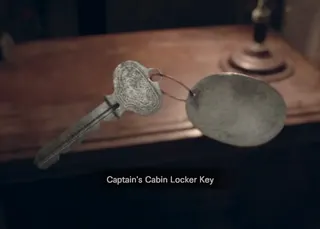 Captain's Cabin Locker Key Captain's Cabin Locker Key | 6 · The Wrecked Ship (Mia) Wrecked Ship 2F, Bunk Room, south half (Corrosive door): on the desk next to the collapsed bunk. Taking it spawns a Crawler Molded (not on Easy). | Opens the weapon locker in the corner of the Captain's Cabin (4F): P19 Machine Gun and 1 Remote Bomb. Optional, but the P19 is the main gun for the mines. |
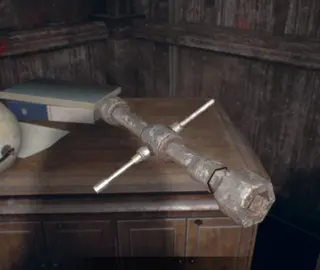 Lug Wrench Lug Wrench | 6 · The Wrecked Ship (Mia) Wrecked Ship 4F, Captain's Cabin: on the desk, next to the Ship Map. | Opens the access panel on the elevator roof: you drop through it into the stalled car. |
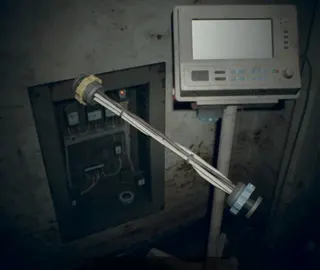 Power Cable Power Cable | 6 · The Wrecked Ship (Mia) Wrecked Ship 3F, Sick Bay: attached to the medical apparatus in the NW corner (unscrew both ends). Taking it spawns a Fat Molded. | Goes in the elevator panel with the General Purpose Fuse: the elevator works again. The Mechanic's Memo (on the elevator wall) sends you here for it. |
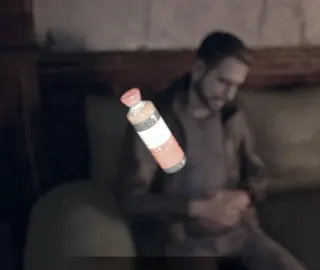 Eveline Tissue Samples Eveline Tissue Samples | 6 · The Wrecked Ship (Mia) Mia's Strange Bottle. Ethan gets it when control returns to him on Wrecked Ship S2 (or after the Mia fight, if you chose Zoe). | Use it on the sample case in the Storage Space (Salt Mine B3, the large cooler SE) → E-Necrotoxin. It cannot be stored in the Item Box: it takes a slot until the mine. |
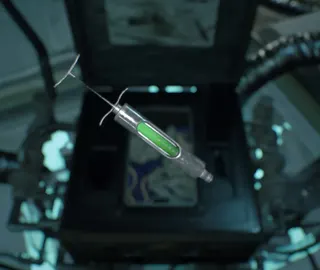 E-Necrotoxin E-Necrotoxin | 7 · Swamp · Salt Mines Salt Mine B3, Storage Space: from using the Eveline Tissue Samples on the sample case. Taking it opens the way on through the mine. | The toxin that kills Eveline. It is injected automatically, in a cutscene, when you reach her in the Guest House attic (chapter 8). It cannot be removed from the inventory or stored in the box. |
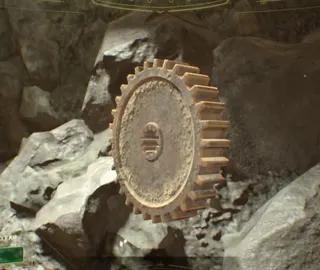 Gear Gear | NaH · Not a Hero · Salt Mines and Lab Mining Work Area, Work Sector A: on the rocks at the end of the NE offshoot. Same on every difficulty. | With the Crank (Not a Hero), it works the mechanism on the north side of Work Sector A: it lowers the crane container holding the Cell Key. |
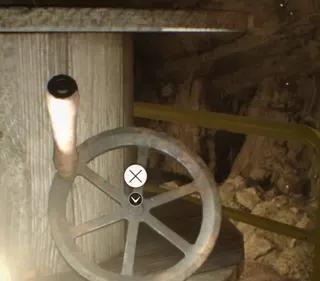 Crank (Not a Hero) Crank (Not a Hero) | NaH · Not a Hero · Salt Mines and Lab Work Sector A: on Easy and Normal, on the large wooden spindle on the east side of the central area, next to 2 Neuro-stun Grenades. | With the Gear, the mechanism on the north side of Work Sector A → lowers the container with the Cell Key. On Professional, Shacknews takes it in the same central area as on Normal, while the Mama Mold is stunned after a deflect; no other source gives its location. |
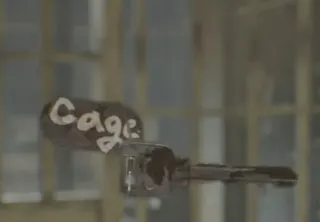 Cell Key Cell Key | NaH · Not a Hero · Salt Mines and Lab Work Sector A: in the container in the centre of the cavern, once you lower it from the crane with the Gear and the Crank. | Opens the Mining Work Area Entrance door → the Cell of the captured BSAA operator. It is one of Lucas's traps; you get the High-Grade Filter there. |
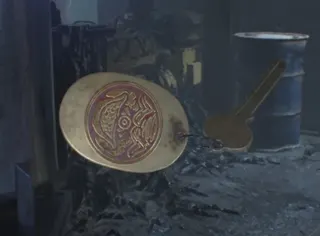 Clown Key Clown Key | NaH · Not a Hero · Salt Mines and Lab Mine Cart Yard, Repair Yard: on the mechanical clown in the middle of the room (the same clown as in the Happy Birthday tape). | Opens the clown doors: Mine Cart Yard Corridor → Back Passage; Mining Work Sector A → Passage; Storage Area Passage → Store Room West. It also works the Central Cavern console that starts the Shield Machine. One source counts 3 doors and another 2; both list the console. |
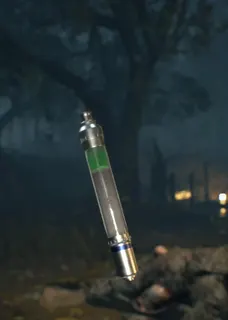 Cure for E-Type Infection Cure for E-Type Infection | EoZ · End of Zoe: from the Swamp to the Main House (Joe) There are two in the story: - Joe's House, Shack: on the soldier's body at the far end of the corridor. - Paddle Boat 1F, Apparatus Platform: activate the machine. Taking it triggers the Swamp Man ambush. | "Medicine made to cure an infection caused by an E-type mutamycete. Should work on Zoe." The first is used on Zoe back in Joe's House (cutscene); the second, in the Baker house after the Swamp Man fight. The Base holds the order to move the synthesis station onto the paddle boat: that is why the second dose is there. |
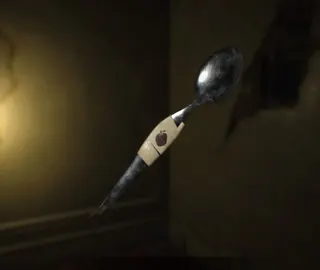 Spoon Spoon | BF1 · Banned Footage Vol. 1 · Nightmare, Bedroom and Ethan Must Die Bedroom: on the food tray next to the bed. | Use it to free your wrist from the cuff. If Marguerite punishes you she screws the cuff tight again: the spoon loosens it again. The tape on the handle shows an apple, the third symbol of the storage-room padlock (snake, leaf, apple). |
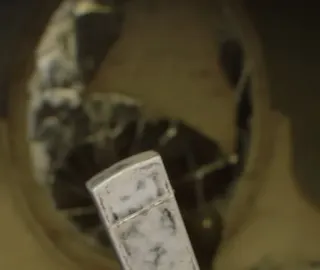 Lighter Lighter | BF1 · Banned Footage Vol. 1 · Nightmare, Bedroom and Ethan Must Die Bedroom: in the vase on the dresser. Do not open the right-hand drawer: it jams. | Lights the Stove with the Solid Fuel to burn the spiders covering the Corkscrew. In Daughters (Vol. 2) Zoe starts with a Lighter: turn it off when you crouch past Marguerite, whose sight is poor. |
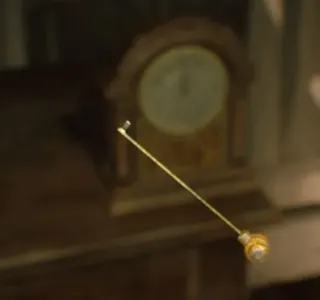 Broken Clock Hand Broken Clock Hand | BF1 · Banned Footage Vol. 1 · Nightmare, Bedroom and Ethan Must Die Bedroom: on the small bedside clock. | Pick the grandfather clock lock by the door with it: Untitled Painting A is inside (the clock shows 5:00). The chime alerts Marguerite: close the clock, hang the Lantern and get back into bed. |
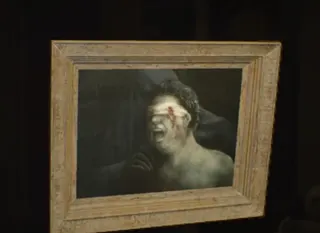 Untitled Painting A Untitled Painting A | BF1 · Banned Footage Vol. 1 · Nightmare, Bedroom and Ethan Must Die Bedroom: inside the grandfather clock (Broken Clock Hand). | The blindfolded man. With B and C, hang them on the wall marks in the order B – C – A to open the book (Sewing Needle). Later, in the order A – B – C to see the padlock clue (the fig leaf). Keep A; put B and C back where they were. |
 Untitled Painting B Untitled Painting B | BF1 · Banned Footage Vol. 1 · Nightmare, Bedroom and Ethan Must Die Bedroom: on the barrel next to the bed, covering the spiders. | The man eaten by crows. It goes on the wall with A and C (order B – C – A, later A – B – C). Put it back on the barrel before Marguerite comes in, and move it again to place the Stove. |
 Untitled Painting C Untitled Painting C | BF1 · Banned Footage Vol. 1 · Nightmare, Bedroom and Ethan Must Die Bedroom: on the wall left of the door. | The burning man. It goes on the wall with A and B (order B – C – A, later A – B – C). Put it back on its nail when you are done. |
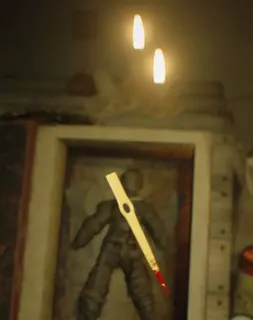 Sewing Needle Sewing Needle | BF1 · Banned Footage Vol. 1 · Nightmare, Bedroom and Ethan Must Die Bedroom: stuck in the voodoo doll in the book that opens with the paintings in the order B – C – A. | Put it in the bedside clock and set 5:00: the bed slides aside and reveals the Snake Key hatch. It makes noise: use the clock again to slide the bed back, tidy the room and get back into bed. |
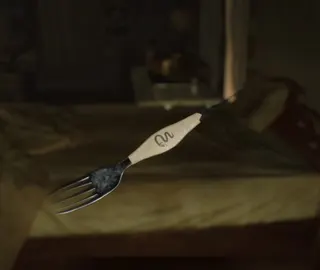 Fork Fork | BF1 · Banned Footage Vol. 1 · Nightmare, Bedroom and Ethan Must Die Bedroom: on Marguerite's second tray, with the Stove. | Three uses: - Pry the nailed board off the cabinet in the back wardrobe → Solid Fuel. - Stick it in the stew → dead rat #1 (achievement "Ratcatcher"). - On the rear pedestal of the shadow puzzle: its prongs are the fangs of the snake's head. The tape on the handle shows a snake, the first symbol of the padlock. In Daughters (Vol. 2) Zoe takes another Fork from the side table in Grandma's room to pull the 2 nails from the boarded window and climb out onto the veranda. |
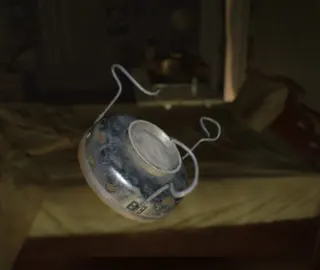 Stove Stove | BF1 · Banned Footage Vol. 1 · Nightmare, Bedroom and Ethan Must Die Bedroom: on Marguerite's second tray, with the Fork. | Combine it with the Solid Fuel, set it on the barrel (move Untitled Painting B first) and light it with the Lighter: the spiders burn and the Corkscrew is free. Then tidy up fast: stove off, painting B on the barrel, Lantern hung. Recipe: Stove + Solid Fuel |
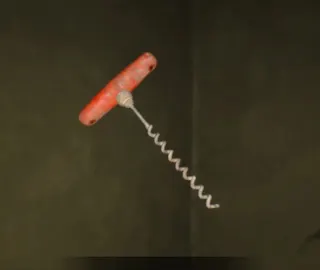 Corkscrew Corkscrew | BF1 · Banned Footage Vol. 1 · Nightmare, Bedroom and Ethan Must Die Bedroom: under the spiders on the barrel, after burning them with the Stove. | Unscrews the two lamp hooks: Lantern Hook A (by the bed) and Lantern Hook B (at the back of the storage room). |
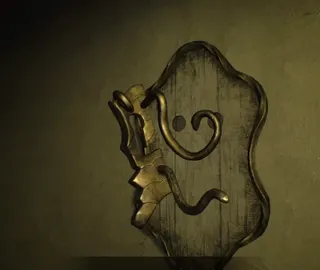 Lantern Hook A Lantern Hook A | BF1 · Banned Footage Vol. 1 · Nightmare, Bedroom and Ethan Must Die Bedroom: by the bed; unscrew it with the Corkscrew. | Combine it with Lantern Hook B → Iron Statuette. Recipe: Lantern Hook A + Lantern Hook B |
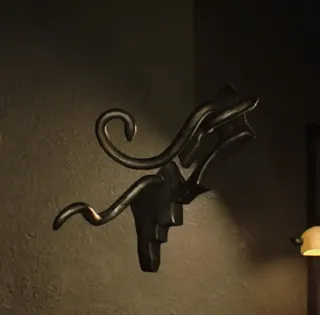 Lantern Hook B Lantern Hook B | BF1 · Banned Footage Vol. 1 · Nightmare, Bedroom and Ethan Must Die Bedroom: at the back of the storage room (snake – leaf – apple padlock); unscrew it with the Corkscrew. | Combine it with Lantern Hook A → Iron Statuette. Recipe: Lantern Hook A + Lantern Hook B |
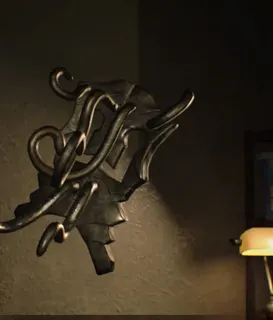 Iron Statuette Iron Statuette | BF1 · Banned Footage Vol. 1 · Nightmare, Bedroom and Ethan Must Die Bedroom: by combining the two lamp hooks. | First cut the tape on the projector box with the Knife and put the Lantern inside. Then set the statuette on the front pedestal and rotate it until its shadow fills Medusa's face; the Fork goes on the rear one (snake's head). The birdcage opens: Snake Key. Recipe: Lantern Hook A + Lantern Hook B |
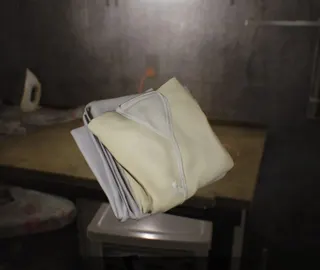 Change of Clothes Change of Clothes | BF2 · Banned Footage Vol. 2 · 21, Daughters and Jack's 55th Birthday Daughters: in the Main House Laundry Room. | Take it to the girl in the Kids' Room (Eveline): it is the first objective. For the true ending, do the extra steps first (Lucas's code, Lock Pick, Small Component, attic): handing over the clothes closes them off. |
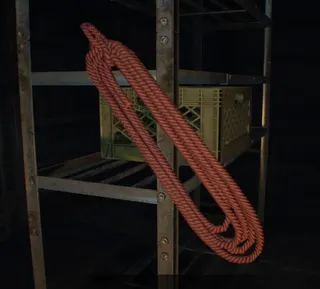 Rope Rope | BF2 · Banned Footage Vol. 2 · 21, Daughters and Jack's 55th Birthday Daughters: in the Garage; Jack sends you for it. | When Jack turns on you, run to the Recreation Room, shut the door and tie it with the rope. |
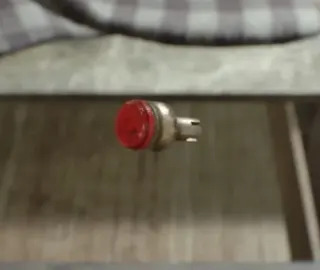 Small Component Small Component | BF2 · Banned Footage Vol. 2 · 21, Daughters and Jack's 55th Birthday Daughters: in the locked Bathroom drawer; open it with the Lock Pick from the crawlspace (entrance in the Pantry). | Fit it on the switch of the lamp trophy in the Kids' Room (on the right as you enter): the attic opens. On the attic laptop enter 1019 (Lucas's phone code, seen over his shoulder at the table) to read his list. True ending only, and before you give the girl the clothes. |
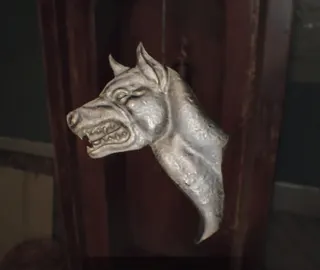 Dog Head Relief Dog Head Relief | BF2 · Banned Footage Vol. 2 · 21, Daughters and Jack's 55th Birthday Daughters: in Lucas's red tackle box at the end of the veranda; squeeze through the gap at the far end. | It is the White Dog's Head. Put it in the Main Hall three-dog door → Yard → Zoe's Trailer. Close the door behind you, read Mia's letter to the Bakers on the trailer table and interact with what Mia is holding: true ending. |
Healing
8| Item | Where | Effect |
|---|---|---|
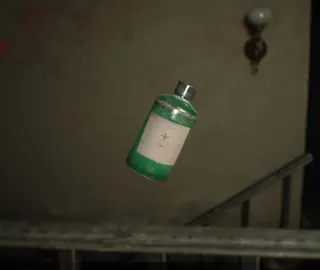 First Aid Med First Aid Med | 1 · Prologue · Guest House 20 on Normal (19 on Easy, 23 on Madhouse). The first 2 are in the Guest House 1F bathroom: in the drawer left of the sink and on top of the cabinet to the right. Then: Store Room A (3F, on the table), Garage (SW locker), Grandma's Room (wardrobe), Morgue (on the bucket), Piano Room, the breakable crates of the Greenhouse, the barn and the ship, and the last one in the Abandoned Mine (on a rock, SE). | "Closes up wounds": restores part of your health (about half the bar; the game gives no number). It has its own heal button, no need to open the inventory. It also reattaches your leg if Jack cuts it off. Recipe: Chem Fluid + Herb 3 per slot. A Separating Agent turns it back into Chem Fluid (the Herb is lost). In End of Zoe it also comes from Critter + Chem Fluid. |
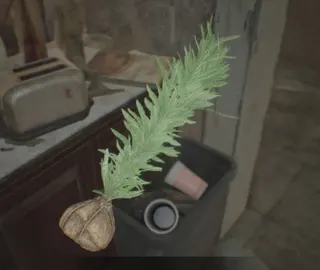 Herb Herb | 2 · Main House · Processing Area 44 on Normal (46 on Easy, 35 on Madhouse). The first is in the bin opposite the fridge in the Main House Kitchen (not on Madhouse). Almost every room has one: plant pots, drawers and breakable crates. The Potting Room (2) and the mine's Cultivation Room (2) give two at once. | "Recovers a small amount of health" (about a quarter of the bar). It is worth far more as an ingredient: Chem Fluid + Herb = First Aid Med; with Strong Chem Fluid you get the Strong First Aid Med, a full heal. 5 per slot. A local Louisiana plant. Eat it on its own only in a pinch. |
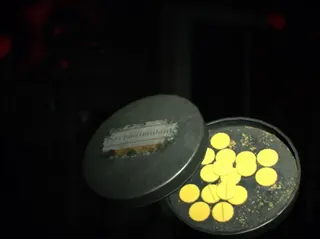 Psychostimulants Psychostimulants | 2 · Main House · Processing Area 8 on Normal and Easy (7 on Madhouse). The first is on the coffee table in the Drawing Room (Main House 1F). More in the Back Passageway, the crawlspace under the Dilapidated Room, the Walkway, the Old Corridor, the Boat House Shed 1F, the ship's Storage and the Mine Office. | "Temporarily sharpens the senses": for a couple of minutes nearby items are marked as dots on screen. Use them when you enter a new area, or to sweep a place before a point of no return. Recipe: Chem Fluid + Supplements Using one gives the achievement "Open Your Eyes". A Separating Agent turns them back into Chem Fluid. The X-Ray Glasses do the same permanently. |
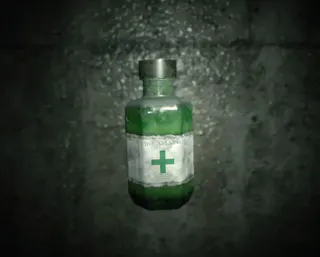 Strong First Aid Med Strong First Aid Med | 4 · Back to the Main House & Testing Area Only 3 on Normal (5 on Easy, 4 on Madhouse), all in breakable crates: Testing Area 2F, Storage Room (NW corner); Salt Mine B1, Abandoned Mine (west side); Salt Mine B1, Exit Passage (east section). | "Strong recovery medicine": fully restores your health. Save it for bosses, or craft one before each. Recipe: Strong Chem Fluid + Herb 3 per slot. The Survival Pack Recovery Set adds 1 more. A Separating Agent turns it back into Strong Chem Fluid. |
 Med Injector Med Injector | NaH · Not a Hero · Salt Mines and Lab 14 on Normal (22 on Easy, 13 on Professional). 1 in the starting inventory (3 on Easy). More on the Abandoned Mine Office desk, a Work Sector A barrel, the Backup Power Room, Store Room East, Section (N2), the Holding Yard, the Repair Yard, Work Sector B (2), Store Room West, the Shield Machine Entrance (2) and the Experimentation Room. | "Fast-acting medicine": restores part of Chris's health. It is his standard heal: Not a Hero has no crafting and no Herbs. |
 Strong Med Injector Strong Med Injector | NaH · Not a Hero · Salt Mines and Lab 4 on Easy and Normal (3 on Professional): breakable crate on the west side of the centre of Work Sector A; crate in Store Room West; and 2 on the east desk of the Cultivation Lab (Research Facility). | Stronger dose: fully restores Chris's health. Save them for the Mama Mold and Lucas's forms. |
 Critter Critter | EoZ · End of Zoe: from the Swamp to the Main House (Joe) All over the swamp: Joe's House Path has a crawfish in the stream east of the bridge, a grub in the tree to the west and a centipede on the boxes. More under the stone by the Shack door, on the Base microscope, in the River (3), at the Quarantine Area 1 Entry (3), on the dead gators of the Northern Water Pool (3) and in the Yard, Courtyard tent. On Joe Must Die they move. | Three kinds of bug (grub, centipede, crawfish). Eat it for a small heal (the animation must finish) or combine it: Critter + Chem Fluid = First Aid Med. Joe has no Herbs: Critters are his healing ingredient. Chem Fluid also makes Stake Bombs: heal first. |
| Adrenaline | BF1 · Banned Footage Vol. 1 · Nightmare, Bedroom and Ethan Must Die Nightmare: at the workbench for 300 Scrap (+1,200 per purchase), once you reach 100,000 points. | Automatic revive: if Clancy goes down with it in the inventory, he gets back up and carries on. It is the insurance for lasting the 5 rounds until 5 AM. |
Materials and crafting
8| Item | Where | Effect |
|---|---|---|
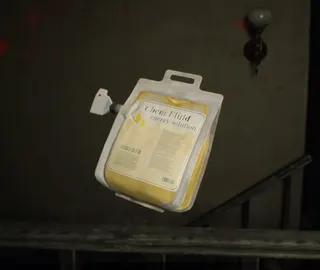 Chem Fluid Chem Fluid | 2 · Main House · Processing Area 41 on Normal (44 on Easy, 28 on Madhouse); 7 of them are inside the 2014 ship flashback and do not carry over. The first ones are in the filing cabinets of the Laundry Room and the Garage (NW corner). The bag is yellow. | "Can't be used as is": the base of all crafting. - + Herb = First Aid Med. - + Gunpowder = 10 Handgun Ammo. - + Solid Fuel = 100 Burner Fuel. - + Supplements = Psychostimulants. Priority: First Aid Meds first and Handgun Ammo with every Gunpowder; do not spend it on Burner Fuel after chapter 3. 1 per slot: it does not stack. Crafting all 8 Chem Fluid and Strong Chem Fluid recipes once gives the achievement "1st Place at the Science Fair" (you can throw the results away). In End of Zoe: + Critter = First Aid Med, + Tree Branch = Stake Bomb. |
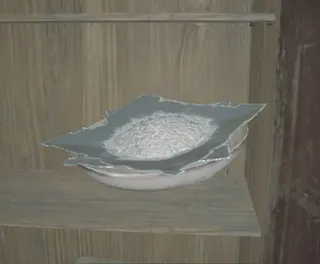 Gunpowder Gunpowder | 2 · Main House · Processing Area 17 on Normal (16 on Easy, 12 on Madhouse). The first is in Main House 1F, Main Corridor: behind the planks by the window of the small storage nook at the SE end. More in the Main Hall (west wardrobe), Small Workshop, Supplies, Porch, Recreation Room, Incinerator Room and Morgue Entry. | "Gunpowder that can be packed into bullets": the only ammo ingredient. - + Chem Fluid = 10 Handgun Ammo. - + Strong Chem Fluid = 10 Enhanced Handgun Ammo. - + 10 Handgun Ammo = 5 Enhanced Handgun Ammo. With Strong Chem Fluid you get twice as many enhanced rounds: use the third recipe only when you have handgun rounds to spare. 10 per slot. Normal's 17 make 170 handgun rounds. The shotguns, the 44 MAG and the P19 have no recipe. |
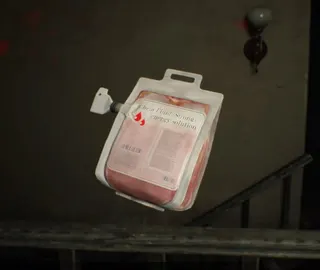 Strong Chem Fluid Strong Chem Fluid | 2 · Main House · Processing Area 14 on Normal (15 on Easy, 8 on Madhouse). The first is on the floor under the metal table by the sink in the Incinerator Room (Processing Area). More in the Boiler Room, the Old House Dining Room and Fertilizer Room, the Old Yard (power box on the pole by the south gate), Supplies, the attic, the barn, the Boat House Shed 1F, the ship (3) and the Mine Entrance Path (2). The bag is red. | The most valuable resource in the game: - + Herb = Strong First Aid Med (full heal). - + Gunpowder = 10 Enhanced Handgun Ammo. - + Solid Fuel = 2 Flame Rounds. - + Supplements = 2 Neuro Rounds. Priority on Normal: Strong First Aid Meds for bosses, then Enhanced Handgun Ammo (triple damage in the handgun you already carry), then Neuro Rounds for the barn Fat Molded. A Separating Agent gets one back from any of its 4 recipes. |
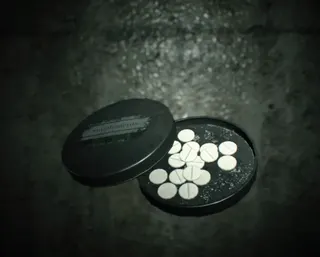 Supplements Supplements | 3 · Yard & Old House 5 on every difficulty: Yard, Courtyard (by the electronic gate, NW); Main House 2F Kid's Room (on the air-conditioning unit, south); Testing Area 2F Rest Area (small table by the sinks); and 2 in the 2014 ship flashback (Dining Room and Bunk Room), which do not carry over. | White tablets that "affect the nervous system"; not usable on their own. - + Chem Fluid = Psychostimulants. - + Strong Chem Fluid = 2 Neuro Rounds. With only 3 usable by Ethan, spend them on Neuro Rounds. 5 per slot. |
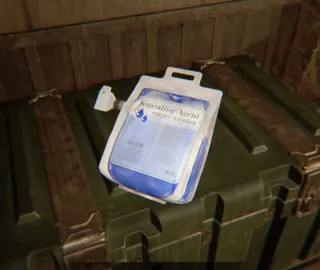 Separating Agent Separating Agent | 3 · Yard & Old House 3 on Normal and Easy (9 on Madhouse): Yard, Courtyard (under the boarded-up window of the house in the half-hidden SE area); Old House (West) 2F Potting Room (table, west side); Boat House, Shed 1F (shelf above the Item Box). The bag is blue. | Undoes a craft: you get the chemical back and lose the other ingredient. - First Aid Med, 10 Handgun Ammo, 100 Burner Fuel or 1 Psychostimulants → 1 Chem Fluid. - Strong First Aid Med, 10 Enhanced Handgun Ammo, Flame Rounds or Neuro Rounds → 1 Strong Chem Fluid. Best use: turn leftover Burner Fuel (after Marguerite) into Chem Fluid, or a spare Flame Round into Strong Chem Fluid for a Strong First Aid Med. Sources disagree on whether the grenade rounds need 1 or 2 rounds. |
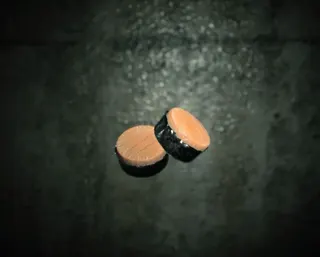 Solid Fuel Solid Fuel | 3 · Yard & Old House 8 on Normal and Easy (10 on Madhouse): Main House 1F Supplies (shelves by the door); Old House 1F Dilapidated Room (inside the tyre under the crates, west), Living Room (desk drawer) and Dining Room (wooden cabinet); Old House (West) Potting Room, Landing and Greenhouse; Testing Area 2F Office. | "A flammable solid"; not usable on its own. - + Chem Fluid = 100 Burner Fuel. - + Strong Chem Fluid = 2 Flame Rounds. The second is almost always the better one. 5 per slot. Bedroom (Banned Footage Vol. 1) has its own Solid Fuel: pry the wardrobe cabinet open with the Fork, and it feeds the Stove. |
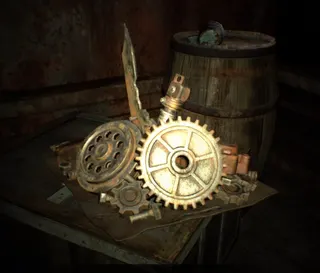 Scrap Metal Scrap Metal | EoZ · End of Zoe: from the Swamp to the Main House (Joe) 7 on Normal (9 on Joe Must Die, 5 of them by the Quarantine Area 2 Shed): Paddle Boat Deck (crate E), 2F Main Passage (inside the duct), 1F Main Passage (floor NW), Quarantine Area 1 (on the upturned bathtub of the Stilt House Underside and on the Lake's E platform) and Quarantine Area 2 (Central Walkway and Northern Walkway). | Scrap Metal + Tree Branch = Throwing Spear, the thrown spear. A spear to the head kills a normal or crawling Molded, and it is the only thing that kills alligators. On top of the 18 spears placed on Normal, this gives at most 7 more. |
 Tree Branch Tree Branch | EoZ · End of Zoe: from the Swamp to the Main House (Joe) 7 on Normal (9 on Joe Must Die): Paddle Boat Deck (against a crate, W), 2F Storage (SW corner), 1F Air Duct, Quarantine Area 1 Stilt House Underside, and in Quarantine Area 2 the Southern Walkway, the water under Stilted Cabin 3 and the NE offshoot of the Northern Walkway. | Two recipes: - + Scrap Metal = Throwing Spear. - + Chem Fluid = Stake Bomb, a remote bomb (drop it with attack, detonate with reload) that also breaks the DLC's wooden doors. There are only 7: split them between spears for the gators and bombs for the doors. |
Special items
21| Item | Where | Effect |
|---|---|---|
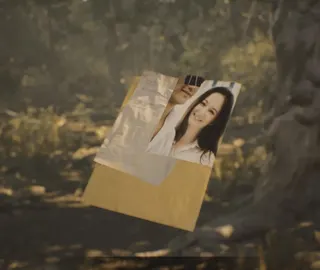 Email from Mia Email from Mia | 1 · Prologue · Guest House In Ethan's inventory from the start. | Examine it to read the file Email from Mia (file 1): "Dulvey, Louisiana. Baker farm. Come get me.", sent on July 18, 2017 by Mia, missing for 3 years. It is the hook for the whole story and opens nothing. |
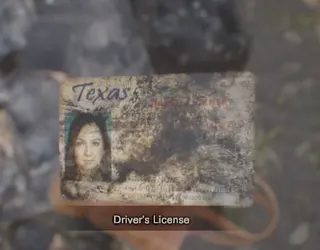 Driver's License Driver's License | 1 · Prologue · Guest House Guest House, Back Yard (1F): in the handbag on the ground next to the small bonfire, near the house door. | Opens nothing: it is Mia's scorched licence and the tutorial for examining items. In the examine menu, turn it over and press on it to slide the licence out of its sleeve: achievement "A-ha!". It takes a slot and does nothing: leave it in the first Item Box (Laundry Room, chapter 2). |
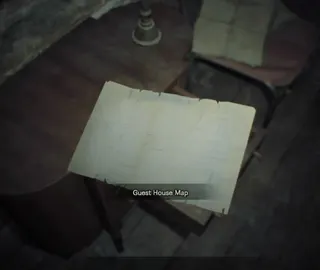 Guest House Map Guest House Map | 1 · Prologue · Guest House Guest House 1F, Front Corridor: inside the small chest of drawers with the lamp, halfway down the corridor. | Gives you the Guest House layout in the map menu. Same on every difficulty. |
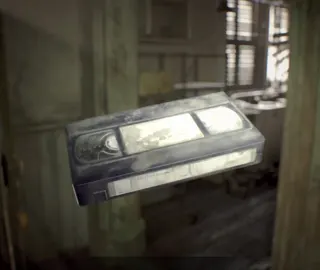 Derelict House Footage Derelict House Footage | 1 · Prologue · Guest House Guest House 2F, Upstairs: on the chest of drawers in the corner. The label reads "Derelict House Footage. Dulvey, June 1". | Play it in the Living Room VHS Player (Guest House 1F, on the TV). You play Clancy, the Sewer Gators' cameraman (June 2017), and the tape shows you the secret passage in the fireplace, your way out. It is mandatory and counts as tape 1 of 4 for the achievement "Be Kind, Please Rewind". Inside the tape there is a Lock Pick that opens Antique Coin #1: turn around as soon as it starts. If you do not use it there, it is gone. |
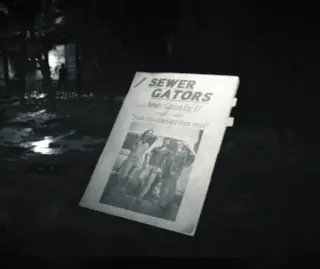 Project Proposal Project Proposal | 1 · Prologue · Guest House In Clancy's inventory during the Derelict House Footage tape. Ethan can read another copy in the Sewer Gators' van near the Main House. | No use: it is the Sewer Gators' show proposal and ties the Beginning Hour demo to the game. It is not one of the 32 files. |
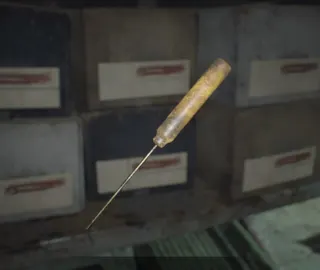 Lock Pick Lock Pick | 1 · Prologue · Guest House 8 on Easy and Normal. The 1st exists only inside the tape Derelict House Footage: on the ground next to Clancy's start point, SE corner of the Back Yard. The rest: Main House 1F Laundry Room (metal box on the shelves by the door); Processing Area, Meat Storage (open freezer, NW); Main House 1F Porch (small goblet on the rail of the steps); Old House 1F Walkway (metal box on the trolley, SE); Main House 2F Kid's Room (small bronze vase, west shelf); Master Bedroom (metal tin on the white dresser); Wrecked Ship 3F Shaft (orange tin by the railing). | Opens one lock and is used up. On Normal there is exactly one per lock: - Guest House, Kitchen: blue cabinet drawer (tape only) → Antique Coin #1. - Main House 1F Main Corridor: cabinet by the SW double doors → First Aid Med. - Small Workshop: locked toolbox → Shotgun Shells ×6. - Study: desk drawer → Chem Fluid. - Main House 2F Balcony: locked box → Shotgun Shells ×4. - Old House 1F Dining Room: sink-unit drawer → First Aid Med. - Old House (West) 2F Potting Room: white unit → Flame Rounds ×2. - Wrecked Ship 3F Control Room: orange toolbox → Antique Coin #17. Keep the Shaft pick for the Control Room box: it is a coin. Opening your first lock gives the achievement "Master of Unlocking". Madhouse: 5 picks (the tape one, Garage, Stairway Entry, the book in the 2F Storage and the Contaminated Room ceiling) for 8 locks; the Garage toolbox holds the Car Key, the others ammo or Strong Chem Fluid. On Switch 2 the Action Set Supply Box adds 1 more pick. Not a Hero has 2 (1 on Professional) and each lock gives RAMRODs. In Daughters, Zoe takes one from the crawlspace for the true ending. |
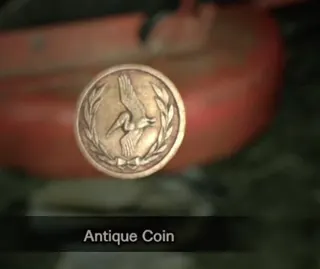 Antique Coin Antique Coin | 1 · Prologue · Guest House 18 on Easy and Normal, 33 on Madhouse (in other spots). The first is inside the Derelict House Footage tape (blue Kitchen drawer, with the tape's Lock Pick); the last is behind the Corrosive panel in the ship's Workers Access Passage 2. | The game's only currency: there is no shop, you spend them on birdcages. On Easy and Normal they are in Zoe's Trailer: Steroids (3), Stabilizer (5) and 44 MAG (9). That adds up to 17: 1 is spare. Madhouse adds 3 cages in the Main Hall (Scorpion Key 3, Iron Defense Coin 7, Assault Coin 8): 35 in total with only 33 coins. Cages you leave shut reappear once in the Swamp Mine Office (chapter 7), with whatever you already paid: it is the last chance to spend coins. Achievement "Pelicans in Your Pocket". Not a Hero has its own 10 coins and 2 cages. |
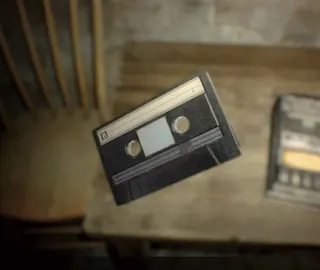 Cassette Tape Cassette Tape | 1 · Prologue · Guest House Madhouse only: 30 in the campaign. The first 2 are on the table next to the Guest House 2F (Upstairs) tape recorder; most tape recorders have 1 to 3 beside them (Trailer 3, Potting Room 3, the ship's Guest Room 3). | On Madhouse, every save at a Tape Recorder uses up one tape. No tapes, no saving: do not waste them on safety saves. In End of Zoe the same applies on Joe Must Die: 17 tapes in the level, and a clear adds 50 to the Item Box. |
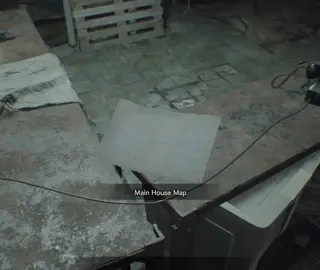 Main House Map Main House Map | 2 · Main House · Processing Area Main House 1F, Laundry Room: on one of the tables (the first safe room, with telephone, tape recorder and box). | Gives you the Main House layout in the map menu. Same on every difficulty. |
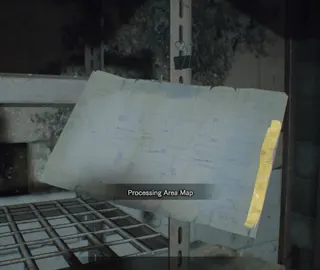 Processing Area Map Processing Area Map | 2 · Main House · Processing Area Processing Area, Tool Storage: pinned to the metal shelves on the west side. | Gives you the Processing Area layout (under the Main House) in the map menu. |
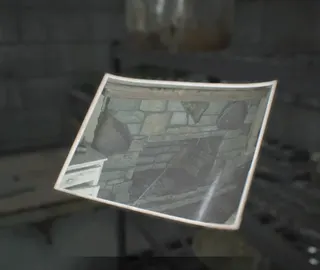 Treasure Photo (Fireplace) Treasure Photo (Fireplace) | 2 · Main House · Processing Area Processing Area, Meat Storage: metal shelves in the NW corner, by the pots and pans. | "I hid something nice here." Carry it and examine the loose stone of the Drawing Room fireplace (Main House 1F, the large stone on the right): out comes a Steroids. Having carried it once is enough; you can drop it afterwards. The hidden item is lost once you leave the estate at the end of chapter 5. |
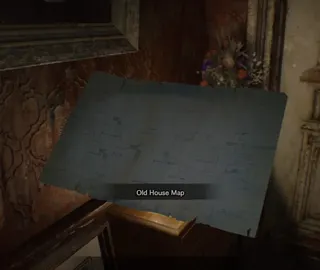 Old House Map Old House Map | 3 · Yard & Old House Old House 1F, Corridor: on the chest of drawers next to the west door. | Gives you the Old House layout in the map menu. There is no map item for the Yard, the Boat House or the Swamp. |
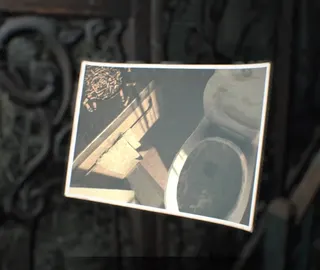 Treasure Photo (Toilet) Treasure Photo (Toilet) | 3 · Yard & Old House Old House (West) 1F, Old Yard: inside the arch of the east stairs up to the Upstairs Entrance door (the Greenhouse one, 2F). The power box on the pole by the south gate holds a Strong Chem Fluid, not the photo. | "I hid something nice here." Carry it and examine the toilet in Zoe's Trailer (Yard, opposite the tape recorder): 44 MAG Ammo ×3. Having carried it once is enough. The hidden item is lost once you leave the estate at the end of chapter 5. |
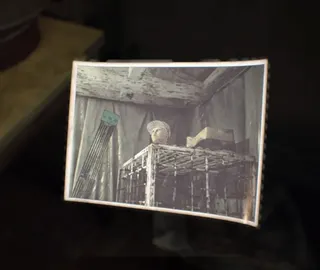 Treasure Photo (Dummy Head) Treasure Photo (Dummy Head) | 4 · Back to the Main House & Testing Area Main House 2F, Storage (the closet off the Master Bedroom, Snake Key): on the stool, NE corner. | "I hid something nice here." Carry it and examine the mannequin head with the cap on top of the cages, NE corner of the Supply Room (Testing Area 2F): out comes the second Repair Kit. Pick it up before you enter the Testing Area. The hidden item is lost once you leave the estate at the end of chapter 5. |
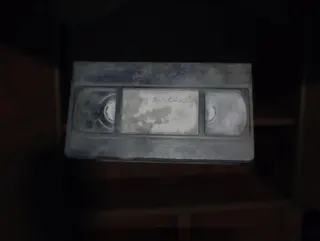 Happy Birthday Happy Birthday | 4 · Back to the Main House & Testing Area Main House attic: inside the wardrobe in front of the ladder entrance. | Watch it at any VHS (Trailer, Recreation Room or the barn Office). You play Clancy in Lucas' Party Room and it teaches you the puzzle solution and the password LOSER. Optional, but watch it before the real Party Room. Tape 3 of 4. Finishing it in under 5 minutes gives the achievement "Out Before Dessert". |
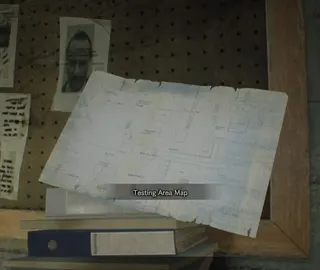 Testing Area Map Testing Area Map | 4 · Back to the Main House & Testing Area Testing Area 1F, Monitoring Room: on the billboard (the safe room after the Party Room). | Gives you the Testing Area layout in the map menu. |
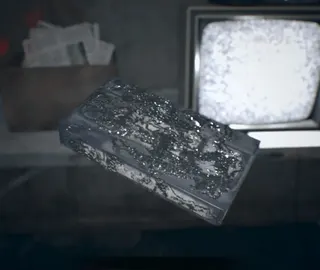 Old Videotape Old Videotape | 6 · The Wrecked Ship (Mia) Wrecked Ship 3F, Security: on the desk next to the TV (Eveline points it out). | Play it in the Security VHS: a 2014 flashback as Mia, armed, on the intact ship. It is mandatory. Whatever Mia uses inside the tape does not carry over. Tape 4 of 4: if you watched all 4 in the same run, achievement "Be Kind, Please Rewind". The Security tape recorder appears after the tape. |
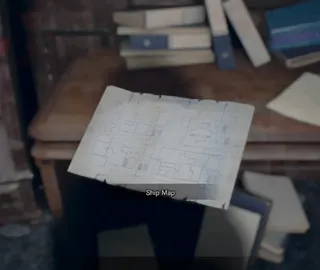 Ship Map Ship Map | 6 · The Wrecked Ship (Mia) Wrecked Ship 4F, Captain's Cabin: on the desk, next to the Lug Wrench. | Gives you the Wrecked Ship layout in the map menu. |
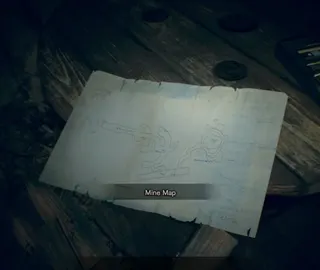 Mine Map Mine Map | 7 · Swamp · Salt Mines Salt Mine B1, Exit Passage: on the giant wooden spindle in the east section, next to the last tape recorder. | Gives you the Salt Mine layout. It comes late: almost at the end of the mine. |
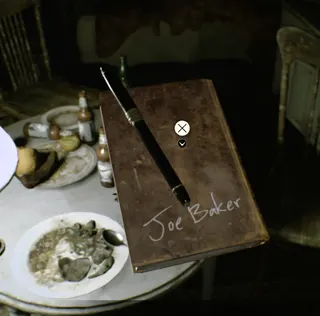 Joe's Survival Manual Joe's Survival Manual | EoZ · End of Zoe: from the Swamp to the Main House (Joe) In Joe's inventory from the start. | Examine it to read the file of the same name: the fighting tutorial. Tough body, soft head; fast combo left, right, right; strong combo right, left, right, then a strong left that knocks them out; stomp a fallen head; crouch and sneak up for silent takedowns. |
 Scrap Scrap | BF1 · Banned Footage Vol. 1 · Nightmare, Bedroom and Ethan Must Die Nightmare: Clancy starts with 1,000 in the Incinerator Room. Compactors produce more over time (up to 1,000 each; you have to walk over to collect it) and each round pays a bonus for kills and for beating Jack. The third compactor is in the Workshop, behind a door that needs Corrosive. | Nightmare's currency: at the workbench you buy weapons, ammo, traps and upgrades, and the price rises with every purchase. Examples: First Aid Med 100 (+50), Strong First Aid Med 300, Adrenaline 300 (+1,200), Corrosive 1,500 (+1,000), 10 Handgun Ammo 50 (+20), 10 Enhanced Handgun Ammo 150 (+100), G17 Handgun 50, M37 Shotgun 100. Buy Corrosive early to open the Workshop compactor, then the compactor upgrade. Many items unlock by points across runs (Adrenaline at 100,000, Enhanced Handgun Ammo at 1,000,000, Strong First Aid Med at 1,500,000). Crafting the Circular Saw or Infinite Ammo multiplies your score by 0.01. |
Ammunition
10| Item | Where | Effect |
|---|---|---|
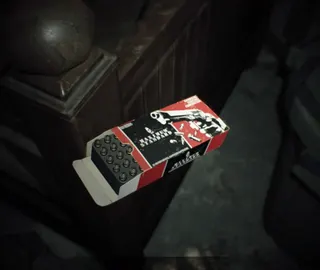 Handgun Ammo Handgun Ammo | 1 · Prologue · Guest House 335 rounds on Normal (247 on Easy, 279 on Madhouse). The first 32 are in the Guest House: Store Room A (5), Store Room B (20) and the attic (7), right before the Mia fight. The area with the most is Boat House (Storage) 1F, where the Shed is (65 in all). | Ammo for the M19 Handgun, G17 Handgun, MPM Handgun and Albert-01R. 10 rounds for every Gunpowder you craft with. 30 per slot; while the gun's chamber is not full it takes no slot. It sits in a separate chamber from Enhanced Handgun Ammo: switch type by holding ZL and pressing X. Recipe: Chem Fluid + Gunpowder The recipe makes 10. A Separating Agent turns 10 rounds back into 1 Chem Fluid. In Not a Hero, Chris uses it in the Samurai Edge - AW Model-01: 129 on Normal (18 at the start), no crafting. |
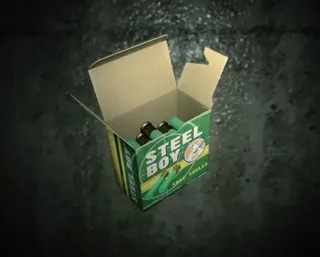 Shotgun Shells Shotgun Shells | 2 · Main House · Processing Area 121 on Normal (117 on Easy, 110 on Madhouse), spread almost entirely over the Main House (25), the Processing Area (11), the Old House (16), the Boat House (45) and the Guest House attic in the finale (10). The lock-pick boxes in the Small Workshop (6) and on the Balcony (4) also hold shells. | Ammo for the M37 Shotgun and the M21 Shotgun. They cannot be crafted: save them for Molded up close, Crawler Molded and bosses. 30 per slot. In Not a Hero, Chris uses Shotgun Ammo, a different item. In End of Zoe, the unlockable M21 comes with 7 shells on Normal (2 loaded, 5 in the Item Box). |
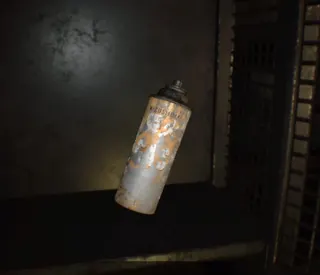 Burner Fuel Burner Fuel | 3 · Yard & Old House 800 on Normal in 10 spots (1070 on Easy, 770 on Madhouse): mostly the Old House (300) and Old House (West) (150), plus Grandma's Room (100), the Swamp (170, on the Mine Office wall ledge by the door) and the mine (80). | Fuel for the Burner, which holds 150. 500 per slot. It burns Marguerite's insects and nests. Recipe: Chem Fluid + Solid Fuel The recipe makes 100. Do not spend Solid Fuel on it: with Strong Chem Fluid it makes 2 Flame Rounds, far more useful. After Marguerite, a Separating Agent turns the leftovers back into Chem Fluid. |
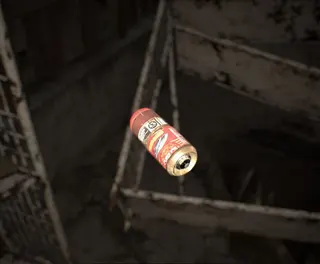 Flame Rounds Flame Rounds | 3 · Yard & Old House 9 on Normal and Easy (6 on Madhouse): Main House 1F Supplies (1); Old House (West) 2F Potting Room (2, in the lock-pick unit); Boat House, Shed 1F (3, metal bench by the stairs); Swamp (1, SW bank by the fence); Salt Mine B3 Office (2). | Incendiary ammo for the Grenade Launcher (1 per shot): impact, then fire that keeps burning. Two knock a Fat Molded down. 5 per slot. Recipe: Strong Chem Fluid + Solid Fuel The recipe makes 2. Careful up close: the blast hurts you too. |
| 44 MAG Ammo | 3 · Yard & Old House 16 on Normal in 9 spots (15 on Easy and Madhouse). The first batch: 3 in the toilet of Zoe's Trailer, with the Treasure Photo (Toilet). Another on a wall ledge of the Mine Office, below Mr. Everywhere #18 (not on Easy). The 44 MAG comes with 1 loaded. | Ammo for the 44 MAG: 1200 damage per round, the strongest in the game. It cannot be crafted: save it for bosses (Mutated Jack, the finale) and Fat Molded. 20 per slot. |
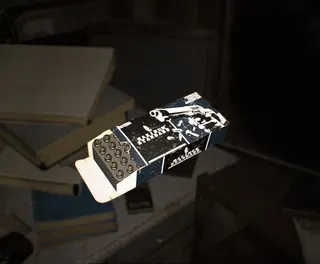 Enhanced Handgun Ammo Enhanced Handgun Ammo | 4 · Back to the Main House & Testing Area 49 on Normal and Easy (44 on Madhouse), in only 4 spots: Processing Area, Workshop (10, metal cabinet NE); Swamp, Mine Office (12, shelves by the ladder); Salt Mine B3, South Cavern (12, barrels by the Office door); Guest House attic (15, final chapter only). | Handgun rounds with triple damage: the closest thing to a weapon upgrade in the game. They fit the M19, G17, MPM and Albert-01R (not the final Albert-01). They sit in a separate chamber: switch type by holding ZL and pressing X. 20 per slot. Recipe: Strong Chem Fluid + Gunpowder The recipe makes 10. Gunpowder + 10 Handgun Ammo also makes 5, but that one does not count for the 8-recipe achievement. |
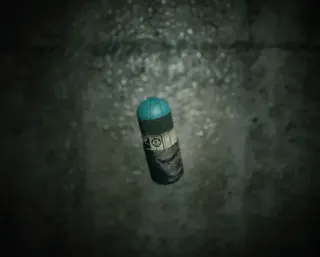 Neuro Rounds Neuro Rounds | 4 · Back to the Main House & Testing Area 4 on every difficulty: Main House 2F, Storage (behind the painting by the blue filing cabinet); Salt Mine B3, North Cavern; Salt Mine B3, Office (open left desk drawer); Flooded Cavern (inside the upturned mine cart). | Grenade Launcher ammo that stuns and heavily hurts Molded (more total damage than Flame Rounds). Ideal for the barn Fat Molded. 5 per slot. Recipe: Strong Chem Fluid + Supplements The recipe makes 2. Only 4 lie around the world: crafting is how you really get them. |
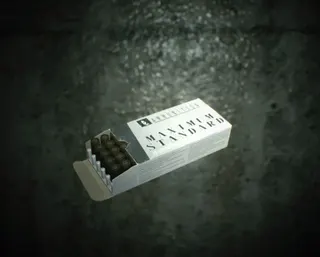 Machine Gun Ammo Machine Gun Ammo | 6 · The Wrecked Ship (Mia) 1060 rounds on Normal (1065 on Easy, 562 on Madhouse); 300 of them are in the 2014 flashback and do not carry over. | Ammo for the P19 Machine Gun (64 per magazine). It cannot be crafted. 300 per slot. It is the gun that carries the Salt Mines (chapter 7). |
| Shotgun Ammo | NaH · Not a Hero · Salt Mines and Lab 220 on Normal in 23 spots (190 on Easy, 116 on Professional); 12 in the starting inventory. | Ammo for the Thor's Hammer - AW Model-02, Chris's semi-auto shotgun and main gun. Nothing can be crafted in Not a Hero. |
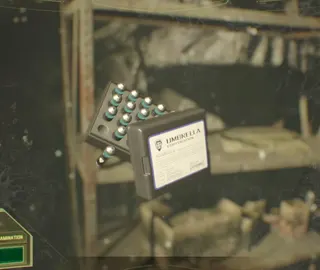 Anti-Regen Ammo (RAMRODs) Anti-Regen Ammo (RAMRODs) | NaH · Not a Hero · Salt Mines and Lab 34 on Normal in 12 spots (39 on Easy, 21 on Professional). Normal's 2 lock-pick locks hold 2 each (the Professional one, 3). | Mycetotoxic rounds for the Samurai Edge - AW Model-01: they break the fungus's cell membrane and stop regeneration. One hit leaves the enemy open to your normal attacks. Essential against Fumers, the Mama Mold, white Molded and Lucas's final form. Switch ammo with aim + inventory. Spend them only on those enemies: one hit is enough before you switch to the Thor's Hammer. |