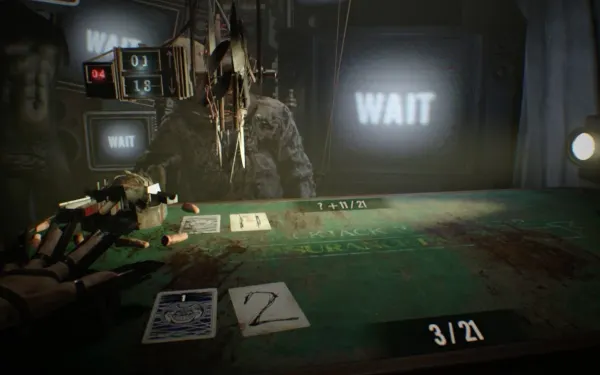
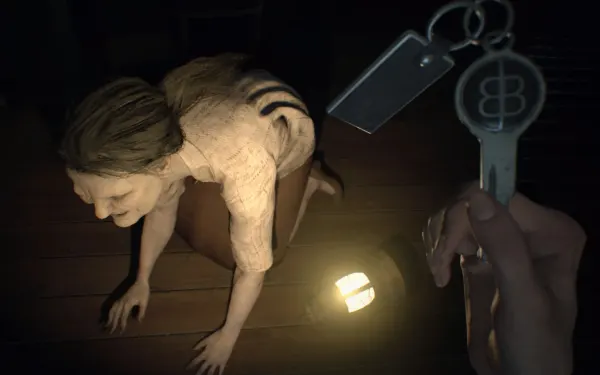
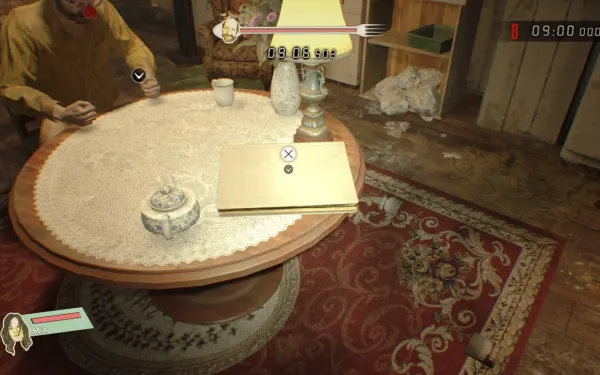
Three more tapes, each one standalone. In 21 you are Clancy again, strapped to Lucas’s table and forced to play a deadly blackjack against another prisoner, Hoffman: you don’t move, you just think through every card. In Daughters you are Zoe Baker on the night of 10 October 2014, when Jack brings Eveline home and the family starts to change: there is no combat, just a house turning hostile and two endings. In Jack’s 55th Birthday you are Mia in a party version of the game: you run six timed stages hunting for food to fill Jack’s stomach, and killing Molded buys you time. This chapter gives you the rules and strategy for 21, both Daughters endings step by step and, for Jack’s 55th Birthday, the ranks, the rewards, the food and what is in each room of the six stages.
Chapter order: 21 (story: fingers → shocks → saw; then Survival with 5 opponents and Survival+ with 10) → Daughters (Zoe, 10 October 2014: Lucas’s phone code → Lock Pick → Small Component → attic laptop → clothes for the girl → Rope → Recreation Room → Veranda: White Dog’s Head → Main Hall → true ending in the trailer or bad ending in the car) → Jack’s 55th Birthday (Mia: Guest House 1 → Testing Area 1 → Main House 1 → Guest House 2 → Testing Area 2 → Main House 2).
Prepare: Banned Footage Vol. 2 sits under Extra Content on the main menu; each mode stands alone and nothing carries over to the campaign. There is no Easy, Normal or Madhouse: in 21 the difficulty rises with Survival and Survival+, and in Jack’s 55th Birthday with the rank you’re chasing.
- 21: there’s no turn timer; you can look around and read the files. In the third game, don’t spend the Love Your Enemy card: it’s your way out of Lucas’s final trick.
- Daughters: there’s no combat. If you want the true ending, do the extra steps at the start, before giving the girl the clothes, or you’ll have to replay. Both achievements take two runs.
- Jack’s 55th Birthday: start with Guest House 1; a B rank opens the next stage. The cooking achievement (Miracle Chef) is best done on a relaxed run, not a score run. The C, B and A rank rewards (skills and weapons) stay in the item box for your S-rank attempts.
21: the rules
Clancy plays Lucas’s blackjack against Hoffman, turn by turn and without moving (the Card Game “21” - Basic Rules file explains it).
- There is a single deck of cards 1 to 11, no repeats, shared: a card already on the table never comes up.
- Each player has one face-down card only they can see.
- You draw (Hit) or stand (Stay); when both stand in a row, the cards are revealed.
- Closest to 21 without going over wins; if both bust, the lower total wins; equal totals are a draw.
- The loser is punished according to their bet.
- Trump Cards are dealt at the start of each round and sometimes when you draw.
Count cards. With 11 unique cards, what you see on the table tells you what’s left. If Hoffman plays Perfect Draw, his total is almost always 21. Use the “draw the X” trumps (2 Card to 7 Card) to check whether he holds the X. Raise his bet only when you’re sure to win. Take small losses rather than burning trumps, and keep them for emergencies. Exchange (swapping the last cards) can push him over 21. Per one guide, on 10 or less you can always draw safely.
21: the trump cards
Yours:
- One-Up / Two-Up: opponent’s bet +1 / +2 while the card is on the table, and you draw a trump. Two-Up+ returns their last face-up card to the deck and raises their bet by 2 (no trump draw).
- Shield / Shield+: your bet −1 / −2.
- Remove / Return / Exchange: remove the opponent’s last card, return yours to the deck, or swap the last ones.
- Destroy / Destroy+ / Destroy++: remove their last trump, all of them, or all of them and block their next ones.
- 2 Card to 7 Card: draw that card; if it’s already on the table, nothing happens.
- Perfect Draw: draw the best possible card. Perfect Draw+: the same, and the opponent’s bet +5. Ultimate Draw: the best card, and you draw 2 trumps.
- Trump Switch: discard 2 trumps at random and draw 3. Trump Switch+: discard 1 and draw 4.
- Harvest: draw a trump after every trump you use while it’s on the table.
- Go For 17 / 24 / 27: changes the target total while it’s on the table and replaces any other “Go For”.
- Love Your Enemy: the opponent draws the best card for them. It looks useless; at the saw it’s the key (see the boss section).
Opponent-only cards: Shield Assault (removes 3 Shield cards from his own side of the table and raises your bet by 3) and Shield Assault+ (removes 2, your bet +5), from the Barbed-Wire Hoffman · Happiness (both draw a trump) and Desire (your bet goes up by half the trumps in your hand), from the Bloody-Handprints one · Desperation (both bets +100 and you can’t draw), Lucas’s trick.
21: the story (3 games)
- Finger guillotine: the loser loses as many fingers as their bet; the bet rises by 1 each round. Draw: both lose fingers. No trumps yet: just count cards.
- Electric shock: trump cards come in (2 each at the start). The shock goes by bet, and level 10 is fatal. Draw: both get shocked.
- The saw: a 15-space track with the saw starting in the middle; it moves toward the loser by as many spaces as their bet. Draws don’t count. This is where Lucas cheats (see the boss section).
There’s a checkpoint after each game. Eye in the Sky achievement: complete 21.
21: Survival and Survival+
Survival opens after the story: the first game’s rules with trumps, bets that don’t rise, and 5 opponents in a row, with your 5 fingers as your life. The last is Molded Hoffman, whose Curse makes you discard a trump and draw the highest card. Card Shark achievement.
Survival+ opens after Survival: shock rules, tougher AI and 10 opponents; the last is Undead Hoffman, with Oblivion (cancels the round and starts a new one) and Dead Silence (you can’t draw). Keep Destroy for him and for Mr. Big Head, who plays Escape (he flees at round end if the card is still on the table). Other opponents: Barbed-Wire (Shield Assault), Bloody-Handprints (Happiness, Desire, Mind Shift: you lose half your trumps at round end unless you use two in one turn), Tally Mark (Twenty-One-Up: if he has 21, your bet +21). You Gotta Know When To Hold ‘Em achievement.
Unlockable trump cards:
- 5 total wins: Go For 24 · 15 wins: Two-Up+.
- 2 wins in a row without punishment: Shield+.
- Reach 21 three times: Starting Trump +1 · three times in a row: Go For 27.
- Use 10 trumps: Exchange · win a round after using 15 or more: Trump Switch+.
- Remove 10 / 20 of the opponent’s trumps: Destroy+ / Destroy++.
- Win while bust: Starting Trump +1.
- Clear Survival: Perfect Draw+ · without punishment: Ultimate Draw · Survival+ without punishment: a “Grand Reward”.
- Beat Mr. Big Head: Starting Trump +1 · twice: Harvest.
Daughters: the rules
You play Zoe Baker on 10 October 2014, the night Jack brings Eveline home. 12 slots, you start with the Lighter, and there’s no combat. There are two endings: the bad one (Butterfly Effect) comes from simply following the objectives; the true one (One Instinct: Survival) needs a few extra steps at the start, before you give the girl the clothes.
Daughters: the start (true-ending steps)
- Dining area. When Lucas sits at the table, look over his shoulder while he types on his phone: the code is 1019.
- Pantry. Get into the crawl space under the floor: Lock Pick. Come out and cross the hallway to the Laundry Room: the change of clothes is on the bench.
- Bathroom. Open the drawer with the Lock Pick: Small Component.
- Kids’ Room (2F). Put the component in the trophy on top of the armoire, press the button, and a ladder comes down to the attic.
- Attic. There’s a note on the desk. On the laptop enter 1019 and interact again to read Lucas’ Fuck-You List. That is what later opens the tackle box on the Veranda.
Daughters: the night
- Give the clothes to the girl in the Kids’ Room. Point of no return for the true ending: if you haven’t done the 5 steps above, you no longer can.
- Find Lucas in the dining area and then Marguerite in the bathroom; Jack comes in and asks you for a rope.
- Garage (1F). Press the red button to raise the shutter; the Rope hangs just in front of the entrance. Go back to the bathroom.
- Jack turns on you: run to the Recreation Room, close the door and tie it with the Rope to the hook on the left (otherwise Jack gets in and catches you).
- Grandma’s room (next door): take the Fork from the side table. Go back to the Recreation Room, pull the 2 nails out of the boarded window with it, and go out onto the Veranda.
- True ending: go right along the Veranda; where the path ends, squeeze through the gap and open Lucas’s red tackle box: White Dog’s Head (the Dog Head Relief). On both routes, at the end of the Veranda you pull the board away and go through to the Main Hall.
Daughters: Marguerite and the way out
Marguerite patrols with a lantern. Crouch past her with the Lighter off: she can’t see well.
True ending (One Instinct: Survival).
- Head back to the stairs down to 1F carefully. Wait for Marguerite to walk back into the hall that joins the kitchen, then sneak to the three-dog-head door in the Main Hall.
- Place the White Dog’s Head, close the door behind you and cross the Yard to Zoe’s trailer.
- Inside, Mia lies on the floor. Read the note on the table (Mia’s Letter to the Bakers) and interact with what Mia is holding. Eveline appears and the achievement pops.
Bad ending (Butterfly Effect). Leave the Main Hall by the 1F door back toward the Living Room. Marguerite, lucid for a moment, gives you the Car Key. Run down the hallway, past Jack, into the Laundry Room and drop into the crawl space. You come up in the Pantry: sneak through the kitchen and dining area behind Jack, go down to the Garage and get into the car. Jack and Eveline stop you.
Jack’s 55th Birthday: the rules
You play Mia (visible health bar) and must fill Jack’s Satisfaction Gauge by feeding him before time runs out (about 15 minutes on the first stage). The Jack’s 55th Birthday: Rules file explains it. Enemies wear party hats and guns fire confetti.
- Start area: each stage begins next to Jack with an item box holding preset gear; you can save and load loadouts. The clock starts when you leave.
- Extra time: shooting, wounding or killing enemies pauses the clock and adds a time bonus depending on the enemy and the weapon. It’s the only way to reach the high ranks.
- Coloured doors: some rooms only open after you kill the enemy of that colour; in Main House 1, 3 specific enemies open up the whole building.
- Power-ups: each stage has special pistols with infinite ammo and a time limit: the blue one (Blue Blaster: one-shot kills, about 10 s per kill) and the red one (sets enemies on fire and speeds you up).
- Mr. Everywhere: smashing the stage’s statue doubles your current time bonus. It calls “Hey!” and “Over here” when you’re close. Some only appear if you do something first: Testing Area 1, kill the yellow Molded; Testing Area 2, enter the orange room once; Main House 2, kill Marguerite (the spider).
- Inventory: food takes up slots. Keep ingredients in the box until you can combine them. Food and weapons you didn’t pick up don’t show on the map in later runs.
Jack’s 55th Birthday: ranks and rewards
Only Guest House 1 is open at first; a B rank opens the next one. The rank is the time you have left (B / A / S / SS), and the satisfaction goal is in brackets:
- Guest House 1 (900): 9:00 / 12:00 / 14:00 / 14:55.
- Testing Area 1 (1600): 5:00 / 7:00 / 9:00 / 9:50.
- Main House 1 (2500): 9:00 / 11:00 / 12:30 / 14:55.
- Guest House 2 (1000): 1:30 / 3:00 / 4:00 / 4:40.
- Testing Area 2 (2300): 4:00 / 5:30 / 7:00 / 7:55.
- Main House 2 (5000): 7:00 / 9:30 / 12:30 / 14:45.
Documented rewards (they go into the item box):
- Guest House 1: C rank, Toughness I (+250 max HP); S rank, Brawler (maxes melee power, greatly cuts defence).
- Guest House 2: C rank, Firepower Up II (much more damage, much slower reload) and Defense II (much more defence, harder to knock enemies back); B rank, Circular Saw (its kills give very little time: bad for scoring).
- Testing Area 2: B rank, Narrow Escape (much more speed near death); A rank, Time Bonus β-II (much bigger bonus per kill, much slower movement); S rank, Infinite Ammo (greatly reduces time bonuses).
- Main House 2: B rank, Speed Up II (much faster, much less defence); A rank, Vengeance (much more attack near death); S rank, Gold Blaster (a gold M19 with infinite ammo, no reload and a fast rate of fire, but low damage and little time per hit).
Other skills in the box with no documented unlock: Time Bonus α-I (bonus per hit), Time Bonus β-I (bonus per kill), Firepower Up I and Clairvoyance (marks items).
Jack’s 55th Birthday: the food
Combining gives more points. Points:
- Single: Spice 50 · Sugar 50 · Cheese 50 · Chicken 100 · Fruit 80 · Beer 80 · Cheap Wine 80 (can’t be combined) · Cake 200 · Stew 180 · Dulvey Cru 300 (found ready-made) · Garbage? 10.
- Combinations: Chicken + Spice = Spicy Chicken 200 · Fruit + Beer = Fruitbeer 180 · Cheese + Stew = Cheese Fondue 270 · Spice + Stew = Tom Yum 270 · Cake + Cheese = Cheesecake 320 · Cake + Fruit = Fruitcake 350 · Cake + Sugar = Sugarcake 400 · Garbage? + Sugar = Baker Family Special 400.
Guest House 1 only has Cheap Wine, Chicken, Garbage?, Spice and Spicy Chicken; everything appears from Main House 1 on. For Miracle Chef feed him all 19 at least once: the ones most often missed are the plain Cake (you always combine it) and the Fruitcake.
Guest House 1: S-rank route
Goal: 900 satisfaction with 14:00 or more on the clock. You start in the kitchen, with Jack at the table.
- From the item box take the shotgun, Shotgun Shells and First Aid Med (and Firepower Up I if you have it).
- Don’t head for the front and back doors: there’s almost nothing there. Go out the door toward the stairs and the TV room.
- Small room under the stairs, on the right: a Molded spawns; shotgun it point-blank to add time. Take 2 Cheap Wine.
- TV room: Chicken and Spice on the table (one guide also counts 1 Cheap Wine and a second Chicken in the room; take them).
- Back to Jack: give him the wine and, while he eats, combine Chicken + Spice into Spicy Chicken and give it. In 5-10 seconds you’re at half the gauge.
- Go upstairs: on the first flight a Molded spawns on the left; kill it before the second flight. Ignore the door on the right for now, go to the end of the corridor, turn right and enter the attic bedroom: the Blue Blaster is in the middle. Kill every Molded you see with it (one shot each, +10 s).
- Far-right room, opposite the ladder: 2 Chicken and 2 Spice on the table.
- On your way back to the stairs, enter the room on the right you skipped: switch to the shotgun (a Molded spawns) and take the wine.
- Give Jack everything, combining the chicken with the spice while he drinks the wine.
What else is in the stage (per a room-by-room Steam guide): by the entrance, 2 Spice and 2 enemies; in the breakable-wall room, 1 Chicken, 4 enemies and the Mr. Everywhere; in the bathroom, Garbage? and a First Aid Med.
Testing Area 1
Goal: 1600. Per the same Steam guide (the room names are its own):
- Hallway and first room by the exit: Stew, Spice and Cheap Wine (a Tom Yum right away).
- Second room: P19 Machine Gun, 3 of its ammo and the yellow Molded. Kill it: it opens the yellow room (Chicken, Cheese, Stew) and makes the Mr. Everywhere appear on the barn’s 2F.
- Green-cabinet room: Beer and Fruit. Blue room: Beer, Chicken and Fruit.
- Barn: on the ground floor, Fruit and Beer; on 2F, Cheap Wine, Chicken, 5 enemies, the red enemy, the red pistol and the Mr. Everywhere. The 2F red room has Stew, Spice and Cheese. In the other part of the ground floor: Spice, 2 Cheap Wine and a Dulvey Cru (the wiki’s table has no Dulvey Cru in this stage; grab it if you see it).
- Room with the corpse: 2 Beer, Fruit and the blue enemy.
Main House 1
Goal: 2500. All the food appears from here, so this is the stage for Miracle Chef. 3 specific enemies open up the whole building.
- Main room, 2F: 2 enemies and the red enemy. 2F hallway: 2 Herbs, Handgun Ammo, 2 enemies, the green enemy and the Mr. Everywhere (in the gap where you can see outside).
- 2F coloured rooms: the first green one has 2 Cheese, 2 Spice, Cake, Chicken and a Grenade Launcher; the purple one, Beer, Cake, Chicken and Dulvey Cru; the second blue one, Sugar, Chicken, Neuro Rounds, 3 enemies and the blue pistol; the second green one, another Dulvey Cru and Cheap Wine. Lucas’s attic: Fruit, Beer, Cheese and Dulvey Cru.
- 1F: the purple room is the richest (Spice, Stew, Fruit, Beer, Chicken, Cheese, Cheap Wine and Dulvey Cru); the red room has Sugar, Spice, Beer, Fruit, Cheese and a Burner, and once you kill everyone a blue enemy appears; the first blue one, Cake, Stew and the M21 Shotgun. The purple enemy is in the green room.
- Also: the mould room (Sugar, Spice), the whiteboard room (Cake, Sugar, Spice) and the deer-statue room (Cheese, Beer, Cheap Wine).
Guest House 2
Goal: only 1000, but with very little time (B = 1:30). The guest house now has a basement.
- 1F red room: 2 First Aid Med and handgun, shotgun and 44 MAG ammo.
- Under the stairs: Cheese. TV room: Chicken and Spice. Breakable-wall room: Cheap Wine, Sugar and the red enemy. 1F yellow room: Cake and Cheap Wine.
- Attic: in the second room, Stew, 4 enemies, the Mr. Everywhere and, once they’re dead, the blue enemy; the blue room has Cake and a 44 MAG.
- Basement: the first room has Sugar, Spice and 4 enemies (killing them brings out the green enemy); the hallway, 2 Beer, 4 enemies, the blue pistol and the yellow enemy (it appears when you go down the ladder from the TV room); the green room, Fruit and Garbage?; the second hallway, Chicken and 5 enemies.
Testing Area 2
Goal: 2300. This stage has traps.
- Hallway by the exit: 2 enemies; the green enemy appears as you near the yellow door. First room: Cheap Wine, Spice, Cheese and the purple enemy. Red room: 2 Chicken.
- Yellow-door room: Dulvey Cru; the first yellow room, another. Green room: Beer and Stew.
- Barn: ground floor with 2 Fruit, Beer, Chicken and the red enemy; 2F with Chicken, Spice, Cheese, 5 enemies, the red pistol and the blue enemy (it appears downstairs and comes up). 2F purple room: Cake and 2 Cheap Wine. The other part of the ground floor: Sugar, Stew and a P19 Machine Gun.
- Blue room: Garbage?, Cheap Wine, a Burner, the yellow enemy and the Mr. Everywhere in the crack in the wall (it appears after you enter the orange room once; the Steam guide calls it “red”).
- Purple room: Cheese and Spice. Second yellow room: Sugar and Stew.
Main House 2
Goal: 5000, the highest, with a basement that includes the Jack-fight rooms.
- 2F: the red room (Fruit, Beer, Cheap Wine, Grenade Launcher), the middle room (Cake, Cheese, Fruit, the red enemy and the blue pistol), the blue room (Sugar, Cake, Garbage?) and Lucas’s room (Neuro Rounds and the blue enemy). Lucas’s attic: Spice, Cake, Cheese and 2 Sugar (two Sugarcakes with the 2F Cakes).
- 1F: the dining room is the richest (2 Fruit, Sugar, 2 Beer, Cheap Wine, Chicken and Dulvey Cru); the red room has an M37 Shotgun and Flame Rounds; the Garage, Stew, Fruit, 2 Sugar and the green enemy; the deer-statue room, Stew, Cheese, Fruit and Spice.
- Basement: the hallway has 2 Spice, 2 Sugar, Fruit, Cheese, Chicken and Marguerite (the spider); killing her makes the hallway’s Mr. Everywhere appear. The first purple room has 2 Dulvey Cru, Cake and Garbage?; the locked room, another Mr. Everywhere; the boiler room, Beer, Cheese, Sugar and Enhanced Handgun Ammo. The Jack-fight room (level 2) holds the red pistol; on level 1 is the purple enemy, which drops a Baker Family Special. The second purple room has 2 Dulvey Cru and 2 Cakes.
One guide gets the Don’t Keep the Man Waiting achievement here: chain kills with the coloured pistols and smash the Mr. Everywhere statues while the bonus is high.
Jack’s 55th Birthday: achievements
- Don’t Keep the Man Waiting: finish a stage with a time bonus of 10 minutes or more.
- Miracle Chef: feed him all 19 dishes (best in Main House 1, calmly).
- Best Birthday Ever: S rank or better on all 6 stages. Bring the skills you’ve already unlocked (Toughness I, Firepower Up II) to the hard attempts, and don’t use Infinite Ammo or the Circular Saw: they cut the time you earn a lot.
Boss — Hoffman (21, the saw)
Arena: Lucas’s table, with the saw in the middle of a 15-space track. Weak point: Lucas, who is working Hoffman, cheats at the end. At the start of the game you’re dealt Love Your Enemy, which looks useless: it gives the opponent the best card.
- Play the first rounds counting cards; lose little and keep your trumps.
- Don’t spend Love Your Enemy. When one more lost round would kill Hoffman, Lucas plays Perfect Draw and Desperation: both bets go up to 100 and you can’t draw, not even with trumps.
- Answer with Love Your Enemy: it makes Hoffman draw another card and, since Perfect Draw already put him on 21, any card busts him.
- Alternative: in the second-to-last round (for example with the saw 5 spaces from Hoffman and his bet at 4), raise his bet with One-Up or Two-Up enough that, if he loses, the saw reaches him. If you win there, Lucas never gets to cheat.
Reward: end of the story, the Eye in the Sky achievement and Survival mode.
Don’t leave without:
- 21: the Eye in the Sky achievement and, if you’re going for everything, Card Shark (Survival) and You Gotta Know When To Hold ‘Em (Survival+).
- Daughters: the code 1019, the Lock Pick, the Small Component and the attic laptop before giving the girl the clothes (true ending), the White Dog’s Head from the Veranda, and a second run for the other ending.
- Jack’s 55th Birthday: a B rank on each stage to open the next, the plain Cake and the Fruitcake for Miracle Chef, and the Guest House 1 and 2 rewards in the box before going for S ranks.