Three videotapes, each played on its own from the menu. In the first two you are Clancy Jarvis, the cameraman from the Old House tape: in Nightmare Jack locks you in the basement Processing Area and you must hold out until 5 a.m., buying weapons and traps with Scrap; in Bedroom you are cuffed to Marguerite’s bed and must escape by solving puzzles without her noticing. In the third, Ethan Must Die, you are Ethan: you cross the Main House, full of traps and of Molded that kill in one or two hits, to find the Greenhouse Key and kill Marguerite in the Greenhouse, with no checkpoints. This chapter gives you the full Bedroom walkthrough, Nightmare’s economy and rounds, and the fixed Ethan Must Die route, obstacle by obstacle.
Chapter order: Nightmare (Clancy, Processing Area: 5 rounds from midnight to 5 a.m., Jack in round 2 and round 5) → Night Terror (the same night, harder) → Bedroom (Clancy cuffed in the Master Bedroom: Spoon → paintings → Sewing Needle → clock to 5:00 → Snake-Leaf-Apple padlock → Corkscrew → shadows → Snake Key) → Ethan Must Die (Yard → Main Hall → Supplies → basement and Processing Area → Boiler Room → passage to the Master Bedroom → 2F east wing (no way back) → Living Room: Greenhouse Key → Main Hall → Yard → Marguerite in the Greenhouse).
Prepare: Banned Footage Vol. 1 sits under Extra Content on the main menu, and each mode is played on its own, in any order. Nothing you do here carries over to the campaign. These modes don’t use Easy, Normal or Madhouse: the difficulty comes from Night Terror (a harder Nightmare) and from Ethan Must Die’s own design. The buttons are the usual ones: L to guard, ZL aim, ZR attack, R quick heal, click the right stick to crouch.
- Start with Bedroom (about 20 minutes, two achievements). Ratcatcher needs all 3 dead rats in the same run, and they only appear after the second course: don’t escape before you have seen them.
- Nightmare has no separate shop: everything is bought with Scrap at the workbench next to the start. The points from every run add up for good and unlock weapons, healing, starting Scrap and traps: don’t be discouraged if you lose the first night, and play a few before trying Night Terror.
- Ethan Must Die goes last: its achievement is the hardest in the pack. Once you go through the 2F east wing door you can’t go back, and one hit can kill you.
Nightmare: the rules and Scrap
The rules. Jack locks Clancy in the Processing Area, the Main House basement. You must survive from midnight to 5 a.m.: 5 rounds (one per hour) of Molded. You start in the Incinerator Room with no items, 20 slots and 1000 Scrap. The workbench is next to the start: everything (items, weapons, ammo, skills) is bought there with Scrap, and every repeat purchase raises the price. Jack shows up in round 2 (as a stalker) and in round 5 (with the scissor-chainsaw).
End of each hour. An alarm sounds; within about 40 seconds the compactors stop and the Defeat All Enemies phase begins: you must kill everything left before the next hour starts. Scrap you didn’t collect doesn’t disappear: it stays in the compactor for later. At the end of the round you get a bonus based on your kills and on whether Jack was there and you beat him.
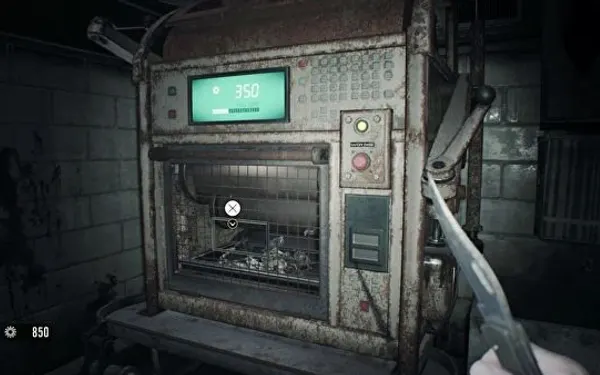
The compactors. There are 4, and each must be switched on before it produces anything; after that they make Scrap nonstop, but you must walk to each one to collect it, and each holds at most 1000.
- C1: in the start room (Incinerator Room). Switch it on as soon as you begin.
- C2: go right (south) to the larger area before the stairs to the Snake door.
- C3: in the Workshop, behind the door with a metal lock to the left of the Incinerator Room. It opens with Corrosive (the first one costs 1500).
- C4: in the Morgue, behind the other Corrosive door (the second one costs 2500).
Both Corrosive areas also hold more traps. Best place to fight: the corridors by the Incinerator Room, between C1 and C2.
Hour-1 opening.
- First run (1000 Scrap, no rewards): buy the G17 Handgun and ammo. Switch on C1, go right to C2 and switch it on, and fight in the corridors by the start. As soon as you have 1500, buy Corrosive, open the Workshop and switch on C3. The Compactor upgrade (2500) pays for itself: buy it as soon as you can.
- With rewards (Machine Gun set and 1500-2000 starting Scrap): buy the P19 Machine Gun and Corrosive, switch on C1, open the Workshop door, turn around (180°), go to C2 and switch it on, go back to the Workshop to switch on C3, and return to the start room to fight. Once C1 holds about 200, loop C2 → C3 → C1 to collect. Buy the Compactor upgrade at the start of hour 2.
Score. At the end of the run you get a score based on the Scrap you have left, the enemies you killed and how long you survived. It is added to the running total that unlocks the rewards (table below). If you’re playing for points, buy only what you need when you need it and end hour 5 with as much Scrap as possible: an 870,000-point Night Terror run ended with about 11,000-12,000 Scrap to spare.
Nightmare: the workbench
Items (starting price and increase per purchase):
- Healing: First Aid Med 100 (+50) · Strong First Aid Med 300 · Adrenaline 300 (+1200; revives you automatically).
- Weapons: Knife 0 · G17 Handgun 50 · Grenade Launcher 50 · M37 Shotgun 100 · 44 MAG 100 · Remote Bomb 100 · P19 Machine Gun 150 · Burner 150 · M21 Shotgun 200 · Albert-01R 200 · Circular Saw 3000.
- Ammo: Handgun Ammo ×10 50 (+20) · Enhanced Handgun Ammo ×10 150 (+100) · Shotgun Shells ×4 40 (+30) · Machine Gun Ammo ×64 150 (+50) · Burner Fuel ×150 150 (+30) · Flame Rounds ×3 100 (+100) · Neuro Rounds ×3 150 (+100) · 44 MAG Ammo ×7 300 (+150).
- Other: Corrosive 1500 (+1000).
Many of those weapons only appear once you earn their points reward; whatever isn’t in the rewards table (Knife, G17 Handgun, M37 Shotgun, Grenade Launcher) should be there from the first night.
Skills (level 2 → level 3): Compactor 2500 (+50%) → 4000 (+100%) · Health 100/200/300/400/500 (+20% per level, up to +100%) · Heal 250 → 500 · Speed 500 → 1000 · Reload 500 → 1000 · Handgun 500 → 1500 (+60% / +140%) · Shotgun 500 → 1700 (+80% / +170%) · Machine Gun 500 → 1700 · Melee 500 → 1500 · 44 MAG 1000 → 2500 (+60% / +200%) · Grenade Launcher 1000 → 2500 · Burner 500 → 1500. Don’t neglect them: Compactor pays for itself, and upgrading a gun twice with your starting Scrap saves a lot of ammo (ammo gets pricier with every purchase; upgrades pay off all night).
Traps. Walls and floors hold turrets and tripwires that you switch on by paying Scrap next to them; some can be levelled up. The 20,000-point reward adds Nerve Gas Traps to the stage and the 150,000-point reward adds Flammable Drums. The Workshop and Morgue areas (the Corrosive ones) hold more traps. Tripwires are very effective but costly and limited: keep them for the Fat Molded and for Jack.
Points rewards (added up across runs of both modes): 5,000 Starting Scrap +250 · 10,000 Machine Gun set · 20,000 Nerve Gas Traps · 40,000 3 First Aid Med at the start · 80,000 Burner set · 100,000 Adrenaline · 150,000 Flammable Drums · 200,000 44 MAG set · 300,000 Circular Saw · 450,000 Starting Scrap +250 · 700,000 Neuro Rounds · 1,000,000 Enhanced Handgun Ammo · 1,500,000 Strong First Aid Med · 2,000,000 Starting Scrap +250 · 3,000,000 Remote Bomb set · 4,000,000 M21 Shotgun · 5,000,000 Albert-01R · 7,000,000 Starting Scrap +250 · 10,000,000 Infinite Ammo. Careful: taking the Circular Saw or Infinite Ammo from the workbench multiplies that run’s score by 0.01; use them only to finish the night (Dead by Dawn? or Sleepless in Dulvey achievements), not to rack up points. Dead by Dawn? achievement: complete Nightmare.
Nightmare: hour by hour
How to kill each enemy. The handgun is your main weapon and the shotgun your second; the Grenade Launcher only for groups of 3 or more, Fat Molded or Jack. Fight in narrow corridors and aim at head height in the doorway they come through.
- Molded (and the Blade Molded): shoot it once in the head as it comes in; it will cover its head with its arm. Wait until it lowers the arm to attack, give it 2 headshots (it staggers) and finish it. A leg shot knocks one down and the knife to the head finishes it without spending bullets. The Blade Molded (blade arm) takes much more punishment and hits harder: kill it first even if it costs more ammo.
- Crawler Molded (on all fours): aim at the floor; about 4 rounds put it down if at least one hits the head. Listen for its fast footsteps to know it’s coming.
- Fat Molded: one 44 MAG shot (with the first upgrade), wait for it to roll onto its side to get up, then another to the head. Without the 44 MAG, the Grenade Launcher or a tripwire. Step back when it dies: it bursts.
What each hour brings. Composition of a Night Terror run written up by an 870,000-point player (Nightmare has the same structure with weaker enemies; its exact numbers haven’t been counted):
- Hour 1: 12 Molded; in the Defeat All Enemies phase, 5 Crawler Molded.
- Hour 2: 8 Molded, 1 Blade Molded (kill it as soon as you can) and, in Defeat All Enemies, Jack with a Molded escort (see the boss section).
- Hour 3: 9 Molded and 4 Fat Molded. A normal Molded comes between the 2nd and 3rd Fat Molded: don’t waste a 44 MAG round on it. The last 2 Fat Molded come in the Defeat All Enemies phase.
- Hour 4: 13 Molded and 3 Crawler Molded; in Defeat All Enemies a few Molded come, there is a pause and 3 Blade Molded spawn at once: 44 MAG to the head.
- Hour 5: 6 Molded, 7 Crawler Molded and chainsaw Jack. If a Crawler comes in alongside a Molded, kill the Crawler first.
What to buy each hour (same run, with the Machine Gun and 44 MAG unlocked): hour 1, P19 Machine Gun and Corrosive, then on your first collection the Machine Gun upgrade and its ammo · hour 2, Compactor upgrade, 44 MAG, its ammo and its upgrade · hour 3, second Machine Gun upgrade and ammo for both · hour 4, ammo for both · hour 5, Adrenaline, the second 44 MAG upgrade, Machine Gun ammo and 44 MAG Ammo twice. In that run the Scrap is collected at the end of each hour (hours 2 to 4) and almost the whole night is spent in the start room.
Night Terror. The same night, harder: compactors make half as much (50 per batch instead of 100), every enemy is tougher and attacks more, there are many more Crawler Molded, the first Fat Molded come in pairs and Jack brings a stronger escort. In return you get more Scrap per cleared round and for beating Jack. Go in with rewards unlocked (Machine Gun set, 3 First Aid Med, Adrenaline and, if you can, the 44 MAG set). Sleepless in Dulvey achievement.
Bedroom: the rules
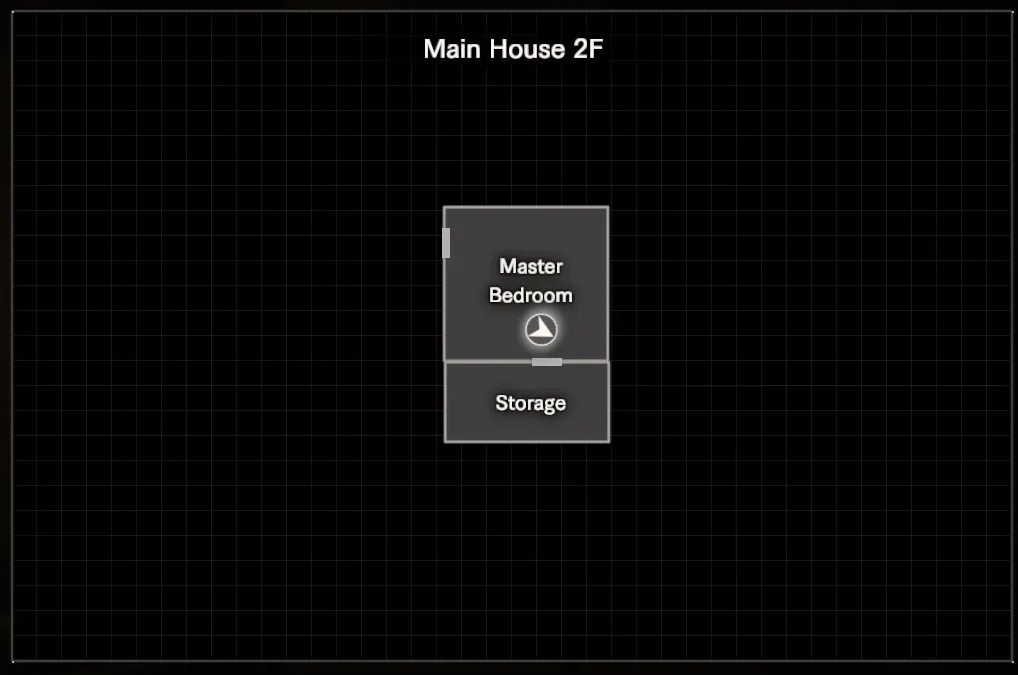
Marguerite has Clancy cuffed to the bed in the Main House Master Bedroom. Goal: escape through the passage under the bed, which opens with the Snake Key. 12 slots, you can’t guard, and there is a hidden weapon.
- Several actions make noise, and Marguerite comes back on a countdown (about a minute, per one guide).
- Before she comes in, put everything back: paintings, grandfather clock closed, bed in place, storage room door shut, Lantern on its hook, you in bed, and choose to wait.
- If she sees anything out of place, she attacks you, the room resets and she tightens the cuff (the Spoon frees it again). 3 hits and you die; eating her food counts as a hit. If you take too long, she comes in and stabs you.
- In the dialogue, the safest choice is to lie and say the food looks good (“looks good”): the other two answers anger her (per the wiki, nothing else changes). Later on, if she offers, blame Lucas and she leaves.
Bedroom: the escape step by step
Phase 1: paintings and Sewing Needle. Take the Spoon from the tray and undo the cuff. Take the Lantern from the hook on the left. On the dresser: the Lighter inside the vase and, in the left drawer, the note “The same time as all other clocks”. Don’t open the right drawer: it sticks and won’t close again.
- Take Untitled Painting C off the wall (the one with three painting slots) and Untitled Painting B from the barrel on the right. From the little bedside clock take the Broken Clock Hand.
- Hang B in the left slot and C in the middle, open the grandfather clock lock with the clock hand, and note the time: 5:00.
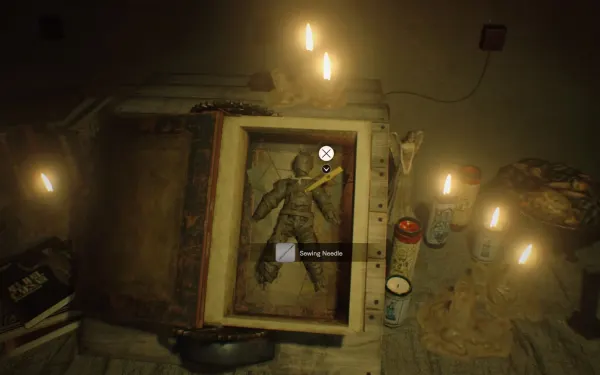
- Inside is Untitled Painting A; taking it makes the clock chime and she comes. Close the clock and hang A in the right slot (order B – C – A): the book on the table opens and you take the Sewing Needle from the voodoo doll.
- Undo everything: take all three down, C back in the left slot, B on the barrel, A stays in your inventory, Lantern on the hook, and back to bed. If you run out of time, close the clock, keep A, hang the Lantern, lie down, and sort out the paintings after she leaves.
Phase 2: the bedside clock. When she leaves, free yourself, take the Lantern and put the Sewing Needle in the bedside clock. Set it to 5:00: the bed slides aside and reveals the passage. That makes noise: use the clock again to put the bed back, hang the Lantern and lie down. She brings a new tray with a Stove and a Fork: take them. From now on the 3 dead rats appear (below).
Phase 3: the padlock. Read the note that came out from under the bed (“darkness”, “gave of his flesh”, “charred black”) and hang the paintings in that order: A on the left (the blindfolded man), B in the middle (the one eaten by crows), C on the right (the burning one). The book shows a doll with a leaf on its bib. Examine the Spoon (its tape has an apple) and the Fork (a snake). Storage room padlock combination: Snake – Leaf – Apple. Before her next visit, take all three down and leave C in the left slot. In the Storage Room: the Snake Key in a cage, a coat with a note about the knives Zoe hid, and a second lantern hook. The note leads to the Knife, behind the dresser.
Phase 4: fire and hooks. With the Fork, pry off the nailed board on the small cabinet in the wardrobe at the back of the bedroom: Solid Fuel. At the barrel, remove painting B, place the Stove, the Solid Fuel on top, and light it with the Lighter: the fire drives the bugs off the bottles and you take the Corkscrew. She comes: put the Stove away, B on the barrel, Lantern on the hook, bed. When she leaves, use the Corkscrew on the corks of Lantern Hook A (by the bed) and Lantern Hook B (in the storage room) and combine them: Iron Statuette. Use the Knife to cut the tape on the back of the projector box and put the Lantern in: it is the light source.
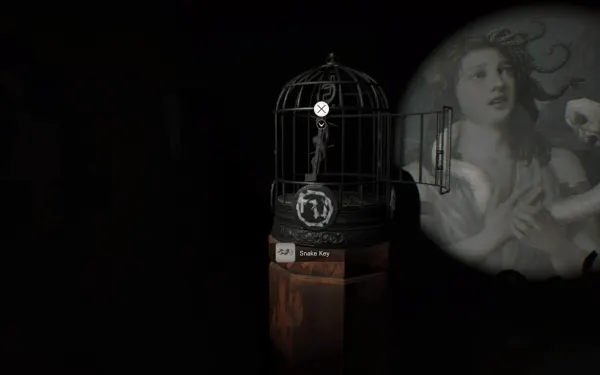
Phase 5: shadows and escape. On the front pedestal place the Iron Statuette and rotate it until its shadow fills Medusa’s face. On the other pedestal place the Fork and rotate it until the shadow becomes the snake’s head (the tines are the fangs). The cage opens: Snake Key. Marguerite comes in and won’t leave: this is the end of the mode, so have the 3 rats already. Equip the Knife and lunge at her: Clancy stabs her in a cutscene. Use the clock to open the passage, open it with the Snake Key and run. Like Mama Used to Make achievement.
Bedroom: the 3 dead rats
Ratcatcher achievement: all three in the same run. They only appear after the second course (the Fork tray) and must be examined with the Lantern in hand.
- In the second course: use the Fork on the stew: an animation plays and the rat is revealed; examine it. Per PowerPyx, using the Fork on the dish is enough; per the Steam guide and the Fandom wiki, Clancy eats, vomits and takes damage (one of your 3 hits), so do it without another hit already on you.
- Bedroom, right of the bed: in the corner by the barrel, on the floor behind the broken shutters next to the radiator; PowerPyx describes it as “the corner of the room near the picture frame”. Crouch to see it.
- Storage Room (behind the padlock): on top of the shelf facing the door, next to the chair hanging upside down.
Ethan Must Die: rules, inventory and crates
The rules. Ethan starts in the Yard, by the Old House entrance, with the knife, the Codex watch (shows your health) and 12 slots. Goal: kill (mutated) Marguerite in the Greenhouse. There are no checkpoints: when you die you go back to the start. Enemies and traps (turrets, tripwires, nerve-gas plates, bomb crates) are always in the same place and always the same enemy type; only the crates hold random loot, which changes with every death. One clean hit can kill you: always guard (L), guarding still reduces damage (except against grabs). Knowing the map, you only need to kill about 7 enemies plus Marguerite; the rest you dodge or kill with their own traps. Ethan Never Dies achievement.
The statue. If you die, you leave a figurine where you fell; on the next run, break it and it drops one random item you were carrying (if you already have that weapon, it gives ammo instead). If you restart or quit the game, no statue is left.
Inventory. Your 12 slots include the knife. A good kit: 1 handgun, 1-2 heavy weapons (2 slots each), their ammo and one stack of Strong First Aid Med. Drop everything else without fear, after spending the ammo.
- Steroids: use them as soon as you find them; the extra max HP can save you from a hit.
- Stay at full health: one or two hits kill you, so heal right away (First Aid Med, or a Herb if you’re in Danger).
- Gunpowder + 10 Handgun Ammo = 5 Enhanced Handgun Ammo. With Strong Chem Fluid, Gunpowder makes Enhanced Handgun Ammo; with Chem Fluid, regular ammo.
- Walking Shoes: you outrun Molded without sprinting; drop them if you need the slot.
- Most useful weapons: the M37 Shotgun (staggers any Molded; a headshot almost always kills), the Albert-01R with Enhanced Handgun Ammo, and the Burner (very effective against Marguerite per the Steam guide, and a few drops of fuel set off traps from range). The Grenade Launcher takes 2 slots for the whole run: take it only when you’re already heading to the Greenhouse. The P19 Machine Gun is for emptying into one enemy or setting off traps, then dropping.
- If you reach the key badly equipped, dying on purpose to re-roll the crates is legitimate.
The crates. By colour:
- 1 star (brown): Chem Fluid, Strong Chem Fluid, Herb, First Aid Med, Gunpowder, Psychostimulants.
- 2 stars (green): Strong First Aid Med, X-Ray Glasses, Stabilizer, MPM Handgun, Handgun Ammo, M21 Shotgun, Shotgun Shells, Burner, Burner Fuel.
- 3 stars (purple): Strong First Aid Med, Steroids, Survival Knife, The Secrets of Defense, The Essence of Defense, M19 Handgun, Handgun Ammo, M37 Shotgun, Shotgun Shells, P19 Machine Gun, Machine Gun Ammo, Flame Rounds.
- 4 stars (silver chest, rare): Walking Shoes, The Secrets of Defense, The Essence of Defense, Albert-01R, Enhanced Handgun Ammo, 44 MAG, 44 MAG Ammo, Grenade Launcher, Neuro Rounds, Steroids.
Booby-trapped crates have a single layer of tape and tick: they explode and can kill you outright. With Psychostimulants or X-Ray Glasses you see the marked items: a crate with no mark is a trap. If in doubt, break it with a shot from range.
Before you enter the house. If the Yard crates give you no weapon, restart until you have one. Lure the Molded into the traps; wounded, Ethan is too slow to escape a plate he steps on himself.
Ethan Must Die: Main Hall, Supplies and basement
- Main Hall. As you enter, 1 Fat Molded spawns on 2F plus 2 Molded (one on your right, one on the left stairs). Run past the one dropping on your right, U-turn left and open the Scorpion door, which needs no key here. Keep hugging the right wall: a 3rd Molded spawns in the hall to the basement. U-turn right, go through the white door and close it behind you. Sometimes 1 or 2 crates appear in the Main Hall: leave them for the way back.
- Supplies (the room behind the crow door, where the Grenade Launcher sits in the campaign). A Molded spawns as you approach, and the entrance has a tripwire: crouch under it. Inside, step away from the door and let the Molded follow you and set off the bomb itself. Break the crates: both hold items.
- Basement stairs. A harmless insect nest blocks the basement door: it takes 8 knife hits (4 with the Survival Knife); one or two handgun rounds first soften it. Stepping on the stairs spawns a Molded behind you: break the nest fast and close the door behind you. If you go back up, it respawns.
- Optional, Incinerator Room hall. Three nerve-gas plates: you can’t avoid the 1st and 3rd, but you can avoid the 2nd. The Incinerator Room always has 2 crates, often 3- or 4-star. Run through only at full health: in Danger the gas kills you. On the way back a Crawler Molded spawns; run past it and make it step on the 2nd plate.
- Basement. Avoid the gas plate to the right of the entrance. In the room where the Scorpion Key was in the campaign, a Molded spawns: lead it into the previous hall so it steps on the plate, and finish it with the knife. A Fat Molded waits behind the door to the lower basement: open the door ajar so it spends its vomit, then open it fully, circle it around the table (use the central column to dodge the vomit, guarding), and when the way is clear, run to the brown metal door.
- Dissection Room. Don’t walk in: there is a tripwire by the door frame. Set it off from outside with a few drops of Burner fuel or, if you have none, with a bullet after step 7. Then go in for whatever is there.
- Tripwire hall. Three tripwires and a Blade Molded at the end. Crouch under the wires, let it see you and walk back: chasing you, it sets off two of the bombs (if it gets past the 2nd, the 3rd finishes it). Keep your distance.
Ethan Must Die: Boiler Room, secret passage and Master Bedroom
- Boiler Room, 1st forced ambush. You need a shotgun or a handgun with a full magazine. Break the crate on the right and the one in front of the exit door (the one opposite the way in): going past that point starts the fight and locks the doors. Stand between the two engines, against the right wall, facing the exit. An armless Molded comes from the left, steps on a gas plate and loses its legs too, and a Blade Molded spawns right in front of you. With a shotgun, one clean headshot on the Blade Molded, then finish the crawler with the knife or a bullet. With a handgun, kill the crawler first and circle the room shooting the Blade Molded. As you leave, a Crawler Molded spawns behind you to kill you in one hit: close the door as soon as you’re through. Break the nest in the bathtub room to go on.
- Workshop and secret passage. Take whatever is in the Workshop and head for the passage up to the Master Bedroom. The last step of the ladder sets off a ceiling trap that kills instantly. Climb the ladder backwards and, as soon as you hear the mechanism click, run forward.
- Master Bedroom. It’s full of bomb crates. Turn around, step on the nerve-gas plate and jump back into the passage: everything blows up while you’re safe.
- Main Hall, 2F. You’ll see a tripwire above the door to the Living Room corridor: don’t set it off, you’ll use it on the way back (step 17). Point of no return: once you go through the 2F east wing door you can’t come back. Before that, pick up everything you left behind (Main Hall, Incinerator Room and Dissection Room crates).
Ethan Must Die: 2F east wing and the Greenhouse Key
- Balcony. You’ll hear a turret gun Jack down. When you open the door, go right so it doesn’t hit you, crouch and move along the balustrade. A Molded spawns behind you: keep heading for the Recreation Room door and let the turret kill it.
- Recreation Room. Go in crouched: there are 2 turrets and 2 tripwires (one on the right by the counter, one behind the pool table on the left). Break the crate in front if there is one, run to the bins by the far door, and from there shoot the pool-table tripwire. If the crate on the counter is a bomb, set it off yourself before the turret blows it up next to you. Next door, Grandma’s room has 2 high-rated crates; run past the turret.
- 2F corridor. Opening the door to the corridor spawns 2 Molded. Run back through the Recreation Room to the balcony and close the door (crouched, because of the balcony turret): the turrets kill them. If one ends up stuck against the door, open it carefully to push it and close it again. Further on, by the broken stairs, 2 more Molded spawn near an explosive barrel: go past the barrel to the corner on the right (without stepping onto the balcony, whose turret is still active), shoot the first one to slow it and blow the barrel when both are close. Keep 1-2 shells in case one survives.
- Broken stairs. Below are 2 tripwires that go off if you just jump. Stand by the couch, shoot the farthest wire and drop down. Optional: the Pantry has high-rated crates, bomb crates and a ceiling tripwire, and an armless Molded spawns when you enter (shoot a bomb crate to clear it, or trap the Molded by circling); the Laundry Room has 2 gas plates and a bomb crate: open the door without stepping on the plate, shoot the crate and cross the plates at full health.
- Dining Room and Living Room. Through the Dining Room double doors you reach the Living Room, which has a turret (run past it, or crouch behind the couch). The Greenhouse Key is in a cupboard in the Living Room. When you take it and try to leave, the doors lock: 2nd forced ambush, 2 Molded and 1 Fat Molded. Stand beside the turret, in front of where the key was, so the Molded walk into its fire; hold them with a shotgun or the 44 MAG. Shoot the Fat Molded alongside the turret and don’t let it round the table; if it does, run out to the Dining Room before the turret and its vomit catch you. Step back when it bursts.
Check your kit here. For Marguerite you want 1 handgun, 1-2 heavy weapons (shotgun, Burner or Grenade Launcher), ammo for all of them, a stack of healing and the key. Drop shoes, scrolls and spare materials. If you’re badly short, consider starting over.
Ethan Must Die: back to the Main Hall and the Yard
- Corridor to the Main Hall. Crouch past the corridor tripwires. 2 legless Molded spawn round the corner and then 2 Crawler Molded. Lead the slow ones to the Living Room turret (if it has ammo left) or into the Pantry or Laundry Room; make the Crawlers jump onto the tripwires from a distance (or use the wires you left at the broken stairs).
- Main Hall. Open the door crouched and hugging the right: you’ll hear a Fat Molded spawn on 2F and then 2 Molded. Back off and wait for them to set off the tripwire above the door (the one from step 11). If one survives, lead it to another trap.
- Yard. Passing the left side of Zoe’s trailer, you’ll hear a Fat Molded spawn behind a door surrounded by 3 tripwires; if you get too close, 2 Molded spawn as well. Get just close enough for the Fat Molded to appear, shoot the 3 wires one by one from range and run to the Greenhouse. Open its door with the Greenhouse Key (per the Steam guide, the lock is on the upper floor) and break the crates in the antechamber before the boss.
Boss — Jack (Nightmare)
Arena: the whole Processing Area, with the round’s Molded around. Round 2: stalker Jack; round 5: Jack with the scissor-chainsaw, and in Night Terror with more escorts. Beating him gives extra Scrap at the end of the round. Weak point: the head.
Round 2.
- Before the round starts, buy ammo and set turrets and tripwires in the corridor you’ll lead him through.
- He comes with a Molded: kill it first, with headshots in a narrow corridor.
- With the 44 MAG (200,000-point reward) he goes down with about 7 headshots; you can keep hitting his head while he’s stunned on one knee. If you miss more than once, finish him with the Machine Gun. Without the 44 MAG, the Grenade Launcher is the weapon for him. Guard (L) if he’s on top of you.
Round 5 (chainsaw).
- Buy Adrenaline before the round as insurance, and 44 MAG Ammo twice: he needs 14 or more headshots.
- When he opens the scissor-chainsaw wide he makes a sweep that can’t be guarded and can kill you outright: don’t guard, run from it.
- Go to collect C3 and start shooting him on the way, lead him back to the start room, keep firing and finish him there. Lead him through the traps you set and don’t stand still.
Reward: end-of-round bonus Scrap and, in round 5, dawn: Dead by Dawn? (Nightmare) and Sleepless in Dulvey (Night Terror) achievements.
Boss — Marguerite (Ethan Must Die)
Arena: the Greenhouse (ground floor, stairs and an upper floor with a balcony). It has tripwires, a turret and a few crates, including a 4-star one on the top floor. There are no spiders, nests or insects here, and she has much less HP than in the campaign. Weak point: the head (+10% damage per the campaign data); the belly nest takes 20% less until it bursts, so shoot it only when it’s all you can hit.
- Before going up, explore the ground floor, note where the tripwires are and break every crate.
- Climb the stairs slowly. As soon as she appears, step back: her grab misses and you can shoot at once (you can also guard it, but you lose shooting time).
- At the top, look right, find a tripwire and shoot it.
- Walk on to the balcony, take the 4-star crate’s item, crouch under the diagonal wire and go into the room on the left, to the crate on the far side, keeping clear of the turret.
- Wait there. The turret hits her while you fire everything. If you run dry, dodge her, go down past the balcony picking up items, open the locked door and lead her round the Greenhouse through the tripwires.
- She’s dead when she screams and kneels.
Weapons: headshots with the shotgun, the Albert-01R or the 44 MAG are the backbone. The Burner is very effective per the Steam guide. In the campaign, Flame Rounds and Neuro Rounds do much less damage to her than bullets (60-80% and 70-90% less), so use grenade rounds to stagger her rather than to wear her down. Guard (L) every swipe; with The Secrets of Defense your guard holds up better.
Reward: end of the mode and the Ethan Never Dies achievement.
Don’t leave without:
- Bedroom: the 3 dead rats in the same run (only after the second course; the stew one may cost a hit) before you open the Snake Key cage, and the Like Mama Used to Make achievement.
- Nightmare: all 4 compactors switched on (C3 and C4 with Corrosive) and the Compactor upgrade. Every run adds points: play even if you lose, until the Machine Gun set (10,000), the 3 First Aid Med (40,000) and, if you can, the 44 MAG set (200,000) before trying Night Terror.
- Ethan Must Die: before crossing into the 2F east wing, every crate on the ground floor and in the basement; leaving the Living Room, the Greenhouse Key, a handgun, 1-2 heavy weapons with ammo and a stack of Strong First Aid Med.