Where each boss shows up, its weak point and how to beat it step by step.

1 · Prologue · Guest House · Guest House 1F: the basement hallway and the Vacant Room
Weak point None in particular: block and counter with the Axe
This is the block and melee tutorial. First you wrestle with Mia and her knife; then she throws you through a wall into a room with an Axe on the floor. She has about 700 HP (datamined, single source). The Axe does 100 per normal swing and 150 per heavy swing, so 5–7 hits are enough. The rhythm never changes: block, one hit, block.
- Knife struggle: press the button shown on screen. You take damage whatever you do; if the screen turns red, heal with a First Aid Med (R).
- Mia passes out. When you walk up to her body she throws you through the wall: pick up the Axe as soon as you get up.
- Circle her and hold L to block when she raises her arm. After each block, one single swing (ZR), then block again.
- Alternative: wait for her wind-up and interrupt it with a swing.
- Your first block earns the "Arms in the Air" achievement.
- Afterwards her body is gone but the Axe stays where she fell: pick it up again, it is your backup for the attic.
Reward: Access to the second half of the Guest House, and the Axe (pick it up again).

1 · Prologue · Guest House · Guest House attic and 3F: pillars, crates and side rooms with doors
Weak point The head (+100% damage)
The first real boss. Before it, Mia cuts off Ethan's left hand; 3F Store Room A holds the M19 Handgun, and Store Room A (5), Store Room B (20) and the attic (7) hold 32 rounds on Normal. Take everything before you climb the ladder to the attic window: the ladder starts the fight. She has about 2000 HP and the head takes double damage: with the M19 that is about 12 headshots on Normal (10–15 depending on your rank). Use obstacles and doors: while she saws through them, you get free shots. The M19 is taken away at the end, so spend every bullet.
- Save at the 2F tape recorder and pick up the three ammo piles on 3F (Store Room A, Store Room B and the attic).
- Climb the ladder: Mia shows up with the chainsaw. Drop off the ladder at once and open distance.
- Put a pillar or some crates between you. Duck into a side room and close the door: while she saws through it, shoot her in the head.
- When she charges in a straight line, sprint sideways (press the left stick) or block it with L: the block stuns her for a moment and gives you a clean shot.
- Every few headshots she staggers (body shots need 5–6 for the same): use it to reposition.
- If a swipe lands, heal at once (R): a few swipes kill you.
- Out of ammo, finish her with the Axe: block, one hit, back off. It is risky.
Reward: End of chapter 1: Mia collapses and Jack knocks Ethan out. "Welcome to the Family, Son" achievement. You lose the M19 Handgun.

2 · Main House · Processing Area · Main House 1F and 2F: main hallway, kitchen, dining room, pantry and bathroom
Weak point The head, but it only knocks him down: he can't be killed
This isn't a fight you win: Jack hunts you through the Main House and doesn't die. With enough damage he collapses, then gets up after a while or as soon as you hit him again. His knockdown only counts stun damage (datamined), so attack coins don't help. Block to take less, shoot his head to drop him, and run.
- First appearance: as you pass the Laundry Room on the way to the dining room, while he still doesn't know where you are.
- In the Pantry, after taking the Hatch Key: if he reaches you he cuts off your leg and leaves a First Aid Med so you can reattach it. Going down the floor hatch despawns him.
- On Easy and Normal he comes back when you take the Wooden Statuette from the 2F bathroom: he smashes through the wall and throws you into the bathtub. Go round it the other way and get out.
- He can burst through the wall from the Pantry when you drop from 2F to 1F and pass the Laundry Room, or on the kitchen loop: he only has to be following you, even if you knocked him down.
- Loop him around the kitchen and dining room to shake him off and reach what you need.
- Safe zones: he never follows you into the Drawing Room or the Processing Area.
- He stops roaming once you take the M37 Shotgun in the Display Room. If he is knocked out at that moment, he stays on the floor until you pick up the Red Dog's Head.
Reward: None: you just survive.

2 · Main House · Processing Area · Main House Garage: the car in the middle, a workbench on the east side and a ladder next to the workbench
Weak point Nothing useful: the car does the work. Headshots only make him flinch
Jack kills Deputy David Anderson right at the start. He has about 10,000 HP (datamined) and the head takes double damage, but you're not meant to shoot him down: the car wins this fight. Two hits from his weapon can kill you. The garage holds the G17 Handgun next to the deputy's body, the Car Key on the east workbench, Chem Fluid in the NW filing cabinet, a First Aid Med in the SW locker and Handgun Ammo ×5 in the SE crate.
- While Jack is busy with the deputy, grab the G17 Handgun and run right to the workbench for the Car Key. The key comes first.
- Get in the car and start it quickly: if you are slow, Jack pulls you out or gets in himself.
- Ram him again and again: drive into him, then reverse to line up the next charge.
- Cutscene: he climbs onto the roof, tears it off, takes the wheel and crashes the car.
- He crawls out on fire. Shoot his head to make him flinch and don't let him touch you: if he grabs you he holds on until the car explodes, and the explosion ends the fight.
- Climb the ladder by the workbench. He grabs you one last time: pull the trigger (cutscene).
- If Jack takes the car first, dodge it: with enough damage he crashes it. Shooting the tyres speeds this up.
- Collect the rest of the garage loot before you climb.
Reward: The G17 Handgun and the walkway above, with the Ox Statuette (in the frame on the metal shelves) and Shotgun Shells ×1.

2 · Main House · Processing Area · Processing Area Morgue: a pit with a central brick pillar and hanging body bags
Weak point Only while he is down or his head is open (the "tumour"); on his feet, bullets only stun him
It starts when you take the Red Dog's Head on the upper level of the Morgue: Jack throws you into the pit. Keep 2–3 slots free for the Chainsaw and carry 2–3 First Aid Meds. He has about 4500 HP and this fight ignores the difficulty rank. While he walks he only takes stun damage; real damage lands when he is down. Bullets break that animation after the first shot and melee doesn't, which is why the chainsaw is the phase 2 weapon. The pit has a First Aid Med on the NE bucket, a Herb in the breakable crate to the south (Strong First Aid Med on Easy) and the Chainsaw behind the mesh. Craft Enhanced Handgun Ammo first (1 Strong Chem Fluid + 1 Gunpowder = 10 rounds).
- Phase 1: circle the pillar. When Jack walks past a body bag, kick it into him (A next to the bag): it staggers him. The angle matters.
- With Jack staggered, shoot his head: about 10 handgun shots bring him to his knees, or 3–5 rounds of Enhanced Handgun Ammo. When his head bursts into a mass of flesh, switch to the shotgun.
- If he grabs you or stabs you, shoot him so he lets go. Out of ammo you can survive by dodging until he goes for the shears, but it takes minutes.
- Phase 2: he rips the mesh open and takes a pair of giant motorised shears. The Chainsaw is right next to it: grab it at once.
- Block with the chainsaw (L): a last-moment block staggers him. Head-on clashes cancel both attacks and nobody takes damage.
- The loop: body bag into him → 2–3 swipes (ZR) → he kneels and the tumour pops out of his head → ZL + ZR and hold to drive the saw into it.
- When the saw's light turns yellow and then red, the engine stalls: rev it with Y, always with the pillar between you.
- He mutates about 3–4 times on Normal. Near the end he knocks down the central pillar and you have less room: keep the pressure on while his face is open.
- "Duck If You Love Life" achievement: when he runs at you and strikes from above with the shears, crouch (press the right stick). His other attacks still hit you. This is the only chance: save before taking the head.
Reward: The Red Dog's Head, the last of the three dog heads. The Chainsaw cuts the door blockade and stays in the Morgue.
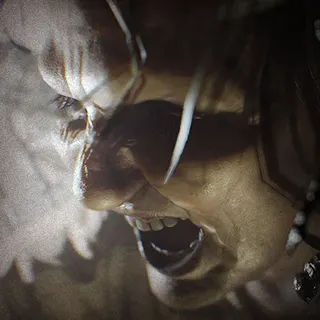
3 · Yard & Old House · Old House 1F and 2F
Weak point The head; while she patrols, every weapon does half damage
After you take the Stone Statuette in the basement and try to leave the Living Room, Marguerite slams the door and covers it in spiders. From then on she patrols with her lantern and, if she sees you, sends swarms of insects. She has 1500 HP, but while she roams every weapon does −50% and the Burner's burn does nothing (direct flame contact does: +150%). You can avoid her or stand your ground once for the achievement.
- Clear the spider door with the knife (ZL + ZR to reach from further away): "Slash Slash, Slashity Slash!" achievement.
- To avoid her: hide in the Old Shack, the save room next to the Gallery, until she leaves.
- For "Back Off, Mrs. B!" (only chance): save when you reach the Old House and hurt her until she knocks Ethan down and leaves the house for good.
- Shotgun or handgun to the head; the Burner for the swarms she sends.
- "Less is More" achievement: one shotgun blast into a group of her insects kills two or more with one shot.
Reward: "Back Off, Mrs. B!" achievement if you drive her off: there is no other chance in the run.
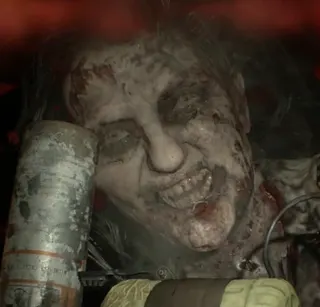
3 · Yard & Old House · Old House 1F: the stairs to the Crow door and the pit that opens under the Dilapidated Room
Weak point The head
It starts when you carry the Crow Key up towards the Crow door: Marguerite throws you down the stairs, the floor gives way and you are stuck in a pit. She has 1500 HP: about 3 M37 Shotgun shells to the head on Normal. Burn the swarms first and shoot her head every time she peers in. Bring about 100 Burner Fuel, 10 rounds of Enhanced Handgun Ammo and 3 First Aid Meds.
- Burn the swarms with the Burner as soon as they appear.
- Shoot her in the head with the handgun or shotgun every time she leans over the edge. Be quick, before she sends more bugs.
- The big insects can't hit you if you keep toggling crouch and stand (press the right stick). You can also finish them with the knife to save fuel.
- When she drops into the pit, it fills with bugs and slime that keep damaging you: climb out immediately.
Reward: The way to the Crow door and the Altar (Serum Documentation). Later her hand grabs the lantern and she flees down a tunnel towards the Greenhouse.
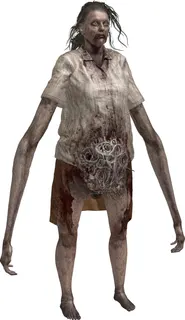
3 · Yard & Old House · The Greenhouse and the Old House west wing: Old Kitchen, Old Corridor, Fertilizer Room, Old Bedroom, Old Living Room, Old Entrance Hall, Landing, Old Upstairs and Upper Level
Weak point The head (+10%). The belly hive takes −20% until it bursts
It starts when you drop through the hole in the Potting Room (Greenhouse 2F) to 1F: you are locked in, and when you climb the back stairs Marguerite bursts through a window and grabs you. She has about 15,000 HP. Almost every guide says her weak point is the belly, but the datamine and a second independent tester agree: the head takes more damage and the belly hive takes less until it bursts. Expect about 17–24 M21 Shotgun shells to the head depending on your rank; cut that down with the 44 MAG and Enhanced Handgun Ammo. Fire barely dents her HP (Flame Rounds −60–80%, Neuro Rounds −70–90%, Burner burn −83%): the Burner is for her swarms and hives, and the grenade rounds are for Mutated Jack and the Fat Molded.
- Before: with 9 Antique Coins you can take the 44 MAG from the trailer birdcage. The toilet Treasure Photo, under the Greenhouse stairs, leads to 44 MAG Ammo ×3 in the trailer's toilet. Save in the trailer before you drop: "Fly Swatter" is lost if you miss it.
- Loot during the fight (Normal): Psychostimulants on the Old Corridor couch (take them to see the items); Shotgun Shells ×8 + Strong Chem Fluid in the spider locker of the Fertilizer Room (burn them off); Handgun Ammo ×15 + Burner Fuel ×75 on the Upper Level table; Burner Fuel ×75 by the ladder; 2 First Aid Meds, a Herb and Chem Fluid in the Greenhouse.
- If she grabs you, attack to break free. She can pull you up from above or grab you from below through holes and cracks: shoot fast. Stay on 2F whenever you can.
- Hunt her, don't hide: left alone she lays hives. If you hear groaning and bodily noises she is building one: shoot her to interrupt it. Finished hives can be burned or shot apart.
- Knock her off walls and ceilings with the handgun and step back when she falls, because she thrashes. On her back she struggles to get up: that is the moment to empty the shotgun, the 44 MAG or Enhanced Handgun Ammo into her head.
- Shoot the belly only when it is all you can see: even at −20% it does about three quarters of a headshot. If the hive bursts, it becomes a weak point.
- Wall leap: she stops, looks at you and jumps. Shoot her in mid-air (the shotgun is best) for the "Fly Swatter" achievement. She only climbs 2–3 times per fight.
- Reload whenever she retreats, and drop to 1F to break contact and heal.
Reward: The Lantern, the counterweight for the Old House scale; a gate crumbles and lets you out. "Fly Swatter" achievement if you shoot her down mid-leap.
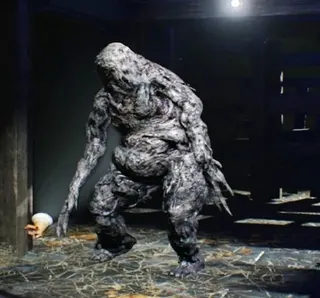
4 · Back to the Main House & Testing Area · Testing Area Barn 1F: hay bales and the enclosed east section
Weak point The head: −50% damage, but with its own small HP pool, so aim there
It comes out of the enclosed east section when you insert the Battery into the control panel. On Normal there are also 3 Molded in the west half of the barn. It has 10,000 HP; the head takes less damage but has a small separate pool, and most Fat Molded go down to 2–4 44 MAG headshots. Use the hay bales as a shield from the vomit and attack after each stream.
- Watch out for the 3 Molded in the west half: one shotgun blast to the head kills each.
- Insert the Battery: the Fat Molded comes out on the east side. Don't shoot it while it stands idle: it answers with a vomit.
- Get behind the hay bales when it vomits. After each stream, circle it and empty your gun into its head.
- Horizontal vomit: crouch. Vertical or short vomit: step right. If it grabs you, block (L).
- If you sprint away it charges faster than you run: shoot its legs to slow it.
- Neuro Rounds from the Grenade Launcher stun it for the headshots.
- It explodes on death: step away or block.
Reward: The barn is clear: go on to the Rest Area and the Party Room.
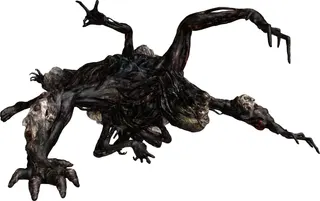
5 · The Boat House · Boat House Storage 1F and 2F: wooden walkways with four holes down to a shallow water floor, and a single ladder
Weak point The glowing orange eyes, about 8: face, belly, right torso, right arm, left arm, tail, under the tail and back. In phase 2, the face eye that grows back
It starts when Zoe gives you the two Serums on Boat House 2F: mutated Jack grabs Ethan and drags him into the storage room. His body has 30,000 HP but never drops below 1: only the eyes count (500–5000 HP each per the datamine; one shotgun shell pops almost any of them). Use both floors to see the hard eyes, and keep the strong ammo for the final eye. The count of 8 eyes comes from a single author: treat it as a checklist. Bring the shotgun, a handgun with Enhanced Handgun Ammo, the Grenade Launcher with Flame Rounds and the 44 MAG if you bought it; craft ammo before healing items and save in the Shed.
- Block (L) as soon as you land: he gets a free swipe.
- Collect the storage loot during the fight. 1F: Handgun Ammo ×15 (crate, NE), ×20 (shelves, SE) and ×15 (crate, NW); Shotgun Shells ×3 (SW) and ×10 (shelves, NW). 2F: Handgun Ammo ×15 and Shotgun Shells ×10 (NW) and 1 First Aid Med on the NW shelves.
- Shotgun up close (one shell per eye), handgun from afar (a few shots per eye; Enhanced Handgun Ammo triples the damage).
- Flame Rounds from the Grenade Launcher for the hard eyes (belly, under the tail, back), and only while he stands still, or the round overshoots: the blast and the burn pop eyes you can't see, sometimes more than one.
- Belly eyes: lure him upstairs, drop through a hole and shoot upwards. Ladder trick: a point near the ladder makes him decide to change floors; step past it, wait until he starts moving, switch floors yourself and shoot the exposed side.
- Sidestep his one-arm lunge. If you see him sputtering, dash left or right: with his face damaged he vomits like a Fat Molded or grabs you.
- After popping an eye, reload every weapon instead of getting greedy.
- Phase 2: he dives, bursts out of the water and pins you in a corner, with a single eye left on his face. Block every overhead slam and shoot the eye between slams with the 44 MAG, the shotgun or Enhanced Handgun Ammo (an ammo crate sits on your left). It takes about 2–3 shells.
- Phase 3: Zoe opens the door. As you walk to the exit Jack grabs you: press the prompt to inject a Serum. If you don't, you die.
Reward: One Serum is left: give it to Mia (Ending 1) or to Zoe (Ending 2, which adds the "Mia (ship)" fight). Save before going upstairs to Zoe so you can see both.

6 · The Wrecked Ship (Mia) · Wrecked Ship S2: No. 2 Engine Room
Weak point None in particular: block and counter with the Crowbar
It only happens if you gave the Serum to Zoe (Ending 2). Mia gives in to Eveline and attacks Ethan with a knife. It is the same fight as "Mia (axe)", with about 700 HP: the Crowbar lies on the floor behind you (it only exists on this route) and hits like the Axe.
- Turn around and pick up the Crowbar from the floor.
- Block (L) every attack and answer with one hit (ZR). Repeat.
- After several hits Ethan impales her and the fight ends.
Reward: The Ending 2 route continues ("Just A Memory Now").

7 · Swamp · Salt Mines · Salt Mine B1, Abandoned Mine: a wide cavern with crates and a central steel structure
Weak point The head (small HP pool); body shots barely hurt
When you drop off the stairs (there is no way back), 2 Fat Molded appear at the far end, behind a large structure. It is the only campaign fight whose HP changes with difficulty: on Easy and Normal they have 3500 and 9000 HP. Remote Bombs are the star tool: plant them while they spawn.
- Run up while they spawn, plant a Remote Bomb (ZR) near them, lead them around the pillar and detonate it (Y).
- Otherwise circle the central steel structure and use the crates as cover from the vomit streams; step out to shotgun their faces.
- Neuro Rounds from the Grenade Launcher stun them: follow up with Enhanced Handgun Ammo to the head.
- If one grabs you while a Remote Bomb is equipped, press ZR: the bomb goes into its mouth and kills it instantly.
- They explode on death: step away or block.
- Arena loot (Normal): First Aid Med on a rock (SE), Machine Gun Ammo ×20 (crate, SE), Strong First Aid Med (crate, west), Burner Fuel ×40 (crate, NW) and a Herb (crate, north).
Reward: The ladder to the Exit Passage: the last tape recorder, the Mine Map, Machine Gun Ammo ×150 and 1 Strong First Aid Med.

8 · Finale · Guest House · The Guest House attic and, after the cutscene, outside
Weak point Her face and eyes; in the final phase, her open mouth
The final boss has three phases and two are scripted: you only need to deal enough damage between cutscenes. Before it, in the Guest House, the hallucinations of Mia with the chainsaw can't hurt you: don't waste bullets. The attic's NW corner has Shotgun Shells ×10 and Enhanced Handgun Ammo ×15 (only on this return). Arrive with grenade rounds and 44 MAG Ammo saved up: the mine Office gives you 2 Flame Rounds and 1 Neuro Round.
- Phase 1, walk up to her: she sends out shockwaves that push you back and hurt you, and you can't aim. Block (L) every wave (she telegraphs it loudly) and walk or run in between.
- When you reach her, cutscene: Ethan injects her with the E-Necrotoxin.
- Phase 2, the giant face: she turns into a huge face that crawls through the attic. Back up and shoot her face and eyes nonstop. If she reaches you before taking enough damage, or you get too close, she eats you.
- Once she has taken enough she moans twice and grabs you with tentacles: move left or right so she can grab you. The fight only continues if she catches you.
- Phase 3, outside: Ethan is on the ground and can only aim. When she lifts you by the leg, empty the Grenade Launcher and the 44 MAG into her face; then alternate handgun and shotgun, and only reload if you must.
- A helicopter drops a crate with the Albert-01 and Chris tells you to take it. Wait for the tentacles to move away from her mouth and fire: a few direct hits end the game.
Reward: Credits and the ending you chose with the Serum: "End of the Night" (Mia) or "Just A Memory Now" (Zoe) achievement. The next run puts the Albert-01R in the Item Box; a Normal clear gives The Secrets of Defense.

NaH · Not a Hero · Salt Mines and Lab · Mining Work Area, Work Sector B: containers that lock you in and a truck in the middle
Weak point Its brain, exposed after one RAMROD hit
The big white Fat Molded. You first meet it in Work Sector A (on Normal, when you lower the hanging container with the Gear and the Crank; on Professional, as soon as you enter) and there it can't be killed: it stays at 1 HP. Avoid it. The real fight is in Work Sector B with the arm bomb running: the 10-minute countdown doesn't stop. It has 50,000 HP and RAMRODs only do 4–6 times a normal bullet: use them to open it up, not to kill it.
- Work Sector A (first meeting): don't shoot it. Throw a Grenade to stun it while you turn the crank, take the key and head back to the elevator.
- Work Sector B: walk to the south side: containers drop, you are locked in and it appears.
- Load a RAMROD into the Samurai Edge - AW Model-01 (ZL + X) and shoot it once: it loses its white invulnerability and its brain is exposed.
- When it is stunned, run in and punch the weak point: big damage and knockback.
- Switch to normal ammo: the Thor's Hammer - AW Model-02 shotgun, Grenades and Incendiary Grenades. A Grenade at its feet while it stands still knocks it down; punch its head while you shoot it. Don't spend more RAMRODs.
- Circle the truck in the middle for cover from its flailing charge. Stay at mid range: too close and it vomits, too far and it charges. Its vomit can be blocked.
- It spawns endless Little Crawlers: knife them, clear them with grenades or let them burst on their own. Loot the room during the fight.
- It explodes on death: step away.
Reward: Push the taped green crate: liquid nitrogen to take the bomb off Chris's arm.
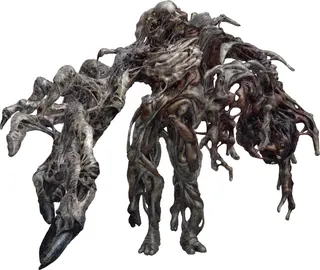
NaH · Not a Hero · Salt Mines and Lab · Research Facility, Cultivation Lab: central machinery and 2 green-lit wall oxygen tanks
Weak point The head (it glows red) until he goes into shock; then the chest
The final boss of Not a Hero. He has 28,000 HP and cuts damage by 75–85% except on the chest; grenades ignore that penalty. The loop: head until he goes into shock, then RAMRODs into the chest. He is invulnerable while he recovers from his drop and while he roars. Smash every crate first: on Normal there are 2 Strong Med Injectors on the east desk, 48 shotgun shells + 20 handgun rounds on the NE desk and RAMROD ×2 on the edge of the central machinery.
- Phase 1: shoot his head with the handgun or the shotgun on normal ammo until he goes into shock. Save the RAMRODs.
- In shock his chest opens: about 5–6 RAMRODs' worth of damage there starts phase 2.
- Deflect (L right before the hit) his close attacks: the vertical slam, the horizontal right-tentacle strike (you can also crouch under it), the slow jab and the backhand. His grab kills instantly unless you block or deflect it; a deflected grab puts him straight into shock.
- The mid-range spinning jump attack can't be deflected: sprint to one side or get behind cover. The 3–4 hit combo can end in the grab: keep your distance or deflect.
- An Incendiary Grenade always stuns him, as long as he isn't already flinching.
- Phase 2: he jumps onto the central structure and mutates his arms. The spores drain your oxygen even with the High-Grade Filter: refill at the 2 green-lit wall tanks, only at about 10–30%, because they recharge slowly.
- Repeat head → shock → chest; now he shields his chest with an arm, so don't shoot the arm. He attacks as he lands when he jumps off the structure (don't stand close), and fires an acid stream from his left hand: take cover, or get close and crouch.
- Kite him around the corners of the machinery so he never has a straight line to you.
Reward: Chris finishes him with a shotgun blast and destroys his computer: the end of Not a Hero.
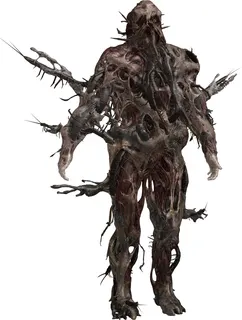
EoZ · End of Zoe: from the Swamp to the Main House (Joe) · Base, Fenced Path
Weak point The head
The first meeting with the Swamp Man, who is Jack Baker, regenerated. He only has 1000 HP. The safe way is to knock him down, smash the yellow west gate while he is on the ground and, when he gets up, dive into the River, where he stops chasing you. Gameranx says you can also smash the gate without beating him and flee into the water. If you fight, use the strong combo and block. Blocking just as a hit lands deflects it: you take less damage and recover faster.
- Learn his moves: a 3-punch combo and a quick kick if you stand too close.
- The 3rd punch often leads into a wind-up: back off or block (L), and he is open afterwards.
- Both hands raised = a grab: punch his face to stagger him or sprint away; if the grab misses, he is stunned.
- Punish him with the strong combo: right, left, right, left (ZR, ZL, ZR, ZL).
- When he goes down, punch through the west gate and cross it. He gets back up: do not fight again, run and dive into the River.
Reward: The way to the alligator river and the Paddle Boat.
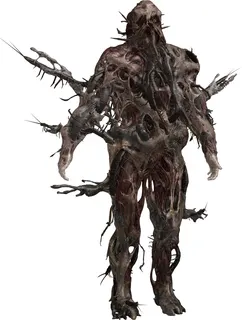
EoZ · End of Zoe: from the Swamp to the Main House (Joe) · Paddle Boat Hold
Weak point The head; finish him when he kneels
It starts right after you activate the machine on the Apparatus Platform and get the Cure for E-Type Infection: the Swamp Man throws Joe down into the hold. He has 8000 HP and two phases; every time he kneels you get a finisher. Before activating the machine, take the Boxer Effigy under the metal bench by the tape recorder, and save.
- Grab the 2 First Aid Meds on the yellow-painted spots straight away.
- Phase 1 plays like the Fenced Path: block his combo, punish, and stay out of the grab.
- When he drops to his knees, press the right fist (ZR) for the finisher quickly: if you are slow, he regains health.
- Phase 2: every attack is a 2-hit combo, and he adds a sprinting body splash: dodge it and stomp him while he is down.
- When he kneels again, second finisher: Joe tears his head off.
Reward: The way out: Hold Exit → Fenced Path → Boat House, where the Swamp Man gets back up and takes Zoe.
EoZ · End of Zoe: from the Swamp to the Main House (Joe) · Baker Estate, Main House: the Main Hall
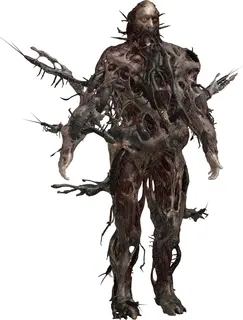
Weak point Only charged left punches from the AMG-78; the guides aim at the head
The final boss of End of Zoe. Only charged left punches from the AMG-78 hurt him; Joe can't block while charging and any hit cancels the charge. It is the only End of Zoe fight whose HP changes with difficulty: 16,000 HP on Easy, 14,500 on Normal and 11,000 on Joe Must Die. Save and use the Item Box at the Yard entrance; bring every critter and turn your materials into Throwing Spears or Stake Bombs.
- Pick up the 2 First Aid Meds on the benches (SW and NE corners) before you approach Zoe: examining her starts the fight.
- Charge the left (hold ZL) away from him and release it between swipes.
- Horizontal tentacle: crouch, but not too early or he aims low. Vertical tentacle: step left. His tentacles reach far and hit very hard.
- Phase 1: when he drops to one knee, a fully charged punch knocks him down and starts phase 2.
- Phase 2: he is faster and chains tentacle combos. If he takes a judo stance with his hands raised, don't punch: he counters everything.
- Pre-charge, back off and strike between swipes until the finisher: Joe crushes his skull.
Reward: The ending of End of Zoe: Zoe gets the cure. "Promise Kept" (Easy or Normal) or "King of the Swamp" (Joe Must Die) achievement.

BF1 · Banned Footage Vol. 1 · Nightmare, Bedroom and Ethan Must Die · Nightmare (Banned Footage Vol. 1): the Processing Area under the Main House
Weak point The head
In Nightmare you play as Clancy and survive 5 rounds, from midnight to 5 a.m., against waves of Molded. Jack shows up in round 2 (as in the Main House) and round 5 (with the Morgue's chainsaw-shears), and you have to beat him. You buy weapons, ammo and traps with Scrap at the workbench.
- Save the traps (turrets, tripwires) for the end of each round and for Jack.
- The handgun is your main weapon and the shotgun your second; use the Grenade Launcher only on groups of 3 or more, strong Molded or Jack.
- Bottleneck the corridors and go for headshots only.
Reward: Bonus Scrap for beating him. "Dead by Dawn?" (complete Nightmare) and "Sleepless in Dulvey" (complete Night Terror) achievements.
BF1 · Banned Footage Vol. 1 · Nightmare, Bedroom and Ethan Must Die · Ethan Must Die (Banned Footage Vol. 1): the Greenhouse, with tripwires and a turret
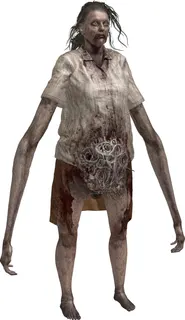
Weak point The head (+10% damage); the belly hive takes 20% less until it bursts
The final boss of Ethan Must Die. It plays like the campaign's Greenhouse fight, but she doesn't lay hives and has noticeably less health. In this mode one clean hit can kill you, so blocking is mandatory.
- Wait for her in the room off the upstairs balcony, by the turret: it hits her while you shoot, and if you run out of ammo lead her through the tripwires.
- Aim for the head with the best gear you got from the crates; the Burner works very well on her. Shoot the belly hive only when it is all you can hit.
- Block (L) everything. With The Secrets of Defense even the knife works if you block well.
Reward: "Ethan Never Dies" achievement.