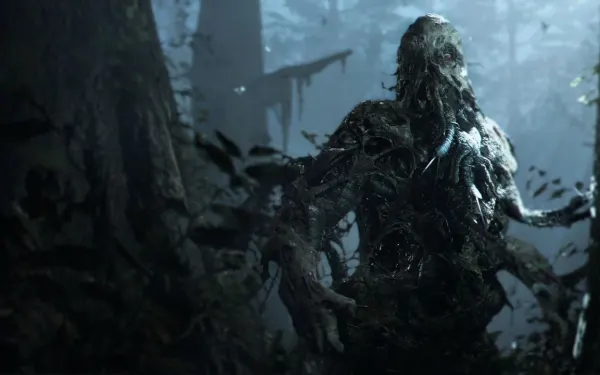
You play as Joe Baker, Jack’s brother who lives hidden in the swamp, in the epilogue of the route where Ethan left with Mia. Zoe has been calcified by the mold and Joe sets out to find a cure without firearms: everything is settled with fists, stealth kills and the spears you craft. The route runs from Joe’s house to the Blue Umbrella base, the paddle boat that holds the cure station and the gator-filled quarantine areas, up to the church where you lose everything, the AMG-78 gauntlet and the final fight with the Swamp Man, who turns out to be Jack, in the Main House.
Chapter order: Joe’s House → Path (box, Tape Recorder) → Shack Yard (Boxer Effigy #1) → Shack: Cure for E-Type Infection → Zoe to the boat → Base: Boat House → Path (Boxer Effigy #2) → Camp (first Throwing Spear) → Side Storage (Boxer Effigy #3) → Medical Storage → Swamp Man on the Fenced Path → River (6 alligators) → Shed (Boxer Effigy #4) → paddle boat: Deck, Roof (Boxer Effigy #5) → 2F → 1F: Air Duct (Champion Effigy #1) → Apparatus Platform (Boxer Effigy #6) → the second cure → Swamp Man in the Paddle Boat Hold → Zoe taken → Quarantine Area 1 (Champion Effigy #2) → Quarantine Area 2 (Champion Effigy #3, Boxer Effigy #7) → Cemetery (Fat Molded) → Church Path (Boxer Effigy #8) → Abandoned Church: Joe loses everything → Forest Path: AMG-78 → Old House (Champion Effigy #4) → Porch (Boxer Effigy #9) → Courtyard (your items) → Swamp Man (Jack) in the Main Hall → ending.
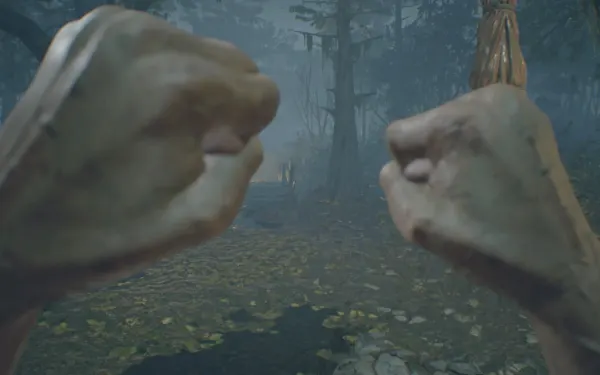
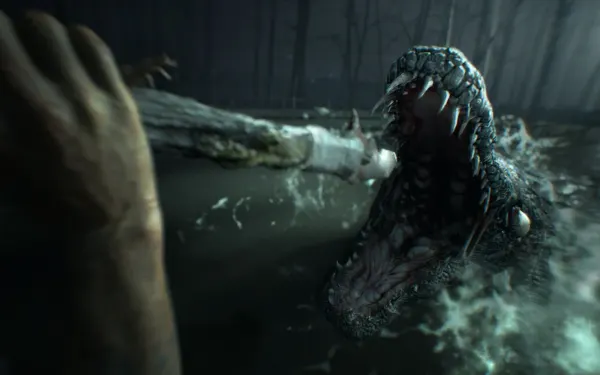
Prepare: Joe uses no firearms. He fights with his fists, left and right on separate buttons, and he guards (on Switch 2 these should be ZL, ZR and L, unconfirmed). He has 20 slots. Combos from Joe’s Survival Manual: the fast one (left, right, right, then more rights) and the strong one (right, left, right, left), whose last hit (300 damage on Normal, against 100 for a single punch) knocks the enemy down. A Molded has 2000 HP and its head takes double: strong combo to the face, then stomp its head on the ground. Better still, stealth kill it: crouch (click the right stick), creep up from behind unseen and press the on-screen prompt; it dies in one hit (not on Fat Molded or alligators). In this guide, “take it from behind” means that. Guarding stops hits from any direction, Fat Molded vomit included. On a first run alligators only die to Throwing Spears (800 HP; a spear does 1000); on later runs the item-box rewards (AMG-78a, AMG-Dual) kill them too. Watch the water for ripples and have a spear readied before you step in. There are 18 spears placed on Normal, and a spear that misses can be picked up again. Your damage is multiplied by 1.5 on Easy and by 0.7 on Joe Must Die. Per-room items and enemies are for Normal unless Joe Must Die is named (there is no Easy data).
No shop: End of Zoe has no merchant and no coin cages. Joe’s only upgrades are the effigies, which only count while you carry them (each Boxer Effigy adds +1% damage and each Champion Effigy +5%), and the story AMG-78. Everything else is crafted:
- Tree Branch + Scrap Metal = Throwing Spear (7 of each material are placed).
- Tree Branch + Chem Fluid = Stake Bomb.
- Critter + Chem Fluid = First Aid Med. Critters (grubs under the bark of trees, centipedes under stones, crawfish in water, fridges, microwaves or on corpses) also heal a little when eaten on their own. Spend Chem Fluid on meds first.
Missables: Champion Effigy #1 in the Air Duct and Boxer Effigy #6 on the Apparatus Platform are lost once you use the cure machine; Boxer Effigy #8 is the last thing before the church. At the church Joe loses his whole inventory until the Courtyard box: the AMG-78 stretch and the Old House are played with nothing.
Joe’s House: the house, the Path and the Shack
Joe’s House. Joe finds Zoe calcified. The Joe’s Note file is on the chest of drawers next to the front door. Examine Joe’s Survival Manual in your inventory to unlock its file.
Path (outside). The shelter opposite the house holds the first Item Box and a Tape Recorder: leave the manual there. Chem Fluid on its metal shelves (north). To the left of the box hangs a punching bag: a 4-hit combo on it earns Queensberry Rules. Critters:
- Crawfish in the stream, east of the wooden bridge.
- Grub in the tree west of the bridge (peel the bark).
- Centipede on the wooden boxes in the clearing.
Crawfish + Chem Fluid = your first First Aid Med. There are 3 Molded to the north: one in the clearing, one patrolling the fence and a third that appears later. Sneak up behind the one patrolling the fence and stealth kill it; if it spots you, another Molded by the gate joins in. Every stealth kill counts toward Swamp Warfare (5).
Joe Must Die: a Molded, a Twin Blade, a Crawler and a Fat Molded at the Shack Yard gate; a tripwire on the north path (between the boxes and a tree stump, by the truck) and a crate bomb; Throwing Knives on the shelter shelves and on the oil drum in the clearing.
Shack Yard. Punch through the yellow-marked wooden barrier. Boxer Effigy #1 and Chem Fluid: on the oil drum on the left, at the fence-line entrance. A Centipede sits under the stone by the Shack door.
Shack. The Cure for E-Type Infection is on the soldier’s body at the far end of the corridor. On the way back: 1 Molded in the corridor and 2 in the Shack Yard (1 on Joe Must Die, with 5 tripwire bombs in the corridor: set them off from a distance with a Throwing Knife).
Back at the house. The house is on fire, the cure is only a partial dose and the Swamp Man kills the captive soldier. Carry Zoe out of the back door to the boat at the Pier.
The Base: Boat House, Path and Camp
Muddy Path and Boat House. Put Zoe on the Boat House couch; there is a Tape Recorder here. Break the wooden crate at the south end of the Muddy Path fence line: crates can drop a random extra effigy.
Path (Base). Boxer Effigy #2: on the west side of the circular pool, on a rock in the water. Go left through the muddy water. There is an alligator near the Boat House and you have no spears yet: keep away.
Camp (the tents). A Molded feeds in the east tent (a Twin Blade on Joe Must Die) and another waits in the north tent. A Crawler wanders the north side and another sits in the south corner, by the Side Storage door. Crawlers (900 HP) are the deadliest thing up close: kill them by surprise or with a spear. Order:
- Take the Molded feeding in the east tent from behind.
- Then the one in the north tent.
- Go through the north tent to reach the first Crawler from behind and finish it.
- Take the first Throwing Spear, stuck in the crate stack in the west corner, and use it on the second Crawler. A headshot kills any normal Molded or Crawler.
Grub on the microscope in the north tent. With the camp clear, break the yellow barrier and go through the wooden house to the Side Storage.
Side Storage, Medical Storage and the Fenced Path
Side Storage (save). Tape Recorder on the small shelves at the top of the wooden steps. Boxer Effigy #3: on the sandbag on top of the oil drum in that same corner. Joe Must Die adds a First Aid Med and a Throwing Knife. Save: the first Swamp Man waits outside.
Medical Storage. Drop in through the roof hatch. The bench in the southwest holds the file Orders Regarding the E-Series Anti-Infective Drug and another Chem Fluid. The file says the cure station was moved to the paddle boat. Craft a First Aid Med if you have a Critter. On Joe Must Die there is a tripwire under the hatch and a gas pressure plate at the tent exit.
Fenced Path. A Crawfish sits on the rocks halfway along. As you near the west side the Swamp Man appears. The safe way comes in three beats:
- Fight until he drops (1000 HP; tactics under “Boss — Swamp Man (Fenced Path)”).
- With him down, punch through the yellow west gate and go through.
- He gets back up. Do not fight again: run and drop into the River. Once you are in the water he stops chasing.
Gameranx adds that you can also back off, break the gate without dropping him and jump into the water; try it if the fight gives you trouble.
River and Shed
Shed (Base, save). Per one guide, the save shack is right ahead as soon as you drop into the water; its door opens onto the river’s east bank. Go in and save now. Tape Recorder on the metal bench (north), Item Box in the southwest and Boxer Effigy #4 on the northeast wall, above the Tape Recorder. Leave the manual and anything you don’t need here.
River (the gator swamp). 6 alligators on Normal: 1 east, 2 southeast, 1 southwest, 1 west and 1 northwest. Spears: one stuck at the water’s edge (east) and one in the water (south). Critters: Crawfish under the rock by the Shed’s east door, Grub in the tree by that door and Crawfish on a broken platform on the south bank. Route:
- Take the Throwing Spear stuck at the water’s edge (east; one guide finds two on the path down to the river) and throw it at the first alligator, straight ahead.
- If you have another, use it on the alligator by the mud wall on the left; if not, first grab the one sticking out of the water (south).
- If the water spear is still there, pick it up for the next one.
- Climb the mud path on the left (Riverbank). Run past its 2 Molded and take the Throwing Spear from the dead alligator on the east platform (one guide pulls 2 from that corpse).
- You need one spear for the alligator guarding the way to the boat. You can run past the second.
On Joe Must Die the Riverbank has 2 Throwing Knives and 2 Crawfish.
The shortcut before the boat. At the end of the river you reach dry mud by the Scaffold. Before you climb, open the nearby door: it is a shortcut that opens from this side and takes you back to the save shack (Tape Recorder and box) and the camp without crossing the gator river again. Save and set up your inventory for the boat.
Paddle boat: Deck and Roof
Scaffold. Climb the ladder to the boat’s deck. On Joe Must Die there is a tripwire above the ladder.
Deck. Scrap Metal on the wooden crate to the east and a Tree Branch propped against a crate to the west: craft a spear. A Twin Blade (3000 HP, hits harder) waits on the southwest stairs down to 2F: guard and counter. Joe Must Die has 2 Molded, 2 Twin Blades and a tripwire at the top of the central stairs.
Steering House (save). Tape Recorder next to the wheel and a First Aid Med in the southwest cabinet.
Roof. Boxer Effigy #5: pass the bridge entrance and take the metal walkway on the left before the stairs. It sits on the broken west edge of the roof, behind the Steering House.
South Stairwell. A Centipede on the barricaded southwest doorway. Break the yellow door to go down to 2F.
Paddle boat: 2F
2F Main Passage. A Molded patrols the north side, a Twin Blade waits in the northwest section and a Crawler roams the northwest corner. From behind the crate, take the patrolling Molded from behind, then the Crawler. Crawl into the vent from the small maintenance room to catch the Twin Blade. The duct through the middle of the passage holds Scrap Metal, and a Throwing Spear leans on the northeast wall. The wooden crate in the southeast, right above the cure machine, can drop a random effigy. On Joe Must Die there are 2 tripwires mid-passage and another at the duct’s west entrance.
2F Storage. Tree Branch against the southwest wall and a crate in the southeast.
North Stairwell. Two Molded by the stairs. Wait for the patrolling one to walk under the floor, drop down, finish it, then the stationary one.
Paddle boat: 1F and the cure machine
1F Main Passage. Scrap Metal on the northwest floor and a Critter on the southeast machinery.
1F Storage and Air Duct. Loot the crate in the small room and enter the vent. Champion Effigy #1 and a Tree Branch in the middle of the duct. It is lost once you use the cure machine. On Joe Must Die there is a tripwire on the duct roof (northwest) and a pressure-plate bomb in the middle: the effigy sits just west of it.
Engine Room. 2 Molded on Normal (one guide counts 3). Come in through the vents to take them from behind.
Compartment. A Twin Blade wanders here. First Aid Med on the medical trolley (north) and a Throwing Spear stuck in the wall of the east alcove, behind the machine. On Joe Must Die a Fat Molded drops down from the Apparatus Platform.
Apparatus Platform (save). At the top of the scaffolding. Tape Recorder on the bench: save, a boss is next. Boxer Effigy #6: climb the ladder on the left, crouch and look right: it is under the Tape Recorder bench, on the bottom shelf by the propane tanks. Take it before you activate the machine. Activate the machine and pick up the Cure for E-Type Infection. The Swamp Man strikes at once and throws Joe down into the Paddle Boat Hold (second encounter).
Paddle Boat Hold and Zoe’s abduction
Paddle Boat Hold (boss arena). 2 First Aid Meds on the rusted machinery in the west and south corners, marked with yellow paint. The 2 wooden crates in the east corner can hold a Boxer or a Champion Effigy. The fight is under “Boss — Swamp Man (Paddle Boat Hold)”.
After the fight. Pick up whatever is left and leave by the Hold Exit and the Fenced Path to the Boat House. The Swamp Man gets up again and takes Zoe. Take the boat after them.
Quarantine Area 1
Entry. A Grub in the tree halfway along the south stretch and 2 Crawfish in the water under the northeast platform.
Shed (Quarantine Area 1, save). Tape Recorder on the table.
Stilt House Underside. 2 alligators. A stuffed alligator toy surfaces as a decoy and the real one is right behind it: spear readied. Tree Branch against the posts at the end of the first narrow stretch. Throwing Spear on the raised southeast platform (turn right and climb the decking). Scrap Metal on the upturned bathtub (west) and a Crawfish in the microwave (northwest). Kill the first alligator and sneak past the second.
Lake. 5 alligators. Hop between platforms watching for ripples. The big house’s main entrance has 2 alligators and the right-hand side entrance only 1: use the right-hand entrance, crouched, approaching from its left side to sneak past the alligator (spear readied just in case). Scrap Metal on the east platform and Chem Fluid on the northwest log. The wooden crate on the northwest platform can hold an effigy.
Lake Exit. Champion Effigy #2: inside the fridge in the corner of the north-side pool, to the right of the stairs up to the shack. The pool has one alligator in the north: have your spear readied before you step down. Another crate on the west platform. The Lake Exit sits right next to Stilted Cabin 1 (Quarantine Area 2’s save room with a box), so it is one step from the Tape Recorder, but take the effigy on your way through. On Joe Must Die there are 3 bombs on the posts, and a Fat Molded appears only if you arrive from the Lake side.
Quarantine Area 2: the stilted cabins
Stilted Cabin 1 (save). Item Box in the southeast, Tape Recorder on the east bench, the episode’s only placed Stake Bomb on the bench and a Crawfish in the chest freezer (west). Save before you go on.
Southern Walkway. A Molded appears by the Cabin 2 door and another when you step inside. A Tree Branch in the west corner. Mind your footing: the pool below has 3 alligators, and falling in means a sure attack.
Stilted Cabin 2 (ambush). 2 Molded come in (one guide counts 3: two from the ceiling and one from behind). Drop the Stake Bomb in the middle, step out and detonate it from a distance: 2000 damage. Throwing Spear and a crate, both in the northeast corner. The crate can hold an effigy. On Joe Must Die a Twin Blade replaces the ceiling Molded.
Central Walkway. The floor of the raised east platform holds 3 Throwing Spears and 2 crates (either can give an effigy). A Crawler sits on the north side by Cabin 3, with Scrap Metal to the northwest. Go left to the dead-end platform and spear the Crawler from there.
Central Water Pool (optional). It is reached only from the Central Walkway. It holds 2 alligators (one in the middle, one in the southeast) and nothing but a Grub in the northwest tree. Skip it: one Critter is not worth two spears.
Stilted Cabin 3. 1 Molded inside, plus 1 Molded and 1 Crawler on the northwest platform outside. Take the patrolling Molded from behind, then the Crawler. Chem Fluid on the chest freezer (north) and a crate southwest of the northwest platform. On Joe Must Die a Fat Molded waits as you leave.
Northern Walkway (the gauntlet). Take the 2 Throwing Spears by the Cabin 3 door and the 2 in the narrow middle stretch. It goes like this:
- Around the first corner 2 Molded come at you and another hides behind a metal barrier (northeast offshoot). Back up, kill the pair, then go for the hidden one.
- As you enter the narrow stretch a Crawler appears in the northwest area: have a spear or a Stake Bomb ready.
- Last, 1 Molded and 1 Twin Blade in the northwest section.
Scrap Metal and a Tree Branch in the northeast offshoot. Crates in the southeast, in the northeast offshoot and southwest of the northwest section. The crate at the top of the ramp after the drop gave an effigy on one guide’s run. On Joe Must Die there are 6 bombs along the walkway, plus pressure plates.
Northern Water Pool: Champion Effigy #3
Champion Effigy #3 (+5% damage for the rest of the episode) is wedged in the tree in the northeast corner of the pool. You see it as soon as you climb the Northern Walkway ramp and follow the walkway to the left; break the crate at the top of the ramp first. The pool is reached only from the Northern Walkway and has 3 live alligators: one in the southeast corner, one in the middle and one in the northeast corner, right by the tree. How to get it:
- Arrive with spears. The 2 by the Cabin 3 door and the 2 in the walkway’s narrow stretch should already be with you.
- Drop into the water on the southwest side, under Stilted Cabin 3. There are dead alligators with 3 Throwing Spears stuck in them and 3 Crawfish, plus a Tree Branch in the water: take it all first.
- Keep a spear readied and wade northeast watching for ripples. The alligators show up as you move through the water.
- Spear the northeast alligator before you reach the tree: a spear does 1000 damage and an alligator has 800, so one throw kills it. If the middle one closes in, do the same.
- Take the effigy and climb back to the walkway.
Path, Shed and Cemetery
Path (Quarantine Area 2). A Centipede under the rock opposite the Shed and a Grub in the tree on the north stretch.
Shed (Quarantine Area 2, save). The save shack before the graveyard. Tape Recorder on the table. Boxer Effigy #7: on the box on top of the oil barrel in the northwest corner. Save here. Joe Must Die adds 2 Throwing Knives and 2 Throwing Spears.
Cemetery. As you near the east exit a Fat Molded appears (6000 HP here), plus 3 Molded from behind.
- Use the coffin in the middle to split the Molded from the fat one.
- Kill the regular Molded first.
- Spend your spears and Stake Bombs here: you lose your inventory at the church and only get it back at the Courtyard.
- Against the Fat Molded, circle it while you punch: it loops into its short vomit, which a sidestep avoids. If it drops to its knees, get behind it, because it counters with a scratch and vomit.
- When it dies, run: it explodes.
Fleeing to a safe spot is also fine. Grub in the north tree and crates southwest and east of the crypt. They can give an effigy or a First Aid Med. On Joe Must Die there are 2 Fat Molded (one on each side), plus a Molded, a Crawler and a Twin Blade mid-cemetery.
Church Path. Boxer Effigy #8 (absent on Joe Must Die): at the foot of the right-hand lamppost, before the steps. It is the last thing you can pick up before the cutscene.
Abandoned Church. In the cutscene the Swamp Man is revealed as Jack. He knocks Joe out, nails him into a coffin and throws it into the swamp. Joe wakes up with nothing: no effigies, no spears, no healing. It all waits in the Courtyard box.
Empty-handed: Shore, Forest Clearing and the AMG-78
Healing until the Courtyard: on Normal, the only healing placed between the church and the Courtyard is the First Aid Med on the Forest Path shelves. You have no Chem Fluid to craft with: avoid every hit you can.
Shore (save). Tape Recorder on the small shelves to the west.
Forest Clearing. A helicopter passes and 1 Molded and 3 Twin Blades appear next to you (1 and 2 on Joe Must Die). Don’t fight: unarmed you have no chance. Run straight ahead and turn right. They despawn when you take the AMG-78.
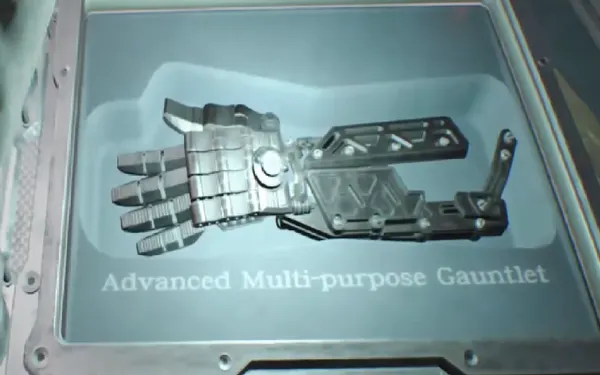
Forest Path. First Aid Med on the shelves on the south side of the path. The AMG-78 is in the weapons case in the west clearing, among the crashed BSAA dinghies: a left-hand exoskeleton gauntlet. Hold the left punch to charge it (3 levels); a full charge reaches far, like a shotgun blast. While charging you cannot guard and any hit cancels the charge. Taking it spawns 4 Molded: 1 northwest, 1 south and 2 east. Joe Must Die adds a Crawler and a Fat Molded. The metal gate won’t give to fists: break it with a charged punch.
Pond, Back Porch and Old Shack (save). Tape Recorder on the Old Shack bench. Save before you enter the house.
Old House
With the AMG-78, Molded stop being a problem: one charged punch kills one. The route is linear: everything else is barred with steel. The tactic for every room:
- Charge the left fist to full outside the doorway, where nothing can reach you (you cannot guard while charging).
- Step in and release it on the nearest Molded.
- Back off to re-charge instead of trading blows; if one gets close, guard and pull away.
Encounters on Normal:
- Gallery: empty on Normal. On Joe Must Die, 2 Centipedes and a Twin Blade (and later a Fat Molded).
- Corridor: 1 Molded in the southeast section. Charge before you turn the corner.
- Dining Room: 2 Molded wandering. Wait at the door for one to come close, drop it and re-charge for the second.
- Living Room: 3 Molded. Kill the northeast one first, then the pair coming from the west, re-charging between them.
- Entrance: a Fat Molded in the middle of the room. Here it has 2000 HP: one fully charged left hook deals with it. Release it from range and back off: it explodes when it dies.
Dilapidated Room. The room with the collapsed floor off the Entrance: turn right. Champion Effigy #4: pinned to the barred door in the northeast corner.
Porch. The bridge to the Yard. Boxer Effigy #9: pinned to the mesh on the right-hand side of the bridge.
Courtyard and Main Hall
Courtyard (save). Military tent on the west side: an Item Box holding everything you lost and a Tape Recorder. Here are the AMG-78 file (north bench) and the Analysis Report (on the floor by the dead soldier). There is also a Crawfish on the soldier, Chem Fluid on the stretcher and a First Aid Med on the south bench. Carry the effigies again (free damage), craft everything (First Aid Meds, spears, Stake Bombs) and save.
Main Hall (the Main House). 2 First Aid Meds on the benches in the southwest and northeast corners. Take them before you approach Zoe: approaching or examining her starts the final fight.
Boss — Swamp Man (Fenced Path)
Arena: the Fenced Path, a lane between fences with a yellow gate at the west end. HP: 1000 (a datamine of the game). Aim for the head. Per Fandom, you break the gate once he is down; Gameranx says you can also break it without beating him and flee into the water.
- Guard just as the hit lands to deflect it: you take less damage and recover faster.
- His combo is 3 punches. If you stand too close he throws a quick kick. The 3rd punch often leads into a wind-up: back off or guard, and he is left open afterwards.
- Both hands raised means a grab: punch his face to stagger him, or run. A failed grab leaves him stunned.
- In every opening, strong combo (right, left, right, left) to the head.
- Once he drops, punch through the west gate and go through.
- He gets up again: do not stay to fight. Run and drop into the River; he gives up there.
Reward: the way to the River. Heal before you wade in among the alligators.
Boss — Swamp Man (Paddle Boat Hold)
Arena: the boat’s hold, full of rusted machinery. HP: 8000 (datamine). He rushes in with punch barrages, slams with both arms and has an unblockable grab. His special follow-up attack does 2500 base damage.
- As soon as you land, grab the 2 First Aid Meds on the yellow paint. Break the 2 east crates in a lull.
- Phase 1: same as the first encounter. Guard on time, get away from raised hands and punish with the strong combo.
- When he drops to his knees, press the right punch quickly for the finisher. If you are slow, he regains some health.
- Phase 2: every attack becomes a 2-hit combo, and he adds a sprinting body splash. Sidestep it and, while he is down, stomp him.
- When he kneels again, finish him again. Joe tears his head off.
Reward: the second Cure for E-Type Infection and the way back to the Boat House, where the Swamp Man takes Zoe.
Boss — Swamp Man (Main Hall, Jack)
Arena: the Main House hall, with Zoe in the middle. HP: 14,500 on Normal, 16,000 on Easy and 11,000 on Joe Must Die (datamine). Only charged left punches from the AMG-78 really hurt him. Normal hits barely count. Use any spears and Stake Bombs you carry as support, not as the plan.
His tentacles have long reach, chain together and deal huge damage:
- Horizontal swipe: crouch just as he swings; crouch too early and he adjusts and swipes lower.
- Vertical swipe: step left.
- Phase 1: charge the left punch away from him and release it between swipes. Don’t charge up close: you cannot guard while charging and any hit cancels the charge. Aim for the head.
- When he drops to one knee, a fully charged punch knocks him down and starts phase 2.
- Phase 2: he is much faster and chains tentacle combos. Pre-charge, back away and strike in the gaps between swipes.
- If he takes a judo stance with his hands raised, don’t punch: he counters anything you throw. Wait for him to drop it.
- Heal after every tentacle combo that connects.
Reward: Joe crushes Jack’s skull and gives Zoe the cure. Chris and the BSAA arrive, and Ethan calls Zoe. There is one ending. A clear on Easy or Normal earns Promise Kept; on Joe Must Die, King of the Swamp. Rewards in the Item Box of later runs: an alternative title screen (any clear), the M21 Shotgun (Easy and up; on Normal it brings 7 shells, 2 loaded and 5 in the Item Box, and on Joe Must Die only the 2 loaded), the AMG-78a and the Joe Must Die difficulty (Normal and up), the Spirit Blade (all Normal Extreme Challenges), the AMG-Dual and 50 Cassette Tapes (Joe Must Die) and Infinite Weapons (all Extreme+ Challenges).
Achievements, challenges and Joe Must Die
Extreme Challenges open after a clear: races against the clock through each zone (8 stretches plus the boat fight and the final fight; the limits are listed in the Stats menu). Clearing one earns Fastest Man in the Swamp. Don’t use the AMG-78a or the AMG-Dual in them: they make the timer run faster.
The Only Guns You Need asks for a Normal or Joe Must Die clear using no weapons (Easy doesn’t count). Healing and the story AMG-78 are allowed, and so are stealth kills. No source settles whether Throwing Spears, Stake Bombs and Throwing Knives count as weapons: to be safe, never use them, and sneak past the alligators without killing them.
Joe Must Die, in short: every save at a Tape Recorder costs a Cassette Tape. There are 17: Boat House ×3 (shelves by the south door), Riverbank (the dead alligator’s hand), Deck (east barrel), North Stairwell (window ledge), Apparatus Platform (bench), Quarantine Area 1 Shed ×2, Lake (northwest log), Central Water Pool (south crossbeam), Stilted Cabin 3 (couch), Quarantine Area 2 Shed, Quarantine Area 2 Path (leftmost crate), Old Shack ×2 and Courtyard. Autosaves come only at the start, after each of the two boat rides and after the church. Tripwire, pressure-plate and gas bombs are everywhere (Throwing Knives set them off from a distance or draw enemies), there are more and tougher enemies, and you take far more damage.
Before you enter the church you should have: Boxer Effigies #1-#8 and Champion Effigies #1-#3 (plus whatever the crates dropped) · Boxer Effigy #6 and Champion Effigy #1 taken before you activated the cure machine · your spears and Stake Bombs spent in the Cemetery, since you lose them anyway · your game saved at the Quarantine Area 2 Shed.
Don’t leave without: Champion Effigy #4 in the Dilapidated Room and Boxer Effigy #9 on the Porch, and every effigy taken back out of the Courtyard box · breaking every wooden crate (they can give extra effigies) · the 5 files (Joe’s Survival Manual, Joe’s Note, Orders Regarding the E-Series Anti-Infective Drug, AMG-78 and Analysis Report) · Queensberry Rules on the punching bag and 5 stealth kills for Swamp Warfare · the 2 First Aid Meds in the Main Hall before you approach Zoe.