Chapter order: Trailer (Lucas’ call, Memo on Deputy’s Head) → Processing Area: Crawler on the stairs → Dissection Room: Snake Key → Master Bedroom (clock 10:15, Backpack #2) → Workshop: Keycard (Red) → Kid’s Room (the attic remote is in the lamp trophy) → Attic: “Happy Birthday”, Toy Axe, Keycard (Blue) → Yard: “7” puzzle (Stabilizer) → Trailer: watch the tape → Testing Area: tripwires, Supply Room (Repair Kit), Passcode Room (the swinging beam) → Fertilizer Room (coin, Steroids) → Barn → Office (safe room) → Battery → Fat Molded → Rest Area (code) → Party Room (candle on the cake, bomb) → Monitoring Room: D-Series Head.
Prepare: the Burner has done its job: leave it in the Trailer box if you are short on space (at most it burns tripwires). Keep the shotgun loaded: Crawler Molded arrive here (900 HP, a full shotgun blast to the head kills), and the barn holds 3 Molded plus the Fat Molded. Pick up the Treasure Photo (Dummy Head) in the Master Bedroom wing before you enter the Testing Area: without it the second Repair Kit never appears. Watch the “Happy Birthday” tape before the real Party Room: it teaches you the solution. Before the Party Room Lucas makes you leave everything in an Item Box; you get it back right after, so there is nothing to lose. If you saved coins, you can still spend them at the Trailer (or later in the Mine Office, chapter 7). On Normal this stretch gives about 25 Handgun Ammo, 10 Enhanced Handgun Ammo, 15 Shotgun Shells, 4 rounds of 44 MAG Ammo, 1 Neuro Round, 6 Herbs, 4 Chem Fluid, 2 Strong Chem Fluid, 2 First Aid Med, 1 Strong First Aid Med and 2 Supplements.
Walkthrough
Zoe’s Trailer. When you come back with the D-Series Arm the phone rings: it’s Lucas. Open the fridge: the deputy’s head with Memo on Deputy’s Head (file #18): “the pig is waiting for you in the dissection room”.
Processing Area. Cross the Main House (the Study is a safe room) and go down to the basement. The house is quiet; the old woman in the wheelchair may be down there and never attacks. On the Dissection Room Stairs, on the way to the Morgue, a Crawler Molded bursts through the wall by the Morgue Entry door. It is fast, runs on all fours and along walls: crouch to line up headshots (2-3 handgun headshots on Normal) or wait for it to close in and give it a shotgun blast. Its short swipe can be guarded with L; its two-hit lunge from mid range must not be guarded (the second hit always lands): shoot it instead.
Dissection Room. The headless deputy lies on a gurney and the sign dares you to reach down his neck: the Snake Key (it is only there once you have the D-Series Arm). Lucas taunts you: find two keycards “to get to the party”. On the way out, 3 Molded in the Morgue Entry: two legless ones crawl up the stairs and another comes out of the wall. Fight or run for the Snake door (Morgue Entry → Back Passageway), which doubles as a shortcut. From now on a Crawler roams the Processing Area corridor.
- The Snake Key opens three doors: Morgue Entry → Back Passageway; 2F Main Corridor → Kid’s Room; and Main Hall 2F → Master Bedroom.
- New Molded on Normal: one in the Main Hall 1F, one on 2F, one in the Living Room, one that drops from the collapsed staircase in the 1F Main Corridor, and a Crawler in the Yard.
Master Bedroom. Through the Snake door on the Main Hall 2F. Chem Fluid in the wardrobe by the door (Shotgun Shells ×2 on Easy; First Aid Med on Madhouse); Herb in the south-west chest of drawers; Shotgun Shells ×2 under the south-west armchair; Lock Pick in the metal tin on the white dresser to the south; and Clock Memo (file #21) pinned to the globe on the left bedside table: “the same time as all other clocks”.
- Clock puzzle: set the small bedside clock to the time of the house’s grandfather clocks: 10:15. The bed slides aside and reveals hidden stairs.
Storage (off the Master Bedroom). Backpack #2 is on the luggage rack opposite the door: +4 slots. On the stool in the north-east corner, the Treasure Photo (Dummy Head); it points to a mannequin in the Testing Area that hides the second Repair Kit. Herb in a blue box on the shelves by the door and Neuro Rounds ×1 behind the painting near the blue filing cabinet. On Madhouse a Lock Pick hides in the big book on the desk: examine its pages.
Workshop (basement, Processing Area). Go down the hidden stairs to the Workshop, which opens onto the Processing Area corridor. Enhanced Handgun Ammo ×10 in the big metal cabinet to the north-east and the Keycard (Red) on the central workbench. When you leave with the Keycard (Red), on Normal 3 Molded and a Crawler appear in that corridor: don’t turn right; go straight, then right to the stairs (the ones up to the Stairway Entry, by the Study) and climb them to leave the enemies behind. Upstairs, go through the scorpion door into the Main Hall and up to 2F.
Kid’s Room (Main House 2F). Snake door off the Main Corridor. Shotgun Shells ×3 under the chest of drawers by the door; Shotgun Shells ×2 (Strong First Aid Med on Easy) in the south-east bedside cabinet; Supplements on the air-con unit to the south; Lock Pick in the small bronze vase on the west shelf; Herb in the white jug on the display cabinet by the piano. Lucas’ Journal (file #19) on the east table and Torn Page from Journal (file #20) on the white dresser in the north-east, by the ladder. The journal says the attic remote is fused into one of his inventor’s trophies; the page says it is “shiny even at night”. It is the lamp-shaped trophy: examine it and press the button inside to lower the ladder. From the ladder, shoot Mr. Everywhere #12 on the ledge beside it.
- Lock Picks: with this Lock Pick and the Master Bedroom one, open the 2F balcony box (Shotgun Shells ×4) and the Study desk drawer (Chem Fluid) now.
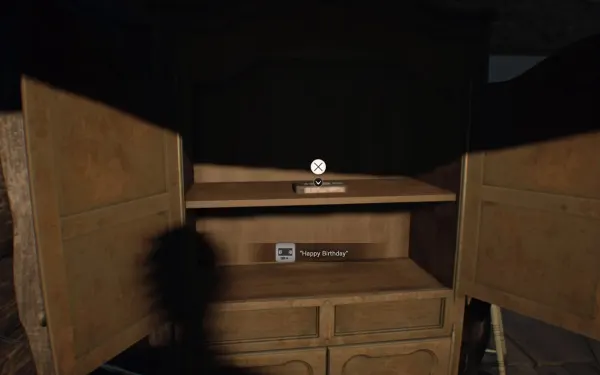
Attic. In the wardrobe in front of the ladder, the “Happy Birthday” tape. On the metal shelves to the south-east, the Toy Axe and the Model Shotgun; on the shelves by the plinth, Strong Chem Fluid. There is a note about installing shadow doors. In front of the “Judgment” painting, turn the plinth’s fixed statuette until its shadow is the executioner raising the axe: the dollhouse in the north wall opens with the Keycard (Blue).
- Model Shotgun: if you put the Broken Shotgun in the Display Room statue to take the M37, go down to that room off the Main Hall and place the Model Shotgun in the statue: it gives you the Broken Shotgun back. Combine it with the second Repair Kit (Supply Room in the Testing Area; you need the Treasure Photo (Dummy Head)) for the M21 Shotgun before the barn. That way you end up with both shotguns.
Back to the Yard. In the Main Hall the phone rings: Lucas tells you to use both keycards on the door by the Trailer. Once you have taken the Keycard (Red), 2 Crawler Molded prowl around the Trailer: shoot them from range.
“7” puzzle (optional, easy to miss). By the keycard door, turn left and push through the bushes in the south-west corner of the Yard: a plinth and the numbers 1, 3, 5, _, 9. Place the Toy Axe and turn it until its shadow forms an exact 7. The silver chest opens: Stabilizer (faster reloads, on every difficulty).
Trailer: the tape. Save and watch “Happy Birthday” in the VHS Player (the Recreation Room or barn Office players also work, but here is the natural spot). You play Clancy at Lucas’ party. Achievement Out Before Dessert: finish it within 5 minutes (it can be replayed).
- Take the Candle from the hand of the mechanical clown (Dummy Room) and walk into the Cake Room: the sprinklers put it out and Lucas explains the game: put a lit candle on the cake.
- Take the Winding Key from the barrel in the Cake Room (in the tape it spills fuel: that is what kills Clancy).
- In the toilet behind the clown, flush and reach in: Dirty Telescope. Stand in the Cake Room doorway and walk through the water while looking through it: it comes out as a clean Telescope. Look at the screens in the kitchen and the corridor through it: three symbols.
- Picture padlock on the small wall cabinet in the Cake Room (south-east), left to right: hanging human figure → small bird on a bell → fetus. Inside, the Straw Doll.
- Burn the Straw Doll on the stove: Dummy Finger.
- Light the Candle at the stove and burn the rope on the door to the Balloon Room. Pop the grey balloons with the candle and pick up the deflated yellow Balloon from the floor (north-west).
- Fill the Balloon at the gas outlet in the wall (Party Room, north-west): it bursts and drops the Quill Pen.
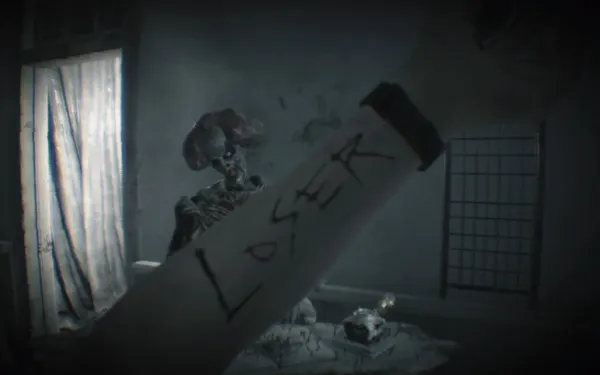
- Give the clown the Dummy Finger, the Quill Pen and the Winding Key: it carves the password LOSER on your arm.
- Enter LOSER on the Balloon Room back door: Valve Handle (Back Room). Fit it in the slot in the Cake Room doorway to stop the water, light the candle and put it on the cake.
Testing Area: entrance. Insert both keycards in the readers by the Trailer and climb the stairs. In the Entrance, sit in the chair: Lucas’ video (“find the last ingredient”), an explosion, and a door opens. In the Southern Corridor, Herb on the small stepladder in front of the barricade.
Tripwires. The wire bombs kill on contact: look before every step. Burning them with the Burner is the cheapest fix; rigged crates can be shot from range.
- Storage Room: a wire crosses the path: crouch under it. Break the north-west crate first (Strong First Aid Med; Handgun Ammo ×5 on Easy) and take Handgun Ammo ×10 from the north side of the middle shelves. There is another wire at the far end: crouch.
- Supply Room: one wire right of the doorway, one on the ceiling behind the lights (step around it) and one under the desk, too low to crouch under: shoot it from the doorway. With the mannequin photo in your inventory, examine the mannequin head with the cap on top of the cages in the north-east: Repair Kit. Under the cage by the north-west door, 44 MAG Ammo ×2.
- Northern Corridor: the crate in the middle is safe (Handgun Ammo ×5); the one on the stairs is rigged. Two wires cross the far doorway: walk to the end of the hall, turn round and shoot one; slide under the other.
Passcode Room. It looks like the Party Room from outside and has an Item Box. At the keypad Lucas appears on screen and feeds you codes: none of them work. When he backs away from the camera, back away from the keypad too: a spiked beam swings across the door if you stay in front of it. Then a hidden door opens on the right.
Carcass Room and Wooden Corridor. First door on the right down the steps: Chem Fluid in the left crate (the southernmost one); the other crate is rigged. Shotgun Shells ×2 in the wheelbarrow. In the Wooden Corridor, as you head west a Crawler comes through the windows behind you: turn and shotgun it. In the crate by the south Carcass Room door, Handgun Ammo ×5 (First Aid Med on Easy). There is another wire before the barn entrance.
Fertilizer Room. The small store at the end of the hall is full of wires: left of the door, behind the shelves, right of the door and on the far ceiling. Don’t just walk in: open the door, step into the doorway to the stables, turn and shoot the visible explosive. Then crouch along the left to the table: Antique Coin #13 in the green workbench drawer. Inch up to the north-west locker (stand right in front of it): Steroids on the bottom shelf. Leave the crate alone: it is rigged.
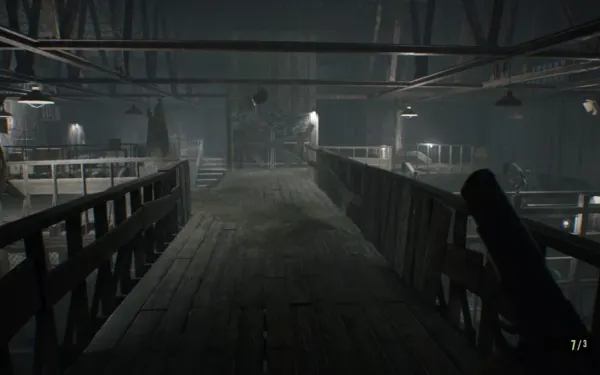
Barn. The west half holds 3 Molded: one round the right-hand corner and two at the far end (one of them crawling along the floor). You can lure them back into the hall to set off a wire, then finish them. Herb in the raised flower bed by the hay (north-west alcove), Shotgun Shells ×3 among the first hay bales to the west, Gunpowder on the shelves by the stairs and 44 MAG Ammo ×2 among the hay to the south-east. Mr. Everywhere #13 is on a southern post of the central cattle grid; it is easy to spot from the upper walkway. East half: south-west crate with Handgun Ammo ×5 and north-east crate with First Aid Med.
Office (safe room). Up via the barn walkway: Tape Recorder, Item Box and VHS Player. Solid Fuel on the north-west shelves and Shotgun Shells ×3 in a bucket by the desk. On the walkway, the north-west crate has Chem Fluid and the south-east crate Strong Chem Fluid. Save here before you go down for the Battery: the Fat Molded fight starts as soon as you insert it in the console.
Battery. Jump down. On the floor, the control console and two crates. Climb to the Platform: the Battery is on the barrel at the top of the stairs; Herb on the north-west shelves and First Aid Med (Herb on Easy) in the north-east crate. The crate by the balcony is rigged. Insert the Battery in the console: the Fat Molded fight begins (see the boss).
Rest Area: the code. Ride the elevator up. In the Rest Area, Clancy’s burnt body in the chair carries Memo on Burnt Corpse (file #22) with the Party Room door code. Read it in your own game: it can change from one playthrough to the next (the values seen most are 1408 and 1146). Supplements on the small table by the sinks and Chem Fluid on the wooden cabinet to the east. Leave and press the button that lowers the stairs towards the Party Room. On the shelf in the north-east of the Southern Landing, next to the button, Antique Coin #14.
Party Room (the real one). Enter the code on the Passcode Room keypad. Lucas makes you leave everything in the Item Box before he opens up, and locks you in. The solution is the tape’s, with one vital change: do not touch the Winding Key (the barrel spills fuel and you burn to death, like Clancy).
- Take the Candle from the clown and light it at the stove.
- Burn the rope, enter the Balloon Room and type LOSER on the back door.
- Take the Valve Handle, fit it in the Cake Room slot to stop the water, relight the candle if needed and put it on the cake.
- Lucas drops a Time Bomb: grab it, go to the wall left of the barrel, pull off the loose boards and drop the bomb through the gap. Don’t hesitate. The blast opens the way out.
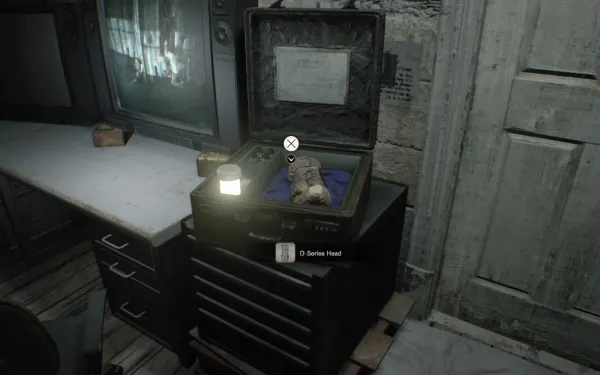
Monitoring Room (safe room). Tape Recorder and the Item Box with all your gear. On the board, the Testing Area Map; in the specimen case by the TV, the D-Series Head. Watch the monitor. The stretch ends here: Mr. Everywhere #14 sits above this door’s frame on the hallway side and already counts for the next stretch.
Madhouse. There are 2 Fat Molded in the barn (one with 15,000 HP) and, in the west half, 1 Molded and 2 Crawlers instead of 3 Molded. Extra coins: on the Attic shelves, two in the Northern Corridor and on the coffee table behind the TV in the Entrance (plus #13 and #14). Flame Rounds ×3 in the locked toolbox on the Office bench, 44 MAG Ammo ×1 behind the metal sheet in the south-east of the Wooden Corridor, and Cassette Tapes in the Kid’s Room, the Fertilizer Room, the Office and the Monitoring Room.
Boss — Fat Molded (barn)
Arena: the barn, with hay bales and an elevator in the enclosed east section, where it comes out once you insert the Battery. Lucas introduces it like a wrestling bout. HP: 10,000 (datamined). Weak point: the head; it takes −50% damage but has its own much smaller pool, so it is still the spot. Body shots barely do anything.
- While it comes out of the elevator, stall it with shotgun blasts to the head.
- Use the hay bales and the elevator as cover from the long vomit stream. After each spew, circle round and unload into the head.
- Horizontal vomit: crouch. Vertical: step to the side. Don’t shoot it while it idles: that can trigger a counter-vomit.
- If it charges you, shoot its legs or guard with L.
- The corpse explodes when it dies: step away.
Ammo: with a repaired M21 Shotgun about 4 shots to the face do it; with the 44 MAG, 2-4 headshots. A couple of Flame Rounds knock it down and Neuro Rounds stun it so you can finish it with Enhanced Handgun Ammo. Madhouse: there are two; use Neuro Rounds to pin one down and kill it fast before you deal with the second. Reward: the elevator leads to the Rest Area and the Party Room code.
Don’t leave without: Antique Coins #13 and #14, Mr. Everywhere #12 and #13, files #18-#22, the “Happy Birthday” tape (and Out Before Dessert), Backpack #2, the mannequin Repair Kit (Treasure Photo Dummy Head), the “7” Stabilizer and the Fertilizer Room Steroids. All of it is lost at the point of no return at the Boat House (chapter 5): do it before the Party Room.