Chapter order: Yard (Repair Kit under the porch, coins #8-#9) → Zoe’s Trailer (cages, phone call) → Old House 1F: Burner Grip and Old Shack (Backpack) → Burner Nozzle = Burner → nests → Cellar: Stone Statuette and Mia → Marguerite roams the house → spider puzzle → Crank → Outhouse: Crow Key → (detour: Grenade Launcher in the Main House) → Marguerite in the pit → Altar (Serum Documentation) → tunnel to the Old Yard (Toilet Treasure Photo) → mutated Marguerite in the Greenhouse → Lantern → Hidden Room: D-Series Arm → 3 Molded → back to the Trailer.
Prepare: with the 9 coins you will have when you reach the Trailer (#8 is in the Yard and #9 on the Trailer table), buy the Steroids (3) and the Stabilizer (5) there; the 44 MAG (9) can wait for the Mine Office (chapter 7), because any cage you leave unopened moves there with your progress kept. Spend the first Repair Kit (under the porch) on the M19 Handgun, or on the M21 Shotgun if you take the Broken Shotgun back from the statue (see “The Repair Kit” below). Carry the Burner through the whole Old House: swarms and nests only go down cleanly with fire. Save in the Old Shack before you go down to the Cellar (achievement Back Off, Mrs. B!) and at the Trailer before you drop into the Greenhouse (achievement Fly Swatter). For mutated Marguerite bring every Shotgun Shell, your enhanced ammo and meds; Flame Rounds and Neuro Rounds do little to her, so keep them for the barn (chapter 4) and Mutated Jack (chapter 5). On Normal this stretch hands out about 450 Burner Fuel, 23 Shotgun Shells, 30 Handgun Ammo, 5 rounds of 44 MAG Ammo, 3 Flame Rounds, 7 Solid Fuel, 4 Strong Chem Fluid, 8 Chem Fluid, 10 Herbs and 6 First Aid Med.
Walkthrough
Main House porch. You leave through the three-dog-head door into the Yard. On the porch, the Lock Pick is inside the goblet on the step balcony opposite the door; there is a Herb in the plant pot by the steps and another in a pot on the west side, and Gunpowder on the yellow shelving to the west. Go down the steps and turn right into the bushes: Antique Coin #8 sits on a stone plant pot behind the eastern steps.
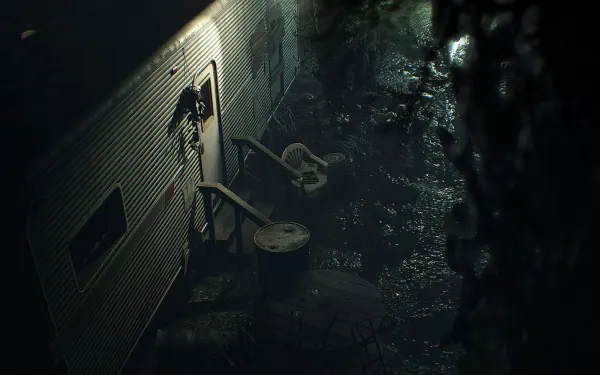
Yard (Courtyard). Between the two sets of porch steps there is a corrugated iron sheet: peel it back, crawl under the porch and break the box: Repair Kit. In the half-hidden south-east area, under the boarded-up window of the house, there is a Separating Agent. By the Trailer door, Chem Fluid in a yellow crate; under the Trailer steps, Mr. Everywhere #7 (one shot or one slash breaks it); under the north side of the Trailer, Shotgun Shells ×4. To the north-west you will see an electronic door with two keycard readers (it opens in chapter 4) with Supplements next to it. Right beside it, hidden behind bushes, is the “7” shadow plinth (1, 3, 5, _, 9) with a silver chest: it needs the Toy Axe from chapter 4, so don’t waste time on it now. In the big rusted dish north-east of the Trailer, on the way to the Old House, there is Gunpowder.
Zoe’s Trailer (safe room). Tape Recorder, Item Box, VHS Player and telephone. Antique Coin #9 is on the table in the seating area, next to the 44 MAG cage. On the bed, the Broken Handgun; on the pin board by the fridge, Zoe’s Investigation Notes (file #14). The toilet hides 44 MAG Ammo ×3, but it only appears if you carry the Toilet Treasure Photo, which you find later in this stretch. The phone rings: Zoe sends you to the Old House for the serum.
- The cages (Antique Coins): on the bench opposite the door, Steroids for 3 coins and Stabilizer for 5; on the table in the seating area, the 44 MAG for 9. Easy and Normal have 18 coins and the three cages cost 17, so you can have everything. If you picked up the first 9, the recommended buy is Steroids + Stabilizer now (8 coins): more health and faster reloads for the whole Old House. Buy the 44 MAG later, at the latest in the Mine Office (chapter 7), the last chance to spend coins. If you would rather have the magnum now (exactly 9 coins), buy the Steroids at the end of this stretch and leave the Stabilizer for the mine. Note that on Normal only 9 rounds of 44 MAG Ammo exist on the map up to the end of chapter 4 (plus the 44 MAG Ammo in the Survival Pack Action Set, amount unconfirmed).
- The Repair Kit: combine it with the Broken Handgun for the M19 Handgun (7 rounds, 120 damage against the G17’s 100) or with the Broken Shotgun for the M21 Shotgun (2 shells, 800 per blast against the M37’s 720). A second Repair Kit in chapter 4 fixes the other one. For Marguerite and the barn the M21 is the better pick, though the M37 does the job. If you left the Broken Shotgun in the statue for the M37, you can take it back now: return to the Display Room and put the M37 back in the statue’s arms (you go without it until you find the Model Shotgun in the attic, chapter 4). If you would rather keep the M37, spend this Repair Kit on the M19 and leave the M21 for the second kit.
Path to the Old House. Leave by the north-east of the Yard. Gunpowder in the big bowl on the left (the same rusted dish). On the Old House porch, break the boxes by the door: First Aid Med (Strong First Aid Med on Easy).
Entrance. Three big Flying Bugs (150 HP): wait until one hovers still, which is when it is about to attack, and kill it with one shot or one slash. Finishing one with the knife gives the achievement Things Got Personal; the ones resting on walls are the easy target. To the right is the Living Room with two armoured nests that spawn endless swarms: stay out for now. Go left.
Dilapidated Room. The big room with the hole in the floor. Behind the breeze blocks by the Guest Room door (south-east), 44 MAG Ammo ×2. Carry on into the Guest Room: a nest and bugs on the right wall. Ignore the nest, knife the bugs and cross to the far door. You will empty the spider-covered locker (north) and the metal box by the TVs once you have the Burner.
Corridor and Gallery. On the chest of drawers by the west door, the Old House Map, and under the chest, Burner Fuel ×100. The Gallery has an empty shadow plinth: its statuette is in the Cellar. Step out onto the Back Porch: the Burner Grip is in the trash bin opposite the Gallery doors; Chem Fluid in the cardboard box by the east bins and a Herb in the east bin (Handgun Ammo ×5 on Easy).
Old Shack (safe room). Cross the plank on the left. Tape Recorder, Item Box and, on the desk, Backpack #1: +4 slots and the achievement In the Bag. Mr. Everywhere #8 on the south-west shelves, next to the box.
Dining Room. As you cross it, bugs burst through the Corridor windows: kill them calmly. Solid Fuel in the wooden cabinet opposite the north-west door; Shotgun Shells ×4 in a wooden box among the stacked chairs. The south-east metal locker is covered in spiders: shoot or slash them from range (swipe from close and they jump on you). Inside, Chem Fluid and Strong Chem Fluid. The locked drawer of the sink unit holds a First Aid Med: spend a Lock Pick.
Walkway. Outside. Gunpowder on the south-west window sill; the Lock Pick in the metal box on the south-east trolley; Psychostimulants on the white shelves to the south-east. One bug perches on the fence by the south door and a nest sits by the crank mechanism: pass it on the right and kill the bugs. In the Water Station, the Burner Nozzle is on the table opposite the door and there is a Herb on the north shelves. Combine the Burner Grip with the Burner Nozzle: Burner. The pulley here needs a crank (later). Once the Burner is assembled, the nests on the walkway and in the fireplace room turn more aggressive.
Nests and Living Room. Nest technique: burn one for a few seconds, step back while the fire eats the armour, then light it again; a close shotgun blast finishes it. They have 2400 HP (2800 for the walkway and fireplace ones); later on, one Grenade Launcher grenade (optional detour after the Outhouse) kills one outright. Back in the Guest Room, burn the nest, open the spider locker (Burner Fuel ×30; ×60 on Easy) and take the Herb from the metal box by the TVs. In the Living Room, with its two nests: Solid Fuel in the north-west desk drawer, Chem Fluid in the small unit in the middle and Burner Fuel ×70 (×50 on Easy) in the wooden box to the south-west. Burn the nest in the fireplace. Save in the Old Shack before you crawl through it: once you come back from the Cellar Marguerite starts roaming the house, and that is the only chance for the achievement Back Off, Mrs. B!.
Cellar Stairs and Cellar. At the foot of the stairs, Antique Coin #10 on the white trolley by the door and Mr. Everywhere #9 behind you, by the wooden pallet. In the Cellar, the Stone Statuette is on the workbench, and Mia is here. The reunion is short: Marguerite slams the Living Room door in your face and covers it in spiders. Clear it with the knife for the achievement Slash Slash, Slashity Slash!: the two-handed stab (ZL + ZR) has more reach and the spiders can’t touch you. This is the first chance; the spider lockers in the Old House and the Greenhouse also count.
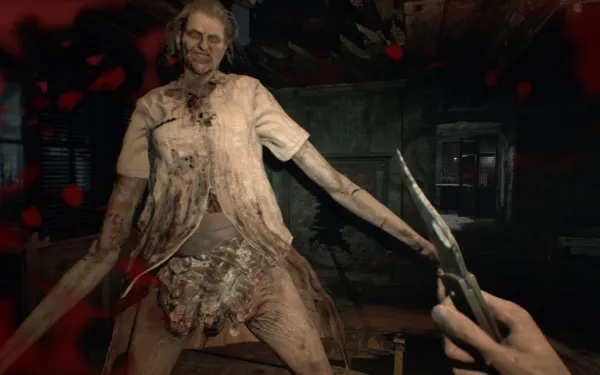
Marguerite roams the house. From now on she patrols with her lantern and cannot be killed yet. If she spots you she throws swarms: burn them with the Burner and run. To avoid her, hide in the Old Shack (right next to the Gallery) until she moves on; she likes the Dining Room and its hallway, and from the Walkway you can watch her through the windows. If you want the achievement Back Off, Mrs. B! (missable, this is the only chance), stand your ground: shotgun or handgun to the head and the Burner for her insects. She has 1500 HP but every weapon does half damage while she roams, so bring spare ammo. Once you hurt her enough she knocks you down and leaves the house for good. Before you stand your ground, save in the Old Shack: if it goes wrong, reload and try again. A shotgun blast into a cluster of her insects also gives Less is More (kill 2 or more with one shot).
Spider puzzle. In the Gallery, place the Stone Statuette on the plinth in front of the “Venomous Predator” painting and turn it until its shadow forms a spider. A bug-filled crawlspace (Hidden Passage) opens and leads to the west side of the Dilapidated Room. There: Herb in the trash bin, Solid Fuel inside the tyre under the crates and, in the alcove at the top of the west stairs, Chem Fluid in the chest of drawers. Those stairs lead to the Crow door, with Marguerite’s Warning (file #15) pinned to its frame.
The Crank. Drop into the crawlspace under the Dilapidated Room, where Mia was caught in her tape. Psychostimulants in a breakable crate, Chem Fluid behind window panes at the far end and Mr. Everywhere #10 on top of a metal unit near the far end. The Crank lies on the floor at the very end. When you take it, 2 bugs appear at the crawlspace entrance. Go back to the Walkway: 4 more bugs are waiting. Use the Crank on the mechanism to raise the bridge to the Outhouse and take the First Aid Med from the sink by its door.
Outhouse. The Crow Key is in the ornate white chest; Burner Fuel ×100 inside the toilet and Antique Coin #11 on the cistern. On Normal, swarms appear in the Corridor once you leave with the key.
Optional detour: Grenade Launcher. The Crow Key also opens the Crow door in the Main House Drawing Room. Behind it, in Supplies: the Grenade Launcher on the white tarp opposite the door (one round at a time, Flame Rounds or Neuro Rounds), Flame Rounds ×1 and Shotgun Shells ×3 on the north-west shelves, Solid Fuel and Gunpowder on the shelves by and behind the door, and Strong Chem Fluid on the floor behind the boxes in the south-west. Keep the Strong Chem Fluid for Flame Rounds (with Solid Fuel) or Neuro Rounds (with Supplements). If you skip it, the launcher turns up later in the Mine Office.
To the pit. With the Crow Key, go back to the Dilapidated Room and climb the west stairs (the ones with the chest of drawers in the alcove) towards the Crow door. Save first in the Old Shack or at the Trailer: as you climb, Marguerite throws you down the hole in the room and the pit fight starts (see “Boss — Marguerite (the pit)”).
Altar (Old House 2F). Once you beat her in the pit, climb out of the hole, go back up the west stairs and open the Crow door with the Crow Key. Open the big chest (cutscene) and read Serum Documentation (file #16) in the case on the table opposite the door: the serum needs the cranial nerve (head) and the peripheral nerve (arm) of a D-series. The phone rings: Zoe says the arm is on this floor. In the east section, Antique Coin #12 in the small chest of drawers in the south-west corner and Mr. Everywhere #11 on the chest of drawers in the middle, opposite the scale. In the Piano Room, Marguerite’s Notebook (file #17) on the desk by the piano, and a First Aid Med (Handgun Ammo ×5 on Easy) in the chest of drawers by the door. The glowing door at the end has a scale holding one lantern: it needs Marguerite’s Lantern as the counterweight.
Tunnel and Old Yard. Go back to the pit: the goo is gone and Marguerite’s hand snatches the lantern into a new tunnel. Climb down the ladder and follow the trail. You come out in the Old Yard: unlock the gate behind you, a shortcut to the Trailer and the Main House. Strong Chem Fluid on the electricity box on the pylon by the south gate. Inside the arch of the eastern stairs, the ones up to the Greenhouse door, is the Treasure Photo (Toilet): it points to 44 MAG Ammo ×3 in the Trailer toilet.
Potting Room. The Greenhouse door downstairs is locked: take the outside stairs up. In the Potting Room, 2 Herbs in the seed trays to the north-east, Solid Fuel on the green shelves to the north, Separating Agent on the west table and, in the locked drawer of the white unit to the west, Flame Rounds ×2 (Lock Pick). Save before you drop through the hole (the Trailer is close through the Old Yard shortcut): the fight starts below and you can’t leave until you win.
Lantern and D-Series Arm. After the boss, pick up the Lantern wherever Marguerite fell. Drop off spare items at the Trailer (the Old Yard shortcut makes it close) and go back to the Altar. Hang the Lantern on the scale and the door opens: Playroom, Kid’s Room (a drawing on the floor, a teddy on the rocking chair, a drawing of a broken ship), hallway, Contaminated Room (black mould, falling dolls), East Corridor and the Detention Room with the bed and the dollhouse. Examine the dollhouse: it is a drawing of this room with the back wall marked. Crouch (click the right stick) at the cut in the wall behind the bed and enter the Hidden Room: the D-Series Arm is on the body of the child sitting in the chair.
Three Molded on the way back. As you leave, one Molded attacks when you open the East Corridor door, another drops from the ceiling in the Contaminated Room and a third waits behind the furniture in the Playroom. They have 3000 HP: the head takes triple damage, a full shotgun blast to the head kills, and so does a 44 MAG headshot. Back off, guard with L if they reach you and aim for the head. At the Altar Zoe calls: meet at the Trailer. The stretch ends when you walk in with the arm. The story achievement The Grave Will Out the Truth pops at some point in this stretch (no source states the exact moment).
Madhouse. Every Tape Recorder needs a Cassette Tape (3 in the Trailer, 2 in the Old Shack, 3 in the Potting Room). The Grenade Launcher is on the Trailer bench (Supplies holds a coin instead) and there is no Broken Handgun on the bed: it is in the Potting Room. The Repair Kit is under the boarded-up south-east window; under the porch there is a coin and Chem Fluid. Madhouse coins sit elsewhere: Supplies (the tarp), Gallery (low cabinet by the plinth), Dilapidated Room (west floor, by the Hidden Passage exit), Walkway (floor under the south-west window), Old Yard (electricity box on the pylon by the hole you come in through) and the Old Entrance Hall of the west wing (green workbench). A Molded appears in the Guest Room and 2 more in the Dilapidated Room after you use the Crank.
Boss — Marguerite (the pit)
Arena: the hole in the Dilapidated Room. When you climb the Crow door stairs with the Crow Key, Marguerite throws Ethan down, the floor gives way and you are trapped in the pit while she watches from above. Weak point: the head. She has about 1500 HP (datamined): a few shotgun shells do it. Bring: Burner Fuel ×100, 10 rounds of Enhanced Handgun Ammo and 3 First Aid Med.
- Use the Burner first and burn the swarms. Angle the stream down to reach the big insects buzzing inside the pit; you can also knife them to save fuel.
- As soon as the swarm clears, switch to the shotgun or the handgun and shoot her head when she leans in. Do it fast, before she releases more bugs.
- Switch back to the Burner each time she summons another swarm. Trick: flying insects can’t hit you if you keep toggling crouch and stand with the right stick.
- She falls into the pit as a damaging pool of insects: climb out of the hole at once.
Reward: the Crow door is clear to the Altar (2F).
Boss — Marguerite (Greenhouse)
Arena: the west wing of the Old House (Old Kitchen, Old Corridor, Fertilizer Room, Old Bedroom, Old Living Room, Old Entrance Hall, Landing, Old Upstairs and Upper Level) plus the four-quadrant Greenhouse. You are locked in once you drop through the Potting Room hole. Weak point: aim for the head. The datamine gives her 15,000 HP, head +10% and the egg sac on her belly −20% until it bursts; many guides say “the belly”, but the measured tests favour the head. Shoot the belly only when it is all you can see (it does ~73% of a headshot) or once the hive has burst. Fire and grenades do little damage to her (Flame −60-80%, Neuro −70-90%, Burner damage over time −83%): the Burner is for her swarms and hives. Count on about 17-24 M21 shells to the head on Normal, depending on your hidden rank (a few more with the M37, at 720 per blast instead of 800); the 44 MAG and Enhanced Handgun Ammo cut that down.
Supplies in the arena (Normal): Old Kitchen, Shotgun Shells ×2 in the green workbench drawer; Old Corridor, Psychostimulants on the couch (west end) and a spider-covered door to the Old Bedroom (burn it); Fertilizer Room, spider locker to the north-east: Shotgun Shells ×8 + Strong Chem Fluid; Landing, metal cabinet by the stairs: Herb + Solid Fuel; Old Upstairs, Herb in the south chest of drawers and Handgun Ammo ×5 in the north-east crate; Upper Level, Handgun Ammo ×15 + Burner Fuel ×75 on the west table; Old Living Room, Handgun Ammo ×5 in the north-west crate; Old Entrance Hall, Shotgun Shells ×2 in the green workbench drawer. In the Greenhouse: Herb in the flower bed of the south-west quadrant, First Aid Med by the toppled ornate pot (south-west) and another in the breakable crate in the south-east of that quadrant, Chem Fluid on the lawnmower (south-east quadrant), Burner Fuel ×75 on the pipe by the ladder (south-west), Handgun Ammo ×5 in the drawer of the cabinet on the west side of the south-east quadrant, and Solid Fuel + Chem Fluid in the north-west metal cabinet. Take the Psychostimulants to see all of it.
- Going up the back stairs she bursts through a window and grabs you: shoot or strike to break free. She flees.
- She climbs walls and ceilings and ambushes from any hole, window or crack; she can pull you up from above or grab you from below: shoot fast and she lets go. Her arms reach far but she is slow on the ground. Stay on 2F if you can.
- Hunt her, don’t hide. Out of sight she starts laying hives that spawn insects and swarms. If you hear groaning and bodily noises she is laying one: shoot her to interrupt it. If a hive is finished, burn or shoot it (they are smaller than the house nests).
- When she is on a wall or the ceiling, a few handgun shots knock her down onto her back: step back while she thrashes and unload the shotgun, the 44 MAG or enhanced ammo into her head.
- Fly Swatter (missable): when she stops on a wall, looks at you and leaps, shoot her in mid-air (the shotgun is best). She only climbs 2 or 3 times per fight: save first, or restart if you miss.
- Reload every time she retreats and craft mid-fight (Chem Fluid, Strong Chem Fluid, Solid Fuel). Drop to 1F to break away and heal (R, quick heal). If she hides to ambush you, you can shoot her out, but if you are in range she grabs you.
- When she screams she gets angry and chases harder: keep your distance and keep aiming at the head. If you have spare Flame Rounds, one works to break a grab or a charge.
Reward: she goes rigid with her arms snapped to her sides and crumbles. She drops the Lantern in whichever room she dies and the exit gate collapses. Madhouse: the same fight, with more ammo in the arena (a crate with Handgun Ammo ×16, shells in 4s and 5s).
Don’t leave without: Antique Coins #8-#12, Mr. Everywhere #7-#11, files #14-#17, Backpack #1, the Toilet Treasure Photo and its 44 MAG Ammo ×3 in the Trailer toilet, and the achievements Back Off, Mrs. B! (only while Marguerite roams the house) and Fly Swatter (only in the Greenhouse). The rest of the estate stays open until the point of no return at the Boat House (chapter 5).