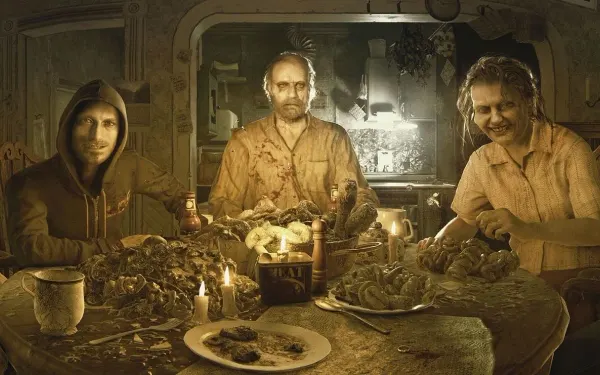
You play Ethan Winters, now a prisoner of the Baker family in the Main House. After dinner, Jack roams the halls and cannot be killed: your goal is to gather the three dog heads (White, Blue and Red Dog’s Head) that open the front door to the Yard. Along the way you get the Knife, the G17 Handgun and the M37 Shotgun, face Jack twice (Garage and Morgue), meet the Molded (the first one comes out of the Monitoring Room wall; then they fill the Processing Area below the house) and have two safe rooms with a Tape Recorder and an Item Box: the Laundry Room and the Study.
Chapter order: Dinner → Dining Area, Kitchen, Living Room, Pantry → Main Corridor (Jack on the prowl, Hatch Key) → hatch (Antique Coin #2) → Laundry Room (save) → the deputy’s Knife → Jack in the Garage (G17 Handgun) → walkway (Ox Statuette) → Main Hall → Clock Pendulum → White Dog’s Head → 2F: Recreation Room (Blue Dog’s Head, “Mia” tape) → Bathroom (Wooden Statuette, Jack) → hawk shadow → Drawing Room → Small Workshop → first Molded → Study (save) → Processing Area (Scorpion Key, photo, incinerators: Dissection Room Key) → Grandma’s Room (Broken Shotgun) → M37 Shotgun → Dissection Room → Red Dog’s Head → Jack in the Morgue → three-heads door → Yard.
Prepare: the first Item Box is in the Laundry Room: drop the Driver’s License there and open the Survival Pack Supply Box items that help right now. The Recovery Set (2 Herb, 1 First Aid Med, 1 Strong First Aid Med) and the Handgun Set (with Enhanced Handgun Ammo) help in both Jack fights. The Action Set comes with a pick, but also 44 MAG Ammo and Flame Rounds you can’t use yet: if you open it now for the pick, leave that ammo in the Item Box. The Burner Set can wait until chapter 3. With 12 slots and no backpack, carry the Knife, the G17 Handgun, heals and key items; the M37 Shotgun takes 2 slots. Shotgun Shells cannot be crafted: keep them for close Molded and for the Morgue. Craft with Chem Fluid: + Herb = First Aid Med, + Gunpowder = 10 Handgun Ammo. With Strong Chem Fluid you get a Strong First Aid Med or Enhanced Handgun Ammo (triple damage). Jack cannot be killed until the real fights: guard (L), shoot him in the head to drop him for a while and run. He never enters the Drawing Room or the Processing Area, and he leaves the house once you take the shotgun. On Normal this chapter gives about 97 Handgun Ammo, 26 Shotgun Shells, 12 Herb, 11 Chem Fluid, 2 Strong Chem Fluid, 7 Gunpowder and 4 First Aid Med.
The 5 Survival Pack coins: the Switch 2 Gold Edition includes them and all five wait in that same Laundry Room Item Box. Each takes 1 slot and only works while you carry it; their effects stack, and a discarded coin goes back to the box.
- Attack Coin: +6% damage (measured in a datamine; the wiki says +8%).
- Defense Coin: reduces the damage you take (the amount is not documented).
- Universal Coin: +2% damage plus a little more defense and knockback.
- Instinct Coin: more knockback and stun damage (the kind that drops an enemy or pops its head).
- Reload Coin: faster reloads; stacks with the Stabilizers.
The Attack Coin only raises HP damage: it doesn’t help knock Jack down while he roams the house, nor against walking Jack in the Morgue. The Instinct and Universal coins do raise knockdown damage, so in theory they help there, but nobody has measured it. With 12 slots, carry Attack + Defense, or just the Universal Coin if space is tight; add the rest once you have the first backpack (chapter 3). The Reload Coin is the lowest priority. If you are going for the “Resource Manager” achievement (never open the Item Box more than 3 times), taking the coins out counts as an opening, and per PowerPyx all 3 openings go on forced story moments (before and after the “Happy Birthday” room in chapter 4, and after leaving the ship). On that run don’t open the box now: take the coins and Supply Boxes at the first forced opening, or through the “Manage Items” option on the death screen of a boss fight, which does not count as an opening.
Dinner, Dining Area and Main Corridor
Dining Area. After the dinner scene, break free. Grandma asleep at the table is harmless for the whole game: ignore her. On the wooden cabinet next to the kitchen bench is the Home-improvement Store Receipt (file 4).
Kitchen, Living Room and Pantry. The Kitchen has a Herb in the trash can opposite the fridge (not on Madhouse). In the Living Room: the Newspaper Article - Missing People (file 5) on the coffee table, Handgun Ammo ×5 in the desk in the SE corner and a grandfather clock with no pendulum (you will come back with the Clock Pendulum). The Pantry has the locked floor hatch, your way out, and a boot marked “Eveline”.
Main Corridor. Here are the Garage door (electric panel taped over), a breakable box at the Garage Entry, a locked cabinet next to the double doors in the SW corner (needs a pick; a First Aid Med inside on Easy and Normal, and your first chance at the “Master of Unlocking” achievement) and the window where the deputy shows up later. Past the missing staircase, the long hall leads to the Hatch Key, on the small white table in the NE corner. The ornate door at the end (ox emblem) leads to the Main Hall: it needs the Ox Statuette.
Jack hunts you. As you walk down the hall Jack appears with a shovel and blocks the way.
- Let him chase you back to the Dining Area, dodge round him while he smashes the table and sprint back into the hall. If he spins you round, turn back and keep running.
- On your second try for the key he bursts through the wall into the Pantry side: that opens a loop. Lead him round through the Kitchen and the wrecked room, and take the key.
- Unlock the Pantry hatch and crawl in fast.
If he catches you by the hatch, he cuts off your leg. It is not game over: he leaves a First Aid Med on the floor. Use it to reattach the leg and dive into the hatch. Guarding reduces his damage; bullets only knock him down for a while.
Crawlspace and Laundry Room (safe room)
Crawlspace. Jack can’t follow you here. Antique Coin #2 on the red lawnmower, on the left.
Laundry Room, safe room. It has a Tape Recorder, an Item Box, a telephone and the Main House Map on a table. Mr. Everywhere #1 is under one of the tables: break it with the Knife as soon as you have it. The filing cabinet on the south side holds Herb + Chem Fluid: combine them into a First Aid Med. The metal box on the shelves by the door holds a Lock Pick. As you leave the phone rings: Zoe tells you to get out through the Main Hall. Use the pick on the Main Corridor cabinet: First Aid Med and the “Master of Unlocking” achievement.
Lock picks: 2 in this chapter for 4 locks. This chapter’s picks are the Laundry Room one and the Meat Storage one. The locks are the Main Corridor cabinet (First Aid Med), the Small Workshop box (Shotgun Shells ×6), the 2F Balcony box (Shotgun Shells ×4) and the Study desk drawer (Chem Fluid). Suggestion: the first one on the corridor cabinet, the second on the Small Workshop box, because shells can’t be crafted. The Balcony and the Study can wait: the chapter 3 picks (the porch and the Walkway) go on the Dining Room drawer and the Potting Room one, and the chapter 4 picks (the Kid’s Room and the Master Bedroom) cover these two. On Easy and Normal there is exactly one pick per lock, so you will open everything in the end. The Survival Pack’s Action Set pick is a spare: use it to open one now.
The deputy, the Knife and the Garage
The deputy and the Knife. Head back towards the Dining Area: someone knocks on the window. Deputy David Anderson gives you the Knife and tells you to meet him in the Garage (if he doesn’t show, walk to the end of the hall and back). At the Garage Entry, break the crate with the knife: Handgun Ammo ×5. Cut the tape on the panel to open the Garage. Before that, in the small storage area at the SE end of the Main Corridor (the barricaded bit past the ox door), Mr. Everywhere #2 is on the shelves and Gunpowder is behind the planks by the window. Enter the Garage: fight Jack (see “Boss — Jack (Garage)”).
Garage walkway. Climb the ladder by the workbench. At the end, on some cardboard boxes, are Shotgun Shells ×1. On the metal shelves there is a picture frame: turn it round, undo the screw, turn it back and take the Ox Statuette. Push the shelf to drop down. Go back to the Laundry Room to save, break Mr. Everywhere #1 and #2 if you still need to, and use the Ox Statuette on the ox door.
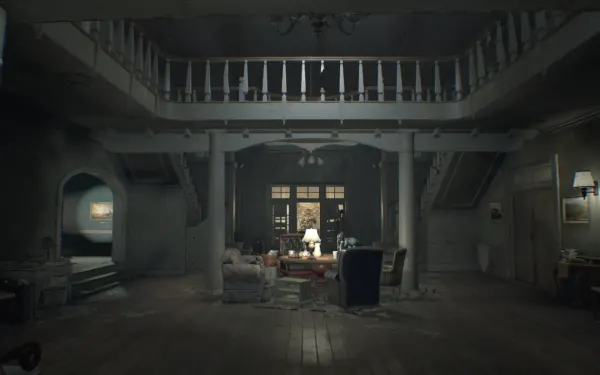
Main Hall
The front door needs 3 dog-head reliefs. The phone rings (Zoe). Other doors: the scorpion door (to the stairs down to the Study), an alcove with a projector and a painting missing a hawk (a shadow plinth), and the Display Room, where a statue holds the M37 Shotgun. Don’t take it yet: the room seals until you put something in its place. Upstairs, the Master Bedroom door has a snake nailed to it (Snake Key, chapter 4). Collect:
- Antique Coin #3 in the chest of drawers in the NW corner (left of the phone).
- Gunpowder in the wardrobe on the west side.
- Mr. Everywhere #3 and a Herb on the semicircular table by the west double doors.
- Chem Fluid in the cupboard under the stairs (east side).
- Newspaper Article - Over 20 Missing (file 6) on the table covered in papers by the alcove steps.
- Clock Pendulum inside the grandfather clock in the NE corner.
“Nice Try” achievement. Before you take the pendulum away, put it on the alcove shadow plinth: any unrelated item works. Then take it to the Living Room clock: it opens and gives you the White Dog’s Head.
2F: Balcony, Recreation Room and Bathroom
Balcony and corridor. From the Balcony you can see the Trailer, the Old House and Marguerite walking with her lantern (she can’t reach you). The Balcony has a Herb behind the pallet at the east end, a breakable crate at the west end with Handgun Ammo ×12 and a locked box on the west metal shelves (Shotgun Shells ×4, needs a pick). The 2F corridor has a Herb in the chest of drawers in the south section and a Chem Fluid in the chest of drawers opposite the broken stairs.
Recreation Room. The door to Grandma’s Room is locked (scorpion); through the window you can see a shotgun. Collect:
- Handgun Ammo ×10 in the wastebasket in the SE.
- Antique Coin #4 and Mr. Everywhere #4 (in the wicker basket) on the stacked furniture in the NE, by the bronze statue.
- Jack’s Memo (file 8) on the semicircular table on the north side, under the stag head.
- Jack’s Journal (file 7) in the drawer of the west cabinet, behind the bar.
- Gunpowder in the green waste bin by the entertainment stand, in the SW part of the room.
- Blue Dog’s Head inside the big orange book on the SW cabinet: examine the pages.
- The “Mia” tape, on the bench next to the VHS Player. Watch it now (see below). Leave the Bathroom for last, because Jack ambushes you there.
“Mia” tape (you play Mia in the Old House, fleeing Marguerite). It is optional, but it counts for “Be Kind, Please Rewind” (all 4 tapes in one playthrough) and previews the chapter 3 Old House. Finish it without being spotted for “Can’t Catch Me”. Getting caught restarts from the checkpoint and does not ruin it. What ruins it is being seen and escaping. You can replay it at the VHS Player.
- Go through the double doors, turn left at once, cross the big room to the far door: a short hallway with a big crate on the left and a jammed door on the right.
- Marguerite opens the door down the hall: crouch behind the crate (click the right stick) and stay still. When she goes into the room next to you, circle the crate and leave through the door she came from.
- In the Gallery (the projector puzzle) there is no time yet. Go out on the balcony and hide to the right, behind the window. The welding torch you see there is the chapter 3 Burner Grip. She checks the balcony door, turns back and then comes outside; when she turns left to the edge, sneak back in and go to the hallway.
- Both doors are locked: hide behind the crate again until she passes back through the locked door.
- Go back to the Gallery: she won’t follow now. Rotate the sculpture until its shadow forms a spider (roughly is enough) and a passage opens.
- You come out across the hole in the first big room. When you hear her, crouch behind the debris in the middle and keep it between you (stay right while she circles left). Then run to the crawlspace at the far right, under the house. The path is blocked and the tape ends.
2F Bathroom. Handgun Ammo ×7 in the cabinet under the sink and Antique Coin #5 inside the toilet. Drain the black bathtub: the Wooden Statuette is at the bottom. As you leave, Jack bursts through the wall and throws you across the tub. Run round the other side and out. Don’t waste ammo: enough hits make him collapse for a while. The best escape: lead him once round the tub, get out, turn left at once and drop through the broken railing where the stairs used to be (no fall damage). Lose him before you use the plinth: puzzles don’t work while an enemy is chasing you. If he is in the Main Hall but hasn’t seen you, hide in the alcove until he kicks a door and leaves.
Hawk shadow and Drawing Room
Hawk shadow (Main Hall alcove, “Sky Hunter” painting). Place the Wooden Statuette on the plinth and rotate it until its shadow fills the hawk outline. A passage opens under the wall into the Drawing Room. Jack does not follow.
Drawing Room. Collect:
- Psychostimulants on the coffee table. Use one for the “Open Your Eyes” achievement: they mark nearby items for a couple of minutes.
- Chem Fluid in the fridge.
- Herb in the plant pot in the SE.
- Handgun Ammo ×4 under the stuffed deer.
- Handgun Ammo ×12 in the drawer of the white cabinet by the fireplace.
- Handgun Ammo ×5 in the breakable crate by the crow door (NE).
- Shotgun Shells ×2 behind the painting leaning on the SW wall.
- Mr. Everywhere #5 in the gap of the crow door frame.
The crow door (Crow Key) leads to a storage room with the Grenade Launcher: chapter 3. A loose brick in the fireplace gives Steroids once you carry the Treasure Photo (Fireplace), which is in the Processing Area: come back later.
Small Workshop, Monitoring Room and Study (safe room)
Small Workshop and Monitoring Room. The Small Workshop has a whiteboard drawing, Antique Coin #6 in the ashtray, a locked toolbox (Shotgun Shells ×6, needs a pick) and Gunpowder on the thin metal trays in the SW; the orange tin only holds maggots. In the Monitoring Room, covered in black mould, the first Molded comes out of the wall as you approach the NE door. Against Molded: aim for the head (it is their weak point and slows them down), don’t sprint near them (they counter with a blow you can’t dodge), crouch and strafe towards the attacking arm to dodge the overhead swing, and guard if it lands. A point-blank shotgun blast to the head kills. They vanish when you enter a safe room.
Study, safe room. Go through the Stairway Entry (the scorpion door is locked from this side too) and down. The Study has a Tape Recorder, an Item Box, Handgun Ammo ×12 in the wardrobe, Travis’ Memo (Front) and (Back) (files 9 and 10, in the NE chest of drawers) and a locked desk drawer (Chem Fluid; a First Aid Med on Easy). Save and go down to the Processing Area.
Processing Area
Corridor. Take the Study stairs down with the handgun ready: further on, a Molded dashes round a corner at you. Back-pedal while you shoot it in the head. The first door in the corridor, the Tool Storage one, is locked from the inside. To reach the other side:
- Follow the corridor round. Walk past the Incinerator Room door (you’ll come back to it).
- Keep going past the locked Workshop door.
- Just before a large grating there is another unlocked door on the left. Pull the grating aside: it leads to the back of that first locked door.
- Undo the lock from the inside: the Tool Storage is now open to the corridor.
Tool Storage. Go in carefully. Inside are the Processing Area Map (west shelves), a Herb behind the pallet in the SW, Handgun Ammo ×12 in a crate on the shelves, Chem Fluid in the crate by the shelves and Antique Coin #7 in a small hole in the south wall by the small pallet: crouch to see it.
Meat Storage. It is further in, past the Tool Storage. The Scorpion Key is stuck in the meat on the centre table. There is also a Lock Pick in the open freezer in the NW, the Treasure Photo (Fireplace) on the NW metal shelves, a Herb in the meat cage (west) and Chem Fluid in the SW metal cabinet. When you take the key more Molded appear: one drops from the Tool Storage ceiling and, per IGN, another forms in the corridor on the way back to the Study stairs (Evil Resource only lists the Tool Storage one; plus the one already roaming the corridor if you didn’t kill it). Head back with your weapon raised and back-pedal while shooting for the head.
Back Passageway. Shotgun Shells ×2 on the trolley, Psychostimulants on the boxes by the west door and Mr. Everywhere #6 by the buckets, next to the snake door (locked until chapter 4). The passage has no other exit: go back through the Tool Storage to the corridor and into the Incinerator Room.
Incinerator Room. One Molded drops from above. On the wall above the sink is the Incinerator Room Memo (file 11), with the clue “3 a’s and a handprint”. There is also Strong Chem Fluid under the table by the sink and Gunpowder in the yellow dish under the stretcher (west). Puzzle: each drawer carries a name; the only one with three a’s is “Tamara” (from the List of Names), the far-right drawer. Open it and leave it open; then open the drawer with the bloody handprint. The leftmost incinerator opens and out comes Travis, a tougher Molded that shields its face with its big arm. Shoot the head when the arm drops and guard when it attacks. The Dissection Room Key is inside his incinerator.
The shotgun: Grandma’s Room and the Display Room
The Scorpion Key opens two doors: the Main Hall one to the Study stairs (a shortcut) and the Recreation Room one to Grandma’s Room. Go up by the shortcut. Collect in the room:
- Broken Shotgun propped on some boxes by the door.
- Memo About Relief (file 12) on the desk right of the door: it says where the 3 heads are.
- Doctor’s Letter (file 13) in the drawer of the small desk on the left.
- Burner Fuel ×100 on the floor between the desk and the wardrobe. Put it in the box: you don’t have the Burner yet.
- First Aid Med in the wardrobe.
- Chem Fluid in the north chest of drawers.
- Shotgun Shells ×2 on the bed.
Jack can still see you through the window and follow you here. Go down to the Display Room, swap the Broken Shotgun for the M37 Shotgun in the statue’s arms (it holds 4 shells and comes empty: load it) and the room opens again. Once you take the shotgun, Jack stops roaming the house. If you want the M21 later (Broken Shotgun + Repair Kit), you can get the broken one back by placing the Model Shotgun from the attic (chapter 4) in the statue.
Washroom and Boiler Room
Go back down. The Washroom has Handgun Ammo ×8 in the NE bathtub, Chem Fluid in the SE one and a Herb on the shelves in the wall hole by the SW door. There are 2 Molded: one at the top of the SW steps and one that appears mid-room as you near the SW door. Lure the first to the stairs, then trigger the second. The Boiler Room has 3 Molded (one just left of the door). The shotgun at point-blank kills them; back out through the door to split them up. Collect Shotgun Shells ×2 on the south trolley and Strong Chem Fluid in the NW metal cabinet.
Dissection Room and Morgue
Open the Dissection Room with its key: the deputy hangs here. Shotgun Shells ×5 in the locker in the east half and Chem Fluid under the metal table in the west half. On the next stairs there are Herb + Shotgun Shells ×2 in the metal cabinet by the double doors. In the Morgue Entry there is Gunpowder on the table under the stairs (north) and the Red Dog’s Head hanging over the Morgue. Save in the Study before you take it and leave 2–3 free slots for the Chainsaw. When you take it, Jack throws you into the Morgue (see “Boss — Jack (Morgue)”).
Way out to the Yard
Cut the door barricade with the Chainsaw; the saw breaks and stays behind. Go back to the Main Hall, set the 3 dog heads in the front door and step out into the Yard: achievement “You Ain’t Gettin’ Away”. From now on you can roam the Main House freely again until chapter 4. Go back to the Drawing Room with the photo for the Steroids in the fireplace brick: they raise your max health for good.
On Madhouse
Each Tape Recorder uses up a Cassette Tape and there is less ammo (about 49 Handgun Ammo + 19 Enhanced and only 7 Shotgun Shells in the whole chapter). There is no Lock Pick in the Laundry Room. The Garage Car Key is in the locked toolbox on the workbench; the pick is in the yellow cabinet in the SW of the same Garage. Another pick sits in a metal box at the Stairway Entry, where a Crawler Molded appears. The Main Hall has 3 birdcages: Scorpion Key (3 coins, on the blue armchair), Iron Defense Coin (7) and Assault Coin (8, +15% damage). If you buy the Scorpion Key right away, the hawk is optional and Jack comes in through the ox door. You take the M37 by swapping in the Model Shotgun, which on Madhouse sits on the Dissection Room shelves. There are 9 Madhouse coins in this chapter, nearly all in different spots from Normal: see the collectibles list.
Boss — Jack (Garage)
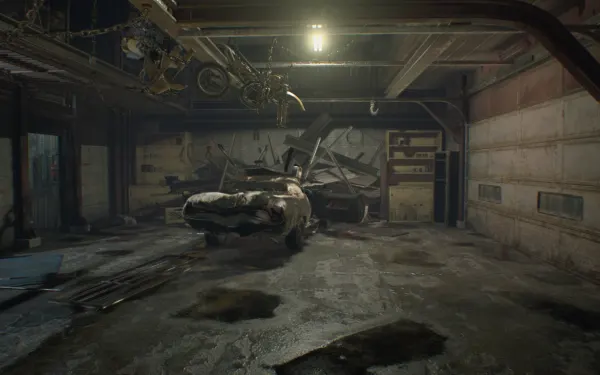
A closed garage with Ethan’s car in the middle, a workbench on the east side and a ladder that falls by that bench. Jack kills the deputy right at the start. He has about 10,000 HP (the head takes double): he is not meant to be shot to death. Two hits of his weapon can kill you. What the Garage holds:
- G17 Handgun next to the deputy’s body (10-round magazine).
- Car Key on the east workbench. Its text says you dropped it in the attic.
- Chem Fluid in the NW filing cabinet.
- First Aid Med in the SW locker.
- Handgun Ammo ×5 in the crate on the SE cabinet.
- While Jack is busy with the deputy, grab the G17 Handgun and run right to the bench for the Car Key. The key matters most.
- Get in the car and start it quickly. If you are slow, Jack drags you out or gets in himself.
- Ram him again and again: ZR to drive forward, ZL to reverse and line up the next charge.
- Scene: he jumps on the roof, tears it off, takes the wheel and crashes the car. You survive.
- He crawls out on fire. Headshots make him flinch. Don’t let him touch you (he grabs) until the car explodes and he goes down.
- Climb the ladder by the bench. He grabs you one last time: pull the trigger (scene).
- If Jack gets into the car first: dodge it and shoot or slash him when the car stalls. He eventually crashes and burns; shooting the tyres speeds that up.
- Reward: the G17 Handgun and the way to the walkway with the Ox Statuette. Collect the rest of the Garage loot before you climb.
On Madhouse: take the pick from the yellow cabinet, open the toolbox, grab the key and run him over.
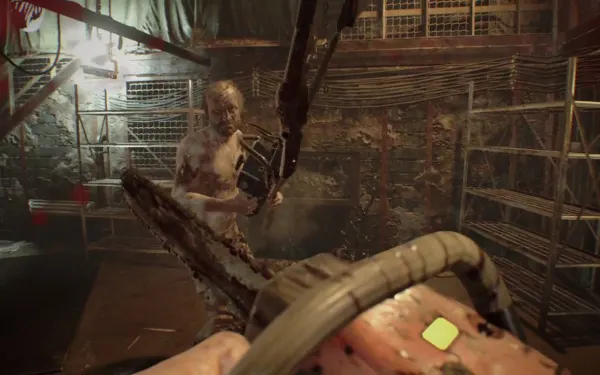
Boss — Jack (Morgue)
A pit with no exit, a central brick pillar and hanging body bags. There is a First Aid Med on the bucket in the NE, a Herb in the breakable crate in the south (a Strong First Aid Med on Easy) and, behind the mesh, a Chainsaw for phase 2. Jack has about 4500 HP and this fight ignores the difficulty rank. While he walks, your bullets only stun him; real damage lands only when he is down or his head is open. Then bullets break the animation after the first shot while melee keeps dealing damage: that is why the chainsaw exists. Bring 2–3 First Aid Med. If you have a spare Strong Chem Fluid, craft Enhanced Handgun Ammo for phase 1 (1 Strong Chem Fluid + 1 Gunpowder = 10 rounds). Remember you also need it for the craft-every-recipe challenge.
Phase 1 (his first weapon).
- Circle the pillar. When Jack passes a bag, kick it into him (press A next to the bag): he staggers. The angle matters; it doesn’t always work.
- With Jack staggered, shoot him in the head: shotgun to the face or several pistol rounds. Sources say 2 shotgun blasts or 6–10 pistol shots make his head hang. You have to do it twice.
- If he grabs or stabs you, shoot him so he lets go.
- If you run out of ammo you can hold out by dodging: he goes for the chainsaw anyway, but it takes minutes and you are exposed.
Phase 2 (chainsaw shears against chainsaw). Jack rips the mesh open and takes a pair of giant motorised shears; right next to them is the Chainsaw: grab it at once.
- If you clash head-on, both attacks cancel and nobody takes damage (it also stops his one-hit kill attack). Better: kick a bag into him and attack from the side or back, back off and repeat.
- Guarding with the chainsaw (L) works very well: a last-moment block staggers him.
- After 2–3 swipes he kneels and a tumour pops out of his head: aim + attack (ZL + ZR) and hold to drive the saw in continuously.
- The saw’s light goes yellow, then red, and the engine dies: rev it with Y (reload), always with the pillar between you.
- When his face is cut open he regenerates for a moment: pour all your damage in then. He mutates about 3–4 times on Normal.
- Near the end he knocks down the central pillar and can cut bags down: you will have less room. Keep the pressure on while his face is open until the finisher.
- Reward: the Red Dog’s Head is yours. The Chainsaw cuts the door barricade and stays in the Morgue.
“Duck If You Love Life” achievement (only here). With the shears, Jack sometimes runs at you and strikes from above: crouch (click the right stick) right on that attack. His other attacks still hit you while you crouch. Bait him by circling until he does it, and save before taking the head in case you miss it.
Before you step into the Yard you should carry: the Knife, the G17 Handgun and the M37 Shotgun (loaded), the Survival Pack coins you picked and your heals. In the Item Box: the Burner Fuel, the Action Set ammo if you opened it (44 MAG Ammo, Flame Rounds) and whatever you don’t use. Lock picks: the Main Corridor cabinet and the Small Workshop box open; the Balcony box and the Study drawer wait for the chapter 4 picks (except whichever you opened with the Action Set pick).
Don’t leave without: Antique Coin #2–#7 · Mr. Everywhere #1–#6 · files 4–13 (the Dining Area receipt and the Grandma’s Room ones are easy to miss) · the “Mia” tape (“Can’t Catch Me” and the 4-tape count) · “Nice Try” with the pendulum · the Treasure Photo (Fireplace) and its Steroids · “Duck If You Love Life” in the Morgue.