Chapter order: Monitoring Room → Exit Hallway (Mr. Everywhere #14) → docks (Walkway): first pulley → north-east hut (Mr. Everywhere #15) → second pulley → ambush (2 Crawlers + 5 Molded) → Shed 1F (safe room) → Storage Entry: Zoe, D-Series Arm + D-Series Head = 2 Serums → Mutated Jack → inject the Serum → the choice: Mia or Zoe → the boat.
Prepare: this stretch is the point of no return for the Baker estate. Once you go up to the Boat House 2F and hand the parts to Zoe, the Guest House, Main House, Yard, Old House and Testing Area close until the Finale (and the Finale only reopens part of the Guest House). Everything you left there is lost for this run: Antique Coins #1-#14, Mr. Everywhere #1-#13, files #1-#22, the first three tapes, the Treasure Photos and their rewards. The Trailer birdcages don’t come back until the Mine Office in chapter 7 either. You need the Crank in your inventory (the one from the Old House): if you left it in the box, take it out in the Monitoring Room. To go up to Zoe you must be carrying the D-Series Arm and the D-Series Head; you can leave them in the box and take them out in the Shed, because the boxes are linked. Bring the shotgun, a handgun with Enhanced Handgun Ammo, the Grenade Launcher and the 44 MAG if you bought it. Craft ammo before healing: Jack soaks up a huge amount of it. 2 First Aid Meds are enough. Save manually in the Shed before you go up: it is the last tape recorder before the boss, and it lets you see both endings by reloading. On Normal this stretch gives about 90 Handgun Ammo, 45 Shotgun Shells, 1 round of 44 MAG Ammo, 3 Flame Rounds, 2 First Aid Meds, 1 Herb, 2 Chem Fluid, 1 Strong Chem Fluid, 1 Gunpowder, 1 Psychostimulants and 1 Separating Agent; more than half of it is inside the boss arena.
Walkthrough
Monitoring Room (safe room). The previous chapter ended here: item box in the corner, tape recorder on the white desk, and the monitor. Before you leave, check your inventory: Crank, D-Series Arm and D-Series Head (or plan to take them out in the Shed), and your best weapons.
Exit Hallway. As soon as you step out of the Monitoring Room, turn around and look up: Mr. Everywhere #14 sits above the door frame, on the hallway side. Break it with a shot or a swing. Follow the hallway to the door to the docks.
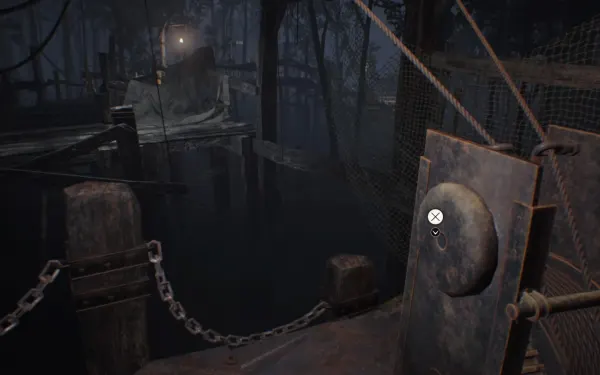
Docks (Walkway), first part. Outside, turn right: Shotgun Shells ×6 on the yellow cabinet by the door. Go down the plank on the right to the south platform: Handgun Ammo ×10 on the tarpaulin by the first mechanism. Use the Crank on the pulley to raise the walkway that leads down. Where the path splits, the left walkway is the one to raise, but its pulley is on the right: go right first.
North-east hut. The lone shack on the boardwalk, near the bridge. Chem Fluid on the table and, in the breakable crates, a First Aid Med and Shotgun Shells ×3 (on Easy a Herb replaces the First Aid Med). Mr. Everywhere #15 is under the fishing net on the left: look down at the floor and break it. It is easy to miss, and there is no way back after the serum.
Second pulley. On the platform with the crab cages, break the crate (Shotgun Shells ×3; Handgun Ammo ×15 on Easy) and pick up 44 MAG Ammo ×1 from the ground by the fishing cages. Use the Crank again to raise the second bridge.
The ambush. Once you have explored the second pulley area, the docks fill up. The Molded have 3000 HP and the Crawlers 900; a full shotgun blast to the head kills either (a Molded’s head takes +200% damage):
- A Crawler Molded (the four-legged kind) jumps out of the water by the north-east hut. Crouch to line up the head, or wait until it is close and give it a shotgun blast. Don’t block its two-hit lunge from mid range: shoot it.
- 4 Molded come along the south walkway from the house side, in two pairs. Handgun to the head from range while they file along the narrow plank; shotgun once they are on top of you. Don’t get surrounded on the platform.
- Crossing the new bridge, another Crawler jumps up and a Molded drops from above on the north walkway.
If you are short on ammo you can run for the building instead (only one Molded blocks the way). But fighting here is cheap: the Shed and the boss arena give back far more than you spend. Madhouse has the same enemies.
Shed 1F (safe room, heavily stocked). Item box opposite the entrance and a tape recorder on the metal bench across from it. Take everything:
- Chem Fluid, Separating Agent and Strong Chem Fluid on the shelf above the box.
- Handgun Ammo ×15 in the breakable crate in the north-east corner (Chem Fluid on Easy).
- Gunpowder in the wooden box on the north side.
- Psychostimulants on the metal bench opposite the entrance.
- Flame Rounds ×3 on the metal bench by the stairs. That much free ammo is a warning: a big fight is coming, and these are for the Grenade Launcher.
- Herb on the plastic chair opposite the stairs.
- Shotgun Shells ×10 in the wooden box by the stairs.
Craft here: Gunpowder + Chem Fluid = 10 Handgun Ammo; Gunpowder + Strong Chem Fluid = Enhanced Handgun Ammo. If you have a spare Strong Chem Fluid and some Solid Fuel, make Flame Rounds. If you have spare Supplements, Supplements + Strong Chem Fluid = Neuro Rounds. Leave in the box whatever you won’t use on Jack (the Burner only if you are short on space; see the boss). Save here.
Madhouse. The Shed has 1 Cassette Tape, Separating Agent and Chem Fluid on the bench, Gunpowder on the shelf, Shotgun Shells 3 + 3 in the crates, 2 Herbs in the wooden box, Shotgun Shells ×6 on the chair and Handgun Ammo ×5 by the stairs; the locked toolbox by the stairs holds 2 Strong Chem Fluid (needs a Lock Pick). No Flame Rounds. In the north-east hut: First Aid Med (crate) and Handgun Ammo ×5 (table); the 44 MAG Ammo ×1 is by the post near the Shed door.
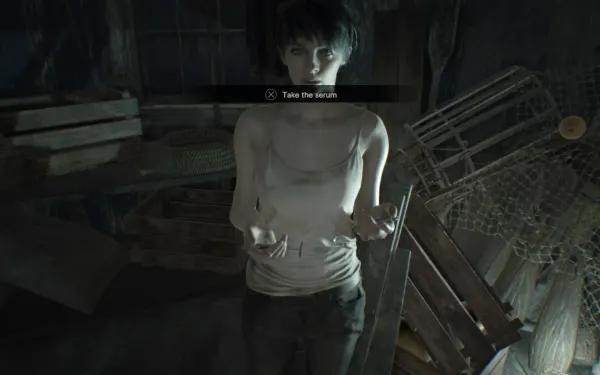
Shed 2F → Storage Entry. Go upstairs. Mia and Zoe are tied up in the Storage Entry. Untie Zoe and give her the D-Series Arm and the D-Series Head: she makes 2 Serums and hands them over (every difficulty). Jack smashes through the wall, grabs Ethan and throws him into the arena. The fight starts at once and Jack gets a free swipe: hold L (guard) as soon as you land.
Boss — Mutated Jack
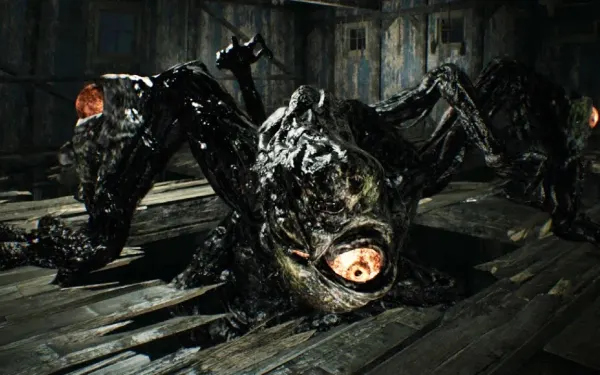
Arena: the Boat House Storage, on two floors. Upstairs, narrow wooden walkways with four large holes dropping to the lower floor, which is under shallow water. A single ladder back up. The building gets wrecked as the fight goes on and ends up on fire.
HP and weak points (datamine): the body has 30,000 but never drops below 1: only the glowing orange eyes all over his body take damage (500-5000 each; in practice one shotgun shell or a few handgun shots per eye). There are about 8: face, belly, right torso, right arm, left arm, tail, under the tail and back. The hardest are the belly, the tail ones and the side and back. The rest of the body takes no damage.
Arena ammo (Normal): grab it during the fight, in the lulls.
- 1F: Handgun Ammo ×15 (crate on the metal shelves, NE corner); Handgun Ammo ×20 (wall shelves, SE corner); Shotgun Shells ×3 (crate on the shelves, SW corner; Burner Fuel ×50 on Easy); Handgun Ammo ×15 (crate on the shelves, NW corner); Shotgun Shells ×10 (metal shelves, NW corner).
- 2F: Handgun Ammo ×15 (crate, NW corner); Shotgun Shells ×10 and a First Aid Med (metal shelves, NW corner). Easy adds another First Aid Med and Burner Fuel ×50 in the SE crates.
- Madhouse: 1F has Handgun Ammo ×15, Shotgun Shells 3 + 3 + 3 and Enhanced Handgun Ammo ×5 (pallet, SE); 2F has Psychostimulants, 2 First Aid Meds, 1 Strong First Aid Med, Handgun Ammo ×15 and Shotgun Shells 3 + 3.
Phase 1: pop the eyes.
- Guard as you land (L): the first swipe is free for him.
- Keep changing floors. Use both the upper and the lower floor. If you are under him, he slams down through a hole; if you are both on the bottom, he sometimes does a long lunge that leaves him open. Staying on his floor for long is dangerous: stay upstairs and drop down only to escape, then climb back up the ladder.
- Dodge: wide arm swipes and a one-arm lunge (sidestep away). When you see him sputtering, step to the side: with his face damaged he vomits a stream like a Fat Molded, or tries to grab you.
- Weapons: handgun from range (a few shots per eye; a third of that with Enhanced Handgun Ammo), shotgun up close (about one shell per eye). The Grenade Launcher Flame Rounds go on the eyes you can’t see well: belly, under the tail and back. Even though Jack resists fire, each one is worth about one 44 MAG shot, the blast can pop eyes you have no line of sight to (sometimes more than one) and the burn keeps doing damage. Only fire when he is standing still: if he is about to move, the grenade overshoots.
- Belly eyes: lure him to the upper floor, drop through a hole and shoot upwards.
- Ladder trick: near the ladder there is a spot that makes Jack decide to follow you up or down. Step just past it, wait for his movement animation to start, then switch floors quickly: it leaves a side exposed.
- When you pop an eye and he reels, reload every weapon instead of getting greedy.
- Burner: last resort only. It is slow to catch, Jack resists it heavily and the fire hides the remaining eyes; if you use it, use it in phase 2 or when he is under the water.
- Keep the 44 MAG and the Enhanced Handgun Ammo for phase 2 (and a couple of grenades if you can).
Phase 2: the pin.
- With no eyes left, he dives into the water, burrows, bursts up and pins Ethan in a corner in front of him. You can barely move. Only one eye on his head is left, and it grows back.
- He raises his arms and slams down again and again. The slam has a long windup: guard (L) every slam and shoot the head eye between slams.
- Use your strongest ammo: 44 MAG, Grenade Launcher, shotgun or Enhanced Handgun Ammo. It takes only a few hits (one shotgun shell is not enough: count on 2-3). A crate with ammo is on your left. Heal after every two or three hits taken.
Phase 3: the Serum. Zoe opens the door. Walking to the exit triggers Jack’s last grab and a button prompt to inject the Serum. Press it: otherwise you die on the spot. It uses one of the two Serums.
Madhouse: Jack hits much harder: guard far more often and use the arena crates. With the Circular Saw from an earlier clear you can circle his body on the lower floor and cut the eyes without spending ammo; from behind or the side he can barely reach you, and with The Secrets of Defense and The Essence of Defense in your inventory guarding costs almost no health. Note that another guide says this is the one fight where the saw is a bad idea and recommends the 44 MAG. Either way, keep Enhanced Handgun Ammo or shells for the last eye.
Reward: the way to the boat and the serum choice. The chapter closes with the achievement You Better Start Running (escape from the Baker family home).
The serum choice. You have one Serum left: Mia or Zoe. This is the decision that sets the ending (at about 66% of the story):
- Serum to Mia → Ending 1, achievement End of the Night. Ethan leaves Zoe behind and takes the boat with Mia. On the ship, Mia resists Eveline and gets Ethan out of the engine room. At the end Mia is in the rescue helicopter.
- Serum to Zoe → Ending 2, achievement Just A Memory Now. Ethan leaves with Zoe and Mia stays behind. Eveline attacks the boat and Zoe is petrified (she is the subject of End of Zoe). You still play Mia on the ship, but at the end Mia turns on Ethan: an extra fight with the Crowbar in the No. 2 Engine Room. At the end Mia is not in the helicopter, only her phone recording, and the music is more sinister.
The ship, the tape and the pickups are the same on both routes; only the post-rescue scene and the Crowbar fight change. To see both endings, save in the Shed before you go up to Zoe and reload after choosing. Both ending achievements unlock when you finish the game.
Don’t leave without: Mr. Everywhere #14 (above the Monitoring Room door) and #15 (under the net in the north-east hut). And, before you go up to Zoe, anything still left on the estate: after that moment there is no way back.