Here you play as Mia, not Ethan. After the serum decision, Ethan ends up on the Annabelle, the gas tanker run aground in the swamp, and Mia wakes up outside with no weapon. The chapter has two halves. First, a 2014 tape (“Old Videotape”) in which an armed Mia shows how the ship was wrecked. Then the ship in the present day, where Mia starts unarmed and has to repair the elevator (fuse and Power Cable) to get down to Ethan at the bottom of the hull. Along the way you find the P19 Machine Gun, the MPM Handgun, Backpack #3 and plenty of Remote Bombs, and everything Mia holds at the end goes to Ethan’s box.
Chapter order: Mia unarmed: S3 → Office S1 (Antique Coin #15) → S2 corridors → Flooded Room 1F (Antique Coin #16) → Main Corridor 1F (2 Crawlers) → Jim’s Letter and Giovanni’s Will → Laundry Room: General Purpose Fuse → stairwell → Security 3F: the “Old Videotape” (Mia in 2014: P19, Remote Bombs, Corrosive, the email to Ethan) → present day: Tattered Secret Document → 4F Bridge and Captain’s Cabin (Lug Wrench) → Side Stairs (Mr. Everywhere #16) → elevator (Mechanic’s Memo) → 2F: Survival Knife, Guest Room (safe room), Bunk Room (Captain’s Cabin Locker Key) → 4F: P19 Machine Gun → Lounge (painting puzzle, 3 Corrosive) → Shaft (Lock Pick, Mr. Everywhere #17) → Control Room (Antique Coin #17) → Sick Bay: Power Cable and a Fat Molded → 1F: MPM Handgun, Backpack #3 → fuse and cable into the elevator → S2: the No. 1 Engine Room Fat Molded → WAP2 (Antique Coin #18) → No. 2 Engine Room: Ethan → Zoe route: Mia → off the ship.
Before you start
- You start with nothing but the Strange Bottle (“E-001”). None of Ethan’s gear helps here: Mia’s item box is not linked to Ethan’s (it only holds unlocked bonus items). Until the tape you have no weapon: avoid the 1F Crawlers, don’t fight.
- Inside the “Old Videotape” (2014) nothing carries over: spend ammo, Remote Bombs and Corrosive freely.
- In the present day, everything Mia holds (inventory and box) goes to Ethan’s box when control returns to him: the P19 Machine Gun, the MPM Handgun, the Survival Knife, the Remote Bombs, the Machine Gun Ammo and the Handgun Ammo. Hoard Remote Bombs (they stack 20 per slot): they are gold in the Salt Mines.
- Present-day Corrosive. On Easy and Normal you find 6 (Guest Room 1, Lounge safe 3, Sick Bay 1, Recreation Room 1) and need 5: one spare. On Madhouse you find 5 (the Recreation Room has none) for 5 uses: none spare. The uses are the Control Room door (required to reach the Sick Bay), the Recreation Room door (Backpack #3 and, on Madhouse, the Survival Knife), the 2F Bunk Room south door (the key to the P19 locker), the Workers Access Passage 2 panel (Antique Coin #18) and the Cargo Bay panel (2 Remote Bombs). If you are one short, the Cargo Bay panel is the first to drop.
- Point of no return: the whole ship is one-way. The four Antique Coins, the two Mr. Everywhere, the five files, the Lock Pick and Backpack #3 are lost once you enter the No. 2 Engine Room. On top of that, coins #15 and #16 are lost as soon as you move on from S1 and the Flooded Room.
- Enemies: Molded have 1500 HP in the tape and 1200 against Mia in the present (the head takes +200%). Fat Molded have 4500 in the Sick Bay and 3000 in the No. 1 Engine Room.
- Saving: tape recorders in Security 3F (it appears after the tape), Guest Room 2F (with an item box) and Maintenance Room 1F (no box). S2 has no tape recorder.
S3 and S1: Mia unarmed (Antique Coin #15)
Clearing → Entrance → L Corridor → Straight Corridor → stairs. Mia sees Ethan’s body dragged off by a moldy mass. Climb into the ship: goo-covered corridors, a hall of barred doors (a scripted scare) and a stairwell. Go all the way up, past mold-covered bodies. No items.
Office (S1). A big room with a flashback: two engineers flee and crawl into a duct. The duct is reached through a floor hatch. Antique Coin #15: where the duct forks, go right into the dead end and look left. Take it now: you can’t come back once you reach 1F. Not present on Madhouse.
S2 corridors and Flooded Room (Antique Coin #16)
The duct drops you one deck down, into S2: Winding Corridor → Locker Room / Rest Area → Exposed Room → Walkway → Maintenance Access. First, the ship’s manifest, a note and a body that died hiding in a locker. Next, a bathroom with a scrawl and another body. The end door leads to a broken room overlooking your route, with the “LNG Tanker ‘Annabelle’” picture. Going up the stairs triggers another flashback and a figure (Eveline) appears: follow it back inside. No items.
Flooded Room (1F). Climb the Maintenance Access ladder past the corpse and drop into the flooded room. Antique Coin #16: in the murky water left of the ladder, towards the middle of the room (NW corner, by the white growth). It is very easy to miss and there is no way back. Easy and Normal only.
Main Corridor 1F: the fuse, unarmed
The girl shuts a door that seals over with black mold: the stairwell door needs a fuse. Danger starts here and Mia has no weapon: 2 Crawler Molded patrol either side of the corridor. Don’t get caught in the open: if one comes from one side, go the other way, and close doors behind you.
- Stockroom (door right of the stairwell): Herb in the green cabinet. You can’t break the crate yet (Gunpowder; open it with the Survival Knife later).
- Bunk Room 1F: Jim’s Letter (file #23) on the NE bunk; Handgun Ammo ×8 under a west bunk. A sailor writes to Janet about odd passengers: a couple with a little girl the captain calls relatives.
- Storage 1F: Giovanni’s Will (file #24) and Psychostimulants on the table by the SW door. A First Aid Med sits in a crate that needs a knife: come back later.
- Laundry Room (door left of the stairs; approach carefully, because one of the Crawlers prowls the hall around the corner): Machine Gun Ammo ×40 on the top washing machine (SW) and Chem Fluid in the trash can (NW). The General Purpose Fuse is in the fuse box on the south wall. A Molded appears when you approach the south side: grab the fuse, run and close the door behind you.
Put the fuse in the sealed stairwell door. The stairwell map shows the ship: 2F (kitchen and dining room) is locked, 3F leads to the Control Room and Security, and the 4F Bridge door is jammed. Go up to 3F.
Security (3F): the “Old Videotape”
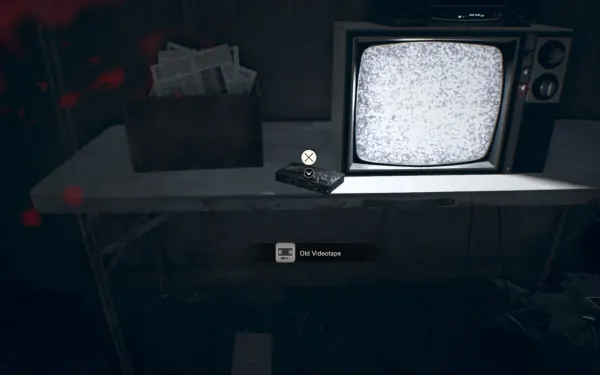
The girl (Eveline) is watching TV and wants you to watch a tape: the “Old Videotape” is on the desk next to the TV. Put it in the VHS Player. It is tape 4 of 4 (achievement Be Kind, Please Rewind if you watched all four in this run). After it, a tape recorder appears here, on the desk by the SE door: save.
Tape: Guest Room and 2F (October 2014)
Mia starts armed: P19 Machine Gun, Survival Knife and a health watch. Her “Echo” bracelet counts down the distance to Eveline. Nothing you find in the tape carries over (except files: Orders counts toward your collection). A wounded Alan Droney gives Mia the bottle and asks her to find Eveline.
- Guest Room: Orders (file #26) on the SE desk (it is also in the present-day Guest Room: you only need it once) and Machine Gun Ammo ×60 on the SE table. There is an item box.
- Bunk Room: 1 Molded standing around. Herb on the north table, Supplements on the SE desk. The north wall panel holds 2 Remote Bombs and needs Corrosive: come back later.
- Main Corridor 2F: Chem Fluid behind the wooden pallets (NE). Another Corrosive panel (2 Remote Bombs) in the NE, next to a locked room.
- Dining Room: Machine Gun Ammo ×40 on the catering trolley (NE), Chem Fluid on a chair (W), Supplements on the shelf (SW).
- Break Room (door right of the Dining Room): black gunk blocks the far door; Machine Gun Ammo ×20 on the sofa (SW). Note the high window: it is your route to 3F later.
- Kitchen (crawl through from the side of the Dining Room): Eveline’s mess and a Herb in the sink.
Tape: elevator, S2 and the first Remote Bombs
Elevator. A Molded appears in the hall: kill it. Eveline takes the elevator down to S2; call it back. As you step in, a Molded drops from the open ceiling.
Workers Access Passage 1 (S2). A Molded lunges from an alcove on the left. Chem Fluid behind the pipes in the middle alcove, Herb in a plastic tray (W), Machine Gun Ammo ×40 on the pallets (W).
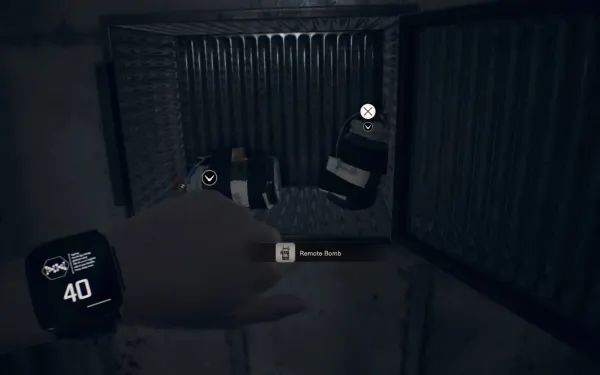
Straight Corridor (S2). Go through the far door: another Molded drops from the ceiling here. Once it is dead, open the wall panel at the south end: your first 2 Remote Bombs. They are placed with ZR and detonated with Y; step away first, because they kill you too.
Achievement That’s a Spicy Meat-a-ball. Now that you have bombs, this is the best time for it. Equip a Remote Bomb, let the next two-armed Molded grab you and press ZR: the bomb goes into its mouth. Detonate it with Y: it dies instantly even at full health. Blade-armed Molded never grab, so they don’t work.
No. 1 Engine Room. A Molded comes down from above: a good first Remote Bomb test. Machine Gun Ammo ×40 by the pipes (S), Machine Gun Ammo ×40 on the gas-canister cage (NW) and Chem Fluid between the vent pipes (NW).
Workers Access Passage 2 and Cargo Bay. The No. 2 Engine Room door is locked: Mia radios Alan, who tells her to look in the luggage area. Chem Fluid behind the stepladder. In the Cargo Bay, Chem Fluid in a crate and 3 Corrosive on the table behind the green gate. Corrosive melts padlocks.
Tape Corrosive: exactly enough. There are 4 (3 here + 1 in the Store Room) and 4 uses: the No. 2 Engine Room door, the Store Room door and the two 2F panels. Don’t waste any.
Tape: the fire, back to 2F and the email
No. 2 Engine Room. Use Corrosive on the door. Eveline lures Mia in and “teleports” out. Alarms go off and the ship starts burning. New Molded now appear: 2 in the No. 1 Engine Room (Remote Bomb them on the stairs), 3 in Workers Access Passage 1, 2 in the Break Room and 1 in the Main Corridor 2F (north-east).
- Store Room (S2): Corrosive on the door, the first on the left in the Straight Corridor. 2 Remote Bombs and 1 Corrosive on the west shelves, Chem Fluid in the NW crates, Machine Gun Ammo ×60 and a Herb on the south shelves.
- Straight Corridor: fire. One Molded, then two more: Remote Bomb the pair.
Back to 2F. Eveline ditches you in the elevator, which dies: you have to detour through 2F. Alan is gone; he left a message in blood. Now melt the two 2F panels with Corrosive: Bunk Room north wall (2 Remote Bombs) and Main Corridor NE (2 Remote Bombs). Go through the Dining Room to the Break Room and climb through the high window to bypass the gunk and reach 3F. Past Security, Eveline kills Alan.
Control Room (3F). Use the laptop to send the email to Ethan: the message from the start of the game. Continue down the hall: the ship explodes and the tape ends.
Present day: Elevator Corridor and Control Room (3F)
Mia is unarmed again.
Elevator Corridor (3F). Chem Fluid in the metal cabinet on the left (NW). Tattered Secret Document (file #27) inside the green sample case in the corner by the elevator: the first hint that a toxin can kill Eveline. You can pry open the elevator shaft door here.
Control Room (3F). Machine Gun Ammo ×40 on the bench, Chem Fluid in the far locker (NW), Gunpowder in the middle desk drawer (W) and a Herb on the desks by the broken laptop. The orange toolbox on the bench holds Antique Coin #17 and needs a Lock Pick (it is in the Shaft, later). The door to the 3F Main Corridor needs Corrosive. After you explore the Bridge, a Molded appears in the NE corner.
Present day: 4F (Bridge, Captain’s Cabin, Side Stairs)
Bridge. Climb the ladder in the elevator shaft and drop into the Bridge from above. On the security computer, switch to camera 5: Ethan is stuck in the goo on the bottom level. Gunpowder in the left filing cabinet (W) and 1 Remote Bomb on the east console.
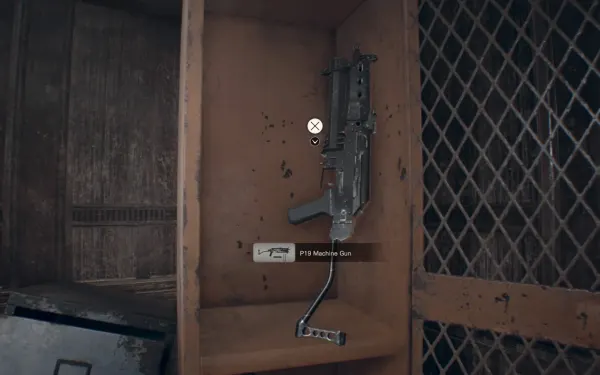
Captain’s Cabin. Lug Wrench and Ship Map on the desk. The locked locker in the SE corner holds the P19 Machine Gun and 1 Remote Bomb; it needs the Captain’s Cabin Locker Key (2F).
Elevator Corridor 4F and Side Stairs. Herb in the locker opposite the elevator. On the blocked stairwell: 1 Remote Bomb on the stairs (not on Easy) and Mr. Everywhere #16 on the ledge by the banister.
The elevator and 2F: Survival Knife, Guest Room and the key
The elevator. Use the Lug Wrench on the hatch on the elevator roof and drop into the car. It is stalled between 2F and 1F: you can get out on either floor. Mechanic’s Memo (file #25) is on the wall: the elevator cable is fried and the replacement went to the 3F Sick Bay. The car is missing a fuse and a Power Cable. Get out on 2F first.
- Survival Knife: stuck in the upside-down table opposite the elevator. Mia can now break crates (on Madhouse it isn’t here: see below).
- Main Corridor 2F: a Molded stands in the west section, facing away: sneak past it crouched. Its crate holds 1 Remote Bomb. If it spots you: run, plant a Remote Bomb or use the knife. It has no arms, but it jumps and bites.
- Guest Room 2F (safe room): the item box, a new tape recorder and Orders if you skipped it. 1 Corrosive at the foot of the bed and Handgun Ammo ×12 in the bedside cabinet.
- Bunk Room 2F: in the north half a Molded drops from the ceiling as you enter. Chem Fluid in the microwave and Gunpowder in the desk drawer. Spend the Guest Room Corrosive on the door to the south half (no Molded on that side): the Captain’s Cabin Locker Key and 1 Remote Bomb on the desk by the collapsed bunk, and Strong Chem Fluid in the white cabinet between the bunks.
The P19 Machine Gun
Take the key back up the elevator shaft to 4F. Taking the key spawns a Crawler on the Bridge (not on Easy) and a Molded in the 4F Elevator Corridor: plant a Remote Bomb for the Crawler and duck into the Captain’s Cabin for the P19 and its Remote Bomb before you deal with the Molded. The P19 is the best weapon you will have in chapter 7.
The rest of 2F and the Lounge puzzle
Back on 2F (climb down the elevator shaft again), check:
- Dining Room 2F: a Molded comes out of the vent hole (SE). No items on Easy or Normal.
- Kitchen 2F: Machine Gun Ammo ×40 on the stove.
- Break Room 2F: Gunpowder in the wardrobe (N).
Lounge 2F: painting puzzle. There are six framed pictures, three on each wall. Each picture on the left wall has a near-identical twin on the right wall. Rotate or flip each picture on the right until it matches its twin on the left. The three should end up like this, left to right:
- Yellow/ochre abstract (landscape format): the magenta blotch in the upper-left corner.
- Two-colour abstract (roughly square, white mat): teal half on top, orange-red half below.
- Grey landscape photo: right side up, sky on top, the road curving away at the bottom right and a tall thin tree right of centre.
The safe opens: 3 Corrosive, on Easy, Normal and Madhouse (the puzzle is the same). There is a Herb on a sofa (Easy and Normal only).
Shaft: Lock Pick and Mr. Everywhere #17
On 2F, near the Bunk Room, an unlocked door opens onto the Shaft: a long ladder climbs up to a 3F landing. Before you climb back down, look at the north ledge across from the ladder: Mr. Everywhere #17. On the floor in the SW corner of the platform, 2 Remote Bombs; in the orange metal box by the railing, the Lock Pick (the only one on the ship). Go back down to 2F, climb the ladder in the elevator shaft up to 3F and, in the Control Room, open the toolbox: Antique Coin #17.
Sick Bay: Power Cable and the Fat Molded
Main Corridor 3F. Use Corrosive on the Control Room door. A legless Molded guards the door: Remote Bomb it if needed. Go past the blast site where the tape ended. The showers (Shower Room) are locked and leaking black mass.
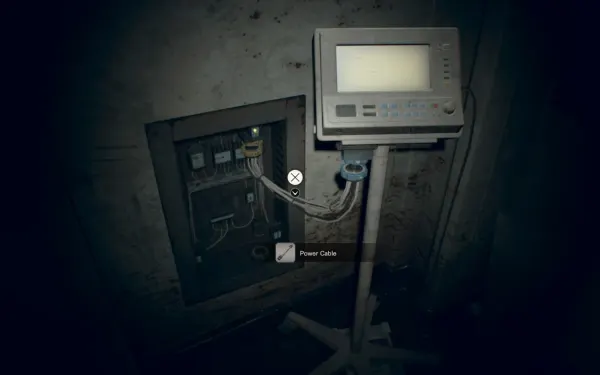
Sick Bay. Chem Fluid and Strong Chem Fluid in the medicine cabinet on the south wall, 1 Corrosive in the medicine cabinet in the NE corner, and the Power Cable on the medical apparatus (NW). Unscrew both ends: it takes time.
The Fat Molded. While you remove the cable, a Fat Molded comes out of the showers (4500 HP). It is slow, very tough and vomits.
- Ammo-saving trick (Easy and Normal): run into the Small Corridor, a short dead end (its far door is sealed); 1 Remote Bomb lies on its floor at the east end. Pick it up, guard its attacks until it grabs you, stuff the bomb in its mouth with ZR and detonate with Y: instant kill.
- If you’d rather fight: 2 or 3 Remote Bombs knock it down, then finish it with shots to the head (the P19 does double damage to it). Don’t shoot its stomach up close: it spits acid. It explodes when it dies: step away.
- On Madhouse the fight changes. 1 Fat Molded and 1 Molded come out of the showers, and the Small Corridor has no Remote Bomb: a breakable crate with Handgun Ammo ×8 sits there instead. For the mouth trick, arrive with a Remote Bomb on you: on Madhouse they are in the 2F Dining Room (white table) and the Captain’s Cabin locker (with the P19), plus the 1F Recreation Room if you have already been down there; the S2 Store Room one comes later. If you have no bomb, the MPM Handgun is on the SE desk of this same Sick Bay. Put the regular Molded down first with P19 headshots, so it can’t grab you while you wait for the fat one.
Present-day 1F: MPM Handgun and Backpack #3
Climb down from the elevator car to 1F. 2 Crawlers are waiting in the corridor (plus a Molded on Easy): have Remote Bombs ready.
- Maintenance Room: a tape recorder (no item box) and a dead man reaching for a drawer. That drawer holds the MPM Handgun, loaded with only 2 rounds.
- Stockroom: break the crate with the Survival Knife: Gunpowder.
- Bunk Room 1F and Storage 1F: Jim’s Letter and Giovanni’s Will if you skipped them; break the Storage crate: First Aid Med.
- Recreation Room (Corrosive on the door): Backpack #3 (+4 slots) and 1 Corrosive on the bench by the door; Machine Gun Ammo ×50 on the SW bench; 2 Remote Bombs in the SE locker. The backpack is lost if you leave the ship without it.
Fix the elevator (last save)
Take the General Purpose Fuse back out of the stairwell door box (the door reseals) and fit it in the elevator panel along with the Power Cable. The elevator now goes down to S2.
Before you go down, save in the Maintenance Room: S2 has no tape recorder and, once you enter the No. 2 Engine Room, you leave the ship for good (on the Zoe route the unarmed fight with Mia also starts there). Check that you have Antique Coin #17, Mr. Everywhere #16 and #17, Backpack #3 and the P19, and pick up Antique Coin #18 (WAP2) in S2 before you enter the engine room.
Present-day S2: down to Ethan
Workers Access Passage 1. Eveline taunts you. In the long hall you hear slithering: a Molded crawls along the duct above and drops behind you at the end. Leave a Remote Bomb where it lands. A second Molded ambushes you around the far corner. Machine Gun Ammo ×70 on the gauge control on the east wall by the entrance; Strong Chem Fluid in the middle alcove crate. Easy adds a Remote Bomb and a Herb.
Straight Corridor. A Crawler drops from the ceiling at the far end: hose it down with the P19 or trap it with a bomb.
Store Room. 2 Remote Bombs on the SE shelves, Machine Gun Ammo ×80 on the west shelves, Handgun Ammo ×10 in the middle crate and a First Aid Med in the green cabinet (N).
No. 1 Engine Room. 1 Remote Bomb on the vent pipe (NW) and Machine Gun Ammo ×70 on the large pipe (W). A Molded forms on the stairs: plant a bomb at its feet. Climbing up, a Fat Molded (3000 HP) appears on the top platform. Use the big pillar as cover: pop out to shoot its face and duck back when it retaliates. Or leave a Remote Bomb and lure it onto it. Up top, Handgun Ammo ×8 in each of the two crates (ledge and walkway).
Workers Access Passage 2. Antique Coin #18: the locked wall panel in the NW corner, on the stairs. Melt it with Corrosive.
Cargo Bay. A wall panel that needs Corrosive holds 2 Remote Bombs. On Easy and Normal that is 5 of the 6 present-day Corrosive used (Control Room door, Bunk Room south door, Recreation Room, the coin and this panel); on Madhouse, all 5 there are.
No. 2 Engine Room and off the ship
Mia finds Ethan and Eveline. Control switches to Ethan, who wakes with nothing but the sample Mia gives him: the Eveline Tissue Samples (the Strange Bottle). It cannot be stored in the box: it always takes a slot. What happens next depends on the serum:
- Mia route (Ending 1): Mia resists Eveline, throws Ethan out of the room and seals herself in the engine room.
- Zoe route (Ending 2): Mia, controlled by Eveline, attacks Ethan with a knife (see the boss).
Getting out (Ethan). In the Pressure Gauge Room, a room with a large cage, crawl through the opening on the left, ignore the creepy message and take the far door → hall → off the ship. Leaving triggers the achievement Into the Depths. All of Mia’s gear is waiting in the Mine Office box, across the swamp (chapter 7).
On Easy
In the 1F corridor there are no Crawlers while Mia is unarmed (before the tape); after the tape the 2 Crawlers show up as on Normal, plus 1 Molded; there is no Crawler on the Bridge and no Remote Bomb on the Side Stairs; S2 Workers Access Passage 1 has an extra Remote Bomb and Herb.
On Madhouse
Weapons and enemies.
- The Survival Knife is on the table-tennis table in the 1F Recreation Room (behind the Corrosive door), not on 2F: until then you can’t break crates. The MPM Handgun is on the SE desk of the Sick Bay.
- 2 Fat Molded stand in the 2F Main Corridor, one in the west section and one in the east (1500 HP each).
- In the Sick Bay 1 Fat Molded and 1 Molded come out of the showers, and the Small Corridor has no Remote Bomb for the trick (see the Sick Bay).
- On present-day 2F no Molded drops into the Bunk Room and none comes out of the Dining Room vent (the corridor already has the two fat ones).
- In the tape the P19 ammo is halved (Machine Gun Ammo ×30 in the Guest Room, ×20 in the Dining Room, ×10 in the Break Room…) and the Straight Corridor panel holds 1 Remote Bomb instead of 2; the Corrosive (3 + 1) and the 2F panels don’t change.
Remote Bombs and Corrosive. Fewer bombs: 1 in the 2F Dining Room (white table), 1 in the Captain’s Cabin locker (with the P19), 1 in the Recreation Room locker, 1 in the south cage of the S2 Store Room, 1 on the floor in the SE of the No. 1 Engine Room and the 2 in the Cargo Bay panel. The Shaft has Machine Gun Ammo ×15 and ×20 instead of bombs. No Lock Pick and no coins #15, #16 or #17. Corrosive: Guest Room 1, Lounge 3 and Sick Bay 1, so 5 for 5 uses.
Items that change, deck by deck (per Evil Resource):
- 1F: Laundry Room: Chem Fluid on the north table and in the trash can, no Machine Gun Ammo. Bunk Room 1F: a Herb in the shoes at the foot of a NE bunk and Machine Gun Ammo ×15 on the SE unit. Storage: Psychostimulants on the north metal shelves, no First Aid Med. Stockroom: the breakable crate holds Handgun Ammo ×15. Recreation Room: Backpack #3 and a Herb under the bench by the door, the Survival Knife on the table-tennis table, and in the SE locker 1 Remote Bomb and Machine Gun Ammo ×60.
- 2F: Guest Room: a Strong First Aid Med on the lamp table, no Handgun Ammo. Bunk Room: Machine Gun Ammo ×30 on the NW table, Chem Fluid in the microwave and a Herb in the broken SE unit; the south half only holds the key (no Strong Chem Fluid, no Remote Bomb). Dining Room: a Remote Bomb on the white table and Machine Gun Ammo ×15 on the SW cabinet. Kitchen: Strong Chem Fluid under the NW sink unit. Break Room: Handgun Ammo ×15 in the NE breakable crate. Lounge: 3 Corrosive in the safe, no Herb on the sofa.
- 3F: Control Room: Chem Fluid in the NW locker and Machine Gun Ammo ×15 on the west desk; no Herb, Gunpowder, Machine Gun Ammo ×40 or coin. Sick Bay: Psychostimulants and Gunpowder in the south cabinet (instead of Chem Fluid and Strong Chem Fluid), Corrosive in the NE one, and the MPM Handgun.
- 4F: Bridge: Psychostimulants on the south-wall desk; no Gunpowder, Remote Bomb or Crawler. Captain’s Cabin: Machine Gun Ammo ×20 and ×30 on the sofa, plus the P19 and its Remote Bomb. Side Stairs: no Remote Bomb.
- S2: Workers Access Passage 1: a First Aid Med on the floor of the middle alcove and Handgun Ammo ×4 in the west green cabinet. Store Room: Handgun Ammo ×8 in the SE crate and ×8 in the middle one, 1 Remote Bomb in the south cage, Machine Gun Ammo ×40 on the west shelves, a Herb in a cardboard box under those shelves and Machine Gun Ammo ×12 in the green cabinet. No. 1 Engine Room: a Remote Bomb on the floor in the SE, no Machine Gun Ammo ×70 and no Handgun Ammo ×8 crates.
7 Madhouse coins on the ship as Mia: in the bottom washing machine of the Laundry Room; at the bottom of the 4F Side Stairs, by the gas canisters; on the small semicircular table in the 2F Main Corridor (west section, outside the Guest Room); in the vase on the lower shelf of the Break Room trolley (SW); on the railing in the NW corner of the 3F Main Corridor; on the floor in the NE corner of the S2 Straight Corridor (turn right straight after the first doorway); and in the Workers Access Passage 2 Corrosive panel (the eighth, in the Pressure Gauge Room, is Ethan’s on the way out: chapter 7).
Cassette Tapes: 1 in the Maintenance Room, 3 in the Guest Room and 1 in Security.
Boss — Mia (Zoe route only)
Arena: the S2 No. 2 Engine Room. It only happens if you gave the serum to Zoe. Ethan has nothing: Mia, controlled by Eveline, attacks him with a knife. HP (datamine): 700, the same fight as the first Mia in the Guest House.
- Turn around: the Crowbar is on the floor in the SE corner, behind you. It only exists on this route and hits like the Axe (100 / 150).
- Guard (L) her attack.
- Right after the block, one hit with the Crowbar. Just one: don’t get greedy.
- Repeat: guard → one hit → guard. After several hits, Ethan impales her with the Crowbar.
Reward: the way off the ship. The Crowbar is gone afterwards.
Before you leave the ship
Check it in the Maintenance Room, before you go down to S2:
- Antique Coins #15 (Office S1 duct) and #16 (Flooded Room water): you can no longer go back for them.
- Antique Coin #17 (orange toolbox in the Control Room, with the Shaft Lock Pick) and, in S2, #18 (WAP2 panel).
- Mr. Everywhere #16 (Side Stairs) and #17 (Shaft).
- Files: Jim’s Letter, Giovanni’s Will, Orders, Mechanic’s Memo and Tattered Secret Document; and the “Old Videotape”.
- Backpack #3 (Recreation Room).
- P19 Machine Gun, MPM Handgun and Survival Knife, plus every present-day Remote Bomb, Machine Gun Ammo and Handgun Ammo: it all goes to Ethan’s box.
- On Madhouse: the seven ship coins (the WAP2 one included).