You are Ethan Winters again, just out of the wrecked ship with one thing in your pocket: the Eveline Tissue Samples bottle Mia gave you. You cross the swamp to the Mine Office, where all your gear and Mia’s is waiting and, for the last time, the Antique Coin birdcages. Then you ride an elevator down into Lucas’ salt mines: three floors of tunnels with tripwires, Molded in waves and the lab where you turn the sample into the E-Necrotoxin, the poison for Eveline. The mine is one-way: every drop closes what came before, and the chapter ends with two Fat Molded in the Abandoned Mine and the last Tape Recorder in the game.
Chapter order: Pressure Gauge Room (Madhouse: Antique Coin #32) → Swamp (Madhouse: Antique Coin #33) → Mine Office (Item Box, birdcages, Mr. Everywhere #18) → Mine Entrance Path (6 Molded) → elevator → Salt Mine B3: Entrance → Cavern (tripwires) → Winding Tunnel (no way back) → Crossroads → Mine Cart Tunnel (push the cart) → North Cavern (Mr. Everywhere #19) → Cultivation Room (Steroids, Email Log) → Storage Space: E-Necrotoxin and 4 files → Office (last Item Box) → South Cavern → Flooded Cavern → Spiralling Cavern B3 → B2 → B1 (waves) → Small Passage → 2 Fat Molded (Abandoned Mine) → Exit Passage (last Tape Recorder).
Before you start: Ethan reaches the swamp with nothing: all his gear and everything Mia carried on the ship (P19 Machine Gun, MPM Handgun, Survival Knife, Remote Bombs, ammo) is waiting in the Mine Office Item Box. Build your loadout for the rest of the game there: the P19 Machine Gun (the gun of this chapter: on Normal the mine gives about 370 rounds of Machine Gun Ammo), the M21 Shotgun, the 44 MAG, the Grenade Launcher, the G17 Handgun, every Remote Bomb and the Survival Knife instead of the Knife. On Normal the whole chapter gives only 2 Shotgun Shells: the shotgun is for emergencies. The Eveline Tissue Samples bottle takes a slot and cannot be stored; it later turns into the E-Necrotoxin, which cannot be stored either. Keep Flame Rounds and Neuro Rounds for Eveline (chapter 8). Spend your Antique Coins at the Mine Office before you ride the elevator down: it is the last shop. The last Item Box in the game is in the B3 Office; neither the Exit Passage nor the Guest House has one. On Normal the chapter gives about 24 Enhanced Handgun Ammo, 15 Handgun Ammo, 6 rounds of 44 MAG Ammo, 3 Flame Rounds, 3 Neuro Rounds, 4 Remote Bombs, 250 Burner Fuel, 7 Herbs, 4 Chem Fluid, 2 Strong Chem Fluid, 1 Psychostimulants, 1 First Aid Med, 2 Strong First Aid Med and the Steroids.
What this chapter locks away, in order: Madhouse Antique Coin #32 (ship), Madhouse #33 (swamp) and the birdcages (all of it closes when you ride the elevator down); Mr. Everywhere #18 (Mine Office, before the elevator); everything above once you drop in the Winding Tunnel; Mr. Everywhere #19, the Steroids and the 5 files (Cultivation Room and Storage Space), left behind once you go on from the Office to the South Cavern; and the Item Box, which never shows up again after the B3 Office.
Leaving the ship: Pressure Gauge Room
After the No. 2 Engine Room scene (or the fight with Mia, if you gave the serum to Zoe; see chapter 6), you go out into the hall and enter the Pressure Gauge Room, a room with a large cage. Crawl through the opening on the left, ignore the creepy message, take the far door and follow the hall to the Outside Exit.
- Madhouse: Antique Coin (Madhouse) #32. It sits on the workbench in the SE corner of the Pressure Gauge Room: look for it before you leave the room. It is missable once you move on: the ship cannot be revisited.
Swamp
A muddy swamp at the foot of the stranded wreck, with shacks; a helicopter flies over. There are no enemies here.
- Before the deeper water, check the right bank by the SW fence: Flame Rounds ×1 (on Easy too).
- Madhouse: Antique Coin (Madhouse) #33, on the north bank, on the right just after you jump the big fallen tree; look down at the water’s edge. It is the last Madhouse coin and the swamp is not revisited: grab it on the way and spend what you have at the birdcages (see the Mine Office).
- Go under the wooden platforms and up the ladder into the Mine Office shack.
Mine Office (safe room and last shop)
Tape Recorder and Item Box in the SW section: your gear and Mia’s are here. Enhanced Handgun Ammo ×12 on the shelves by the ladder; Psychostimulants on the small shelf with the fan, in the middle corridor; Machine Gun Ammo ×120 under the SW bench. A radio talks about the helicopter team: someone who has been watching the Bakers and wants Eveline too. There is a photo of the helicopter nearby.
- The birdcages move here from Zoe’s Trailer. Any cage you did not open reappears once, with the coins you already paid in: Steroids for 3, Stabilizer for 5 and 44 MAG for 9. With all 18 Easy/Normal coins you can afford all three (17). This is the last chance to spend them. If you never picked up the Grenade Launcher, it is here too.
- What to do here: take out the guns and ammo from the “Before you start” list, leave the Knife, the Burner and any spare healing (you get a box again in the B3 Office) and only craft if you are short on healing: the recipes and what is worth crafting are in the B3 Office section.
- Resource Manager (the achievement for finishing with 3 or fewer Item Box openings): PowerPyx counts this box as the third forced opening (other guides count only two in the whole game). On Easy/Normal you can skip it with “Manage Items” on a boss fight’s death screen, which does not count as an opening; not on Madhouse, where you need guns for the charges on the Abandoned Mine ladder. You arrive unarmed, so plan exactly what you take out.
- Madhouse: no Machine Gun Ammo ×120 or Enhanced ×12; instead 1 Cassette Tape and Solid Fuel (SW table), a First Aid Med (breakable crate in the ladder room), Chem Fluid (shelves by the ladder), Separating Agent (white desk in the middle corridor), and Handgun Ammo ×10 and Neuro Rounds ×1 (TV shelf, NW corner). The Madhouse cages, in the Main House Main Hall (Fandom, IGN, Evil Resource), add the Assault Coin (8) and the Iron Defense Coin (7). Only the Fandom wiki says they also reappear in this office: unconfirmed. If they are here in your run, this is the last chance to spend all 33 coins.
Mr. Everywhere #18. It sits on the window ledge of the room with the ladder you came in by. Leave the shack, turn around and shoot it from outside. Right below it, on a ledge of the shack wall (NE corner), is 44 MAG Ammo ×1 (not on Easy or Madhouse).
Mine Entrance Path and the elevator
The elevator clearing, out through the Mine Office door. There are 6 Molded in total: 4 wander the clearing and 2 more spawn on either side of the elevator as you approach.
- Tactic: pull them one at a time with handgun headshots from the office door; the swamp Molded have less health than the ones at the house (1200 against 3000, per the datamine), so a short P19 burst to the head also does it. If you are short on ammo, press the elevator button and ride down without fighting.
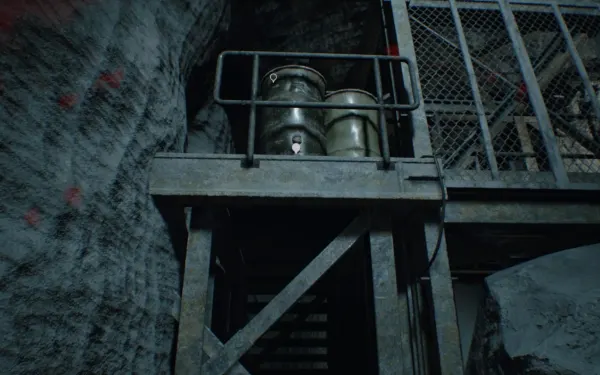
- Pickups (Normal): Burner Fuel ×170 on the ledge of the shack wall by the door. Chem Fluid in the mine cart by the office and Strong Chem Fluid on the machinery next to it. Chem Fluid in the upturned digger bucket by the elevator. Herb in the orange metal box on the digger (west). Machine Gun Ammo ×40 in the SW breakable crate. Herb in the SE breakable crate. Strong Chem Fluid on the barrels by the elevator.
- Easy: the SW crate holds a Herb (not Machine Gun Ammo ×40) and the SE crate a Chem Fluid (not a Herb).
- Madhouse: only 2 Herbs: one on the ground by the upturned mine cart opposite the Mine Office door and one in the SE corner of the clearing. There are still 6 Molded.
- Before you go down: spend your coins and break Mr. Everywhere #18. Once you ride the elevator you cannot return to the swamp or the office.
Salt Mine B3: Entrance, Cavern and Winding Tunnel
Entrance. At the bottom a Crawler Molded comes from the far end of the tunnel: crouch to line up the head or wait for it with a shotgun blast.
Cavern. It is full of Lucas’ tripwires: move crouched along the left side. Two Molded come from the next passage as soon as you enter: circle the wires so they walk into them and blow up without you spending a bullet. Break the crates:
- Handgun Ammo ×15 (west crate; Machine Gun Ammo ×40 on Easy) and Herb (east crate).
- Madhouse: instead of those crates, Shotgun Shells ×4 on the white containers in the NW corner and Enhanced Handgun Ammo ×3 on the ground, on the south side of the central shaft pillar.
Winding Tunnel. The tunnel carries on from the far end of the Cavern and ends with a drop off a ledge: you cannot climb back up. Everything above (coins, Mr. Everywhere #18) is left behind.
Crossroads and Mine Cart Tunnel
Crossroads. A big chamber with several paths; you come in facing south.
- Straight ahead, on the ground of the southern alcove, Remote Bomb ×2.
- To the left, in a half-buried barrel on the east side, 44 MAG Ammo ×1.
- To the right (west) is the way on: as you approach the western section 2 Molded ambush you from behind, one of them a Crawler. Turn fast and find the Crawler first, low to the ground (crouch to line up the head); if you have time, drop a Remote Bomb at the tunnel mouth and detonate it as both pass.
- Madhouse: the barrel holds Solid Fuel, a crate in the southern section has Machine Gun Ammo ×40 and there are no bombs.
Mine Cart Tunnel. From the Crossroads’ western section, turn left into the tunnel with tracks. As you enter, 2 more Molded appear behind you (in the west part of the Crossroads). Kill them, then push the mine cart: it smashes the barricade and opens the way. Push it quickly and it runs over any Molded in the way.
North Cavern
A big chamber with stairs and a walkway above; the stairs lead up to the lab.
- Before you go up: under the walkway, in the breakable crate on the south side of the lower level, Machine Gun Ammo ×40 (Shotgun Shells ×3 on Easy).
- Mr. Everywhere #19 is by the barrels on the upper level, south side, before the walkway to the lab, and can only be seen from below: look up and slightly left and shoot it.
- Behind the east support under the bridge, Neuro Rounds ×1 (not on Madhouse).
- Madhouse: no Machine Gun Ammo crate and no Neuro Rounds; instead, Enhanced Handgun Ammo ×5 on the ground by the rocks on the lower south side.
- There is a tripwire going up the stairs: shoot it from a distance. The crate up there is rigged: don’t break it up close. The door at the top leads to the Cultivation Room.
Cultivation Room and Storage Space (the lab)
Cultivation Room. On the computer on the north workbench, the Email Log (file #28): Lucas’ reports to the Connections; Eveline no longer controls him. Herb ×2 on the workbench. The Steroids (the fourth in the game) are on the floor by the two boarded-up bathtubs: don’t leave without them, the mine is one-way. On Madhouse there is Gunpowder (north workbench), a Herb (metal shelves, SW) and a locked toolbox on a bathtub: 44 MAG Ammo ×4 if you still have a Lock Pick.
Storage Space. Enter through the north door (the Cultivation Room one). This room connects only to the Cultivation Room and the Office.
- Infection Report (file #29) on the shelves facing the entrance. Down the steps there are disturbing photos.
- In the large standing cooler (the sample case in the SE area) is the E-Necrotoxin Document (file #30): the E-Necrotoxin is activated by placing an E-series cell sample in the container.
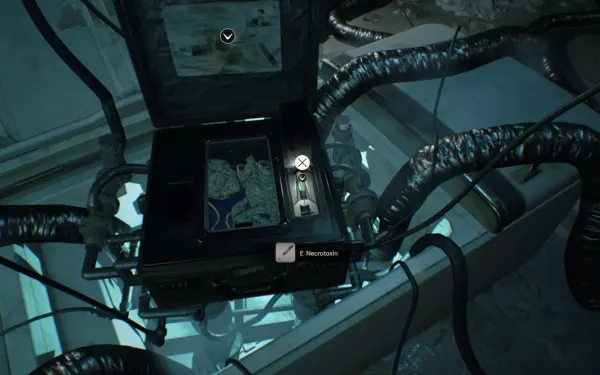
- Key step: use the Eveline Tissue Samples on that case. You get the E-Necrotoxin, a syringe of poison for Eveline. It cannot be stored or discarded; it is used on its own, in a cutscene, in chapter 8.
- R&D Report [1 of 2] (file #31): on the workbench in the SE corner, behind the necrotoxin device.
- R&D Report [2 of 2] (file #32): on the desk opposite the south door, by the exit. It is the last file in the game: if you have all 32 in this run, you get The Devil Is in the Details.
- Madhouse: also Supplements (NE table), Strong Chem Fluid (SE workbench), Chem Fluid (sink on the south wall), Shotgun Shells ×6 and Handgun Ammo ×10 (desks opposite the south door).
With the E-Necrotoxin and both R&D Reports, leave through the south door: it opens straight into the Office.
B3 Office (safe room, last Item Box)
Tape Recorder and the last Item Box in the game (SW corner). Flame Rounds ×2 on the east shelves and Neuro Rounds ×1 in the open drawer of the left desk. The Office’s other door opens onto the South Cavern walkway.
This is where you settle your final loadout: whatever you don’t take with you stays here for good. Save here: it is the last Tape Recorder before the spiral climb and the two Fat Molded in the Abandoned Mine; the next one is after the fight, in the Exit Passage. Carry what “Before you start” lists and at least 2 Grenade Launcher rounds for Eveline. Leave the Burner and its fuel in the box: it can’t set Eveline on fire. On Madhouse there is 1 Cassette Tape (by the Tape Recorder) and a Strong First Aid Med (east shelves), and no Flame or Neuro Rounds.
What to craft before the finale. RE7 has no merchant: crafting is what is left to “buy”. You combine from the inventory, at any time. The recipes:
- Herb + Chem Fluid = First Aid Med; Herb + Strong Chem Fluid = Strong First Aid Med.
- Gunpowder + Chem Fluid = Handgun Ammo; Gunpowder + Strong Chem Fluid = Enhanced Handgun Ammo.
- Solid Fuel + Chem Fluid = Burner Fuel (×100); Solid Fuel + Strong Chem Fluid = Flame Rounds (×2).
- Supplements + Chem Fluid = Psychostimulants; Supplements + Strong Chem Fluid = Neuro Rounds.
On Normal the mine gives no Gunpowder, Solid Fuel or Supplements: only what you carry over matters. If you have Solid Fuel or Supplements left, turn them into Flame Rounds or Neuro Rounds with the 2 Strong Chem Fluid for the Fat Molded and Eveline: it is the best possible use. Otherwise use Herb + Chem Fluid for First Aid Meds, and spend a Strong Chem Fluid on a Strong First Aid Med only if you are short on healing. By this point you have 2 Chem Fluid (2 more come later: South Cavern and Spiralling Cavern B1) and 5 Herbs.
Madhouse: the mine does give components. Solid Fuel in the Mine Office, in the Crossroads barrel and in the Spiralling Cavern; Supplements in the Storage Space; Gunpowder in the Cultivation Room and the Spiralling Cavern (B1). With the Strong Chem Fluid from the Storage Space (and the one in the B1 fenced area, which you find later), craft Neuro Rounds (Supplements) and Flame Rounds (Solid Fuel) for the three Fat Molded still ahead. The Mine Office Separating Agent pulls a Chem Fluid out of 100 Burner Fuel you will no longer use.
South Cavern and Flooded Cavern
South Cavern. You leave the Office onto an upper walkway.
- On the barrels by the Office door, Enhanced Handgun Ammo ×12.
- The far door is sealed, but behind the curtain at the end of the upper walkway (north), on the floor to the right, is 44 MAG Ammo ×2.
- Go down the stairs: by the lights, Remote Bomb ×1 on the ground and Chem Fluid in the large container, both in the SW. Then take the path on the left to the Flooded Cavern.
- Madhouse: instead, the upper-walkway crates hold a First Aid Med and Machine Gun Ammo ×40.
Flooded Cavern. You hear Eveline humming. Neuro Rounds ×1 in the overturned mine cart to the east and 44 MAG Ammo ×2 on a rock to the NW (on the left, behind a rock); on Madhouse there is nothing. Check your gear before you crawl: the waves start on the other side. Crawl through into the big shaft: Eveline gets angry and starts filling the mine with mold and Molded.
Spiralling Cavern (B3 → B2 → B1)
A spiral climb with waves. The Molded in this stretch have half the health of the ones in the first part of the mine (1500 against 3000, datamine): a full shotgun blast to the head kills them, and the P19 handles groups well. If you are short on ammo, you can run up without fighting every wave, but a last ambush waits on the western steps of the upper level (step 5): have a Remote Bomb ready. Past that one, on Easy and Normal you are safe (on Madhouse a Fat Molded also waits at the north exit).
- Lowest level: 3 Molded appear (2 from the ground and 1 down the slope). Drop a Remote Bomb where they rise and detonate it as they stand up. Herb in the NW offshoot.
- Climbing to B2: 1 Molded, then 1 Crawler. In the cage area, in the crate on the far side of the central machine, Burner Fuel ×40 (Chem Fluid on Easy).
- Passage from B2 to B1: 1 Molded marches down at you: wait for it at the top of the ramp and aim for the head.
- B1: Remote Bomb ×1 on the floor of the small NE offshoot (on the left). In the fenced storage to the east, 2 crates: Chem Fluid and Shotgun Shells ×2 (Herb and Machine Gun Ammo ×20 on Easy).
- Western steps, upper level: a Crawler rushes out, followed by 3 Molded. This is the place to lay Remote Bombs as traps on the steps, set them off as they pass and finish the ones left without legs.
The way out is the metal steps at the north side of the upper level: they lead into the Small Passage (B1), an empty corridor to the stairs above the Abandoned Mine.
- Madhouse: Solid Fuel on the barrels in the middle of the lowest level, 44 MAG Ammo ×2 in a SW offshoot of B2, Machine Gun Ammo ×20 in the crate and Shotgun Shells ×4 inside the cage, Gunpowder (instead of the Remote Bomb) in the B1 NE offshoot, and in the B1 fenced area a Cassette Tape (barrels in the corner), 2 crates of Shotgun Shells ×2, a Strong First Aid Med, Strong Chem Fluid and Chem Fluid.
- Madhouse: Fat Molded at the north exit (8000 HP), on the metal steps, right after the step 5 ambush. It blocks the way out:
- Don’t shoot it while it idles: it answers with a vomit.
- Horizontal vomit: crouch. Vertical vomit: strafe right.
- Stun it with a Neuro Round (there is 1 in the Madhouse Mine Office; craft more with Supplements + Strong Chem Fluid) and follow up with headshots: the head takes −50%, but it has its own small health pool, and the P19 does +100%.
- Or plant a Remote Bomb on the steps and lure it onto it.
- Keep at least one Neuro Round for the two Fat Molded and the ladder charges that come next.
Abandoned Mine and Exit Passage
Abandoned Mine. From the Small Passage, drop off the stairs: there is no way back. This is the two Fat Molded arena (see boss). Pick up during or after the fight:
- Normal: First Aid Med on a rock to the SE, Machine Gun Ammo ×20 in a SE crate, Strong First Aid Med in a west crate, Burner Fuel ×40 in a NW crate and Herb in a north crate.
- Easy: the same, except the SE crate holds Shotgun Shells ×2 and the north crate Machine Gun Ammo ×20 (not the Herb).
- Madhouse: only Machine Gun Ammo ×20 (SE crate), Shotgun Shells ×2 (crate by the central pillar) and Machine Gun Ammo ×20 (NW crate).
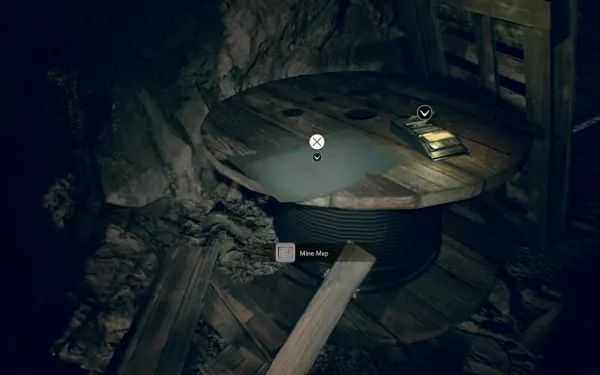
Exit Passage. Climb the ladder out of the arena. The last Tape Recorder in the game and the Mine Map, both on the giant wooden spindle in the east section. In the crates, Machine Gun Ammo ×150 and Strong First Aid Med. No Item Box. Save here: the finale is next. On Madhouse there is 1 Cassette Tape and the crates are empty.
Boss — 2 Fat Molded (Abandoned Mine)
Arena: a wide cavern with crates and structures all around and a central steel structure that works as a pillar to circle. The two Fat Molded appear on the far side, behind a large structure. Health: on Easy and Normal, 3500 and 9000 (datamine); they are the game’s only exception to the rule that health doesn’t change with difficulty: on Madhouse they have 14,000 and 24,000. Weak point: the head. It takes half damage (−50%), but it has its own health, separate from the body’s and much smaller, so aiming there is fastest; body shots do almost nothing. The P19 does +100% damage to them.
Their attacks and how to read them:
- Up close: a short vomit (strafe right) or a grab (block with L, or stuff the Remote Bomb in its mouth: see step 4).
- At mid and long range: a horizontal vomit (crouch) or a vertical vomit (strafe right).
- Charge while leaking vomit: it hits several times; shoot its legs to stop it.
- If you sprint away or are far off, it charges faster than you can run.
- Its vomit also stuns other Molded: if one gets between you and the other, use it.
- Bombs as they spawn: run up while they emerge, drop one or two Remote Bombs near them, lead them around the pillar and detonate when they step into the zone. Each bomb deals 2000 base damage in a wide radius (careful: it hurts you too).
- Without bombs: circle the central structure. Use the pillars and crates as cover against the long vomit stream: horizontal vomit, crouch; vertical vomit, strafe right. After each vomit, step out and unload into the face: P19 bursts, M21 blasts up close or 2-4 44 MAG shots to the head.
- Don’t shoot them while they idle: they answer with a vomit.
- If one charges you (it runs faster than you), shoot its legs or block with L. Its close grab can be blocked with L; but if you have a Remote Bomb equipped when it grabs you, press fire to stuff it in its mouth and detonate: an instant kill (and the That’s a Spicy Meat-a-ball achievement if you don’t have it yet).
- Kill the small one (3500) first so you only have one enemy left.
- The corpse explodes when it dies: step away or block.
Neuro Rounds: they stun a Fat Molded so you can finish it with Enhanced Handgun Ammo to the head, but try to keep at least 2 Grenade Launcher rounds for Eveline. Madhouse: they are faster and the exit ladder has 3 tripwire C4 charges on its sides: stun both with Neuro Rounds while they are grouped, shoot the three charges, stun them again and climb; or kill them first, pouring headshots in with everything you have, and then blow the charges calmly. Reward: the ladder to the Exit Passage.
Before you leave the chapter
Don’t leave without:
- Your Antique Coins spent at the Mine Office (before the elevator). On Madhouse, also coins #32 (Pressure Gauge Room) and #33 (north bank of the swamp).
- Mr. Everywhere #18 (Mine Office window, from outside) and #19 (North Cavern, seen from below).
- The Cultivation Room Steroids.
- Files #28-#32: Email Log, Infection Report, E-Necrotoxin Document and both R&D Reports.
- The E-Necrotoxin in your inventory (the finale doesn’t move on without it).
- Your final loadout from the B3 Office: P19, 44 MAG, Grenade Launcher with at least 2 strong rounds (Flame or Neuro) for Eveline, a handgun with Enhanced Handgun Ammo and at least one healing item.
- A save at the Exit Passage.
The mine is one-way: every drop closes what came before.