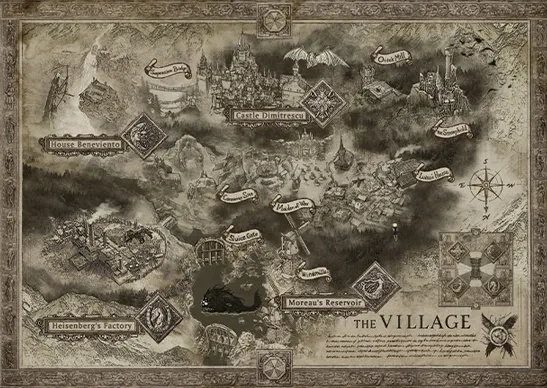
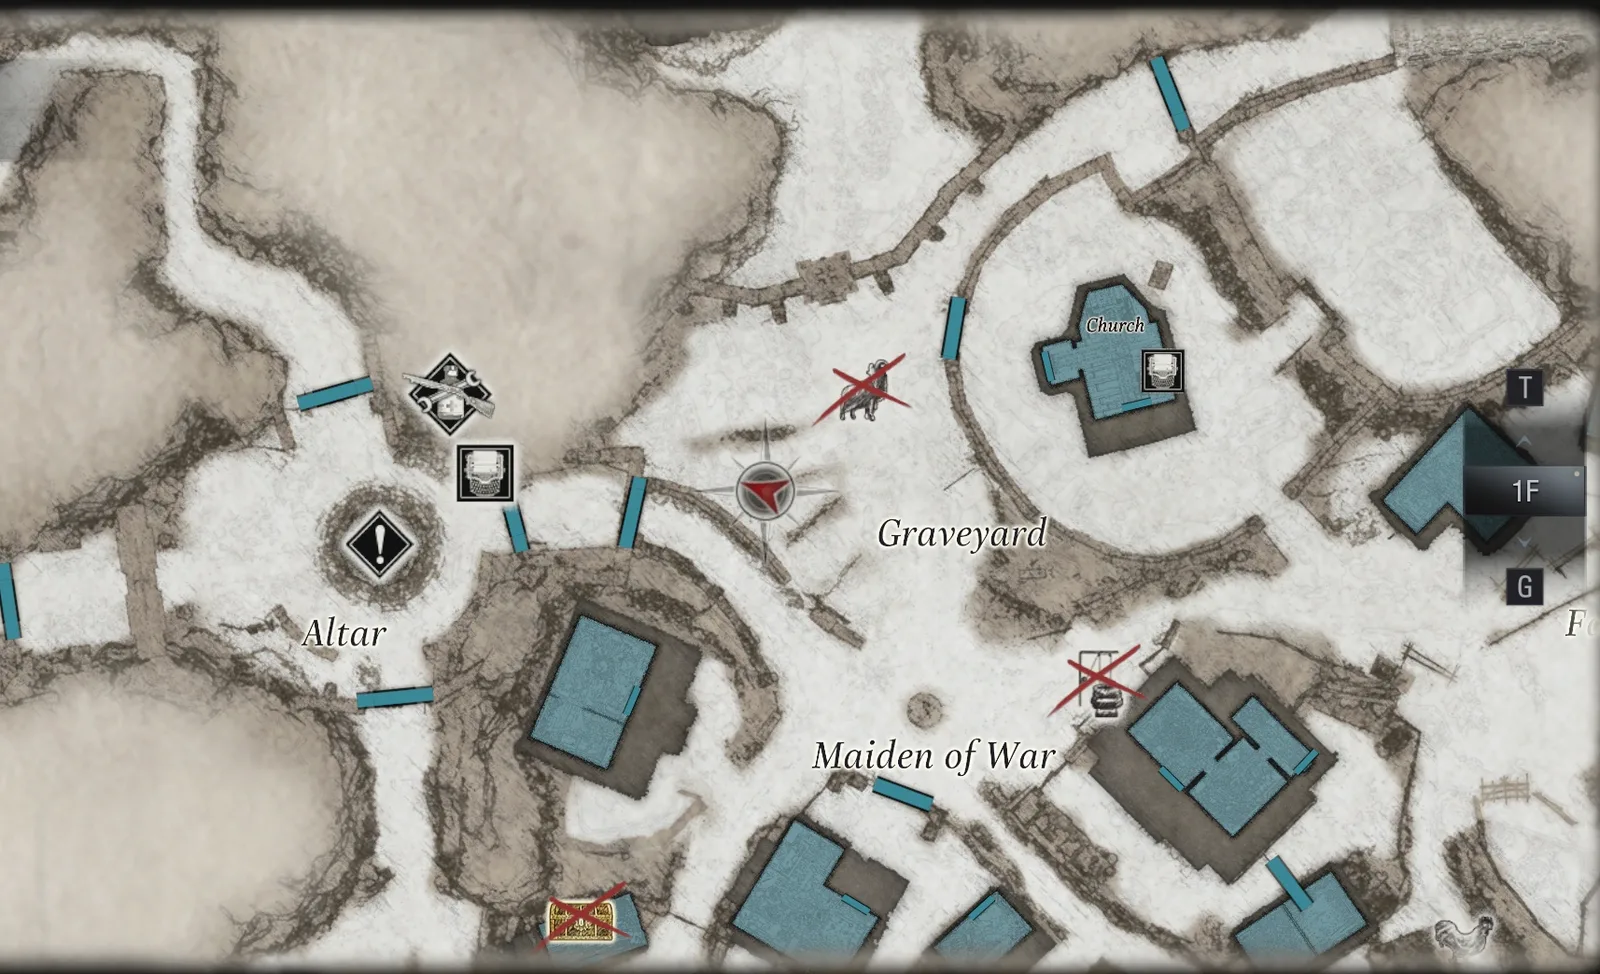
You play Ethan, riding up out of Moreau’s reservoir in the Windmill Elevator with the Crank and the Six-Winged Unborn Key. The story carries on through the Graveyard gate toward the Stronghold (chapter 10), but the Crank opens four more mechanisms around the village and this chapter covers all of them: Moreau’s laboratory with the M1851 Wolfsbane revolver, the mermaid labyrinth, a hidden yard in East Old Town, the Fallow Plot’s Vârcolac Alfa and a boat trip down the river to a trap chamber and a crypt under the castle. It is the stretch where you make the most money and where you finish cooking the Duke’s dishes.
Chapter order: Windmill Elevator (you leave the reservoir with the Crank and the Six-Winged Unborn Key) → Windmill Yard: Crank door → Moreau’s Laboratory (Mermaid Ball, M1851 Wolfsbane, file 32, Vârcolac, well 6) → Mermaid labyrinth (Chartreuse Skull) → East Old Town: Crank door (Yellow Quartz, 2 chickens, Pigeon Blood Ruby on the roof) → Graveyard (2 goats) → Fallow Plot (Vârcolac Alfa) → Altar (sell, upgrade, cook) → Lone Road: drawbridge with the Crank → boat to the far end (Finest Fish, Riverbank Cave Camp: Antique Coin, W870 TAC - Foregrip, file 33) → boat to the castle end (second drawbridge, well 7: Trap Chamber, Large Pigeon Blood Ruby; Riverbank Treasure House) → Dimitrescu’s Necklace → Altar (cook the Sarmale de Peste) → Graveyard: the Six-Winged Unborn Key gate (chapter 10).
Before you start: this whole chapter is optional and stays open until you enter Heisenberg’s Factory (chapter 11), so you can do part of it now and part after the Stronghold. But it is where you make the most money: 80,000 Lei from the Vârcolac Alfa, a 50,000 necklace, 20,000 from the statue and another 20,000 from the labyrinth. Reach the Altar with room in your case. For the two Vârcolaci bring the GM 79 with Explosive Rounds and Flashbangs (if you didn’t enter the Water Mill in chapter 8, get it before Moreau’s Laboratory; see East Old Town below), 2 or 3 Mines and, as soon as you have it, the M1851 Wolfsbane: its rounds are scarce (only 14 are placed in the whole game and there is no recipe until NG+), so spend them on the Vârcolaci and on bosses, never on Lycans. Carry 1 spare Lockpick just in case, although this chapter doesn’t need one (you do gain one in the Trap Chamber).
Don’t sell: the Necklace with Two Holes or the Pigeon Blood Ruby until you have the Large Pigeon Blood Ruby: together they make Dimitrescu’s Necklace (50,000). Not a single ingredient: this is where you cook the Bird and Beast Pilaf, the Ciorba de Porc and the Sarmale de Peste (and the Tochitura de Pui if you didn’t cook it in chapter 7), and the Meat for the Ciorba comes out exact.
Missables and points of no return: everything in this chapter is lost once you enter Heisenberg’s Factory (chapter 11). Inside the Trap Chamber, once you drop into the locked-gate chamber you can’t get back to the upper levels: collect everything up there first.
Difficulty: puzzles and treasures are the same on every difficulty. Village of Shadows adds Magnum Ammo ×2 in Moreau’s Laboratory, 1 large Lycan in the basement (B1) of the East Old Town Farmer’s House and 2 large Lycans in the Fallow Plot’s foliage. On Casual the Vârcolaci fall much sooner; on Hardcore and Village of Shadows you need many more rounds (your damage is fixed at ×0.20 on VoS).
The Crank and where it goes
You took it from the North Windmill in the reservoir (chapter 8). It is this chapter’s key: it works 5 mechanisms. You have already used the first, the two windmills. Four remain: the Windmill Yard gate to Moreau’s Laboratory, the gate in the west corner of East Old Town to the Farmer’s House Yard, the Lone Road pier (lowers the bridge to the boat) and the west side of the North Riverbank (lowers the second bridge, back to the Castle Path). The Six-Winged Unborn Key opens the Graveyard gate to the Stronghold: leave it for last.
Windmill Yard
You ride up the Windmill Elevator: it never works again, the reservoir is behind you. The Windmill Shack has a typewriter (south-east table) and, if you didn’t take it, the Photo of a Rare Animal on a barrel in the north corner (it marks the white pig in the Fallow Plot: the Quality Meat). Use the Crank on the iron gate straight ahead as you leave the windmill.
Moreau’s Laboratory (the “Moreau’s Hidden Weapon” marked treasure)
Behind the gate is a path lined with huts. There are 3 Samcă on the south side: one F2 Rifle shot to the body kills one; with a shotgun or handgun, knock them down and finish them with the Knife. The Center Building has 2 Moroaică lying down that get up (one F2 shot to the head kills each) and Handgun Ammo ×25 on the window sill. The East Building has 1 Moroaică hiding in the hay and Sniper Rifle Ammo ×4 in the north-east. Shoot the crows: they drop Lei.
- Mermaid Ball: go up the path, right at the fork, smash the crate (Sniper Rifle Ammo), cross the bridge and go left: it sits on an altar in the small wooden kiosk in the north-east.
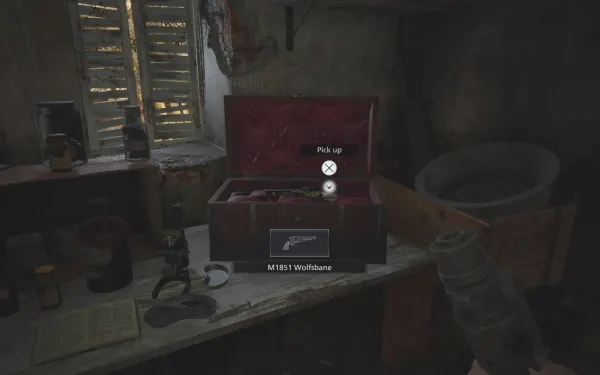
- West Building (the brick house): the front door is locked. Crouch through the hole in the back wall. 1 Lycan is inside. On the table: Moreau’s Diary of Experiments (file 32) and the chest of the Moreau’s Hidden Weapon marked treasure with the M1851 Wolfsbane (30,000 Lei instead if you already own it, in NG+).
- Outside: Shotgun Ammo ×5 on the log pile south of the house, Rusted Scrap by its south-west corner and a Herb on the south-east hilltop, by the zipline. On Village of Shadows there is also Magnum Ammo ×2 on a board over two barrels, north of the East Building.
- Well 6 (end of the south-west path, with the Well Wheel): Flashbang ×3.
- When you leave the West Building a Vârcolac appears (see “Boss — Vârcolac” below). It drops a Crystal Beast (20,000).
M1851 Wolfsbane. A 5-round revolver: power 1,700 (the game doubles it internally), rate of fire 1.5, reload 2.5; it takes 8 slots. Against a Vârcolac it does enormous damage: 2 shots to the face drop a normal one. On a first run treat it as your boss gun and don’t spend Lei on it beyond, at most, one power level (48,000): ammo is the limit.
Mermaid labyrinth (The Water Wheel)
In the shed in the south-east corner of the Windmill Yard, behind the Windmill Shack. Place the Mermaid Ball and follow these steps:
- The rail. The first stretch is linear: let the ball roll along the rail to the water wheel and feed it in gently.
- The wheel: get off at the first platform. The wheel lifts the ball. Tilt the board as soon as the ball reaches the first platform so it rolls off there. If you miss it, the ball is lost and you have to start over (SegmentNext, Gamerant).
- The drop down the tunnel. The ball falls through a tunnel to the next level. The path ahead is broken: hug the right wall and roll the ball from the very corner so it crosses on the part that is still whole; there is a broken edge on the left.
- Down to the bottom. Wrap around and work down level by level to the goal at the bottom. Watch for the holes in the bridges the whole way down: take it slowly.
Prize: Chartreuse Skull (20,000). If it is the first labyrinth you solve, challenge Get the Ball Rolling (1,500 CP).
East Old Town: the Crank door
Head back to the village along the stream. The mechanism is west of the south-west house in East Old Town, where the first Vârcolac attacked you (by the chicken symbol on the map). Behind it is the East Old Town Farmer’s House Yard:
- 2 chickens: Poultry ×2.
- Yellow Quartz (10,000) inside a toppled milk urn under the house. The yard’s outhouse door has a yellow arrow pointing at it (this outhouse is not one of the challenge’s 10).
- Village of Shadows: Evil Resource puts 1 helmeted large Lycan in the basement (B1) of the Farmer’s House, without saying on which visit it shows up: go in carefully. Knock its helmet off with a Pipe Bomb or a Mine, then shotgun to the head (without the helmet, the head takes triple damage). Evil Resource lists no treasure drop for it.
- Climb the ladder onto the rooftops, the East Old Town Ledge: on the roof of the woodshed (south-east corner) a small chest holds the Pigeon Blood Ruby (3,000). Don’t sell it.
- If you didn’t enter the Water Mill in chapter 8 (the Iron Insignia Key door by the stream), do it now: GM 79 on the table opposite the door, Explosive Rounds ×2 in the south-east crate and a Lockpick on the north-east sill. The barn has held 2 Lycans since you came back from House Beneviento.
Graveyard
After Moreau, 2 goats appear in front of the castle gate: Meat ×4. The birdcage in the tree above the north-east path (the one to the Stronghold gate) comes down with one shot. On the Broken Slab in the west crypt the sources disagree: most say it is lost once you move on to Moreau (see chapter 7), one says it is still there. If you didn’t take it, look inside the crypt; if it is gone, nothing can be done.
Fallow Plot: the Vârcolac Alfa
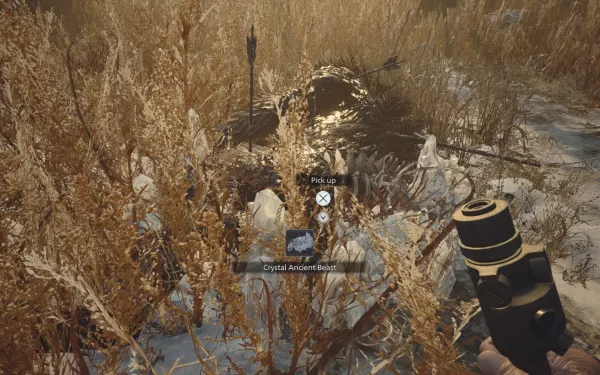
Since you beat Moreau, a huge Vârcolac prowls the wheat field in front of Luiza’s House. It is optional, but it drops the Crystal Ancient Beast (80,000), the most valuable treasure in the game, and awards the Leader of the Pack challenge (10,000 CP). If you skipped Luiza’s Heirloom (the jewellery box on Luiza’s porch: Necklace Stone and Luiza’s Key, which opens the Lone Road chest with Cesare’s Goblet, 19,000), you now have to do it with the Alfa around. If you haven’t taken the Quality Meat (the white pig in the Fallow Plot Shed Yard), take it now: the Ciorba de Porc needs it. See “Boss — Vârcolac Alfa” below. On Village of Shadows there are also 2 large Lycans in the foliage.
Altar: the Duke and the kitchen
Your richest visit. Place the Arms Flask on the pedestal, next to the Head and Legs Flasks (one to go). Save at the typewriter.
- Sell: the Crystal Ancient Beast (80,000), the Crystal Beast drops (20,000 each), the Chartreuse Skull (20,000), the Silver Angel Statue (10,000) and the Crystal Moreau (40,000) if you still carry it. Keep the Necklace with Two Holes and the Pigeon Blood Ruby. Never sell Meat or Fish here.
- Upgrade: the F2 Rifle to power 3 and 4 (15,000 + 29,000), the ideal weapon for the Stronghold approach, and the W870 TAC to power 4 (39,000) if you can afford it. At the very least, get the rifle to 1,000 power.
- Buy or craft Mines and Pipe Bombs: the Stronghold is the biggest ammo sink in the game.
Cooking. Following this guide’s plan (Herbed Fish in chapter 5, Tochitura in chapter 7, Mititei at the Gatehouse in chapter 8) you arrive with about 7 Fish, 2 Poultry and 2 Meat. This chapter gives you Poultry ×2 (East Old Town), Meat ×4 (the Graveyard’s 2 goats), the Quality Meat (if you didn’t have it) and, on the river, Fish ×2 and the Finest Fish. Cook in this order:
- Bird and Beast Pilaf (Poultry ×4 + Meat ×1: less damage when guarding). It leaves you with exactly 5 Meat.
- Ciorba de Porc (Fish ×1 + Meat ×5 + Quality Meat ×1: much less damage when guarding). It uses up all the Meat.
- Sarmale de Peste (Fish ×6 + Finest Fish ×1: faster walking). It waits until you’re back from the river with the golden fish.
That way you finish the chapter with all six dishes. Exceptions:
- If the Gatehouse gave you only 2 Poultry (PowerPyx’s count; Evil Resource says 3), you’re one short for the Pilaf: it waits for the Otto’s Mill Poultry (chapter 10).
- If you didn’t cook it in chapter 7, the Tochitura de Pui (Poultry ×4 + Meat ×3 + Juicy Game ×1: max health, a big boost) comes first: if you cooked the Pilaf in chapter 5, you arrive with 2 Poultry and 4 Meat, the 2 East Old Town chickens make up the 4 and, with the goats, you’re left with exactly 5 Meat for the Ciorba.
The effects are permanent and carry into NG+.
Lone Road: the drawbridge
Instead of crossing the bridge to the Ceremony Site, turn right toward the river and use the Crank on the mechanism on the wooden platform. The bridge lowers. On the north-east corner of the platform across the river is a wooden crate you can only reach now (handgun ammo). If you haven’t taken them yet, the Lone Road still has Goat of Warding #7 (under the bridge), the Luiza’s Heirloom chest and a Rusted Scrap in the south-west passage. If you ran past them in chapter 5, 4 Lycans are still here (on Village of Shadows, 3 plus a large Lycan). Take the stairs on the left and get in the boat. Guides disagree on calling each end “north” or “south” (the in-game map is flipped): here they are the far end and the castle end.
Far end: South Riverbank and Riverbank Cave Camp
Sail to the end away from the castle.
- Pool in the south-west corner, left of the pier: Fish ×2 and the Finest Fish, the big golden fish. It is unique per playthrough and Sarmale de Peste needs it. The Photo of a Phantom Fish (in the Stronghold, chapter 10) marks it, but you don’t need the photo to kill it.
- Riverbank Cave Camp (the cave across from the pool, roots everywhere). On the weapons crates in the north-west corner: the laptop with Analysis Results (file 33: examine it), the Antique Coin (8,000; its description says it looks like one from the Baker house), Explosive Rounds ×1, Flashbang ×1, Handgun Ammo ×30 and 2 Mines. In the weapons case on the same crates: the W870 TAC - Foregrip (faster fire: time between shots 1.6 → 1.4 s; worth 14,000 in the shop). On the way out, 3 Moroaică drop from the ceiling or rise from the ground by the south-east exit: W870 to the head, two blasts each.
Castle end: Craftsman’s House
Back in the boat, go to the other end, upriver toward the castle. Get off and use the Crank on the second drawbridge (west side of the North Riverbank): it links back to the Castle Path. The Craftsman’s House is the hut where you saved after the castle: typewriter and a Rusted Scrap in the west cupboard. The back-yard outhouse has Gunpowder.
Well 7: the Trap Chamber
The well behind the house. Use the Well Wheel: instead of an item, a ladder rises. Climb down. Below are a locked gate and spike-trap platforms at several heights (they don’t hurt).
- Take the Lockpick from the puddle by the ladder.
- Climb onto the low spike platform on the right, then the next one, up to the ledge with the control panel. A Pipe Bomb sits in the north-east corner of the upper level.
- Press only the two white buttons, and don’t touch the panel again. The top-left and top-centre platforms rise.
- Cross to the other side and push the cart twice so the second cart comes within reach. Shotgun Ammo ×8 on the rocks in the southern corner of the upper level, just past the cart, in the corner on your left.
- Turn right and push the other cart off the ledge. Drop onto it and climb to the top-centre platform: a crate with Explosive Rounds.
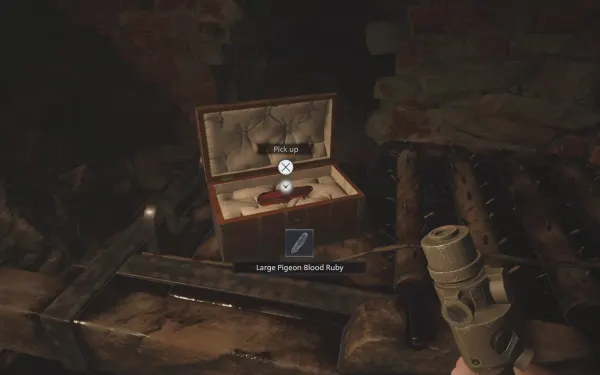
- Before going on, make sure you have everything on the upper levels: once you drop through the hole into the locked-gate chamber there is no way back up. Drop into the locked-gate chamber. On the torture bench, a chest with the Large Pigeon Blood Ruby (5,500). Under the bench, Flashbang ×2 and Magnum Ammo ×1. A Mine on the rocks north-east of ground level. Unlock the gate from inside to leave.
Combine the Necklace with Two Holes, the Pigeon Blood Ruby and the Large Pigeon Blood Ruby right away: Dimitrescu’s Necklace (50,000). If it is your first combination, challenge Repairer (1,000 CP); it counts toward Treasure Hunter.
Riverbank Treasure House
The crypt under Castle Dimitrescu. From the pier at the castle end, the entrance is on the right, in the dungeon under the castle: cross the bridge by the boat and take the stairs up. It is the Riverbank Treasure House marked treasure, and visiting it counts toward Mapmatician (along with Moreau’s Laboratory and Otto’s Mill).
- The Vault. A burning brazier hangs and swings in the middle. Shoot it diagonally so that its swing lights the two corner torches, left and right. Two doors open. There is a wooden crate on the ledge by the north-west archway.
- Chamber A (the room the left torch opens): 5 piles of Lei on the table (500 + 1,200 + 500 + 2,500 + 300 = 5,000).
- Chamber B: as soon as it opens, Moroaică start coming endlessly from the right side, out of a hole in this chamber’s wall, and they don’t stop until you open Chamber C. There are 2 wooden crates (north-west and south-west).
- The third torch is unlit, at the far end, out of the brazier’s reach: it’s the one that opens Chamber C. Wait for a Moroaică to pass under the brazier and shoot the brazier so it swings into her and sets her on fire. Then lure her to the third torch: let her follow you and position yourself so she passes right by it; when she touches it she lights it and the last door opens. Don’t finish her off first: the fire drains her health but stops at 1 HP, so she won’t die on her own. Setting her alight earns the Medium Rare challenge (3,500 CP).
- Chamber C: the Golden Lady Statue (20,000) and Magnum Ammo ×1 on the table. The Moroaică stop coming.
Back to the Altar
Sell Dimitrescu’s Necklace, the Golden Lady Statue and the Antique Coin, cook the Sarmale de Peste with the Finest Fish (and whatever you still have pending) and save. The Six-Winged Unborn Key gate is in the Graveyard, on the north-east path under the birdcage: chapter 10 starts there. You can leave the river for after the Stronghold (you have to come back to the Altar for the Giant’s Chalice anyway), but not for after you place it at the Ceremony Site.
Boss — Vârcolac (Moreau’s Laboratory, optional)
The game’s second Vârcolac (7,000 HP). It shows up after you explore the West Building. It is too big to enter houses: it claws at doors and windows, gets stuck, and that is when it is most vulnerable. Stand too close to the door and it grabs you and throws you out. Its grab can be blocked without damage.
- Before it arrives, lay Mines in front of the door and the facing window of the house you plan to hole up in.
- If it spots you in the open, fire a Flashbang from the GM 79 to slow it and run inside.
- When it gets stuck in the doorway, 2 M1851 Wolfsbane shots to the face (guides say 1 to 3). Without the magnum: Explosive Rounds or the shotgun to the face; the shotgun knocks it back.
- Reward: Crystal Beast (20,000).
Boss — Vârcolac Alfa (Fallow Plot, optional)
It has 20,000 HP, almost three times a normal Vârcolac, and its charge hits extremely hard. Unlike the others, it doesn’t follow you into houses: it hides in the tall wheat and retreats into it if you run toward the church. Explosives and the magnum do extra damage (the M1851 Wolfsbane, ×5.2). As a guide, by the damage formula at the start of Standard: about 5 M1851 Wolfsbane shots; if you play well, the game lowers your damage and it takes up to a third more.
- Set the trap. The short path from the Church to Luiza’s House is blocked by a broken carriage. Lay 2 or 3 Mines where that path meets the wheat and stand behind them.
- Draw it out with a shot from range. It charges in a straight line: it trips the Mines and falls.
- Once it is down, unload: M1851 Wolfsbane to the head, then the shotgun to the face.
- If it hides in the wheat, use the GM 79’s Explosive Rounds: they reach it in there and knock it down mid-lunge. A Flashbang stuns it so you can aim.
- Keep the Mines between you and repeat. If it corners you, block.
- Reward: Crystal Ancient Beast (80,000) and the Leader of the Pack challenge (10,000 CP).
On Casual your damage starts at ×0.85 (Standard: ×0.50): it falls much sooner. On Village of Shadows your damage is fixed at ×0.20, it takes 2.5 times the shots of Standard and there are 2 more large Lycans in the foliage: bring every Mine you can.
Don’t leave without: the M1851 Wolfsbane (if you miss it, the Duke sells it in the Factory for 120,000 Lei) and Moreau’s Diary of Experiments · the Mermaid Ball and the Chartreuse Skull · the Yellow Quartz in the milk urn and the Pigeon Blood Ruby on the roof · the 2 Poultry, the Graveyard’s 4 Meat, the Quality Meat and the Finest Fish with its 2 Fish · the Bird and Beast Pilaf, Ciorba de Porc and Sarmale de Peste cooked · the cave’s W870 TAC - Foregrip, Antique Coin and Analysis Results · the Large Pigeon Blood Ruby (combine Dimitrescu’s Necklace) · the Golden Lady Statue and the 5,000 Lei in the Riverbank Treasure House (Medium Rare challenge) · the Crystal Ancient Beast. All of it is lost once you enter Heisenberg’s Factory.