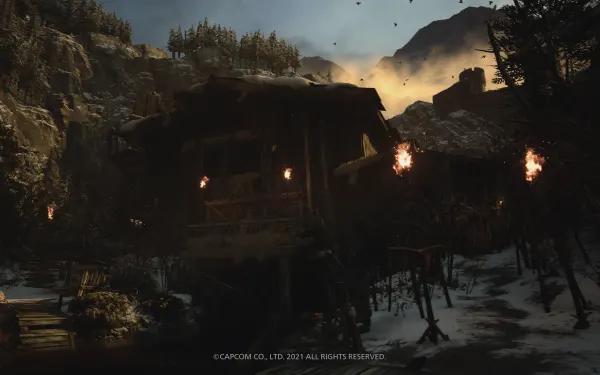
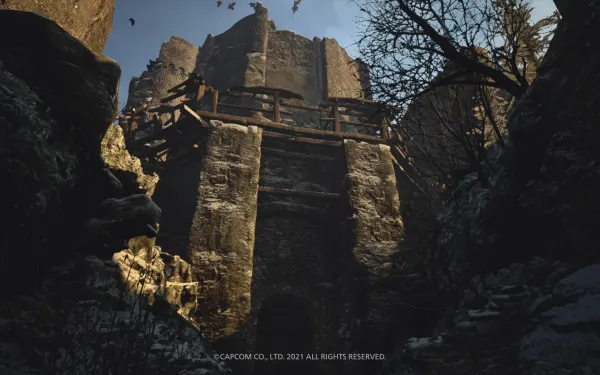
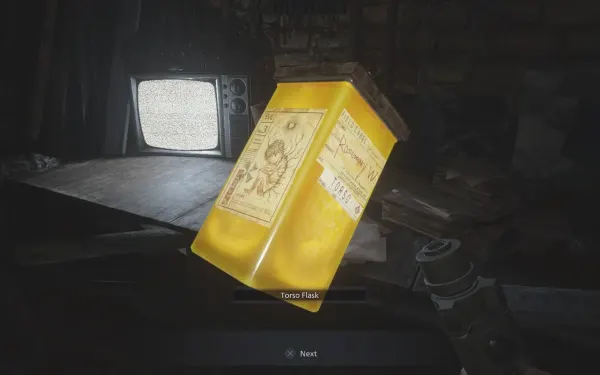
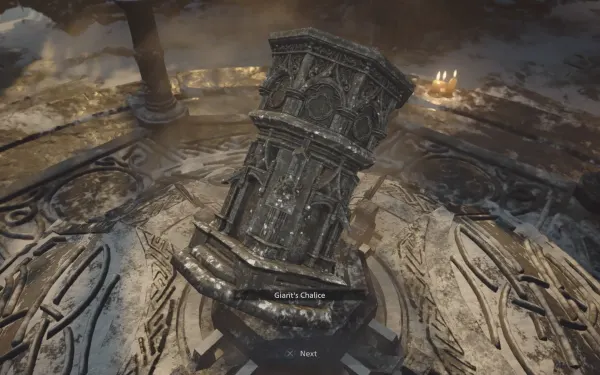
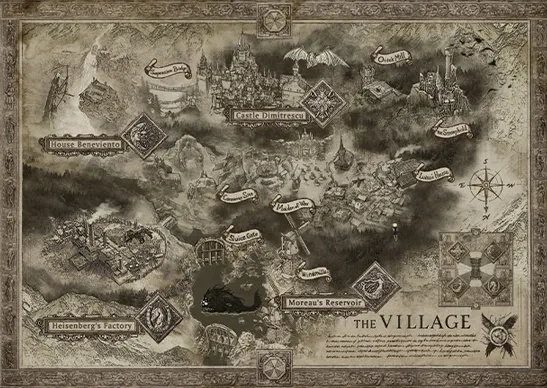
You are still Ethan, and three of Rose’s four flasks already sit in the Altar. The missing one, the Torso Flask, is in Uriaș’s Stronghold, behind the Graveyard gate that the Six-Winged Unborn Key opens. The chapter is one long fighting line: woods full of archers, ruins with two ambushes, the Main Hall Lycan den and, at the bottom, Uriaș in the Large Cavern. On the way you can detour to Otto’s Mill (optional), where another axe giant, the Uriaș Drac, is waiting. You leave the Stronghold by boat, climb out into the village’s Crypt Yard, and at the Altar you receive the Giant’s Chalice, the key to the point of no return.
Chapter order: Graveyard: Six-Winged Unborn Key gate → “Good Luck” sign → (optional, left) Otto’s Mill: Uriaș Drac, file 34, Cannibal’s Plunder, Goat of Warding #15 → (stairs) Forbidden Woods (archers) → Ruins (two levers) → Entry Hall (typewriter, Vivianite) → Main Hall (Lycan den, zipline, large Lycan) → Tower → Tower Stairs (Goat of Warding #16) → Small Cavern (typewriter, file 35) → Cavernous Passage → Uriaș (Large Cavern) → Crystal Cave → Stairway Passage → Workshop (Torso Flask) → Waterway (Guglielmo’s Plate) → Dungeon (file 36, Photo of a Phantom Fish) → Crypt Yard → Church Courtyard → Graveyard → Maiden of War → Altar: Giant’s Chalice and the Duke.
Before you start: the Stronghold is the biggest ammo sink in the game: 8 Lycans in the woods, 7 + 12 in the ruins, 28 + 10 in the Main Hall, then Uriaș. Lycans never drop ammo or healing (only Lei, Rusted Scrap, Chem Fluid, Gunpowder and sometimes a 900 Crystal Skull), so everything you spend comes from crates and floor pickups. Before going through the gate, at the Altar: the F2 Rifle at 1,000 power at least (one head shot kills any normal Lycan), the W870 TAC with its power upgrades, 3 or 4 Mines and 3 or 4 Pipe Bombs (craft or buy them), the GM 79 with Flashbangs and Explosive Rounds, and the M1851 Wolfsbane rounds kept for Uriaș. Make room: there are plenty of crystals to sell inside. Save before you set out. Otto’s Mill is optional and stays open until the Factory: do it now or later. Everything inside the Stronghold, though, take as you pass: you leave by a ladder into the village’s Crypt Yard and there is no confirmed way back in. The Uriaș fight starts as soon as you enter the Large Cavern: save in the Small Cavern.
The Six-Winged Unborn Key gate
It is in the Graveyard, on the north-east path (under the birdcage in the tree). Open it with the Six-Winged Unborn Key and follow the path to a yellow “Good Luck” sign: a fork. Left is Otto’s Mill (optional). Up the stairs is the Stronghold.
Otto’s Mill (optional)
Otto’s Mill Yard. Cross the stream: a black pig grazes on the left (Meat ×2). On the small wood chipper next to the big stack of planks in the middle of the yard is a Crystal Fragment (2,000). In the small wooden structure to the north, 2 Mines and a crate with Lei. To get into the mill, circle it on the left, smash the crate and shoot or knife the padlock off the gate.
Otto’s Mill Processing Room (the sawmill). In the south-east corner of 1F an Uriaș Drac is butchering meat and doesn’t see you come in. It is optional (see “Boss — Uriaș Drac” below): you can shoot the 3 padlocks off the red door and move on without killing it. Pickups:
- Handgun Ammo ×20 on the barrel in the middle of 1F, Shotgun Ammo ×7 on the giant saw (east, 1F) and Sniper Rifle Ammo ×6 on the beam pile (south, 1F).
- Chem Fluid on the 2F walkway (north-east to east) and Rusted Scrap at the top of the east stairs (these two are not there on Village of Shadows).
- 3 wooden crates, and explosive barrels by the south stairs (1F) and on the north-west platform (2F).
The Samcă the giant summons (500 HP, they come in pairs) drop Lei, scrap, Herbs and sometimes a Crystal Wing (2,400).
Otto’s Mill Meat Storage (behind the red door). Ernest’s Diary (file 34) on the smaller table: it talks about the medicine company symbol in the Duke’s newspapers that also appears on the Giant’s Chalice. Ingredients: Meat ×2 on the metal shelves, Meat ×1 and Fish ×1 on the table, Poultry ×1 on the shelves. Don’t leave the Poultry: if you have not cooked Tochitura de Pui yet (4 Poultry + 3 Meat + Juicy Game per most sources; Evil Resource lists Fish instead of Poultry, and the Duke shows you the real recipe), you may come up short. Also a Herb in the south-west cabinet and Metal Scrap north-west of the east area.
Otto’s Mill Back Corridor. In the south-east corner, the large chest of the Cannibal’s Plunder marked treasure: Father Nichola’s Angel (22,000). Gunpowder and 2 crates with ammo on the metal shelves.
Otto’s Mill Riverbank (the exit). 4 Lycans come along the south-west path: there are explosive barrels in two mine carts by the river; let them bunch up and shoot. Goat of Warding #15: inside the small wooden kiosk under the mill (as you cross the stream, turn right before you reach the far bank). A crate sits in the north-east shelter. Visiting the mill counts toward Mapmatician. Head back to the sign and take the stairs.
Forbidden Woods
8 Lycans come at you as you advance, and archers on the ruins fire flaming arrows: strafe and take them down with the F2 Rifle (up close they drop the bow and melee).
- Fast Reflexes challenge (8,000 CP): equip the Knife and swing right after an archer fires to knock the arrow out of the air.
- This is also an easy place for Trick Shot (3,000 CP: a long-range sniper kill) and Strategist (3 kills with one attack, using a barrel).
- Pickups: a Herb growing from a tree (north), Rusted Scrap in the toppled mine cart, Flour (throw it to blind a group) and 2 crates.
Ruins: the two levers
West entrance: a Mine on the barrel pile, 2 crates (Lei and Rusted Scrap) and an explosive barrel by the central wall.
Walkway and 2F (east side of the ruins). Going up the walkway, 7 Lycans attack: lay a Mine on the slope and use the red barrel below. On 2F: Handgun Ammo ×25 (on a south-west barrel), Shotgun Ammo ×4 (north-west wall alcove), an explosive barrel in the middle and another in the south-west corner, a crate to the south-west and another in the north-east room.
3F: the ambush. The gate at the top needs two levers. On 3F there is Sniper Rifle Ammo ×7 on the north-east window ledge, a crate in the south-east corner and an explosive barrel on the platform in the north-west corner: don’t waste it early, it is for the wave.
- Left: take the stairs in the left corner up to 3F. Pulling the lever brings 12 Lycans (the ambush fires on whichever lever you pull first). When they bunch up by the north-west platform, shoot the barrel.
- If the wave overwhelms you, fall back to the entrance: the Lycans here are not endless. Pick them off as they come at you in a line and keep the shotgun for the ones that reach you.
- Right: climb the ladder and pull the second lever, with no surprises.
On Village of Shadows it is 5 and 11 Lycans instead of 7 and 12.
The Stronghold: Entry Hall, Main Hall and Tower
Stronghold 1F: Entry Hall. Typewriter on a barrel by the stairs: save. A Pipe Bomb right there, Rusted Scrap in the toppled barrel mid-hall and 2 crates. Look up: in the side of the ruined stone stairs on the east side is an embedded Vivianite (5,000). Shoot it. It counts toward the Geologist challenge (shoot down 15 different minerals).
Main Hall: the Lycan den. The hardest room of the chapter. Evil Resource counts 28 Lycans as you explore and 10 more when you go up to 2F, and in practice they keep coming until you push through: don’t try to empty it.
- Tactics: back off to the entrance corridor and shoot from there; advance in the gaps between waves. Shoot the climbers before they finish climbing. Save the barrels for groups. A full W870 blast to the head kills a normal Lycan.
- Route: drop to the lower level (red barrels and pickups), take the stairs, left at the top, straight on without taking the walkway, up the stairs, shoot the barrel as the Lycans jump across and ride the zipline. Then right up the stairs, right across the wide walkway, left and up the stairs: ambush by the large Lycan plus more Lycans. Back off laying Mines, then climb back up to the iron doors and go through: they lead to the Tower.
- Large Lycan (Armored Lycan), by the north door on 2F: knock its helmet off with the shotgun or a Pipe Bomb (or a Mine) and shoot it in the face. Going by the game’s memory values, the first one in the Stronghold has only 700 HP: once the helmet is off it drops fast. It drops a Perfect Crystal Skull (10,000). On Village of Shadows there is another on the north side of 1F and two at the 2F door.
- Pickups: Handgun Ammo ×25 (support post, north-west walkway, 1F), Explosive Rounds ×1 (north-west barrel, 1F), First Aid Med and Pipe Bomb (barrels on the north side, B1), Shotgun Ammo ×3 (stone coffin to the west, B1), Sniper Rifle Ammo ×4 (edge of the south walkway, 2F). Explosive barrels on the north-west walkway (1F) and the south side (B1).
Tower (2F). Gunpowder and Magnum Ammo ×2 on the wooden boxes to the west.
Tower Stairs and Small Cavern
Tower Stairs. The spiral staircase goes down. Metal Scrap on the 1F landing and a crate with rifle rounds on the B1 landing. Goat of Warding #16: at the bottom of the stairs, look right: it is on the small wall behind some buckets. Break it now: you don’t come back. Squeeze through the crack in the wall opposite.
Small Cavern. The safe room before the boss. Typewriter on a barrel to the south-east: save here. Officer’s Diary (file 35) on the floor on the east side: a soldier writes about the Ceremony Site, its four giant statues and the Giant’s Chalice. First Aid Med on the candle ledge (west). Explosive Rounds ×2 and Sniper Rifle Ammo ×5 on the south-east barrel.
Cavernous Passage → Large Cavern. The passage beyond is empty and opens into the Large Cavern, where Uriaș appears as soon as you walk in. Arrive with everything picked up, saved and the M1851 Wolfsbane loaded. See “Boss — Uriaș” below.
After Uriaș: Crystal Cave and Workshop
Crystal Cave. Once Uriaș is down, leave the Large Cavern by the red door in the corner. Look up and shoot the sparkles on the crystals: 4 Crystal Fragment (2,000 each), 1 Vivianite (5,000) and 1 Yellow Quartz (10,000). The Large Crystal (3,000) is on the big crystal block in the south-east corner. Keep shooting until the room turns blue on the map. They all count toward Geologist.
Stairway Passage. The staircase down to the workshop; nothing to pick up.
Workshop. On the workbench in the north-west corner of the main room, next to the TV, is the Torso Flask. Cutscene: Heisenberg talks to you through the screen. The south-east corner has 2 crates (one on the floor, one on a barrel) with ammo.
Waterway and Dungeon
Waterway. At the bottom of the stairs, on the altar in the east dock area, is Guglielmo’s Plate (25,000): the Treasure Under the Stronghold marked treasure. Take it before you get in the boat. Sail through the dark tunnel following the lights.
Dungeon (optional but worth it). At the pier, don’t climb the ladder yet: take the corridor and stairs on the left.
- Experiment Notes (file 36) on the table on the south side: the list of Cadou subjects, one of them a certain “Alcina D”.
- The Photo of a Phantom Fish on the trolley in the south-west cell: it marks the Finest Fish in the South Riverbank pool (chapter 9).
- Chem Fluid in the stretcher bowl in the south-west cell; Pipe Bomb and Shotgun Ammo ×6 on the south-west metal shelves; a crate in the south-east cell.
- Exploring the south side brings 3 Moroaică. One F2 Rifle shot to the head kills each; explosives do little to them.
Go back to the pier and climb the ladder: there is no way back into the Stronghold.
Back in the village: from the Crypt Yard to the Altar
The ladder comes out in the Crypt Yard, the yard of crypts next to the Church Courtyard (the one the Iron Insignia Key opened). 2 chickens run around here (Poultry ×1 each, if they are still alive: useful for Tochitura de Pui if you have not cooked it yet and skipped the mill), there is a Herb in the south-east corner, a crate between the crypts to the north-west and a Large Crystal in the arch over the gate (you most likely shot it down in an earlier chapter).
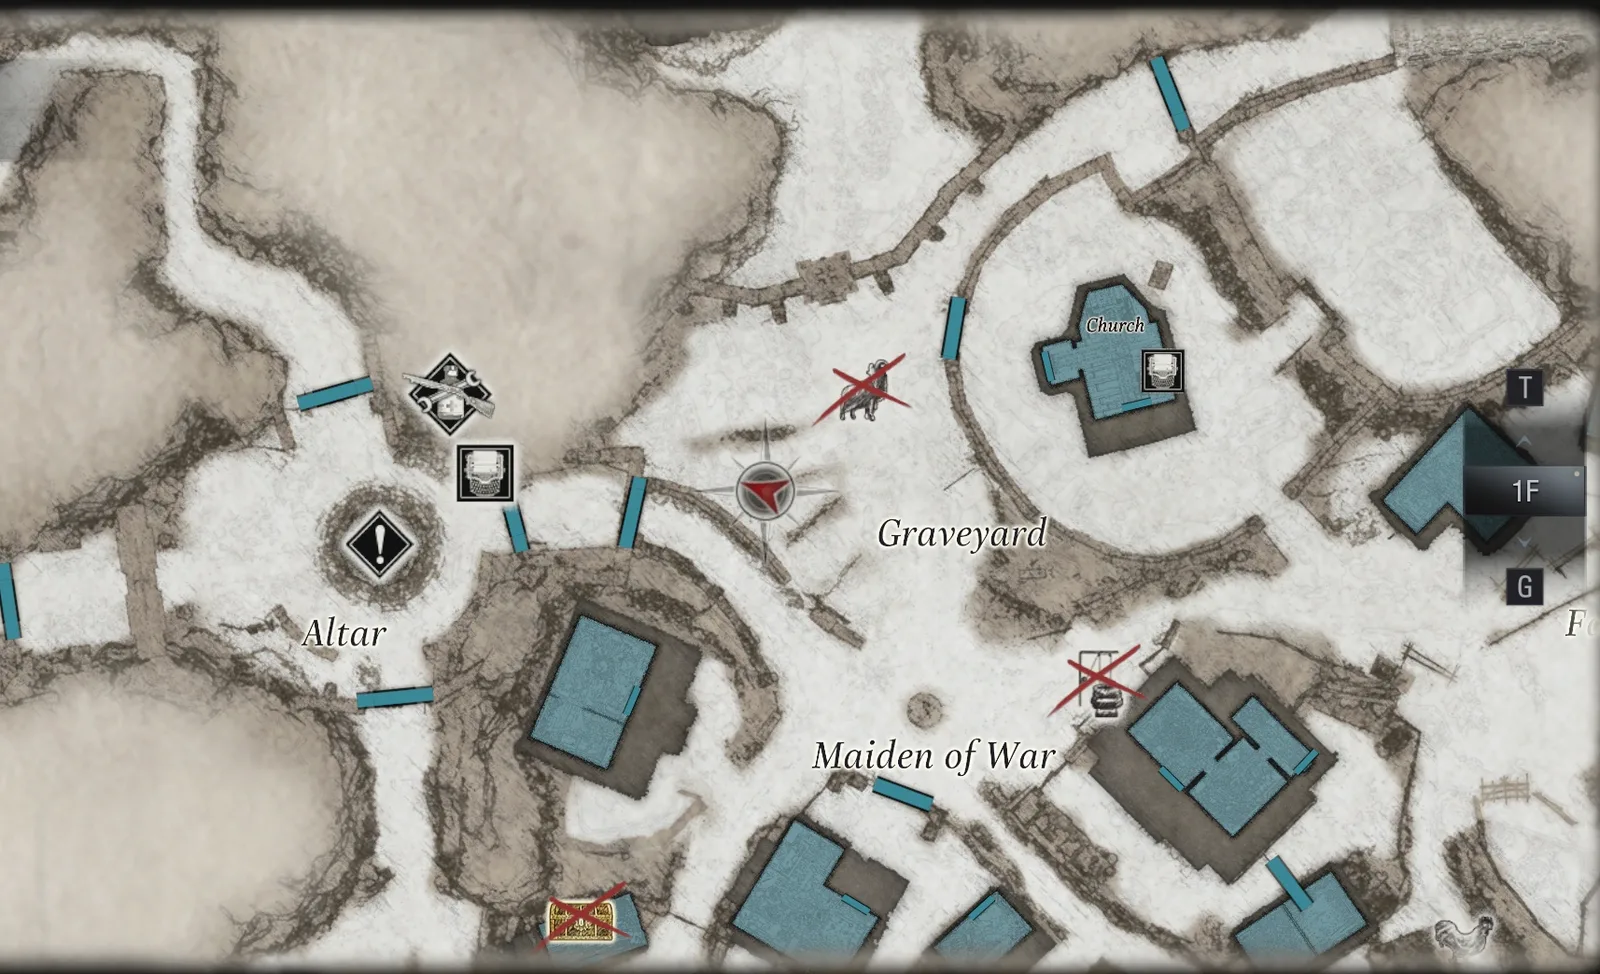
Route to the Altar: Crypt Yard → Church Courtyard → Graveyard → Maiden of War → Altar. The Duke is parked in the Altar’s corner by the inner gate to the Maiden of War, with the typewriter on a small table beside him.
Altar: the Giant’s Chalice
Place the Torso Flask in the Altar’s central pedestal, next to the Head, Legs and Arms Flasks: the altar gives you the Giant’s Chalice. Torches light the way through the west gate to the Lone Road and the Ceremony Site.
Placing the chalice there (chapter 11) is the point of no return: after that you never roam the village again. Before you go, make a manual save and check what is left:
- the chapter 9 river (Trap Chamber, Riverbank Treasure House, Riverbank Cave Camp, Finest Fish) and the Vârcolac Alfa;
- Otto’s Mill if you skipped it (Uriaș Drac, Cannibal’s Plunder, Goat of Warding #15, Poultry);
- the Mermaid labyrinth, Luiza’s Heirloom and the Maestro’s Collection;
- the Duke’s dishes: if you still need Tochitura de Pui, the Otto’s Mill Poultry helps finish it, and the Finest Fish makes Sarmale de Peste. Their effects are permanent and carry into NG+;
- the grey areas of the map: Mapmatician needs Moreau’s lab, the Riverbank Treasure House and Otto’s Mill.
The Duke: the village’s last shop
This is the last visit before the point of no return. There is no new stock this time (Evil Resource and Game8 record nothing new between chapter 9 and the Factory): the next addition, the SYG-12, arrives in the Factory’s cargo elevator.
- Sell: the Crystal Hammer (35,000), Guglielmo’s Plate (25,000), the Perfect Crystal Skull (10,000) and the Crystal Cave crystals; if you did the mill, also Father Nichola’s Angel (22,000) and the Giant Crystal Axe (30,000).
- Buy: if you could not afford it in chapter 9, W870 TAC power 4 (39,000). If you already have it, save your Lei: the Factory has the SYG-12 (180,000) and its SYG-12 - Red Dot Sight (42,000), about 222,000 in all.
- Cook: Tochitura de Pui if you have not made it yet (with the Poultry from Otto’s Mill or the Crypt Yard) and Sarmale de Peste if you already have the Finest Fish.
- Restock Mines or Pipe Bombs: the Factory needs 2 explosives for two cracked walls, plus whatever the Soldat Panzer takes.
- Don’t place the Giant’s Chalice at the Ceremony Site before selling, cooking and checking what is left in the village.
Boss — Uriaș Drac (Otto’s Mill, optional)
The second axe giant (the first was at Beneviento’s Grave, chapter 7). 22,000 HP. Its real weak spot is the back of the torso (×3.0; the head ×2.4). It can climb straight to 2F without the stairs, and its roar summons 2 Samcă (the first one called Moroaică). The room has explosive barrels.
- Open while it works: a magnum or rifle shot to the head before it turns around. Beforehand, lay Mines in the narrow walkways and corners you’ll lead it through.
- Keep obstacles between you: it hits very hard. Lead it over the Mines and throw Pipe Bombs behind you as you round corners.
- When it passes a red barrel, shoot the barrel from range with the handgun.
- When it roars, stunning it in time cancels the summon. If the Samcă arrive, kill them at once: the shotgun drops them in 1 or 2 blasts, and one F2 or magnum shot to the body kills them. They are too agile to ignore.
- If it turns, shoot it in the back. As a guide (formula, start of Standard), each M1851 Wolfsbane shot there takes about 5,100: about 5 shots. The GM 79’s Flashbangs slow it and buy you time.
- If it gets out of hand, break the 3 padlocks on the red door and leave: killing it is not required.
- Reward: Giant Crystal Axe (30,000).
Recommended weapons: W870 TAC, GM 79, Mines and Pipe Bombs.
Boss — Uriaș
The hammer giant from the chapter 2 ambush, now in the Large Cavern (Stronghold B1). 25,000 HP. It doesn’t matter if you killed him in the ambush (Timber challenge): he appears here again. The head takes ×2.6 and the rest of the body ×2.0: always aim for the face. As a guide (formula, start of Standard): each M1851 Wolfsbane shot to the head takes about 4,400 (about 6 shots); a full blast from an un-upgraded W870 TAC to the head, about 1,000; a Mine or Pipe Bomb, about 1,500.
The arena is a U-shaped cavern with stone pillars and a raised plateau in the middle, where he starts. Pickups in the wall alcoves (take them while he is still up top): First Aid Med (west), Handgun Ammo ×30 and 2 Pipe Bombs (north-east), Shotgun Ammo ×4 and Sniper Rifle Ammo ×4 (south-east), and a crate to the south-west.
His attacks:
- Leaping hammer slam, from the plateau or on the ground. He crouches first: sprint in a straight line across the room.
- Hammer swings and a spin, and a charge that chases you and ends in a slam.
- Tears out a pillar and throws it: hide behind another pillar or run to the far side of the U.
- Climbs back onto the plateau and roars: 1 or 2 Lycans arrive.
- Before he comes down, grab the pickups, lay Mines on the floor and open with the F2 Rifle or the magnum to the face.
- When he crouches to leap, run. When he lands and recovers, M1851 Wolfsbane or the GM 79’s Explosive Rounds to the face: explosives and Flashbangs stun him.
- Keep your distance: a single hit can put you in the red. Shoot, run when he closes in and use the pillars against his swings. If you can’t dodge, block.
- When he goes up to roar, kill the Lycans quickly (W870 to the head). A Pipe Bomb or a GM 79 Explosive Round fired as they land beside him hits them all at once.
- With enough damage he kneels for a few seconds: empty everything into his face.
- Reward: Crystal Hammer (35,000) and the Up Urs! challenge.
Recommended weapons: W870 TAC, M1911, GM 79, M1851 Wolfsbane, Mines and Pipe Bombs. On Casual he takes far less ammo. On Village of Shadows your damage is fixed at ×0.20 (2.5 times the shots of Standard) and the GM 79 starts to fall short: hide behind the pillars and, if you must, buy healing from the Game Over screen shop.
Don’t leave without: the Entry Hall Vivianite · the large Lycan’s Perfect Crystal Skull · Goat of Warding #16 at the foot of the spiral stairs · the Officer’s Diary · the 7 minerals in the Crystal Cave · the Torso Flask · Guglielmo’s Plate · the Dungeon’s Experiment Notes and Photo of a Phantom Fish. All of that stays inside the Stronghold. Otto’s Mill (Ernest’s Diary, Father Nichola’s Angel, Goat of Warding #15, the Poultry) waits until the Factory. Before heading to the Ceremony Site: the Giant’s Chalice in your case, treasures sold, dishes cooked and a save in a separate slot.