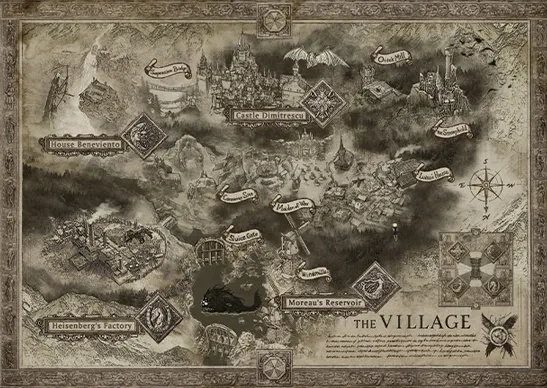
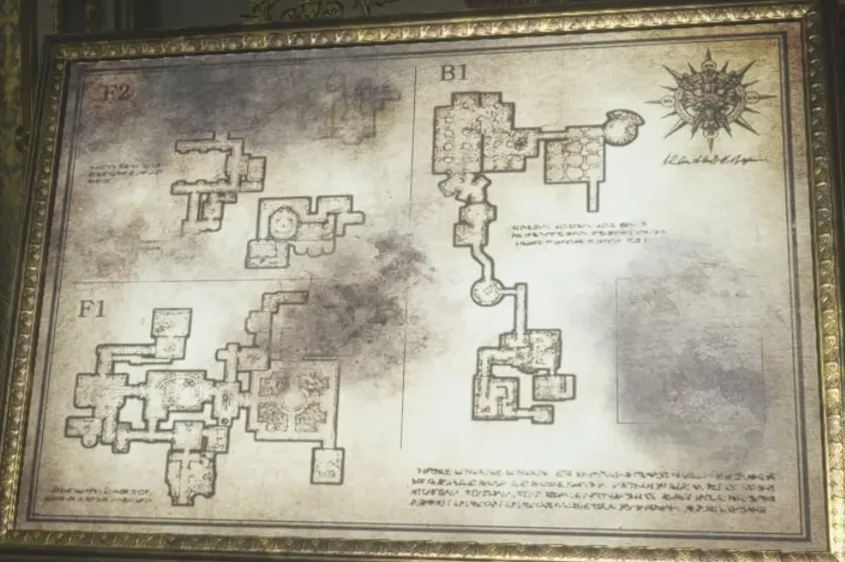
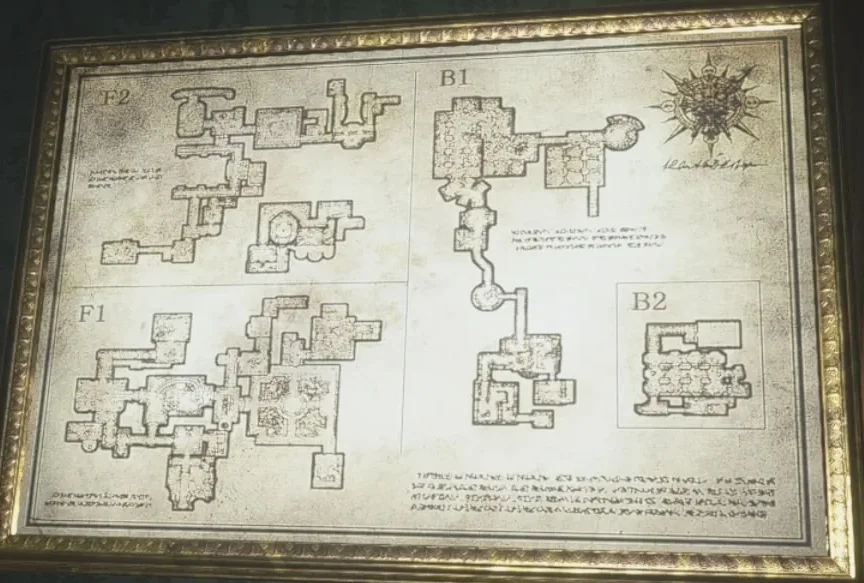
Chapter order: Entrance Hall → Hall of the Four (cutscene and hooks) → Maroon Eye → Merchant’s Room (the Duke, typewriter) → Main Hall → Private Corridor (Cassandra) → B1 basement (Hall of War brazier, Chamber of Solace) → Bela → Kitchen (Sanguis Virginis) → Eastern Corridor (LEMI - Recoil Compensator) → Wine Room (Courtyard Key) → Courtyard → Hall of Ablution statues → Goat of Warding #5 → Terrace Room (typewriter) → Dimitrescu’s Chambers (Dimitrescu’s Key) → Dungeon B2 (the severed hand) → Mask of Sorrow → Hall of Pleasure (Mask of Pleasure) → Armory (Cassandra) → Opera Hall (piano: Iron Insignia Key) → Special Chambers (Azure Eye, optional) → Library (Daniela) → Mask of Joy → Atelier (5 bells) → Attic (Goat of Warding #6, F2 Rifle) → Rooftops (Samcă) → labyrinth (optional) → Tower of Rage (Mask of Rage) → Hall of the Four (point of no return) → Mutated Dimitrescu → Dirty Flask.
Prepare: this is the longest stretch of the game, and everything inside it is lost once the four masks go into the Hall of the Four door: the 19 windows (Hooligan), Goat of Warding #5 and #6, files #9 to #20, the castle’s 9 Crystal Fragment pickups, the labyrinth, the Azure Eye, the Silver Ring, the Lady’s Lipstick and the Wooden Angel Statue. There are two typewriters: the Merchant’s Room (1F, the yellow door next to the Hall of the Four, with the Duke) and the Terrace Room (2F). Floors are named as on the in-game map: 1F is the ground floor, 2F the floor above, B1 and B2 the basements and RF the attic and rooftops. According to PowerPyx the game fully heals you on entering the castle, after the first cutscene, so don’t spend a First Aid Med right before it. The three daughters are immune to bullets while they are a swarm of flies: don’t shoot until cold air comes in (broken window, blown wall, open dome). The shotgun does a little less to them than usual (game data: ×1.6, against ×2.0 for handguns and rifles), so handgun head shots save shells. You don’t need to hold a Pipe Bomb back for the Armory wall (there are 2 in that very room), but don’t waste them on Moroaică: per the game data, explosives do less to them than bullets (×0.67). Carry free space: the F2 Rifle takes 6×2 slots. You can skip the Moroaică in the cells and the Courtyard: they are slow and can almost always be dodged.
Walkthrough
Entrance Hall. The Guest Book file (#9) is on the table in the northwest corner, left of the painting of the three women. Smash the glass of the cabinet on the east side: Gunpowder. There is a Giant Vase west of the central stairs; TheGamer found Shotgun Ammo in the one up the stairs on the left. Break every vase in the castle with the Knife: contents vary, but they are almost always ammo, Lei or materials.
Elevator Room. Right of the Entrance Hall. Shoot the Crystal Fragment embedded high on the west wall, opposite the elevator (2,000 Lei). The wooden box next to the elevator, which has no power yet, holds 500 Lei.
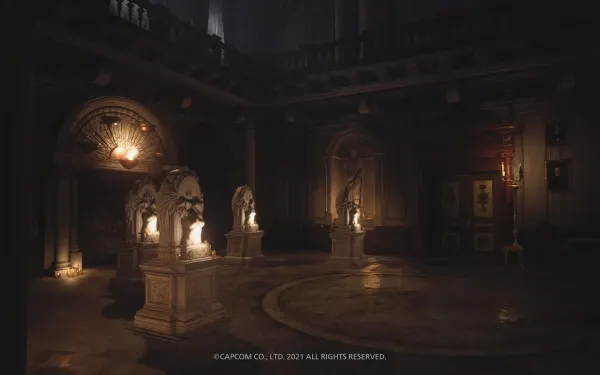
Southern Corridor and Hall of the Four. The vase next to the Hall of the Four door has Handgun Ammo. Before going on, save at the typewriter in the yellow-door room (the Merchant’s Room). Then examine the west double door with the inscription (“Mask the angels’ blinded gaze and only then will you be saved”). Cutscene: Lady Dimitrescu and her three daughters catch you.
Bedchamber (the hooks). You wake up hanging from meat hooks. Look up at your right hand and interact to tear free. The Crimson Glass (3,500 Lei) is on the desk at the foot of the bed.
Living Room. In the next room, the locked drawer in the southwest corner holds Shotgun Ammo ×4. Open it with the Duke’s Lockpick: your first lockpick gives the Petty Thief challenge. Open the fireplace gate and crawl in.
Hidden Passage. Rusted Scrap on the large crate in the alcove. At the west end, on the ground, lies the Maroon Eye Ring (picked up as you pass). In Key Items, examine it, turn it to face front and examine the stone: out pops the Maroon Eye.
Northern Corridor. The drawer of the cabinet by the Hall of the Four door has Chem Fluid; the one by the Living Room door, Gunpowder. Smash the glass cabinet next to the Hall of the Four door: another Crystal Fragment is inside. You can unlock the shortcut to the Bedchamber from here. In the Hall of the Four, four statues have risen from the floor: they are the mask pedestals.
Merchant’s Room: the Duke. The Duke is now here, next to the typewriter. On the small round table beside the castle miniature is The Labyrinths (#10): the miniature is the first labyrinth, and its ball turns up later in the Opera Hall. His stock is the same as at the Vineyard (chapter 3). What to do in the castle:
- Sell freely the Crystal Fragments (2,000), Crimson Glass (3,500), Wooden Angel Statue (3,000), Ingrid’s Necklace (2,000), each daughter’s Crystal Torso (5,000), the Lady’s Lipstick (6,000) and the labyrinth’s Crimson Skull (8,000): none of them combines.
- Don’t sell the Silver Ring (1,800) or the Azure Eye (1,200) on their own: together they make the Azure Eye Ring (12,000).
- Extra Baggage (S) (10,000) if you skipped it: the F2 Rifle takes 12 slots.
- Recipe: Sniper Rifle Ammo (4,000) as soon as you hold the F2 Rifle, not before.
- With what’s left, the M1897: power level 2 (8,000) or capacity (6,000). The LEMI is worth one cheap upgrade at most: the M1911 arrives in chapter 5.
The Crystal Dimitrescu (25,000) from the finale can’t be sold here: the Duke’s next stop is the Altar, outside the castle.
Main Hall. Ground floor: Handgun Ammo ×5 in the drawer in the southwest corner; Giant Vases northeast (1F) and southwest and northwest (2F). On 2F, the small vase to the northeast has 200 Lei, and a Crystal Fragment sits on top of the frame of the southeast painting. Unlock the right-hand door to the Entrance Hall: it is a shortcut.
Wine Room (2F). Straight ahead from the stairs, the first yellow door. On the central table, Winemaking History (#11): the clue to the Sanguis Virginis wine. Chem Fluid on the northeast barrel. Note the bottle stand on the wall: you’ll be back with the bottle.
Private Corridor: Cassandra. Before placing the Maroon Eye, save in the Merchant’s Room: there is no other typewriter until the Terrace Room and this stretch ends in the Bela fight. In the right-hand hallway on 2F is the door with a woman’s face: put the Maroon Eye in the eye socket. Going on, Cassandra Dimitrescu appears. Don’t shoot: bullets do nothing to her. Run down the ornate corridor, turn left (ignore the locked door ahead: that’s the Hall of Pleasure, for later), go through the end door into the Dressing Room, pull the planks off the gap in the wall and drop through the hole into the basement.
Cleaning Storage (B1). Where you land. A Maid’s Diary (#12) is on the metal shelves in the northeast corner of the main room: it tells how the daughters shriek when a window is opened. Rusted Scrap in an alcove of the tunnel. Crawl on.
Tasting Room. Handgun Ammo ×10 on the east cabinet. Lady Dimitrescu crosses the next room without seeing you: stay still. In the ceiling of the north tunnel, the stairwell out, is a Crystal Fragment. At the bottom of those stairs, on the left, a box on a shelf holds more Handgun Ammo.
Hall of War: the brazier. A lit brazier hangs in the middle; two unlit wooden torches stand at the edges of the room. Push the brazier with your body or shoot it from the right angle so it swings and lights both torches. The exit opens. There is a Wooden Crate in the southern storage area.
Chamber of Solace and Cells. Walk straight until a bloody torture table blocks the way: to its right, on a metal trolley, is Treatment Candidates (#13). Go left into the cell with the crumbled wall and out the other side: in the cell straight ahead (third from the bottom on the east side) is Observation Report (#14). Take it before the enemies arrive. Materials: Metal Scrap on the floor of the right-hand cell on the north side, Rusted Scrap in the top-most west cell and another Rusted Scrap inside the hole in the wall of the south-middle cell. There are crates in the north, northeast and southeast cells and on the barrels in the middle; TheGamer found a Pipe Bomb in the one in the cells next to the crawlspace (a Moroaică crawls out of the wall as you approach). There are 8 Moroaică. Aim for the head (×2.4), shoot the legs to slow them and shoot the weapon arm to make them drop it: the first time gives Butter Fingers. They are slow, so you can run past, but don’t get cornered inside a cell. One of them drops Ingrid’s Necklace (2,000 Lei).
Holding Area. As you reach the middle, Bela Dimitrescu appears as a swarm and chases you. You can’t hurt her here: enough damage only disperses her for a few seconds. Run, grab the crates in the middle-east and southwest cells if it’s safe, and leave by the southeast stairs. On Village of Shadows a burning Moroaică waits at the west entrance and another wanders the west side.
Back Storage (1F). At the top of the stairs, Chem Fluid on a barrel. There is Handgun Ammo ×10 on the table in the southern room, another ×10 on that room’s northwest bookshelves and Shotgun Ammo ×3 on the table northeast of the passage. Pull off the planks on the left: the cutscene breaks one window and the Bela fight begins (see below). The other window in this room is window 1 of 19.
Kitchen. A Cook’s Diary (#15) on the southeast shelves. Reach into the tub of blood in the middle: Sanguis Virginis, the Wine Room’s bottle. Rusted Scrap inside the north fireplace and a crate on the south bench (Lei, according to TheGamer).
Eastern Corridor. The Lockpick is on the cabinet next to the door. Use it on the drawer at the north end of the passage: Wooden Angel Statue (3,000). The weapons case in the west alcove holds the LEMI - Recoil Compensator, free: +30 power (100 → 130). Fit it from the inventory; if you don’t have Gunsmith yet, it pops here.
Dining Room. Crystal Fragment in the ceiling to the northwest, above the table. Gunpowder in the southeast drawer. Break windows 2 and 3, one on each side of the Courtyard door. Unlock the side door to the Main Hall.
Wine Room: the Courtyard Key. Put the Sanguis Virginis in the wall stand. A secret passage opens: Courtyard Key in the small red chest, Gunpowder on the bench and Rusted Scrap on the shelves. Heading back to the Dining Room, Cassandra may block you by its doors: go around her and keep moving. Open the Dining Room double door with the Courtyard Key.
Courtyard. Herb in the southwest shrubbery. Listen for the creak of the birdcage on the west side and shoot it down: 1,000 Lei. Giant Vases northwest, southwest and northeast (TheGamer got Metal Scrap and Herb). Go through the white double door in the southeast corner: Lady Dimitrescu walks up the stairs ahead of you.
Southern Stairwell. Chem Fluid in the northeast drawer at the bottom; Lei in the northeast vase on 2F. Break windows 4 and 5 on this stairwell.
South East Wing (2F). On the north wall, halfway down the corridor, hangs the Castle Map (Main), the 1F and 2F map. Gunpowder in the southwest glass cabinet and Handgun Ammo ×5 in the drawer of the northwest cabinet (round the corner). Break windows 6, 7 and 8: one at the top of the stairs and two in front of the Hall of Ablution.
Hall of Ablution: the statues. The plaque reads: “Women are blind to male advances, but the poor shall take their chances to give their lord their bounty sown, so that soon the wine may flow.” There are four rotating statues: the lord on horseback, the two poor men with bread, the lady with the chalice and the woman with the hat. Solution: rotate every statue once except the man on the horse. In the end the poor face the lord, the lord faces the lady with the chalice and the two women face each other (no woman faces a man). The pool of blood drains: go down the steps at the bottom, then the ladder.
Torture Storage (B1). Goat of Warding #5: on the ground in the southwest corner, right at the foot of the ladder you come down (guides disagree on whether it’s to your left or right). Break it.
Hall of Blood and Distillery. 4 Moroaică rise from the pool of blood in the Hall of Blood. Rusted Scrap by the collapsed shelves to the east and another in the barrel alcove of the passage to the Distillery; Handgun Ammo ×10 on the table at the south end of the central aisle; crates on the northeast and west barrels. In the Distillery 4 more Moroaică emerge from the blood (one more in the southeast room on Village of Shadows). Gunpowder on the southwest boxes; crates in the small elevator room and on the northeast shelves. Ride the lift at the far end.
Terrace (2F). At the top, turn around: Herb on the ground on the west side. On the left, before the plank bridge, is the Terrace Room: typewriter and 1,000 Lei under the northwest desk (Standard only). Save. Cross the planks: cutscene of Lady Dimitrescu on the phone. The southeast vase on the balcony has Handgun Ammo.
Dimitrescu’s Chambers. Alcina Dimitrescu’s Diary (#16) on the couch in front of the windows. Dimitrescu’s Key hangs on the southwest wall. Break windows 9 and 10 in the room and window 11 at the end of the outside balcony. In Dimitrescu’s Bathroom, the cabinet drawer holds the Lady’s Lipstick (6,000). Use the key on the gilded north door, next to the giant dress: Lady Dimitrescu bursts in and knocks you through the floor.
Dungeon (B2): the severed hand. Leave the cell to the right: Gunpowder in the northeast wooden bucket. There is a crate in the tunnel room (Lei, according to TheGamer). Crawl through the hole in the wall and pull the lever on the right to open the gate. In the southeast room, Chem Fluid in the north alcove and a crate with 1,000 Lei (Standard only). Follow the candles to the east lever: cutscene, Lady Dimitrescu cuts off Ethan’s hand. You can’t heal or shoot until you get it back (after the Mask of Sorrow), and on Village of Shadows you start this in red health. The chase:
- Lead her around the loop: always leave by the archway she does not come through.
- Get back to the lever and pull it again. The gate rises very slowly.
- Take her around the loop once more and go through the door by the lever once the gate is up.
On Village of Shadows a Moroaică appears with her at the lever and another rises on the north side.
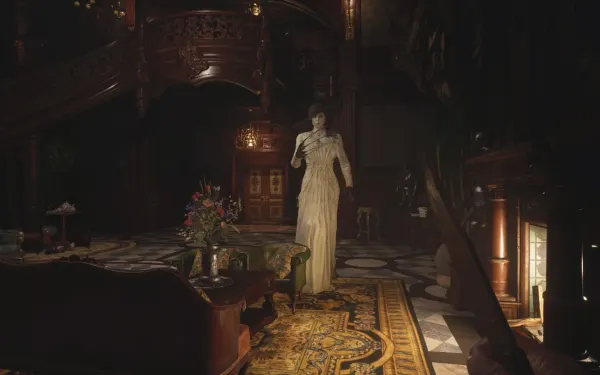
Hall of Sorrow. Go down the stairs and open the door with Dimitrescu’s Key. Take the Mask of Sorrow from the statue in the middle; the lift carries you up to the Courtyard. In the lift, Ethan reattaches his hand with a First Aid Med (cutscene; it doesn’t use yours): from here on you can heal and shoot again. The Courtyard now holds 7 Moroaică (11 on Village of Shadows, plus 2 more after you visit the Merchant’s Room). Clear or avoid them. From here Lady Dimitrescu roams the castle: you’ll hear her music and her footsteps. She can’t be killed or stunned; a head shot only makes her stumble. Guard her claw sweeps, don’t let her reach you up close (she impales you) and slip away by another route. She won’t enter the Merchant’s Room or the Atelier. If a Moroaică gets in her way, she kills it herself. Your first visit to the Duke after the mask triggers a cutscene.
Mask order. This guide does Pleasure → Joy → Rage, like Game8 and TheGamer: the Opera Hall route carries on to the attic and rooftops, so you avoid backtracking. For Dashing Dad (under 3 hours), Game8 recommends Sorrow → Joy → Rage → Pleasure.
Hall of Pleasure. Through Main Hall 2F, go back to the Private Corridor (Cassandra still roams it) and open the formerly locked door with Dimitrescu’s Key. Mask of Pleasure on the south statue: taking it bars the door. Silver Ring (1,800) in the northwest drawer: keep it. Crystal Fragment in the middle of the ceiling. Lei in the southeast vase. Crouch through the fireplace and climb to the Armory: Pipe Bomb ×2 and a Lockpick on the northwest table, Handgun Ammo ×15 (Standard only) and Shotgun Ammo ×2 on the southeast barrels. Cassandra fights you here (see below). Afterwards take the Mounted Animal Skull from above the west fireplace; in Key Items, turn it around and remove the back board to get the Animal Skull. Put it on the Hall of Pleasure statue in place of the mask: the door opens.
Northern Stairwell. On the north side of the Courtyard, open the golden door with Dimitrescu’s Key (clear the Moroaică first). Straight ahead as you enter, on the northeast wall of 1F, is the Castle Map (Annex) (basements B1 and B2). Handgun Ammo ×5 in the north drawer on 1F and Gunpowder in the glass cabinet on the 2F balcony. On 2F, on the table with the clock between two black curtains, is Grand Chambermaid’s Notice (#17): the clue to the Lady’s Lipstick. Break windows 12, 13 and 14.
Opera Hall (2F). Further Observations (#18) is a book on the cabinet at the end of the southeast hallway on 2F: pick it up and examine it. The left walkway leads to the northwest room, with another castle miniature and one Moroaică: the open chest holds the Flower Swords Ball, and window 17 is in that corridor. Windows 15 and 16 are on the south side, before the stairs down to the piano. Crystal Fragment in the ceiling above the small round table to the south. The locked drawer on the northeast balcony holds Sniper Rifle Ammo ×6 (use the Armory’s Lockpick). 2 Moroaică walk the hall.
Opera Hall (1F) and the piano. Gunpowder on a green seat to the northwest, Rusted Scrap in the west fireplace and a vase under the northeast stairs (Handgun Ammo). On the small table by the piano is Insect Observations Journal (#19): pick it up and examine it. Play the 10-note sheet music on the piano. Wrong notes aren’t punished and don’t reset anything: a circle on the sheet shows where your note landed. If it sits below the target note, move right on the keyboard; if above, move left. Game8 numbers the keys and gives 8-5-7-6-6-9-8-9-10-10; other guides count from the leftmost key and give 15-12-14-13-13-16-15-16-17-17 (the same tune shifted 7 keys; trust the circle). The Iron Insignia Key pops out of the piano. Unlock the Opera Hall’s 1F door for a second exit. Lady Dimitrescu may ambush you on the way back up.
Special Chambers (optional, Azure Eye). Keep the Iron Insignia Key: it opens 5 doors, 3 of them outside the castle. Go down the stairs in the Back Storage (the Bela fight room, next to the Kitchen) to the Holding Area (B1) and open the door to the Special Chambers with the Iron Insignia Key. Watch out: on Standard, since you got Dimitrescu’s Key there are 4 new Moroaică in the Chamber of Solace; on Village of Shadows, 4 more in the Holding Area once you have the Iron Insignia Key. As you enter, a fence rises around the sarcophagus:
- Take the Pipe Bomb from the recess in the southwest wall and the Handgun Ammo ×10 from the northwest recess.
- Throw the Pipe Bomb at the cracked wall in the southwest corner. Behind it are a lit brazier, a Crystal Fragment on the boxes and a crate.
- Shoot the unlit hanging torch nearest the fire so it swings in and catches (the shotgun swings it harder).
- Swing the lit torch into the second one; if needed, shoot both until they burn.
- The fence lowers: open the sarcophagus on the east side and take the Azure Eye. Combine it with the Silver Ring: Azure Eye Ring (12,000) and the Repairer challenge.
The attic’s Treasure Map points to this room, but you don’t need it to solve it.
Library and Hall of Joy. Open the Opera Hall’s 2F door with the Iron Insignia Key: Daniela attacks as soon as you enter (see below). The library has Handgun Ammo ×10 on the southern bookcase and another ×10 in the northwest chest of drawers, Shotgun Ammo ×3 on the northeast bookcase and a vase to the southwest. Leave west to the Hall of Joy: Mask of Joy on the north statue and window 18 in the hallway. A door here unlocks back to the Main Hall.
Atelier: the 5 bells. Go through the silver door. Lady Dimitrescu won’t come in here. Handgun Ammo ×15 in the east glass cabinet. Shoot the 5 golden bells:
- On the small table by the entrance.
- On the clockwork seen through the hole in the wall: it swings with the pendulum, so time the shot.
- A tiny hidden bell by the door, on top of the glass cabinet (guides describe it differently: sweep that wall with your sights).
- On top of the chandelier: from the top of the stairs shoot the chandelier once to make it swing, then shoot the bell.
- Outside: go up the stairs, break the skylight (window 19: it’s mandatory, you can’t miss it) and hit the bell outside.
The huge portrait of Lady Dimitrescu opens: climb the ladder.
Attic (RF). Goat of Warding #6: on the large wooden box right behind you at the top of the ladder. On the table in the middle of the north attic, the Treasure Map; on the southwest table, Rumors of a Dagger (#20). Lockpick on the northeast boxes, Gunpowder in the west wooden box and a crate on the middle table (Lei). Careful: a Moroaică lies on the floor in the northeast, playing dead. On a chair in the southwest room, right on your way to the roof, is the F2 Rifle (power 600, 4 rounds). Take it now even if you must rearrange your case: the Duke sells it for 40,000 afterwards. With it, a head shot does ×4.0 to a Moroaică and usually drops her.
Rooftops. As you step out 4 Samcă are flying, then single ones show up by the west elevator tower, at the southwest balcony exit, at its southeast corner and at the southeast balcony. Pick them off with the F2 Rifle at range: the first long-range kill gives Trick Shot. You can also knock them down with the handgun or shotgun and finish them on the ground with the Knife. They may drop a Crystal Wing (2,400), but if they fall off the roof the drop is lost. Crystal Fragment high on the east side of the square tower in the middle (the map stays red until you shoot it down). Gunpowder on the southwest outer ledge of the Belfry. There are vases by the two round watchtowers, on the southwest balcony and at the west elevator tower; TheGamer got Lei, Handgun Ammo and Sniper Rifle Ammo, two of them in the shelter before the zipline. The west tower elevator takes you down near the Main Hall: a good moment to visit the Duke and do the labyrinth. Then ride that same elevator back up to the rooftops to carry on toward the Belfry.
The castle labyrinth (optional). In the Merchant’s Room, put the Flower Swords Ball into the miniature and tilt it:
- Roll the ball left, then down (toward you).
- Tilt carefully right to cross the rising and falling bridges: wait until each one is up.
- Roll the ball up (away from you).
- The final courtyard has 3 trap holes in the middle: tilt toward you so the ball hugs the near edge and ease it left to the glowing hole with the red flag.
Reward: Crimson Skull (8,000, sell it on the spot) and the Get the Ball Rolling challenge.
Belfry and Tower of Rage. Cross the rooftops east, go over the sloped roof, keep east and climb to the Belfry (2 vases). Loop around the top and take the zipline to the Tower of Rage: the Mask of Rage is on the statue in front of you. Follow the balcony, kick down the ladder, climb down by the elevator and ride it. A Moroaică now waits in the Kitchen.
Last sweep before the door. Go over the 19 windows and everything on the list below. A PowerPyx reader claims that if you open the Tower of Worship coffin without taking the dagger, the game autosaves and Lady Dimitrescu despawns, but it is unconfirmed: do your cleanup before placing the masks.
Hall of the Four: the masks. First of all, save at the Merchant’s Room typewriter, in a new slot: past this door you climb to the Tower of Worship, where Mutated Dimitrescu waits, and there is no way back into the castle. Facing the door, left to right: Mask of Sorrow, Mask of Pleasure, Mask of Joy, Mask of Rage. If Lady Dimitrescu bothers you, hide in the Merchant’s Room and come back. Past the door are 2 vases and 2 more outside, either side of the steps (Rusted Scrap, Herb, Chem Fluid and Lei, according to TheGamer). Climb into the Tower of Worship and examine the coffin at the back: the poisoned dagger from Rumors of a Dagger (Dagger of Death’s Flowers). Cutscene: Alcina impales Ethan, he stabs her with the dagger and she mutates.
Boss — Bela Dimitrescu
Arena: the Back Storage (1F), a cramped room full of obstacles. The cutscene breaks one window; you break the other. Weak point: the cold; head shots make her stumble. 2,900 HP according to data mined from the game.
- Break the second window as soon as the fight starts (shot or Knife). That floods the room with cold air and counts as window 1. Breaking it doesn’t hurt her: it only makes her vulnerable.
- Keep her between you and the open windows and back away. Don’t try to run past her: she hits you with her sickle as you go by.
- Handgun head shots to save shells; the M1897 at close range breaks up her attacks if she closes in. There is ammo in the room.
- She freezes and shatters. Reward: Crystal Torso (5,000).
On Village of Shadows 2 Moroaică join in: kill them first or retreat to the dungeon corridor to heal.
Boss — Cassandra Dimitrescu
Arena: the Armory (2F), small and full of furniture. She appears halfway into the room. Weak point: the cold behind a cracked wall. 3,400 HP.
- If you have no Pipe Bomb, take the 2 on the northwest table.
- Push aside the yellow-taped shelf on the left wall: behind it is a cracked wall with light coming through.
- Throw a Pipe Bomb at the crack. Cold air pours in. The blast does her no damage.
- Keep your distance (up close she swipes and blinds you with flies), use the furniture to slow her and shoot her head until she shatters. Reward: Crystal Torso (5,000).
If you’re going for the Knives Out challenge (finish the story using only melee weapons, on a later playthrough), you must still blow this wall with an explosive; it doesn’t break the challenge, but check under Pause > Challenges > Knives Out that its counter stays at 0.
Boss — Daniela Dimitrescu
Arena: the Library (2F), round, with pillars in the middle and bookshelves. Weak point: the cold from the dome. 3,700 HP. She uses the swarm far more than her sisters, teleports close to you and her flies block your view when you guard.
- Run straight to the central pillars: one has a lever that opens the glass dome and lets the cold in for a while. Don’t shoot the roof: it won’t break.
- With the dome open, shoot her from range. She runs and hides behind the bookshelves: don’t close in even when she looks weak.
- Circle the room and pick up ammo from the shelves and the vase.
- If the dome closes, wait for the clink of the mechanism resetting and pull the lever again. Reward: Crystal Torso (5,000).
Boss — Mutated Dimitrescu
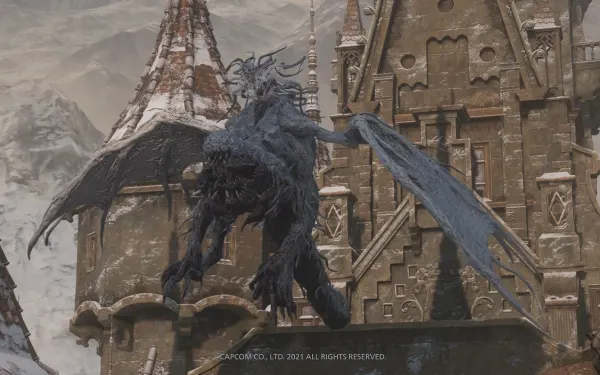
Arena: the Tower of Worship battlements, then the top of the tower. Supplies: on the barrels at the top of the northwest stairs of the battlements, First Aid Med ×1, Shotgun Ammo ×7 and Sniper Rifle Ammo ×15, plus a vase; the tower top has 2 more vases with ammo. Weak point: the human torso on the dragon’s back (×2.0; the dragon body only ×1.2). Explosives do ×2.0 anywhere. 9,000 HP plus a separate 3,500 bar. Weapons: M1897 up close, F2 Rifle while she flies, Pipe Bombs; the handgun alone won’t cut it.
- Back off when she lunges, circle behind her and shoot the torso from behind. She turns with a damaging stomp: step clear.
- When she flies around the tower, shoot her with the F2 Rifle: a good hit stuns her and she crashes onto the tower, exposed. Unload the shotgun or a Pipe Bomb into the torso then.
- Insect swarm while she flies: step into the doorway you came out of (or the small watchtower on the side of the roof, a PowerPyx Village of Shadows tip); the insects can’t reach you there.
- When she says “More blood!” you end up on a stairwell higher in the tower. Don’t spend ammo: climb straight to the top.
- Tower top: she circles outside, then smashes in. It’s tight: strafe to one side and shotgun the torso. When she faces you and glows red she is about to charge: stop firing and run to the other side. Repeat until she falls.
Reward: Crystal Dimitrescu (25,000, automatic) and the That Sucked! challenge. Lady Killer (25,000 CP) asks you to beat her in under 2:30: easier in New Game+ with an upgraded F2 and shotgun. For Knives Out, stay behind her and slash the back leg: she can’t reach you until she turns. On Village of Shadows she is faster and tougher; same pattern.
Afterwards, in the Tower of Worship Crypt, take the Dirty Flask from the south altar: it opens the way out. The castle is closed for the rest of the playthrough. Chapter 5 starts at the Craftsman’s House, by the river.
Don’t leave without: the 19 windows (1 Back Storage, 2-3 Dining Room, 4-5 Southern Stairwell, 6-8 South East Wing, 9-11 Dimitrescu’s Chambers, 12-14 Northern Stairwell, 15-17 Opera Hall 2F, 18 Hall of Joy, 19 Atelier) · Goat of Warding #5 (Torture Storage) and #6 (Attic) · files #9 to #20 · the 9 Crystal Fragment pickups (Elevator Room, Northern Corridor cabinet, Main Hall 2F frame, Tasting Room tunnel, Dining Room ceiling, Hall of Pleasure ceiling, Opera Hall ceiling, Special Chambers and the Rooftops tower) · Azure Eye + Silver Ring · Wooden Angel Statue · Lady’s Lipstick · Crimson Glass · the labyrinth’s Crimson Skull · F2 Rifle · LEMI - Recoil Compensator.