Chapter order: Craftsman’s House (typewriter, outhouse 3) → river cave (3 fish, Winged Key) → Ceremony Site → Lone Road (Lycans, Goat of Warding #7) → Altar (the Duke, Head Flask) → Maiden of War → Leonardo’s House (outhouses 4 and 5) → Church (Church Computer) → Workshop (M1911 and Jack Handle, code 070408) → ambush → tractor → West Old Town (Armored Lycan, outhouse 6) → Luthier’s Yard (outhouse 7, Goat of Warding #8) → Iron Insignia gate (Well Wheel) → Eugen’s Yard (outhouse 8) → red-chimney house (Four-Winged Key) → optional loop (Crypt Yard and Goat of Warding #9, wells, animals, Luiza’s Heirloom) → the Duke (cooking and marked treasures) → Altar north gate → suspension bridge (Goat of Warding #10).
Prepare: you leave the castle with the Crystal Dimitrescu (25,000 Lei): sell it at the Altar and buy Extra Baggage (M) (30,000), because this chapter is packed with ammo, materials and animals that take up slots. At the Altar also buy the Recipe: Pipe Bombs (2,500): one Pipe Bomb knocks the helmet off the Armored Lycan in West Old Town. Carry at least 1 Lockpick: there are 3 locks here (the Chapel, the West Old Town farmer’s house and Leonardo’s House) and 2 new lockpicks (outhouse 7 and a well). Don’t sell ingredients (Fish, Poultry, Meat, Quality Meat, Juicy Game): you cook them as soon as the Duke opens his kitchen at the end of the chapter, and animals are limited per playthrough. Don’t sell half of a combinable treasure either: the Wooden Animal (Body) and (Head) make the Wooden Goat (15,000); the Madalina (Body) waits for its head in chapter 6; the Necklace with Two Holes becomes part of Dimitrescu’s Necklace (50,000) much later. You can leave for chapter 7 the Luthier’s House (it needs the gardener’s key from chapter 6) and, if you prefer, Luiza’s Heirloom, the wells and the animals; but do the Fallow Plot before Moreau (chapter 8), because after that the Vârcolac Alfa guards it.
Walkthrough
Craftsman’s House. Leaving the castle crypt you carry the Dirty Flask (the Duke will call it the Head Flask). The first hut on the right of the path is the craftsman’s: typewriter and Craftsman’s Note (file 21) on the table on the north side; it talks about delivering something to “the house with the red chimney” through the caves, and that is your goal for the chapter. Rusted Scrap in the cupboard in the west corner. Save here. In the back yard is outhouse 3 of 10, with Gunpowder inside. That yard’s well only opens in chapter 9. Break the padlock on the iron gate with the Knife to go on.
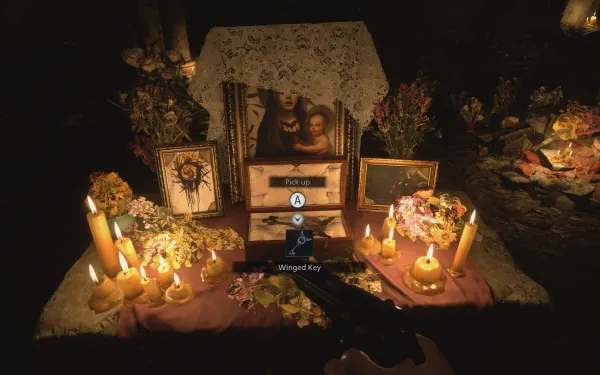
River cave (Cave Passage). 3 Fish swim in the pool in the middle. Crouch and kill them with the Knife from the edge; the first one gives the Hunter challenge (hunt an animal). Take them now: you never come back to this cave. In the Cave Altar the old woman (the Hag) is waiting: a cutscene in front of a mural of the four houses around a pedestal (“a life for a life”). Then open the small chest on the altar: Winged Key. Use it on the gate to leave. You come out at the Ceremony Site; one guide points to Sniper Rifle Ammo up a small path on the right before the stairs (only one source says so: take a quick look on your way).
Lone Road. The road between the Ceremony Site and the Altar, by the river. After the castle 4 Lycans roam it (on Village of Shadows, 3 plus a large Lycan). Shoot one from the bridge with the F2 Rifle and the rest will charge you; go down and finish them with the shotgun. One waits below by the docks.
- Goat of Warding #7: go down the wooden stairs on the left, by the river, to the drawbridge. The goat is in the small dark room under the bridge, beneath the stairs.
- Interior passageways: a wooden crate at the end of the south-west offshoot; another crate in the north-east corner of the north passage (the left opening, guarded by a Lycan); Rusted Scrap in the south-west passage (the first opening on the right).
- Locked chest in the south-east passage (the last opening on the right, the first room on the left coming from the Altar). It needs Luiza’s Key, which comes from Luiza’s Heirloom later. Inside: Cesare’s Goblet (19,000). Mark it and come back.
- The river drawbridge needs the Crank: that is the chapter 9 boat route.
Altar: the Duke. First meeting with the Duke at the Altar, the village hub from now on. He identifies the Dirty Flask as the Head Flask, tells you what it holds and that Rose can still be saved. Place the Head Flask on the pedestal (you can do it later; once all four are in, they form the Giant’s Chalice). Typewriter on the small table next to the Duke. New stock:
- Extra Baggage (M): 30,000 Lei (needs the S). The case grows to 13×8 (104 slots). The most important buy.
- Recipe: Pipe Bombs: 2,500 Lei (Game8 says 3,000). Formula: 1 Gunpowder + 1 Metal Scrap = 1 Pipe Bomb. Recipe number 6 for the Artisan challenge.
- F2 Rifle - High Magnification Scope: 15,000 Lei (more zoom). F2 Rifle - Cheek Rest: 20,000 Lei (less sway). Only if you have spare cash.
- Sniper Rifle Ammo: 1,000 Lei. F2 Rifle: 40,000 Lei, only if you missed it in the castle attic.
- First Aid Med: 1,000 Lei (the price rises with each purchase, per Game8).
The Winged Key has only two wings: the Altar’s other winged gates stay shut. Take the east gate back into the village.
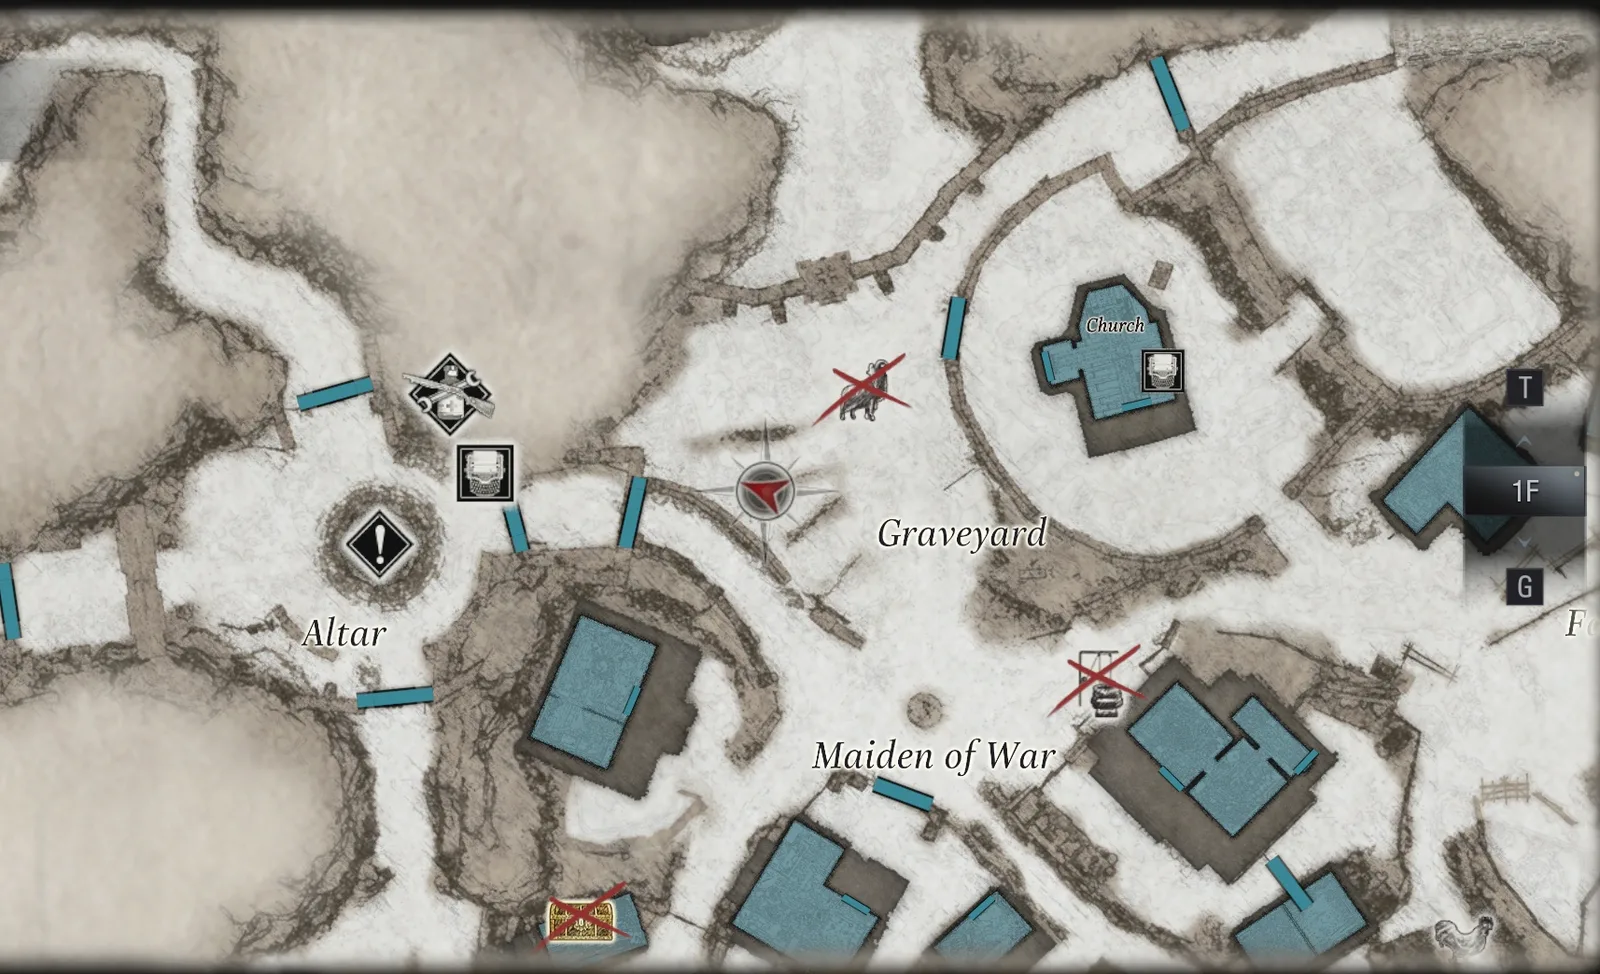
Maiden of War. Time has passed: there are bodies in the streets and the castle drawbridge is still raised. If you didn’t take it in chapter 2, the Crystal Fragment is still on the statue’s shield. Rusted Scrap on the seat of the tractor on the right and Gunpowder on the bench by the big blue metal gates. The well on the east side holds the Wooden Animal (Head), but you need the Well Wheel (later). If you have a Lockpick left, the chapter 2 Chapel still has the locked desk in the back bedroom with Shotgun Ammo ×7.
Leonardo’s House. The house to the right of the Maiden of War, now open.
- Basement (entered from the Maiden of War side): Vivianite (5,000) inside the kiln, south side; Teddy Bear (4,000) in a wooden box on the south-east shelves; Chem Fluid (north-east shelves), Rusted Scrap (north-west shelves), Gunpowder (south-east shelves) and a wooden crate in the south-east.
- Upstairs: Leonardo’s Message (file 22) on the table in the north-west room; it tells you the way to the red-chimney house is cut off and you have to go round through the hole in the stable. Handgun Ammo ×10 in that room’s closet. Shotgun Ammo ×7 in the locked drawer of the north-east room (Lockpick). Wooden Animal (Body) (2,000) on the small desk in the east hallway room.
- Back yard: outhouse 4, with Rusted Scrap inside. Leonardo’s Front Yard: Metal Scrap in a toppled barrel in the south-west corner (keep it for Pipe Bombs).
- Go down to the small barn and push the shelf to get out. A Lycan waits on the other side next to outhouse 5, a green one with a corpse inside. Kill it before you open the door.
Church. Before or after the Workshop, step in: a laptop now sits beside the altar, the Church Computer (file 25), the log of Chris’s team. It wasn’t there on the first visit.
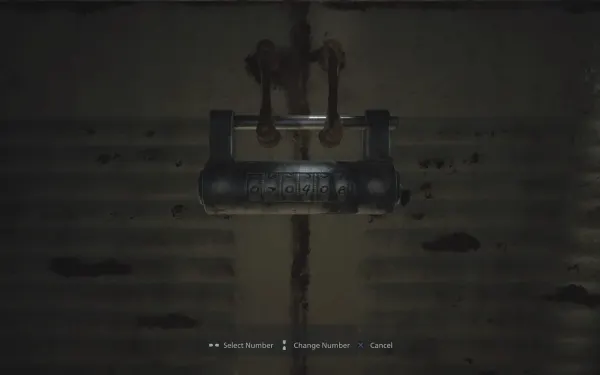
Workshop. In the Workshop Yard break the padlock on the large gate with the Knife. Rusted Scrap by the inaccessible building (south-east) and a wooden crate to the south. Inside the Workshop Building, the locker in the north-east corner has a combination lock:
- Turn over the photo on the workbench.
- Look out of the window: the numbers painted on the frame and on the buildings in the distance line up with the photo.
- Code: 07-04-08 (070408).
While you are inside, a Lycan bursts in through the window (a scripted scare on Standard): be ready. In the locker: the M1911 (automatic pistol: hold the trigger) and the Jack Handle. The M1911 has 160 power (the LEMI, 100) but only 7 rounds: its first upgrade should be capacity (7 → 9 for 6,000 Lei), then power (160 → 170 for 10,000). It has two part slots (High-Capacity Mag. and Improved Grip, later). If you sell the LEMI, the rounds in its magazine go with it: unload it first.
The ambush on the way out. When you leave with the Jack Handle, 4 Lycans show up: 3 on the east side of West Old Town and 1 in the Farmer’s Land (3 there on Village of Shadows). With the M1911 on full auto at their heads and the M1897 for the ones that close in, it’s no trouble. Use the Jack Handle on the jack under the tractor in the middle of West Old Town to lift it, and crawl underneath.
West Old Town, past the tractor. 2 Lycans in the central area (one on top of a tractor: shoot it from range) and 3 Lycans on the west side (4 on Village of Shadows). Take two rights toward the Old Man’s Front Yard, the yard of the house where you got the Knife: the Armored Lycan is waiting there (see below), by the Iron Insignia gate. Outhouse 6 stands right in front of that gate.
Luthier’s Yard. The gate with the note about the missing owners is across the lane, facing outhouse 6. Break the yellow padlock. Inside:
- Outhouse 7 (on the right, south side), with a Lockpick inside.
- Goat of Warding #8: on the roof of the woodstore attached to the shed, between the house and the shed to its right (south-east corner).
- Note on the Luthier’s House (file 23) pinned by the door: the gardener of House Beneviento holds the key. The Luthier’s House only opens in chapter 7.
- A wooden crate on the east side.
- Luthier’s Shed: 1 Lycan. Gunpowder on the animal cages. Break the stack of boxes in the south-west: Handgun Ammo ×25 and the Madalina (Body) (3,000).
Woodcutter’s Shed (Iron Insignia gate). Open the gate with the Iron Insignia Key from the castle piano. The house right behind it, before the yellow ladder, is the woodcutter’s shed: Well Wheel on the barrels at the back, a wooden crate by the door and Metal Scrap on the roof (climb the outside ladder). The Well Wheel opens the marked wells in the village (list below).
Eugen’s Yard. Climb the yellow ladder and drop into the yard. 3 chickens = 3 Poultry: kill them with the Knife or a shot. Outhouse 8 (white, south-west corner), with a Large Crystal (3,000) inside. Gunpowder on the rusty cooker in the open shelter (east side). In Eugen’s Shed, 1 Pipe Bomb on the workbenches. The yard’s gate to the Maiden of War opens from this side: open it, it’s a shortcut.
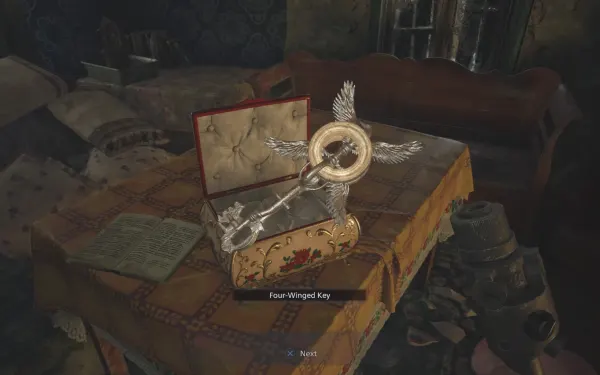
The red-chimney house (Eugen’s House). The door is locked. Walk round the house, climb the ladder at the back onto the roof and follow the yellow cable to the hole in the roof: drop in. There is 1 Lycan inside. Handgun Ammo ×15 in the closet in the north corner. On the central table: Eugen’s Diary (file 24; it tells how Miranda turned the baby into a white crystal and split her parts between the Lords in flasks) and a jewelry box with a key piece. Examine it: it joins the Winged Key and forms the Four-Winged Key.
Optional loop through the village (do it now or in chapter 7). All of this is already open, and it is where the chapter’s money and extra health come from:
- Crypt Yard (the Iron Insignia gate north-east of the church yard; also reachable from behind the church): Goat of Warding #9 on the ground behind the easternmost crypt (go in and turn right, between the crypt and the wall). 2 chickens = 2 Poultry. Herb in the south-east corner, a wooden crate between the crypts and a Large Crystal (3,000) set in the arch above the entrance gate: shoot it.
- Wells (Well Wheel):
- Maiden of War, east side: Wooden Animal (Head). Combine it with the Body in the inventory: Wooden Goat (15,000) and the Repairer challenge if you didn’t have it yet.
- West Old Town Farmer’s Land, in the middle: Lockpick.
- Behind the Church (Church Courtyard): Necklace with Two Holes (4,000). Don’t sell it: it is part of Dimitrescu’s Necklace (50,000).
- Fallow Plot Shed Yard, next to Luiza’s house: 3 Pipe Bombs.
- West Old Town Farmer’s House (the first house in the village): the chapter 2 locked drawer holds Sniper Rifle Ammo ×7 (Lockpick). In the Farmer’s Shed, a black pig = 2 Meat (spare it and it runs out into the yard). In the Farmer’s Barn, shoot the yellow hanging birdcage under the roof: Shotgun Ammo ×4. There is a new crate in the Farmer’s Yard (east).
- Graveyard: the Juicy Game is a blue bird in the tree to the north-west, directly left (west) of the castle gate: bring it down with the F2 Rifle. It is a unique ingredient: there is only one per playthrough. Shoot the hanging birdcage in the tree above the north-east path. There are 4 crows here and 2 more as you enter the field: the easiest way to get Squawk Shot (5 crows in flight); if you miss, restart from the checkpoint.
- Drawbridge moat: 3 Fish in the water left (west) of the raised bridge. Stepping into the water brings 2 Lycans into the graveyard.
- Fallow Plot: 4 Samcă fly overhead. Snipe them from range with the F2 Rifle (they drop Crystal Wings worth 2,400, Lei, materials and herbs). A hanging birdcage in the tree by the Fallow Plot Shed. In the Fallow Plot Shed Yard there is a white pig = Quality Meat (the only one in the playthrough); reach it through the shed’s back window. In the Chicken Yard (the dead end south of the Fallow Plot): 2 Poultry and Rusted Scrap. On Village of Shadows, 2 large Lycans lurk in the tall grass.
- Luiza’s Heirloom (marked treasure). On the porch steps of Luiza’s burned house there is a jewelry box: Luiza’s Necklace. Examine it in key items: the first time gives the Necklace Stone (8,000); the second, Luiza’s Key. Take it to the Lone Road chest: Cesare’s Goblet (19,000). The yard also has Magnum Ammo ×2 on a barrel by the gate, Handgun Ammo ×30 on the table (north) and Explosive Rounds ×2 on the bench: keep those last two for guns that come later. Do it before Moreau: after that, the Vârcolac Alfa guards the Fallow Plot.
Back to the Duke. Talk to him at the Altar: he explains the four Lords and the four flasks, opens his kitchen (The Duke’s Kitchen) and marks the treasure chests on your map. Dishes and effects (permanent):
- Herbed Fish (health +): Fish ×3 + Poultry ×2. Cook it now: you have 6 fish and 7 birds if you did the loop.
- Bird and Beast Pilaf (less damage while guarding): Poultry ×4 + Meat ×1.
- Three-Flavored Mititei (health ++): Fish ×4 + Poultry ×2 + Meat ×3.
- Tochitura de Pui (health +++): Poultry ×4 + Meat ×3 + Juicy Game ×1.
- Ciorba de Porc (much better guard): Fish ×1 + Meat ×5 + Quality Meat ×1.
- Sarmale de Peste (movement speed): Fish ×6 + Finest Fish ×1 (the special fish comes later).
This chapter gives you only 2 Meat (the black pig); the black goat in chapter 7 gives 2 more. Keep the Juicy Game and the Quality Meat until you can complete their dishes. With spare cash, raise the M1911’s capacity and the M1897’s power (640 for 8,000; its ceiling, 800, is barely above the base of the shotgun you get in chapter 6).
North gate and suspension bridge. The Four-Winged Key opens the Altar’s north gate: a ravine of hanging dolls leads to House Beneviento. Before you cross, save at the Altar and heal to full: past the Potter’s Field the path closes behind you and you can’t get back to the village or the Duke until House Beneviento is done, where you lose all your gear and can’t heal. No enemies; the crows drop Lei. Goat of Warding #10: while crossing the suspension bridge, look left (south) at the other, unreachable suspension bridge: the goat sits on it. Shoot it with the F2 Rifle. On the way back it is on your right.
Boss — Armored Lycan
A large Lycan with a helmet and armor in the Old Man’s Front Yard, in front of the Iron Insignia gate (2 of them on Village of Shadows). Slow and very tough (4,000 to 5,000 HP per the game data), it charges head-on. With the helmet on, aim for the body; without it, the head takes ×3 (×3.75 with a shotgun) and the legs ×2.
- Before you get close, have a Pipe Bomb ready (the one in Eugen’s Shed comes too late; craft it with the Altar recipe) or lay a Mine on the path it will take.
- Take the helmet off: a Pipe Bomb or a Mine strips the armor in one go. Without explosives, shotgun the body until it falls off.
- When it charges, sidestep instead of backing up in a straight line; if it reaches you, guard with L.
- Helmet off, go for the head: M1911 bursts or point-blank shotgun blasts while you back off. If it gets too close, shoot its legs to slow it.
- Reward: Perfect Crystal Skull (10,000). It doesn’t combine with anything: sell it.
Don’t leave without: the 3 Fish in the cave (no way back) · Goats of Warding #7–#10 (under the Lone Road bridge, the Luthier’s Yard woodstore roof, behind the east crypt, the south suspension bridge) · outhouses 3–8 (all of them count in a single playthrough for When You Gotta Go…) · the M1911 and the Well Wheel · files 21–25 · the combined Wooden Goat. Leave the Luthier’s House for chapter 7 and, if you ran out of time, Luiza’s Heirloom, the wells and the animals.