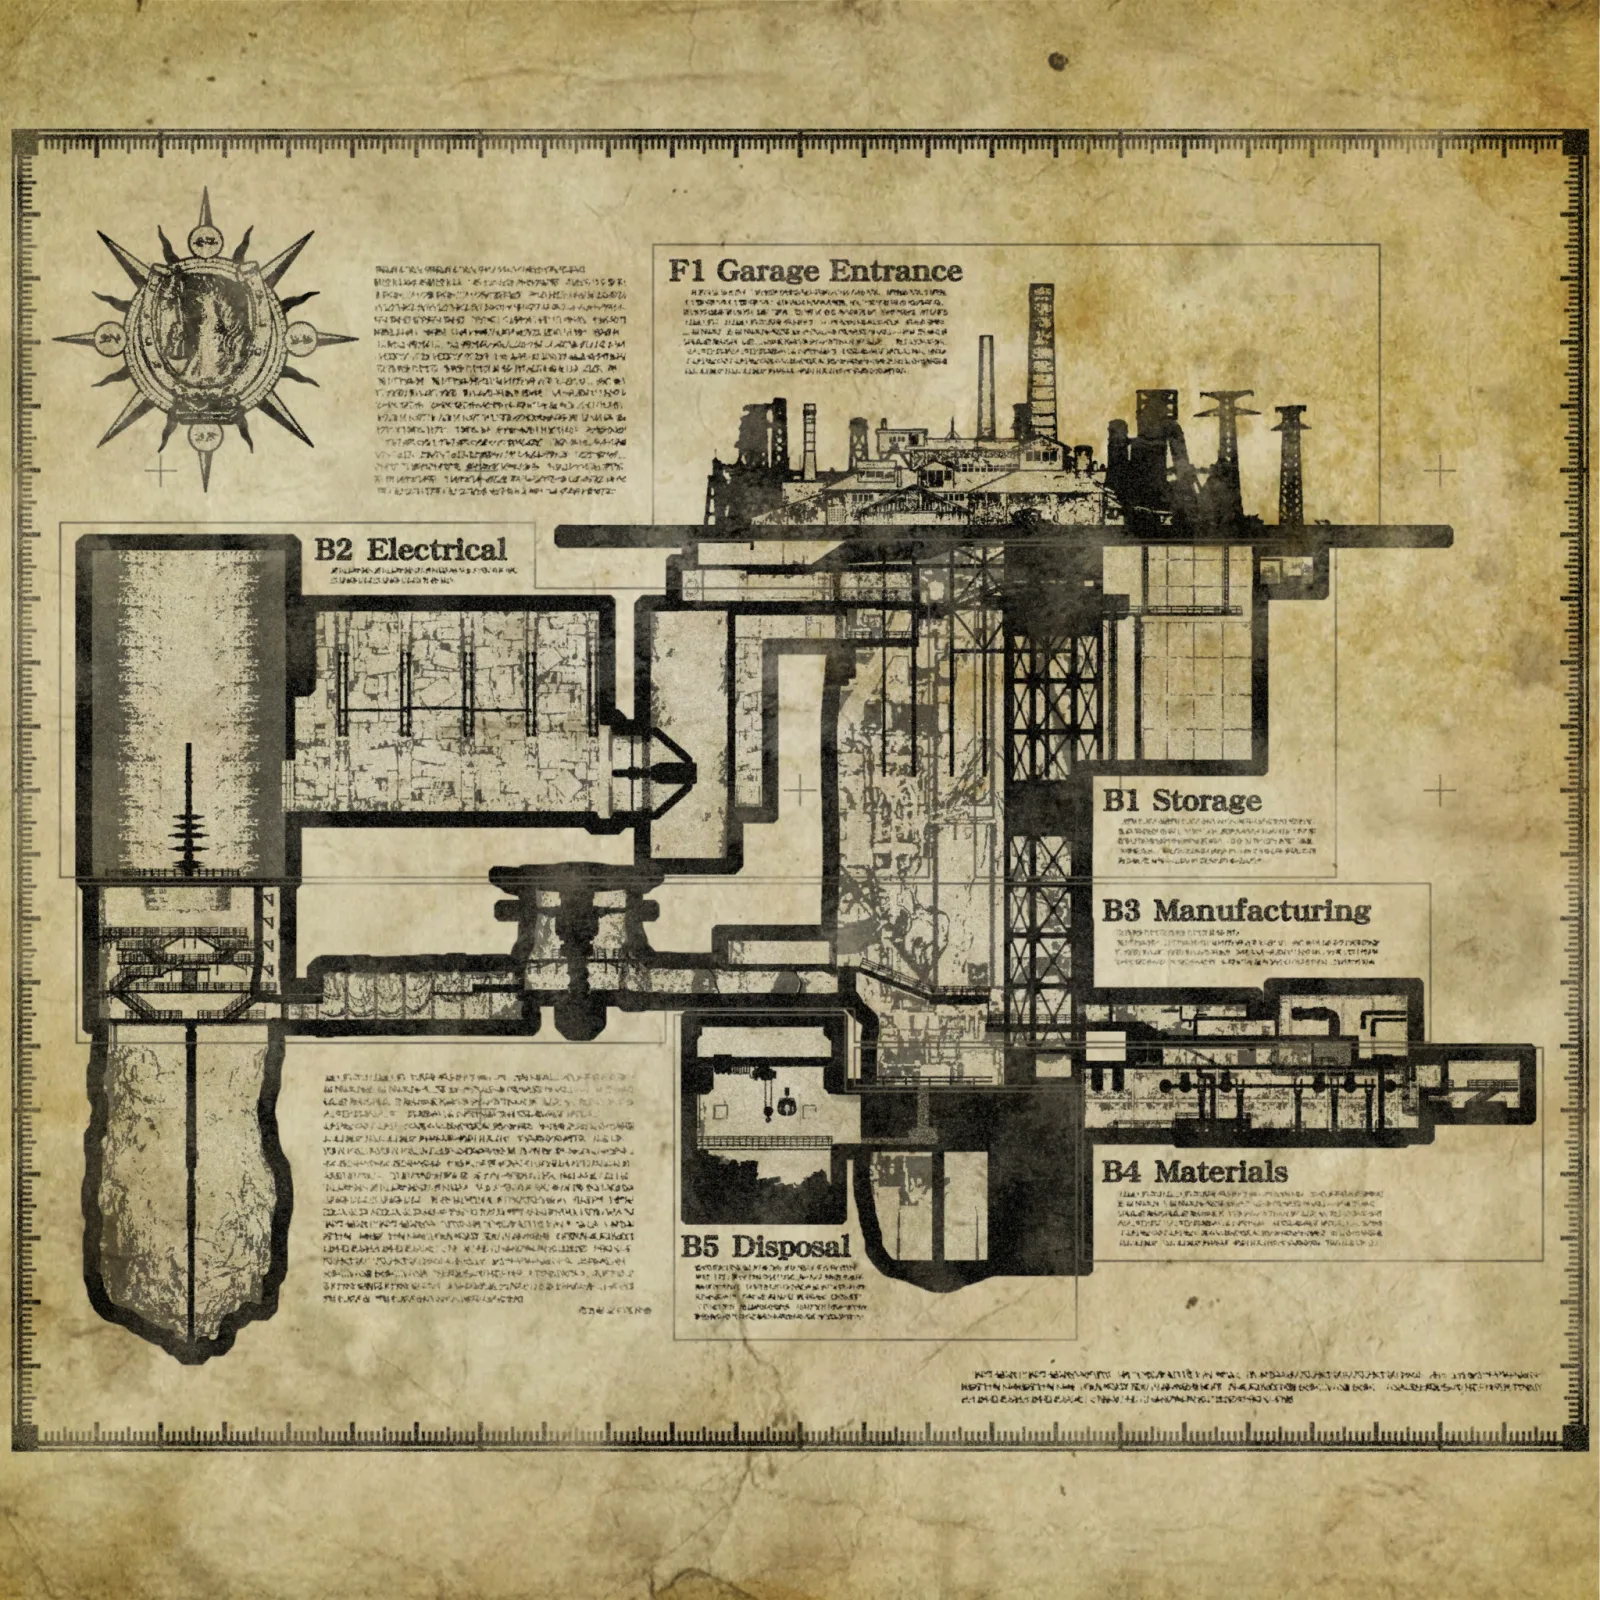
You are still Ethan, and now there is no turning back: placing the Giant’s Chalice at the Ceremony Site takes you down into Heisenberg’s Factory, a complex of basements (B1 to B5, with the MB3 and MB4 mezzanines) that plays like a maze of doors with red lights. Its hub is the Foundry: the casting machine turns four molds (Relief, Cog, Ball and Key) into the parts that open each area. Sturm hunts you, you run into the Soldats (Eins, Zwei, Jet and Panzer), and the Duke waits in the cargo elevator that links the floors. The chapter ends with Sturm in the B1 Maze and Mutated Heisenberg, fought from Chris’s tank.
Chapter order: Ceremony Site (Giant’s Chalice) → Ancient Bridge (typewriter) → Study (Heisenberg) → Sturm chase → Disposal Chamber → B4: the Duke → Examination Room (Relief Mold) → Foundry (Relief of a Horse) → Engine Room → cracked wall (Mechanical Part (Cylinder)) → MB4 Storage (Cog Mold, file 37) → Backup Generator (Large Cog: power returns) → Large Power Regulator Room → Operating Room (M1851 Wolfsbane - Long Barrel) → Boiler Room → second chase → Construction Tunnels → Grinder Shaft (2 Soldat Jet, file 38) → B2 Storage (Ball Mold) → Ventilation Duct (Goat #17) → B1 Storage (Key Mold) → Goat #18 → Foundry (Heisenberg’s Key, Iron Horse Ball) → Heisenberg’s Quarters (Mechanical Part (Shaft)) → Soldat Panzer → The Iron Tower labyrinth → Duke → Power Room (file 39) → Sturm → Cargo Control Room (file 40, Goat #19) → Cargo Bay → Scrapheap (Chris, file 41) → Mutated Heisenberg.
Before you start: placing the Giant’s Chalice at the Ceremony Site is the game’s point of no return: afterwards you never roam the village again, and there is no chapter select after the credits. Before you do it, finish everything from chapter 9 (Moreau’s Laboratory, the river, the Riverbank Treasure House) and Otto’s Mill: without those optional areas Mapmatician will not pop. Save in a separate slot before you go down. Carry 2 Lockpicks: the factory’s two locks (a fridge and a drawer) come before the 2 Lockpicks you find inside. Keep 2 explosives (Pipe Bomb or GM 79 Explosive Rounds) for the two cracked walls with a yellow X, plus Mines and Pipe Bombs for the Soldat Panzer. Save the M1851 Wolfsbane ammo for Sturm and the F2 Rifle ammo for Heisenberg’s on-foot phase. Arrive with case space and money: the SYG-12 costs 180,000 and its SYG-12 - Red Dot Sight 42,000. You can ignore almost every Hauler: they are slow. Lost once you use Heisenberg’s Key on the B1 door: everything in the factory before Sturm (the Operating Room, Heisenberg’s Quarters, the labyrinth, Goat of Warding #17, hanging birdcages #9 and #10; Goat #18 gets a second chance from the tank).
Ceremony Site and the factory entrance
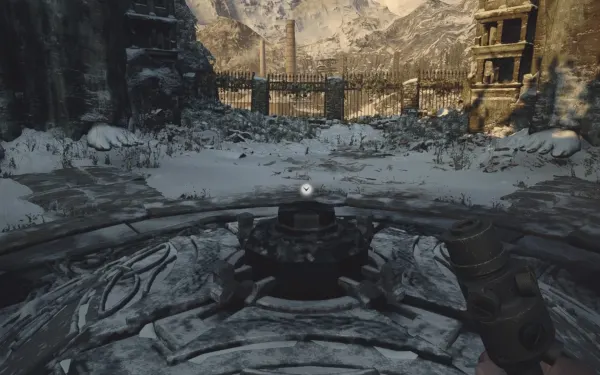
Ceremony Site. At the end of the Lone Road, place the Giant’s Chalice on the stone dais in the middle of the stone circle. Challenge Temporary Measures. The centre platform lowers and carries you down to the factory.
Ancient Bridge. Typewriter on the barrel at the northeast end of the bridge: save. The Front Yard has no enemies; open the bonnets of the rusted cars either side of the doors: Metal Scrap and Rusted Scrap.
Garage Entry and Study. Gunpowder on the southeast shelves of the Garage Entry. Go downstairs, turn left and follow the corridor round to the Study (1F): Chem Fluid on the southeast table. Examine the cloth over the photo board on the right: a cutscene with Heisenberg, and Ethan drops to a lower floor.
The first Sturm chase
Sturm chase. Sturm chases you through the B1 Maintenance Passage. You cannot fight it: if it touches you, you die. Route: run straight toward the red light and take the first right; climb the stairs on the left, hop off and turn right; go straight on and crouch under the beam; ahead and left to a dead end; use the chute on the right. On Village of Shadows 2 Haulers block the way: knock them down or stun them and keep running.
Disposal Chamber (B4). Climb the corrugated sheet on the right, then left. Gunpowder on the oil barrels at the end of the climb, Metal Scrap in a car bonnet, Rusted Scrap ×3 and a crate to the northwest. 3 Haulers on the upper northwest platform. The Hauler (1,100 HP) wears a cranial helmet that hits knock off; even so, the head is its weak point: one F2 Rifle head shot kills it, and a shotgun takes 2. It drops Lei, Chem Fluid, Herbs and sometimes a Polycrystal Skull (3,500), which sells to the Duke. A crate by the vent holds Explosive Rounds. Crawl through the vent and climb the ladder.
B4: the Duke and the cargo elevator
The production line. At the top you see rows of Soldats hanging from the line. Shoot the rope above one to drop it: challenge Quit Hanging Around (3,500 CP). You can also see them from B3.
The Duke (B4). He is in the big cargo elevator, with a typewriter on the round table next to him. New stock:
- SYG-12 (180,000): semi-auto shotgun, power 1,160, capacity 10, 12 slots. It is the pick for Sturm and Miranda. With the SYG-12 - Red Dot Sight (42,000) that is about 222,000.
- V61 Custom (120,000 per Evil Resource (ER); Game8 says 180,000): full-auto machine pistol. On a first-run budget the SYG-12 gives more. The V61 Custom - Gunstock (35,000) only reduces recoil.
- M1851 Wolfsbane - Increased Capacity Cylinder (100,000): cylinder 5 → 7. Too expensive for the ammo there is.
- Extra Baggage (L) (50,000): only if you are short of space.
The V61 Custom, its Gunstock and the Increased Capacity Cylinder are on sale from this first visit (ER and Game8); only PowerPyx lists them as NG+ purchases, while planning trophies. They are available, but not worth buying on a first run: keep that Lei for the SYG-12 and its upgrades. If you cannot afford the SYG-12, upgrade the W870 TAC and the F2 Rifle. Sell the Crystal Mechanical Hearts as they drop.
B4 Vacant Room and B4 Storage. The room opposite the elevator holds The Iron Tower labyrinth on its north side (no ball yet) and Rusted Scrap on the west bench. Its east room is the B4 Storage: Chem Fluid on the north metal shelves. The B4 Walkway, the elevator’s walkway, has a crate in the southeast corner.
Doors with red lights. Doors with red lights are locked: shoot or knife every light. The first one, right of the Duke, has 3; later ones have 2 and 5.
From the elevator to the Foundry
To the Foundry. From the elevator, go through the 3-light door right of the Duke:
- B4 Passage: a corridor, empty for now.
- B4 Workshop: Gunpowder on the north workbench.
- B4 Stairs: 2 Haulers by the B4 Workshop door. The stairs climb to the MB4 level; according to Gamepressure you pass the Lift Controls, still unpowered.
- Materials Room (MB4): 2 crates in the northeast and southeast corners of the lower level. This room’s Yellow Quartz can only be reached once the power is back (see below).
- Foundry.
Foundry: the Relief Mold
Foundry (MB4). The casting machine is on the east side: it turns every mold into its part. 2 Haulers by the Materials Room door. Chem Fluid on the shelves of the x-ray bench (southeast), Rusted Scrap on the southwest workbench and crates with Lei either side of the door in.
Generator Room Walkway. Take the stairs in the far-left corner. 3 Haulers, Gunpowder on the northeast oil barrel and, in the north passage, a locked fridge: open it with a Lockpick for the Yellow Quartz (10,000). On Village of Shadows a Soldat Jet also turns up here after the Relief Mold.
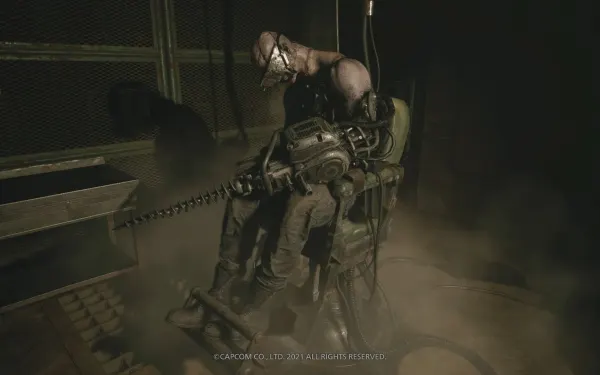
Examination Room. You enter through the south door of the Generator Room Walkway (not straight from the Foundry). A Soldat Eins sits in a chair. In the east room, the large case holds the Relief Mold (Rusted Scrap on the northeast workbench). Taking it wakes the Soldat. The Soldat Eins (3,000 HP) has its weak point in the red reactor on its chest: everything else takes only ×0.4. Shoot the reactor when the drill is not covering it, above all when it rears back to attack; with the W870 TAC that is about 4 reactor hits, and a shotgun blast stuns it briefly. A head shot breaks its control unit: it stops guarding but gets more aggressive. Its drill cannot be guarded. It stays in its zone: outrun it and it returns to its post. It drops a Crystal Mechanical Heart (5,000).
Relief of a Horse. Cast the Relief Mold and set the Relief of a Horse in the wall depression right of the casting machine: a hidden passage opens.
Engine Room, Cylinder and Cog Mold
Private Passageway. Climb the stairs behind the wall. You pass Heisenberg’s Quarters, locked (it needs Heisenberg’s Key; come back later). Locked desk drawer: Magnum Ammo ×3 with a Lockpick.
Engine Room (B4). Climb down the ladder. Moving pistons and gears with 5 Haulers. Shoot the glowing circle on each piston to stop it (one has 5 lights, like the five side of a die), or time your runs and let the machines crush the Haulers. Rusted Scrap on the platform at the top of the north ladder, Explosive Rounds ×1 behind the northeast railing of the central platform and 2 crates (handgun and shotgun ammo). At the end, climb the ladder, pull the grate and crawl through: you come out in a corridor by the Foundry with idle Soldats. Unlock the Foundry shortcut door here.
The yellow-X wall (B4). In the passage by the Backup Generator Room (southwest side) there is a cracked wall with a yellow X. Blow it with a Pipe Bomb or an Explosive Round. Secret room: a large case with the Mechanical Part (Cylinder) (7,000) and Shotgun Ammo ×6. Do not sell it: with the Shaft it makes Heisenberg’s Hammer (45,000).
Backup Generator Room. The generator is missing a cog. Gunpowder on the northwest workbench, a Mine in the northwest locker and a crate to the southeast.
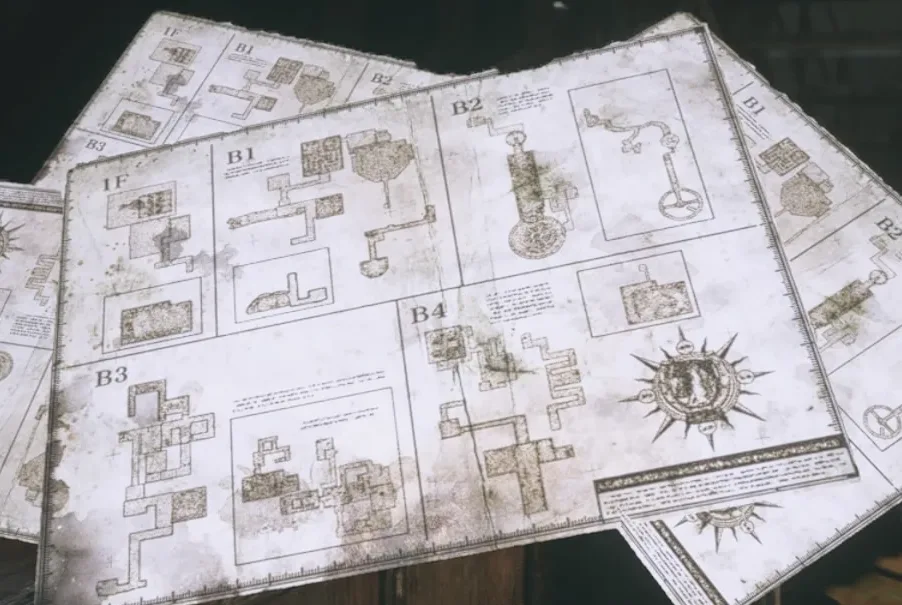
MB4 Storage. Take the stairs down and up to the door with 2 lights (top and bottom). Large case: Cog Mold. Development Note 1 (file 37) on the north bench: it explains that a Soldat stops if you destroy its reactor. Factory Map (Lower Levels) on the southwest table and Gunpowder on the southwest workbench.
The Large Cog. Head back to the Foundry through the Experiment Passage (straight through): the southernmost Soldat Eins wakes as you pass (Crystal Mechanical Heart). Cast the Cog Mold and fit the Large Cog to the Backup Generator: power returns.
With power: the regulators and the Operating Room
With power. The old path is blocked; a new one opens left of the stairs. In the Backup Generator Room a Soldat Eins drops in.
Small Power Regulator Room (B4). 2 Soldat Eins: one patrols the lower level and one drops from above on the west side. The walls have electrical boxes: shoot one when a Soldat is next to it to electrocute and stun it. Gunpowder in the north locker (lower), Explosive Rounds ×2 in the southwest corner (upper) and a crate to the northwest. Village of Shadows adds a Soldat Zwei.
B4 Small Storage. It only opens from the Small Power Regulator Room, so you visit it now, with the power back on. Large Crystal (3,000) on the wall in the northwest corner (Game8: above and right of the doorway): shoot it down. Sniper Rifle Ammo ×5 in the locker in the southwest corner and a crate on the south side. Back in the Small Power Regulator Room, the door with 5 lights is up top.
Large Power Regulator Room (MB4). ER only puts Haulers here on Village of Shadows (3); other guides see them on Standard too.
- Fenced room to the northwest (lower level): a Soldat Eins lies on the operating table. Shoot it awake and let it break the fence (or, once the upstairs Soldat Zwei shows up, see below, lure it into the fence), then kill it. Inside: 12,000 Lei (2 × 3,000 on the floor and 2 × 3,000 on the table) and Magnum Ammo ×2.
- Mines: on the small northwest table (lower) and in the northeast locker of the east section. Yellow Quartz high on the south wall, opposite the foot of the stairs. Shotgun Ammo ×5 in the south locker upstairs.
- Upstairs a container drops onto the walkway and a Soldat Zwei climbs out: two drills and the reactor on its back. Stun it with a head shot (rifle) or an electrical box: it kneels. Circle round and shotgun its back. Explosives are the safest bet. It drops a Large Crystal Mechanical Heart (9,000).
Materials Room. Press the button to lower the platform (it has power now). Yellow Quartz on the underside of the pipe over the south door to the ‘L’ Passage.
Operating Room (MB4). You enter through the Operating Room Entry, off the Generator Room Walkway (the walkway above the Foundry, left of the casting machine); its door only opens once power is back. As you approach, a Soldat Eins bursts out of the south room. In the weapons case on the east side of the south room: M1851 Wolfsbane - Long Barrel (free; +200 displayed power; sells for 36,000). Lockpick on the northeast workbench, Flashbang ×2 and Handgun Ammo ×30; in the entry, Sniper Rifle Ammo ×5 in the northwest desk drawer. Listen to the recording. You can do this now or when you come back with Heisenberg’s Key, but never after using the key on the B1 door.
‘L’ Passage and B3 Storage (B3). Gunpowder, Shotgun Ammo ×4 in the northeast desk drawer and a crate. In the B3 Storage, Gunpowder, Metal Scrap and Rusted Scrap.
Boiler Room (B3). A Soldat Zwei wanders the north room: use the room’s electric trap. Large Crystal Mechanical Heart. Leave through the 5-light door.
Second chase and the Construction Tunnels
Second Sturm chase. In the B3 Maintenance Passage, Sturm bursts through the wall. Run left, crouch under the crossed pipes, climb the stairs and go through the door at the top. In the main hall, pull the lever to bring the Duke’s elevator up to B3: from now on it runs between B3 and B4.
Construction Tunnels (MB3). Climb the ladder; the walkway crumbles: climb down and go into the pipe (a crate with Lei). Haulers: 2 in the south offshoot and 3 in the east cavern. 2 Pipe Bombs in the buckets at the end of the south offshoot and a Herb on its wall. Lockpick in the locker on the east side of the east cavern. Crystal Fragment and Large Crystal by the giant drill. Hanging birdcage #9 in the ceiling of the tunnel into the east cavern (Lei): shoot it down. Crawl into the vent on the far side.
The second yellow-X wall (MB3). When you drop down, turn around: another cracked wall. Blow it: 2 Large Crystals, 1 Vivianite and 1 Yellow Quartz.
Grinder Shaft and B2: the Ball Mold
Grinder Shaft. Climb the balconies toward the spinning grinder. When you go up from the lower level 2 Soldat Jets drop in (4,500 HP each). A red laser marks the line of their charge: step off it or run past them. The reactor is on the chest; wait for it to open its arms to attack and shoot. Explosive Rounds and Pipe Bombs knock them down; a Mine on a balcony helps. Each drops a Large Crystal Mechanical Heart. Gunpowder on the west walkway (reached from the middle of the lower level), Metal Scrap in the southeast junk pile (lower), Rusted Scrap on the second level to the west, and 3 crates. Village of Shadows adds a Soldat Zwei. To stop the grinder, shoot its 4 orange points: three around it and one below; move underneath to see them all. Climb the ladder and walk along the blades.
Grinder Shaft Maintenance Room (B2). At the top of the stairs. Development Note 2 (file 38) on the desk on the south side (lower level), with Chem Fluid in its drawer: it says the Panzer’s armour does not hold up against strong blasts. Factory Map (Upper Levels) on the big boxes under the southwest stairs.
B2 Storage: the Ball Mold. At the foot of the next stairs, push the cart and crawl through the gap. Large case: Ball Mold (optional, for the labyrinth). Gunpowder to the southwest and Handgun Ammo ×30 in the northeast desk drawer. Chem Fluid in the B2 Maintenance Access.
Ventilation Duct (B2). Upstairs, the giant fan sucks Ethan in mid-air: shoot the orb in the centre of the fan before you reach it. When you land, on the “balcony” with yellow excavator shovels on the south edge, is Goat of Warding #17, with Metal Scrap and Rusted Scrap. Yellow Quartz on the northeast side of the broken walkway overhead. Go through the fan, follow the pipes down through the smoke to a ladder and a hatch, and ride the lift up to B1.
B1: the Key Mold and Goat #18
B1 Storage. Large case to the west: Key Mold. Explosive Rounds ×2 in the southwest containers, Shotgun Ammo ×8 in the southeast locker (Standard only) and hanging birdcage #10 in the ceiling of the northeast corner (Herb): shoot it down.
B1 Walkway. Climb the ladder and pull the lever to bring the Duke’s elevator up to B1 (required). From the elevator platform drop along the pipes to a northwest platform: 2 Mines and Shotgun Ammo ×8. In the northeast corner of the main platform, by the elevator, there is a crate. From the northwest platform, zip-line to the Walkway Access: Yellow Quartz on the wall of the upper west platform.
Goat of Warding #18. It sits on the Duke’s elevator shaft structure, on a red railing. Easiest: stand on the B3 Walkway, look up the shaft and shoot it with the rifle. Otherwise, from the moving elevator between B1 and B3: it is visible for about 2 seconds, so have the shotgun ready and ride again if you miss. Second chance: it is still there when you ride up in the tank at the end of the chapter.
Back to the dark Foundry
Back to the Foundry. Ride the elevator down to B4 and repeat the earlier route (B4 Passage → B4 Workshop → B4 Stairs → Materials Room). After the Key Mold the Foundry area is dark and there are 2 new Soldat Eins (each drops a Crystal Mechanical Heart). It is the most awkward fight in the factory: save at the elevator first.
- The one in the Materials Room (the room before the Foundry) glows in the dark, swings wildly and always finishes with a lunge. Back up, let it miss and shoot the chest reactor right after the lunge. Use the long corridors behind you to make room.
- The one in the Foundry bursts out of the door. Don’t go in after it: let it come to you, blind it with a GM 79 Flashbang and unload into the reactor.
- According to the game data, the one that comes out of the Foundry has 1,500 HP and the other 2,000: well below the first one’s 3,000. Their drill still cannot be guarded.
Then cast the Key Mold (Heisenberg’s Key) and the Ball Mold (Iron Horse Ball) at the machine.
With Heisenberg’s Key: Quarters, Soldat Panzer and labyrinth
Heisenberg’s Quarters (MB4, optional). Open it with Heisenberg’s Key. 4 Haulers. In the large case in the middle, the Mechanical Part (Shaft). Gunpowder and 2 Rusted Scrap on the northeast trolley; Rusted Scrap on the northwest bench. Combine the two parts: Heisenberg’s Hammer (45,000). It counts toward Treasure Hunter and, if it is your first combination, gives Repairer. If you skipped the Operating Room, do it now.
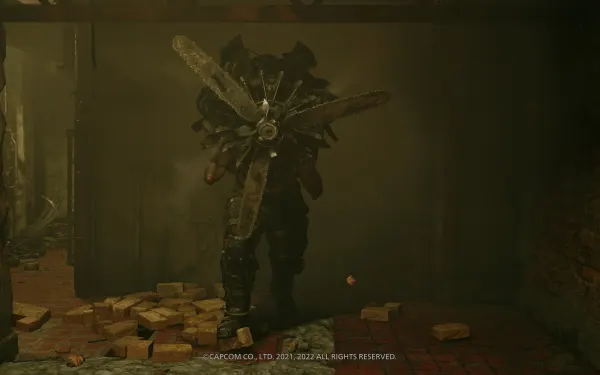
Soldat Panzer. After Heisenberg’s Key one appears in the Materials Room and, per ER, another in the B4 Passage or the B3 Maintenance Passage (only in whichever you reach first). Game8 counts only one on Standard. It is fully armoured with three drills per arm and charges in a straight line. Normal bullets bounce off: strip the armour with explosives (about 2 GM 79 Explosive Rounds, Mines, Pipe Bombs), then shoot the chest reactor. The blasts that strip the armour do no HP damage (5,000 HP). It follows you everywhere except to the Duke: if it pushes you, get into the elevator. Stripping all its armour gives challenge Strip Miner (2,500 CP). It drops a Perfect Crystal Mechanical Heart (25,000). Village of Shadows adds another by the casting machine.
Labyrinth 4: The Iron Tower. In the B4 Vacant Room, opposite the Duke’s elevator. Insert the Iron Horse Ball. Several guides rate it the hardest of the four; take it slowly:
- Top level: move the ball slowly around the circle. At the very end, where you tilt right, do not let it roll off the edge.
- Middle level: tilt into the rotating gear and keep the ball pressed against its sides while it carries it. Rotate the camera: it is hard to see. It eventually settles at the back.
- As it circles round the back, slow down before the next drop.
- Wait for the orange trolley below to move all the way right before dropping to the lower level.
- Pass through the trolley on the left and drop one last time into the goal.
Reward: Bister Skull (30,000). If it is your first labyrinth, challenge Get the Ball Rolling (1,500 CP).
The Duke: the factory’s last shop. Sell the Crystal Mechanical Hearts, the Large and Perfect Crystal Mechanical Hearts, Heisenberg’s Hammer, the Bister Skull and the crystals. Buy the SYG-12 if you still do not have it, First Aid Meds, shotgun and rifle ammo, and Mines or Pipe Bombs. Save. The next shop is at the Altar, after Chris’s mission. Ride up to B1.
Power Room: the door with no way back
Power Room (B1). Using Heisenberg’s Key on the B1 door (golden horse icon, by the elevator) locks you into the Sturm fight with no way back. Finish the Operating Room, Heisenberg’s Quarters, the labyrinth and your shopping first. Inside: the Sturm file (file 39) on the fan unit (east), a hint for the fight. First Aid Med and Handgun Ammo ×25 on the northwest desk, a Mine in the northeast locker and 2 crates.
After Sturm: Cargo Control Room to the Scrapheap
Cargo Control Room (B1). After Sturm, leave by the northeast. Heisenberg’s Diary (file 40) and the Cigar (3,000) on the northeast metal desk; Chem Fluid in the southwest locker. Crouch through the gap right of the file: B1 Small Storage. Goat of Warding #19 on the oil drum in the northwest corner (Game8: on the table). Chem Fluid on the southeast drum, Herb by the south vent, Metal Scrap on the north desk and Shotgun Ammo ×7 in the northwest desk drawer. You only pass through once: the factory is one-way from here.
Cargo Bay. Drop in (2 crates with supplies), climb the ladder on the south side, balance across the beam and use the boom-arm lever to be lifted up. The east door leads to a cutscene with Heisenberg and his iron giant; Ethan is knocked to the bottom.
Waste Runoff and Scrapheap (B5). Pull the grate, crawl through and examine the debris: a cutscene with Chris Redfield. In the Scrapheap: Chris’s Computer (file 41), the laptop in the middle (read it before you board the vehicle); typewriter mid-room; First Aid Med on the northwest table and a crate to the northwest. Heal before you board: you cannot heal in the vehicle, not even from the inventory. Save. Drive the tank into the cargo elevator (second chance at Goat #18: shoot it from the tank, watching the left side as you ride up) and, at the top, blast the door with the cannon.
Boss — Sturm
The B1 Maze: narrow corridors whose walls Sturm smashes as it charges. It has 15,000 HP. Its weak point is the red reactor/turbine on its back (×2.0); arms, torso and legs take ×0.6 and bullets on the propeller do nothing. From the front it is invulnerable. Maze pickups: Handgun Ammo ×30 on the pipes by the northeast door, a Mine on the southeast pipes and Sniper Rifle Ammo ×10 on the pipes on the northeast wall. For reference, at the start of Standard it takes about 5 M1851 Wolfsbane shots to the reactor.
- Let it smash walls early on: it gives you room to dodge.
- Stand with your back to an unbreakable wall. It revs up before charging and cannot turn mid-charge: sidestep at the last moment and it gets stuck in the wall.
- Run round behind it and unload into the red turbine on its back: M1851 Wolfsbane, SYG-12 or W870 TAC, or Explosive Rounds. The shotgun spends less ammo than the V61 Custom.
- Mines on its charge path stun it. A GM 79 Flashbang blinds it and it ends up walking into a wall: use it to get behind.
- Burning phase: after enough damage it overheats and catches fire. It uses a flamethrower (it revs the propeller; the fire lingers on the floor) and makes three charges in a row: the first two blind, the third at you. Take cover behind a wall, draw the fire to one side so the flames do not sit in the middle, wait for the third charge and punish it when it sticks. The jet only tracks you until it ignites: then it stays still and you can circle round it.
- Reward: Complex Mechanical Heart (45,000).
On Hardcore and Village of Shadows the charge can kill you in one hit and it barely shows its back: shoot the legs (×0.6), which still do damage (bullets on the propeller do not count), and listen for the fire wind-up to dodge it. For Knives Out, let it hit a wall, crouch behind it and knife the orange dot.
Boss — Mutated Heisenberg
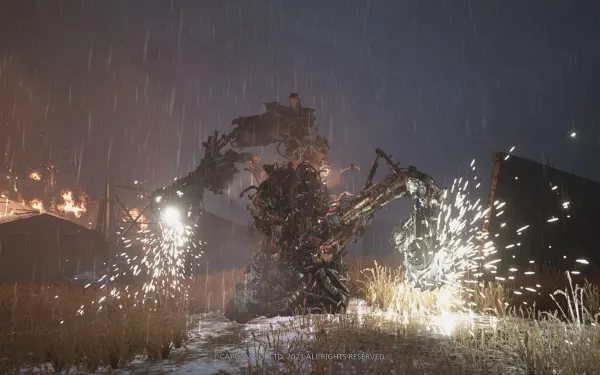
The factory entrance’s Back Yard: a huge open field. He has 100,000 HP; at 9,000 his health locks and the on-foot phase starts, so the tank does almost all the work. You cannot heal in the tank. According to PowerPyx the game heals you before this fight, but that is unconfirmed: if you are low on health, heal before you board.
The tank: an infinite machine gun that never overheats; an infinite cannon with a long reload after each shot; and guard (L), which also swings the chainsaw and blocks his blade and saw strikes. The cannon does twice as much damage on a weak point as on the body.
- Machine-gun the red or orange weak points: one on each arm and one at his base. Breaking one stuns him briefly; take the arms off first.
- When he charges or winds up a strike, hit him with the cannon: it staggers and interrupts him. While the cannon reloads, drive sideways and guard.
- Wall of sheets: he raises a wall of metal sheets, then fires them at you. Stop it by damaging his visible head or with a cannon shot to the face. The sheets that stick in the ground become cover from his lunges. If he fires drills, shoot them down with the machine gun.
- Scrap tower: he builds a tower and slams it down: move sideways, the arena is huge.
- Blade tornado: near the end he forms a whirlwind that drags the tank in: fire the cannon straight at his head as soon as it is ready. A cutscene throws Ethan out.
- On-foot phase: he has far less health left (the last 9,000, at ×2.0 from any gun). Ammo is hidden behind the sheets stuck in the ground: Explosive Rounds ×2 (east), Handgun Ammo ×30 and Shotgun Ammo ×15 (southwest), Sniper Rifle Ammo ×12 (northwest) and ×8 (south).
- Run far, turn and put the F2 Rifle in his face: a few shots do it. The M1851 Wolfsbane to the face works too. GM 79 Explosive Rounds interrupt his blade attacks, and the shotgun works when he misses up close. When a third arm forms above him, shoot the weak spot at its base. You cannot use Mines here; Pipe Bombs work. Use the sheets as cover while they last.
- He drags you in again: final cutscene, Ethan finishes him with the cannon.
- Reward: Crystal Heisenberg (70,000) and challenge Iron Giant Down. Beating him in under 4 minutes gives Blitzkrieg (15,000 CP).
On Village of Shadows, 3 hits kill you even while guarding: only fire the cannon when he attacks with his right arm, and dodge the left. For Knives Out the tank’s weapons are allowed; on foot, knife only.
Don’t leave without: the fridge’s Yellow Quartz and the drawer’s Magnum Ammo ×3 (2 Lockpicks) · the Mechanical Part (Cylinder) and the crystals behind the MB3 wall (2 explosives) · the 12,000 Lei in the Large Power Regulator Room · the M1851 Wolfsbane - Long Barrel · files 37 to 41 and both factory maps · Goats of Warding #17, #18 and #19 and hanging birdcages #9 and #10 · the B4 Small Storage Large Crystal · the Mechanical Part (Shaft) and Heisenberg’s Hammer · the labyrinth’s Bister Skull · challenge Quit Hanging Around. Everything before the Heisenberg’s Key door is lost once you use it.