Where each boss shows up, its weak point and how to beat it step by step.
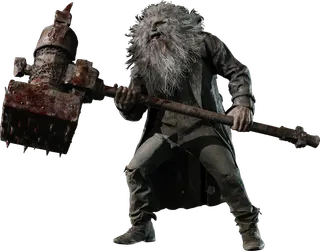
2 · The Village (1st visit) · Lycan Ambush · Luiza's House · East Old Town, the open area between the farmer's house, the stable and the water mill, with houses, rooftops and ladders.
Weak point The head (×2.6 from guns; the rest of the body ×2.0). Explosives do ×2.0 anywhere.
On a first run this is not a fight: it is the Lycan ambush, and you have to survive it. Lycans keep coming until an automatic cutscene; halfway through, Uriaș, the hammer giant, shows up. He hits far harder than the Lycans and chases you swinging his war-hammer.
Killing him is optional and meant for New Game+ with strong weapons or infinite ammo. Leaving him alive costs you nothing: he comes back as a boss in the Stronghold (chapter 10) either way.
- Before you leave, take the M1897 from the table in the middle of the farmer's house. At Standard's starting rank, one un-upgraded shell to the head (840 damage) kills a 700 HP Lycan.
- Fight from the buildings: use them as chokepoints and climb onto the roofs by the ladders if you get surrounded. Shoot the flour sacks (the dust cloud hides you) and the red barrels when several Lycans bunch up.
- Shoot each Lycan in the head before it strikes: it flinches, then lunges to grab you. Hold L at that moment and Ethan kicks it away.
- If you only want to survive: wait until Uriaș appears, stop fighting and run down the path with the water channel between the buildings. That triggers the final cutscene: Ethan is grabbed from behind or hit by an arrow, and every Lycan withdraws.
- If you are going for Timber (New Game+): hole up in the M1897 house, thin out the Lycans and, when Uriaș arrives, unload your strongest gun into his head (Game8 recommends the M1851 Wolfsbane and the GM 79).
- Before you follow the old woman through the gate by the red barrel, pick up everything the Lycans dropped.
Reward: 35,000 Lei if you kill Uriaș (one source adds a Crystal Skull, unconfirmed) and the Timber challenge (20,000 CP). Surviving gives the story challenge Not Lycan This...; killing 30 Lycans during the ambush gives Unstoppable (20,000 CP).

4 · Castle Dimitrescu · Castle Dimitrescu: a chase from the Holding Area (B1), then the fight in Back Storage (1F), a narrow room full of obstacles.
Weak point The cold: break the second window. Her whole body takes ×2.0 from handguns, rifles and magnums, but only ×1.6 from shotguns. Head shots make her stumble.
First she chases you through the Holding Area as an insect swarm: in that form she is invulnerable, and enough damage only disperses her for a few seconds. Run for the south-east stairs; she follows you into Back Storage. When you pull the planks, the cutscene breaks one window and the fight starts.
With the cold in the room she cannot turn back into a swarm and swings her sickle in a frenzy. Break the other window, keep your distance and shoot her in the head.
- Break the second window the moment it starts (a shot or the Knife). Cold air floods the room. Breaking it does her no damage: it only makes her vulnerable. It also counts as window 1 of 19 for Hooligan.
- Back away without running past her: even if you dodge, her sickle catches you as you pass.
- LEMI to the head to save shells (it makes her stumble). Keep the M1897 for when she closes in: it breaks up her attacks.
- Grab the room's ammo between swings (Handgun Ammo ×10 on the table and on the shelf of the south room, Shotgun Ammo ×3 in the corridor).
- Keep shooting until she freezes and shatters.
Reward: Crystal Torso (5,000 Lei). All three daughters' Crystal Torsos are missable: the castle closes at the end of chapter 4.

4 · Castle Dimitrescu · The Dungeon (B2) and, from the Mask of Sorrow on, the whole of Castle Dimitrescu.
Weak point None: she cannot be killed or stunned. Enough damage to the head only makes her stumble for a moment.
Lady Dimitrescu in human form is a stalker, like Mr. X or Nemesis. First she chases you through the Dungeon after cutting off Ethan's hand; then, from the Mask of Sorrow on, she patrols the castle. You hear her music and footsteps before you see her.
Her wide claw sweeps hurt a lot unless you block, and up close she impales Ethan and throws him aside. Don't spend ammo on her: change route, circle obstacles and take refuge where she doesn't go.
- Dungeon (B2): after the hand cutscene you cannot use healing items until you get it back. Lead her around the obstacles, pull the lever and go through the slowly opening gate. You may have to loop her once more before it finishes opening.
- Safe rooms: she does not enter the Merchant's Room (the Duke, typewriter) or the Atelier. If she corners you, duck into one and come back once she moves off.
- Block (L) her claw sweeps if you can't dodge them and never let her get right on top of you: up close she impales you.
- Circle pillars and furniture to gain distance. If a Moroaică gets in her way, she slaps it aside or kills it herself: use that to clear your path.
- She also appears in the Opera Hall after the Iron Insignia Key: unlock the Opera Hall's 1F door for a second way out.
Reward: None: the real fight is Mutated Dimitrescu at the end of the chapter.
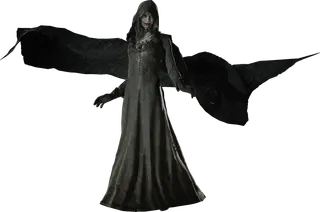
4 · Castle Dimitrescu · The Armory (2F), a small room full of furniture that you reach through the Hall of Pleasure fireplace.
Weak point The cold behind a cracked wall. Same factors as Bela: ×2.0 from handguns, rifles and magnums; ×1.6 from shotguns.
Before the fight she shows up in the Private Corridor, the Main Hall and by the Dining Room doors (after the Courtyard Key): she phases through doors as a swarm and gives up if you get far enough away. Don't shoot her there.
Taking the Mask of Pleasure locks the door; crouch through the fireplace and go up the stairs into the Armory and she appears as soon as you enter. The key is blowing open the corner wall with a Pipe Bomb to let the cold in.
- If you have no Pipe Bomb, take the 2 Pipe Bombs from the Armory's north-west table.
- In the far corner, push the cabinet (yellow tape) away from the wall: behind it is a crack with sunlight.
- Throw a Pipe Bomb at the crack. Cold air pours in. The blast does her no damage.
- Keep your distance (up close she claws and her flies block your view) and use the furniture to slow her down.
- Shoot her in the head until she shatters. Ammo in the room: Handgun Ammo ×15 (Standard only) and Shotgun Ammo ×2 on the south-east barrels.
Reward: Crystal Torso (5,000 Lei). Afterwards take the Mounted Animal Skull from above the west fireplace to get out of the Hall of Pleasure.
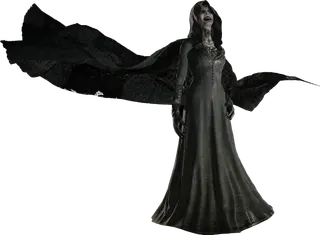
4 · Castle Dimitrescu · The Library (2F): round, with pillars in the middle, bookshelves and a glass dome. Opened with the Iron Insignia Key from the Opera Hall's 2F.
Weak point The cold from the dome, which a lever opens. Same factors as Bela: ×2.0 from handguns, rifles and magnums; ×1.6 from shotguns.
She attacks as soon as you walk in. She uses the swarm far more than her sisters: her flies block your view, especially while you block, and she teleports close or floats at you to strike or bite.
Open the dome with the lever, shoot her from range while the cold is in, and go back to the lever every time it closes.
- Run straight to the pillars in the middle: one has a lever that opens the dome and lets the cold in for a while. Don't shoot the ceiling: the glass won't break.
- With the dome open, shoot her from range. She runs and hides behind the bookshelves: don't close in even when she looks weak.
- Circle the room and collect ammo: Handgun Ammo ×10 on the south bookshelf and ×10 on the north-west dresser, Shotgun Ammo ×3 on the north-east bookshelf.
- When you hear the mechanism clink, the dome is closing: go back and pull the lever again.
Reward: Crystal Torso (5,000 Lei). Head west into the Hall of Joy for the Mask of Joy.
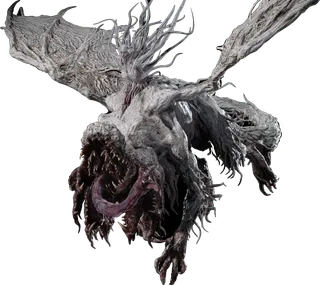
4 · Castle Dimitrescu · The Tower of Worship battlements (the roof), then the top of the tower. It starts when you take the Dagger of Death's Flowers from the coffin.
Weak point The human torso on the dragon's back (×2.0). The dragon body takes only ×1.2 (Knife ×0.8). Explosives do ×2.0 anywhere.
Three stretches. On the battlements, circle her and shoot the torso from behind; when she flies around the tower, knock her down with the F2 Rifle so she crashes and is left open. After "More blood", climb the stairs without fighting. At the top, in a tight space, shotgun the torso and dodge her charge.
Supplies: on the barrels at the top of the battlements' north-west stairs there are a First Aid Med ×1, Shotgun Ammo ×7 and Sniper Rifle Ammo ×15, plus a vase; at the top of the tower, 2 more vases with ammo.
- Take the battlement supplies before you spend any bullets.
- Back away when she lunges, circle her and shoot the torso from behind with the handgun or shotgun. As she turns she does a damaging stomp: step away.
- When she flies around the tower, shoot her body with the F2 Rifle. A good hit stuns her and she crashes onto the tower: unload the shotgun or a Pipe Bomb into the torso.
- Insect swarm while she flies: get back into the doorway alcove you came out of. The insects can't reach you there.
- When she says "More blood", you are moved to a stairwell higher up. Don't spend ammo: climb straight to the top.
- Top of the tower: she flies around outside, then smashes in. Strafe to one side and shotgun the torso. When she faces you and turns red, stop firing and run to the other side: she is about to charge. Repeat until she falls.
Reward: Crystal Dimitrescu (25,000 Lei, automatic) and the That Sucked! challenge. Lady Killer (25,000 CP): beat her in under 2:30. Afterwards take the Dirty Flask from the crypt altar: the castle closes for good.
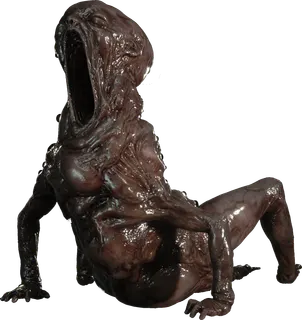
6 · House Beneviento · House Beneviento B1: the corridors of the Doll Workshop, Medicine Room, Study, Bedroom and Elevator Hall.
Weak point None. It is a hallucination: you have no weapons and it swallows you whole (instant death).
A weaponless chase in three encounters. It turns poorly and gets clumsy in corridors, but its lunge is fast. Listen to it: it sounds happy while chasing you and upset when it has lost you. Don't let it see you get into a hiding place.
- Encounter 1 (with the Breaker Box Key): it appears at the end of the Doll Workshop corridor. Wait behind the Doll Workshop table until it comes in, then go round the opposite side. Reach the breaker box by the elevator, use the key and take the Relief of a Child.
- Crawl back through the gap. If you are too quick it may be waiting at the exit: wait a moment. Placing the relief in the door with the depression despawns it.
- Encounter 2 (the Bedroom Fuse): the lights go out and it blocks the stairs. Run to the Bedroom and hide under the bed (or in a tall closet). When it passes, sprint. Bookshelves now block the crawl space: go the long way through the Medicine Room, where it despawns.
- Encounter 3 (the elevator): put the Fuse in the elevator box and it comes round the corner at you. Lead it around the couches and the projector table in the Study, then run for the elevator, which opens by itself when you stand in front of it.
- Press the button inside immediately. In the cutscene it just misses.
Reward: None: the elevator takes you up to the hide-and-seek with Angie (Donna Beneviento).

6 · House Beneviento · House Beneviento, ground floor and upstairs, full of dolls (Living Dolls).
Weak point None: Donna never fights. You have to find Angie 3 times and stab her with the Scissors.
A hide-and-seek with no weapons and no healing: go in with good health. Angie is the only doll in a white dress, sitting on the floor with her head slumped; the others stand. If you take too long or retrace your steps, the dolls laugh, shake and attack you in an unavoidable cutscene that takes a lot of health; afterwards Angie moves to a new spot.
- First time (always the same): upstairs, the side bedroom behind the door to the right of the upstairs windows.
- Second and third (random, always on the ground floor): follow the blood smears on the walls.
- Possible spots: the kitchen corner by the window; left of the couch in the living room; the dining room by the couches or in the back corner by the cabinet; the corner directly left of the entrance, by the blocked door; the far end of the hall in front of the elevator (PowerPyx: usually the third spot).
- If she isn't in any of them, check the foyer.
- After the third stab, Donna crumbles by the front door: take the Angie treasure before you leave.
Reward: Angie (28,000 Lei), on the floor next to Donna's remains: missable, you never return to the house. Also the piece for the Four-Winged Unborn Key and the Legs Flask on the pedestal by the front doors. The Got No Strings challenge; Hide and Seek Master (10,000 CP): finish the hide-and-seek in under 1:40.
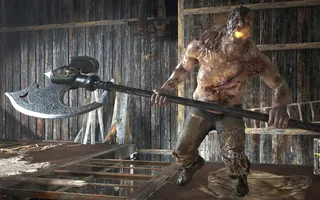
7 · The Village (3rd visit) · Beneviento's Treasure · Beneviento's Grave (Beneviento Entry): the clearing with Claudia's grave and a pile of gravestones in the middle, with the entrance stairs behind you.
Weak point The back of the torso (×3.0 from guns) and the head (×2.4); the rest ×2.0. Explosives do ×2.0 anywhere. Game8: explosives and shotgun blasts.
An optional boss guarding Beneviento's Treasure. It appears when you return to the grave with the Broken Slab, which is missable: the Graveyard crypt closes later on. It is a giant with an axe, about twice human height, slow on foot but able to leap huge distances. It soaks up a lot of damage: circle the gravestone pile in the middle and shoot from range.
Moves: it crouches and leaps onto you; a single swing while chasing; a multi-hit sweeping combo; and a roar that summons 2 Moroaică, repeated all fight (stunning it before the roar ends cancels the summon).
- Before it closes in, lay Mines on the path you will take around the central grave: it always walks over them.
- Keep the gravestone pile between you and it and shoot from range (F2 Rifle to the head). If you are on the far side it leaps over; if you are just out of reach, it stays down.
- When it crouches, move sideways: that is the leap. After each leap or sweep, shoot its head (or its back if it turns it to you).
- Kill the Moroaică it summons: they keep harassing you even after the giant dies.
- If it chases you, throw Pipe Bombs behind you.
- Game8 cheese: back off far enough toward the entrance stairs and it stops chasing you. Its reach is long: don't get careless.
Reward: Giant Crystal Axe (30,000 Lei). Then place the Broken Slab in the grave: Berengario's Chalice (18,000).
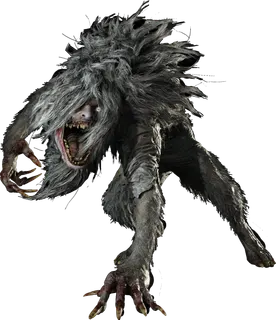
8 · Moreau's Reservoir · East Old Town, once you go through the Altar's south gate with the Four-Winged Unborn Key. A cutscene throws Ethan into the East Old Town Stable.
Weak point The whole body: ×2.0 from almost everything, magnum ×2.6, M1851 Wolfsbane ×5.2, explosives ×2.4. Game8: shotgun, explosives and magnum.
The first Vârcolac, a giant Lycan. It patrols a path and, once it sees you or you shoot it, charges to grab you. It is too big to get into buildings: it claws through doors and windows, gets stuck and loses interest, and that is when it is vulnerable. Stand right at the doorway and it grabs you and throws you out. It can climb onto roofs; its grab can be blocked with no damage and a shotgun blast breaks up its long-range attacks.
It is optional: you can sneak past and grab the GM 79 in the Water Mill while it has lost you.
- Stay in the stable from the cutscene. Put Mines outside the door and outside the window on the parallel wall.
- Climb the ladder to the roof, shoot it with the rifle or handgun to draw it, then climb back down: it can reach the roof too.
- When it gets stuck in the door or window, it steps on the Mines. Blast its face with the shotgun from a step back: it still has reach.
- Repeat until it falls. Its grab can be blocked (L) with no damage.
Reward: Crystal Beast (20,000 Lei).
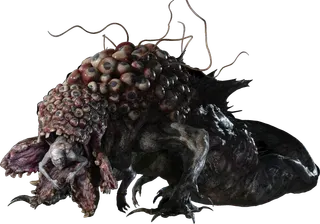
8 · Moreau's Reservoir · Moreau's Reservoir: first the flooded Drowned Houses traverse while he hunts you; the fight is in the drained Drowned Houses (he appears as you near the south-east corner).
Weak point The human Moreau in the mouth, from the front only: ×2.0 from rifles, ×1.6 from shotguns and magnums, ×1.2 from handguns. The fish shell takes ×0.6-1.0. Mines do ×3.0; other explosives ×2.0.
Before the fight, you cross the reservoir on sinking platforms while Moreau, in fish form, rams them: move only after he has passed. Shoot the yellow-taped support to drop a bridge, wait on the middle platform of the long walkway, then sprint. In the lifted boat, break the goo fast before he wrecks it.
In the fight: open with the shotgun or the GM 79 on the mouth, use the red barrels and Mines, and when he lies on his side, unload into the body. Take cover from the acid rain.
Supplies: SW: Chem Fluid and Rusted Scrap; W: Rusted Scrap and Shotgun Ammo ×5; N: Mine + First Aid Med, Handgun Ammo ×30 and an explosive barrel; E: Gunpowder, Metal Scrap, Shotgun Ammo ×12 and another explosive barrel.
- Open with the W870 TAC or the GM 79 on the mouth, from the front.
- Acid spit: he rears back and shows the human "tongue". A GM 79 grenade interrupts it.
- Charge and swipe: dodge sideways; the close swipe knocks you down.
- Bloating: he swells up and ignores all damage, then sprays more acid when he reaches you. Run or break line of sight.
- Shoot the red barrels when he is next to them and put Mines in his path (×3.0).
- When he lies on his side, unload into the body from a distance: he swipes as he gets up.
- Acid rain (he climbs a roof): get under a shelter marked with yellow cords and paint. The rain leaves goo barriers across the paths: shoot them to get through. He does it again later.
Reward: Crystal Moreau (40,000 Lei, automatic) and the Fish Out of Water challenge. Sashimi (25,000 CP): beat him in under 1:00. Afterwards, the Six-Winged Unborn Key in his Underground Study.
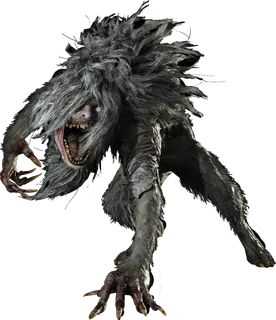
9 · The Village (4th visit) · The River · Moreau's Laboratory, behind the Windmill Yard's mechanical gate that the Crank opens. It appears after you explore the West Building (where the M1851 Wolfsbane is).
Weak point Same as the East Old Town one: M1851 Wolfsbane ×5.2, magnum ×2.6, explosives ×2.4, the rest ×2.0.
The second Vârcolac, optional. It appears right after you take the M1851 Wolfsbane from the West Building chest, so you already hold the ideal weapon. Same behaviour: it gets stuck in doors and windows.
- Take the M1851 Wolfsbane from the West Building and load it before you step outside.
- Get inside a building and let it get stuck in a door or window.
- Put Mines at the openings, or use Pipe Bombs or Explosive Rounds.
- Finish it with the M1851 Wolfsbane to the face: 1 to 3 shots according to Game8.
Reward: Crystal Beast (20,000 Lei).
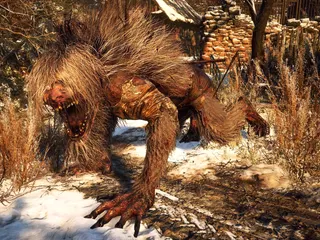
9 · The Village (4th visit) · The River · The Fallow Plot (the wheat field in front of Luiza's House), after you beat Moreau.
Weak point Like a Vârcolac: M1851 Wolfsbane ×5.2, explosives ×2.4, the rest ×2.0. Mines and the GM 79 knock it down.
An optional boss with nearly three times a normal Vârcolac's health and a charge that hits very hard. It does not follow you into houses: it hides in the tall wheat and retreats into it if you run toward the church. If you didn't collect Luiza's Heirloom before Moreau, it now guards it.
The key: Mines where the path meets the wheat, knock it down and finish it with the magnum.
- Bring the M1851 Wolfsbane from Moreau's Laboratory before you come here.
- The short path from the church to Luiza's House is blocked by a broken carriage. Plant Mines where that path meets the wheat.
- Shoot it from range and keep the Mines between you: it charges in a straight line, trips them and falls.
- GM 79 Explosive Rounds knock it down mid-lunge and reach it inside the wheat. Flashbangs also help.
- While it is down, M1851 Wolfsbane to the face.
Reward: Crystal Ancient Beast (80,000 Lei, the most valuable single pickup in the game) and the Leader of the Pack challenge (10,000 CP).
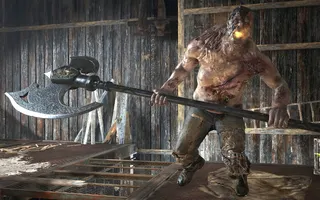
10 · The Stronghold · Otto's Mill · Otto's Mill Processing Room (the sawmill, Stronghold Entry): the giant is in the south-east corner of 1F, butchering meat as you walk in. Explosive barrels sit by the south stairs (1F) and on the north-west platform (2F).
Weak point Same as the Beneviento's Grave one: back of the torso ×3.0, head ×2.4, the rest ×2.0; explosives ×2.0 anywhere.
The second Uriaș Drac, optional, down the left fork of the Stronghold Entry (the "Good Luck" sign). Differences from the first: there is no gravestone pile, it climbs straight up to 2F without using the stairs, and its roar summons 2 Samcă instead of Moroaică (kill it fast and they never come). You can skip it: shoot the 3 padlocks on the red door and leave.
Supplies: Handgun Ammo ×20 on the barrel in the middle of 1F, Shotgun Ammo ×7 on the giant saw (E), Sniper Rifle Ammo ×6 on the beam pile (S).
- Open with a magnum or rifle shot to the head while it is still working.
- Keep obstacles between you. Put Mines on narrow walkways and at corners, and throw Pipe Bombs behind you as you turn.
- Shoot the red barrels with the handgun when it passes them.
- Kill the Samcă quickly with the shotgun (1-2 shots each): they are too agile to ignore. Stunning it mid-roar cancels the summon.
- Keep it staggering with the M1851 Wolfsbane, Flashbangs or an upgraded rifle.
Reward: Giant Crystal Axe (30,000 Lei). Behind the red door, the Cannibal's Plunder chest (Father Nichola's Angel, 22,000).
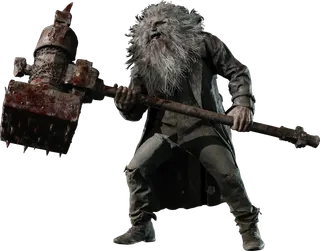
10 · The Stronghold · Otto's Mill · The Large Cavern (Stronghold B1): a U-shaped cavern with stone pillars and a raised central plateau.
Weak point Game8 says "none"; the game data gives head ×2.6 (Knife ×1.73) and the rest ×2.0. Explosives ×2.0. GM 79 grenades and Flashbangs stun him.
The ambush Uriaș comes back as a required boss. Save first in the Small Cavern: typewriter, First Aid Med, Explosive Rounds ×2 and Sniper Rifle Ammo ×5.
Supplies in the cavern alcoves (grab them while he is still on the plateau): First Aid Med (W), Handgun Ammo ×30 + 2 Pipe Bombs (NE), Shotgun Ammo ×4 + Sniper Rifle Ammo ×4 (SE).
Moves: a jumping hammer slam (he crouches first: run in a straight line); hammer swings and a spin; a chasing charge that ends in a slam; he tears out pillars and throws them (hide behind another or run to the far side of the U); and he climbs back to the plateau to roar for 1-2 Lycans.
- Before he jumps down, lay Mines and open with rifle or magnum shots to the face.
- When he crouches, run in a straight line away from the leap. When he lands, M1851 Wolfsbane or GM 79 to the face.
- Keep your distance (one hit puts you in the red) and use the pillars against his swings.
- If he tears out a pillar, hide behind another or go to the other end of the U.
- When he climbs up to roar, kill the Lycans fast: a GM 79 grenade or a Pipe Bomb hits them and him at once.
- After enough damage he kneels for a moment (rarely): unload everything.
Reward: Crystal Hammer (35,000 Lei) and the Up Urs! challenge.
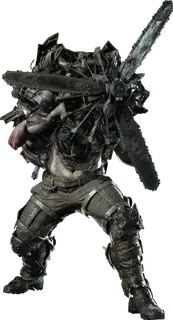
11 · Heisenberg's Factory · Two chases (B1 and B3 Maintenance Passage) and the fight in the Maze (Heisenberg's Factory B1), behind the Heisenberg's Key door, which is one-way.
Weak point The red reactor on its back (×2.0). Arms, torso and legs take only ×0.6. Bullets on the propeller do nothing. Explosives ×2.0 anywhere.
An armless Soldat with an aircraft engine and three blades in place of a torso. Chase 1 (B1 Maintenance Passage): contact kills; run to the red light, first right, up the stairs, crouch under the beam and take the chute on the right. Chase 2: B3 Maintenance Passage, north side.
Before the fight: using Heisenberg's Key on the B1 door locks you in with it. Finish everything else in the factory first. In the Power Room: the "Sturm" file (#39), First Aid Med, Handgun Ammo ×25 and a Mine. In the maze: Handgun Ammo ×30, a Mine and Sniper Rifle Ammo ×10.
Moves: a straight-line charge (it revs first and can't turn); after enough damage it overheats and bursts into flames: a flamethrower (the fire lingers on the floor), three charges in a row and rampages in every direction.
- Let it smash the walls early on to make room.
- Stand with your back to an unbreakable wall, sidestep the charge and it lodges in the wall.
- Run round it and shoot the red reactor on its back with your best gun.
- Put Mines on its charge path: they stun it. A Flashbang stuns it and makes it walk into a wall.
- Burning phase: bait the flamethrower beside a side wall so the fire doesn't end up in the middle. The jet tracks you only until it ignites, then stays put: go round it and hit the reactor.
- Wait for the third charge in a row (aimed at you), dodge it and punish.
Reward: Complex Mechanical Heart (45,000 Lei). Afterwards, File #40 and the Cigar (3,000) in the Cargo Control Room.
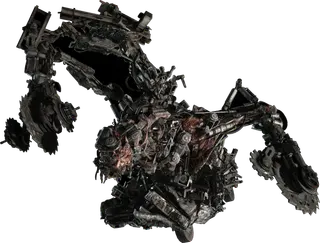
11 · Heisenberg's Factory · The Back Yard (Factory Entry), aboard **Heisenberg's Self-propelled Artillery**; the second phase on foot.
Weak point Phase 1: the glowing red weak points, one on each arm and one at his base. Phase 2: the face (×2.0 from every gun) and the weak spot at the base of the third arm.
Prepare: read File #41 (Chris's Computer) and heal before you board the vehicle: inside you cannot heal, not even from the inventory. The vehicle has an infinite machine gun that never overheats and an infinite cannon with a reload after each shot; blocking (L) works while mounted.
Phase 1: break the weak points and use the cannon to interrupt his attacks. Phase 2 on foot: he has very little health left; F2 Rifle to the face from range.
Phase 2 supplies, hidden behind the metal sheets stuck in the ground: Explosive Rounds ×2 (E), Handgun Ammo ×30 + Shotgun Ammo ×15 (SW), Sniper Rifle Ammo ×12 (NW) and ×8 (S).
- Machine-gun the red points on his arms and base; Game8 suggests taking the arms off first. Breaking one stuns him briefly.
- When he charges or winds up a strike, hit him with the cannon: it staggers and interrupts him. While the cannon reloads, drive sideways and block.
- Wall of metal sheets: he raises it, then fires the sheets at you. Break it off with damage to his visible head or a cannon shot to the face. Sheets that stick in the ground become cover. Shoot down the drills he fires too.
- Scrap tower: move sideways; the arena is huge. At the end he forms a tornado that pulls the vehicle in: cannon to the head as soon as it is ready. Ethan is thrown out (cutscene).
- On foot: grab the ammo behind the sheets, run far, turn and F2 Rifle to the face (a few shots). The M1851 Wolfsbane to the face works too; GM 79 grenades interrupt his blade attacks and the shotgun punishes his misses up close.
- When a third arm forms above him, shoot the weak spot at its base. You can't use Mines here; Pipe Bombs work. It ends in a cutscene: Ethan finishes him with the cannon.
Reward: Crystal Heisenberg (70,000 Lei, automatic) and the Iron Giant Down challenge. Blitzkrieg (15,000 CP): beat him in under 4:00.
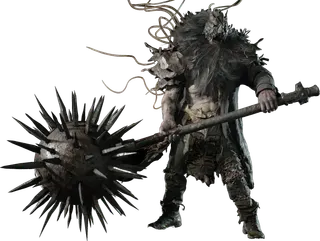
12 · Chris: the village and the caverns · Ceremony Site · Chris's mission: the caverns below the village, reached through the hole the artillery blows in the mould construct at the Maiden of War. Much smaller than Uriaș's arena.
Weak point The tentacles on his back (the parasite, ×2.0 from the USM-AI and Dragoon); the face and shoulders are armoured (the rest of the body ×0.8). The Target Locator does almost all the damage. Flash Grenades stun him.
Before: Chris marks the mould construct 3 times with the Target Locator while Lycans keep spawning (every strike kills the enemies around it). The safe spot is halfway up the ladder behind the red-chimney house: nothing can hit you there. Collect both supply sets and use the explosive barrel next to each one.
Uriaș's older brother, with a mace. More aggressive, but he doesn't throw pillars or summon Lycans. Moves: a jumping mace slam (he crouches first), mace swings and a hard-to-dodge circular sweep.
- Collect all the healing and ammo in the cavern before you close in.
- Don't waste ammo on his front: it is armoured.
- When the radio says the artillery is ready, mark him with the Target Locator right after one of his big attacks. Hold the laser until the gauge fills: getting hit resets it. Lobo needs about a minute to reload.
- Between strikes, circle behind him and shoot the tentacles on his back with the Dragoon or the USM-AI: every hit there saves you artillery strikes.
- Throw Flash Grenades to stun him and block the slam if you can't dodge it. When he charges the leap, run around the edge of the arena.
- PowerPyx trick: stay close to his left knee (your right), where the mace often misses, and keep firing.
Reward: Giant Crystal Mace (60,000 Lei). Sell it as Ethan at the last Duke visit. The wall behind him opens.
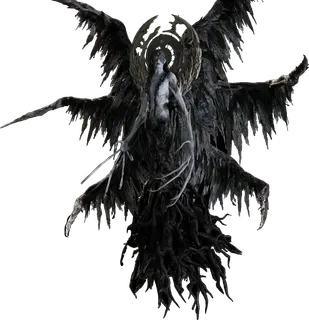
12 · Chris: the village and the caverns · Ceremony Site · The Ceremony Site, at the end of the Lone Road. Touching the wall of black roots starts the fight.
Weak point No special weak point: head, arms, torso and legs share one factor (Knife ×4.0, F2 Rifle ×1.6, handgun ×1.4, shotgun ×1.0, magnum only ×0.8). Avoid the wings and spider legs (×0.16-0.32). Explosives ×2.0 anywhere.
The final boss. Prepare at the Altar: the last Duke (sell the Giant Crystal Mace and everything else, buy and upgrade), a typewriter and fresh supplies: First Aid Med, Handgun Ammo ×30, Shotgun Ammo ×10, Explosive Rounds ×3, Sniper Rifle Ammo ×5 and Magnum Ammo ×2. On the Lone Road 4 Moroaică drop from the mould vines: shoot them or run.
She changes form and turns grey just before she changes. Later she cycles forms at random. Chris throws down ammo during the fight.
- Base form: she glides at you with mould-spike stabs and raises giant spikes from the ground at range. When she sweeps her arms (mould waves), sidestep.
- Black pillars and central orb: hide behind a pillar while the orb sprays fireballs. She is invulnerable during it.
- Winged form: a flying charge (run sideways and shoot as she recovers). She summons 1 large or 3 small orbs that turn yellow and fire: shoot them first, or hide behind the roots. A charged giant orb has to be shot down.
- Spider form: long-reach leg stabs. She climbs the statue or ledge and leaps onto you: run, or block if you can't make it.
- Darkness: only the candles stay lit and she flanks you. Listen for her laugh and hit her when she appears; a Flashbang round cancels it early. A well-timed shotgun blast, or a Mine or Pipe Bomb as she comes in, also works.
- Ending: she pins you with mould and summons a big orb above her. Shoot the orb and keep shooting her.
Reward: The end of the story. Keep the completed save: New Game+ loads from it.
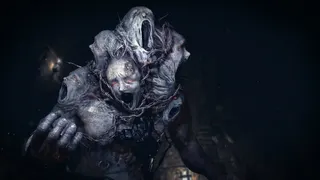
SoR1 · Castle Dimitrescu · The three masks · Castle Dimitrescu in Shadows of Rose: it stalks the castle, and the fight is in the Execution Yard, after you take the (fake) Purifying Crystal.
Weak point An orange core that moves each phase: the chest, the right leg and the back. The shotgun is strongest.
A multi-headed brute with a mace (some guides call it "the Amalgam"). As a stalker it cannot be killed: avoid it and use the crawl spaces. It turns up in the Main Hall (south balcony, 2F), the Private Corridor, the Main Cellar (B1), the Isolated Passage and the Courtyard after the Silver Mask. Rose's stun lasts less on it than on others.
In the boss fight Rose can't block: stun it with your power and shoot the core. Supplies: Handgun Ammo (9) on the south wall of the eastern square, Shotgun Ammo (5) on the east window ledge, a First Aid Med on the south-east wall; in the SW passage, Handgun Ammo (9) and Shotgun Ammo (4); in the NW passage, RW-Variant Flask 3, Shotgun Ammo (7), a First Aid Med and Handgun Ammo (18).
- Phase 1 (eastern square), core on the chest: two attacks, an overhead mace slam and a hand-out grab. Run and punish the whiff, or stun it with your power and shoot. If it grabs you, spend a power slot to break free. Grab the wall items between attacks.
- Phase 2 (SW passage), core on the right leg: mould floods most of the arena; run to the bars. 2 Face Eaters come out: Pipe Bomb or shotgun. It now sprints with wild, fast sweeping swings: shoot the leg when it tires after a combo. Break the core at the end of the tunnel or it will corner you.
- Between phases: more bars open and 2 more Face Eaters come out. Behind them "Michael" hands you RW-Variant Flask 3 (fourth slot and a refill), plus a First Aid Med and ammo.
- Phase 3, core on the back: it sinks into the mould and erupts under you: keep moving when it vanishes; it is stuck after the swing. If it holds the mace upside down and charges, shoot it while it charges and get into a corridor before it covers the arena in mould.
- Stun it and shotgun the back at close range: about 3 stuns finish it.
Reward: You move on to the House Beneviento stratum. The castle cannot be revisited.

SoR2 · House Beneviento · The Winters' memory · House Beneviento (Shadows of Rose), the 1F foyer and the stairs up. Prepare in the Living Room: typewriter, First Aid Med and **RW-Variant Flask 4** (fifth slot and a refill).
Weak point Only Rose's power damages her; guns are useless. Rose has to be standing to use it.
Her only attack is charged wind blasts, often three in a row, which get longer as the fight goes on. Break line of sight behind furniture, wait until she is tired, and hit her with your power. Then she teleports: follow her blue glow and take cover facing her new spot. Don't step on the mould on the floor.
- Hide behind furniture until the burst ends and she looks slumped.
- Stand up and hit her with your power.
- Follow her blue glow: first she shows up near the entrance of the room you came from, then in the corridor right of the front door (hide behind the cabinet).
- When mould covers the floor, stand in the middle, between the two fallen pieces of cover.
- Stairs: she teleports upstairs and 2 sclerotia appear that block the way. Follow the red veins: one left of the stairs and one on the upper floor, further left. Break them and sprint up to the cover at the top.
- Upstairs she attacks more often: wait out the last burst of three, hit her once more and "Michael" (Ethan) lands the final blow.
Reward: You move on to the Deep Stratum.
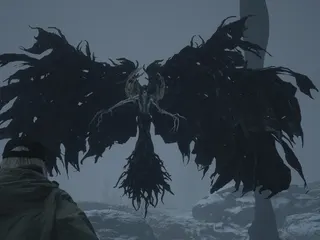
SoR3 · Deep Stratum · Memories' Edge · Memories' Edge, at the end of the Deep Stratum. Last safe room before it: the Pit Laboratory (typewriter, 42 handgun rounds, 19 shells, a First Aid Med and a Bunch of White Sage).
Weak point Your power stuns her; then the M1897 point-blank. Guns barely hurt her while she flies.
She fights mostly in winged form, with brief spider-form pounces. For this fight Rose gains three powers: dodge (free, with brief invincibility), absorb projectiles just before impact (refills slots) and the Megamycete attack (3 slots, a short-range root thrust that stuns her "for a good while"). Handgun Ammo (10) keeps appearing on the ground throughout the fight.
- Absorb her projectiles (a mould trail that glows and rushes you) just before they hit to fill 3 slots. Later she throws several in a row.
- Dodge sideways from her spinning dive and the close wing spin. The best moment to stun her is right after the spin.
- Use the Megamycete attack up close and unload the M1897 while she is stunned. Don't waste bullets or power while she flies.
- Darkness: she swims under the ground, fakes, then lunges with her arms spread: dodge the real lunge. She also bursts from under you (black mould appears first).
- Mould tornado spitting projectiles in every direction: keep moving between the shots and dodge.
- Ending: in a red-sky arena she fires projectiles you can't stop and Rose falls regardless (heal first if you can). Ethan lends her his power: approach, follow the prompt and use your power to finish her.
Reward: The end of Shadows of Rose.