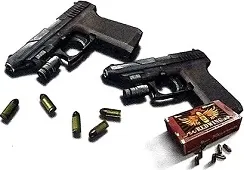
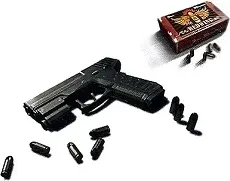
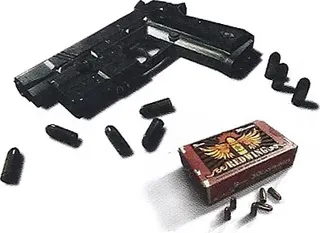
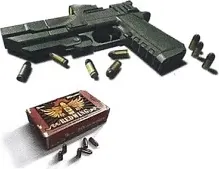
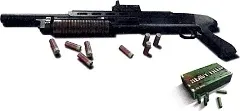
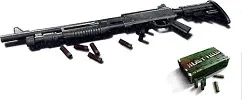
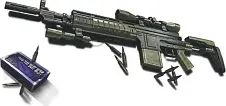
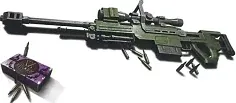
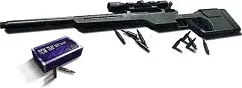
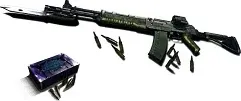
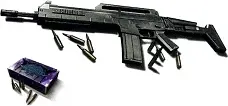
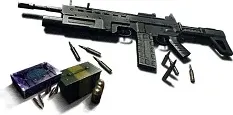
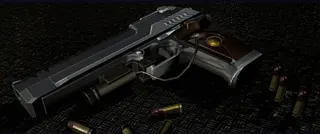
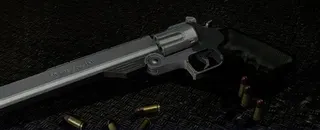
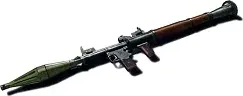
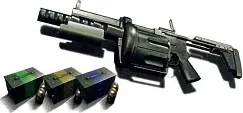
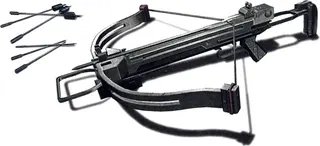
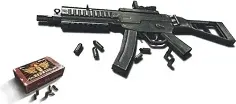
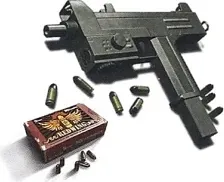
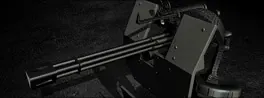
- 9 slots (single source). Weapons don't take a slot: they always all fit. Ammo, herbs, grenades and the First Aid Spray do.
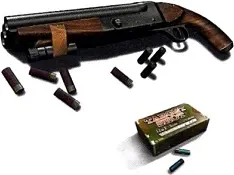
- Cap per slot: 150 9mm Ammo; 40 12-Gauge or 10-Gauge Shells; 60 5.56mm, 7.62mm and 12.7mm; .50 AE: 50 or 80; .500 S&W: 60 or 80 (sources disagree); 40mm: 12 or 30 (sources disagree); 60 Arrows (Normal) and 40 Arrows (Pipebomb); 5 grenades or Remote Bombs; 3 First Aid Sprays.
- You only pick up ammo for guns you own (only Helena picks up 10-Gauge Shells, for example).
- Each character has their own inventory in each campaign: nothing moves from Leon to Helena or between campaigns. Within a campaign it carries from chapter to chapter. Per one player, changes are only kept at the "Saving..." points between sections, not at checkpoints.
- No item box and no expansions: RE6 has no backpacks, vests or inventory upgrades.
Split-screen: in your Item Slot pick an item and give it to your partner; it works at any distance and only in split-screen. The manual names herbs and ammo. Test in Leon Chapter 1 whether grenades and First Aid Sprays can be given too, and what happens when the partner's slots are full.
Item Slot, inside the COMs Device. It opens in real time: the game doesn't pause while you swap weapons or mix herbs.
Carry only ammo for guns you use, mix herbs and move them into the case as soon as you can, and preload the Grenade Launcher: that's how 9 slots last.
Card →

- Green Herb alone = 1 tablet; Green + Green = 3; Green + Green + Green = 6; Green + Red = 6. A Red Herb alone is useless: always mix it with a green one.
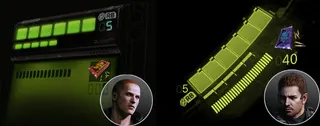
- One Health Tablet heals 1 health block and fully refills the combat gauge, even at full health.
- Used near your partner, it heals them too (half a block per tablet).
- When your partner is dying, revive them with your tablets: one per press, up to 6.
- Cap: 17. At 12 or more a 6-tablet mix won't fit: eat some first or wait.
Split-screen: give the herb to your partner before converting it; tablets probably can't be passed over.
Inside the COMs Device; it takes no slot. On Switch, pick a herb in the Item Slot and press A to store it as tablets.
Mix before you convert (Green + Red or three Greens = 6 tablets; a lone Green gives 1) and heal next to your partner: one tablet heals both of you.
Card →
The in-game menu: Resume game, Return to the latest checkpoint (restarts the checkpoint without a Game Over), Display other player's records, Change game settings, Change skills (switch skill set) and Quit game (unsaved progress is lost). Cutscenes are skipped from here too.
It runs in real time: enemies keep attacking while it's open. For a real pause (offline only) use +.
The − button on Switch.
Switch skill sets from here, but in a quiet corner.
Card →

Ada climbs to ledges and crosses gaps with it; she also rides zip-lines.
Agent has no grapple: when Ada uses it, Agent vanishes and reappears next to her once she lands. He also can't open doors, pick up key items, flip switches or use zip-lines.
Ada Chapter 3, bus roof against the Ubistvo: Ada dodges by grappling to the other end; Agent has to slide or roll between its swings to the opposite side.
Ada has it from Ada Chapter 1; used at marked points.
In split-screen, Ada is always player 1: the grapple and every interaction are hers; Agent provides the covering fire.
Card →
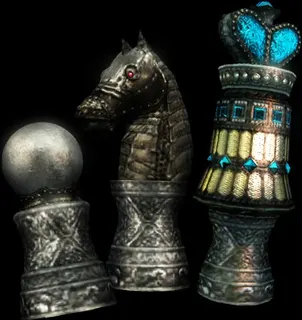
- Values: Pawn 50, Knight 100, Bishop 300, Rook (Bronze) 500, Queen (Bronze) 1,000, Rook (Silver) 1,500, King (Bronze) 2,000, Queen (Silver) 2,500, Rook (Gold) 3,000 (The Mercenaries only), King (Silver) 4,000, Queen (Gold) 5,000, King (Gold) 10,000 (only one Chris Chapter 3 suitcase).
- Enemies: Ogroman and Ubistvo 4,000; Whopper and Gnezdo 2,500; Napad 1,500; Shrieker and Strelats 1,000; Bloodshot 500 or 1,000 (sources disagree).
- Helping or thanking your partner quickly gives extra SP.
- On No Hope skills don't work.
- There's no shop and no money: SP only buy skills.
Big fixed hauls: the Leon Chapter 4 / Chris Chapter 3 race (4-4 / 3-5 Medical Research Center): the team that reaches the elevator first gets 2 × 2,000, and the one that opens the hacked door first gets 5,000 + 5,000 + 4,000. Without online players the other team is AI. Chris Chapter 3: a 10,000 suitcase in the room past the wooden box with 2 Green Herbs in the cabinets.
Farming: Jake Chapter 4 (4-3): 2 boxes in the opening alley = 7,000 in 1 minute; go through the door, wait for "Saving..." to disappear, quit and repeat. Chris Chapter 2 (2-3 and 2-4): the 2 Ogromans and the Napads give about 30,000 in 25-30 minutes. Always quit after "Saving..." clears.
Split-screen: the SP player 2 picks up most likely go into the same pool (player 1's save). Check the total at the end of the chapter.
Chess pieces dropped by enemies and found in crates, suitcases and chests. Shared across all characters and campaigns.
Spend early on the cheap ones (under 4,000) and save for Firearm and Defense Lv3; maxing every levelled skill (the Mad Skillz achievement) costs 954,000.
Card →
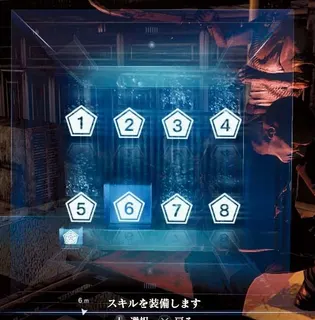
- 3 skills per set. You start with 1 set; clearing one campaign gives you 8. A level replaces the previous one (you can't equip Lv1 and Lv2 of the same skill).
- Buying only between chapters or from the menu; switching sets at any time (in real time).
Split-screen: player 2 has no SP and no purchases of their own; they use what player 1 bought and pick one of those sets from their own − menu. Only player 1 sees the shop at the end of a chapter. Test in Leon Chapter 2 whether each player can run a different set at the same time.
Buy order (one shared pool):
1. The cheap ones: Defense Lv1 (3,200), Item Drop Increase (3,500), Breakout (2,800), Critical Hit Lv1 (3,500), Lock-On Lv1 (2,800). J'avo Killer and Zombie Hunter Lv1 (3,000) as soon as they unlock.
2. Firearm Lv1 (12,000), then Firearm Lv2 (29,000) and Defense Lv2 (28,000).
3. Zombie Hunter Lv2 for Leon and Ada Chapter 2; J'avo Killer Lv2 for Chris and Jake (25,000 each).
4. Firearm Lv3 (75,000) and Defense Lv3 (80,000).
5. Your main weapon's Master skill when it unlocks.
6. After all 4 campaigns, 1 or 2 Infinite skills.
Recommended co-op sets:
- Leon / Helena: Firearm + Defense + Zombie Hunter; for bosses, Firearm + Magnum Master or Shotgun Master + Defense.
- Chris / Piers: Firearm + Defense + J'avo Killer; Chris with Assault Rifle Master, Piers with Lock-On for the scope.
- Jake / Sherry: Firearm + Defense + J'avo Killer; for melee, Melee + J'avo Killer + Defense (Hand-to-Hand and the Stun Rod scale with Melee).
- Ada / Agent: Firearm + Defense + Quick Reload or Crossbow Master; in Ada Chapter 2, Zombie Hunter as the third.
Don't buy Team-Up, Field Medic or Lone Wolf for split-screen: they only affect an AI partner.
Bought on the end-of-chapter screen or in Play Game > Campaign > Skill Settings (once you've cleared the first chapter). Switched at any time with − > Change skills.
Firearm + Defense + the campaign's enemy skill is the base set for both players; build a second set for bosses and switch with − before the fight.
Card →
Damage of every firearm +10% / +20% / +50% (one source says +30% at Lv3; three say +50%).
End-of-chapter screen or Play Game > Campaign > Skill Settings. Available from the start. · 12,000 / 29,000 / 75,000 SP (116,000 total)
Essential: Lv1 as soon as you can and Lv3 as the big buy. With Lv3 on Normal, a point-blank shotgun blast kills a Bloodshot.
Card →
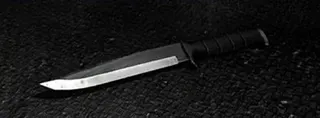
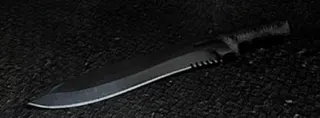
Melee damage +10% / +20% / +50%: physical attacks, the Stun Rod, both knives and Hand-to-Hand.
End-of-chapter screen or Play Game > Campaign > Skill Settings. Available from the start. · 10,000 / 25,000 / 75,000 SP (110,000 total)
For Jake and Sherry, whose game revolves around melee; everyone else, after Firearm.
Card →
Damage taken ×0.8 / ×0.7 / ×0.5. It's unclear whether it covers every attack or only enemy firearms.
End-of-chapter screen or Play Game > Campaign > Skill Settings. Available from the start. · 3,200 / 28,000 / 80,000 SP (111,200 total)
The other essential buy: Lv1 costs only 3,200.
Card →
The red aiming dot drifts less after each shot.
End-of-chapter screen or Play Game > Campaign > Skill Settings. Available from the start. · 2,800 / 31,000 SP (33,800 total)
Lv1 is cheap and helps Piers and the Chris Chapter 4 snipers; Lv2 isn't worth 31,000 early on.
Card →
Less reticle kick from recoil.
End-of-chapter screen or Play Game > Campaign > Skill Settings. Available from the start. · 3,500 / 33,000 SP (36,500 total)
Optional: Lock-On gives more per SP.
Card →
Critical chance +50% / +75% / +100% (relative to the weapon's own). One source lists Lv1 at 7,500; four at 3,500.
End-of-chapter screen or Play Game > Campaign > Skill Settings. Available from the start. · 3,500 / 13,000 / 32,000 SP (48,500 total)
Lv1 is cheap; it pairs well with the Nine-Oh-Nine (12.5% crit).
Card →
Bullets pierce +1 / +2 / +3 enemies. It doesn't affect the Crossbow or the grenade launchers.
End-of-chapter screen or Play Game > Campaign > Skill Settings. Available from the start. · 12,000 / 28,000 / 55,000 SP (95,000 total)
Good in zombie-packed corridors, but expensive early on.
Card →
Damage against J'avo +20% / +50%.
End-of-chapter screen or Play Game > Campaign > Skill Settings. Unlocks after killing 30 J'avo. · 3,000 / 25,000 SP (28,000 total)
Lv2 is a must in Chris's and Jake's campaigns.
Card →
Damage against zombies +20% / +50%.
End-of-chapter screen or Play Game > Campaign > Skill Settings. Unlocks after killing 30 zombies. · 3,000 / 25,000 SP (28,000 total)
Lv2 for Leon's campaign and for Ada Chapter 2.
Card →
One more zoom level on the Sniper Rifle, the Semi-Auto Sniper Rifle and the Anti-Materiel Rifle. The Mercenaries has its own version.
End-of-chapter screen or Play Game > Campaign > Skill Settings. Available from the start. · 3,000 SP
Cheap: handy for far-off emblems and for whoever plays Piers.
Card →
Reloads 20% faster.
End-of-chapter screen or Play Game > Campaign > Skill Settings. Available from the start. · 10,000 SP
A good third slot for Ada and for the slow shotguns.
Card →
The last round in the magazine deals +300%.
End-of-chapter screen or Play Game > Campaign > Skill Settings. Available from the start. · 55,000 SP
Niche: it means reloading one round at a time. Skip it.
Card →
Removes the reticle and the scope; in exchange, +50% damage.
End-of-chapter screen or Play Game > Campaign > Skill Settings. Available from the start. · 65,000 SP
Avoid it: no scope means no sniping.
Card →
Combat gauge +3 / +5 blocks (from 5 to 8 and to 10).
End-of-chapter screen or Play Game > Campaign > Skill Settings. Available from the start. · 70,000 / 90,000 SP (160,000 total)
A late-game luxury; worth it if you melee a lot (Jake).
Card →
Fewer inputs to break free from a grab.
End-of-chapter screen or Play Game > Campaign > Skill Settings. Available from the start. · 2,800 SP
Cheap and useful against the Rasklapanje's grabs, Carla's hands and the Ubistvo.
Card →
Enemies drop items more often (+40% per one source). The Mercenaries has its own version.
End-of-chapter screen or Play Game > Campaign > Skill Settings. Available from the start. · 3,500 SP
The best first-chapter buy: more ammo and more SP.
Card →
When dying you get up on your own in 10 s / 7 s instead of 15 s.
End-of-chapter screen or Play Game > Campaign > Skill Settings. Available from the start. · 10,000 / 70,000 SP (80,000 total)
Lv1 for a defensive set; in co-op your partner usually revives you sooner.
Card →
An AI partner within 5 m deals as much damage as you. Single player only.
End-of-chapter screen or Play Game > Campaign > Skill Settings. Available from the start. · 14,000 SP
Don't buy it: in split-screen it almost certainly does nothing, and Ada's campaign has no AI partner.
Card →
The AI partner gives you 1-2 / 2-4 tablets when rescuing you. Single player only.
End-of-chapter screen or Play Game > Campaign > Skill Settings. Available from the start. · 12,000 / 95,000 SP (107,000 total)
Don't buy it for split-screen.
Card →
The AI partner won't help you. Single player only.
End-of-chapter screen or Play Game > Campaign > Skill Settings. Available from the start. · 100 SP
Good for the One Is Better Than None achievement (the cheapest skill) and for Down, Not Out solo; in co-op your partner just doesn't revive you.
Card →
More 12-Gauge and 10-Gauge Shells (covers the Hydra).
End-of-chapter screen or Play Game > Campaign > Skill Settings. Available from the start. · 8,000 SP
Useful in Leon's campaign, where the Shotgun is the main weapon.
Card →
More .50 Action Express and .500 S&W Magnum Ammo.
End-of-chapter screen or Play Game > Campaign > Skill Settings. Available from the start. · 25,000 SP
Pricey; only if you use magnums beyond the bosses.
Card →
More 7.62mm NATO and 12.7mm Ammo.
End-of-chapter screen or Play Game > Campaign > Skill Settings. Available from the start. · 8,000 SP
The ammo buy for whoever plays Piers.
Card →
More 40mm Explosive, Acid and Nitrogen Rounds.
End-of-chapter screen or Play Game > Campaign > Skill Settings. Available from the start. · 22,000 SP
For Chris and Piers from Chris Chapter 3 if they live off the Grenade Launcher.
Card →
+100% damage with thrown grenades.
End-of-chapter screen or Play Game > Campaign > Skill Settings. Unlocks after 800 grenade kills. · 40,000 SP
Slow to unlock; only worth it if you use a lot of grenades.
Card →
+100% damage with the Nine-Oh-Nine, Wing Shooter, Triple Shot and Picador.
End-of-chapter screen or Play Game > Campaign > Skill Settings. Unlocks after 1,500 handgun kills. · 37,000 SP
The easiest Master to unlock: everyone carries a 9mm handgun.
Card →
+100% damage with the Shotgun and the Assault Shotgun (whether it covers the Hydra is unconfirmed).
End-of-chapter screen or Play Game > Campaign > Skill Settings. Unlocks after 1,000 shotgun kills. · 38,000 SP
For Leon and Helena, who live off the Shotgun.
Card →
+100% damage with the Lightning Hawk and the Elephant Killer.
End-of-chapter screen or Play Game > Campaign > Skill Settings. Unlocks after 800 magnum kills. · 40,000 SP
For Leon's and Jake's boss set.
Card →
+100% damage with the MP-AF and the Ammo Box 50.
End-of-chapter screen or Play Game > Campaign > Skill Settings. Unlocks after 1,500 machine pistol kills. · 38,000 SP
Of little use: those are support guns.
Card →
+100% damage with the Grenade Launcher and the Bear Commander's grenade.
End-of-chapter screen or Play Game > Campaign > Skill Settings. Unlocks after 800 grenade launcher kills (one source says 1,500). · 40,000 SP
Good for Chris and Piers's boss set.
Card →
+100% damage with the Crossbow.
End-of-chapter screen or Play Game > Campaign > Skill Settings. Unlocks after 800 crossbow kills. · 40,000 SP
Ada's best third slot once it unlocks.
Card →
Infinite ammo for handguns; you still reload. It only works if the Infinite Ammo option is set to Allow when the chapter starts.
End-of-chapter screen or Play Game > Campaign > Skill Settings. Unlocks after clearing all 4 campaigns (any difficulty). · 79,000 SP
Cheap for its class, but handguns hit weakly.
Card →
Infinite ammo for shotguns; you still reload. It only works if the Infinite Ammo option is set to Allow when the chapter starts.
End-of-chapter screen or Play Game > Campaign > Skill Settings. Unlocks after clearing all 4 campaigns (any difficulty). · 89,000 SP
Recommended for Chris and Ada on higher difficulties.
Card →
Infinite ammo for magnums; you still reload. It only works if the Infinite Ammo option is set to Allow when the chapter starts.
End-of-chapter screen or Play Game > Campaign > Skill Settings. Unlocks after clearing all 4 campaigns (any difficulty). · 99,000 SP
The favourite with Firearm Lv3 for Leon and Jake: it lets you skip Simmons phases.
Card →
Infinite ammo for sniper rifles; you still reload. It only works if the Infinite Ammo option is set to Allow when the chapter starts.
End-of-chapter screen or Play Game > Campaign > Skill Settings. Unlocks after clearing all 4 campaigns (any difficulty). · 79,000 SP
Only for whoever plays Piers or Ada as support.
Card →
Infinite ammo for machine pistols; you still reload. It only works if the Infinite Ammo option is set to Allow when the chapter starts.
End-of-chapter screen or Play Game > Campaign > Skill Settings. Unlocks after clearing all 4 campaigns (any difficulty). · 89,000 SP
Skippable.
Card →
Infinite ammo for assault rifles; you still reload. It only works if the Infinite Ammo option is set to Allow when the chapter starts.
End-of-chapter screen or Play Game > Campaign > Skill Settings. Unlocks after clearing all 4 campaigns (any difficulty). · 89,000 SP
The best one for Chris and useful for Jake and Ada with the Bear Commander.
Card →
Infinite ammo for the Grenade Launcher; you still reload. It only works if the Infinite Ammo option is set to Allow when the chapter starts.
End-of-chapter screen or Play Game > Campaign > Skill Settings. Unlocks after clearing all 4 campaigns (any difficulty). · 99,000 SP
Unlimited Explosive rounds: the boss option for Chris and Piers.
Card →
Infinite ammo for the Crossbow; you still reload. It only works if the Infinite Ammo option is set to Allow when the chapter starts.
End-of-chapter screen or Play Game > Campaign > Skill Settings. Unlocks after clearing all 4 campaigns (any difficulty). · 79,000 SP
With infinite Pipebomb arrows, Carla and Simmons stop being a problem.
Card →
Your creature's damage +10% / +20% / +30% (one source says +50% at Lv3).
Agent Hunt menu; paid with the same Skill Points. Agent Hunt is online only: split-screen has no invasions. · 5,000 / 15,000 / 60,000 SP (80,000 total)
Only if you play Agent Hunt online; it doesn't affect the campaign. Whether it counts for Mad Skillz is unconfirmed.
Card →
Damage taken −10% / −20% / −30%.
Agent Hunt menu; paid with the same Skill Points. Agent Hunt is online only: split-screen has no invasions. · 5,000 / 15,000 / 60,000 SP (80,000 total)
Only if you play Agent Hunt online; it doesn't affect the campaign. Whether it counts for Mad Skillz is unconfirmed.
Card →
Health +20% / +50% / +100%.
Agent Hunt menu; paid with the same Skill Points. Agent Hunt is online only: split-screen has no invasions. · 5,000 / 15,000 / 60,000 SP (80,000 total)
Only if you play Agent Hunt online; it doesn't affect the campaign. Whether it counts for Mad Skillz is unconfirmed.
Card →
Stamina to 6 / 7 / 10 units.
Agent Hunt menu; paid with the same Skill Points. Agent Hunt is online only: split-screen has no invasions. · 5,000 / 15,000 / 60,000 SP (80,000 total)
Only if you play Agent Hunt online; it doesn't affect the campaign. Whether it counts for Mad Skillz is unconfirmed.
Card →
With 30 s or less left, the combo window lasts 17 s instead of 15.
The Mercenaries menu (No Mercy too). Bought separately from campaign skills, and only one can be equipped at a time. · 60,000 SP (another source: 40,000)
For squeezing score out of the final stretch.
Card →
Each time crystal gives 10 s more.
The Mercenaries menu (No Mercy too). Bought separately from campaign skills, and only one can be equipped at a time. · 90,000 SP (another source: 30,000)
The most useful one for reaching all 150 enemies.
Card →
The combo crystal lasts 10 s longer.
The Mercenaries menu (No Mercy too). Bought separately from campaign skills, and only one can be equipped at a time. · 50,000 SP (another source: 15,000)
Good for high ranks once you know the map.
Card →
+50 points per kill past a 50 combo.
The Mercenaries menu (No Mercy too). Bought separately from campaign skills, and only one can be equipped at a time. · 60,000 SP (another source: 20,000)
Only if you chain long combos.
Card →
+50% attack right after your partner attacks.
The Mercenaries menu (No Mercy too). Bought separately from campaign skills, and only one can be equipped at a time. · 5,000 SP
Cheap and made for a split-screen duo.
Card →
Quick Shot +50%.
The Mercenaries menu (No Mercy too). Bought separately from campaign skills, and only one can be equipped at a time. · 15,000 SP (another source: 8,000)
Good if you play on Quick Shots and melee.
Card →
Counters +25%.
The Mercenaries menu (No Mercy too). Bought separately from campaign skills, and only one can be equipped at a time. · 8,000 SP (another source: 15,000)
For zombie maps, where counters are easy.
Card →
+10% damage at 2 health blocks or less.
The Mercenaries menu (No Mercy too). Bought separately from campaign skills, and only one can be equipped at a time. · 6,000 SP (another source: 20,000)
Small effect.
Card →
Melee +25%, firearms −50%.
The Mercenaries menu (No Mercy too). Bought separately from campaign skills, and only one can be equipped at a time. · 25,000 SP (another source: 9,000)
Only for Jake or a pure-melee player.
Card →
Firearms +25%, melee −50%.
The Mercenaries menu (No Mercy too). Bought separately from campaign skills, and only one can be equipped at a time. · 25,000 SP (another source: 9,000)
It trades bonus time for damage: melee kills add seconds, so use it with care.
Card →
Damage +30%, but you take triple damage.
The Mercenaries menu (No Mercy too). Bought separately from campaign skills, and only one can be equipped at a time. · 30,000 SP (another source: 18,000)
Risky; experts only.
Card →
Attacks from behind +25%.
The Mercenaries menu (No Mercy too). Bought separately from campaign skills, and only one can be equipped at a time. · 7,000 SP
Niche.
Card →
+300% damage while dying, and you recover in 5 s.
The Mercenaries menu (No Mercy too). Bought separately from campaign skills, and only one can be equipped at a time. · 15,000 SP (another source: 3,000)
Cheap insurance when playing solo.
Card →
Each tablet heals 2 blocks.
The Mercenaries menu (No Mercy too). Bought separately from campaign skills, and only one can be equipped at a time. · 17,000 SP (another source: 6,000)
Very good with characters that start with few tablets.
Card →
Medic Skill (Mercenaries)
Your tablets heal your teammate 1 block at any range.
The Mercenaries menu (No Mercy too). Bought separately from campaign skills, and only one can be equipped at a time. · 12,000 SP
For the duo: one equips this and the other a damage skill.
Card →
A partner you rescue gets up with 1 extra block.
The Mercenaries menu (No Mercy too). Bought separately from campaign skills, and only one can be equipped at a time. · 15,000 SP (another source: 6,000)
Useful in a duo if you go down often.
Card →
Health regenerates twice as fast in cover.
The Mercenaries menu (No Mercy too). Bought separately from campaign skills, and only one can be equipped at a time. · 20,000 SP (another source: 3,000)
Impractical: Mercenaries leaves no time for cover.
Card →
Health and combat gauge recover 25% faster.
The Mercenaries menu (No Mercy too). Bought separately from campaign skills, and only one can be equipped at a time. · 15,000 SP
A good all-round pick if you melee a lot.
Card →