Where each boss shows up, its weak point and how to beat it step by step.
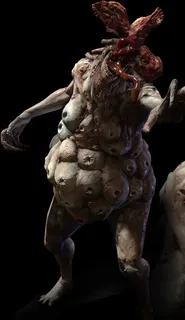
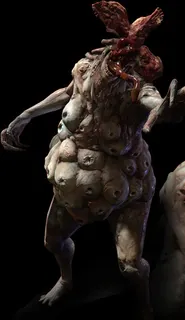
L2 · Cemetery & Cathedral · 2-3 Cathedral: the main hall, once you place the Madonna of Grief and the Madonna of Sorrow on the blue pedestals. There are item boxes on the third level.
Weak point The legs to make it kneel; then the head (the creature that pokes out of its head once it's hurt)
A bulbous mutation that sprays blue gas to turn civilians into zombies. At first it ignores you and hunts the civilians; once none are left, it comes for you. Shooting its body makes it vent grey gas, which knocks you down at close range (about 1.5 health blocks on Normal, per one source). The method every source agrees on: legs until it kneels, then a coup de grâce or a point-blank shotgun blast to the head. Kill it fast: saving the last two women (Jenny and Megan) earns I Prefer Them Alive.
- Before placing the second Madonna, reload everything and equip your strongest weapon: there are item boxes on the top level.
- While it chases civilians, kill the freshly turned zombies from range: they drop Incendiary Grenades, which work very well on it. Use them freely.
- When it comes for you, keep your distance and shoot the legs with the Semi-Auto Sniper Rifle (you've just picked it up) or the Wing Shooter. The shotgun up close is risky because of the gas.
- A Remote Bomb or a hand grenade makes it kneel at once, and the coup de grâce finishes it.
- Kneeling: coup de grâce or a shotgun blast to the head. Back off as it stands and repeat.
- If it grabs you with its tongue (Tongue Shove), rotate the stick: failing puts you in Dying, and kills you if you were already in the red. Its gas on a Dying player kills them, so revive your partner right away.
- In co-op, split the job: one player shoots the legs from range, the other waits closer with the shotgun or the knife to finish it the moment it kneels.
Reward: The Underground Keycard by its corpse. Under the altar, a chest with 4,000 SP and 2 barrels behind the door. I Prefer Them Alive if Jenny and Megan survive: they stay by the altar, and one pew has a Green Herb + Red Herb.
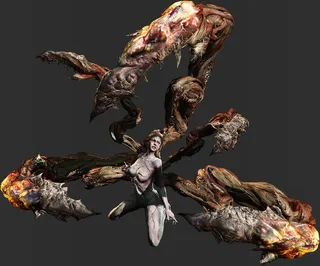
L2 · Cemetery & Cathedral · A2 · The Forest Cemetery, the Simmons Crypts, Deborah and the Underground Lab · 2-6 Primitive Altar (Leon) / 2-2 Altar Corridor (Ada): a two-level chamber, the descent through the mine, the mine cart and the final platform. **Story Intersection** between Leon Chapter 2 and Ada Chapter 2.
Weak point The glowing orange and yellow glands on the tentacles on her back; her human body is practically invulnerable
Helena's sister, turned into a chrysalid by the C-Virus. Damage goes in through the glands on her tentacles, which shatter after a few handgun shots; body shots do little. Four attacks: chest-pierce strike (spins down from above and impales you: wiggle out and counter), a long horizontal claw swing at ground level, a dash attack with her claws out and a 360 spin (back off as she jumps). When she screams, she leaps at you: dodge. It's a phased fight: chamber, descent, mine cart and finish. In Leon's campaign Ada fights alongside you; in Ada's, Leon and Helena are AI when you play offline.
- Shoot her a few times until a short scene plays: the real fight starts there.
- Aim for the glands on the tentacles. When she poses on the upper level with the appendages out, it's free damage (dual Wing Shooters as Helena, the Ammo Box 50 as Ada).
- There are 2 explosive barrels: only shoot one when she's right next to it.
- With enough damage she falls on her back with a tentacle out: get close, melee and follow the on-screen buttons to tear off a claw. 3 tentacles destroyed triggers the scene.
- If she straddles Helena, help her: a human Helena who fails that QTE takes heavy damage or dies.
- Zombies spawn now and then: they're weak and drop ammo (shoot their lanterns).
- Split before the cart: in Leon Chapter 2, Helena and Ada go down first and cover Leon, who descends through the mine past zombies and turns the crank; in Ada Chapter 2, Ada and Helena drop into the cart and Leon works the switches.
- Mine cart: lie on your back (aim and hop backwards). Prone, you avoid the 4 beams and almost all her attacks. Ada must hold a weapon other than the crossbow or she only backflips. Shotgun her glowing parts from the floor.
- Shoot the TNT drum at the roadblock on the track before you reach it, or it's game over. The other 2 barrels on the track only hurt you.
- Finish: after the crash, grab the ammo and shoot the glowing tentacle tip aimed at Helena before the platform gives way. Time is short: the sniper rifle is fastest. Too slow and it's game over.
Reward: In Leon Chapter 2 it ends the chapter (achievement Buried Secrets). She drops nothing: your ammo comes from the zombies. A medal in both Leon Chapter 2 and Ada Chapter 2: Killed 5 zombies while in the minecart; in Leon Chapter 2, also Relieved Deborah of her suffering.
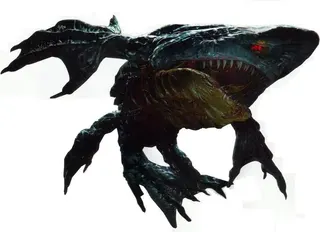
L3 · The Catacombs · 3-4 Underground Water Channel: the flooded channel, the iron gate and the rapids at the end of the chapter
Weak point The glowing orange tongue in its mouth, which only drives it back; it dies to a scripted explosive barrel
A giant shark-like B.O.W. You don't fight it: you run. Don't waste ammo on its body (one source gives it 150,000 health in the first encounter). Every time it advances, shoot its tongue to drive it back; if it reaches you, it's instant death. The kill comes on its own at the end, in slow motion.
- First encounter: a series of QTEs, slightly different for Leon and Helena. Follow the on-screen buttons.
- Split, the chase: Leon swims along the torches to a gate Helena has to raise. Mash the swim button to outrun it. If a corpse grabs him near the end, rotate the stick.
- Helena, on the rope bridges, shoots the Brzak's orange tongue to save Leon. If either of you fails, it's game over. Open the gate together.
- Rapids: a waterfall sweeps you along. Grab the 9mm Ammo that appears. Each time it advances, shoot the tongue repeatedly and reload in the gaps. Dodge its bite (a 2-button QTE) at least once.
- Finish: explosive barrels roll down the tunnel and the game goes into slow motion: shoot the barrel above it when it's close.
Reward: End of Leon's Chapter 3 (achievement Get on the Plane).
L4 · The Plane, the Market and the Train · 4-1 Inside the Airplane: the cramped cockpit, then the cargo hold
Weak point The legs to make it kneel; in the cargo hold it's invulnerable
It hatches from the “pilot” cocoon in the cockpit. The problem is space: use the back of the cockpit for distance and circle behind it to avoid its grab (a grab means Dying unless your partner interrupts it). In the cargo hold it can't be hurt: you win by opening the hatch.
- First, take the Lightning Hawk from the cockpit floor, next to the co-pilot, and the .50 AE ammo on both sides. If you don't miss, the magnum kills it.
- Alternatives: unload the Assault Rifle RN or chain counters (no ammo spent, but slow).
- When it kneels, coup de grâce: it flees into the ceiling. Inspect the panel.
- Cargo hold: a First Aid Spray sits on the far left by a canister. Turn the big red valve together: it comes back, invulnerable.
- One player distracts it while the other smashes the grey-and-red box on the wall opposite the valve (mash the button) and pulls the lever: the hatch opens and it's sucked out.
- Crawling back: hold both triggers and release and re-grab each in turn, in rhythm with Leon's arms. Dodge the sliding cargo box (two buttons).
Reward: The way back to the passenger cabin (now full of zombies from the gas).
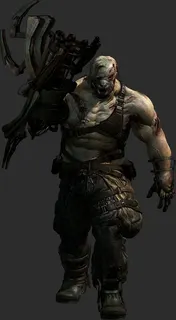
L4 · The Plane, the Market and the Train · J4 · Lanshiang: the Bike, Poisawan, the Shopping District, the Crash Site and the Stilt Houses · 4-2 Airplane Crash Site (Leon) / 4-5 (Jake): containers, forklifts, a bus and a cage. **4-player Story Intersection**: Leon, Helena, Jake and Sherry (the other pair is AI offline).
Weak point The head; the real damage comes from the explosive-canister crates. The metal arm takes less damage.
You can't win with bullets (short of an infinite magnum): the damage comes from the canister crates you push off the container tops. Lure it underneath and shoot them. The container tops are a good refuge: it almost never climbs up. Attacks: kick, foot crush (pins you, then kicks), encapsulate (stuffs you into the cage on its back: your partner frees you by hitting it with the partner button), grab and throw (throws one character into another) and extending claw. In phase 2 it carries a grenade launcher.
- Phase 1: lower the forklift (red button by the ladder) and climb onto the containers: 6 wooden crates and 2 canister crates you can push. They're separate objects: push both.
- On the ladder opposite the forklift: 3 wooden crates + 1 canister crate. Jump to the next container: 3 more wooden crates.
- Push the canister crates down, lure it underneath and shoot them.
- 2+2 split: when it retreats, Leon and Sherry start the bus: they open the rear panel together, Leon presses the shown button 5 times to fix the wiring and Sherry drives it through the gate. Jake and Helena dodge the Ustanak, now with a grenade launcher: keep moving.
- Phase 2: the right side opens. Another forklift leads to a platform with 4 canister crates, and there's 1 more on top of the cage. Blowing them all near it ends the fight.
- Optional, all four together: push the “tower” against the container wall to reach a case with a First Aid Spray + 3 Remote Bombs in the centre.
- Finally it switches to a spare claw; more damage and it amputates it. A metal structure falls on it (cutscene).
Reward: Jake's medals Defeated Ustanak with Leon and Helena and Blew up all the fuel tanks at the crash site (use every canister crate).
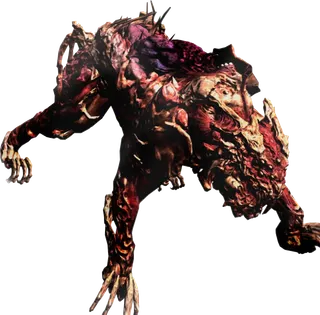
L4 · The Plane, the Market and the Train · 4-5 Train: the roof, the inside of the cars and a parallel train
Weak point In human form, the head (he kneels) and the finisher. In the Centaur 2 form, the deformed human face.
His first transformation: a fast quadruped. Every form shares the same loop: damage the beast → he reverts to human → headshot → he kneels → special melee finisher (press melee, then mash the shown button). Miss the window and you have to spend more ammo to recreate it. Inside the train the Assault Rifle RN is a good pick: 5.56mm ammo is plentiful.
- Roof: after the transformation, grab the 9mm and 5.56mm and shoot fast so he reverts before he charges.
- The cars: back up while collecting 2 × 5.56mm NATO Ammo and shotgun shells (more 9mm and shells further on). Keep a doorway between you and him. The human-and-finisher loop happens twice inside and once on the roof.
- When he climbs onto the roof: boost Helena up and she pulls Leon up.
- Split: Leon is thrown onto the next train: sprint to the end and jump back. Helena shoots the beast (any weapon) to stun it before it catches Leon.
- Centaur 2: he gallops alongside firing bone darts that hover around him first: stay behind the wall until they fly. When he stops, shoot his torso or head (it cuts the volley).
- He rips wall sections off: those spots drop ammo but lose cover. Take the rear ammo first, since he claws in at the back. When he enters the car, dodge with the 2 shown buttons.
- Finale: on the roof, he charges the train head-on. Shoot him before he reaches it (rifle, machine gun or pistol) or the train derails and you retry.
Reward: End of Leon's Chapter 4 (achievement Big Trouble in China).
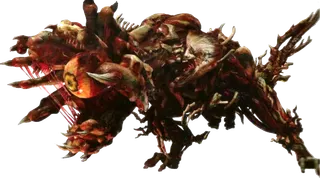
L5 · The Port, the High-Rises and the Quad Tower · A5 · Lanshiang by Helicopter and the Quad Tower: the Dinosaur, the Rooftops and the Walkway · 5-3 Quad Tower Entrance (Leon) / 5-2 (Ada, from the helicopter): the plaza with the central obelisk, red barrels, a fuel tanker and a Humvee. **Story Intersection** with Ada.
Weak point The eyeball inside his mouth, and the flesh on his back once you shoot the scales off. From the air (Ada): the eye on his back.
Pure brute strength: stomps, bites and a roar that disorients up close. He throws cars: instant death, so don't hide behind small cars. Use the central obelisk as cover. It's a long, phased fight, and between phases he reverts to human for the finisher loop.
- First, loot the ring of crates along the walls (about 20), a First Aid Spray in the open area and at least one Remote Bomb in a box by the obelisk.
- Lure him next to the red barrels and shoot them. Remote Bombs work too.
- When he reverts to human: ram him, shoot his head until he kneels and do the finisher.
- Humvee phase: a BSAA soldier arrives in a Humvee with 2 machine guns (infinite ammo, but they overheat: fire in bursts). Aim at the eye in his mouth when he lunges. It ends when he wrecks the Humvee.
- Get him to charge the fuel tanker and shoot the spilled fuel to set him on fire.
- Final phase: fewer barrels left. Remote Bombs by the obelisk. The magnum works, but save some .50 AE for the fly.
- Ada (helicopter): circle him constantly while firing, and put the obelisk between you when he lifts a car. Break the plates on his back and shoot the eye there. Save the missiles (3-4) for his human form, and shoot the red barrels near him too. If he catches Leon in his mouth, hit him with a missile so he lets go: according to two forum threads, that earns the medal Rescued Leon from becoming B.O.W. chow.
- Co-op in Ada Chapter 5: Agent sits in the co-pilot seat with his own gatling gun, and the missiles are shared. Let Agent handle the gun while Ada flies and fires the missiles.
Reward: On to 5-4 Quad Tower (Leon) or 5-3 Quad Tower Roof (Ada).
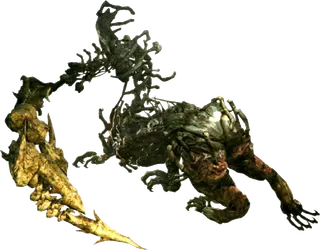
L5 · The Port, the High-Rises and the Quad Tower · A5 · Lanshiang by Helicopter and the Quad Tower: the Dinosaur, the Rooftops and the Walkway · 5-4 Quad Tower: the elevator shaft and the pedestrian walkway. **Story Intersection** with Ada.
Weak point The deformed human face; in human form, the head and the finisher
Centaur 2 again, with a new move: a spear stab that drags you in for a tentacle barrage. Also: charge, claw swipe (close), tentacle smash (close to medium) and bone darts (medium to long). Stay at medium or long range and, when he charges, sprint through the gap he leaves between himself and the edge of the walkway to switch ends. Don't shoot during his speech: it's a timed event.
- Leon, the elevator cable: climb by alternating the triggers. Halfway, drop onto a ledge and snipe him while he fights Ada. Climb again fast: he chases you and Ada shoots him to save you.
- Split: Leon and Ada on the walkway; Helena alone, sniping from a room in the building. Her hits knock him back to human form.
- Loop: beast → human → headshot → finisher. Zombies keep spawning and drop items: check after every shot. The small platform mid-walkway is the best spot for dodging.
- Weapons: shotgun and magnum, keeping a few magnum rounds.
- Finale: when he “dies”, he drags Leon to the edge. Ada must reach him and use the partner button or it's game over. The AI does it on its own; a human Ada has to run the moment his speech starts.
- Ada alone (Ada Chapter 5, before the above): on top of the elevator, hold out and shoot. On the walkway, rifle or crossbow between charges and pipe-bomb arrows until the scene triggers; you can also counter his fired claw.
- Ada in support: shoot Simmons while Leon and Helena climb the cable (any weapon but the shotgun) so he slips back. A human Leon needs that help or he dies.
Reward: On to 5-5 Quad Tower Roof (Leon). In Ada Chapter 5 it leads to the ending: the console, Carla's lab and the credits (achievement What's Next?).
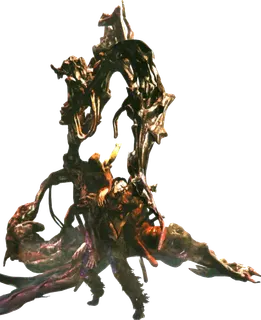
L5 · The Port, the High-Rises and the Quad Tower · 5-5 Quad Tower Roof: a rooftop corner surrounded by zombies
Weak point His body; he barely moves
A humanoid form weighed down by a mass on its back, almost stationary, with a scorpion-like tail of huge reach. The tail has a fixed rhythm and can't aim well past the corner: hide there. He impales zombies and absorbs them to heal, so clear the zombies first.
- Get behind the corner.
- Kill the nearby zombies so he can't heal.
- Peek out between tail strikes and shoot his body: shotgun, a few magnum rounds or a Remote Bomb.
- It ends in a cutscene: the zombies swarm him.
Reward: Access to the rest of the roof: 2 crates + 1 wooden box on the far side. Don't take the stairs yet: behind or under them, through the bars, is Serpent Emblem #20.
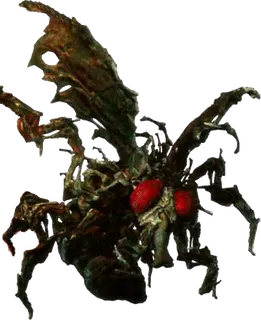
L5 · The Port, the High-Rises and the Quad Tower · 5-5 Quad Tower Roof: the window-washer cart, then the helipad with the broken lightning rod
Weak point The golden joints where the legs meet the body; the eyes once he collapses. Normal shots bounce off the shell.
Leon's final boss. First, from the window-washer cart, Leon shoots the fly's head and eyes. On the helipad comes the final form: the pincers cover the eyes, so break the leg joints. Each lost leg makes him absorb zombies to regenerate, and that's where the lightning rod comes in: impale a zombie with it and, when Simmons eats it, lightning strikes him. The magnum is the best weapon (save it all chapter); the shotgun and assault rifle also work.
- Split, the window-washer cart: Leon drops into the cart and shoots the fly's head and eyes and its spit globs; from there he can't aim towards Helena. Helena runs the cart switch while zombies swarm her: the faster she is, the sooner you regroup.
- Helipad: loot first: 2 crates + wooden box on the far right, 2 crates + wooden box in the upper-left corner and 3 crates in the far-right corner.
- Shoot the golden joints on the legs. About 2 broken legs is a good pace.
- If he swipes close to you, a QTE appears: succeed and your character climbs the leg and plants a grenade in the joint.
- Pick up the broken lightning rod and impale a zombie (prompt next to the zombie). Keep damaging him until he eats it: lightning, massive damage and a stun. Break 2-3 more joints while he's stunned.
- The rod drops: pick it up again. Co-op: one player carries the rod and impales zombies; the other shoots the legs and keeps the zombies off them.
- After about 3 strikes he collapses: stab the rod into his eye, or impale another zombie and shoot the eyes.
- Last shot: by the helicopter, take the Rocket Launcher and fire at his eye as he climbs up.
Reward: End of Leon's campaign (achievement The Trouble with Women).
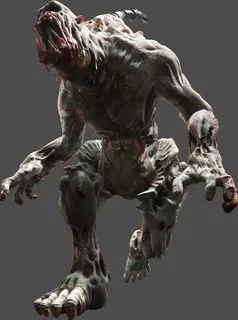
C2 · Edonia: The Street, the Bridge and City Hall · 2-1 City in Eastern Europe: the street under the walkway, with two-storey buildings on both sides
Weak point The red growth on the back of its neck and its open mouth; the crotch too, but it spills bile
A giant from Edonia. It appears when you try the partner door on the walkway; up there it can't hurt you, so don't waste bullets. You have two ways out: survive about 5 minutes until the APC arrives and drives it off, or kill it, which gives 4,000 SP and items. Its moves: a striding swipe (2 blocks on Normal; it also kills J'avo), a stomp (minor damage and a stagger), a grab if you're close (shoot its face to escape), a head-height punch with a big wind-up and bile if you shoot its crotch.
- Get high: the L-shaped stairwell to the right of where you jumped down is safe (it can't reach you through the wall and the J'avo come single file). That building has 3 crates.
- Shoot its neck or mouth until it staggers and rests a hand on the building.
- From the second floor, melee next to its arm to jump on: a QTE, mash to pull out a spine and stab it into the growth. The QTE timer gets more forgiving with each try.
- If you fail, it grabs you: shoot its face or rotate the stick (shooting is faster).
- Repeat until it bubbles and dissolves.
- Easy kill: lure it under the electrical wire by the ladder on the building at the end of the street (on the left). The shock stuns it: shoot the red part, jump on, QTE, and repeat.
- J'avo spawn in pairs on the walkway and scaffolding the whole time: they're a good ammo source.
Reward: 4,000 SP and items. Medal Defeated the giant B.O.W. through its weakspot. Afterwards, go back with Piers to the red door where it first appeared: Assault Shotgun + First Aid Spray + a crate.
C2 · Edonia: The Street, the Bridge and City Hall · 2-2 The Bridge: the collapsed bridge (Chris) and a sniper perch in the building (Piers)
Weak point The red fuel tanker behind it: one shot destroys it
Bullets won't do it: it's a two-person job. Chris draws the tank forward and Piers, from above, shoots the fuel behind it. One shot destroys the tank and most of the J'avo on the bridge.
- Split, Chris: the bridge collapses. Crawl to Finn on the far left (anywhere else and you fall); tap sprint to crawl faster.
- Chris: take cover behind the truck and kill the turret gunner on the right as soon as you can. Move forward to draw the tank out. There's a sniper ahead: kill him or rush the ladder at the end of the bridge (on the left, past the tank).
- Piers: Chris throws him over the gap. Follow the soldier; at the 2 bunkers, grenades (they're bunched up). From the perch, snipe the gunners and, when the tank inches forward, one shot on the red fuel tanker.
- Chris climbs up and lowers the ladder for Piers.
- Back together, push the white container and hold the line: J'avo parachute in while Finn sets the explosives.
Reward: Passage over the bridge. Right after, Serpent Emblem #6: on the beams under the bridge, by the first support column. It's Piers's in practice (Chris only from a specific angle).
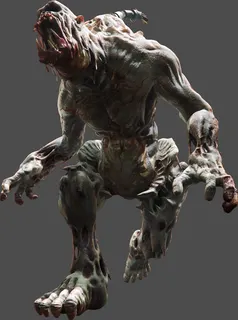
C2 · Edonia: The Street, the Bridge and City Hall · J1 · Edonia: the sewers, the warehouse and the helicopters · 2-3 In Front of City Hall (Chris) / 1-4 (Jake): the square and 3 anti-aircraft guns. **4-player Story Intersection** with Finn (invincible AI).
Weak point The same: neck and mouth. The second one starts with no exposed growth: you have to rip out its regeneration machine first.
Two Ogroman while Finn destroys 3 anti-aircraft guns. Fight from second floors: when it staggers it rests a hand on the building edge and you can jump on. The first one is easy to kill from the AA gun 1 building. The second (the one that fled the bridge) has no exposed growth until you down it once and rip out its metal regeneration spine. The route guide doesn't work here: stay close to the BSAA team.
- Gun 1: in the building right behind you (2nd floor). There are 2 crates in the nearby room, 2 by the stairs and 2 in the room with the blown-out back wall. The Ogroman can't reach you there: it's the best moment to kill the first one (face + neck growth, jump on, QTE; twice per one source).
- Gun 2: go down the street; Finn blasts the door of the central building (on your left). Defend him from the J'avo dropping in from the roof rubble. Once it's destroyed, J'avo snipers appear, along with the second Ogroman.
- Second Ogroman: lure it to the electric wires. The shock lets you board it and rip out the machine to expose the growth.
- Gun 3: drop through the hole on the ground floor into the underground passage (Green Herb, Red Herb and crates). The Ogroman kicks out the ceiling grate and tries to grab you. Kill the turret gunner, kick down the ladder and distract the Ogroman while Finn sets the charges (dropping into the hole in the street often works better, since the snipers multiply).
- Once all 3 guns are down, the BSAA airstrike finishes any Ogroman with its growth exposed, but gives you no SP. Any one still carrying its machine has to be boarded once.
Reward: 4,000 SP per Ogroman you kill yourself. Medals Defeated the giant B.O.W. through its weakspot, Neutralized 3 anti-aircraft guns (Chris) and Teamed up with the BSAA in the square (Jake).
C3 · Lanshiang: Poisawan, the Stilt Houses and the Medical Center · J4 · Lanshiang: the Bike, Poisawan, the Shopping District, the Crash Site and the Stilt Houses · 3-2 Poisawan Courtyard (Chris, from the rooftops) / 4-2 (Jake, in the construction pit). **Story Intersection**.
Weak point Anywhere on the hull, with explosives, while it hovers
About 6 explosive rounds on Normal anywhere on the hull drive it off (single source). Hit it while it hovers dropping enemies: meanwhile it keeps deploying Noga-Skakanje J'avo.
- Chris: the Grenade Launcher is straight ahead in a shack, with 2 explosive rounds + a First Aid Spray. You need it.
- Chris and Piers: climb to the platform (behind it, the back ladder leads to 5 crates) and fire when it hovers. Break crates for more rounds.
- Jake and Sherry, before: in the pit, kill J'avo while dodging the machine gun; only the ones with red markers count. A corner of a narrow alley is out of its reach. One kills while the other draws the chopper.
- Jake and Sherry, after: from the highest section, Bear Commander explosive rounds (switch to the weapon's grenade launcher). It reloads slowly. Sherry can't use Jake's swing bar and gets a narrower firing window.
- Hard Choice: when it hovers over the high roof, a rope hangs down. Grab it, mash to climb and, over the glass, shoot the pilot with the Elephant Killer as Jake.
- If Jake and Sherry take too long, Chris and Piers bring it down for them.
Reward: Medal Shot down the helicopter (Chris). Achievement Hard Choice and medal Personally finished off the helicopter pilot (Jake).
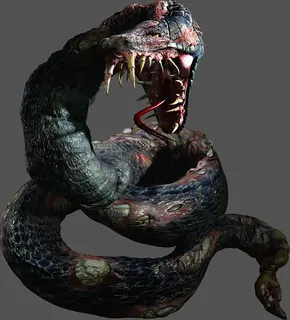
C3 · Lanshiang: Poisawan, the Stilt Houses and the Medical Center · 3-3 Poisawan Inner Area: 3 rooms of the tenement and a circular pit with a pool of water
Weak point Inside its mouth when it opens to strike; at the end, only electricity
A giant camouflaged snake. It has one attack and telegraphs it: it rears its head back and opens its mouth before lunging. To spot it, look for the ripple in the air: your laser sight bends as it crosses it (change the laser colour in Options if it blends in). It attacks through walls, from the ceiling and up through floors. If it coils around you, QTE; fail and it bites your head: instant death. If it grabs and throws you, moderate damage. Breakout (2,800 SP) shortens its grabs.
- Rooms 1 and 2: shoot its mouth when it lunges from the holes and roll aside. Chris's assault rifle or the Assault Shotgun. After enough damage it flees to the next room (room 2 has 4 crates).
- Room 3: the cabinets are fake cover: it hits you through them. There are 4 × shotgun shells here: use the shotgun.
- Don't miss it: before the ladder, go through the vent in the corner: a box, 2 Green Herbs in the cabinets and a case with 10,000 SP.
- Finale: in the pit its scales harden and weapons barely hurt it. Climb a ladder (2 Green Herbs at the top) and flip the switch: the wire slips out and Marco plugs it back in.
- Your partner lures it to the pool under the switch; nobody should stand in the water. Pull the lever again as it crosses the pool: the first throw blows the fuse, the second kills it.
- It rarely climbs onto your ledge: don't get complacent.
Reward: Marco pulls you up; a Red Herb. The 10,000 SP case in the vent room is the only one of that value in the whole game.
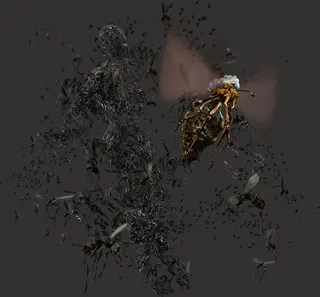
C3 · Lanshiang: Poisawan, the Stilt Houses and the Medical Center · 3-3 Poisawan Inner Area, upstairs, right after the Iluzija
Weak point The queen: the large insect flying apart from the swarm
Marco becomes a chrysalid and a Gnezdo hatches: a swarm of insects around a queen. Killing the queen is the only way. If the swarm catches you, it drains your health and you have to shake the stick.
- Shoot the swarm with the shotgun to scatter it and expose the queen.
- Empty the shotgun into the queen from medium range: that's the main method. This chapter only has fixed 40mm Explosive Rounds; if a crate happened to give you 40mm Acid Rounds, use them here: they're especially effective against the Gnezdo.
- Back off or slide to avoid the swarm; in co-op, one player scatters and the other finishes the queen.
- Collect the 5 crates around the room and Marco's C4 to blast the doors.
Reward: Marco's C4 (key item). Unlike ordinary Gnezdo, it does not drop the 2,500 SP Queen (Silver).
C3 · Lanshiang: Poisawan, the Stilt Houses and the Medical Center · 3-4 Stilt Housing Area: the floating restaurant (the red pagoda-style building)
Weak point Anywhere on the hull, with explosive rounds
6 explosive rounds on Normal with the Grenade Launcher (single source). Its explosive rounds hurt a lot: take cover in the rooms between shots and make every hit count.
- The chase before it: run across the boats without stopping to fight (a Napad and 2 hoppers can be avoided; stopping here is suicide) to the floating restaurant. Climb the ladder to the 1st floor.
- Restaurant rooms: room 1 = Red Herb + 2 vases; room 2 = Green Herb + 3 vases. The boxes hold plenty of rounds.
- Step out to fire when it hovers, then get back into cover.
- Serpent Emblem #11: during this fight, from the restaurant (one guide says the upper floor; Evil Resource, the bottom), look left across the harbour (on the scaffolding of a building under construction or a greenish hut on the water; the sources describe it differently). It's missable once you jump off the restaurant.
- The chopper crashes into the boat: jump off.
Reward: Access to the last part of the chapter.
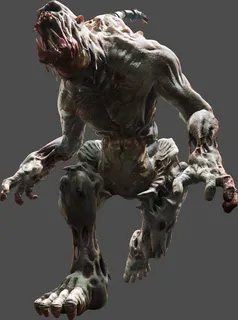
C4 · The Aircraft Carrier: Hangars, Bridge and the VTOL · 4-4 Airspace over Aircraft Carrier: Chris flies the VTOL and Piers goes down to the deck
Weak point Any hit stalls it; Piers's missile finishes it
The finale of a split chapter. First Chris flies the VTOL and destroys the AA guns and 3 helicopters; then Piers runs across the deck to stop a missile (about 4 minutes) while Chris covers him from the air. At the end an Ogroman comes out of the carrier: Chris stalls it and Piers kills it with a missile.
- Phase 1: Chris fires the cannon at the AA guns (green squares on his screen, red squares on Piers's) and rolls to dodge missiles (red icon). Piers runs the missiles: hold the reticle until it fully locks on before firing, or you waste the shot.
- Phase 2, Piers: at each container, action button and the timed buttons (1, then 2, then 3). J'avo climb out of a manhole south of him: Chris covers him with infinite ammo.
- After blowing the 1st container, Serpent Emblem #16 (Piers's in practice): head towards the stern, slide over the girders and turn right: it's inside a tyre.
- 2nd container: there are snipers. Chris, shoot the J'avo on the balconies of the building on the left: the AI Chris can't hit them, so in co-op it's your job.
- Piers: crawl under a pipe, jump into the trailer, do the launch-console QTE (4 buttons), climb the crane to the end and jump back into the jet.
- Ogroman: Chris keeps shooting it (any hit stalls it) while Piers gets back to the jet. Then, when the marker says so, shoot the missile behind it. The missile launching isn't a failure: it's scripted.
Reward: End of Chris's Chapter 4 (achievement There's Always Hope). Medals Destroyed 3 helicopters with the VTOL's barrel gun and Reached the missile in 3 minutes or less.
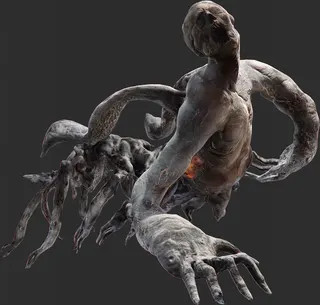
C5 · The Underwater Facility: the Ducts, Haos and the Escape · 5-3 Upper Levels: the climb out of the chamber and the circular drainage ring; 5-4 Emergency Escape Route: the tunnels
Weak point The head and face; in the tunnels, its hand when it smashes through the wall
A huge B.O.W. that hatches in 5-2, at the intersection with Jake and Sherry. At times it's invincible: if it chases you, don't waste ammo, run. In the drainage ring only its upper body shows, and it falls fairly quickly to explosives.
- Escape: climb the wall after the cutscene and run counter-clockwise holding sprint. Piers goes up first; have him pull Chris up straight away.
- When it blocks the way, shoot its head with your strongest weapon (the Grenade Launcher works very well) until it recoils, or it crushes the platform.
- Slide under the low obstacle (dash and slide together, then get up at once; judge the distance by the shadow on the floor). On higher difficulties, failing it is game over.
- Chris boosts Piers and hangs on (QTE) while Piers stuns it one last time.
- Drainage ring: collect the outer-ring crates first (2, 3, 1, 1, 2 and 3 counter-clockwise): beating it forces you out of the room. Keep 30 m or more on the indicator and aim at the head: machine-gun bursts, then rifles; the shotgun is poor at range.
- If it raises an arm, roll or slide aside. The hand sweep covers a wide area: roll or slide to the edge of the platform.
- Tunnels (5-4): crawl under the door (press action to crawl faster). In each cabin, when the hand smashes through, shoot the hand once or twice (one explosive round is enough) and slide under the shutter. If it catches you or a door closes on you, you die.
- At the last blast door, Piers mashes to hold it open while Chris climbs. Before using the partner door, turn around: Serpent Emblem #19 is on the floor to the left.
Reward: After the ring: 40mm Acid Rounds and shotgun shells on the floor past the doors.
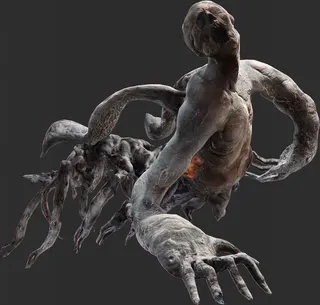
C5 · The Underwater Facility: the Ducts, Haos and the Escape · 5-4 Emergency Escape Route: the final chamber, with containers and high platforms
Weak point The 2 orange or red growths on the sides of its back; then the cocoon and the 3 hearts
With his arm crushed, Piers injects himself with the C-Virus: he can no longer use weapons, herbs or items. He only fires bio-electric shots (the charged one stuns and damages; normal ones are more accurate on the growths) that cost vitality, which regenerates on its own. Chris uses his normal weapons. In this phase, damage anywhere but the growths does nothing. Attacks: hand smash, long swipe, grab and crush = instant death, tentacles that snake around corners, a drag under its body, slime bombs (4-5 green balls that grow on the floor and explode: shoot them; some stick to the ceiling and drop as you pass) and a body slam (extreme damage). When hurt, its lower half detaches, scurries around and explodes a few seconds later.
- Before it: 4 wooden crates + 3 boxes. Bring Flash Grenades and acid rounds. Press the floor panel to start.
- Stun it first: a Flash Grenade stuns it instantly; so do a few acid rounds, some shotgun shells or Piers's shots.
- Get behind it and pop a growth. You usually get one per stun: stun it again for the second.
- With both growths gone, a large organ shoots out of its lower chest and explodes if you touch it: shoot it and keep away.
- It crystallises into a cocoon: break it with a full shotgun or machine-gun magazine before it regenerates (leave it alone and it regenerates fully).
- It falls on its back: run in and do the special melee to slash one of its 3 hearts. When Piers says it's your chance, go.
- It climbs onto a container and cocoons again: up there it can't be damaged. When it comes down, repeat.
- 3rd heart (scripted): Chris is left Dying. Crawl to Haos and use the partner button while Piers holds on with his own QTE. Both have to succeed.
- Afterwards: open the door for Piers. Piers fires his charged arm up close at the organic barricades while Chris covers him; it's timed, so don't stop to fight. At the 3rd barricade, look down to the right: Serpent Emblem #20, above a red light (missable once you pass).
Reward: End of Chris's campaign (achievement Duty Calls). Medals Escaped from the giant B.O.W. and Said farewell to your partner.
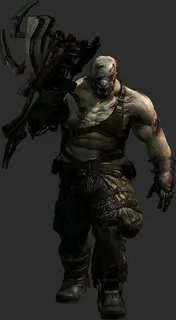
J1 · Edonia: the sewers, the warehouse and the helicopters · 1-2 Water Channel: the big warehouse, ringed by an upper walkway
Weak point The head; the metal arm takes less damage
Jake's pursuer. First you flee (hold sprint: jog and it catches you), then the warehouse fight. Explore before opening the green doors: that starts the fight. There are 6 explosive barrels on the ground and 5 on the upper walkway: shoot one just before it passes (once it's past, its body blocks your shot). It usually follows you upstairs, so the walkway is the ideal loop.
- Before the green doors: go up the central stairs, jump the gaps and kick down the 2 ladders (your escape routes). Take the Elephant Killer from the 2nd-floor storage room (through the hole in the wall); each player gets their own. Switch back to the handgun to save magnum ammo.
- Open the green doors together: the Ustanak drops in.
- Loop: central stairs → jumps → perimeter → the ladders you kicked down. Shoot barrels as it passes them. If your partner provokes it downstairs, it stays down there: agree on a plan.
- Remote Bombs on the upper walkway: about 4 is enough on Normal (single source).
- Dash ram: from medium or long range with line of sight; it slams you into a wall and almost certainly puts you in Dying. Sidestep.
- Claw grapple: the arm device opens first (that's the tell). Up close, move to its side or duck; a long-range version drags you in. If it catches you, rotate the stick, or your partner hits the Ustanak to free you.
- The J'avo sliding down ropes give ammo: melee them only when the Ustanak isn't winding up a charge.
- It ends crushed under rubble (cutscene).
Reward: Medal Escaped from a collapsing building.
J1 · Edonia: the sewers, the warehouse and the helicopters · 1-5 Inside the Helicopter: two Chinooks and a turret
Weak point On the turret, the helicopters it rides; at the end, the red gas canister
It rips into the Chinook through 6 doors. Its next entry point shows as a red icon on screen: move away from it. You don't need to spend much ammo. Then, from the second Chinook's turret, you shoot down the 3 helicopters it rides.
- Chinook 1: 2 × 9mm Ammo + First Aid Spray by the cockpit. Shoot it with the handgun or the Elephant Killer. Once hurt it also throws grenades: watch where they land.
- When the chopper catches fire, jump to the other Chinook at the doorway by the BSAA operative. Jake has a QTE after the jump; Sherry doesn't.
- Switch to the handgun and reload it before or after the jump: you'll need it at the end.
- Turret: shoot the 3 helicopters it rides (shooting it does nothing) and shoot down the missiles. The turret overheats: short bursts. Hold sprint to duck its attacks.
- Finale: it hangs on while you slide down the cabin. Shoot the red gas canister (it looks like a fire extinguisher) next to it, then press the parachute button the moment it appears. Missing it is death.
Reward: End of Jake's Chapter 1 (achievement Money Talks).
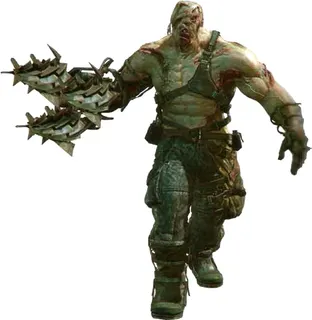
J2 · The Edonian mountains: the snowy path, the avalanche and the cave · 2-3 Cave: ice corridors, the Oko maze, the keycard chamber and the mining drill
Weak point It can't be hurt: stealth, distraction and the drill QTE
A stealth section. The Ustanak hears very well but sees poorly: that's why it uses the Oko. If an Oko spots you or you fire a gun, the Ustanak comes, and being found is death. Dumpsters are hiding spots, but count on one hide only: the sources disagree on whether the second one kills you. It ends with a QTE on a giant mining drill.
- Kill the Oko from behind with the contextual attack: silent and instant. Running doesn't alert them.
- Optional 4,000 SP: let the first Oko spot you by the first ice wall with the Ustanak behind it, run to the dumpster and hide: it smashes the wall. Once it leaves, kill the Oko and take the box in that room. There's another box with 2,000 SP up the small ladder on the left.
- The 5-Oko maze: only the first dumpster on the left wall works. Follow the left wall down the stairs: a box with 5,000 SP before the maze. The AI partner won't let you leave until all 5 are dead.
- Serpent Emblem #8: on the water tank at the exit. Turn the door wheel without going through, shoot the emblem (it alerts the Ustanak) and go through the door together at once. In co-op it's easy; with the AI, your partner runs for a dumpster instead.
- On the ice, it smashes the left wall: sprint and slide through the gap in time.
- Keycard: take the 4 Remote Bombs on the right side. Jake boosts Sherry up the broken ladder. Plant a bomb far away and detonate it: the Ustanak goes to the noise and Sherry takes the keycard from the body.
- Four heavy doors in a row: turn the wheel, open and repeat, fast.
- Drill: rotate the stick and press the shown button on cue; repeat until it's driven back.
Reward: Medal Defeated Ustanak with the drill. End of Jake's Chapter 2 (achievement A Revolting Development).
J3 · The Neo-Umbrella Facility: the Cells, the ID Medals and the Tank · 3-3 Entrance: the Buddha room, a corridor, the pond garden and the rotating statue
Weak point It can't be destroyed
A tank bursts into the room. You don't destroy it: you dodge it by circling, and use it to break things.
- Serpent Emblem #11: stand behind the Buddha statue so the tank destroys it; the emblem is in the debris. Take it before leaving the room.
- Run up the stairs: Jake swings across on the pipe, kills the J'avo and pulls Sherry up fast, or the tank targets you.
- Corridor: run towards the camera and move away from the side the barrel points at (a hit knocks you down and that's death). At the end, go right into a cubby.
- Garden: Serpent Emblem #12 is behind the stone staircase of the pagoda, at ground level. Take it before climbing.
- Split: Sherry stays in the lever room holding off J'avo (Remote Bombs or Bear Commander grenades once they bunch up). Jake swings across and makes the tank turn the statue clockwise 3 times: stand near the end to draw it forward (it grazes the statue) and retreat to the start to make it back up.
- At the end, Sherry holds out against J'avo and tank shells while Jake gets the bike going.
Reward: Medal Evaded the tank's attacks. Cases: 300 SP + .500 S&W Magnum Ammo, and 4,000 + 300 SP in the bike room. End of Jake's Chapter 3 (achievement Let's Blow This Joint).
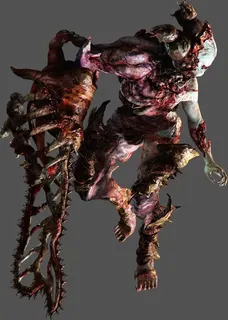
J4 · Lanshiang: the Bike, Poisawan, the Shopping District, the Crash Site and the Stilt Houses · 4-4 Shopping District: a closed arena with a structure in the middle
Weak point The heart at the base of the chainsaw on its right arm (its own file says destroying it kills it); the legs make it kneel
A humanoid B.O.W. with a chainsaw arm. Here, any chainsaw hit leaves you Dying or kills you outright. It's slow but chains its swings and can go berserk (chasing you very fast). Attacks: a wild swing in a straight line (dive aside), a torso cut if you're on your back or Dying, a neck swing, a 180° swing if you're behind it, and a leap strike and double swing (6 blocks each). It's the only fight against it that requires the team finisher.
- 1-2 J'avo join at the start: get them out of the way.
- Weapon: the Elephant Killer; otherwise the shotgun or the Bear Commander. Explosive rounds make it trivial.
- Shoot the base of the chainsaw from range. If it closes in, shoot the legs to make it kneel.
- Climb the central structure and drop down when it follows (repeatable), or circle obstacles.
- Once it's staggered: Jake presses the shown button, then Sherry: a team finisher.
Reward: 4,000 SP.
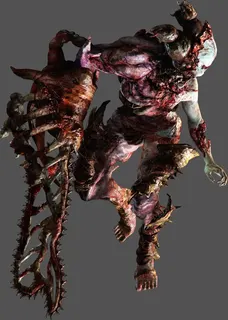
J4 · Lanshiang: the Bike, Poisawan, the Shopping District, the Crash Site and the Stilt Houses · A3 · Lanshiang: the Night Market, the Ubistvo, the Bus, the Train and the Stilt Houses · 4-6 Stilt Housing Area (Jake) / 3-4 (Ada): the long roof, the boat and the downed helicopter's rotor. **Story Intersection**: Ada covers from range.
Weak point The same: the base of the chainsaw
Three rounds back to back. On the roof it has more health and J'avo drop in non-stop until it goes down; here its wild swing is a QTE (mash while your partner helps) instead of putting you straight into Dying. On the boat it has less health. Ada decides the finale.
- Roof (Jake and Sherry): Flash Grenades, Remote Bombs and Bear Commander explosive rounds. Let its blind swings kill the J'avo.
- Ada: from cover, the sniper rifle (the boxes only spawn rifle ammo). Shoot the J'avo in Jake and Sherry's way and focus the Ubistvo when it attacks them at the red building.
- Boat (Jake): a tiny arena. About 2 Remote Bombs do it (leave room to get clear of the blast). Use the steering column to block its path.
- Ada: at the crane, shoot it and, after a short scene, press the action button to drop the girders on it.
- Finale: Sherry is trapped on the drifting boat. Jake shoots it from the pier; Ada does nothing until the prompt appears, then ziplines down and grabs Sherry. The rotor shreds it.
Reward: Ada's medal Saved Sherry from the attacking B.O.W. In Ada Chapter 3 the chapter ends when you board the jet ski (achievement This Takes Me Back).
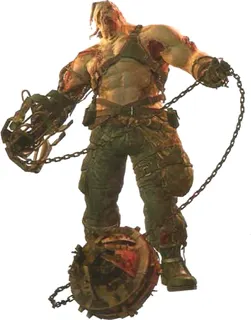
J5 · The Underwater Facility: the Batteries, the Lava Arena and the Tram · 5-3 Underwater Facility 2: walkways over a sea of lava, a small platform and a catwalk for the fist fight
Weak point The head; at the end, Jake's fists
Jake's final boss, now with a ball-and-chain flail. Three stages: walkways, a platform by the lava and a fist fight with Jake alone. Never stand in front of it.
- Don't fight yet: turn around, take the left path, drop down, cross to the right, climb and push the crate together.
- Serpent Emblem #19 first: at the base of a pillar in the lava, in the maintenance-walkway area (after pushing the crate, 90° right along the edge). On later runs you can snipe it from the entrance before triggering the Ustanak.
- Stage 1 (walkways): there are 9 crates. Use the sniper rifle and the 909 and save the heavy stuff. The Chain Shot (sometimes dipped in lava) is dodged by moving sideways; up close it uses the Chain Swing.
- Stage 2 (platform): it turns slowly: circle it and stay off its right side and front (the flail sweeps right). Its ground slams leave lava pools; items sometimes pop up in them, so wait for them to cool. This is where you spend the magnum and explosive rounds.
- Once staggered: both players melee → prompts: Sherry's stun rod, then Jake's kick. The flail breaks.
- Stage 3 (Jake only, fists only, no stamina limit): charged combos (aim + melee) to drive it back, hit the counter and dodge prompts and mash at the end. 3 failures = it knocks you into the lava (game over).
- Meanwhile, Sherry can send containers down 5 rails at it to unbalance it, though they often miss.
Reward: Medals Successfully countered one of Ustanak's attacks (silver) and Landed the finishing blow to Ustanak.
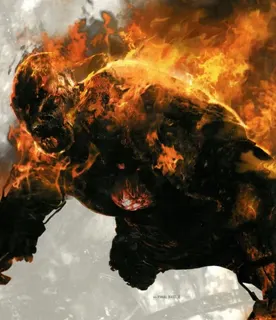
J5 · The Underwater Facility: the Batteries, the Lava Arena and the Tram · 5-4 Shipping Center: the speeding tram
Weak point Scripted: the Elephant Killer at the end
Its last appearance: it chases the tram. It's all team prompts.
- Climbing: hold both triggers and release and re-grab the one pointing up, alternating; releasing in rhythm is fastest.
- When it gets close, dodge with the shown buttons.
- Canister crate: both players press the button to release it. Climb on. Iron pipes: both release them, then mash.
- Crawl to the Elephant Killer stuck on the tram and pick it up.
- Final shot: Sherry presses fire and Jake presses his partner button (on Normal; the buttons may differ on other difficulties).
Reward: End of Jake's campaign (achievement See You Around). Medal Escaped from the underwater facility.
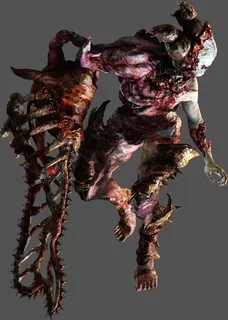
A3 · Lanshiang: the Night Market, the Ubistvo, the Bus, the Train and the Stilt Houses · 3-2 Shopping District: the zombie courtyard, the roof of a bus and the railway tracks
Weak point The base of the chainsaw; the legs to make it kneel
In Ada's campaign its wild swing is instant death. Ada has no AI partner: solo it's hard, and with Agent in co-op his second gun helps a lot. Three rounds: getting the key back in the courtyard, surviving on the bus and two trains on the tracks.
- The chase: hold sprint, slide under the low obstacle and use the grapple at the end.
- Before taking the Back Street Key: kill every zombie in the courtyard and ready Incendiary Grenades and a medium-range weapon. There are 5 crates, a Green Herb and a box with 2,000 SP.
- Courtyard: crawling zombies keep dropping in and grab you: they're the real danger, so keep moving. Lead it to the edges of the courtyard. Sniper Rifle and pipe-bomb arrows, or the Assault Shotgun while backing off. Incendiaries on the zombies.
- When it drops to its knees, run in and melee. 3 knockdowns + finisher and you get the key back.
- Bus: survive until it's thrown off. When it charges, press action to grapple to the other end. Agent has no grapple: he has to slide between its swings on the opposite side. Slide under the green signs. Serpent Emblem #11 is at the first stop (scaffolding on the left): shoot it fast.
- Tracks: there are 10 crates, but only grab them if you can spare a few seconds. It closes in whenever you reload: take a few shots and move.
- 1st train: a 3-button QTE. Then about 2 pipe-bomb arrows + a melee until the 2nd train: waggle the stick fast. That ends the direct fights.
Reward: You get the Back Street Key back. Possible medal: Used a B.O.W.'s attacks to kill all zombies in the area (let its swings kill the courtyard zombies; unconfirmed).
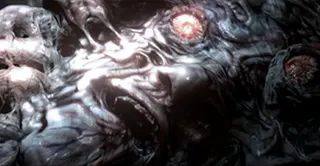
A4 · Carla's Aircraft Carrier: the 3 Passcodes, the Stealth Bridge and the Slime Escape · 4-3 Aircraft Carrier Interior: a giant face over a doorway, in a room with pillars; liquid-nitrogen tanks behind it
Weak point The eyes, then a hole in the face and the liquid-nitrogen tanks behind it
Carla injects herself with the enhanced C-Virus and becomes a mass that spreads through the ship. The boss (a large Carla Spore) is a warped face over a doorway: normal damage heals quickly, she swells her blood-filled eyes until they burst, spraying acid over a wide radius, and she spawns Ada clones (slow: ignore them). You have to open a hole in the face and burst a nitrogen tank: she freezes and shatters.
- Before it, in the slime chase, don't stop: if it touches you, it's game over. Shoot the red growths on the doors to open them. Wall arms: rotate the stick. Faces: pass while they retract; at the third, shoot the blue tanks to freeze it and take the Arrows (Pipebomb) on the left.
- In the boss room, hide behind a pillar when her eyes start bubbling.
- Burst both eyes: she heals more slowly after that.
- Focus fire on one spot of the face (next to the mouth) until a hole opens. About 4 pipe-bomb arrows into the same spot open it quickly.
- Switch to a fast weapon (Bear Commander) and shoot a blue tank through the hole: 4-5 bullets detonate it, and one is enough.
- No pipe-bomb arrows: use the shotgun to wear the face down.
- Ammo: shoot the red growths on the pillars and walls. Don't melee them: they burst and hurt you.
Reward: Medal Killed off your imperfect doppelganger. The elevator past the face ends Ada's Chapter 4 (achievement Ada's Demise).
A5 · Lanshiang by Helicopter and the Quad Tower: the Dinosaur, the Rooftops and the Walkway · 5-1 High-Rise Area: a tenement block; Ada flies her helicopter
Weak point None: it's a damage sink, and missiles speed it up
A gunship by the building. Before it, enemy helicopters come down the street: one, another, then two at once. Against the gunship, use the left and right edges of the building as cover from its missiles, keep moving to dodge its machine gun and swing out of cover spraying.
- Street: cover Leon and Helena; kill zombies with the gun only and save the missiles. Serpent Emblem #17 first: the yellow truck bed, on the left.
- Chase: one missile per helicopter, then the gun; one for the pair. Watch out for RPGs. Keep at least 3 missiles for later.
- Serpent Emblem #18 before the gunship: drop altitude, on the right, on a signboard.
- Gunship: use the edges of the building and drift slowly right during the shoot-out to dodge its missiles, which take a lot of health.
- Arrive with good health: coming in hurt makes the dinosaur fight start badly.
- Co-op: Agent sits in the co-pilot seat with his own gatling gun and aims with his own aim button; the missiles are shared.
Reward: On to 5-2 Quad Tower Entrance.