Skip to content
RE Guide RE6
ES
Pick your current chapter ›

Enemies

Every common enemy: where it appears, where to hit it and how to handle it.

Zombies (C-Virus)

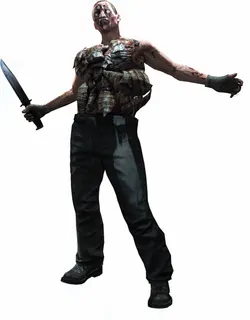
Zombie

Prelude; Leon 1–5; Ada 2, Ada 3 (the Shopping District courtyard) and Ada 5 (from the helicopter and in the Quad Tower)

Weak point The head (×1.5 damage); arms and legs take ×0.8

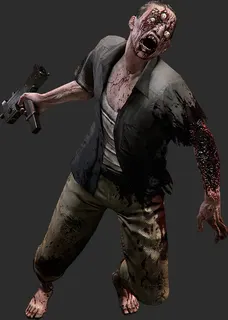
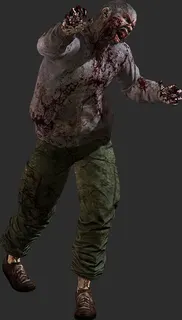
They shamble in, then lunge at you. They climb fences, crawl if you shoot their legs, spit acid at range, and many carry weapons (pipes, axes, swords). If one grabs you, rotate the stick to fill the gauge in time or it bites you and knocks you down. Go for the head: it finishes them fast. Melee does more damage to them than to other enemies, so counters, quick shots and hits after a stun save ammo; the shotgun handles groups. A weapon stuck in a zombie can be used against it after a counter or a stun. Don't let them surround you.

Drops: Ammo, herbs and SP pieces (Pawn worth 50 and Knight worth 100; double on No Hope)
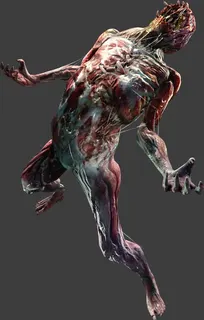
Bloodshot

Leon 1 (1-5 Gun Shop: enters the bar during the siege and climbs over the balcony railing), Leon 2 (the cemetery siege and, in the lab, Helena's side of the lever puzzle) and Leon 3

Weak point The heart, in the torso (×3 per one source); damage to the knees makes it kneel

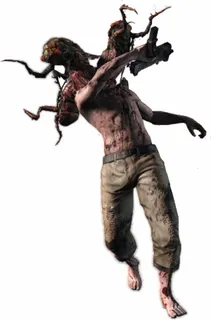
Zombies about to turn have glowing pink eyes and red clothes or a red hood: damage them (the head especially) and they change. It attacks with a long-range leap at your throat (medium to high damage) and, if you're too close, a slow uppercut. Counter the leap: you flip it over your shoulder and stomp its ribcage, an instant kill on lower difficulties, and you're invulnerable during the animation. Otherwise shoot it out of the air when it crouches to leap, or sidestep: it can't turn in mid-air. Assault rifle, shotgun or grenade launcher (they knock it back). It's hard to stun with melee. With Firearm Lv3 on Normal, one shotgun blast kills it.

Drops: Rook (Bronze): 500 SP

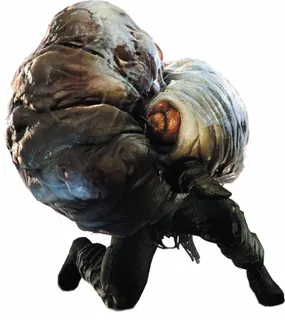
Whopper

Leon 1 (1-5 Gun Shop: breaks down the upstairs room door, climbs onto the balcony and blocks the bus), Leon 3 (3-3 Cavern: guards the exits of the wooden bridges), Ada 2 (2-2, at the end of the blade tunnel; 2-3 Underground Lab: 4, one with double health) and Ada 5 (the third rooftop: it has to die before Ada can land)

Weak point The legs: damage to a leg stuns it for 5–8 s. The body is very tough (×0.5) and the head nearly as tough (×0.6).

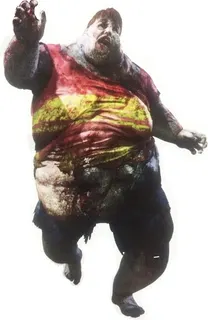
A giant zombie. Arm swing for 1–2 blocks (dive or slide), bite: it lifts you and bites your belly, 3 blocks (it stretches its arms out first: back off), and a ram for 2–3 blocks that can't change direction once it's charging. When it dies its body can fall on you (3 s stun), and it finishes off a Dying player with a stomp. On the cavern bridges it rocks them to knock you off balance. Assault rifle at mid-range into the legs; with a shotgun, about 2 blasts per leg. Counter its arm swing to sweep its legs, then give it the coup de grâce. Incendiary Grenade almost always stuns it. Ada: 2–4 normal bolts (one per leg) bring it to its knees; pipe-bomb bolts hit hard, but watch the fuse if it charges. Once stunned: point-blank shotgun to the head, or both players' coup de grâce at once.

Drops: Queen (Silver): 2,500 SP

Shrieker

Leon 1 (the alley past the Backdoor Key house and a truck outside the gun shop), Leon 2 (the crypt paths after the Cemetery Key; room 102 in both lab blocks; the bathroom), Leon 3 (the cavern's stone platforms) and Ada 2 (one in each passage while you chase the gold-tooth zombie)

Weak point The throat and the glowing lung sac in its chest (×4 per one source)

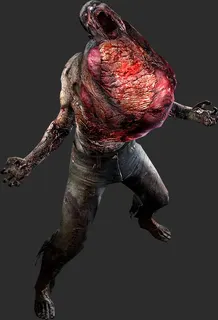
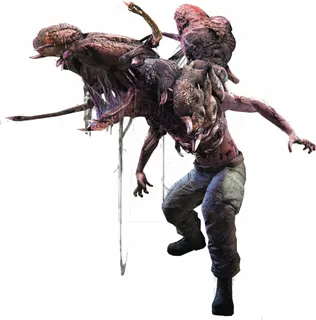
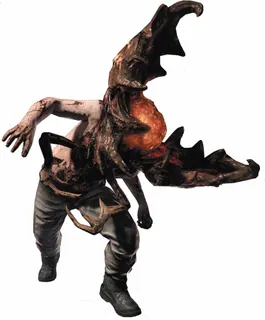
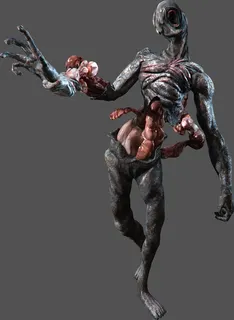
A long-necked zombie with a red-orange tumour in its chest. Its scream stuns you and summons and enrages nearby zombies; if you're Dying it stands over you and screams you to death. When shot it runs off to regenerate, so keep firing. Kill it first. Pop the sac: it kneels and lets out a last scream that damages nearby players and instantly kills every zombie around it. Use that: pop the sac when it's surrounded by zombies. One sniper-rifle or shotgun shot pops it. To make it fill its lungs (the one-hit-kill moment): wait for it to inhale, throw a flash grenade, give it enough knife, or a running kick from Helena, Sherry or Ada. Otherwise it shrugs off anything below a magnum.

Drops: Queen (Bronze): 1,000 SP

Zombie Dog

Leon 1 (the subway tunnels) and Leon 2 (the cathedral gate, the cemetery after you free the dog holding the Cemetery Key, and 1 caged in the lab)

Weak point Anywhere; countering its leap kills it

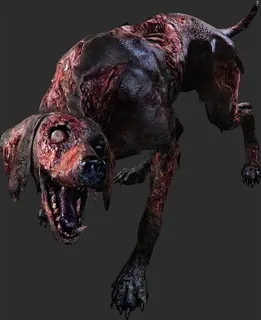
Fast and hard to hit. It leaps at your throat; packs flank you, one barks to call the others, and they jump sideways to dodge. The tell: one bark, a pause, two barks, then the charge. Counter the leap: it dies on the spot. Otherwise, shotgun. If one pins you, kick it off after the QTE. Flash grenades are close to useless on them.

J'avo

J'avo

Every Chris and Jake chapter; Ada 1, 3 and 4. Never in Leon's campaign.

Weak point The head, though it takes several shots; per one source the head takes ×1.2 and the torso only ×0.6

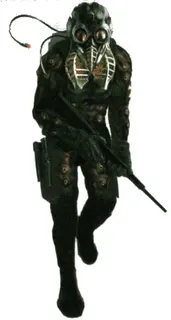
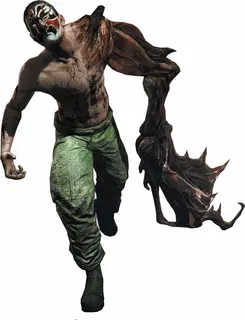
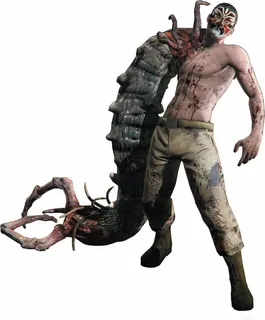
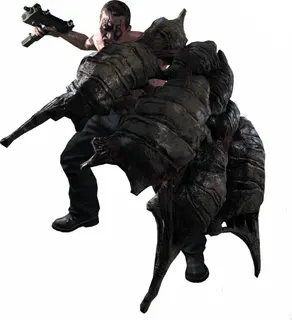
C-Virus soldiers who keep their intelligence and training: they take cover, talk to each other, hold you so another can hit you, drive vehicles and regenerate (even with half the head blown off). They mutate depending on where you hit them, can mutate more than once and can cocoon into a Chrysalid: head → Glava, arms → Ruka, legs → Noga, torso → Telo. They carry machine pistols, machine guns, sniper rifles (with a laser sight), rocket launchers, stun rods, machetes and knives. Take out the snipers and rocket J'avo first. The ammo saver: head shot, stun, melee, then coup de grâce or a head stomp. Counters kill almost every J'avo that comes at you in melee. A flash grenade bunches them up for the finish. A heavy melee hit or a grenade-launcher round stops one from cocooning.

Drops: Ammo, herbs and SP pieces (Pawn worth 50 and Knight worth 100)

Neo-Umbrella J'avo

Ada 1 (the submarine) and Ada 4 (the aircraft carrier), Chris 4 and 5, Jake 3 and 5

Weak point The head, like a normal J'avo, but they have more health

Neo-Umbrella's troops: masked, and they mutate at will, not only when hurt. The ones with green-lens masks mutate and cocoon more often than the red-lens ones. They talk in reversed English. Some carry knives, sniper rifles, rocket launchers or stunning wrist blades. They can spawn Mesets. On the Chris Chapter 5 and Jake Chapter 5 lifts they drop onto the platform 2 at a time: finish them in melee and shoot the snipers and rocket J'avo in the doorways first. Flash grenade if they surround you.

J'avo mutation · head (Glava)

Glava-Sluz

Chris 3 and 4; Jake 3 and 4; Ada 1

Weak point The back of the head: the orb rises while it spits

It spits a sticky web that pins you (you can still shoot, and it can be countered). If its arm isn't mutated, it hits a pinned player with gastric juices. A few handgun shots are enough. Get behind it while it spits and finish it. If it pins you, let your partner kill it; Breakout frees you sooner.

Glava-Smech

Chris 1 and 5; Jake 2; Ada 1 and 4

Weak point The glowing core in the chest, and the mouth

The head opens into mandibles: it bites and grabs you (heavy damage and a QTE). It can be countered. Shoot its mouth to make it close. A single hit stuns it: slide in and give it the coup de grâce. Too many hits can make it explode. If it also has a Ruka-Khvatanje arm it hits harder: shoot it from range with a rifle or a grenade.

Glava-Begunats

Chris 4; Jake 1, 2 and 3; Ada 1 and 3

Weak point The head; a counter kills it

The head split in two. It charges berserk swinging its weapon (with more reach if it has a Ruka-Srp arm, and it hits you even on the ground), or sprays fire non-stop if it has a gun. Counter the charge: the counter kills it.

Glava-Dim

Jake 3 and 4; Ada 1, 3 and 4

Weak point The red spheres on the back of its head

It fires a smoke dart: a red fog that blinds you. There's hardly any way to hurt it other than the red spheres on the back of its head: circle it, or have your partner draw it while you shoot it from behind.

J'avo mutation · arm (Ruka)

Ruka-Srp

Chris 1, 3, 4 and 5; Jake 3 and 4; Ada 1 and 3. Never in Edonia.

Weak point None: a shot or a hit to the head stuns it

A scythe arm. Horizontal slash (twice in a row with both arms mutated), a 2-hit dash attack (which can't be countered if it also has Noga-Let legs), a quick close slash and, at low health, a heavy downward slam, also used on a player on the ground. It hits hard and can put you straight into Dying. Stunned by a shot or hit to the head → coup de grâce; melee is safer, since shooting the head can trigger another mutation. Body shots barely stun it: shotgun or rifle. Aim at the legs: it's slow to get up, so stomping it is easy. Flash grenades affect it less.

Ruka-Khvatanje

Chris 2 (per the official guide) and 4; Jake 3 and 4; Ada 1 and 4

Weak point The tip of the tentacle

A tentacle arm. A lunge (stuns; can be countered) and a long-range snatch and slam that reaches around cover. With a second mutation it hits harder, and at low health it puts you into Dying or kills you. A wall between you makes it recoil. Shoot the tentacle tip when it lashes out.

Ruka-Bedem

Chris 2, 4 and 5; Jake 2; Ada 1 and 4

Weak point None: the shield bounces bullets; flank it

A shield arm. A close shield bash (can be countered, unless it has Noga-Oklop legs), a shield charge and one-handed machine-pistol bursts. One melee hit to the face → coup de grâce. In co-op, one player keeps it busy from the front while the other shoots it from the side.

J'avo mutation · legs (Noga)

Noga-Trchanje

Chris 1 or 3 (sources disagree) and 4; Jake 3; Ada 1 and 4

Weak point None; one stomp kills it

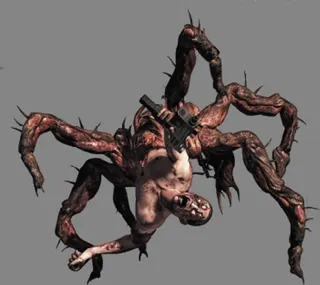
Spider legs: it pounces on you, attacks from the ceiling and crawls on walls. Easy to counter, and a single stomp kills it on any difficulty. Don't let them swarm you: they're dangerous in groups.

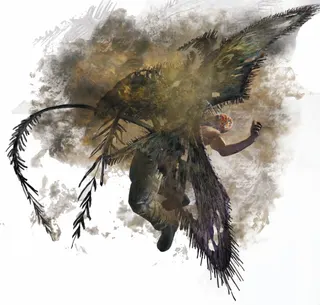
Noga-Let

Chris 1, 2 and 5; Jake 1, 4 and 5; Ada 3

Weak point Fragile: counter and stomp

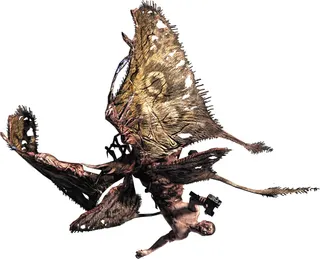
Moth wings. A shrieking dash attack (it can crash into a wall and stun itself: coup de grâce), an airborne grab (a QTE: fail it and it snaps your neck; can be countered) and, rarely, grenades. Counter, then one stomp. Flash grenades stun it.

Noga-Skakanje

Chris 3 (the Poisawan helicopter drops them); Jake 3 and 4; Ada 1

Weak point The lower-abdomen sac: 1–2 shots bring it down

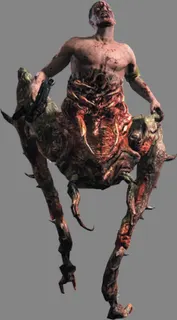
Grasshopper legs. A long-range trample, a jump kick as it closes in and a back kick (can be countered; it takes half your health even with Defense Lv3). Slide into it to trip it and stomp its head. Leon, Chris, Piers, Jake and Agent can elbow it and finish it with the coup de grâce.

Noga-Oklop

Chris 4 and 5; Jake 5; Ada 1

Weak point The torso

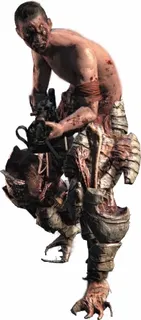
Armoured legs. A running jump kick and a high kick (the ones with guns; can be countered). Nearly immune to stuns: a coup de grâce takes both players. Low threat: shoot the torso and move on.

J'avo mutation · torso (Telo)

Telo-Eksplozija

Chris 4 and 5; Jake 5; Ada 1

Weak point The legs: it kneels and blows up on the spot

It walks at you and explodes when close or when killed; it wraps itself around a Dying player and explodes. Shoot its legs so it blows up away from you. A punch or kick sends it flying like a living grenade into other enemies. In co-op, warn your partner before you shoot it if they're nearby.

Telo-Krljusht

Jake 1 and 2; Ada 4

Weak point The head and legs; the torso scales are bulletproof

A torso covered in scales; it shoots one-handed. The scales stop bullets: headshot it with a scoped weapon, or hit the legs. It's vulnerable to explosives. Per two sources it's nearly immune to melee and counters (another says the opposite).

Telo-Magla

Chris 2 and 5; Jake 4 and 5; Ada 3 and 4

Weak point None; stomp its head while it gasses

Moth wings on the torso: it releases a cloud of scales that blurs your vision (harmless, per one source). A head stomp while it's gassing kills it easily. At low health it can get back up: finish it.

Chrysalid and complete mutations

Chrysalid

Wherever there are J'avo: every campaign except Leon's (he walks past unhatched cocoons)

Weak point None: it soaks up a lot of damage

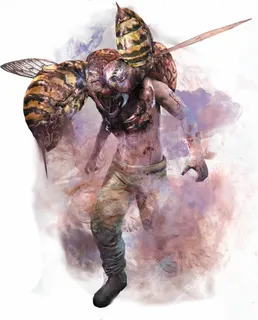
A J'avo that cocoons (the complete mutation). Inside it doesn't attack, and it hatches into a Strelats, Napad, Mesets or Gnezdo. It can be broken before it hatches, but that takes a lot of ammo: rarely worth it. Better to stop the cocoon with a heavy melee hit or a grenade-launcher round. In Ada Chapter 2 you can destroy the Napad cocoons before you trigger the alarm.

Strelats

Chris 2 (2-4 City Hall), Jake 3, Jake 4 (4-4 Shopping District, where the J'avo cocoon often) and Ada 3 (3-1 Bin Street)

Weak point Very weak to melee; resists bullets

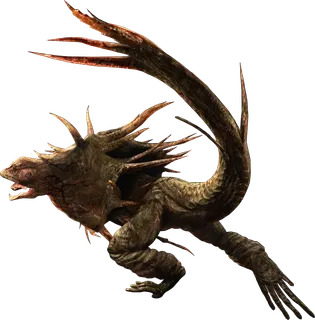
A lizard. It fires needle volleys from its neck fins (the fins steam before it fires: don't stand in front), releases a vision-distorting gas and spits poison in a semicircle that drains health very fast up close. It climbs walls but can't cling to them. If it runs off, chase it so it can't fire. Slide into it and press action while it's stunned for its special finisher. The Anti-Materiel Rifle and the Elephant Killer make it easy; a full 909 magazine up close works too. Flash grenades stun it and nitrogen rounds work well.

Drops: Queen (Bronze): 1,000 SP

Mesets

Jake 2 (2-1 Mountain Path: 2 chrysalids by the bridge, more while you hunt the memory devices, and a corpse that transforms when you take FOS C) and Chris 4 (a J'avo near the deck gate)

Weak point Anywhere; very vulnerable to flash grenades

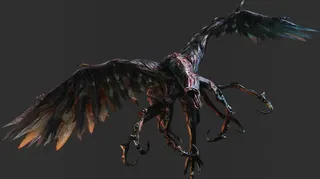
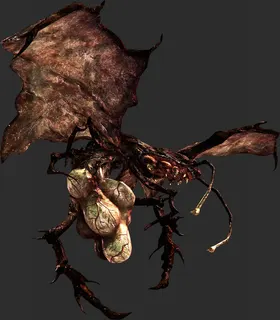
A bird. It circles and dives at you: the dive can't be countered, so shoot it first. A talon slash and a grab: it carries you up and drops you (medium damage; on higher difficulties it's a QTE, and failing it throws you into the drop). Wait for the snowstorm to clear and shoot it when it lands or hovers (Jake's 909, Sherry's Triple Shot). A flash grenade kills several at once. Fight on the rope bridge or inside a cabin. In Chris Chapter 4 the grenade launcher brings it down fast.

Drops: Rook (Bronze): 500 SP

Napad

Chris 2 (2-4 City Hall: the ones in the hall; Finn and the others turn into Napad), Chris 3 (3-4, on the boats), Chris 4, Chris 5 (5-1), Jake 3 (3-1 Detention Center, per the official guide; where exactly is unknown), Ada 1 (the final submarine defence) and Ada 2 (2-3 Underground Lab: 2 smash through doors and about 5 come out with the alarm)

Weak point The flesh on its back, under the armour (×1.8); the armour takes ×0.6 and arms and legs ×0.3

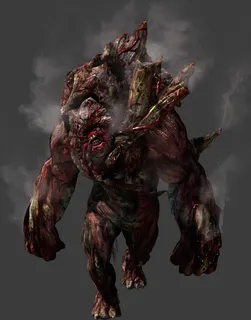
An armoured brute. A smash for 2–3 blocks, a ram for 4 blocks with a knockdown (a visible wind-up; it has its own counter), a pummel finisher after the ram (Dying), a throw (2 swings and a grab with a QTE), a backhand if you're behind it and a last swipe as it dies. Break the armour with high damage or a grenade at its feet while it stands still after a charge, then empty the Assault Shotgun or Chris's rifle into its back. Ada: a pipe-bomb bolt always strips the armour; normal bolts crack it. Get behind it during its smash or throw and hit it in melee to stun it: you can repeat that until it dies. Dodge the charge at the last moment or step onto a side ledge. With Firearm Lv3, a mid-range shotgun blast stuns it and a point-blank one to the head kills it.

Drops: Rook (Silver): 1,500 SP

Gnezdo

Chris 3 (Marco's, see bosses), Chris 4, Chris 5 (5-1), Ada 1 (1-3 Torpedo Room: the first one and an area with 5) and Ada 4 (4-2, one in the control room)

Weak point The queen hidden in the swarm

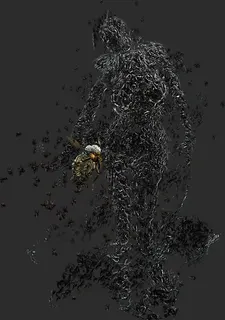
A slow-moving insect swarm. If it catches you it drains a lot of health and you have to shake the stick; it can split off a second, human-shaped swarm as a decoy. Grenades or a shotgun scatter the swarm: close in and kill the queen fast. One acid round kills the queen instantly once it's exposed, and Ada's crossbow kills it in one shot with good aim. Back off or slide to dodge the swarm. Avoid it if you can: in Ada Chapter 1 it won't follow you underwater.

Drops: Queen (Silver): 2,500 SP (Marco's doesn't drop it)

Other B.O.W.s

Rasklapanje

Leon 4 (4-3 Market: another comes out with each key), Chris 4 (4-3 Forward Hangar: the passcodes), Ada 4 (4-1, the same passcodes) and Jake 5 (5-1: it stalks you through the battery rooms)

Weak point The hands first; fire exposes the parasite

It splits into torso, legs and 2 hands, and every part keeps attacking. A grab (a QTE; fail it and the parasite kills you; can be countered), a stomp on a downed player, a thrown hand that covers your face (you can shoot and move slowly; your partner can shoot it off) and a sidestep with a grab. The legs kick and charge with an acid aura; the torso, once both hands are gone, bounces at you. Shoot the hands first before they reattach, then the legs and torso. A shotgun or the Elephant Killer splits it in half; in Chris Chapter 4, one explosive grenade-launcher round to split it and another for the top half. It never dies for good: the parasite flees and rebuilds (in about 2 minutes), so explore fast or run. An Incendiary Grenade on the halves stalls the regeneration for about 2 minutes. Stunned parts turn white. Destroy the hands for good with the scenery: boiling soup pot, microwave and furnace (the Leon Chapter 4 market); microwave, boiling water and toilet (the carrier); trash compactor and incinerator (Jake Chapter 5).

Drops: The last part you kill drops 3,000 SP; the parts drop SP and ammo (farmable with Item Drop Increase)

Oko

Jake 2 (2-3 Cave; the maze with 5)

Weak point Anywhere: an attack from behind kills it silently

The Ustanak's scouts: they're born from an organ on its back. Eyeless, they track by ultrasound, which doesn't pass through walls, and they only look ahead. Their tumours glow blue when calm and red when they detect you; then they shriek and the Ustanak comes. On their own they're harmless. Walk up behind one while its light faces away and press the contextual attack: an instant, silent kill. Running doesn't alert them. Shooting one draws the Ustanak unless it dies in one shot (Elephant Killer or sniper rifle).

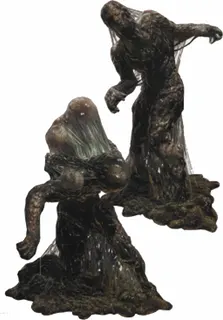
Carla Spore

Ada 4 (4-3 Aircraft Carrier Interior)

Weak point Clones: head, arms and legs, then the finisher. The faces can't be destroyed.

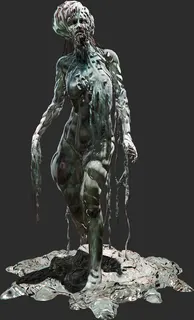
What's left of Carla spread through the ship. Ada clones (small spores): gooey copies with acid boils that burst when you get close or shoot them. They're among the toughest creatures in the game and can't be destroyed for good, so ignoring them is almost always best. To kill one: head → each arm → legs → it kneels → finisher; bolts take a limb in 1–2 hits. The tiny variants (3 red eyes on a lump) die in one hit, but burst acid up close. Arms in the walls: they grab and hold you (rotate the stick; Breakout helps). Smiling faces that open into jaws and bite: steady fire makes them flinch, but they can't be destroyed; freeze them with the blue nitrogen tanks.

Drops: Clones: 50–100 SP or, more often, ammo

Report an issue

Show diagnostics

Environment


Console errors


Failed requests