The end of Leon’s campaign. Leon (P1) and Helena (P2) reach Tatchi’s port just as the C-virus missile releases its gas over the city, cross the same streets as the Prelude and chase Simmons to the top of the Quad Tower. At heart the chapter is one long fight against Simmons in five forms (dinosaur, centaur, recovery form, giant fly and the final shot), with zombie hordes in between, a chain of QTEs in a helicopter and two intersections with Ada.
Chapter order: 5-1 Port Area (C-virus gas, the clothing store with Serpent Emblem #17, the corridor horde, the car) → 5-2 High-Rise Area (the Prelude streets, Serpent Emblem #18, the burning plane, the helicopter, Serpent Emblem #19) → 5-3 Quad Tower Entrance (intersection with Ada: dinosaur Simmons, the Humvee) → 5-4 Quad Tower (the elevator cable, centaur Simmons on the walkway with Ada) → 5-5 Quad Tower Roof (Simmons’s recovery form, Serpent Emblem #20, the window-washer cart, the giant fly on the helipad, Rocket Launcher).
Before you start
Gear and skills: golden rule: save the Lightning Hawk’s .50 AE ammo for the fly on the helipad, where it does the most good (and, if you want the no-rocket-launcher medal, for the final shot). The Shotgun and the Assault Rifle RN handle the other forms; the Semi-Auto Sniper Rifle is for the elevator cable and for Helena on the walkway. Bring Remote Bombs (the dinosaur and the street staircase) and Incendiary Grenades (the port hordes). There’s no shop: between chapters, get Firearm and Defense to the highest level you can afford; Firearm Lv3 (75,000 SP) turns these fights around. If you’re short, replay earlier chapters for SP: the 14,000 SP farm at checkpoint 4-4 is the fastest. There are no fixed SP cases here (no guide lists any). A rank (single source): accuracy ≥70%, ≤2 deaths, ≤65 minutes and ≥60 kills.
Intersections: both are with Ada (the Quad Tower entrance and the Quad Tower): offline, she’s AI-controlled.
What slips by if nobody warns you: Serpent Emblem #17 is in the clothing store at the start, with the gas pouring in through the windows: break it first. The medal Beat the chapter without using a rocket launcher is decided in the chapter’s last second: don’t take the Rocket Launcher if you want it. Everything can be replayed from chapter select.
Saving: autosave only. The main checkpoints (5-1 Port Area, 5-2 High-Rise Area, 5-3 Quad Tower Entrance, 5-4 Quad Tower and 5-5 Quad Tower Roof) are where the game resumes after you quit. A Serpent Emblem is recorded the moment you shoot it, even if you never reach a checkpoint: you can die to the 5-1 gas right after breaking #17 and keep it (PowerPyx). SP, on the other hand, need a save before you quit the game.
Difficulty: on Amateur the life-and-death QTEs complete themselves (the helicopter chain, the chandelier and the cable climbs become easy) and, per a single guide, your damage is doubled. On Professional QTE timers are shorter and mash QTEs fill more slowly (the dinosaur’s special melee needs really fast mashing, says Gamer Guides), enemies rarely drop items and never Green Herbs, breakables give SP and your damage drops to about ×0.8 (same guide): bring more .50 AE and Remote Bombs. On No Hope there are no skills, so no Firearm Lv3 either, and you respawn with your checkpoint health. IGN reports that an Infinite Magnum can skip dinosaur phases.
5-1 Port Area
The gas. Follow the BSAA soldier round the corner. The C-virus gas zombifies you on contact (one guide says it kills Leon instantly): only fight what blocks your way. Upstairs, kick the door in, turn right, go up the stairs and through the right-hand door: the clothing store.
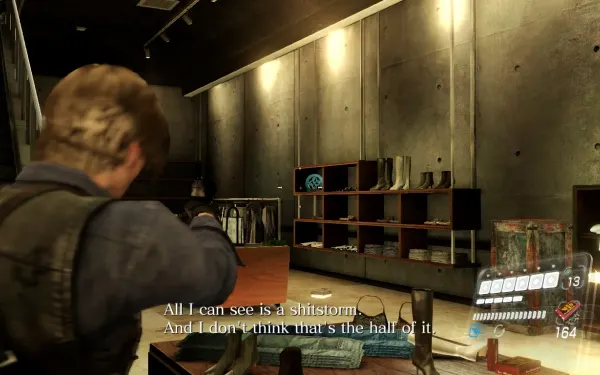
The clothing store: against the clock. The gas comes in through the windows soon, so grab fast and in this order:
- Serpent Emblem #17 is on the shoe shelving on the right wall, right of the stairs: shoot it from a distance if there’s no time to walk over. It unlocks the file Derek C. Simmons.
- 2 × 9mm Ammo on the small table and 12-Gauge Shells on the other low table.
- At the back by the counter, a wooden crate, a wooden box and a Red Herb.
- Head straight up the stairs.
In co-op, split it: one breaks the emblem while the other clears the tables. If the gas gets you, replay checkpoint 5-1 from chapter select: the emblem counts the moment you break it.
The corridors and the horde. Go up two floors: 3 wooden crates. Wait for the soldier to open the doors (zombies arrive; the soldiers deal with most of them). In the corridors, 3 more wooden crates. Then a huge horde chases you: you can stand and kill them all (it takes a few minutes and adds kills for the rank) or push on to the double doors, pry them open together and get into the car. Use Incendiary Grenades on the corridor clusters.
5-2 High-Rise Area
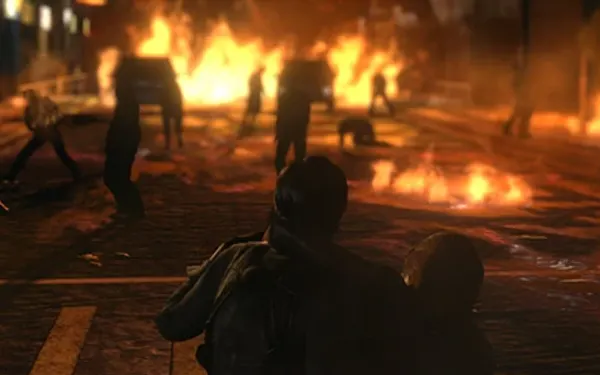
The Prelude streets. After the car ride, climb over the overturned truck in the barricade together. Ada’s helicopter helps you against the zombies until you’re pushed into the alley (the building with the white-and-red sign). Crawl into the corridor: 2 wooden boxes. (Ada is in her helicopter during this stretch, but it isn’t an intersection.)
The Humvee yard: Serpent Emblem #18. This is the Prelude yard where Leon got the herb for Helena. There are 2 BSAA zombies in gear: headshot, then melee. 2 wooden boxes, a Green Herb inside the jeep and, in the back of the big truck left of the entrance, on some wooden crates, Serpent Emblem #18. It unlocks the file Derek’s 1st Transformation.
The staircase and the street. Go through the door and down a little: a group of zombies comes up the stairs. Reload everything first (you get little time) and plant a Remote Bomb on the stairs or throw an incendiary. On the street, shoot from above, drop down and clear it: a zombie breaks the barricade.
The burning plane and the helicopter. A plane crashes into the street: sprint (left stick forward + hold B) ahead of the fireball and jump into the helicopter. If a zombie grabs your leg, waggle the stick.
QTE split: the helicopter. Leon and Helena each get their own chain of prompts, and in co-op both must succeed: fixing the flight, saving Helena from the zombified pilot, and the crash. Only press what shows up on your half of the screen. After landing, dodge the wreckage with the 2-button QTE. On Amateur the chain completes itself; on Professional the windows are shorter.
Serpent Emblem #19. After the crash and the falling-chandelier QTE there are 5 wooden boxes. Hop over the right-hand railing: the emblem is in the cubby-holes of the shelving behind the reception desk, right of the doors you’ll go through, behind some golden bars. Shoot it. It unlocks the file Derek’s 2nd Transformation. Drop down: cutscene with Simmons.
5-3 Quad Tower Entrance
Intersection with Ada. This is where you cross Ada Chapter 5 (checkpoint 5-2): she fights from the helicopter and keeps the monster busy. It’s the fight against dinosaur Simmons (see the boss below, with the plaza loot). There’s a First Aid Spray in the plaza: know where it is for when you need it.
5-4 Quad Tower
The elevator cable. Climb the cable: the same QTE as on the plane, hold ZL + ZR and release and re-press each one in turn. Halfway up, drop onto a temporary ledge and snipe Simmons while he fights Ada. Zombies spawn and drop ammo: if you’re dry, wait for them (on Professional they barely drop anything: arrive stocked). Then climb fast: Simmons comes after you and Ada shoots him to save you. The walkway fight follows (see the boss below). This is also an intersection, with Ada Chapter 5 (checkpoint 5-4).
5-5 Quad Tower Roof
The recovery form. Simmons is almost stationary, with a mass on his back and a scorpion tail with huge reach (see the boss below). On the far side are 2 wooden crates + 1 wooden box. It ends with a cutscene: zombies swarm him.
Serpent Emblem #20. Before you climb the stairs, go behind and underneath them and look through the metal bars: the emblem is on a bench or on the ground behind the fence. Shoot it. It unlocks the file Derek’s 3rd Transformation. In the corner, wooden crate + wooden box.
On to the helipad. On the roof, at the end of the walkway, 3 wooden crates. Downstairs, 2 wooden boxes before the door (kick it in together). Behind it, on the right, wooden crate + wooden box. Climb the platform, reload and boost Helena (A) over the air-conditioning unit: it’s the last split.
Split: the window-washer cart.
- Leon (P1) falls into the cart and fights the fly: shoot its head and eyes, and pop the spit globs it throws at you. From there he can’t aim toward Helena.
- Helena (P2) has one objective: work the switch that gets the cart moving while zombies swarm her; the faster she is, the sooner you regroup. No source we read (Gamer Guides, IGN, Gamepressure) lists what’s on her side: smash everything you see in the meantime.
Once together, 2 wooden boxes in the corner; kick the door in: 2 wooden crates + wooden box; up the ladder, 2 wooden boxes + wooden crate in the corner before you drop to the helipad.
Boss — Dinosaur Simmons (Quad Tower Entrance)
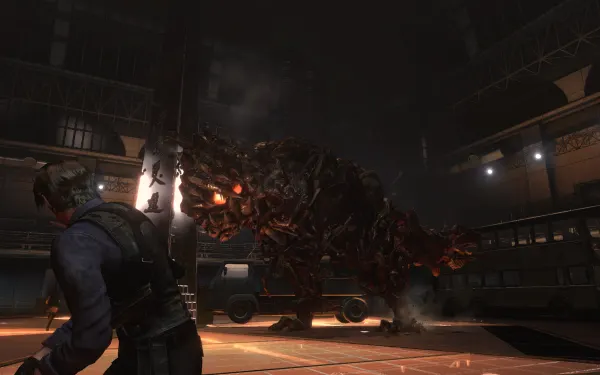
A plaza with a stone obelisk in the middle, a red fuel tanker, cars and red barrels, and Ada firing from the helicopter. Simmons turns into a giant dinosaur: stomps, bites and thrown cars (instant death: don’t hide behind small cars). His roar disorients you and does a little damage up close. Weak points: the eye inside his mouth (the main one) and the flesh on his back once you shoot the scales off.
Loot (clockwise along the walls): [3 wooden crates + wooden box], [3 wooden crates], [2 wooden crates], [4 wooden crates], [3 wooden boxes], [2 wooden crates + wooden box]. Also 3 wooden crates by the obelisk, 2 wooden crates by the fuel tanker, a First Aid Spray in the open area (among the wrecked vehicles) and at least one Remote Bomb in a box by the stone circle in the middle. Only go for the boxes when you need ammo.
- Use the central obelisk as cover: keep it between you and him at all times.
- Red barrels: lure him next to them and shoot them. Remote Bombs work too.
- When he turns human: ram him (dash, then ZR), shoot him until he kneels and do the special melee (ZR, then mash B; on higher difficulties you have to mash very fast). If it doesn’t land, keep hurting him other ways.
- The Humvee: a BSAA soldier arrives in a Humvee carrying 2 machine guns with infinite ammo. They overheat: fire in bursts. Aim at the mouth eye when he lunges. In this phase the red barrels may not go off (IGN: they may be meant for later), so don’t count on them. The phase ends when he throws the Humvee (the soldier dies). At the lower left of the entrance there’s a second gun vehicle, but he wrecks it if he charges into it.
- The fuel tanker: get him to charge it, then shoot the spilled fuel to set him on fire.
- Final phase: use the remaining red barrels and the Remote Bomb from the box by the central stone circle: plant it by the obelisk and lure him over to turn him human. The Lightning Hawk works, but save .50 AE for the fly.
- In co-op, one player leads him round the obelisk while the other waits for the human window to do the special melee. Ada keeps him busy from the air; online, lure him back to you if he goes after her.
Boss — Centaur Simmons (Quad Tower walkway)
A long pedestrian walkway between buildings, with a small platform in the middle. Leon fights on the walkway with Ada while Helena is alone in a sniper room in the building: it’s a split. Offline, Ada is the AI. Attacks: claws and tentacle lash at short and medium range, bone darts at long range (move sideways and away), a charge, and a spear stab that drags you in for a tentacle barrage. His deformed human face is the weak point. Don’t shoot during his speech: it’s a scripted moment.
- Leon (P1): stay at medium or long range. When he charges, sprint through the gap between him and the walkway edge to switch ends. The small platform in the middle is the best place to dodge.
- Helena (P2): with the Semi-Auto Sniper Rifle, shoot him from the room: your hits knock him back to human form. Also watch the zombies that spawn on the walkway.
- The usual loop: beast → human → headshot → special melee. Zombies keep spawning (check after every shot) and drop items.
- Weapons: Shotgun and Lightning Hawk, but keep a few magnum rounds for later.
- Finish: when he “dies”, he drags Leon to the edge. Ada has to do the partner action to save him: the AI does it on its own; if Ada were human (online) and didn’t make it in time, it’s game over.
Boss — Simmons, recovery form (rooftop)
A corner of the roof. Simmons barely moves; his tail has huge reach but a fixed rhythm, and he absorbs zombies to heal.
- Hide behind the corner: he can’t aim at you properly from there.
- Kill the zombies first so he can’t heal.
- Peek out between tail strikes and shoot his body: Shotgun, a few magnum rounds or a Remote Bomb.
- In co-op, one clears zombies while the other shoots from the corner. It ends with the cutscene of the zombies swarming him.
Boss — Simmons, the giant fly (helipad)
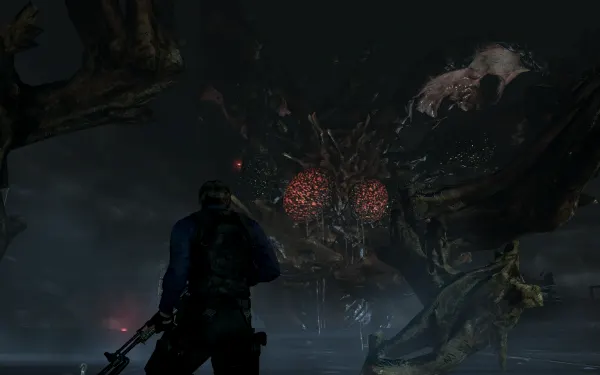
The rooftop helipad, with endless zombies and a broken lightning rod. Loot: 2 wooden boxes + wooden crate far right, 2 wooden boxes + wooden crate in the upper-left corner and 3 wooden crates in the far-right corner. While he’s standing, shots to the eyes don’t work: the pincers cover them. The eyes are only exposed when he collapses (step 6) and when he climbs back up onto the helipad at the end (step 8). The weak points are the glowing golden joints where the legs meet the belly.
- Break the legs: shoot the golden joints. About 2 broken legs is enough.
- Leg QTE: if you’re close when he stomps or swipes with a leg, a prompt appears: succeed and Leon or Helena climbs the leg and plants a grenade in the joint, severing it outright.
- The lightning rod: once he loses a leg, he absorbs zombies to regenerate (their kills give ammo). Pick up the broken lightning rod and impale a zombie with it (the prompt appears next to the zombie).
- Damage him until he eats the impaled zombie: lightning strikes him, he takes massive damage and is stunned. Use it to break 2–3 more joints.
- The rod drops to the floor. Co-op roles: one carries the rod and impales zombies; the other shoots the legs and keeps the zombies off.
- After about 3 strikes (or enough lost legs) he collapses and his head is exposed. Carry the rod over and drive it into his eye, or impale another zombie and shoot his eyes. The last lightning bolt knocks him off the roof.
- Weapon: the Lightning Hawk is the best here; the Shotgun and Assault Rifle RN also work.
- The last shot: when you reach the helicopter Ada left, Simmons climbs back up onto the helipad. The Rocket Launcher is in the helicopter (press the prompt as you get close) and one shot to the eye does it. The launcher doesn’t stay in your inventory for the next playthrough, whether you use it or not.
- Bronze medal Beat the chapter without using a rocket launcher: at that last moment don’t pick up the Rocket Launcher. Shoot his exposed eye with your own weapons (which is why you keep .50 AE for the Lightning Hawk) until he falls, and the medal pops on the chapter results. The RE Wiki confirms the secret medal comes from finishing Simmons without the launcher; the method comes from a GameFAQs board thread read in a search summary, and the exact damage needed is unknown. If it doesn’t pop, replay checkpoint 5-5 from chapter select.
- Reward: the end of Leon’s campaign, the achievement The Trouble with Women, the bronze medal Sent Derek to his grave, the Hand Grenade dog tag template and, over the chapter, the story copper medals Made it to Quad Tower and Parted ways with Ada once again. All 4 of this chapter’s emblems unlock the Lepotitsa figure; all 20 of Leon’s unlock the Deborah Harper figures. If this is the first campaign you’ve finished, you go from 1 to 8 skill sets.
Don’t leave without:
- Serpent Emblem #17 (the clothing store’s shoes, with the gas closing in), #18 (the truck in the Prelude yard), #19 (behind the reception desk) and #20 (under the roof stairs, through the bars).
- The First Aid Spray in the dinosaur plaza and the Remote Bomb in the central box.
- The .50 AE ammo for the fly and for the final shot.
- The no-rocket-launcher medal, if you want it: it’s decided at the helicopter.
- If you’re missing any of Leon’s emblems, every checkpoint can be replayed from chapter select. After the credits your SP and skills stay: the next campaign starts with your 8 skill sets.